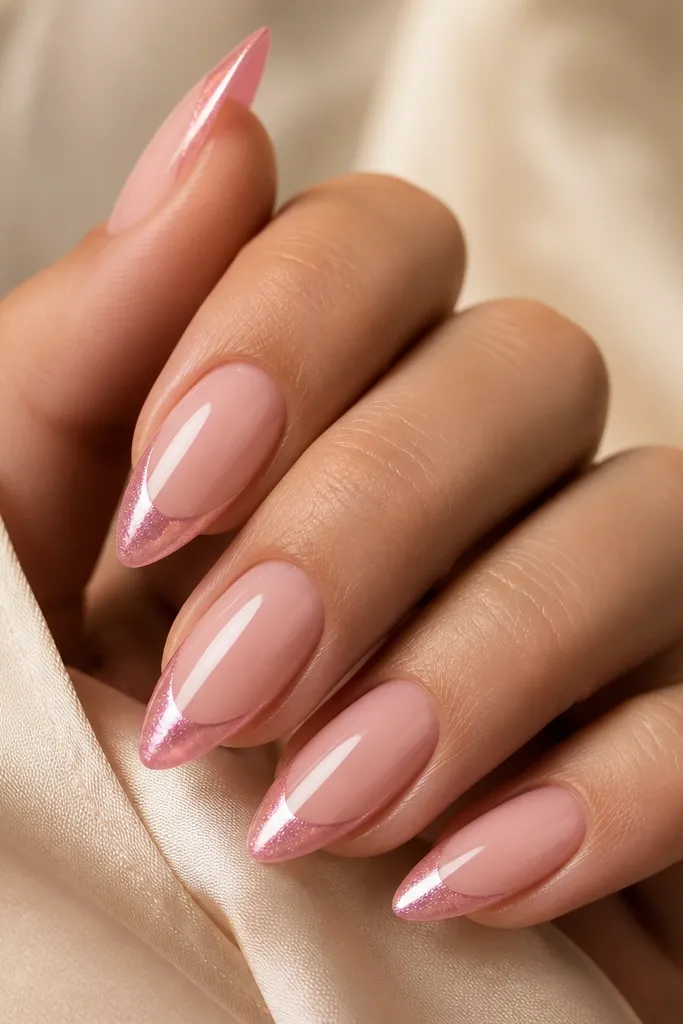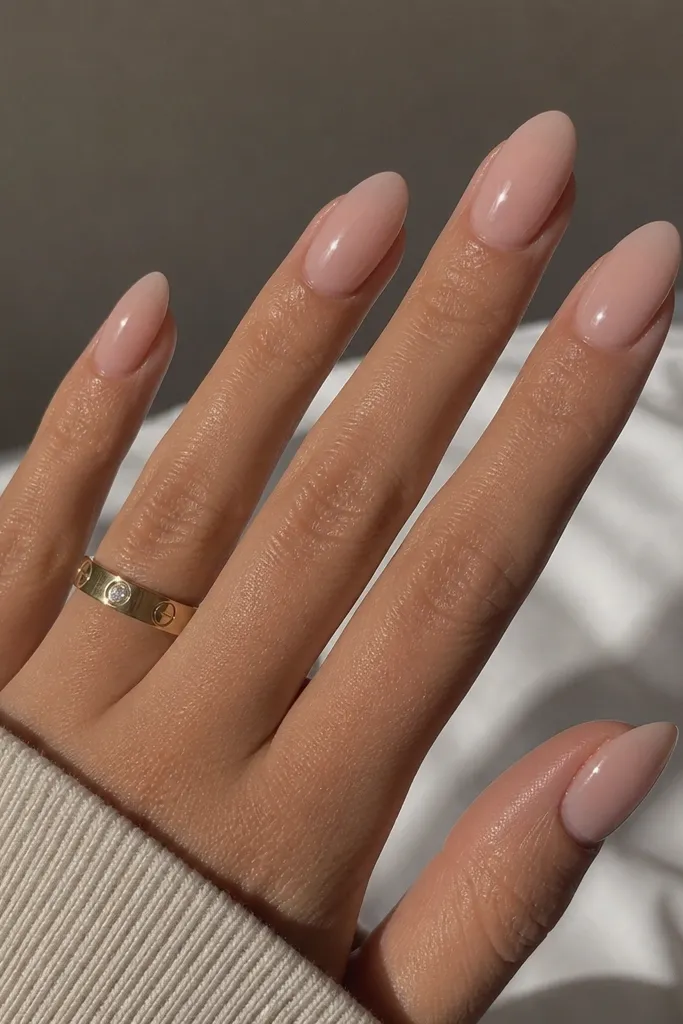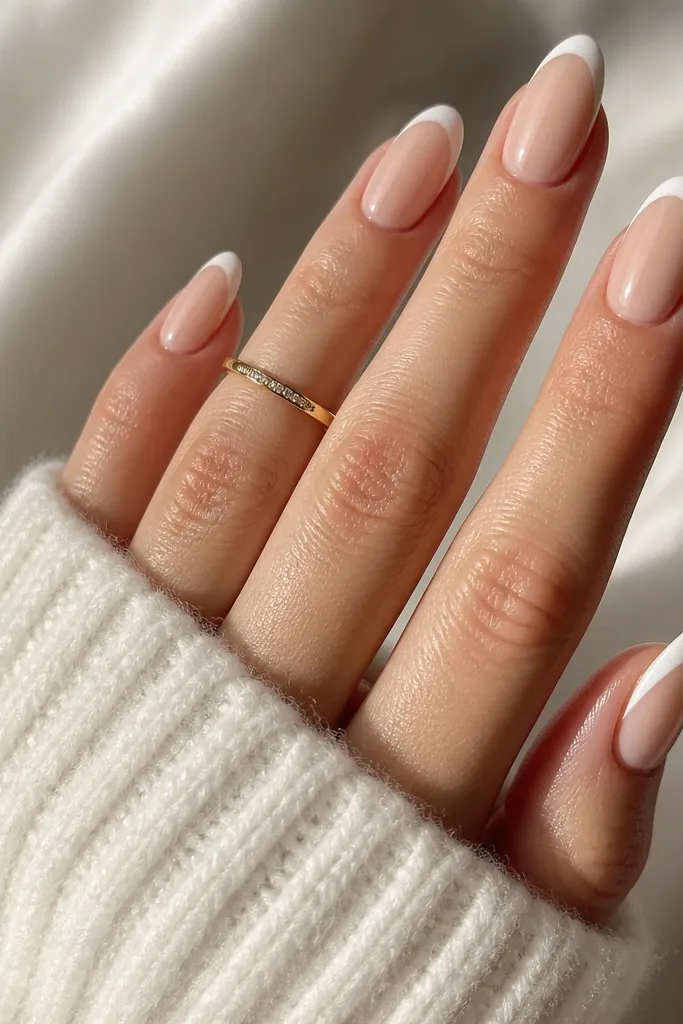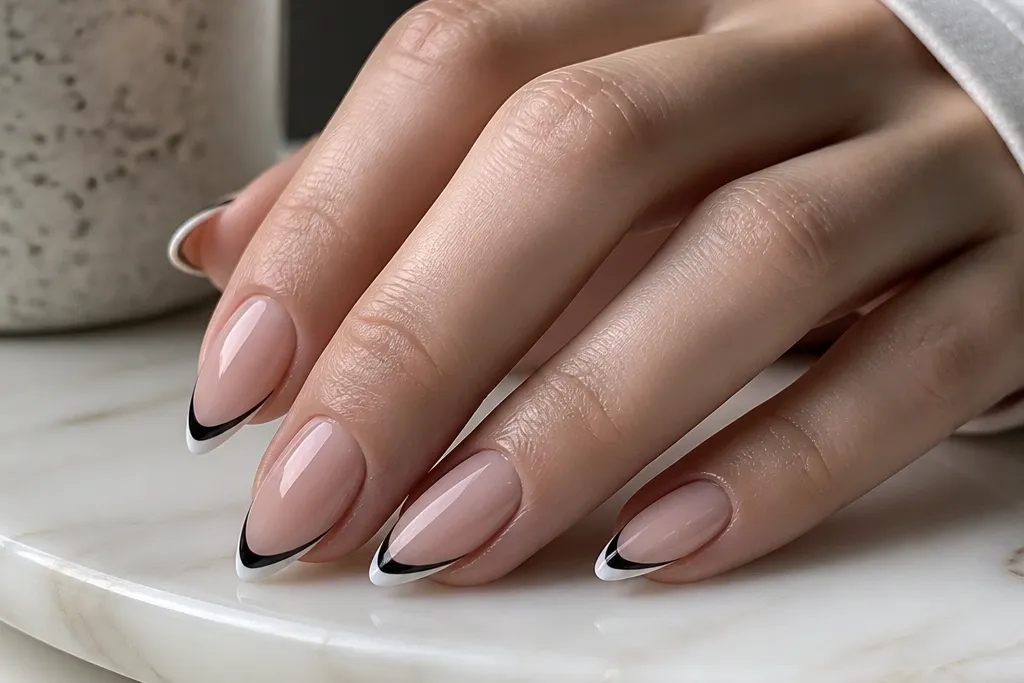
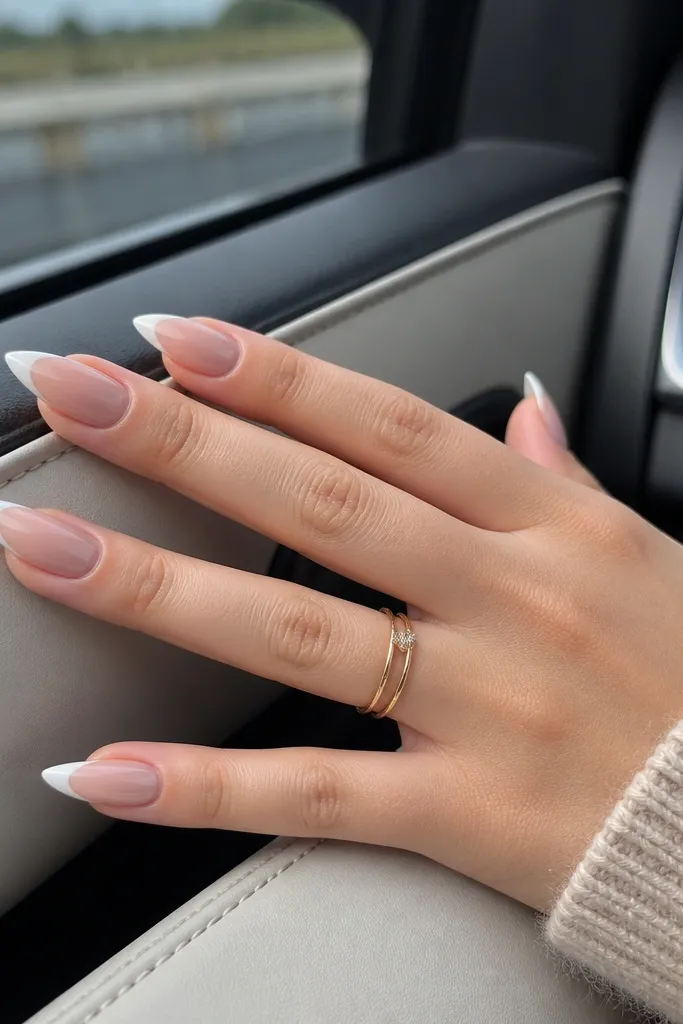
1. Midnight Black Cat Eye Micro French
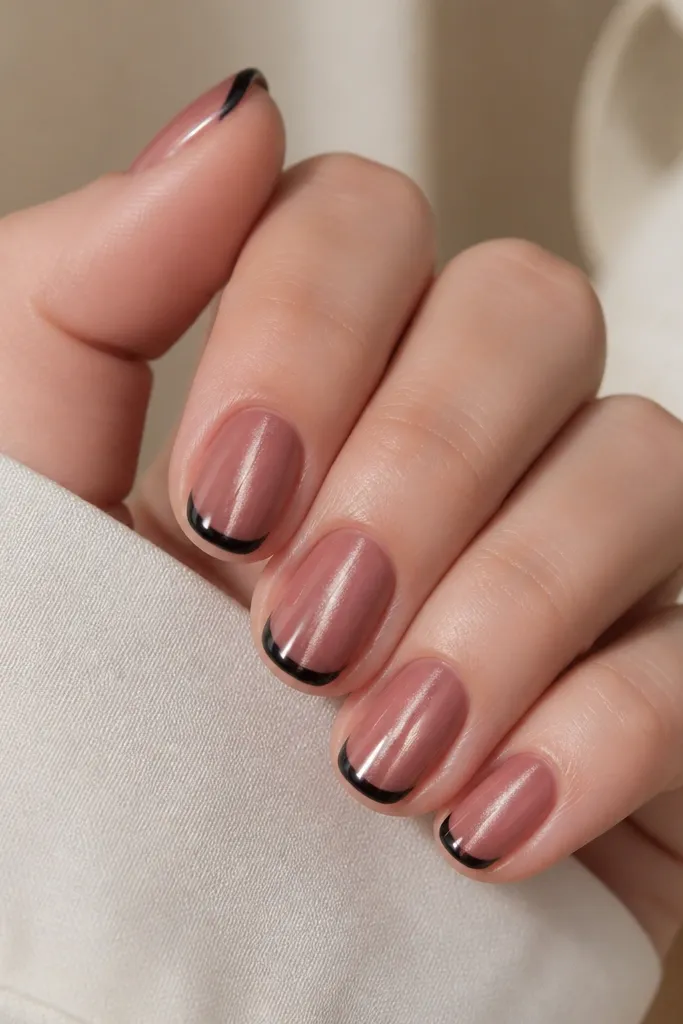
Start by pushing cuticles back and buffing the shine off the nail plate. Apply a thin sheer pink base gel and cure fully. Paint the French tip with a striping brush, keeping the arc narrow and centered. Apply the black cat eye gel to the whole nail except the very edge, then hold the magnet 2-3 mm above the nail for 10-15 seconds before curing. Finish with a glossy top coat and wipe the tacky layer so the French edge stays razor clean.
This one looks best on short, rounded nails because the tip is a micro arc that doesn’t take over the nail. I start with a sheer pink base so the nail bed still shows through, then I paint a super-thin black French line at the free edge. The cat eye pigment is magnetized into one tight stripe that sits above the tip — that’s what makes the nail look longer. The midnight black also flatters cooler skin tones and olive tones because it creates contrast without needing neon colors.
Skip thisDon’t make the French tip thick — on short nails it turns into a band that shortens the look.
Editor's noteUse a dotting tool to place the cat eye gel slightly higher than the French line so the glow doesn’t blur into the tip.
2. Deep Espresso Brown Cat Eye French Curve
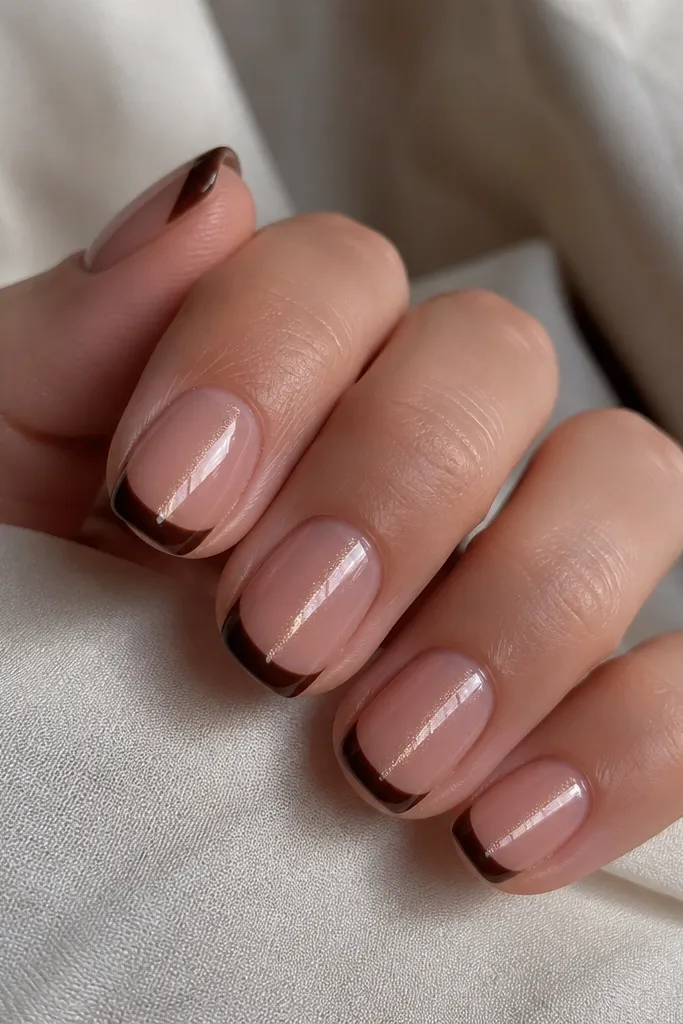
Espresso brown is my go-to when black feels too harsh. On small nail beds, the warmth of brown makes the nail look softer, while the cat eye line keeps it interesting. I magnetize a single vertical stripe so it reads as a clean “column” from the center to the tip. This design flatters medium to deep skin tones because the brown matches undertones and doesn’t wash out the nail. If you wear gold jewelry, the bronze shift in the cat eye looks especially intentional.
Apply a translucent milky base gel and cure. Paint the French curve with espresso gel — keep the arc thin and slightly higher than you think, because the magnet glow will pull the eye down. Apply a brown cat eye gel over the center and lower half of the nail, leaving a tiny gap at the very top edge so the French stays crisp. Hold the magnet parallel to the nail for a tight stripe, cure, then add top coat. Clean up the French border with a small flat brush dipped in gel cleanser before curing the final layer if needed.
Magnetize with the nail facing straight down — it keeps the stripe from drifting toward the sidewalls on short nails.
Don’t let the cat eye gel touch the French line while it’s still uncured — it smudges and makes the tip look messy.
3. Burgundy Wine Cat Eye French Tips
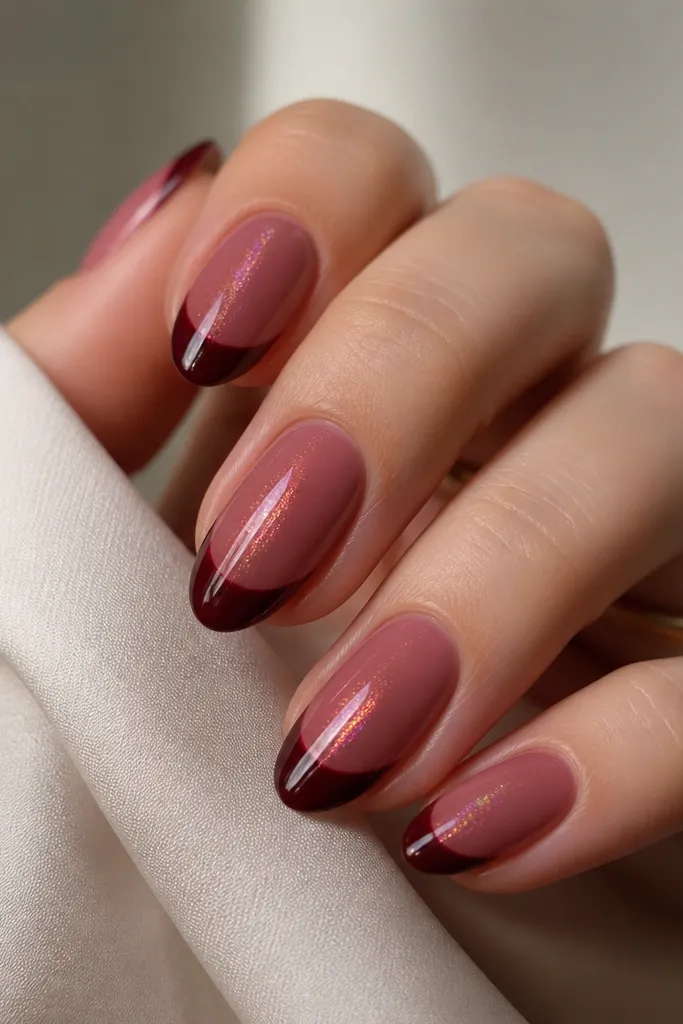
Start with a sheer rose base, cure, then wipe. Use a fine brush to paint a narrow burgundy French tip with a smooth arc — aim for a clean smile line. Apply burgundy cat eye gel as a thin layer from near the center toward the tip, avoiding the very edge of the French. Magnetize for a crisp vertical stripe, cure, then seal with glossy top coat. If you see any fuzz on the French border, clean it with a thin brush and cleanser before final curing.
Burgundy is dramatic but still wearable, especially when your French tip is thin. I like a sheer rose base because it gives warmth and keeps the design from looking like heavy nail polish on tiny nails. The cat eye stripe is the star — it turns the burgundy from flat color into something dimensional. This set looks great on fair to light-medium skin tones because the red-purple shift brightens the fingers. It also pairs well with cool-toned outfits like black jeans and a white tee.
Skip thisDon’t use a matte top coat on this one — the cat eye glow needs shine to look expensive.
Editor's noteAdd one extra coat of top coat on the French tip only — it makes the edge look freshly painted.
4. Royal Navy Cat Eye Micro French
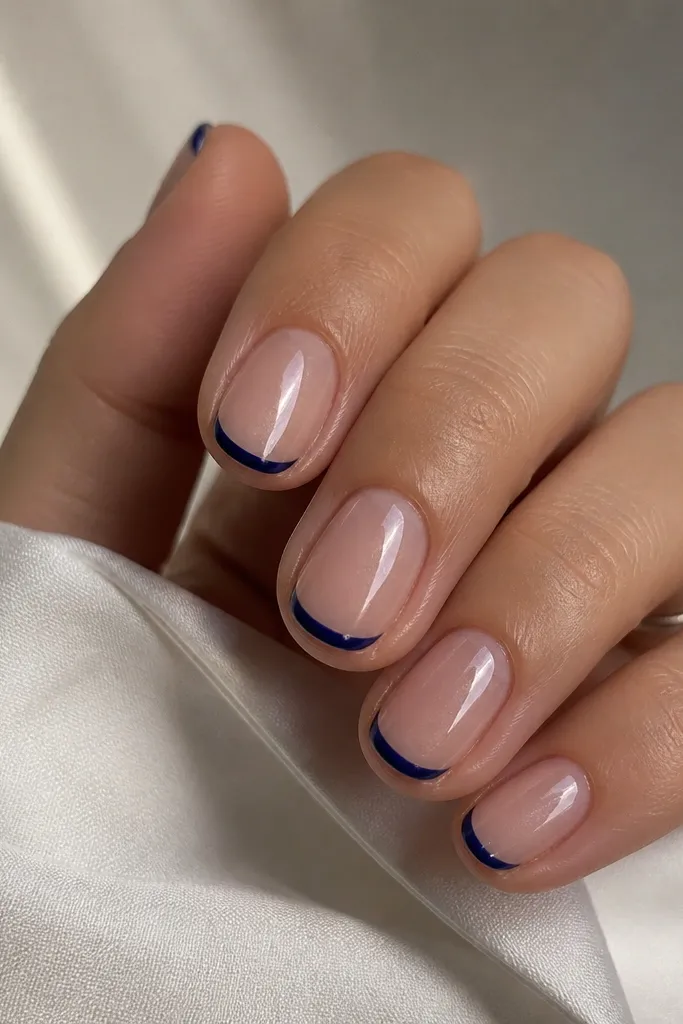
Royal navy is clean and crisp, and it makes small nails look neat instead of busy. The micro French keeps the focus on the tip shape, while the navy cat eye stripe adds movement. I magnetize the stripe so it looks like a glowing thread running up the nail. This works well for hands that look a little dry or uneven because the sheer nude base smooths the look visually. It’s also flattering for people who love silver jewelry since the teal shift reads cool.
Apply a sheer nude base gel and cure. Paint a navy micro French tip with a striping brush, keeping the arc narrow and the side edges sharp. Then apply navy cat eye gel only from the center down and cure after magnetizing. Hold the magnet close (around 1-2 mm) so the stripe stays tight, then cure fully. Finish with glossy top coat and cure again for a hard, glassy finish.
Keep the magnet angle consistent across nails — the stripe should land in the same spot on each nail for that “set” look.
Don’t go too close to the cuticle with the cat eye gel — it can look like a stripe that starts too low on short nails.
5. Emerald Green Cat Eye French with Sheer Milky Base
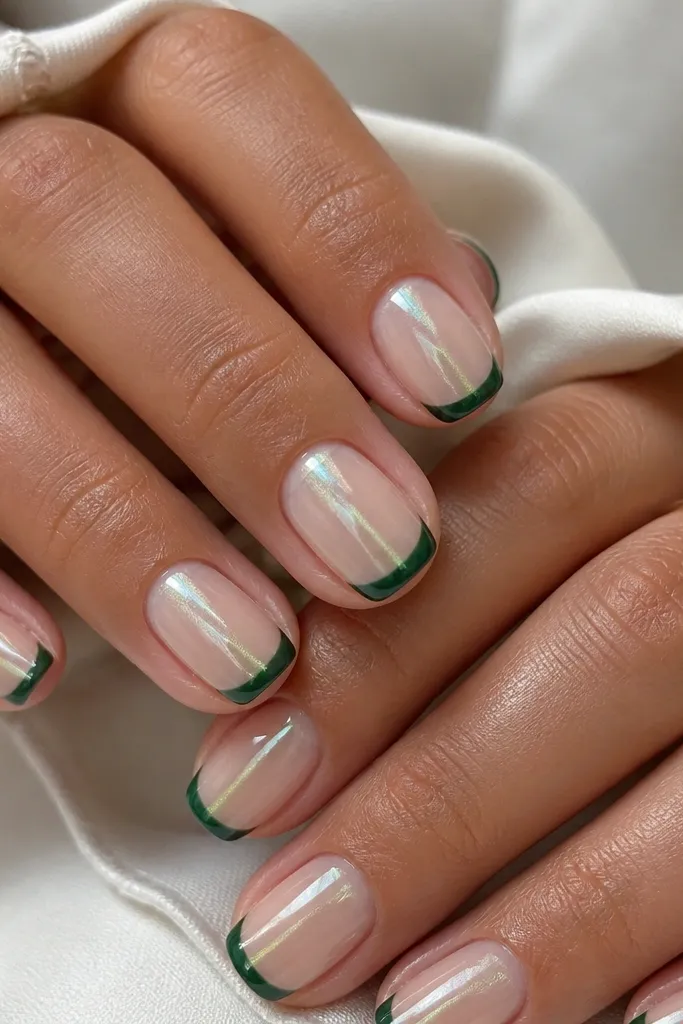
Start with a milky sheer base gel and cure. Paint emerald green French tips with a fine brush, keeping the arc small and centered. Apply emerald cat eye gel to the nail center and lower half, leaving a tiny clean zone at the very top so the French stays sharp. Magnetize vertically, cure, then add a glossy top coat. Clean the side edges with a gel brush so the tip line doesn’t look thick from the profile view.
Emerald on short nails can look either luxe or cluttered. Mine stays luxe by keeping the French tip thin and using a milky sheer base that doesn’t compete with the glow. The cat eye pigment shifts gold as it moves, so the nail looks like it has a secret light source. I magnetize a single vertical stripe for a clean look that doesn’t crowd the small space. This color flatters warm undertones and makes brown and hazel eyes pop when you’re wearing rings.
Skip thisDon’t stack glitter on top — it makes the cat eye look foggy and cheap.
Editor's noteIf your magnet stripe looks too wide, use a thinner coat of cat eye gel and magnetize longer by 5 seconds.
6. Rose Quartz Cat Eye French Tip with Soft Pink Arc
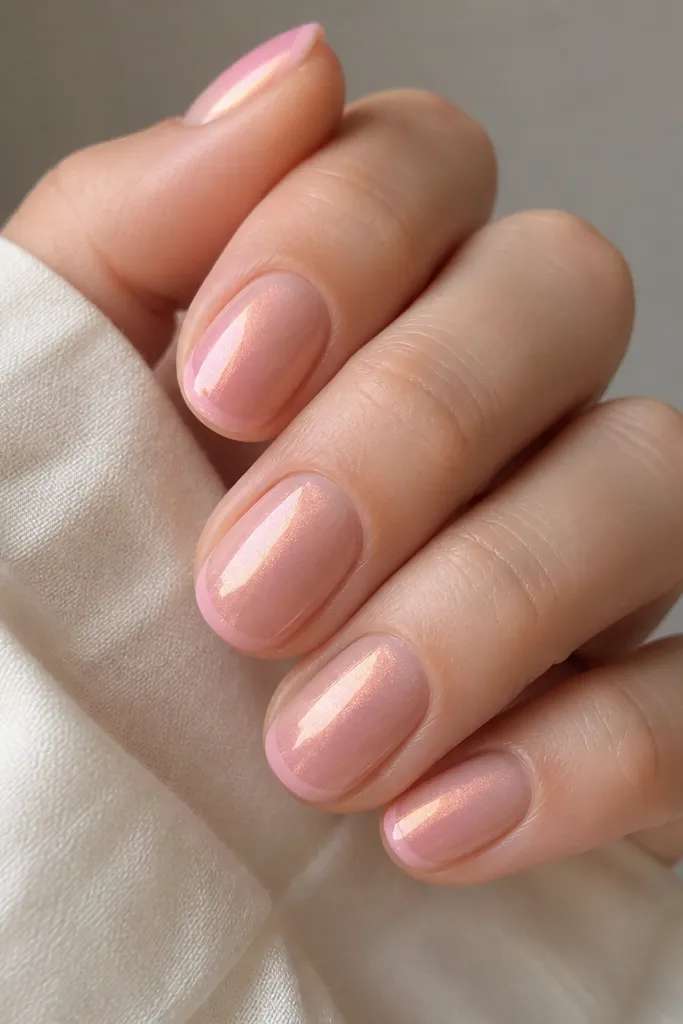
Apply a sheer pink base gel and cure. Paint a thin rosy French tip and keep it slightly lower than you would for black, since the color is lighter and needs more visible arc. Add a thin layer of rose quartz cat eye gel over the center, leaving the very edge of the tip untouched. Magnetize for a soft vertical line, cure, then seal with a glossy top coat. Wipe the tacky layer and check from the side — the tip should look smooth, not raised.
This is the “pretty but not loud” version that still reads as cat eye. The French tip is a soft rosy arc, so the design feels light and works on tiny nail beds where bold colors can overwhelm. I use a cat eye pigment that has a gentle shift instead of high-contrast black — it looks like rose quartz under light. It flatters fair skin and neutral undertones because it doesn’t fight your natural nail color. If you wear everyday nude makeup, this set looks like it belongs with your routine.
Skip thisDon’t overbuild the French color — pale tips get chalky if you do too many thick layers.
Editor's noteUse a slightly thicker top coat on the French arc to make the pale line look crisp.
7. Black Cat Eye French with Tiny Silver Dot Accent
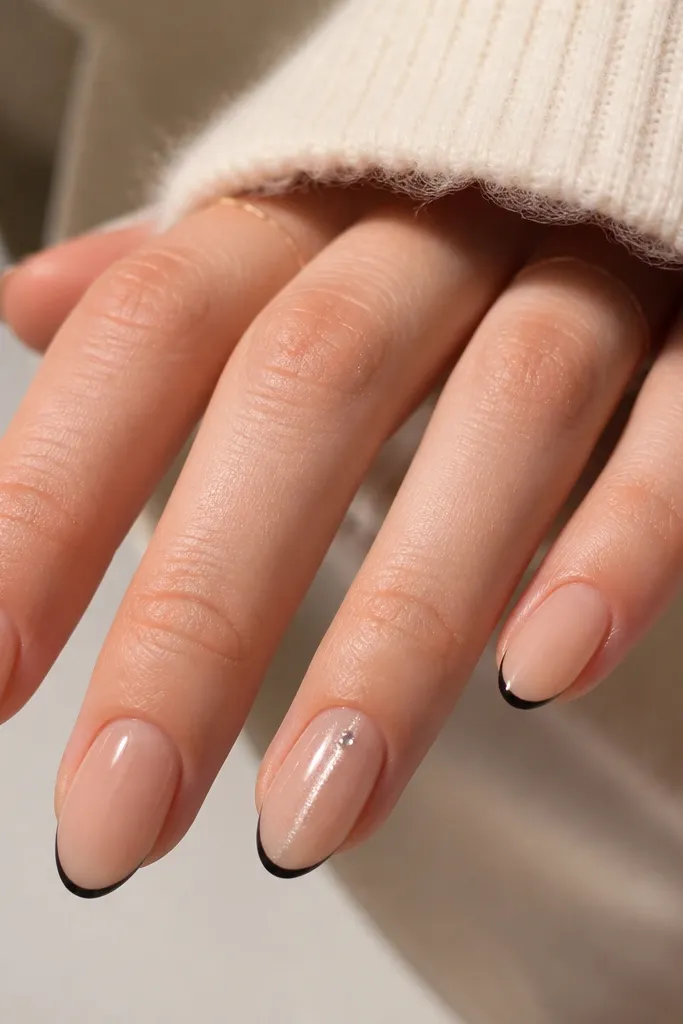
When your nails are small, accents need to be microscopic. This design uses a standard thin black cat eye French, then adds one tiny silver dot — just enough to catch light without taking up space. I place the dot slightly above the French line so it looks like part of the glow rather than a random sticker. It flatters almost every skin tone because black and silver are neutral together. It also works great for events because the dot flashes when you move your hands.
Start with a sheer nude base and cure. Paint thin black French tips with a striping brush, keeping the arc centered and clean. Apply black cat eye gel to the center and cure after magnetizing for one vertical stripe. Using a toothpick or dotting tool, place a single silver micro dot on the ring finger nail near the stripe, then cure. Finish with glossy top coat across all nails so the dot is sealed and won’t snag.
Seal the dot by dragging top coat around it, not over it too thick — thick top coat can make the dot look like a bump.
Don’t add multiple dots — two or three makes short nails look crowded fast.
8. Teal Cat Eye French with Reverse Smile Tip
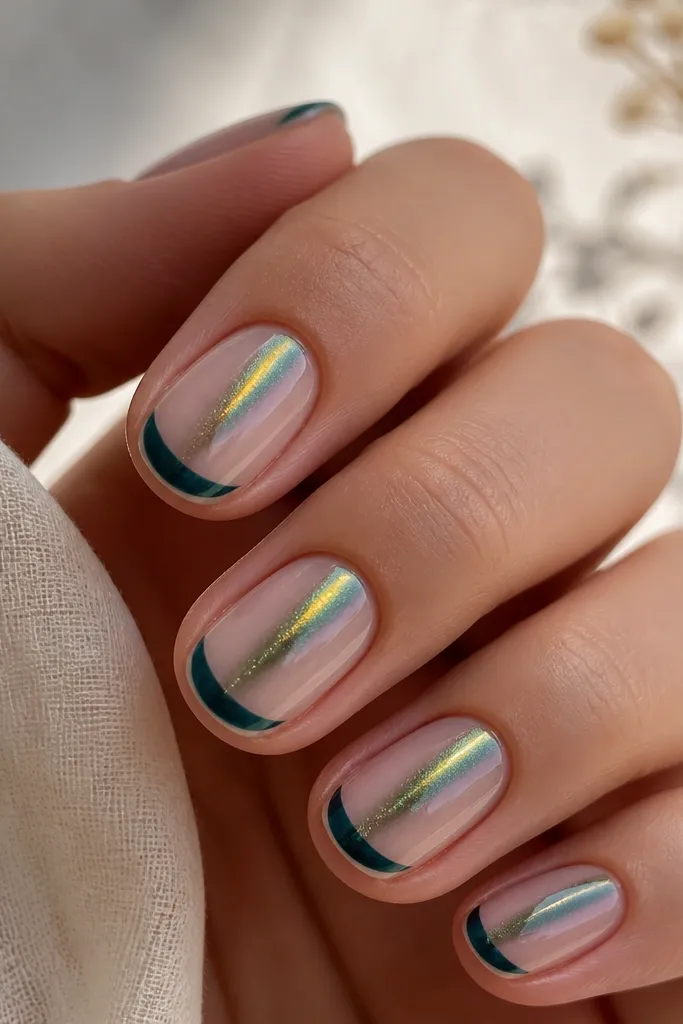
Apply a sheer base gel and cure. Paint the reverse smile teal line — think of it as a thin curve that starts near the sidewalls and sits slightly inward from the free edge. Leave a small gap between the reverse line and where you’ll apply cat eye gel. Apply teal cat eye gel to the rest of the nail, magnetize vertically, then cure. Seal with a glossy top coat and run the brush along the tip edge lightly so the reverse line stays smooth.
Reverse smile tips are a trick I use when the classic French arc feels too wide. The line sits a touch inward from the free edge, so your nail looks longer because the outer edge stays visually clean. Teal cat eye shimmer adds that “fish scale” movement, but the stripe stays controlled when you magnetize vertically. This looks stunning on short oval nails because the shape already has curves. It flatters warm and cool undertones — teal sits in the middle and works with both silver and gold accents.
Skip thisDon’t overlap the reverse line with cat eye gel before curing — it turns into a blur.
Editor's noteKeep the reverse line thickness under your brush bristles width — if it’s too chunky, it stops reading as “length.”
9. Purple Amethyst Cat Eye French Tip with Micro Curve
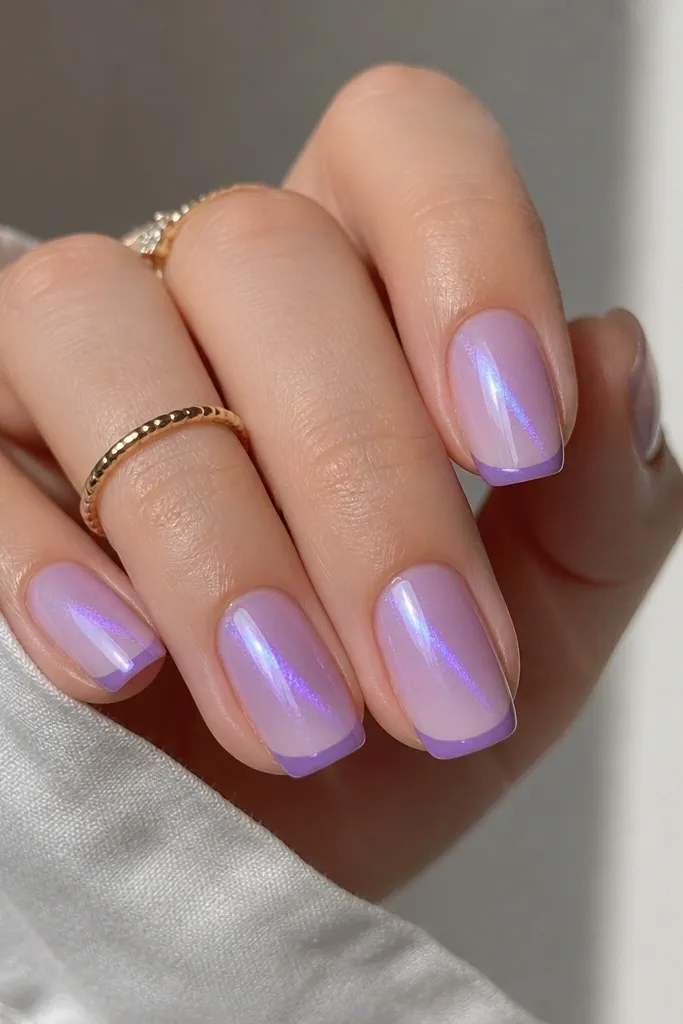
Amethyst purple gives you that jewelry vibe without forcing long nails. The micro curve keeps the design from spanning too much of the nail, which is the usual problem on short lengths. I magnetize the cat eye stripe so it looks like a thin beam, not a wide halo. This flatters cool undertones and looks great with silver rings and lavender makeup. It also makes hands look polished even when your nail beds are uneven.
Use a sheer lilac base gel and cure. Paint a thin purple French tip with a micro arc, keeping the line tight at the center. Apply amethyst cat eye gel from the center down, keeping it off the very top edge of the French line. Magnetize for a crisp stripe and cure. Finish with glossy top coat and check the smile line from a straight-on angle — it should look even across nails.
If the stripe looks too bright, apply a thinner cat eye layer and magnetize for the same time — it sharpens instead of fading.
Avoid thick base layers — they make the French curve sink and look uneven.
10. Champagne Gold Cat Eye French Tips on Nude
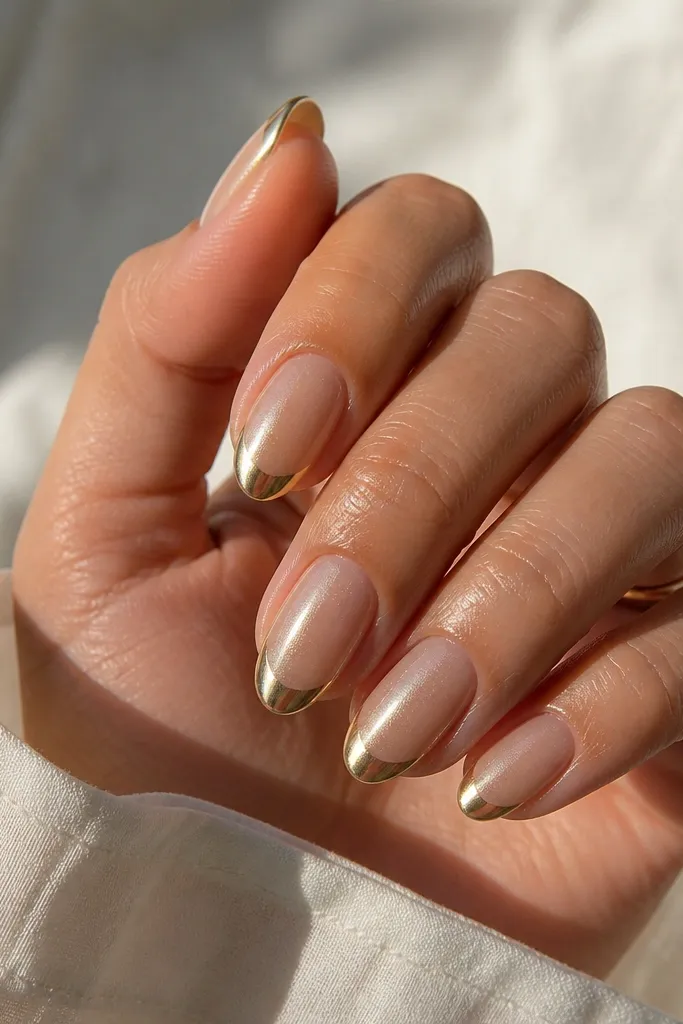
Champagne gold is my “small space” cheat code for hands that look pale or tired. The nude sheer base keeps everything light, and the gold French tip is bright enough to show length. The cat eye stripe is warm and reflective, so it draws attention toward the center and doesn’t widen the nail. This works on fair to deep skin tones because gold matches the warmth in most undertones. If you wear gold hoops or a watch with gold hardware, this set looks like it was made for your jewelry.
Start with a nude-beige sheer base gel and cure. Paint a thin champagne gold French tip, keeping the arc narrow and clean. Apply champagne gold cat eye gel over the center area, leaving the French edge untouched. Hold the magnet to create a tight vertical stripe, cure, then apply glossy top coat. Wipe the tacky layer and use a fine brush to clean any gold that crept onto the sidewalls.
Use a liner brush to sharpen the French edge at the corners — that’s where small nails look sloppy fastest.
Don’t use chunky gold foil with cat eye — it competes and kills the magnetic line.
11. Deep Teal Cat Eye French with Negative Space Side Lines
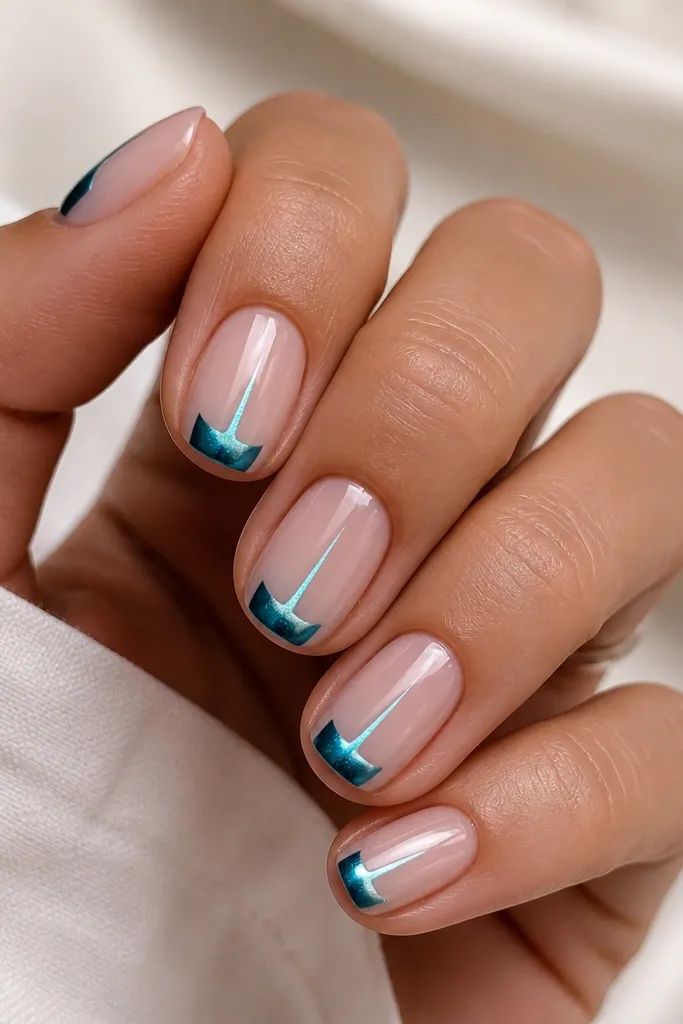
Negative space is the whole reason this works on tiny nails. By leaving thin slivers of nude at the sides, you create a slimmer visual frame, and the French tip looks like it’s floating. The deep teal cat eye stripe keeps attention on the center while the sides stay clean. I magnetize for one vertical stripe so the effect reads as length instead of a wide shimmer patch. This design looks especially flattering on short squoval nails because the shape already has a wide front; the negative space balances it out.
Apply a sheer nude base gel and cure. Paint deep teal French tips only in the center strip, leaving a narrow gap on both side corners. Apply deep teal cat eye gel to the center and magnetize vertically so the stripe aligns with the French center. Cure and then top coat carefully, avoiding flooding the side gaps. Clean the negative space edges with a small brush and cleanser so it stays crisp after curing.
If your side gaps close, use a thinner brush stroke for the French and cap the top only lightly along the edge.
Don’t overfill the sides with teal cat eye — it removes the slimming effect.
12. Black Cat Eye French with Cuticle Halo (No Glitter)
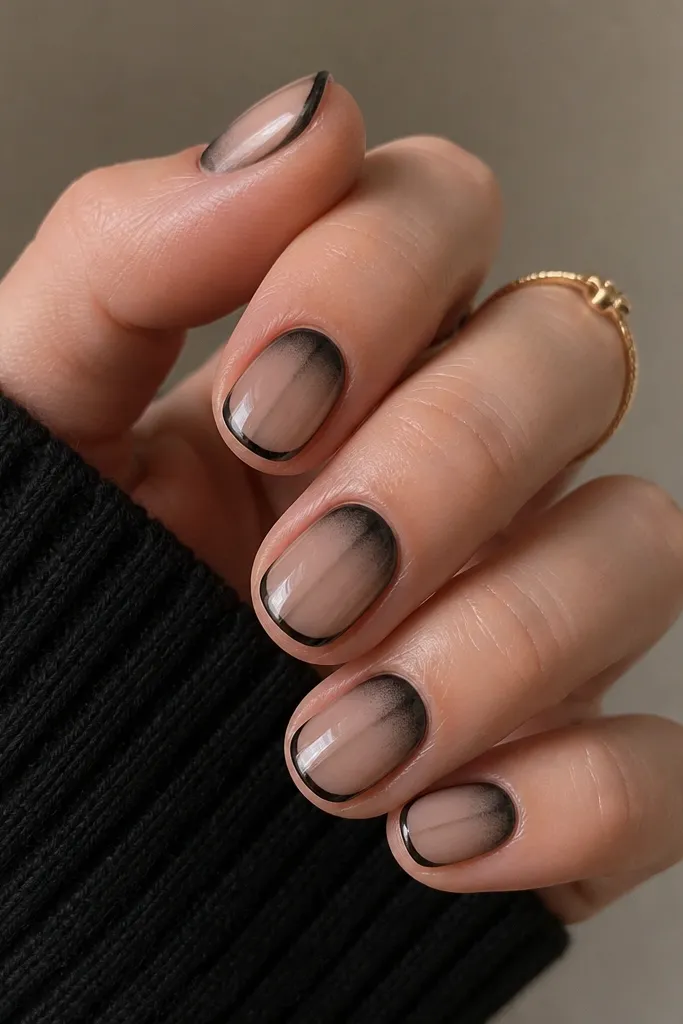
This is the “cat eye all the way” look without turning into a heavy, dark manicure. The cuticle halo is done with a light magnet pull — just enough to create a soft ring near the base. Then the vertical stripe runs down through the center, and the French tip stays thin so it doesn’t swallow the nail. I like this for small nails because the halo is close to your natural nail base and doesn’t take up the free edge. It looks best on medium to deep skin tones because the black glow contrasts beautifully with a sheer base.
Apply a sheer base gel and cure. Paint a thin black French tip and cure. Next, apply a very thin layer of black cat eye gel around the cuticle area only, then magnetize at a slight angle for a soft halo effect for 10 seconds, cure. Apply a thin cat eye layer down the center for the vertical stripe, magnetize straight, cure. Seal with top coat and make sure the halo area is smooth by gently brushing the top coat over it.
Use less product than you think for the cuticle — the halo should look like a glow, not a thick ring.
Avoid thick cuticle placement — it makes the base look bulky on short nails.
13. Pink Chrome Cat Eye French Tip with Blush Base
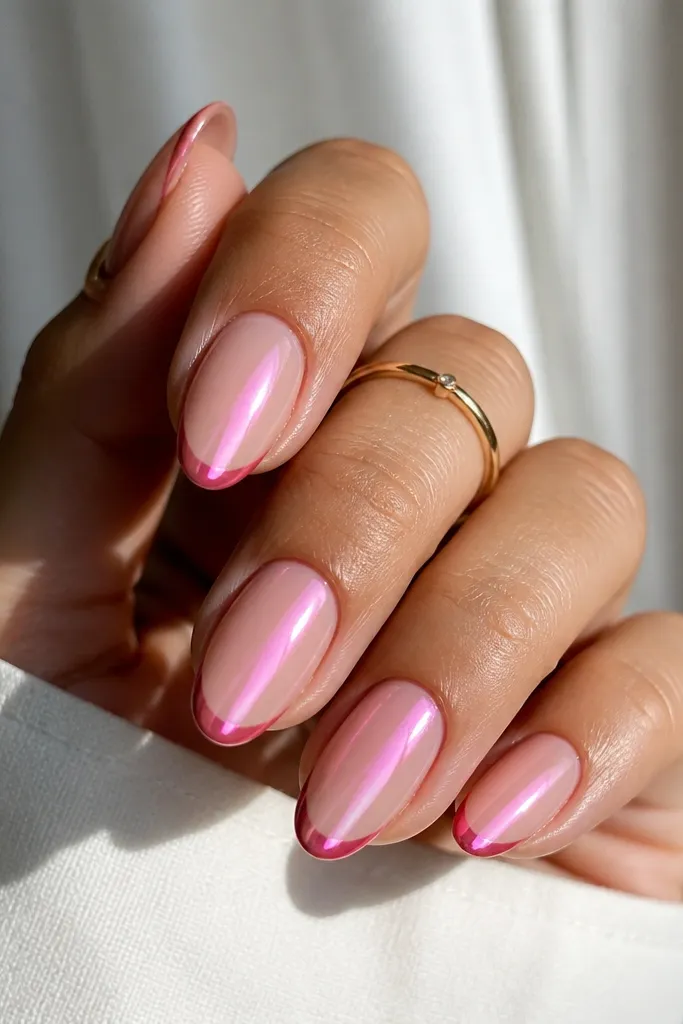
Start with a blush sheer base gel and cure. Paint a thin hot pink French tip — keep the arc narrow because chrome reads bolder than regular gel. Apply pink chrome cat eye gel to the center of the nail and magnetize for a crisp vertical stripe. Cure, then apply top coat that’s compatible with chrome (a gloss top coat works best). Finish by carefully cleaning the French border so the hot pink arc stays sharp.
Chrome cat eye looks amazing on small nails when the French tip is hot pink and the base is blush. The blush base keeps the manicure from looking like a full solid color block, and the cat eye stripe adds that mirror line effect. I magnetize the stripe so it reads like a vertical highlight, which makes your nails look longer. This set flatters fair and neutral undertones because pink chrome brightens the hand without turning dark or heavy. It also looks great for spring events and birthdays.
Skip thisDon’t go heavy on the chrome layer — thick chrome can look grainy on short nails.
Editor's noteIf your chrome dulls after top coat, use a glossy chrome-friendly top coat and cure on time — under-curing makes it look flat.
14. Mocha Cat Eye French with Thin White Outline
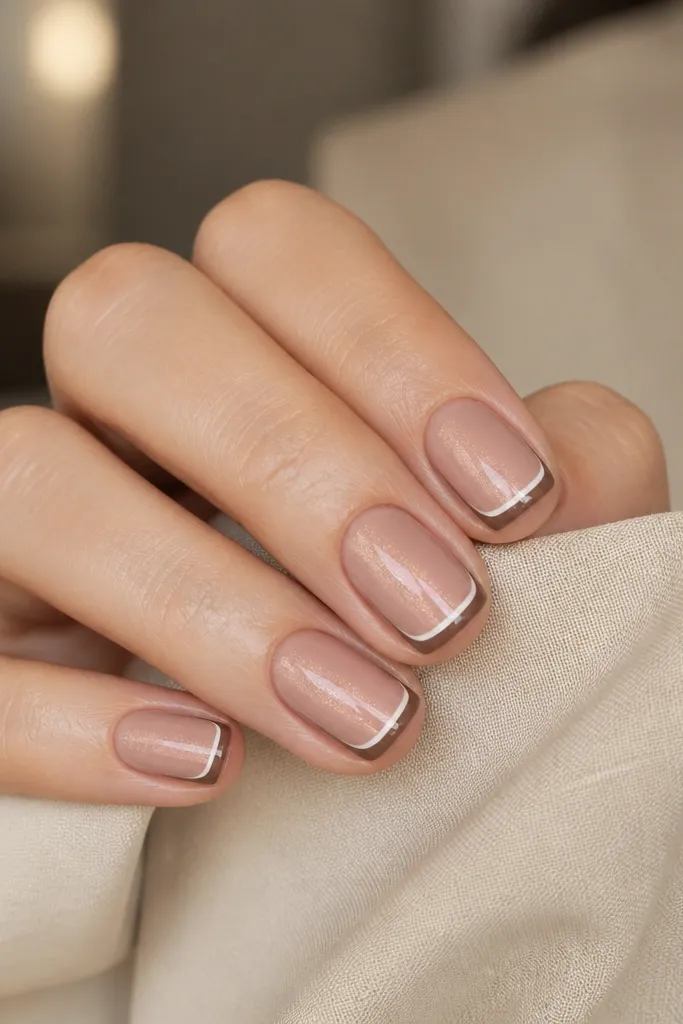
Apply a sheer nude base gel and cure. Paint a thin mocha French tip with a striping brush. Then, add a super-thin white outline along the outer edge of the French arc, keeping it centered so it doesn’t look crooked. Apply mocha cat eye gel to the center and magnetize vertically, curing after you get a tight stripe. Seal with a glossy top coat and use a fine brush to remove any white that touches the sidewalls.
This design is for when you want extra definition but still need to keep the tip narrow. The mocha French tip gives depth, and the thin white outline acts like a border that makes the tip look crisp even on small nails. The cat eye stripe adds the magnetic beam, so the manicure looks dimensional instead of flat. I like it on medium to deep skin tones because the white outline pops without needing bright colors. If you wear neutral outfits, the mocha + white combo looks clean and intentional.
Skip thisDon’t outline the whole nail edge — keep it only on the French tip line.
Editor's noteOutline only after the mocha tip is fully cured — it prevents bleeding and keeps the border razor sharp.
15. Deep Plum Cat Eye French with Tiny Top-Cuticle Star
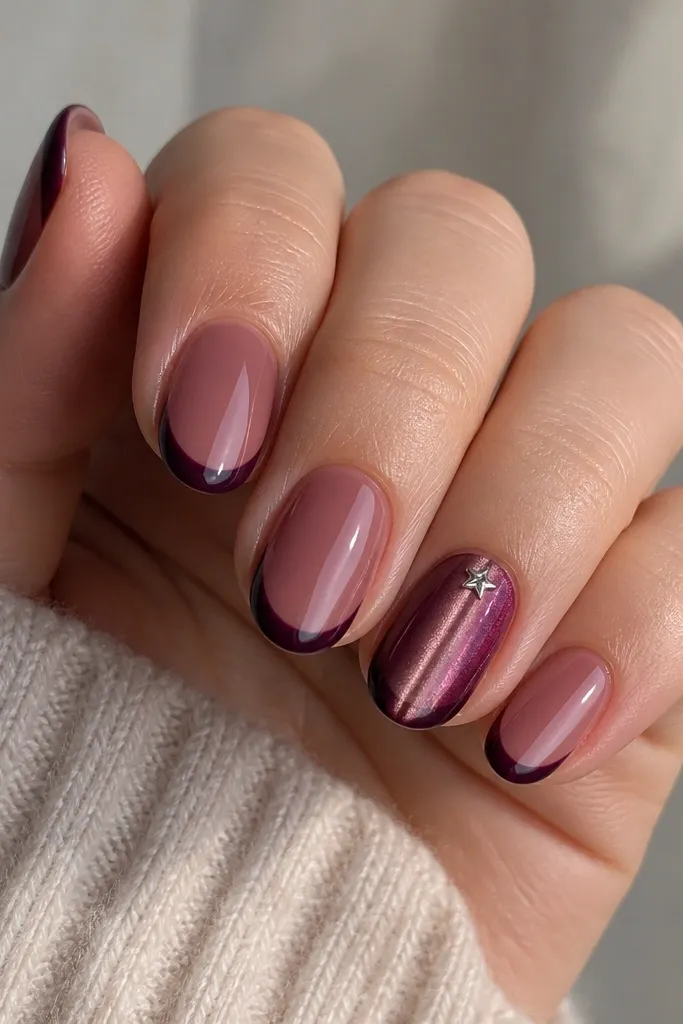
Start with a sheer berry base gel and cure. Paint a thin deep plum French tip, centered and clean. Apply deep plum cat eye gel to the center and magnetize vertically for a bright stripe, cure, then top coat. On the ring finger, place a micro silver star near the top cuticle line (not touching the skin), then cure. Finish all nails with glossy top coat and cap around the star so it doesn’t catch on fabric.
This one is a small-space party trick: the French tip stays thin and glossy, and the accent sits near the cuticle where it doesn’t crowd the free edge. The cat eye stripe in deep plum pulls your eye upward, while the tiny star adds a flash when you move. I keep the star size about the width of a grain of rice so it looks like nail art, not decoration. This flatters many skin tones because plum is deep enough for contrast and the silver star cools it down. It’s also great for nights out because it reads “styled” even with short length.
Skip thisDon’t place the star too low — on short nails it looks like it’s sitting on the French line.
Editor's noteUse tweezers and place the star with light pressure — if you press too hard, it sinks into gel and the edges blur.