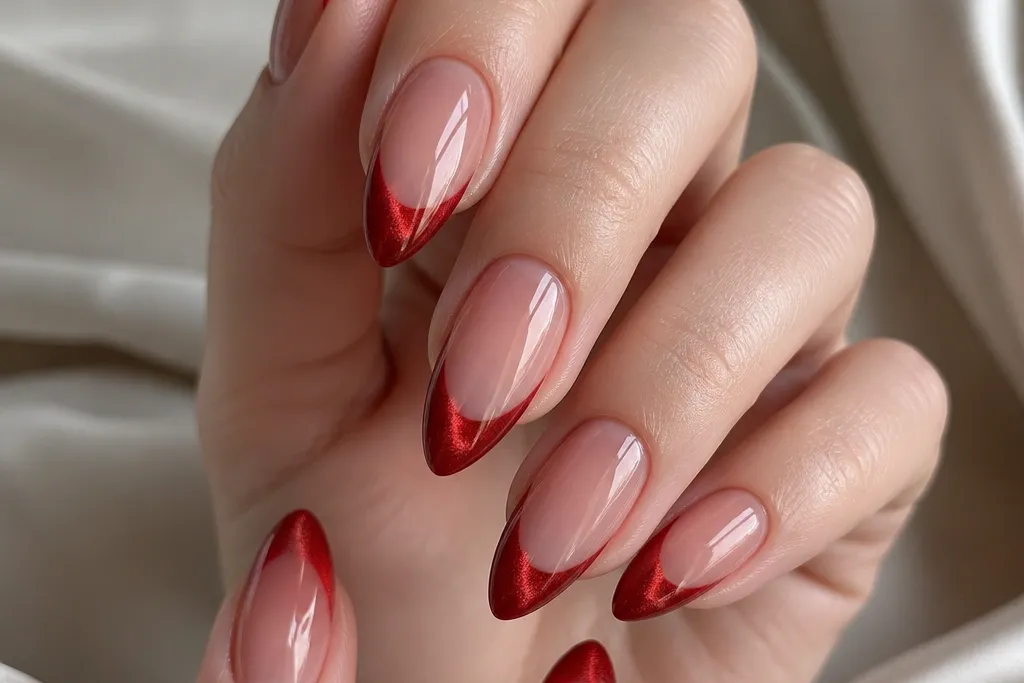

1. Cherry Red Cat Eye French Tips with Milky Rose Base
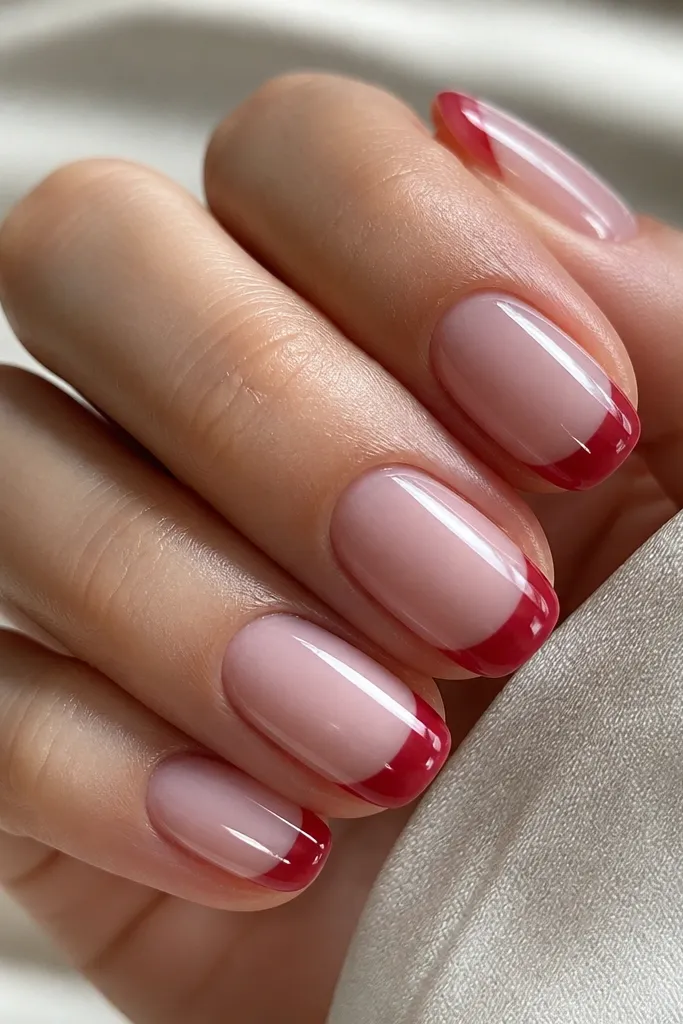
Start by prepping and pushing back cuticles, then apply a thin base gel and cure. Paint the milky rose base in 2 thin coats, curing each coat, leaving the tip area slightly lighter for placement. For the french tip, use guides or a striping brush to paint a clean arc about 1.5-2 mm wide at the free edge. Apply the cherry red magnetic gel only on the tip, hold the magnet directly above the painted area for 8-12 seconds, then cure. Finish with a glossy top coat in one full pass over the tip and cure again.
This version is the easiest “beginner win” because the milky rose base hides tiny gaps and makes the red stripe pop. I’ve used a warm cherry magnetic gel (the kind that looks like red wine in the bottle) and pulled the magnet so the cat eye line sits straight down the center of each tip. It flatters light to medium skin tones because the base is pink, not gray, and it makes your nail bed look cleaner. It also works great if your nails stain easily — the milky base keeps the red from looking harsh. The styling principle is contrast: a soft base plus a concentrated magnetic tip makes the french edge look crisp.
Skip thisDon’t magnet the whole nail at once if you want french tips — it blurs where the tip should start.
Editor's noteIf your cat eye stripe won’t show, thin your red layer and magnet for the full 12 seconds — thick gel kills the line.
2. Crimson Cat Eye French Tips with Clear Glossy Nudes
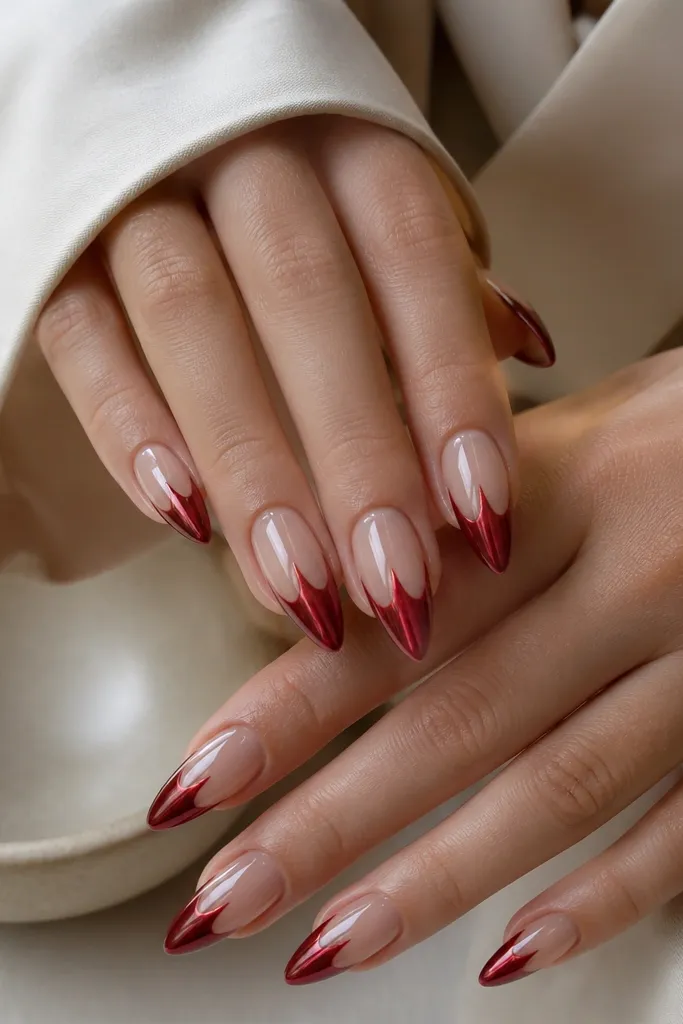
Apply a thin clear rubber base (or clear builder gel) and cure. Seal the nail bed with a glossy clear/nude gel in 1-2 coats, curing each time, and keep the skin around the nails clean. Use french tip guides and paint a crisp crimson cat eye tip, staying within 2 mm of the free edge. Right after painting the tip, magnet for 10 seconds so the stripe lands in the center, then cure. Top coat over the entire nail and cap the tip edge with an extra thin layer.
This is the “clean and bold” version. The clear glossy nude base makes the crimson cat eye look like a spotlight, especially when the stripe is pulled straight down. I’ve seen it look best on medium skin tones and olive undertones because the nude base doesn’t turn ashy next to deep red. It also makes your fingers look longer since there’s no heavy color blocking the nail bed. The principle here is keeping the base glassy and neutral while the tip does the drama.
Skip thisDon’t use a matte top coat — it kills the “cat eye glow” effect.
Editor's noteWipe the magnet with a lint-free wipe before each use so dust doesn’t create tiny dots in the red.
3. Red Cat Eye French Tips with Nude Pink Ombré Edge
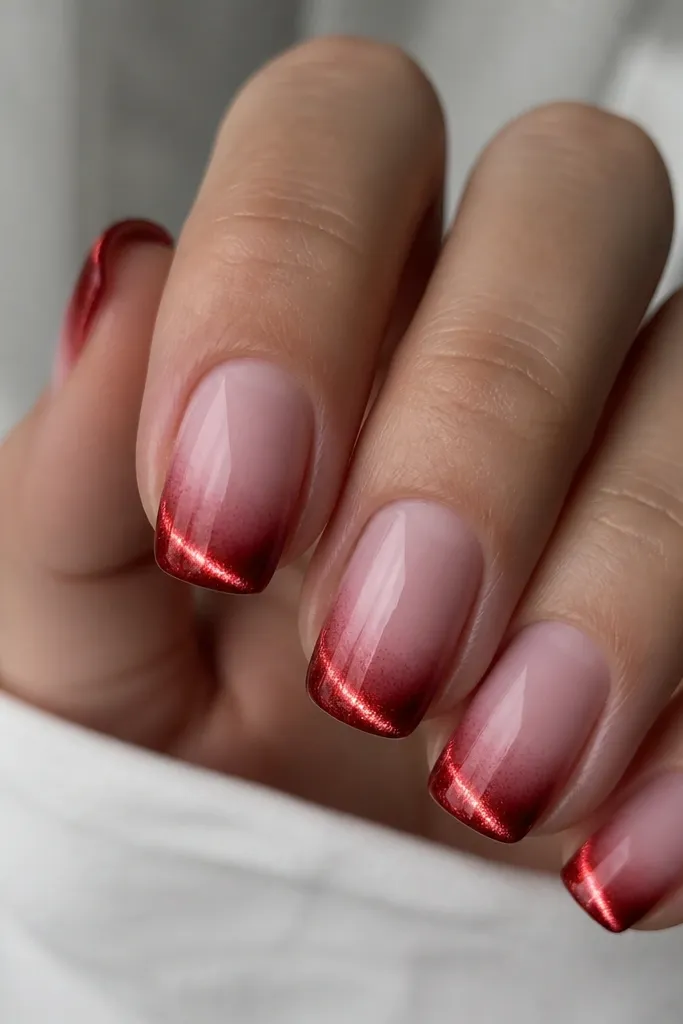
This one looks harder than it is because the transition hides small alignment issues. You paint a nude-pink ombré band at the tip boundary, then layer red cat eye on top so the magnetic stripe still looks sharp. It flatters all skin tones because the ombré is close to your natural nail color, and the red reads as intentional rather than too stark. If you have short nails, the soft fade makes the tip feel longer. The principle is a forgiving boundary: you blur the edge where you’re less confident, keep the tip stripe crisp.
Start with a nude pink base gel and cure. Sponge a thin ombré layer at the top third using a makeup sponge and a nude-pink gel, then cure. Apply magnetic red only on the very tip area, using a guide to keep the french shape, and magnet for 8-10 seconds. Use a small brush to blend the red’s inner edge into the ombré before curing if you need a softer line. Finish with glossy top coat, making sure the transition area is fully sealed.
Use a damp (not wet) sponge for the ombré so you don’t lift pigment and create streaks.
Don’t over-blend the red — if the stripe smears sideways, it stops looking like cat eye.
4. Red Velvet Cat Eye French Tips with Micro Glitter Top
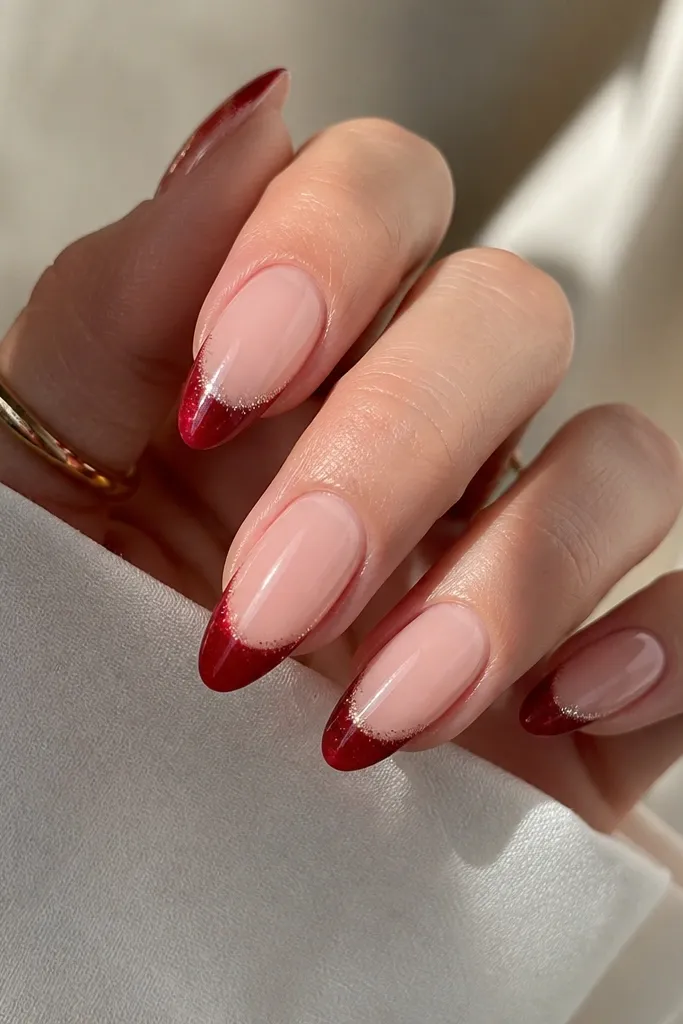
Apply sheer nude base gel and cure. Create the french tip with a deep red magnetic gel, magneting for 10-12 seconds so the stripe stays centered. While the red is cured and fully set, brush a micro-glitter top coat gel only on the last 1/3 of the tip, then cure. If you want extra glow, do a second thin glitter layer only on the very edge. Finish with a final clear high-gloss top coat to smooth the texture and even the shine.
This is the party version that still looks wearable. The deep red cat eye reads like velvet under light, and the micro glitter at the tip edge gives you a “sparkle flare” without turning the whole nail into glitter overload. It’s especially flattering for warm skin tones because the glitter reflects warm highlights instead of icy ones. I’ve worn this with red lipstick and it matches without looking like a costume. The principle is controlled sparkle: you add glitter only where the light hits the french tip.
Skip thisDon’t mix chunky glitter into the magnetic gel — it ruins the stripe clarity.
Editor's noteCap the glitter layer with clear top coat so it doesn’t catch on your cuticles or snag on fabric.
5. True Red Cat Eye French Tips with White Outline Line
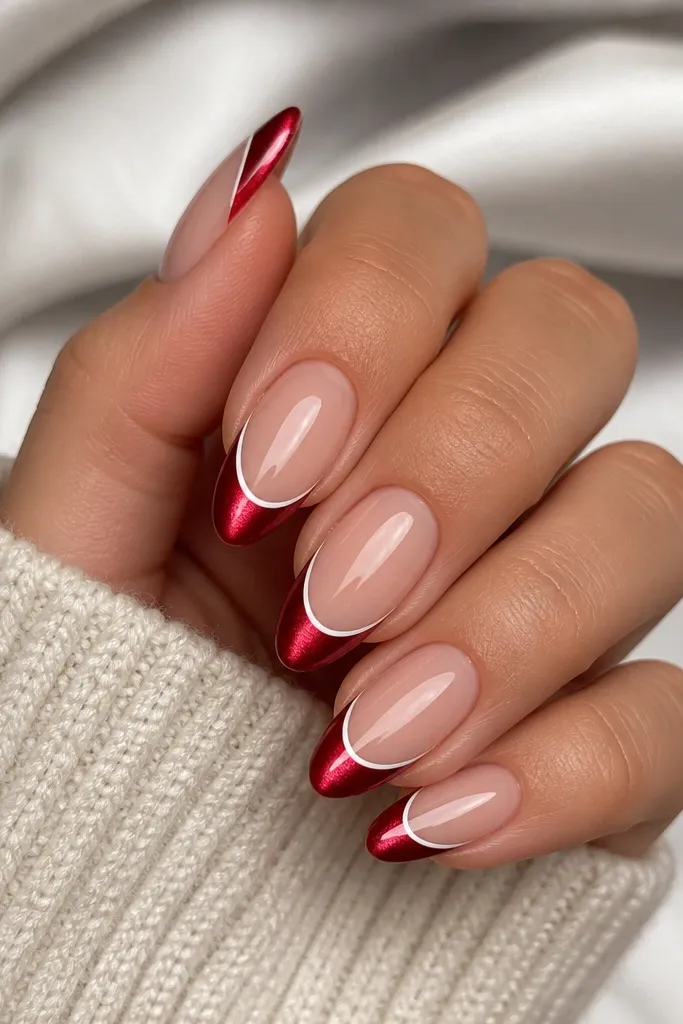
Start with a nude base gel and cure fully. Paint magnetic true red only on the tip area using guides for a smooth arc, magnet for 9-11 seconds, and cure. With a striping brush, paint a thin white line following the french curve, staying on the red edge, then cure. Add one thin clear top coat over the whole nail, and cure again. If the white line looks slightly raised, polish it gently with a soft buffer and re-top-coat.
This design looks like nail art you’d pay extra for, but it’s straightforward. The white outline makes the french shape look engineered, and the red cat eye stripe keeps it from being flat. It flatters fair skin and cool undertones because the white doesn’t fight the red; it actually sharpens it. If your french tips usually look wobbly, the outline gives you a second chance — your eye follows the border. The principle is framing: you outline the tip, then let the magnetic stripe add movement.
Skip thisDon’t outline before curing the red — the white can bleed into the magnetic gel.
Editor's noteUse gel striping in a fine brush size (like 00 or 0) so the white line stays hair-thin.
6. Red Cat Eye French Tips with Black Micro-Liner Accent
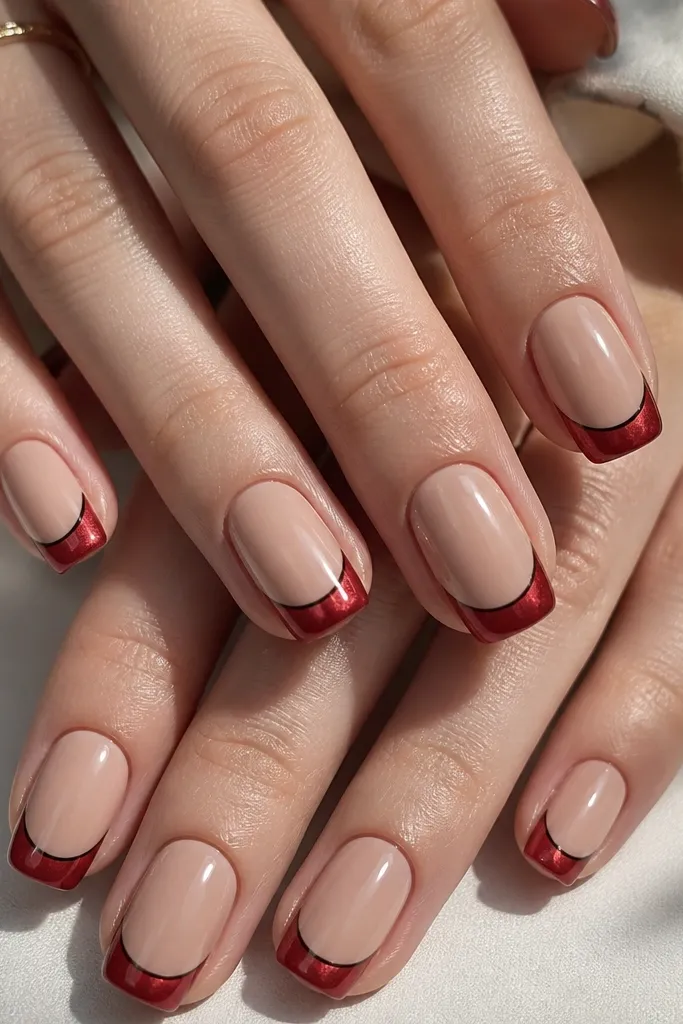
I love this when you want bold without adding rhinestones. The black micro-liner gives the red depth and makes the stripe look brighter by contrast. It flatters most skin tones, especially if you wear black eyeliner or dark nail polish already — it matches your wardrobe easily. This also works well for short nails because the black line visually defines the tip boundary. The principle is contrast control: red does the glow, black does the structure.
Apply nude base gel and cure. Use french tip guides or a steady freehand to paint red magnetic gel only on the tip, magnet for 10 seconds, then cure. With a micro-liner brush, draw a thin black line along the inner edge of the red curve, about 0.5 mm from the border. Cure the black line and check the symmetry on all nails. Finish with a glossy top coat, lightly dragging the brush over the black line so it blends smoothly.
If your liner looks uneven, fix it right away with a clean gel brush dipped in cleanser — don’t wait until cure.
Don’t thicken the black line — chunky black makes the tips look heavy and cheap.
7. Burgundy Cat Eye French Tips with Sheer Rose Jelly Base
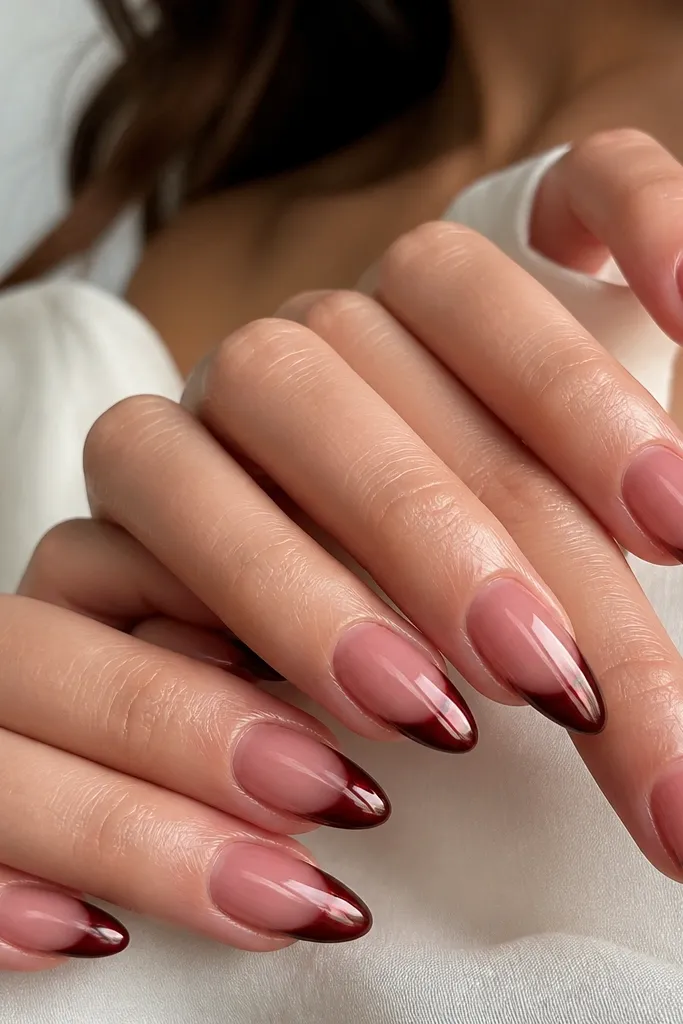
Start by prepping and applying a thin base coat. Paint sheer rose jelly base in 2 thin coats, curing each, so it stays translucent. Apply burgundy cat eye gel only at the french tip, magnet for 10-12 seconds, and cure. Keep the tip width around 1.5-2 mm so it doesn’t swallow the jelly base. Seal with glossy top coat, and cap the free edge so the jelly base stays glassy.
Jelly bases look amazing with cat eye because they let the nail bed shine through while the tip holds the magnet effect. This burgundy shade is deeper than cherry, so it looks dramatic under warm lights and flattering on medium to deep skin tones. It also makes your manicure look smoother because the jelly base softens visible nail ridges. If you like a “moody red” that isn’t black-red, this is it. The principle is layering translucency: sheer base glow + dense magnetic tip.
Skip thisDon’t apply jelly base too thick or it becomes opaque and flattens the cat eye contrast.
Editor's noteUse a slightly cooler undertone burgundy if your red pulls orange — magnet stripes look cleaner with cooler pigment.
8. Red Cat Eye French Tips with Gold Foil Crescent
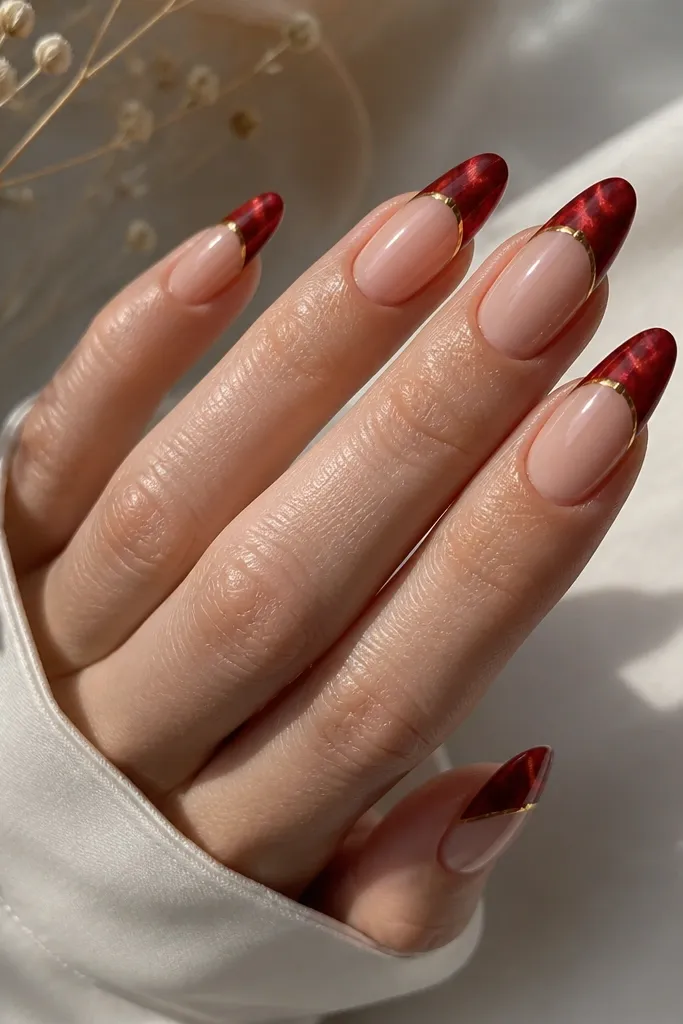
Gold foil crescents add a luxe flash without needing full coverage. The foil sits where the light hits the tip curve, so it looks like jewelry on your nails. This combination flatters warm undertones and looks especially good with gold rings. I’ve worn it to weddings where I wanted something bold but not overly blingy. The principle is placement: foil only at the inner corner keeps it classy and makes the stripe still the main character.
Apply a nude base gel and cure. Create your red cat eye french tips using guides, magnet for 9-11 seconds, and cure. Add a small amount of gold foil adhesive (or tacky layer from gel) at the inner corner of the tip, then press gold foil into place and tap off excess. Cure the foil adhesive according to your product instructions. Finish with a glossy top coat, using a slightly thicker top coat over the foil so it’s sealed and smooth.
Cut foil into tiny crescents before you start so you don’t fight big pieces on small nail surfaces.
Don’t lay foil over uncured tack — it smears and turns into a dull patch.
9. Red Cat Eye French Tips with Red-to-Clear Tip Fade
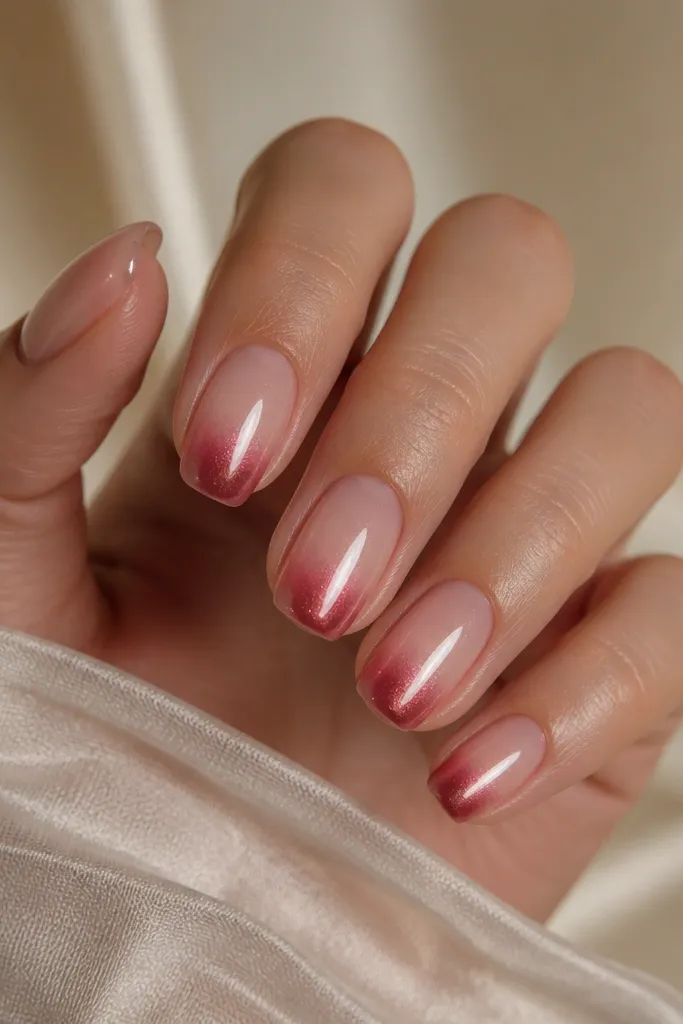
Start with a clear glossy base gel and cure. Use a guide to paint a red cat eye strip down the center of the tip rather than full tip coverage. Magnet for 10 seconds so the stripe forms, then cure. With a clean brush, feather the red outward slightly with a transparent gel so the edges fade toward clear, then cure again. Apply top coat and cap the tip edge carefully so the fade looks smooth, not patchy.
This is the optical trick that makes your nails look like they have length even when they don’t. A red-to-clear fade makes the stripe look like it’s floating, and the cat eye glow sits in the middle where your eye naturally looks. It flatters short fingers because the fade doesn’t create a heavy block at the tip. I like it for minimalists who still want the magnetic effect. The principle is negative space: you keep the sides lighter so the stripe stays crisp.
Skip thisDon’t fully cover the sides with red — that removes the negative space that makes it lengthening.
Editor's notePaint the red stripe a hair narrower than you think — the feathering widens it once you blend.
10. Red Cat Eye French Tips with Tiny Red Rhinestone Dot
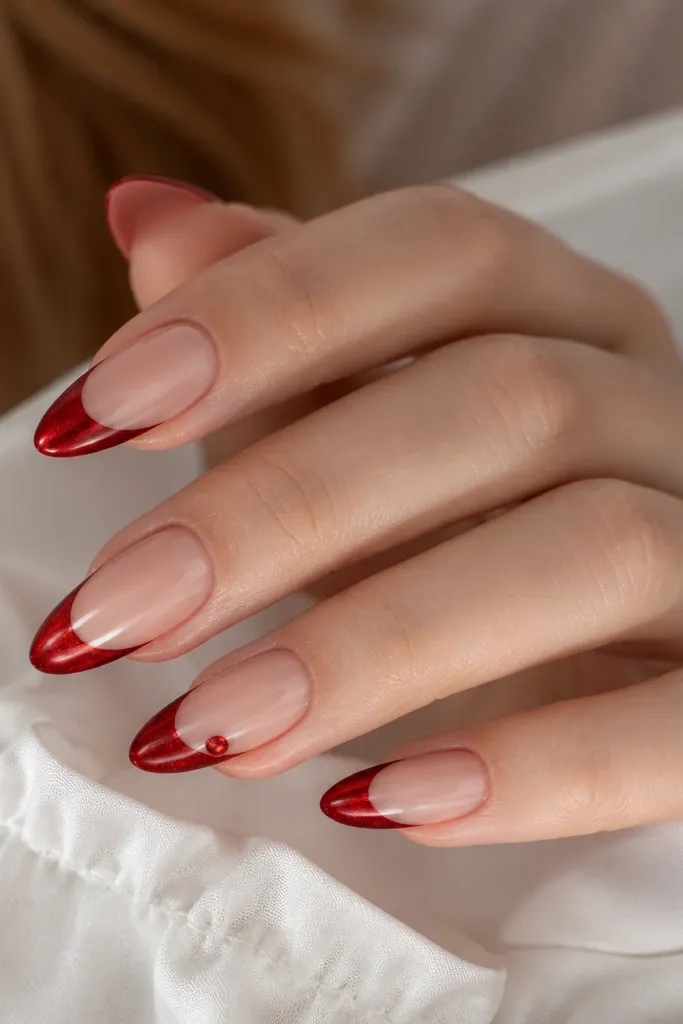
A single micro rhinestone makes the manicure feel intentional, not busy. The rhinestone catches light right where the cat eye stripe starts, so the whole nail looks like it has a focal point. This flatters hands that need a little “event polish” — it reads special without going full bling. I like it for birthdays, dinner plans, and photos because it shows up in flash. The principle is one accent, one focal point — let the cat eye do the rest.
Apply nude base gel and cure. Paint red cat eye french tips with guides, magnet for 9-12 seconds, and cure. Place a tiny dot of clear gel at the french curve on the accent nail only, then set a micro rhinestone and press gently. Cure the rhinestone in place, then top coat over the entire nail, keeping the top coat smooth around the stone. If you want extra shine, add a second thin top coat layer just on the accent nail.
Use a rhinestone size around 1.0-1.5 mm so it doesn’t look oversized against a french tip.
Don’t put rhinestones on every nail — the cat eye already has movement and you’ll lose the clean look.
11. Red Cat Eye French Tips with Black Cherry Base Layer
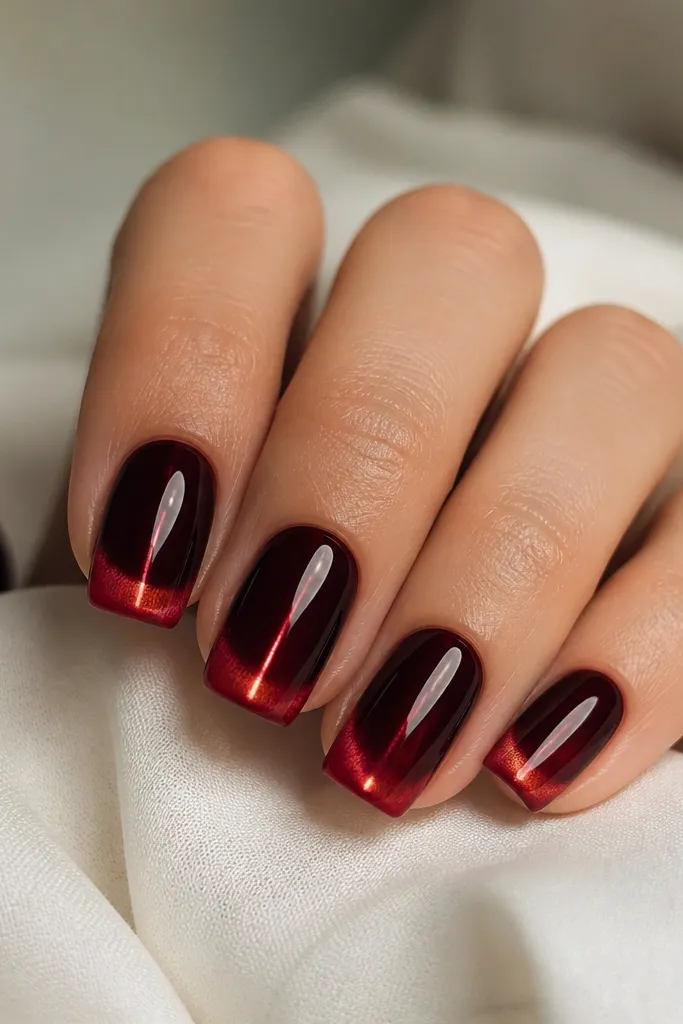
This design is darker and moodier, but the stripe keeps it from looking heavy. The black-cherry base makes the red tip look brighter, like it’s lit from within. It flatters deep skin tones and looks stunning with silver jewelry, because the cool depth balances the red. I’ve worn it on nights out when I wanted something different from classic red. The principle is tonal layering: darker base, brighter magnetic tip.
Start with a black-cherry gel base in 2 thin coats, curing each. Use guides to paint a lighter red cat eye french tip, magnet for 10 seconds, and cure. Keep the tip width around 1.5-2 mm so you still see the black-cherry base beneath. If you need a smoother transition, use a thin brush to soften the inner edge of the red before curing. Finish with a glossy top coat to bring back shine and make the stripe look crisp.
Choose a cat eye red that is at least one shade brighter than your base — otherwise the stripe disappears.
Don’t use a flat red non-magnetic top coat over the tip — it dulls the magnetic line.
12. Red Cat Eye French Tips with White Milky French Edge
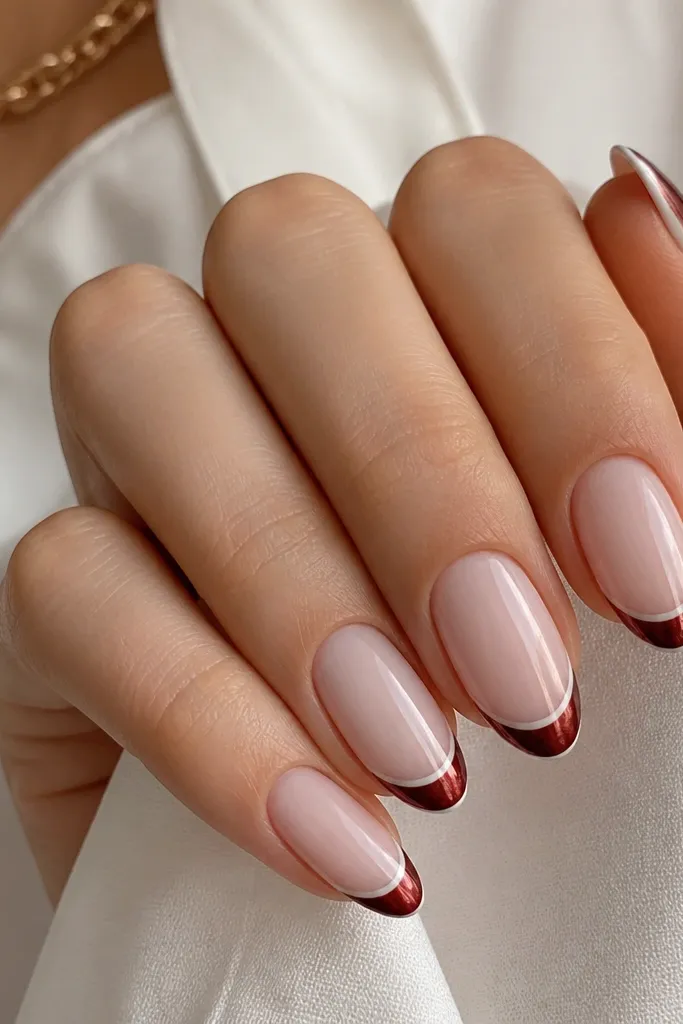
Milky white borders make french tips look sharp even if your hand shakes. The red cat eye fills the main tip area, while the white edge acts like a frame that defines the curve. This flatters fair and light-medium skin tones because the white is clean and bright, not creamy-yellow. It also looks great on nails with slight staining since the milky white hides discoloration at the tip. The principle is framing again, but softer: white border + magnetic red center.
Apply a milky pink base gel and cure. Paint the red cat eye area on the tip using guides, magnet for 8-10 seconds, and cure. Then, with a fine brush, add a thin milky white line along the very edge of the french curve — aim for a 0.5-1 mm border. Cure that line and apply glossy top coat over the whole nail, making sure the white border is sealed. If the white looks streaky, do a second ultra-thin white border and cure.
Thin your milky white gel with a gel medium if it’s too opaque — you want a smooth border, not a thick stripe.
Don’t skip sealing the border — unsealed white edges chip fast.
13. Red Cat Eye French Tips with Reverse Magnet Stripe
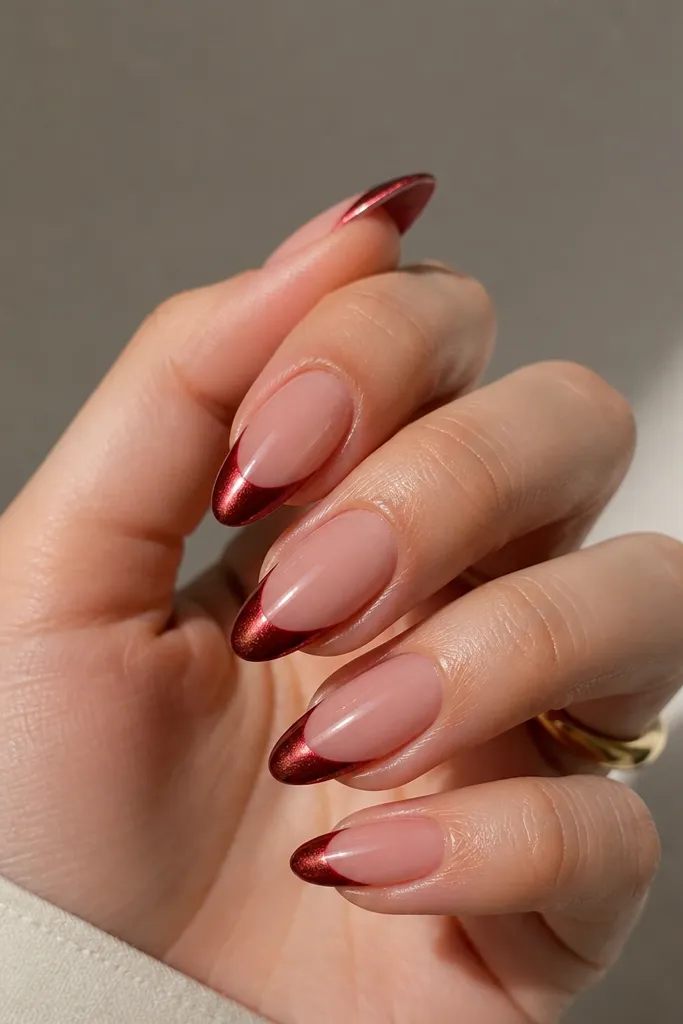
Start with a nude base gel and cure. Use guides to paint your red cat eye french tip, but magnet with the tool slightly to one side of the stripe center. Hold for 10 seconds, cure, then check the stripe direction under the lamp. If you want it sharper, do a second thin magnetic layer just on the tip stripe area and repeat the angled magnet for 6-8 seconds. Top coat everything and cap the tip edge so the angled stripe stays crisp.
Reverse magnet placement changes how the stripe reads, and it looks extra bold on french tips. Instead of pulling the cat eye straight down, you magnet at an angle so the stripe tilts slightly, making the tip look like it’s moving. This is a great option if you’re bored with straight-center stripes and want a more fashion-forward look. I’ve found it flatters longer almond shapes because the diagonal stripe follows the nail’s natural line. The principle is direction control: magnet angle changes the optical effect.
Skip thisDon’t move the magnet during those 10 seconds — shifting makes the stripe look cloudy.
Editor's notePractice on one nail first — angled magnet looks amazing when it’s consistent across fingers.
14. Red Cat Eye French Tips with Red Chrome Halo Tip
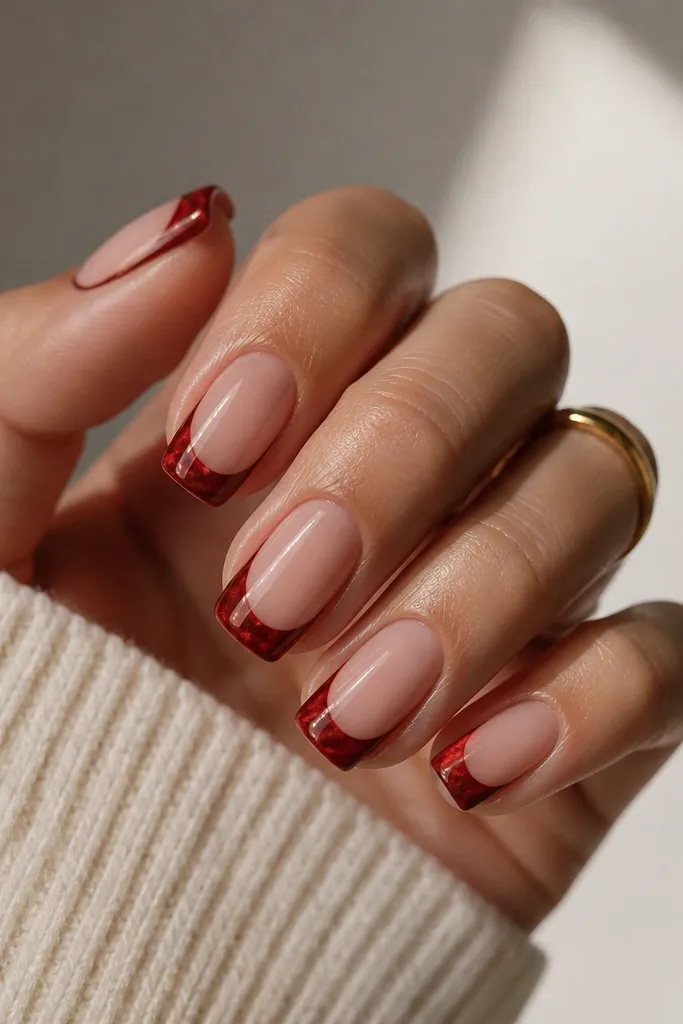
Chrome halos make the french tip look like it has a rim light. I use a red cat eye base on the tip, magnet it for the stripe, then apply red chrome only around the outer edge so it frames the magnetic glow. It’s flattering because the halo follows the nail curve and visually sharpens your tip shape. This looks great on medium to deep skin tones and makes silver rings pop. The principle is edge lighting: chrome only on the perimeter, not on the whole tip.
Apply nude base gel and cure. Paint red cat eye french tip with guides, magnet for 10 seconds, and cure. With a small brush or sponge, apply red chrome to the outer 1 mm edge of the tip — think of it like a thin rim, not a full cap. Press lightly so it bonds, then wipe off excess. Seal with a top coat that’s compatible with chrome (use the one your chrome line recommends) and cure fully.
If the chrome smears, switch to applying it on a slightly tacky layer instead of fully dry gel.
Don’t buff the cat eye stripe before chrome — it reduces the glow.
15. Red Cat Eye French Tips with Gradient Marble Cuticle Accent
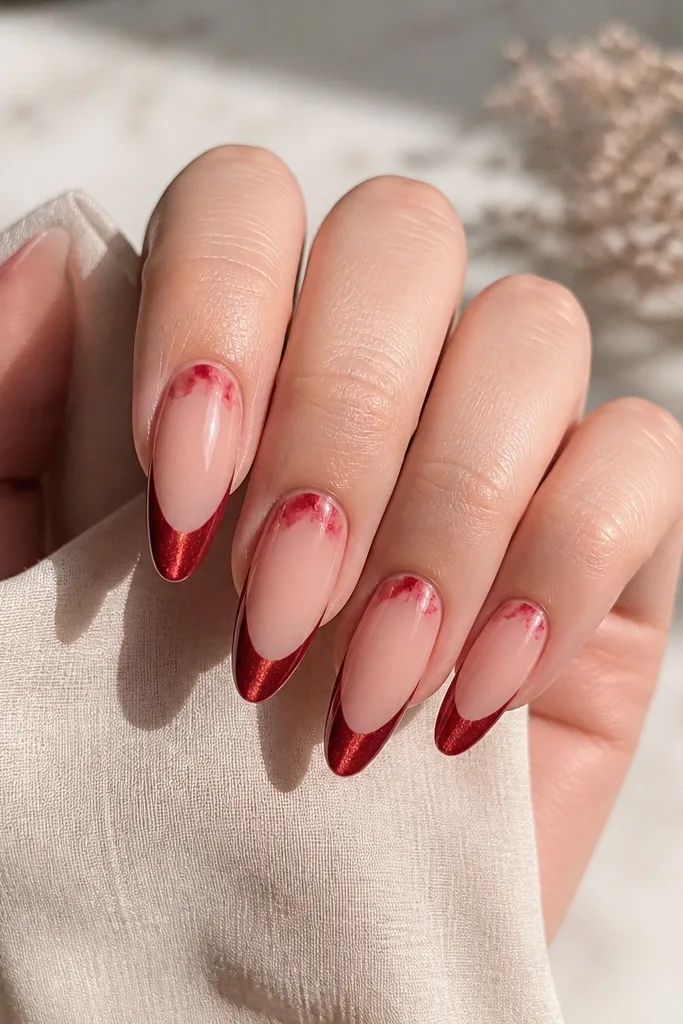
Start with a nude base gel and cure. Paint red cat eye french tips using guides, magnet for 9-11 seconds, and cure. For the marble accent, dab a tiny amount of pink-red gel near the cuticle using a small brush, then swirl it with a toothpick for marble veining — keep it under 2 mm wide. Add a very thin layer of red cat eye gel over the marble accent area only if you want it to glow slightly, then cure. Finish with glossy top coat, making sure the marble is sealed without flooding the cuticle edges.
This one keeps the french tips bold but adds a personal touch near the cuticle. The marble accent is small and airy, so it doesn’t fight the magnetic stripe. I like this for medium skin tones because the pink-red marble warms the whole manicure and keeps it from looking too harsh. It also looks good on hands with short nail beds because the accent draws attention upward. The principle is balance: strong tip, light cuticle detail.
Skip thisDon’t drag marble lines down into the french area — it ruins the crisp separation.
Editor's noteKeep the marble accent tiny — bigger cuticle art makes the french tip look less clean.