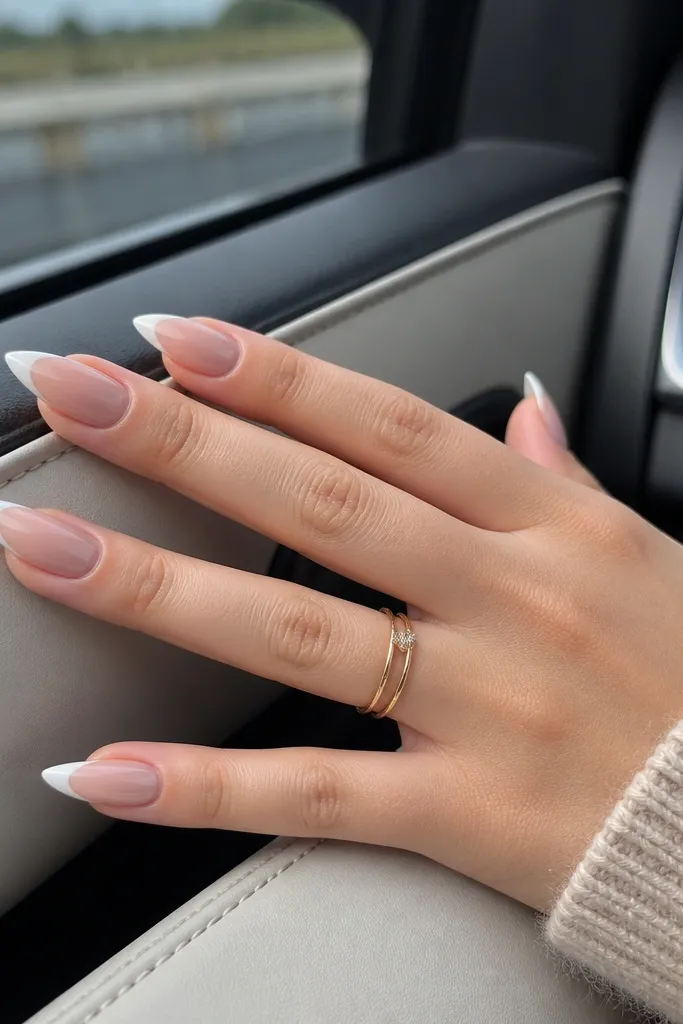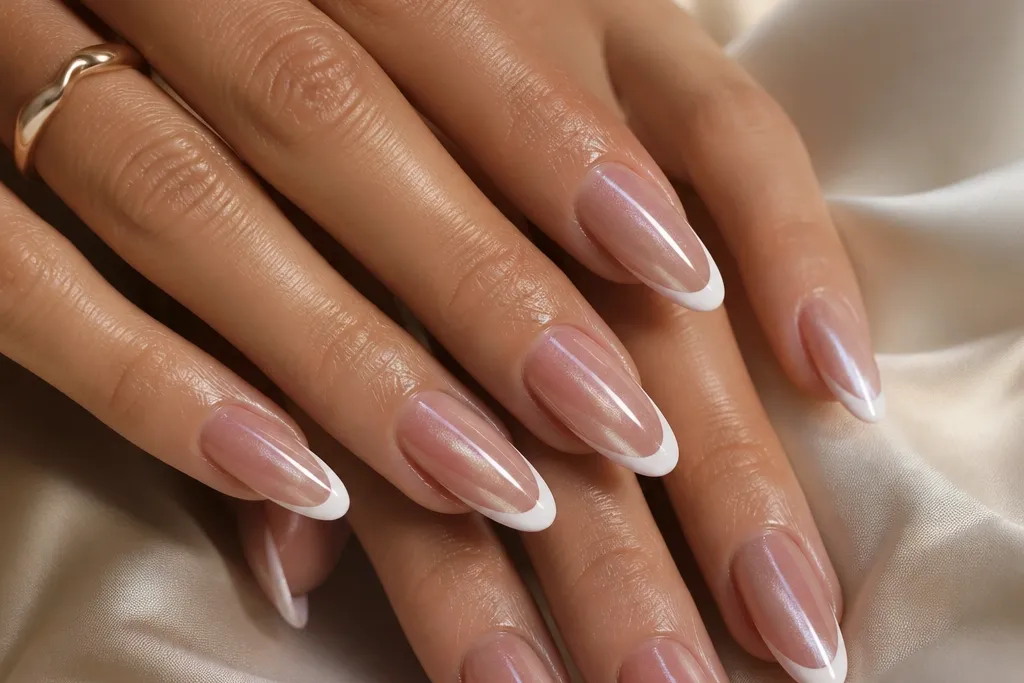
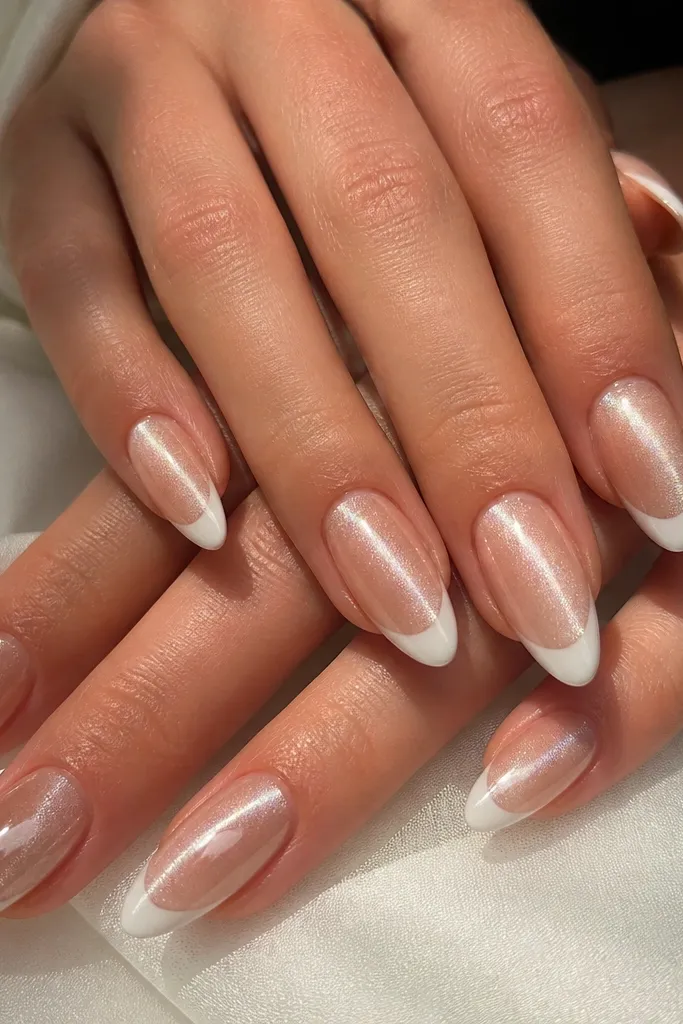
1. Black Cat Eye with Micro White French Tips
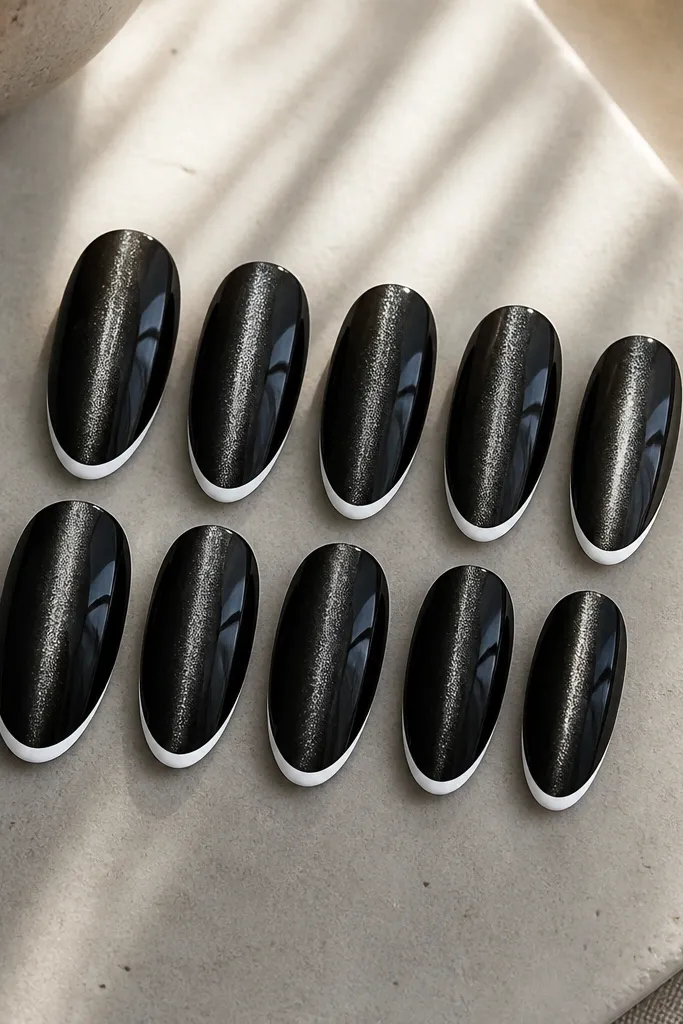
This one is my go-to when I want “clean but expensive.” The black cat-eye makes the center shimmer look like a glossy wire, and the micro French tip keeps the whole set from looking heavy. On fair to medium skin, the contrast is sharp and flattering around the nail bed. The trick is keeping the white tip thin — thick white makes the cat-eye look darker than it should. It looks best for workdays, interviews, and anything where you still want a little drama.
Editor's noteIf your white tip looks streaky, do two ultra-thin coats instead of one thick one.
Start by cleaning nails, pushing back cuticles, then applying a thin base coat and curing for 60 seconds. Paint cat-eye black in one smooth layer, then hold the magnet 1-2 mm above the nail and pull in a straight line for 2 seconds before curing. Add a second thin cat-eye layer only if you need more opacity, cure again, then wipe the tacky layer if your top coat requires it. For the French tips, use a thin striping brush to draw a narrow white arc at the edge, keeping the curve about 1.5 mm wide. Cure, then cap the tip with a final thin top coat and cure fully.
Skip thisAvoid magnet pulls longer than 3 seconds — the shimmer turns cloudy and the center line loses its crisp stripe.
2. Plum Cat Eye with Cream French Tips and a Single Gold Dot
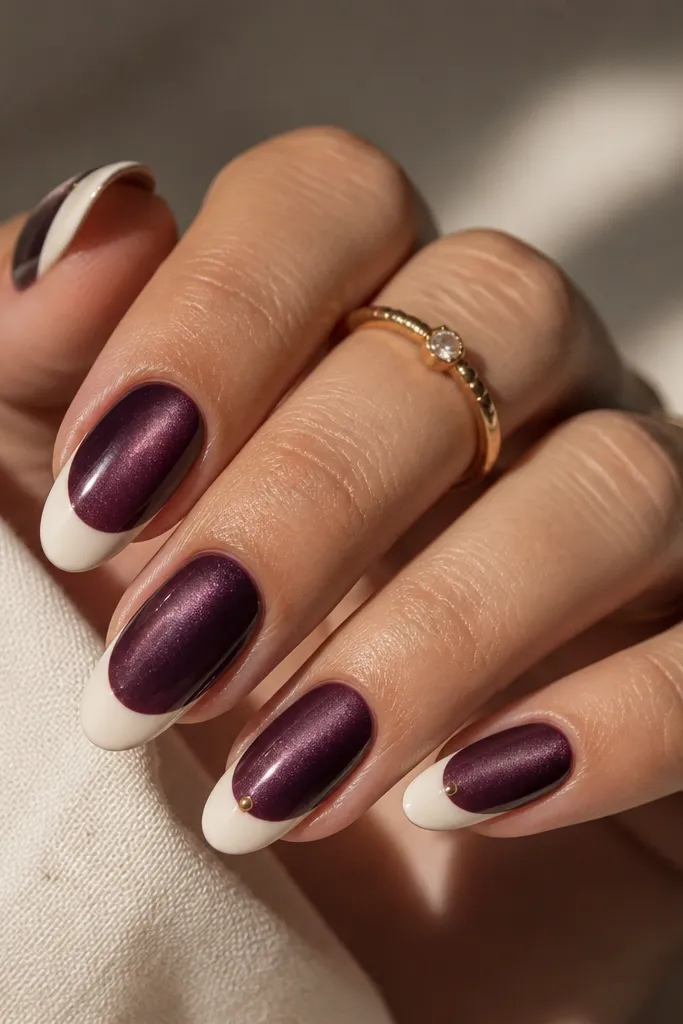
Plum is the color that makes cat-eye look classy instead of goth. The cream French tip softens the contrast and keeps the set wearable, even if your nails are short. I like this on medium and fair skin because the purple undertone flatters both warm and neutral complexions. The single gold dot adds a tiny focal point without turning the set into a themed manicure. This is a great option for date nights, holidays, and any time you want “pretty jewelry nails.”
Editor's noteUse a dotting tool tip that’s 1/3 the size of the French border — the dot should look intentional, not like a blob.
Apply base coat and cure. Paint cat-eye plum in one even stroke, then magnetize straight down the center for 2 seconds and cure. Add a second plum layer only on areas that look thin, cure again. For the French tips, use a creamy white or beige-cream polish and paint a 2 mm arc, keeping the smile line even across all nails. While the tip layer is tacky, place one gold dot with a dotting tool right at the border on the ring finger and cure. Finish with a glossy top coat, then cap the free edge.
Skip thisSkip chunky charms — the French tip border already has contrast, and extra pieces make it look crowded fast.
3. Emerald Cat Eye with Glossy White French Tips
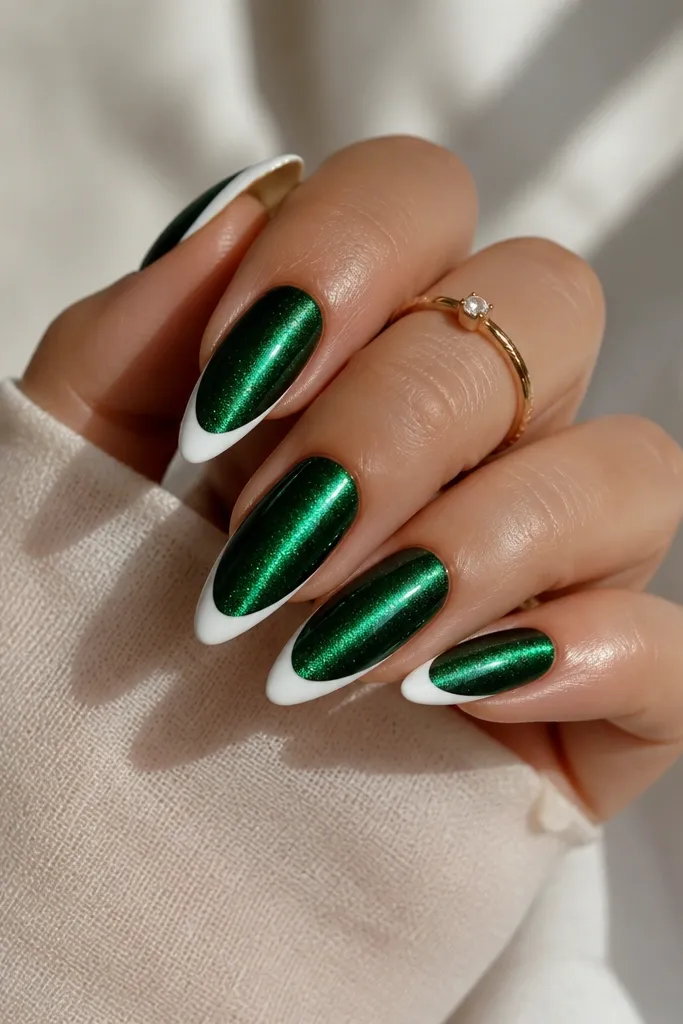
Emerald cat-eye is the jewel shade that reads “chic” even on a budget. The vertical shimmer makes the nail look longer, and the bright white tip gives a crisp frame. On tan and medium skin, green looks like it belongs on you — it warms up the hand and makes the nails look freshly done. On fair skin, emerald can look bold but still clean when the French tip is thin. Wear this for weddings, parties, or when you want your manicure to look like a gemstone under lights.
Editor's noteIf your white French tip bleeds into the green, let the cat-eye layer fully cool for 1 minute before painting the tip.
Start with a dehydrator or alcohol wipe, then base coat and cure. Apply emerald cat-eye gel in a smooth layer, magnetize with the magnet held above the center line for 2 seconds, and cure. Paint a second thin emerald coat to deepen the color, cure again, and wipe if needed. Use white French polish with a guide strip to keep the arc even, painting just 2 mm of tip. Cure, then apply a thick self-leveling top coat so the cat-eye line looks glass-smooth. Cap the free edge and cure fully.
Skip thisDon’t use a matte top coat — cat-eye needs shine to show that tight light stripe.
4. Teal Cat Eye with Milky Nude French Tips
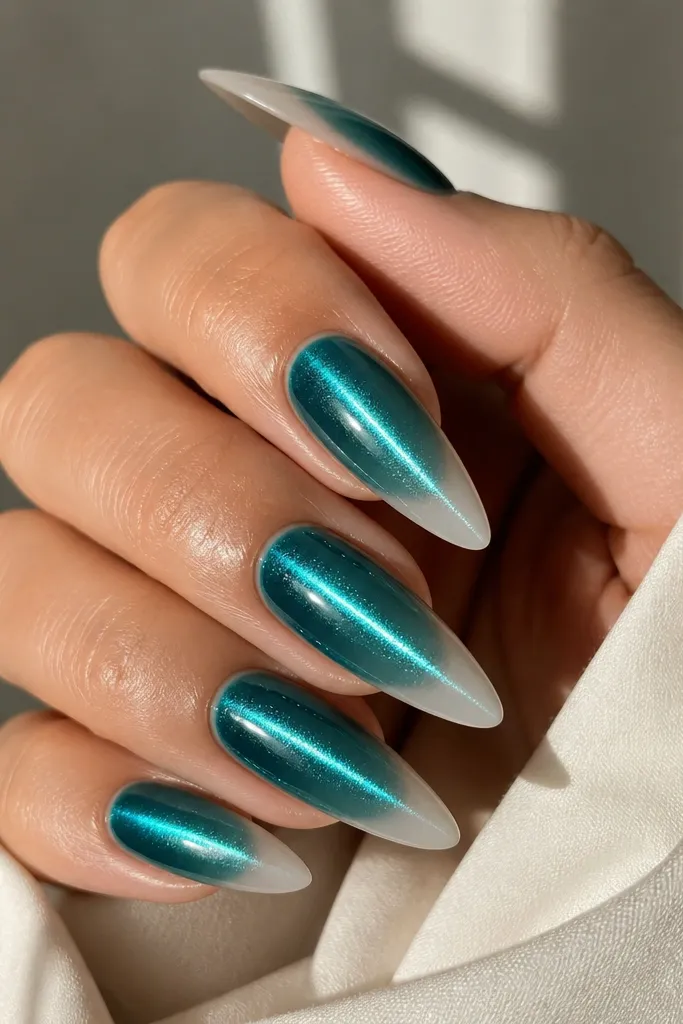
This is the “I want cat-eye but I still want it calm” set. Teal cat-eye shows a bright shimmer line without feeling harsh, and milky nude French tips keep everything soft. I’ve worn this on my own hands when I wanted my nails to look tidy with casual outfits and it still got compliments. It’s flattering on almost every skin tone because the nude tip is semi-sheer and matches your nail bed color. For everyday wear, it looks expensive because the shimmer is crisp and the tip isn’t stark white.
Editor's noteMilky nude looks best when you do a thinner first coat — the second coat builds opacity without thickening the tip.
Clean nails, apply base coat, and cure. Brush on teal cat-eye gel in one even layer, magnetize for 2 seconds with the magnet centered, then cure. Add a second thin teal layer only if the base looks too transparent, cure again. For the French tips, use a milky nude polish and paint a soft arc that’s about 2-2.5 mm wide, leaving a tiny gap so the teal line stays visible. Cure and then seal with a glossy top coat, paying extra attention to the free edge. Finish with one more top coat if your cat-eye looks slightly flat after curing.
Skip thisDon’t paint the nude tip too close to the cuticle — it makes the set look shorter.
5. Chocolate Brown Cat Eye with White French Tips and a Thin Outline
Chocolate brown cat-eye is underrated. It looks warm, makes your hands look tidy, and the shimmer thread adds depth without screaming for attention. The white French tip gives the classic look, and the thin brown outline makes the tip border look like it was professionally painted. I like this on medium to deep skin because the brown flatters undertones and the white stays bright. It’s also great for fall — it reads cozy but still polished.
Editor's noteOutline only after the white is fully cured; otherwise the liner smears into the cat-eye.
Apply base coat and cure. Paint chocolate brown cat-eye in one coat, magnetize straight down for 2 seconds, cure, then add a second thin coat for opacity and cure again. For the French tip, paint a 2 mm bright white arc. After curing the white tip, use a very thin liner brush with brown gel polish to draw a micro outline line just inside the white edge, then cure. Finish with glossy top coat and cap the free edge so the outline doesn’t catch on fabric.
Skip thisAvoid using a thick liner brush — thick lines turn into a blob and ruin the French shape.
6. Rose Gold Cat Eye with Nude Pink French Tips
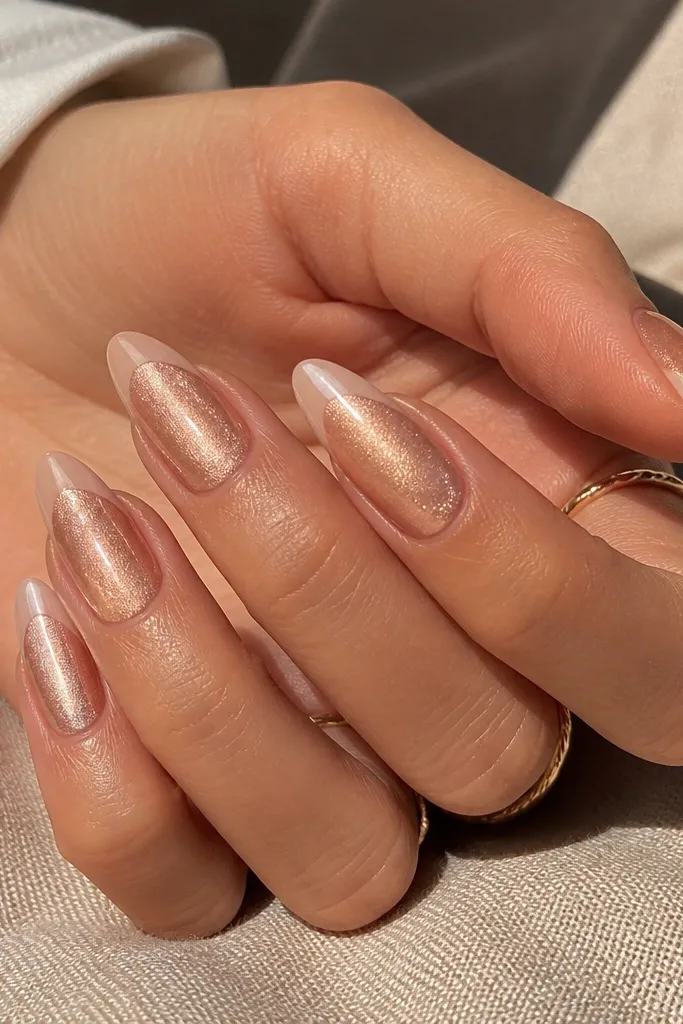
Rose gold cat-eye makes your nails look like jewelry without needing extra gems. The shimmer reads soft and warm, and nude pink French tips keep it girly and clean. I’ve used this combo for bridal showers and it always photographs well because the rose-gold line catches light without looking glittery. It’s flattering on fair and neutral skin tones, especially if your nail beds are naturally pink. If you hate harsh white tips, this is the French alternative that still looks “done.”
Editor's noteChoose a nude pink that matches your natural nail bed — it should look like an upgraded version, not a different color.
Start with base coat and cure. Apply rose gold cat-eye gel in one smooth layer, then magnetize for 2 seconds held over the center. Cure and add a second thin coat if you want a stronger metallic look, then cure again. Use a nude pink polish for the French tip and paint a 2-2.5 mm arc, keeping the edge smooth and even. Cure, then top coat with a glossy finish and cap the free edge. If the nude tip looks too streaky, add a second ultra-thin nude coat for even coverage.
Skip thisDon’t use a super opaque white under rose gold — it can dull the warm shimmer.
7. Sapphire Blue Cat Eye with Clear Glassy French Tips
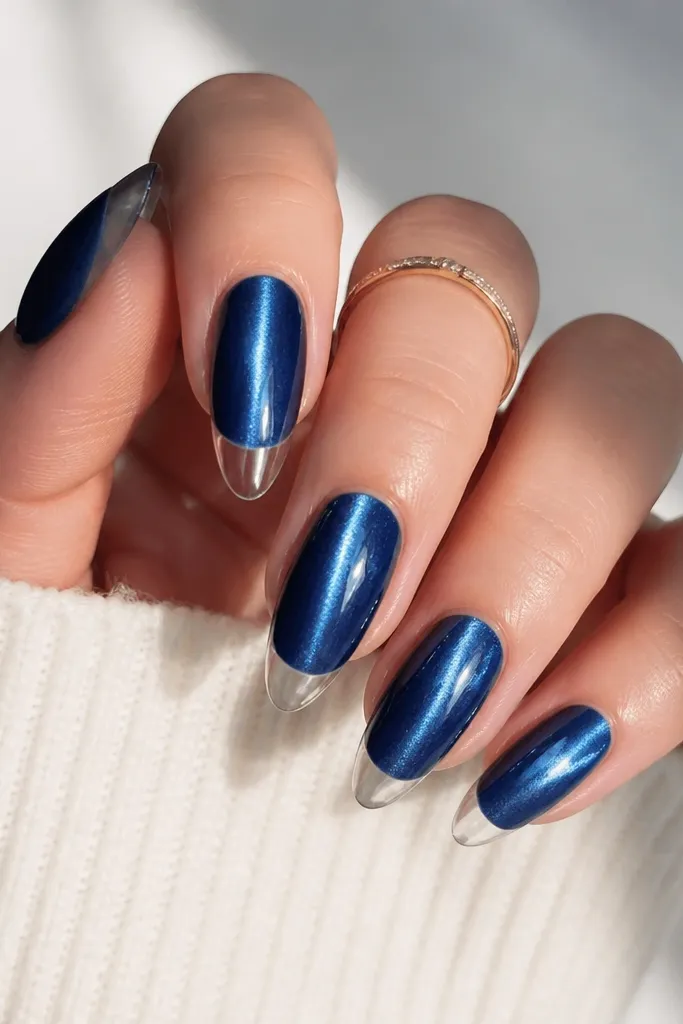
If you like a “fresh manicure” look, this clear French tip style is the one. Sapphire blue cat-eye gives you the bold shimmer stripe, while the clear tips keep everything light and modern. This looks great on shorter nails because it doesn’t add heavy color at the tip. On fair and medium skin, the blue looks crisp; on deeper skin, it looks like a rich jewel without needing extra decoration. I’ve worn this to summer events and it stays classy even when the rest of my outfit is simple.
Editor's noteWork in thin clear layers — clear gel gets lumpy fast if you try to cover in one go.
Prep nails and apply base coat, cure. Paint sapphire blue cat-eye gel in one coat, magnetize for 2 seconds with the magnet centered over the nail, cure. Add a second thin sapphire coat if the shimmer thread isn’t bright enough, cure again. For the French tips, use clear builder gel or a clear gel polish and paint just the tip area (about 2 mm), staying slightly above the natural nail line. Cure, then apply a high-gloss top coat to make the tips look glassy. Cap the free edge so the clear layer stays smooth and doesn’t chip.
Skip thisAvoid thick clear tips — they look bulky and can catch on hair and clothing.
8. Grey Cat Eye with Silver French Tips and a Side Sweep
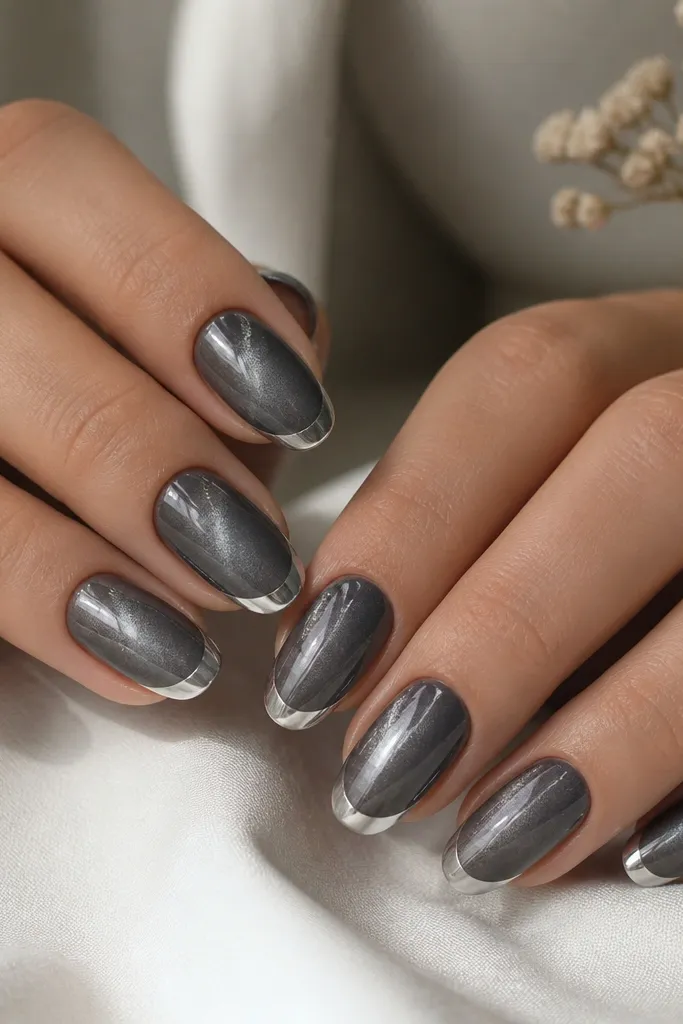
Grey cat-eye is a stealthy way to get the cat-eye effect without going bright. The silver French tips look icy and clean, and the tiny side sweep gives it that “designed” look while staying budget-friendly. I like it on medium and tan skin because grey and silver make the hand look cool-toned and sharp. On fair skin, it looks chic and modern. This style is perfect for winter, concerts, and any time you want something that still looks neat in photos.
Editor's noteFor the side sweep, use the magnet at a slight angle and only pull for 1 second so the streak stays tiny.
Apply base coat and cure. Paint grey cat-eye gel in one smooth layer, magnetize for 2 seconds straight down the center, cure. Add a second thin grey coat if needed and cure again. Paint silver French tips with a metallic gel polish in a 2 mm arc, curing after each set of nails. For the side sweep, use the same grey cat-eye color with the magnet to create a small angled shimmer streak near the left edge of the tip border, then cure. Finish with glossy top coat and cap the edges.
Skip thisSkip full-magnet pulls for the side sweep — it turns into a big stripe that ruins the French balance.
9. Burgundy Cat Eye with French Tips in Same Color Fade
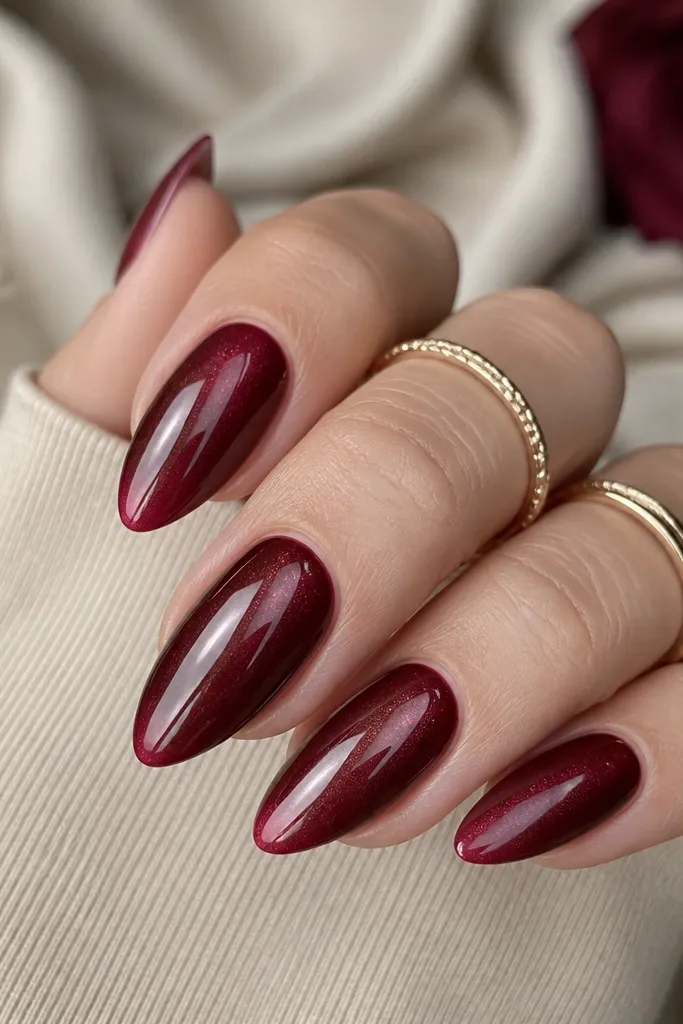
This is for people who hate stark lines but still want a French look. Burgundy cat-eye gives depth, and a same-color fade makes the manicure look custom. The shimmer line stays crisp in the center, while the tip blends so it looks softer and more expensive. I’ve worn this on my nails when I wanted something flattering for events but not too bright. It flatters fair through deep skin tones because burgundy sits in a wide range of undertones. It also hides minor growth because the fade looks intentional.
Editor's noteBlend while the gel is still slightly tacky so the gradient looks smooth instead of two stripes meeting.
Prep nails and apply base coat, cure. Paint burgundy cat-eye in one coat, magnetize for 2 seconds down the center, cure. Add a second thin coat for full opacity and cure. For the French fade, use burgundy gel polish and a slightly lighter wine color. Paint the tip area about 2 mm wide with burgundy at the border, then lightly blend toward the tip edge using a small brush dipped in the lighter wine. Cure, then apply glossy top coat and cap the free edge. If you see any harsh line after curing, add a second thin top coat and gently drag the brush over the fade area.
Skip thisDon’t use nail art striping tape for gradients — it leaves edges that look fake.
10. Teal-to-Black Cat Eye with Milky White French Tips
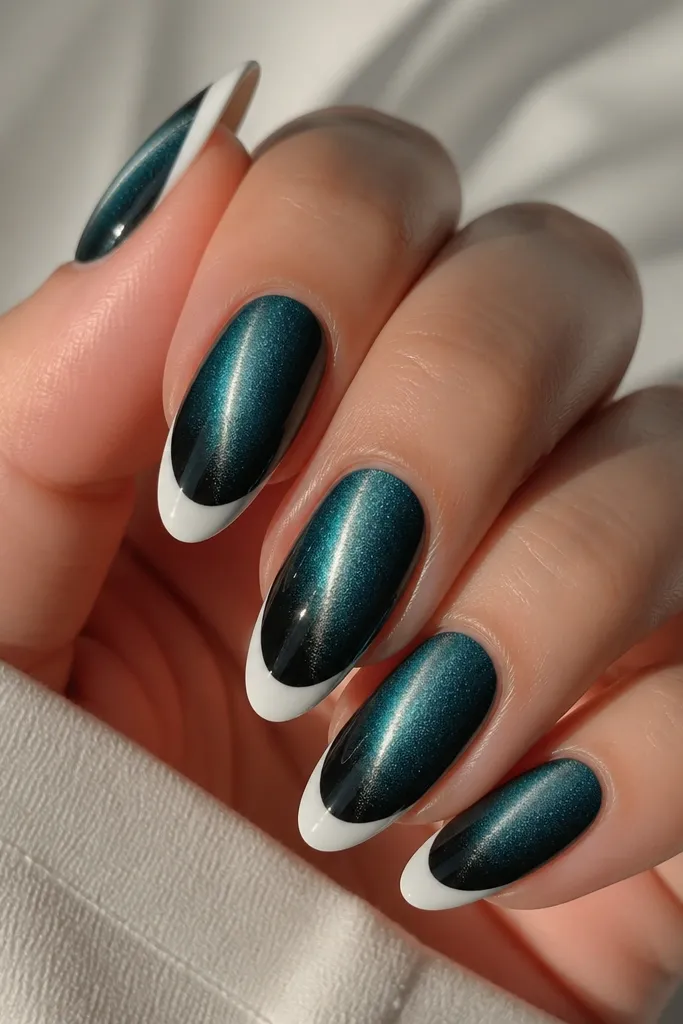
This combo looks designer because it has depth inside the nail before you even get to the French tip. The teal-to-black transition makes the cat-eye shimmer look dimensional, and the milky white tips keep it fresh instead of too dark. I like this on medium and deeper skin because the teal pops without looking washed out, and the black anchors the look. On fair skin, it still works, but keep the teal stronger so it doesn’t turn into a grey mess. It’s a great choice for nights out when you want something that looks different from every angle.
Editor's noteKeep the teal area about 60% of the nail so the black doesn’t swallow the shimmer.
Apply base coat and cure. Paint a teal cat-eye layer on the upper half of the nail, magnetize for 2 seconds, and cure. Then sponge or brush a thin black cat-eye layer from the midline down, magnetizing again so the shimmer thread still lines up through the center — cure. For the milky white French tips, paint a 2 mm opaque arc with a milky white gel polish, curing after the first coat. Add a second thin milky coat if you need full coverage, then cure. Finish with a glossy top coat that self-levels and cap the free edge so the color transition stays smooth.
Skip thisAvoid magnetizing separately for each half without aligning — the shimmer threads will look like they don’t match.