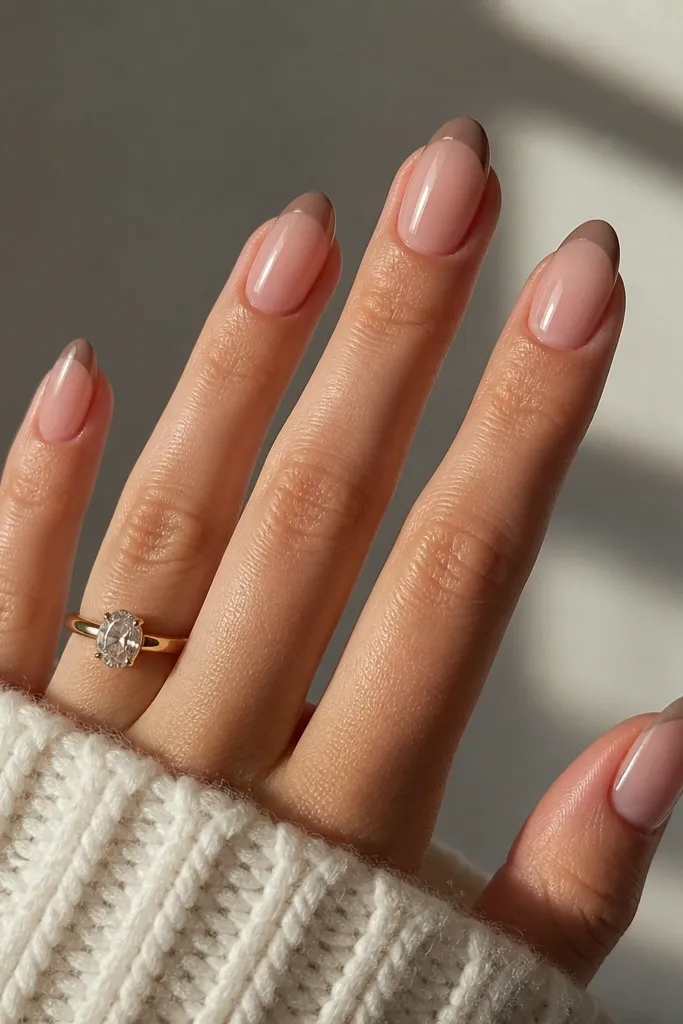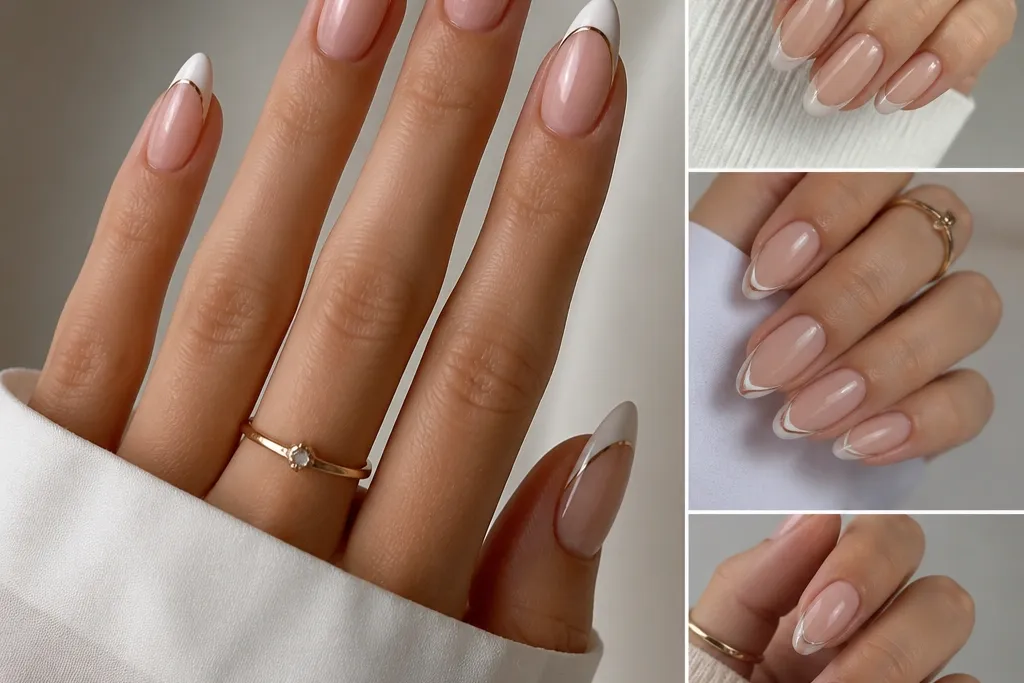
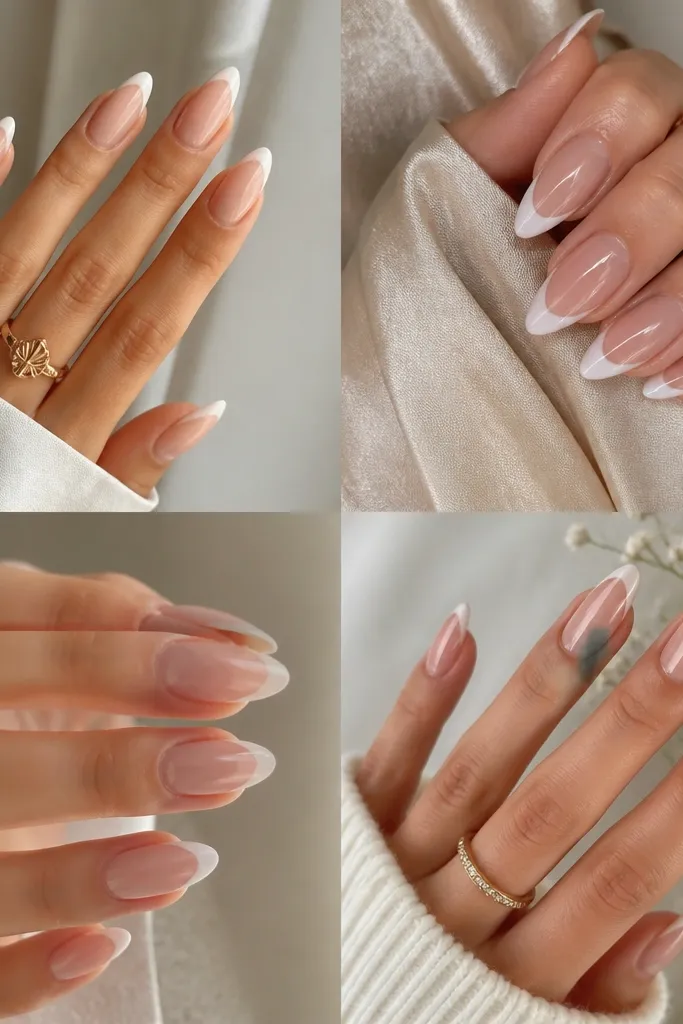
1. Icy Silver Cat Eye on Nude Almond with Micro French
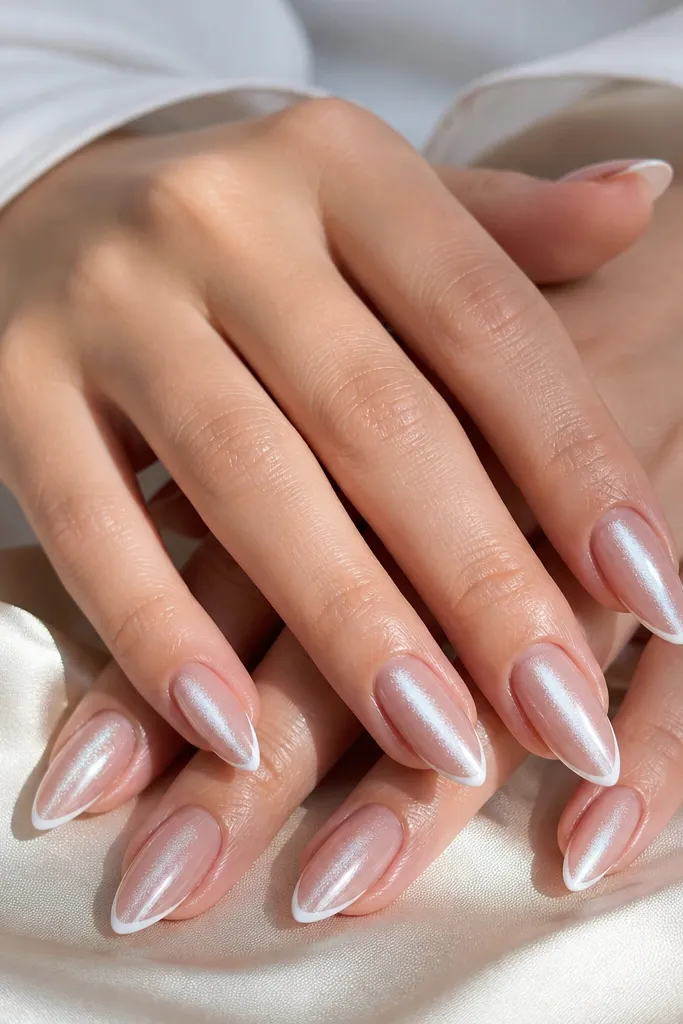
Start with a nude base gel that matches your skin depth — I use a beige nude, not a rosy one. Apply a thin coat of the nude and cure. Next, paint the cat eye gel in a thin, even layer, then hold the magnet over the nail for 8-12 seconds right before curing so the stripe sharpens. After curing the cat eye layer, use a striping brush to draw a micro French line, keeping the curve low and even across the almond. Finally, seal with a glossy top coat, and cap the free edge so the French line doesn’t lift.
This is the version I reach for when I want “clean and expensive” without adding a single decoration. The icy silver cat eye stripe looks crisp against a nude base that’s closer to beige than pink, so the magnet effect reads like a reflective line instead of a cloudy streak. Because the French tip is micro-thin, it doesn’t fight the cat eye stripe — it just frames the top edge. It flatters short-to-medium nail lengths because the narrow tip keeps the almond shape looking longer. If you’re fair or cool-toned, this set makes your nails look brighter; if you’re medium, it still works because the nude base keeps everything balanced.
Skip thisDon’t make the French tip thick — on almond nails it turns the set into a chunky block.
Editor's noteIf your white French looks slightly gray, mix white gel with a tiny dot of titanium white before you paint so it stays clean.
2. Rose Gold Cat Eye with Warm Nude Base and Classic French Smile
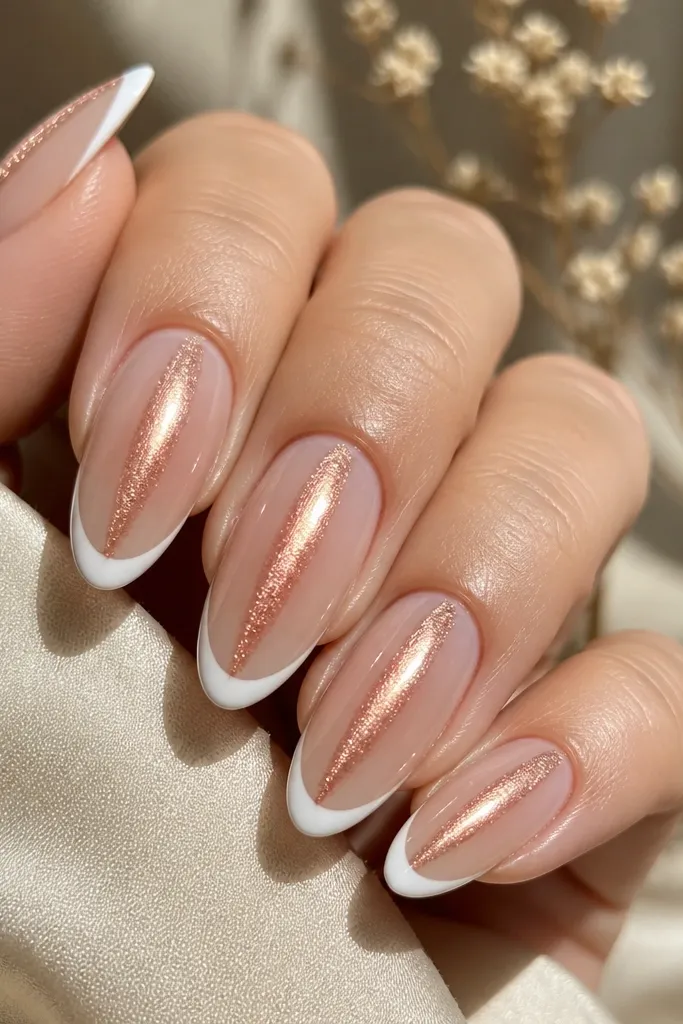
Prep and shape first, then apply a thin nude base and cure. Paint rose gold cat eye gel in one even coat, then magnetize for about 10 seconds to pull a single clean stripe. Cure. For the French, use a flexible French guide or freehand with a thin brush — place the smile about 1-2 mm below the tip edge, then fill the tip area with opaque white gel. Cure fully, then top coat glossy and wipe the tacky layer if your gel needs it so the white stays crisp.
This is the “date night” version of the look. The warm nude base makes the rose gold cat eye stripe look smoother, and the gold shift gives it that soft glow that still reads elegant. I like the classic French smile here because the rose gold stripe already adds interest; the French tip should be slightly thicker than micro to balance the warmth. This set flatters medium to deep skin tones beautifully because the warm nude gives a natural hand tone, and the white French line stays bright without looking stark. If your nails are on the shorter side, the classic smile curve helps your almond look intentional instead of delicate.
Skip thisSkip layering cat eye gel too thick — it blurs the stripe and makes the French line look messy.
Editor's noteUse a slightly warmer white (gel labeled bright white) so it doesn’t look blue under indoor light.
3. Black Plum Cat Eye French with Soft Nude and Thin Outline
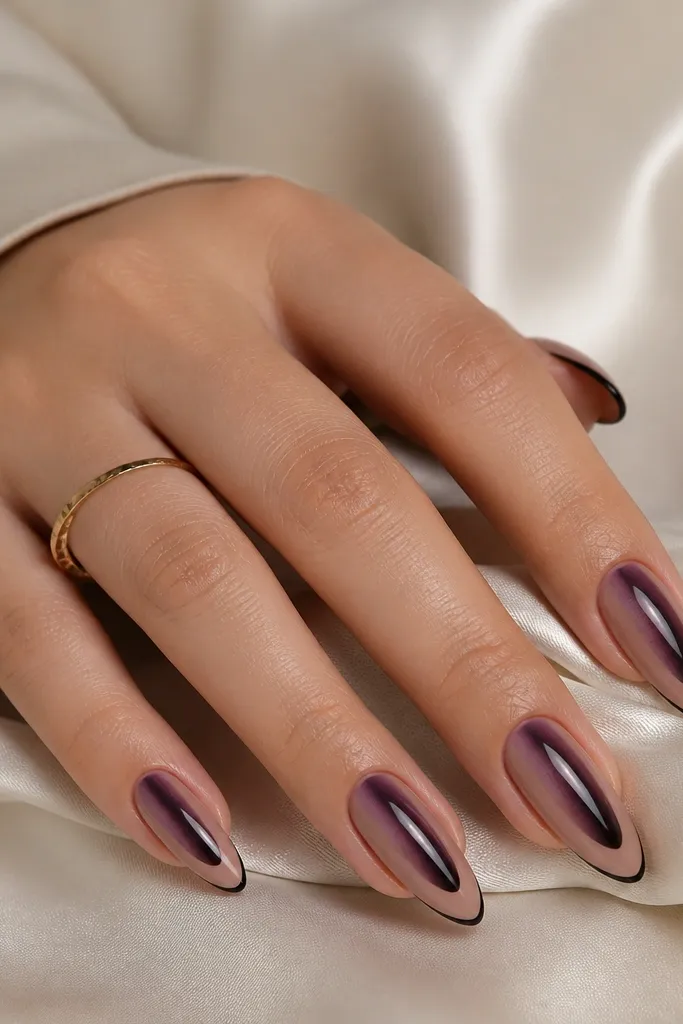
If you like drama but still want it to look polished, this one does it. The black plum cat eye stripe looks like a moving shadow, and the thin outline French keeps the design airy instead of heavy. The nude tip interior matters — it keeps your almond shape from looking like a full black nail, which can make hands look shorter. This flatters most skin tones, but it’s especially good for medium to deep tones because the plum reads rich instead of dusty. For work settings, you can make it feel more subtle by keeping the outline ultra-thin.
Apply a soft nude base gel and cure. Paint black plum cat eye gel in a thin coat, magnetize for 9-11 seconds, then cure. For the French outline, use a striping brush and draw a thin line that follows the smile curve, then leave the center of the tip nude. If your outline is wobbly, go back with a tiny dot of nude gel to clean the inner edge. Cure and seal with one glossy top coat, then cap the free edge of the outline.
Use a gel liner brush with a fine tip — foam-tipped brushes make the outline too wide.
Don’t fill the tip solid black — it turns the cat eye into the background instead of the star.
4. Chocolate Brown Cat Eye with Cream French and Almond Taper
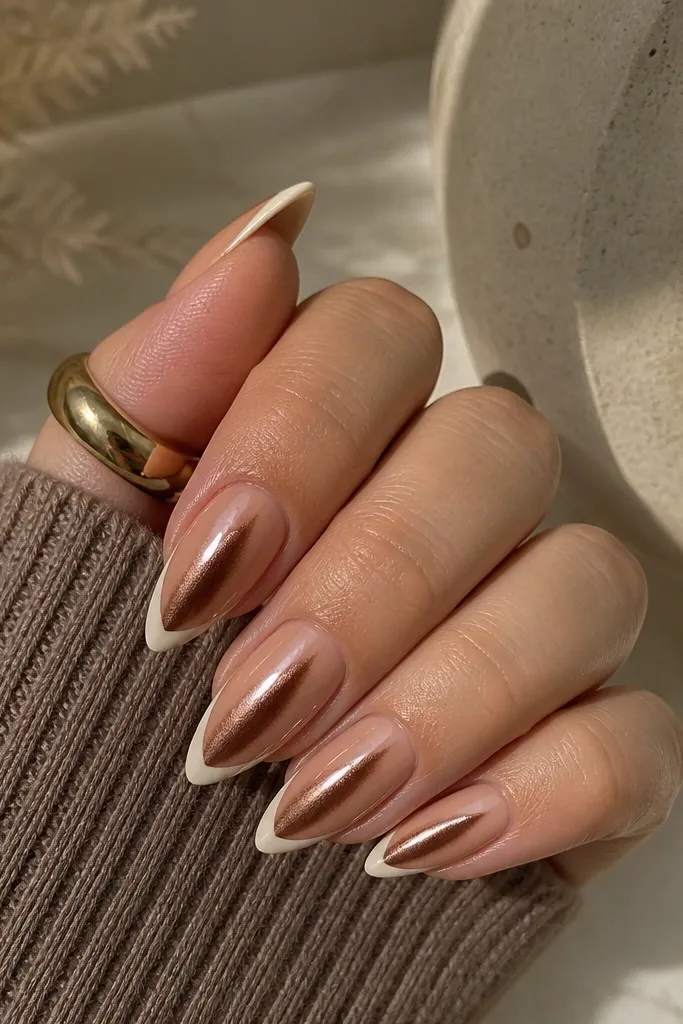
Start with a creamy nude base and cure. Apply chocolate brown cat eye gel in a thin layer, magnetize for 10 seconds, and cure. Wipe the surface if needed, then paint the French tip with cream gel, keeping the smile smooth and the tip width about 1/8 to 1/6 of the nail width. Keep the French edge tidy — I use a silicone French guide for the first attempt, then refine freehand. Finish with glossy top coat, and use a small brush to clean any gel from the sidewalls.
This is the “cozy but classy” combo. Chocolate brown cat eye looks expensive when the French tip is cream instead of icy white, because the warm tones melt together and stop the set from feeling harsh. I also love how it looks on almond nails with a sharper taper — the brown stripe pulls the eye upward, and the cream French looks like a natural highlight. It’s flattering on fair to medium skin because the cream French adds brightness without turning blue. For deep skin, it still works, but keep the nude base slightly lighter so the whole set doesn’t go too muddy.
Skip thisDon’t use pure white cream — it can clash with chocolate tones under warm lighting.
Editor's noteIf the brown stripe looks too dark, add a slightly lighter brown cat eye gel for the base layer and magnetize once on the top layer.
5. Champagne Cat Eye French with Clear Nude Base and Micro Rhinestone Line
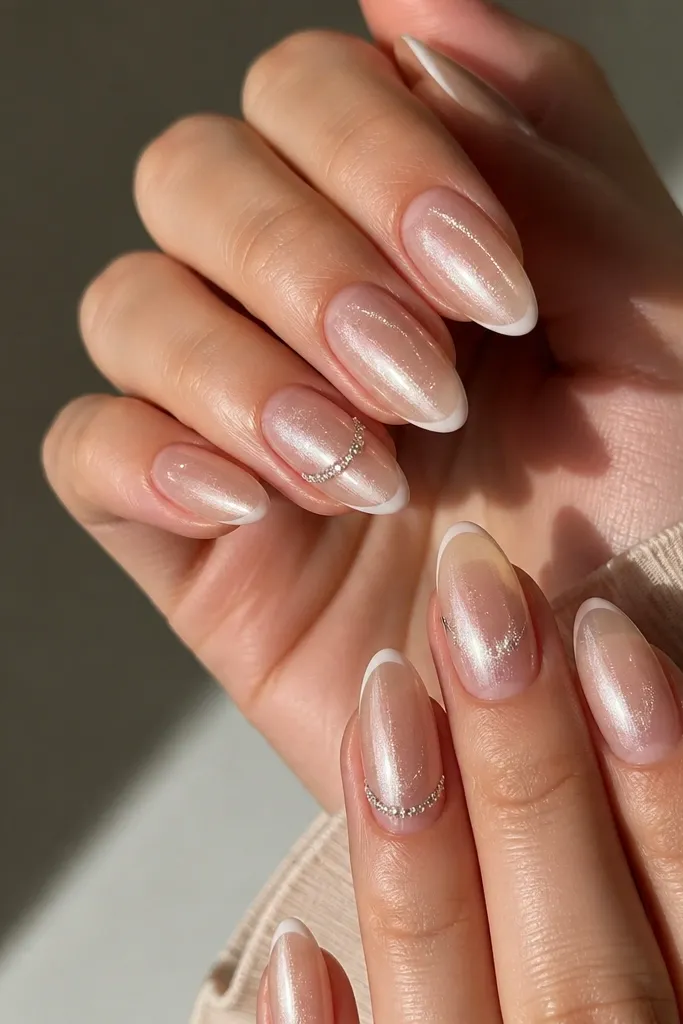
Apply a clear nude or sheer pink builder base and cure. Paint champagne cat eye gel thinly, magnetize for about 9-12 seconds, and cure. Draw a micro French tip with pale white gel — keep it thin and place it consistently across all nails. For the accent nails, add a tiny bead of clear gel along the smile curve, then set 3-6 small rhinestones with tweezers. Cure, then top coat over the stones carefully without flooding the smile line.
This one is for when you want the cat eye to look like jewelry. A clear nude base makes the champagne stripe look like it’s floating, and it makes the magnet effect brighter because light hits more evenly through the layer. The French tip stays micro-thin so it doesn’t compete with the rhinestones. I add a micro rhinestone line only on one or two nails because too many stones turn it into a party set. This flatters hands with thinner nail beds because the clear nude stretches the look and keeps the almond shape airy.
Skip thisDon’t cap rhinestones with a thick layer — it can make the stones sink and look dull.
Editor's noteUse the smallest rhinestones you have — 1.0-1.3 mm reads clean, bigger ones look bulky on almond.
6. Periwinkle Cat Eye with White French and Matte Top Coat
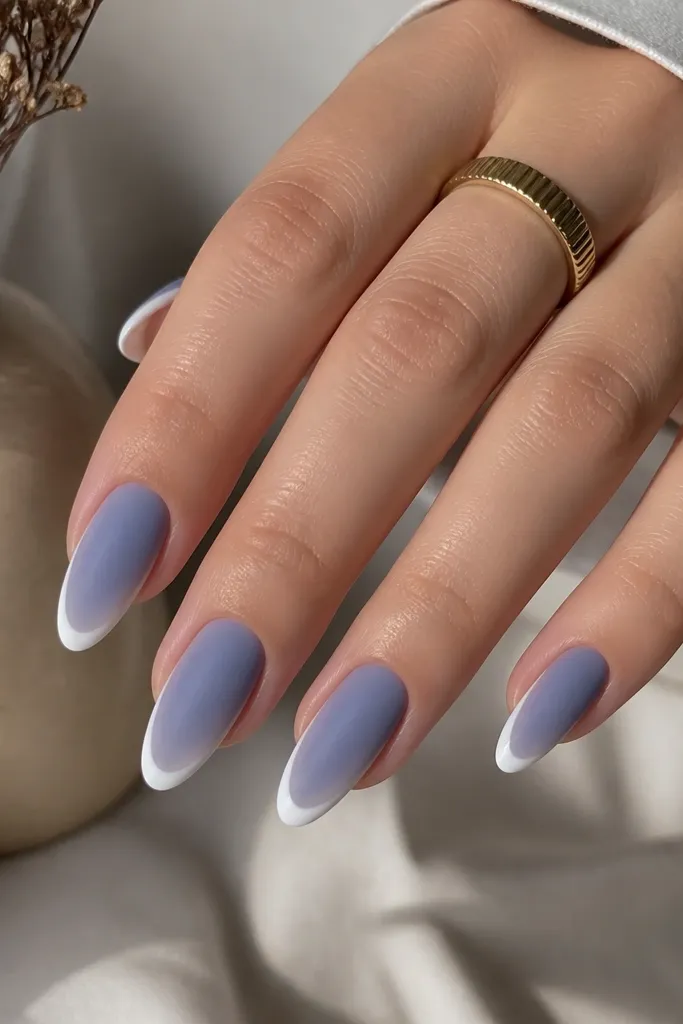
Matte makes cat eye look softer and more modern, like a satin ribbon. Periwinkle is the color that keeps it from looking gray — it reads playful while still classy. The white French tip stays sharp, but matte makes it feel less stark than glossy. This flatters people who hate the “too shiny” look — it also hides minor surface texture issues better than glassy top coat. If your skin tone is cool or neutral, periwinkle matches naturally; if you’re warm-toned, pair it with a slightly pink nude base so it doesn’t go icy.
Do your prep and apply a pinky-beige nude base, then cure. Paint periwinkle cat eye gel in a thin coat, magnetize for 8-10 seconds, then cure. Create the French tip with opaque white gel, keeping the smile curve even and the tip width medium-small. Cure again, then apply a matte top coat as your final step. Matte top coat needs full cure time, so don’t rush it — let it set long enough before you touch water.
After matte top coat, use a soft brush to clean around the cuticle — matte shows smudges more than gloss.
Don’t magnetize too long — over-magnetizing can create fuzzy bands on matte finishes.
7. Emerald Cat Eye French with Nude Base and Negative Space Smile
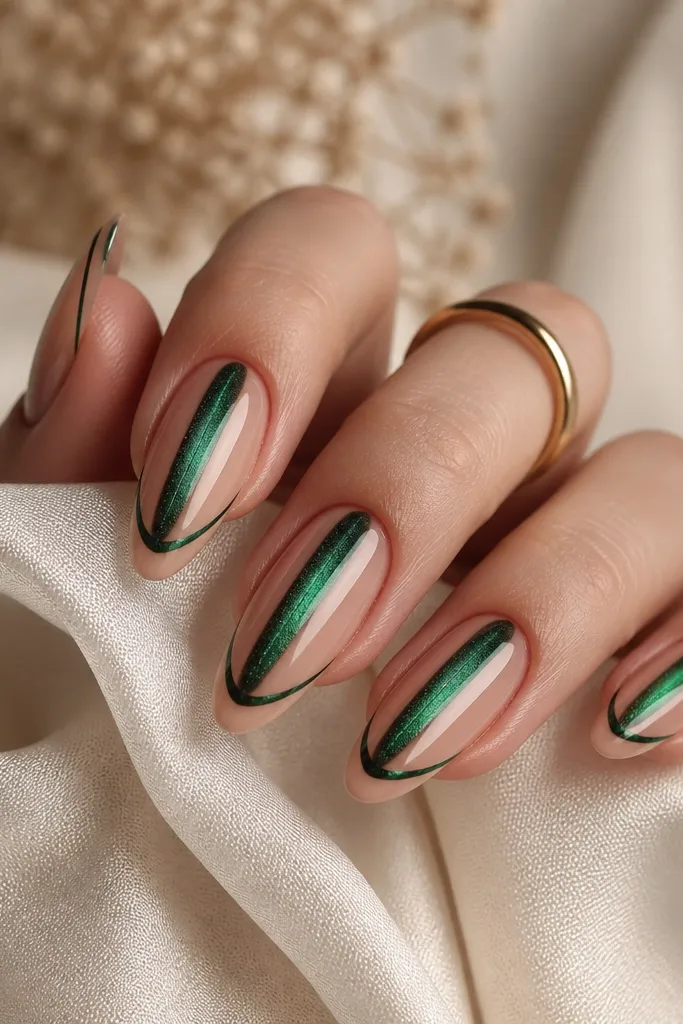
Apply nude base gel and cure. Paint emerald cat eye gel thinly, magnetize for 10 seconds, cure, then clean any stray magnet dust. Use a striping brush to draw a thin emerald line where the French smile would be, leaving the rest of the tip nude. If your line looks uneven, add a second micro pass after the first cure instead of trying to fix it all in one go. Seal with glossy top coat, paying attention to the outline edges so they don’t catch.
Negative space is the cheat code for keeping this look elegant when the color is bold. Emerald cat eye is intense, so leaving the tip nude prevents the set from feeling heavy. The emerald outline at the smile curve gives you the French structure without filling the whole tip. This is flattering on medium to deep skin because emerald pops and the nude base keeps it wearable. On fair skin, it still works, but keep the nude base slightly warmer so the contrast feels intentional.
Skip thisAvoid a thick outline — it turns negative space into a solid panel.
Editor's noteKeep the emerald outline the same thickness on every nail — this set looks best when the line is consistent.
8. Garnet Cat Eye with Blush Nude Base and Reverse French Accent
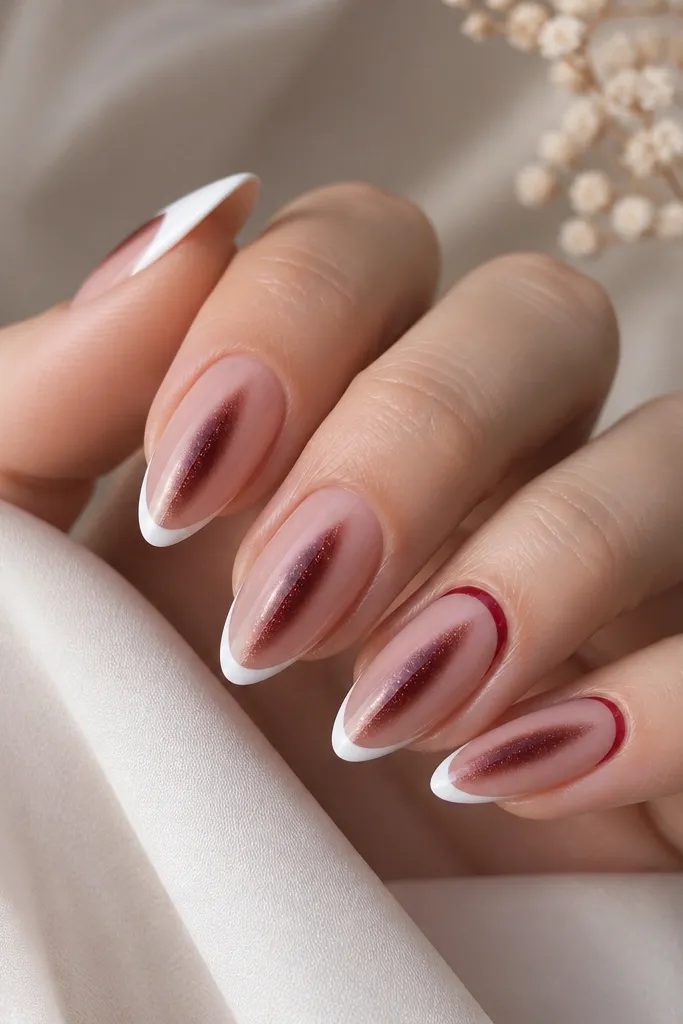
Start with blush nude base gel and cure. Apply garnet cat eye gel thinly in a single pass, magnetize for 9-12 seconds, and cure. Add a standard white French tip on all nails, using a guide for the first nail and matching the curve across the rest. On two accent nails, skip the French tip detail and instead draw a thin garnet line right under the cuticle — keep it around 1 mm away from the skin. Cure and finish with glossy top coat, making sure the reverse line is smooth.
This is a twist that feels fresh without looking trendy for one week only. Garnet cat eye has a deep red glow, and the blush nude base keeps it flattering instead of harsh. The reverse French accent near the cuticle makes your nails look longer because it visually frames the base area. I like doing reverse French only on two nails because it keeps the set from looking busy. This flatters nearly everyone because blush nude softens the red and the white French keeps the classic structure.
Skip thisDon’t place the reverse line too close to the cuticle — it drags the eye downward.
Editor's noteIf reverse French bleeds toward the skin, use a tiny amount of gel remover on a micro brush to clean the edge before curing.
9. Iridescent Cat Eye with Clear French Gel Smile
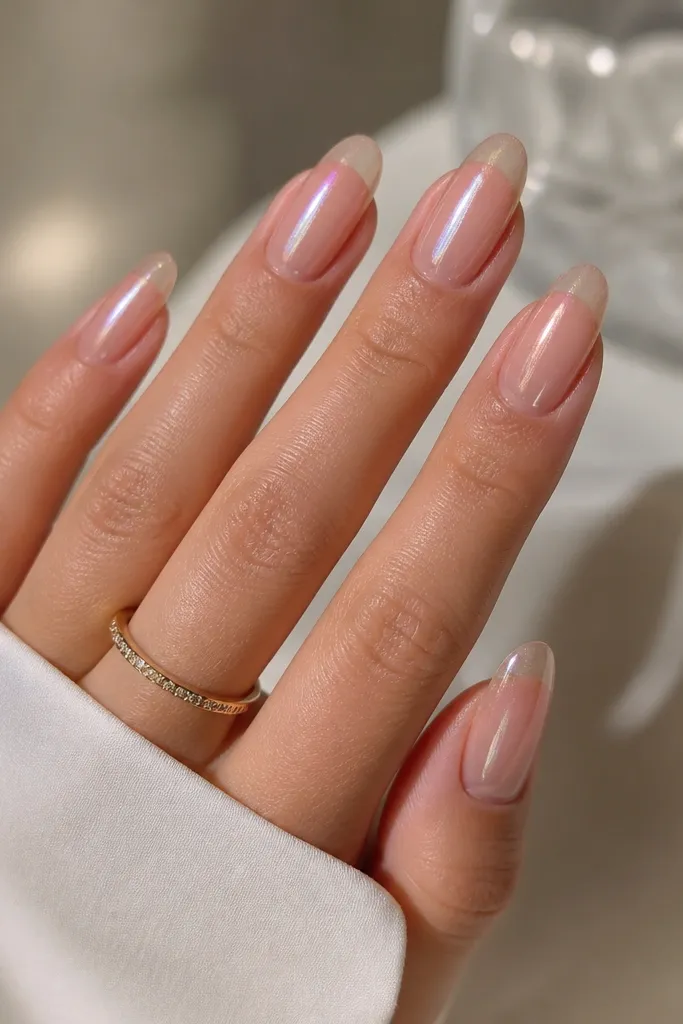
Use a sheer nude base gel and cure fully. Apply iridescent cat eye gel in a thin layer and magnetize for 8-10 seconds, then cure. For the French, use a clear shimmer gel and paint only the smile curve — keep it narrow and focus on the top edge. Avoid filling the whole tip; the point is a highlight line, not a panel. Cure, then apply glossy top coat so the iridescence reads under light.
This is for the “I want French but I hate white tips” crowd. An iridescent cat eye stripe gives you movement, and the clear French gel smile keeps the look airy and modern. Instead of painting opaque white, you’re outlining the smile with a sheer shimmer — it reads like light catching the edge of the nail. This works on all skin tones because it doesn’t add heavy contrast; it just brightens. If you have short nails, this style makes them look longer because the French isn’t a solid block color.
Skip thisAvoid thick clear French gel — it looks like a ridge instead of a refined smile.
Editor's noteLet the clear shimmer gel level for 20-30 seconds before curing — it helps it settle into a smooth smile curve.
10. Sapphire Blue Cat Eye with White French and Tiny Star Dot
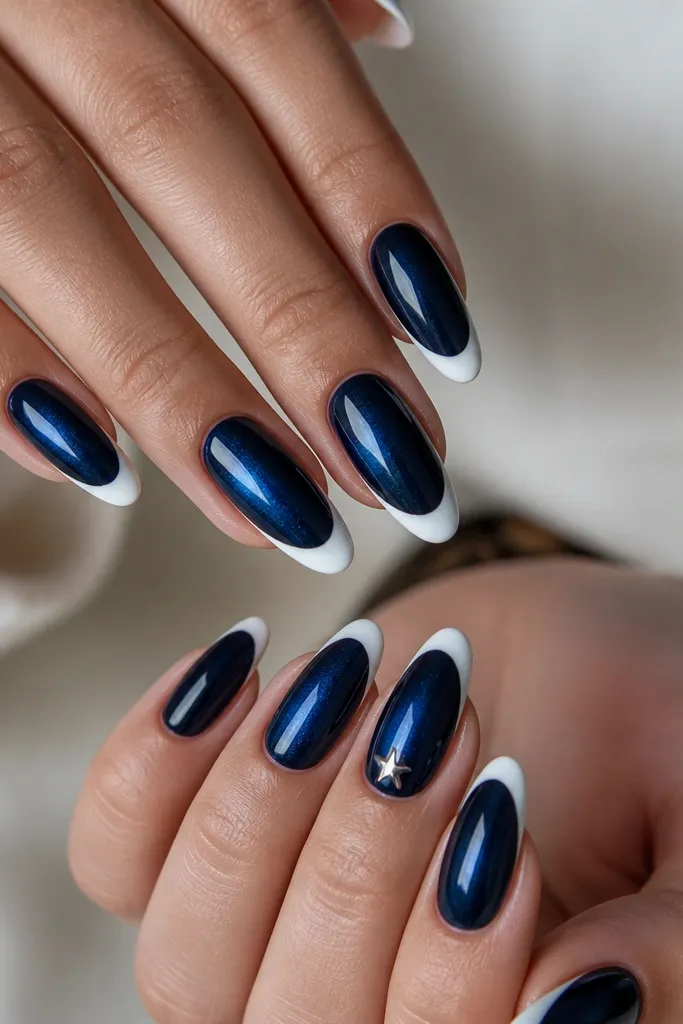
Apply nude base gel and cure. Paint sapphire cat eye gel thinly, magnetize for 10 seconds, and cure. Add white French tips with a thin brush — keep the smile curve consistent and the tip width medium-small. On one accent nail, place a tiny silver star dot using a dotting tool and cure it with a small amount of clear gel behind it. Finish with glossy top coat, and cap around the star dot so it doesn’t snag.
Sapphire cat eye is bold, but the white French keeps it from looking like a full blue nail. The magic is the micro star dot — tiny enough that it feels like a detail, not a theme. This set flatters hands with medium to deep skin because sapphire looks rich, and it also looks great on fair skin because the French tip adds crisp contrast. I like this for events because it looks like jewelry when the cat eye stripe catches light. Keep the accent minimal — one star dot is enough to make it feel intentional.
Skip thisDon’t place multiple stars — it turns the set into a sticker sheet.
Editor's noteUse a metallic silver gel liner for the star dot so it doesn’t look dull under flash.
11. Burgundy Cat Eye with Taupe French and Two-Line Side Detail
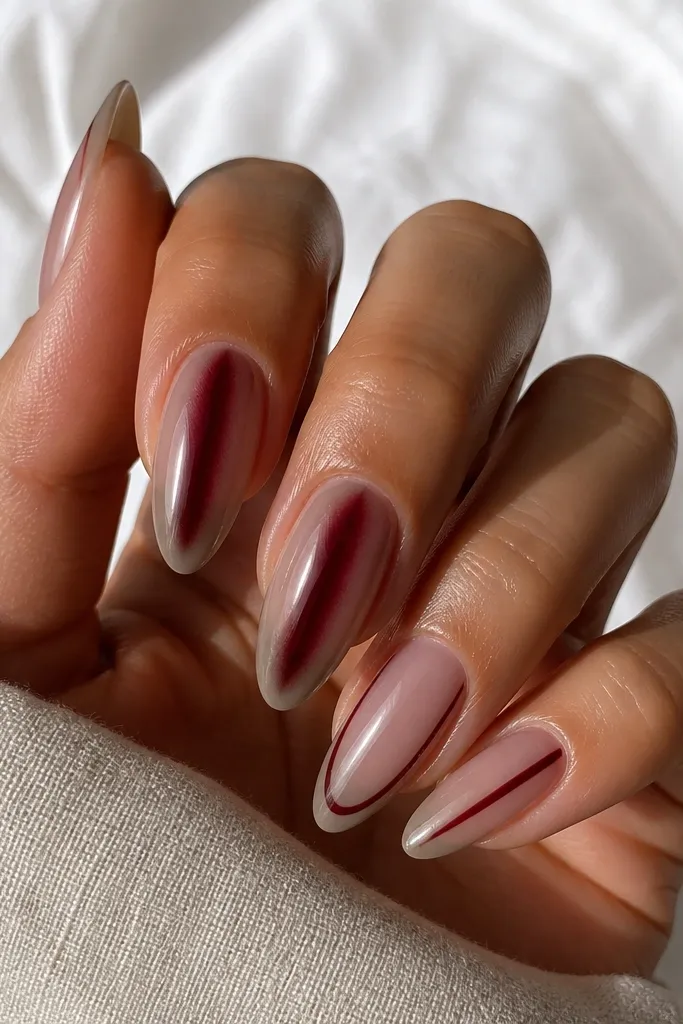
This one is for when you want a softer French color instead of stark white. Burgundy cat eye gives depth, and taupe French keeps everything grounded so it reads elegant on its own. The two-line side detail adds structure — it makes the almond taper look sharper without adding height or bulk. It flatters fair to medium skin because taupe looks natural and the burgundy stripe provides the contrast. For deep skin tones, you can still do it, but use a slightly darker taupe French so the tips don’t wash out.
Start with taupe nude base gel and cure. Apply burgundy cat eye gel thinly, magnetize for 9-11 seconds, then cure. Paint taupe French tips, keeping them opaque but not thick — aim for a clean smile curve with a narrow band. On two accent nails, draw a thin burgundy line on each side of the nail starting just below the French smile and ending near the tip point. Cure and top coat glossy, making sure the side lines are smooth at the edges.
If your side lines look shaky, use a strip of tape as a guide for the first line, then remove and do the second freehand to match.
Skip chunky side decals — lines should be gel-thin, not raised.
12. Pearl Pink Cat Eye French with Glossy Chrome Edge
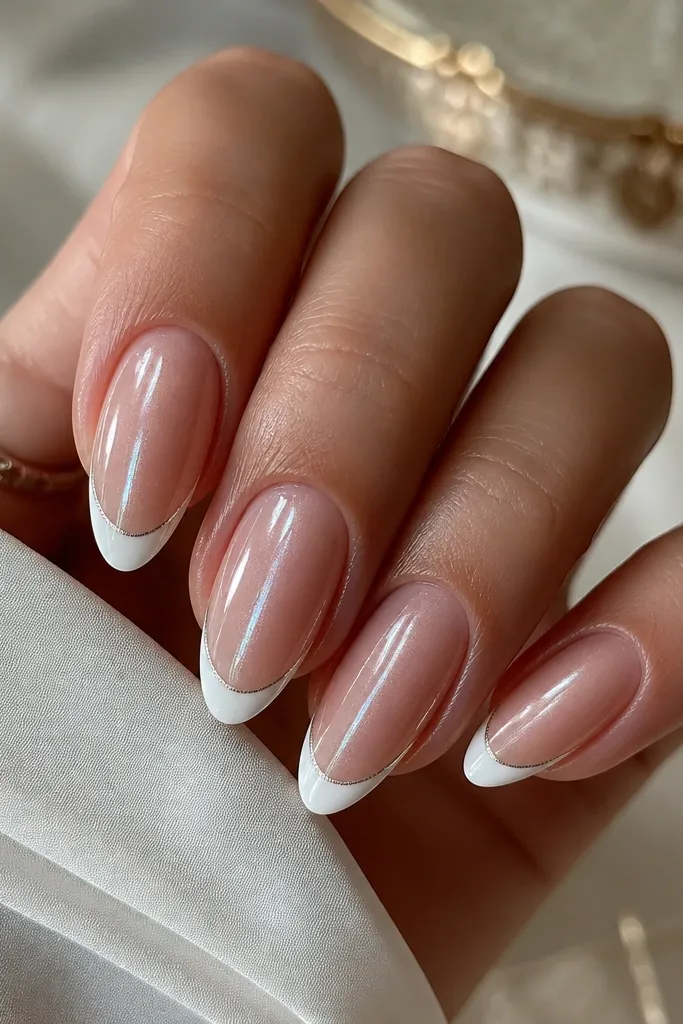
Chrome edge details are the fastest way to make a French tip look like it came from a salon. Pearl pink cat eye gives a gentle glow, and the chrome line at the very edge of the French tip makes the whole set look sharper when you move your hands. This flatters almost everyone because pearl pink isn’t too cool or too warm — it sits in the middle. If you have short nails, the chrome edge makes the tip look thinner and longer. If you love shiny manicures, keep the rest glossy so the chrome reads clean, not dull.
Apply sheer nude base gel and cure. Paint pearl pink cat eye gel thinly, magnetize for 8-10 seconds, and cure. Do the French tips in bright white gel, using a guide for straightness. While the white is cured, apply a thin layer of chrome gel or clear tacky gel along the very edge of the tip, then press chrome powder lightly and buff off excess. Seal with glossy top coat, but keep it thin over the chrome so it doesn’t dull.
Use a separate small brush to apply chrome gel — if you spread it too wide, the chrome line turns into a full cap.
Don’t bury chrome under thick top coat — it kills the mirror effect.
13. Teal Cat Eye with Nude French Cap and Cuticle Glow
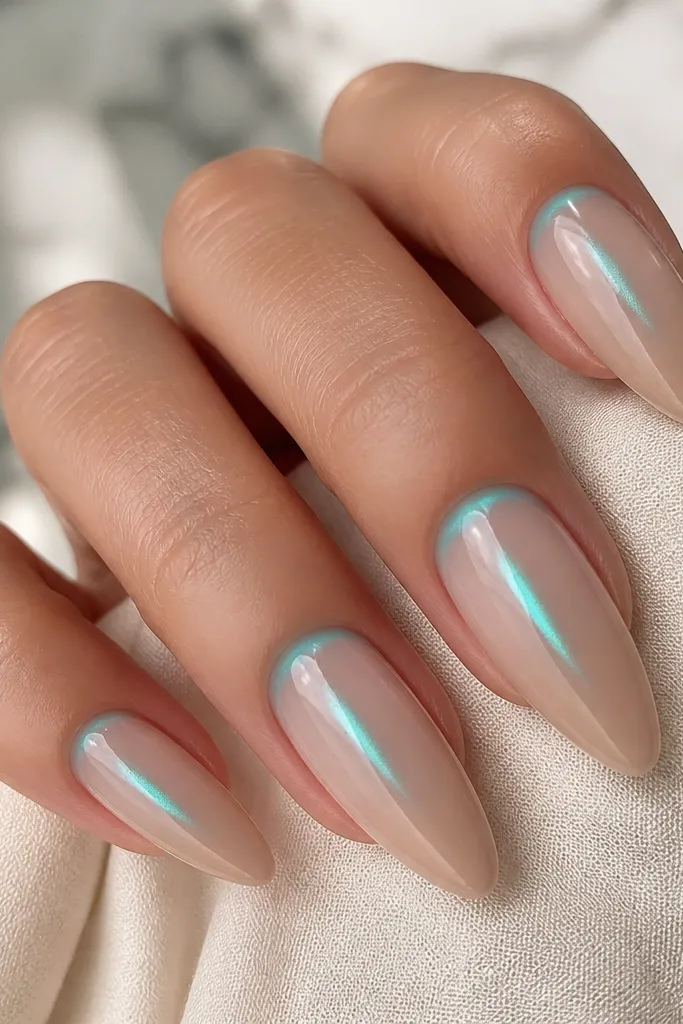
Start with a sheer nude base gel and cure. Apply teal cat eye gel thinly, magnetize for 9-12 seconds, and cure. For the French, paint a nude gel slightly lighter than the base and place it only on the tip area, blending the edges with a sponge or soft brush. Add a thin teal line right at the cuticle on a couple nails — keep it 0.5-1 mm tall so it reads like a glow, not a stripe. Cure and finish with glossy top coat, then clean the cuticle edge with a small gel brush.
This is an elegant “French but different” set that doesn’t rely on white. Teal cat eye gives you that moving stripe, and the nude French cap keeps the top edge definition without blocking color. I add a cuticle glow using a super thin teal line because it echoes the cat eye stripe and ties the set together. This flatters hands that look better with softer contrast, like if you have very fair skin or you don’t like bright white. It also looks great for everyday wear because it doesn’t scream for attention, it just looks polished.
Skip thisDon’t over-paint the cuticle glow — too tall and it looks like a mistake.
Editor's noteBlend the French cap edges while the gel is still slightly tacky before curing so you avoid a hard line.
14. Sage Green Cat Eye with White French and Micro Floral Dot on One Nail
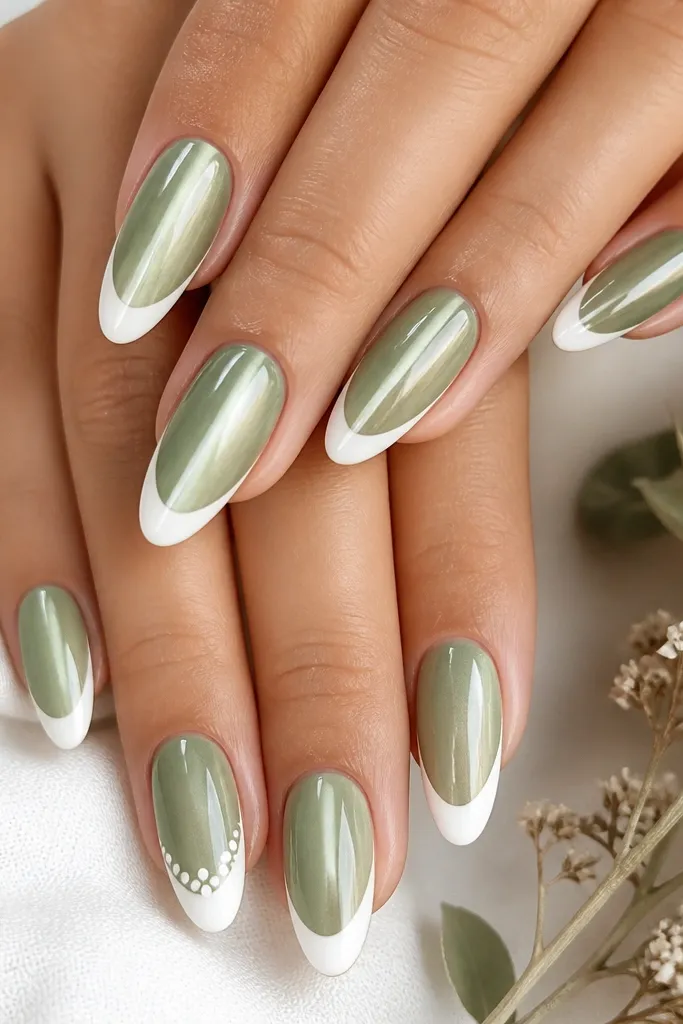
Apply a beige nude base gel and cure. Paint sage green cat eye gel thinly, magnetize for 10 seconds, and cure. Add white French tips with a thin brush, keeping the smile curve smooth and the tip band narrow. On one accent nail, place a tiny cluster of white dots with a dotting tool — 3-5 dots in a rough flower shape — right under the smile line. Cure the accent detail, then apply glossy top coat to all nails and cap the French edges.
Sage cat eye is calmer than emerald and it looks fresh without turning into pastel baby nails. Pairing it with crisp white French keeps it clean, and the tiny floral dot on one nail adds personality without taking over. The floral dot technique is great because it looks hand-drawn — small clusters of dots feel delicate on almond tips. This flatters fair to medium skin because sage sits nicely next to beige nude bases, and it also works on deeper skin if you use a slightly darker nude base so the sage reads intentional. It’s perfect for spring events, but I’ve worn it to everyday errands too because it stays subtle.
Skip thisAvoid adding flowers on every nail — the set loses its French elegance.
Editor's noteDot flowers look best with a small dotting tool (finer than you think) so the petals don’t turn into blobs.
15. Violet Cat Eye with Deep Purple French and Glossy Top
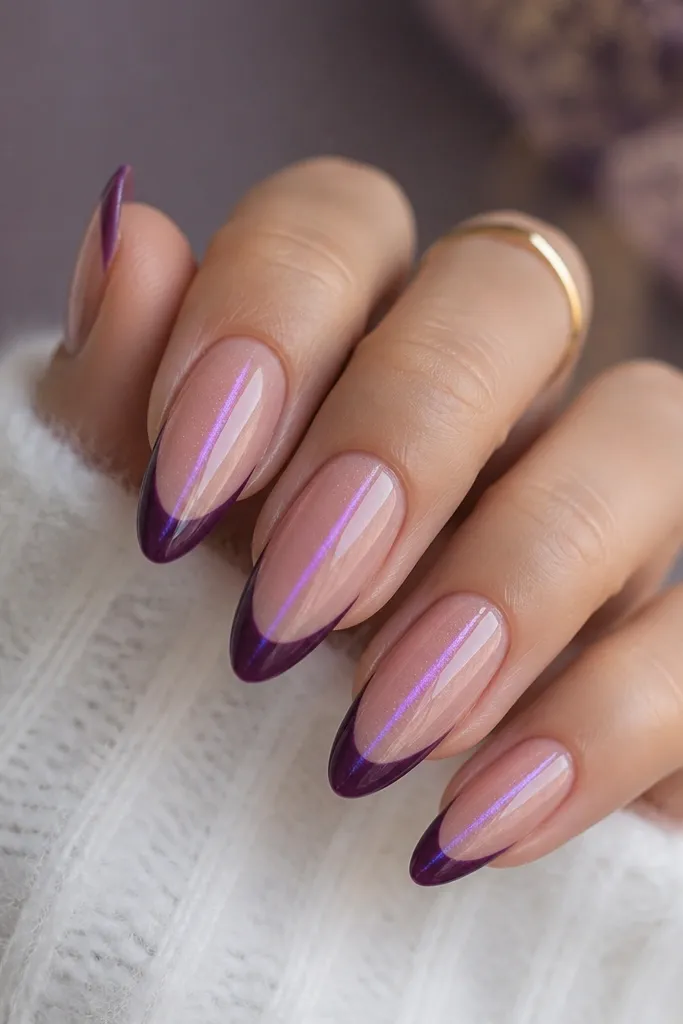
This is the richest version in the guide, and it still looks elegant because the colors are in the same family. Violet cat eye gives the magnetic glow, while deep purple French tips create a structured frame that doesn’t feel like random color blocking. I like this on medium to deep skin because the purple reads luxurious, but it also looks great on fair skin if your nude base is warm beige. The high gloss finish is non-negotiable here — it’s what makes the cat eye stripe look like it’s lit from inside. If you’re attending something evening, this set reads “done” fast.
Apply warm nude base gel and cure. Paint violet cat eye gel thinly, magnetize for 8-10 seconds, and cure. Create deep purple French tips with opaque gel, keeping the smile curve consistent and the tip width slightly larger than micro so it balances the richness of violet. Use a steady hand and let the gel self-level; if needed, do a second thin pass rather than thickening the first layer. Cure and seal with glossy top coat, then clean sidewalls so the deep purple stays crisp.
Use a gel that’s labeled opaque — sheer purple French tips look patchy next to a strong cat eye stripe.
Skip glitter top coat — it fights the cat eye stripe and makes it look cloudy.