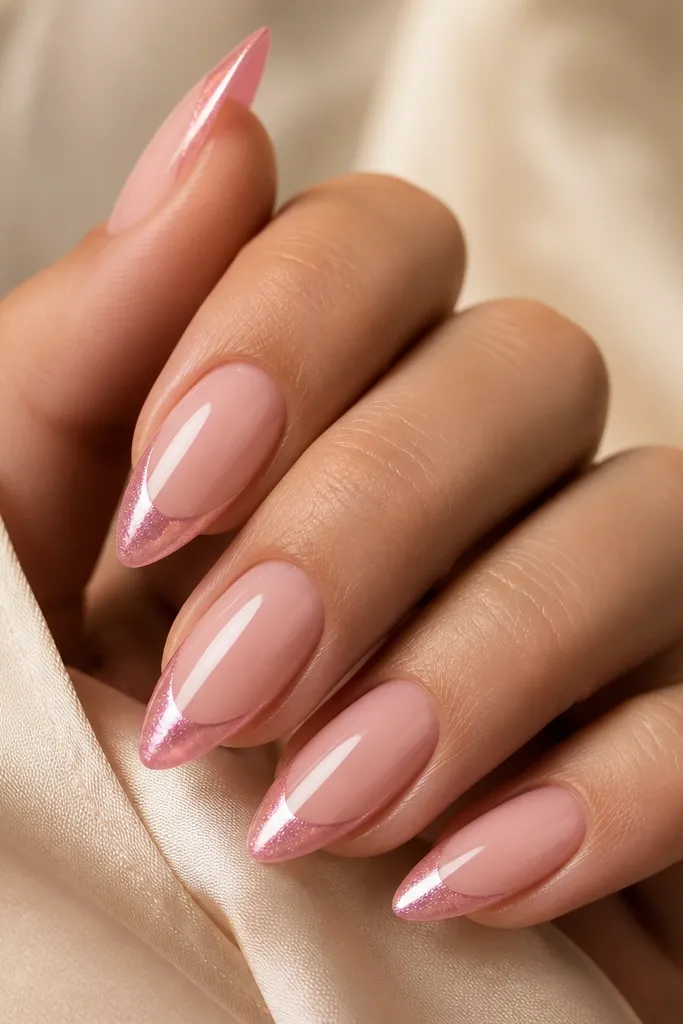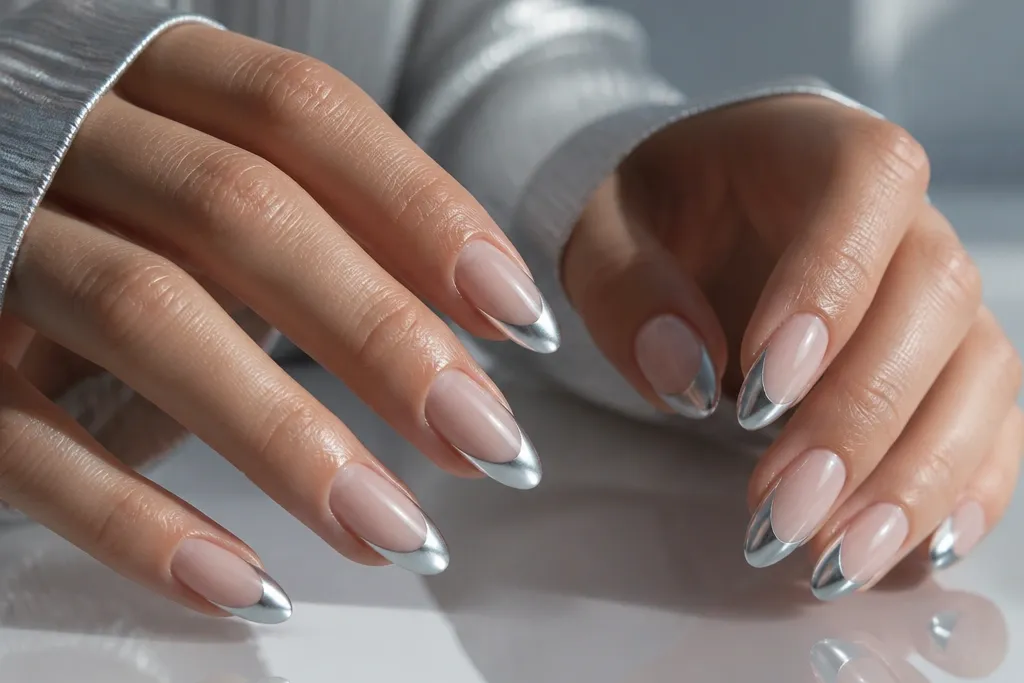
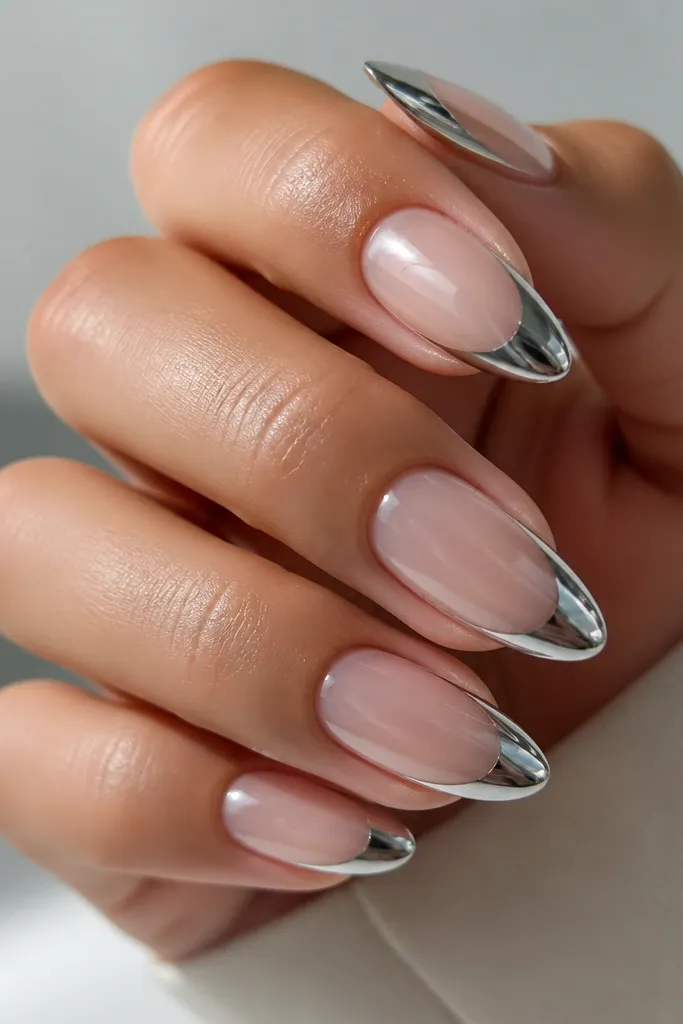
1. Steel Silver Cat Eye French Tips with Micro-Glazed Smile Line
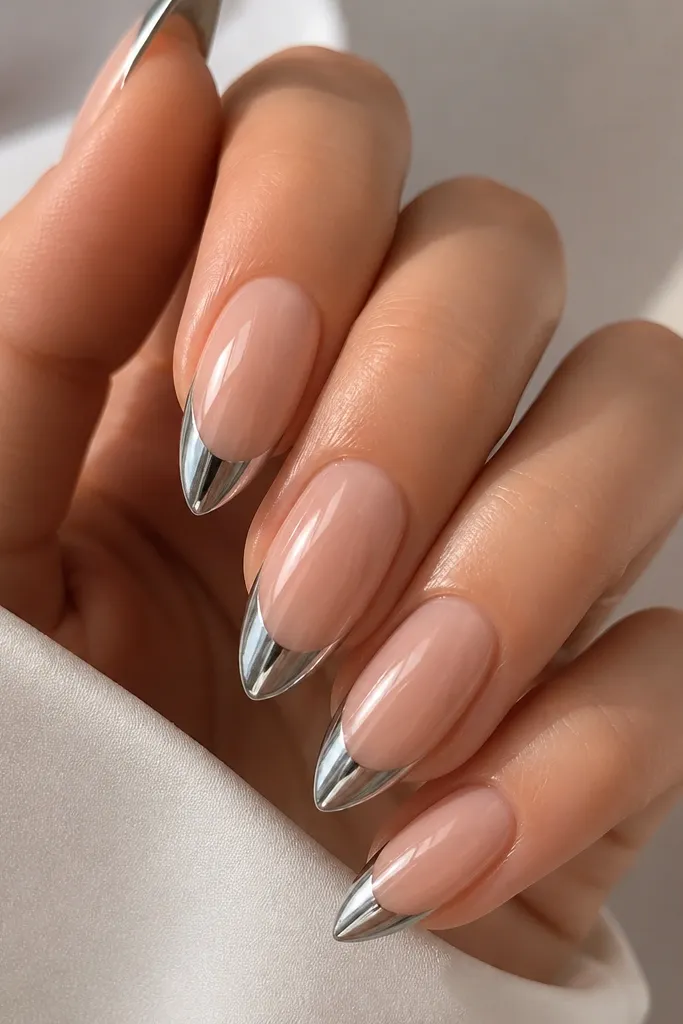
This is the “looks like expensive makeup” version. The sheer nude base keeps everything clean, while the steel silver cat-eye chrome on the tips gives a moving highlight when you tilt your hand. The stripe is placed only in the tip area, so the glow looks intentional instead of spread out. I like it on medium to long almond shapes because the tip arc frames the stripe like a tiny runway light. It also flatters hands with slimmer nail beds, since the sheer base visually lengthens without looking bare.
Editor's noteAfter curing, run a lint-free wipe over the top coat surface and check from the side — you want no “orange peel” texture before you add the final thin top layer.
Start by painting a sheer nude gel base and curing it hard (full cure). Then trace your French smile line with a gel that matches your nude so the arc stays crisp. Apply the steel silver cat-eye chrome to just the French tip zone, leaving the sides a hair thinner than the center. Hold the magnet directly above the tip for 12-18 seconds, then cure. Finish with a slick, high-shine top coat and cure again, keeping the brush strokes flat so the surface stays mirror-smooth.
Skip thisDon’t magnetize the whole nail — it makes the stripe wander and kills the French-tip focus.
2. Icy Blue Aurora Chrome Cat Eye French Tips
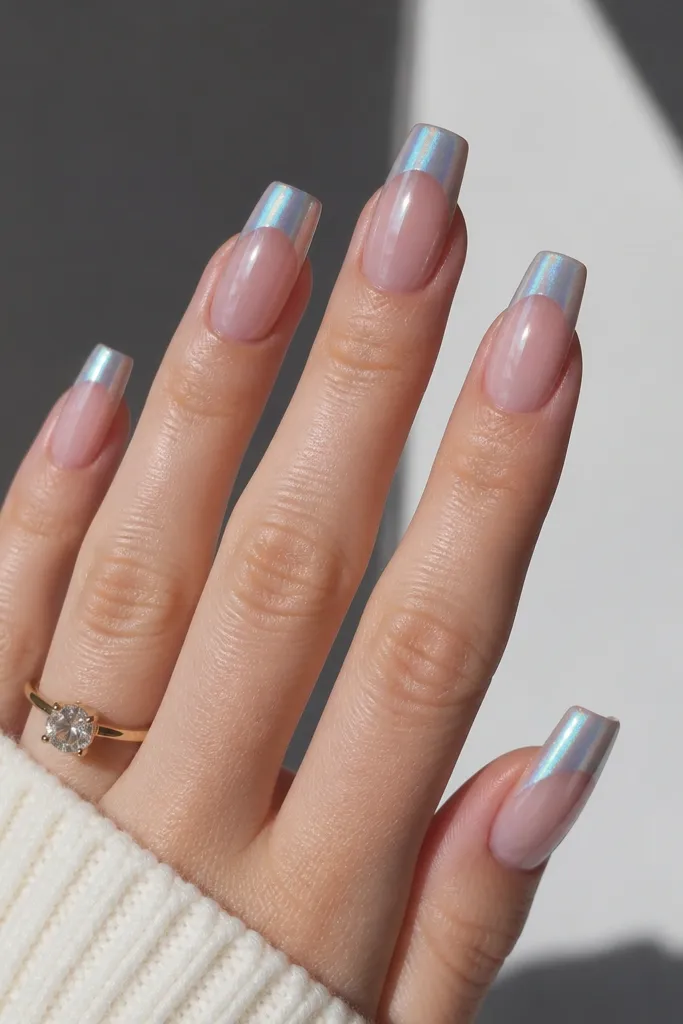
This one reads futuristic because the blue shift looks cool under indoor lighting but still turns pretty outdoors. The milky nude base softens the contrast, so the chrome doesn’t look harsh on the finger. The cat-eye stripe stays centered on the tip, giving that “scanner light” effect when you move your hand. I wear this when I’m doing a winter palette or blue eyeliner days, and it always photographs clean. It’s also flattering if your skin is fair to light-medium cool-toned, because the icy blue doesn’t fight your undertones.
Editor's noteIf the stripe is too faint, add a second thin layer of cat-eye chrome only on the center of the tip, then magnetize again briefly.
Apply a milky nude base gel and cure until it’s fully set. Create a thin French tip line with a translucent builder gel, then brush the icy blue cat-eye chrome only onto the tip. Magnetize by holding the magnet at the same angle for every nail — I keep it parallel to the nail bed and magnetize for 10-15 seconds. Cure, then add a clear gel top coat in two thin coats so the chrome stays smooth. Finish by capping the tip edges with a final micro-layer of top coat.
Skip thisSkip heavy glitter under this — it makes the stripe look dusty instead of glossy.
3. Blackened Smoke Chrome Cat Eye French Tips with Sheer Base
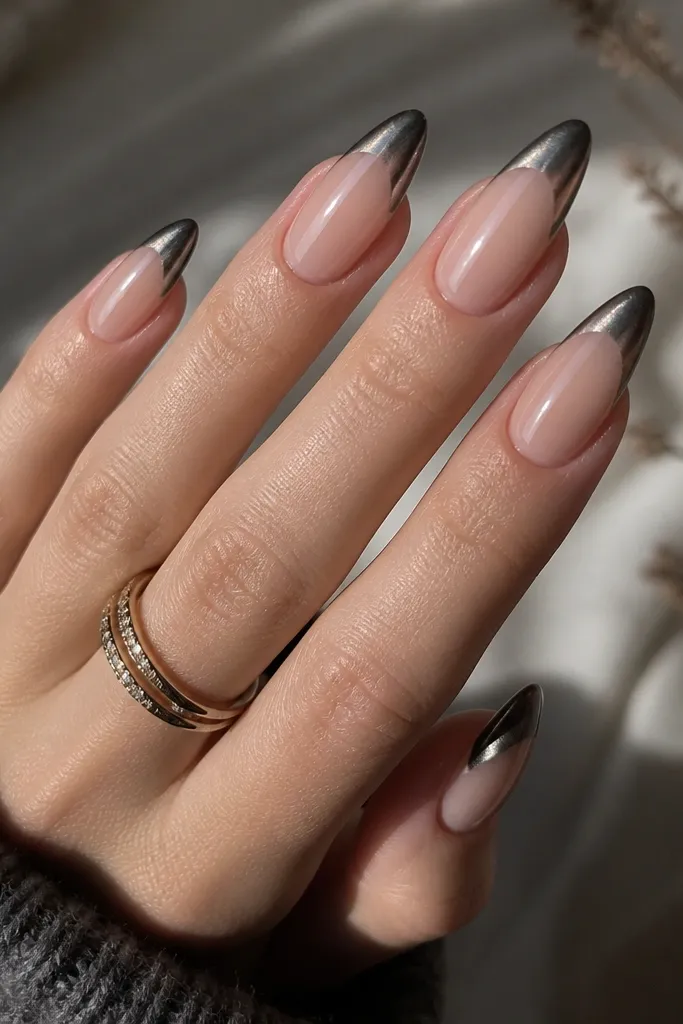
Dark smoke tips make your hands look instantly sharper. The sheer base keeps it wearable, while the blackened chrome cat-eye creates depth that still moves when the stripe shifts. I like the silver-gray stripe because it catches light without turning the whole tip gray. This design flatters longer nail beds and looks especially good on hands with warm undertones because the contrast reads expensive, not muddy. For a night out or editorial photo day, this is the one I reach for when I want “futuristic” without rhinestones.
Editor's noteUse a darker base gel under the tip area if you want the stripe to look brighter; the contrast makes the light line pop.
Start with a sheer pink nude base and cure completely. Outline the French tip with a thin line of black gel so the arc is clean. Apply blackened smoke cat-eye chrome to the tip area, then place the magnet over the center lane and hold for 14-20 seconds. Cure and inspect the stripe — if it’s too wide, remove excess pigment from the sides with a clean brush before curing. Seal with a glossy top coat, cap the free edge, and cure again.
Skip thisDon’t use a matte top coat — it kills the mirror effect that makes this luxe.
4. Champagne Gold Cat Eye French Tips with Glassy Cuticle Seal
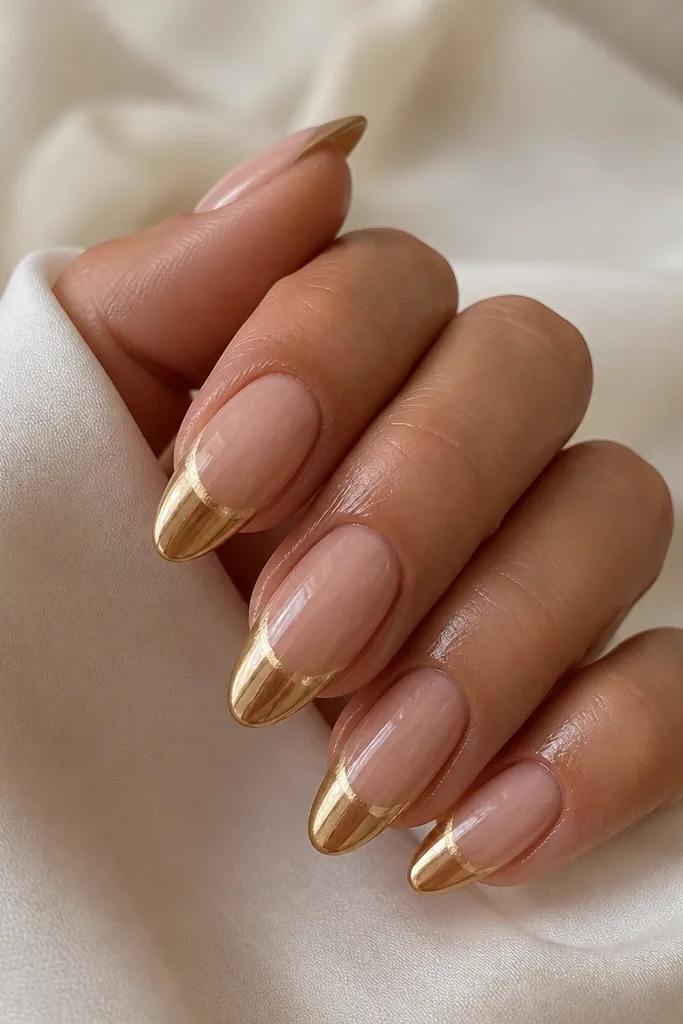
Warm champagne gold is the “expensive nails at brunch” choice. The cat-eye stripe is placed right down the tip center, so it looks like a thin gold blade catching light. The nude-beige base adds warmth without turning the whole set yellow, which is the mistake people make when they go too gold on the base. I’ve worn this on medium skin tones with peachy undertones and it looked clean, not overpowering. It also flatters short-to-medium nails because the French tip arc adds length while the sheer base keeps it light.
Editor's noteFor extra luxe photos, add one thin top coat pass after curing and let it level for 20 seconds before final cure.
Paint a nude-beige base and cure. Brush a thin gel outline for the French tip, then apply champagne gold cat-eye chrome only on the tip. Magnetize with the nail flat on your table, magnet hovering 1-2 cm above the tip for 12-18 seconds. Cure, then wipe any stray residue near the cuticle with a lint-free pad and a tiny dab of gel cleanser before top coat. Finish with a high-shine top coat and cap the cuticle edge with a clear gel micro-layer so it looks sealed and glassy.
Skip thisDon’t let gold pigment touch the sidewalls — it makes the tip look thick and less French.
5. Aurora Pink Cat Eye French Tips on Milky Nude
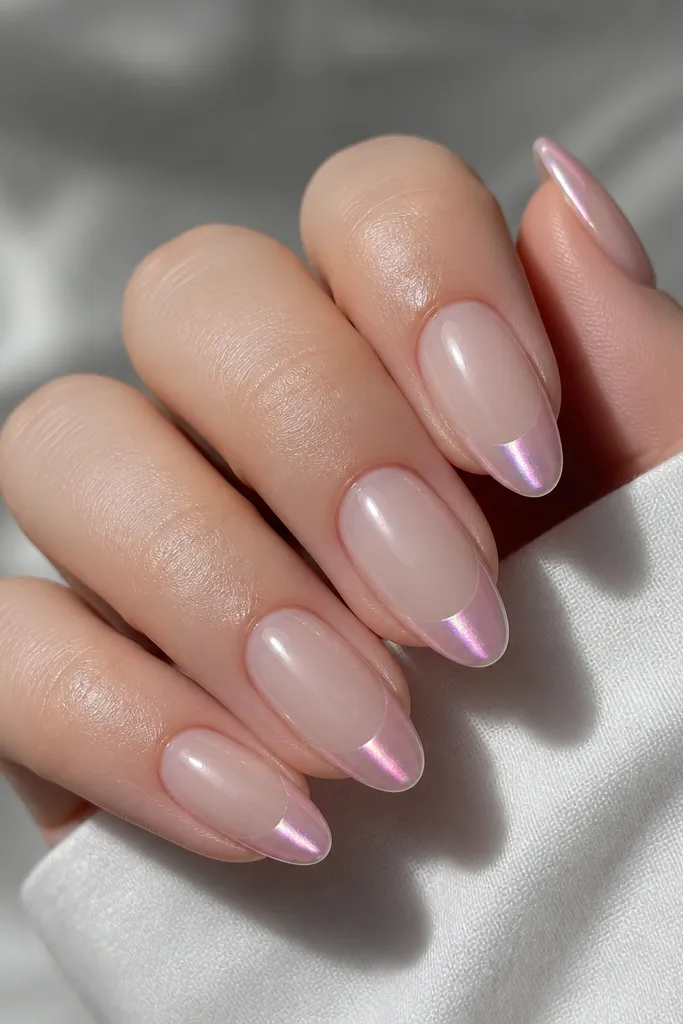
This is the soft-futuristic set. The aurora pink shift looks romantic in daylight, then flashes silver when you move in bright indoor lighting. The milky nude base keeps the pink from looking neon, and the stripe stays crisp because the pigment is confined to the tip. I wear this when I want something “pretty” but still glossy and modern, especially with pinkish blush makeup. It flatters light to medium skin tones and looks great if your nails are naturally dry because the milky base hides little texture.
Editor's noteIf the stripe leans sideways, rotate your magnet position and reapply only on the tip center — don’t try to fix it by buffing after curing.
Apply a milky nude gel base and cure. Create a French tip arc with a translucent pink builder gel so you can place the chrome neatly. Add aurora pink cat-eye chrome to the tip area and magnetize for 10-16 seconds with the magnet centered over each tip. Cure and check the stripe direction — keep it vertical, not angled. Seal with two thin coats of glossy top coat, and cap the tip edge so the chrome stays smooth through wear.
Skip thisAvoid thick base layers — they make the French arc look bulky and the stripe stops looking sharp.
6. Chrome Cat Eye French Tips with Torn-Glaze Silver Edge
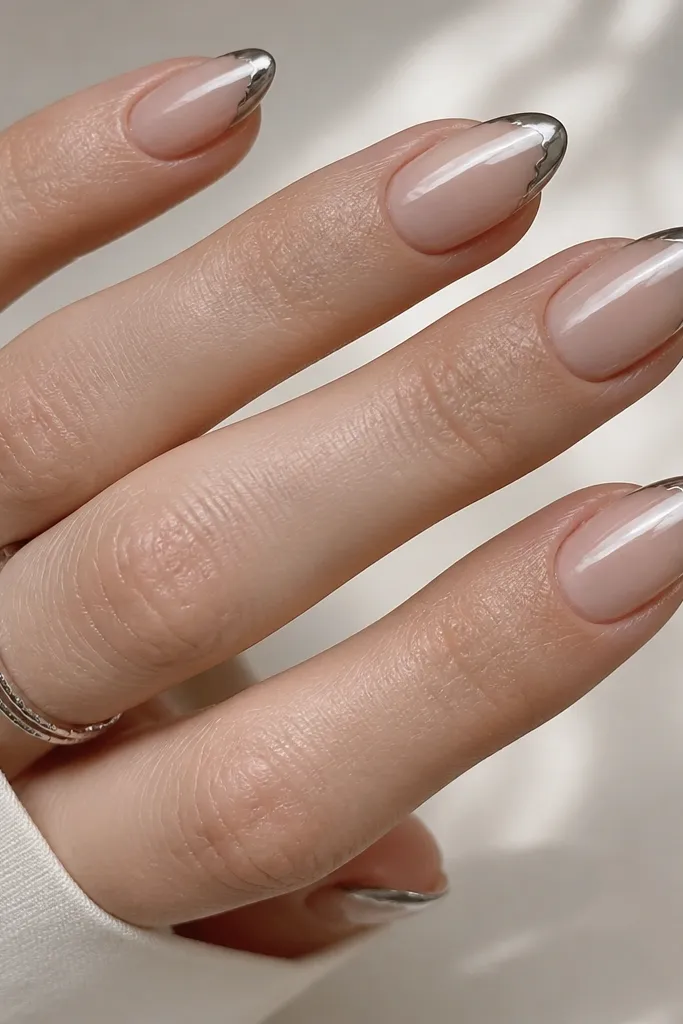
This design adds a designer detail without losing the French look. The torn-glaze silver edge looks like a thin, uneven sheet of glass, but the cat-eye stripe stays straight so it still reads luxe. I like it on short almond or petite nails because the irregular edge gives visual interest where you don’t have much length to work with. On hands with smaller nail beds, the sheer nude base keeps it from feeling heavy. It’s a good pick for people who like chrome but hate full glitter sets.
Editor's noteUse a smaller brush for the outer edge variation — a wide brush makes the torn effect look accidental.
Start with a sheer nude base and cure. Outline a French tip, but instead of a perfect arc, slightly vary the outer edge by painting the border with a gel brush tip. Apply silver chrome cat-eye only to the tip zone, keeping the border irregular and the center stripe clean. Magnetize for 12-18 seconds with the magnet directly over the center. Cure, then use a thin clear gel to “glaze” over the torn edge so it looks smooth, not jagged. Finish with one thick-ish glossy top coat to level the surface.
Skip thisDon’t overbuild the torn edge with extra chrome — it turns into a chunky ridge.
7. Matte-Nude Base with Glossy Chrome Cat Eye French Tips
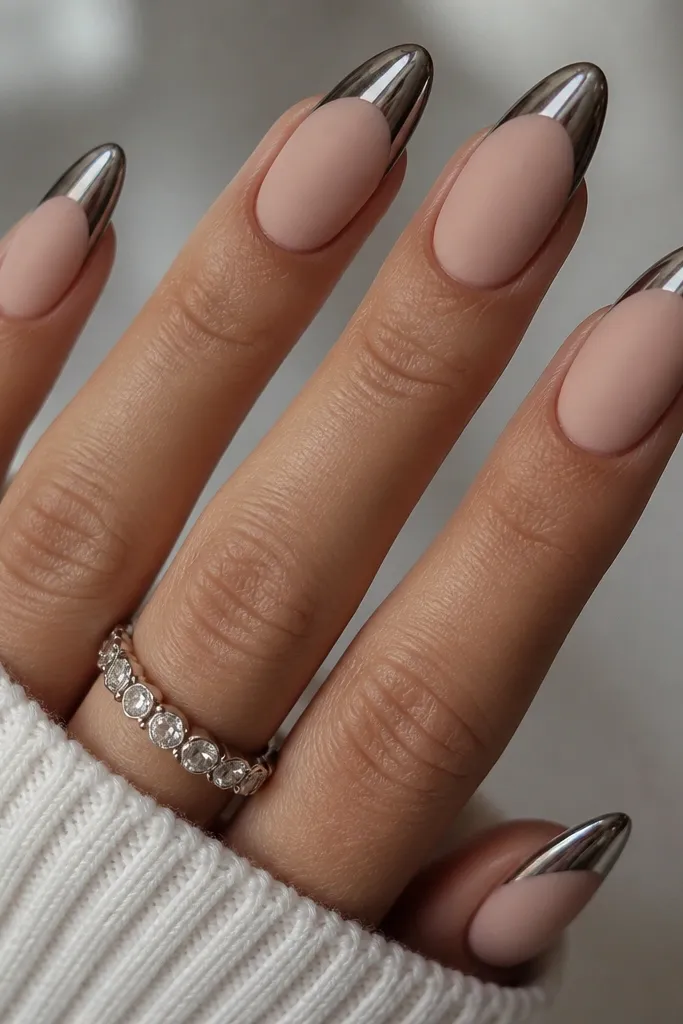
Contrast is what makes this look expensive. A matte nude base hides tiny nail texture, then the glossy chrome cat-eye tips act like a spotlight. The stripe stays centered and reflective, and the matte background makes the light line more dramatic when you tilt your hand. I’ve worn this with plain outfits and got compliments because it looks intentional, not random. It flatters hands with slight ridges since the matte base disguises them, and it looks clean on both warm and cool skin tones because the nude is neutral.
Build a matte nude base by curing your nude gel, then applying a matte top coat and curing again. Create a French tip arc with a clear builder so you have a smooth surface to place chrome on. Apply silver chrome cat-eye to the tip only, magnetize for 12-17 seconds, then cure. Do not add matte top coat over the tips — instead, use glossy top coat on the tips only and cap the free edge. Clean up around the cuticle with a gel-safe wipe so the matte base stays crisp.
Use matte top coat only on the base — paint a thin strip of glossy top coat right where the French tip will be so you don’t end up with satin chrome.
Don’t matte the whole nail after you magnetize — the chrome stops looking like chrome.
8. Rose Quartz Cat Eye French Tips with Clear Jelly Base
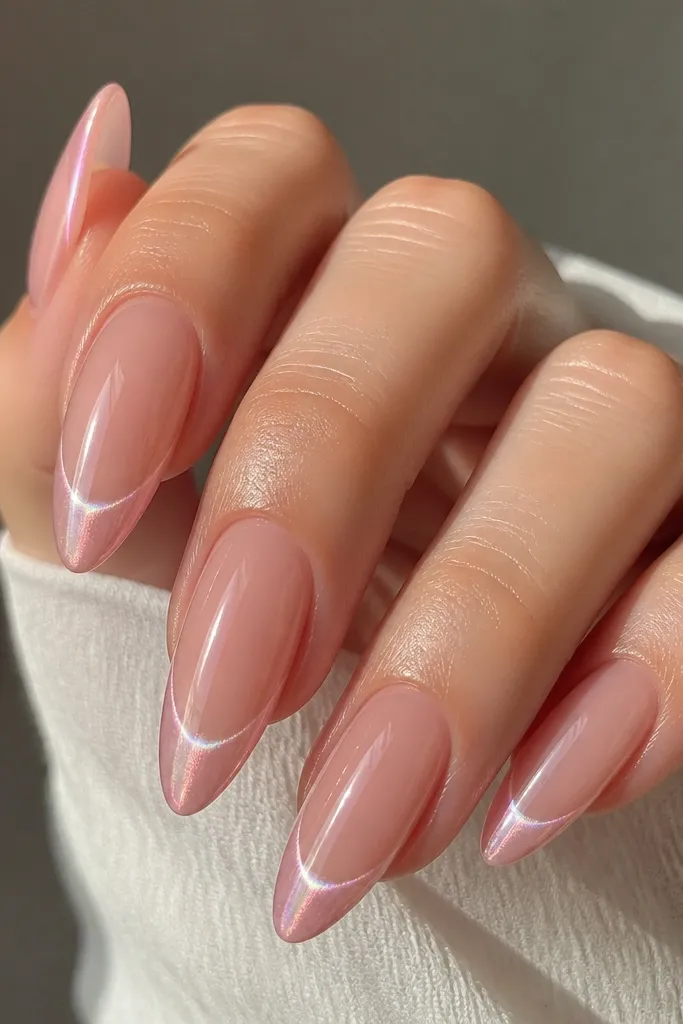
Jelly bases make chrome look extra high-end because the light has depth to travel through. The rose quartz cat-eye stripe is soft and milky, not neon, so it feels futuristic without looking harsh. I like this on longer almond nails because the jelly base adds a “floating” look that reads expensive in photos. It flatters fair to medium skin tones and looks especially pretty if you like clean, minimal nail art but want movement. The clear jelly also hides slight staining better than opaque nudes.
Editor's noteIf the jelly base looks too thin after curing, add a second thin jelly layer before the French tip so the surface stays even.
Start with a clear jelly base gel and cure. Tint the base lightly with a pale pink if needed so your nail looks rosy, not transparent-white. Outline the French tip arc with a thin clear builder gel, then apply rose quartz cat-eye chrome to the tip area. Magnetize for 10-15 seconds while keeping the magnet centered over the tip stripe. Cure, then apply glossy top coat with a thicker brush stroke in the middle so the jelly look stays glassy. Cap the tip edges and cure again.
Skip thisDon’t use a thick opaque base under this — it removes the “liquid” depth that makes the luxe effect.
9. Glacier Silver Cat Eye French Tips with Tiny Side-Sparkle
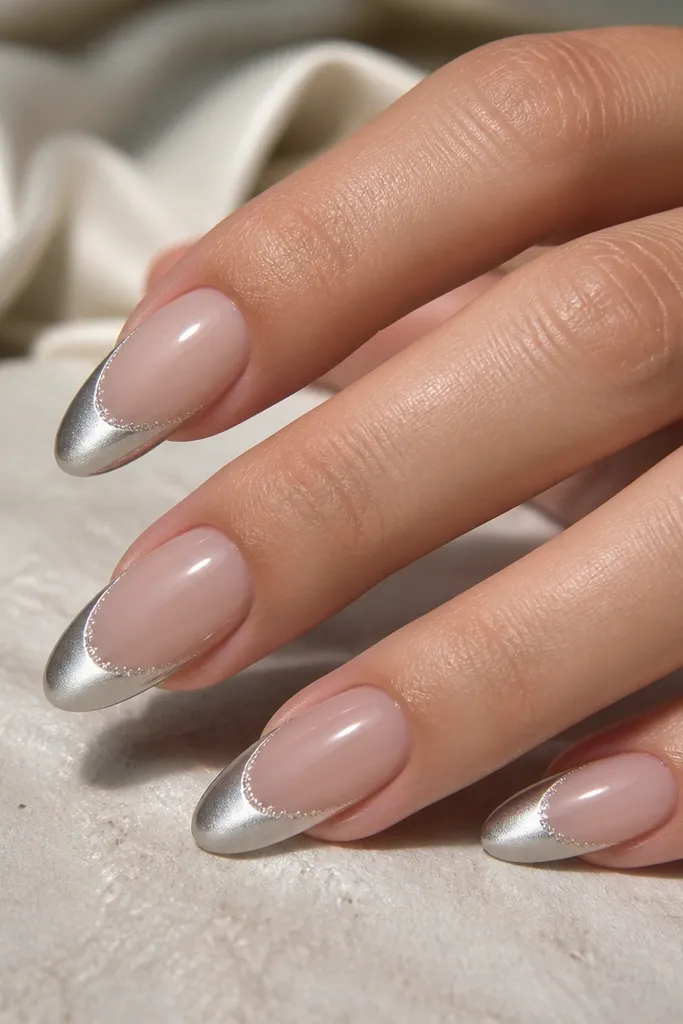
This is where I let myself add a little detail without turning it into rhinestones. The glacier silver stripe does the main work, and the micro side-sparkle adds a second flash when you move your fingers. The sheer nude base keeps it light and makes the chrome look like it’s floating above the nail. I recommend this for people who love chrome but get bored with one-dimensional stripes. It flatters most skin tones because glacier silver sits in the neutral lane.
Apply a sheer nude base and cure. Map your French tip arc with a thin gel line so the tips stay consistent. Spread glacier silver chrome cat-eye across the tip area, then magnetize for 12-18 seconds. Before top coat, add micro-sparkle gel in a narrow strip along each side of the tip, keeping it just outside the center stripe. Cure, then finish with glossy top coat in two thin layers so the sparkle stays smooth and doesn’t snag.
Keep the side-sparkle strip thinner than the center stripe — if it matches width, the design looks like random glitter.
Don’t cure sparkle gel too thick — it turns gritty and ruins the mirror chrome look.
10. Black Cherry Cat Eye French Tips with Wine-Shift Stripe
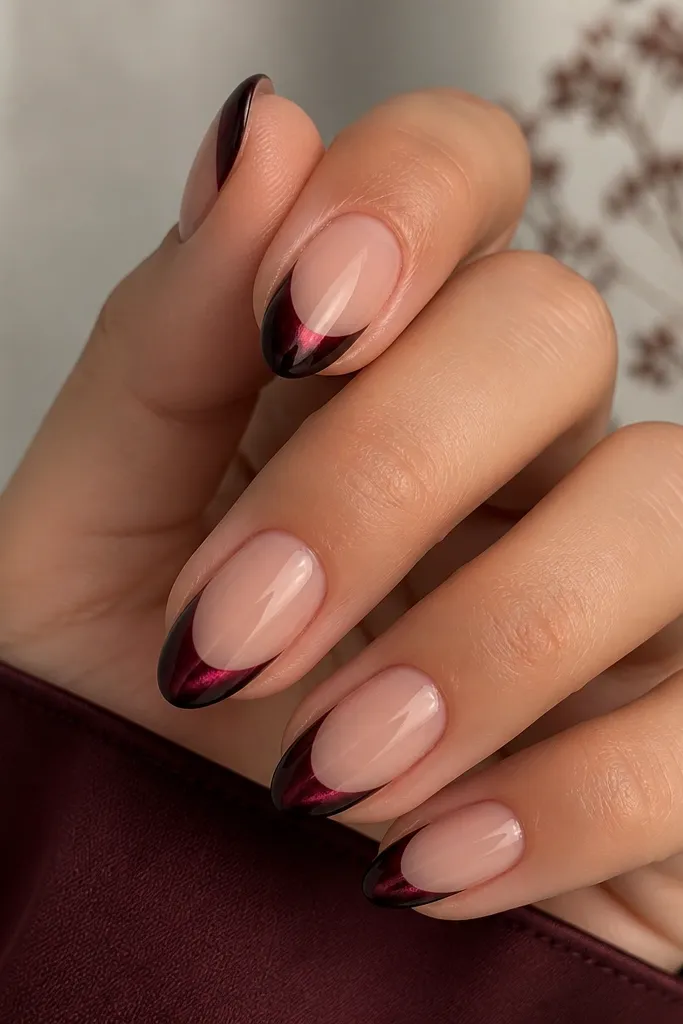
Black cherry is the moody luxe shade. The cat-eye stripe reads like a wine-red line that moves across the tip, and the blackened base makes the color look richer. I like this for fall events and date nights because it’s dark enough to feel special without being “heavy.” On warm skin tones it looks like expensive berry makeup; on cool skin tones it still works because the cherry shift brings warmth to the hand. This design also looks good on shorter nails since the stripe is concentrated where you need it.
Editor's noteIf your stripe looks too thick, buff the tip surface lightly before applying top coat — chrome shows texture fast.
Start with a sheer nude base and cure. Outline a clean French tip arc with a deep plum gel so the edge stays crisp. Apply black cherry cat-eye chrome to the tip and magnetize with the magnet centered for 14-20 seconds. Cure and check the stripe — you want a narrow vertical line, not a wide smoky smear. Seal with glossy top coat and cap the tip edge thoroughly to prevent tip wear, especially if you’re rough on your nails.
Skip thisSkip overly thick gel on the tip edge — it makes the French line look rounded instead of sharp.
11. Pearl White Cat Eye French Tips with Soft Opal Stripe
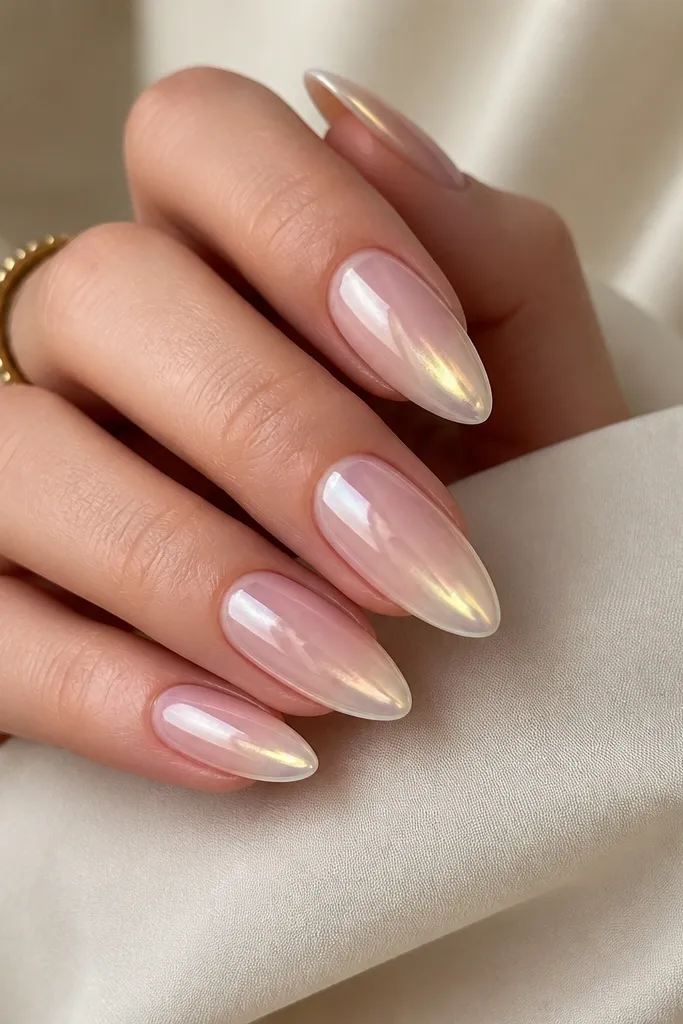
Pearl white cat-eye tips look futuristic but still “clean girl.” The stripe shifts softly, so it doesn’t scream neon under daylight. A sheer pink base keeps the look flattering and avoids the stark white that can wash out skin. I’ve done this for bridal-adjacent events when people want something modern but not traditional. It flatters fair to medium skin tones, and it makes nails look longer because the pearl tip blends smoothly into the base. The opal stripe gives movement without harsh contrast.
Editor's noteUse a translucent white for the outline, not opaque — opaque outlines can look chalky once the chrome goes over.
Apply a sheer pink base gel and cure. Draw your French tip arc with a translucent white gel, keeping the line thin. Apply pearl white cat-eye chrome to the tip area only and magnetize for 10-14 seconds centered over each nail. Cure and add a thin clear builder gel on top of the tip to smooth any micro-texture from the pigment. Finish with glossy top coat, cap the free edge, and cure again. Clean up around the cuticle with a gel-safe wipe so the pearl stays crisp.
Skip thisDon’t add extra pigment over the sidewalls — pearl chrome gets dull there.
12. Neon Coral Cat Eye French Tips with Sunset Glow Stripe
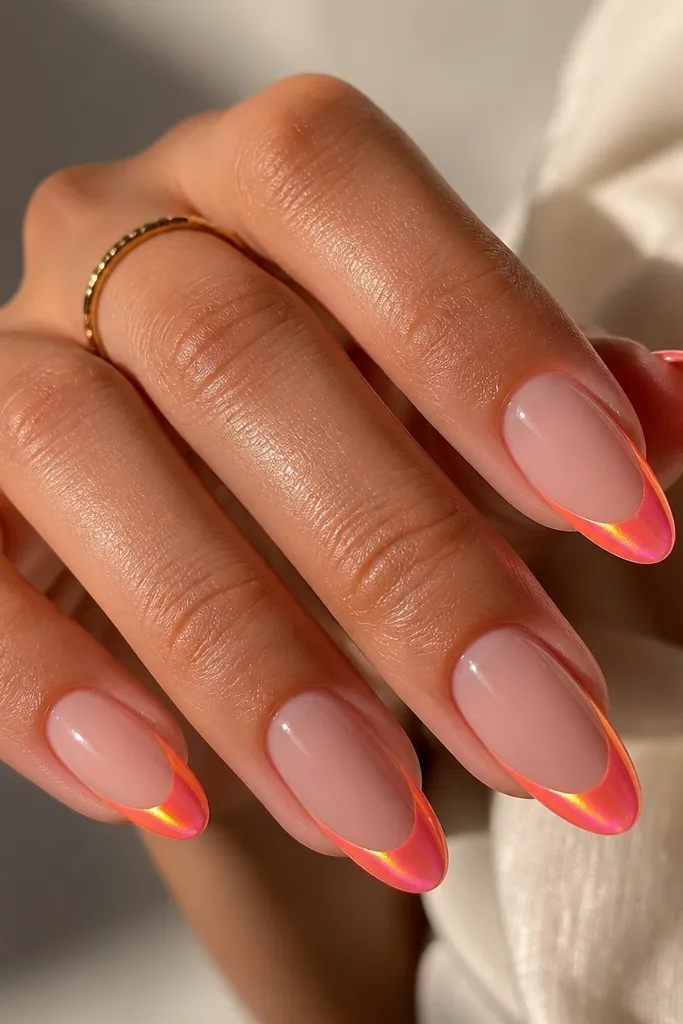
This is the “summertime futuristic” set. Neon coral cat-eye chrome gives a warm stripe that looks like a sunrise line, and the French tip keeps it from looking like a full neon manicure. I love it with bronzy makeup and warm-toned outfits because the stripe echoes the glow in your skin. It also flatters medium to deep skin tones because coral reads bright and clean. On fair skin, it can look too bold if the base is too white, so stick with a sheer nude base that has warmth.
Start with a sheer nude base that leans peach, then cure. Paint a thin French tip outline using a translucent coral gel. Apply neon coral cat-eye chrome to the tip area and magnetize for 10-16 seconds with the magnet centered. Cure and check the stripe for a clean vertical line; adjust with a tiny brush to remove excess from the sides if needed. Finish with a glossy top coat in two thin layers and cap the tip edge to keep the coral chrome looking smooth.
Pick a coral cat-eye shade that shifts toward gold — it reads luxe instead of candy neon.
Don’t pair with cool gray bases — the color clash makes the stripe look off.
13. Violet Smoke Chrome Cat Eye French Tips with Clear Negative Space
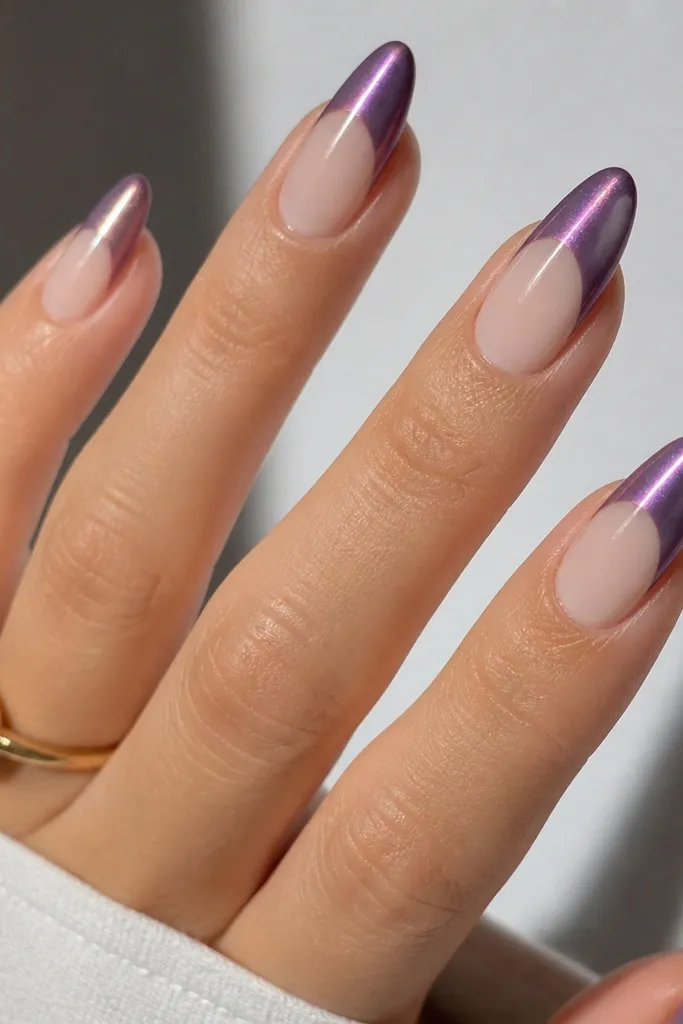
Negative space makes cat-eye French tips look designer and airy. The violet smoke chrome has depth, and the stripe gives that moving “light beam” effect without needing gems. I like clearing the cuticle area with a gel-safe barrier so the purple doesn’t creep where it shouldn’t. This design flatters hands with small cuticle areas because the clear space makes everything look intentional. It also works for both cool and neutral skin tones because violet smoke sits in a flattering middle ground.
Editor's noteUse a thin barrier gel around the clear window before chrome — it prevents purple staining when you wipe and cure.
Apply a sheer base gel but leave a small clear window near the cuticle — about 1 mm from the cuticle line. Cure. Outline the French tip arc on the tip area, then apply violet smoke cat-eye chrome only on the French tip zone. Magnetize for 12-18 seconds centered over the stripe lane. Cure, then add glossy top coat, but keep it away from the clear window so it stays transparent. Finally, cap the tip edges for durability.
Skip thisDon’t cover the negative space with opaque gel — it defeats the floating look.
14. Chrome Cat Eye French Tips with Gold Outline and Center Stripe
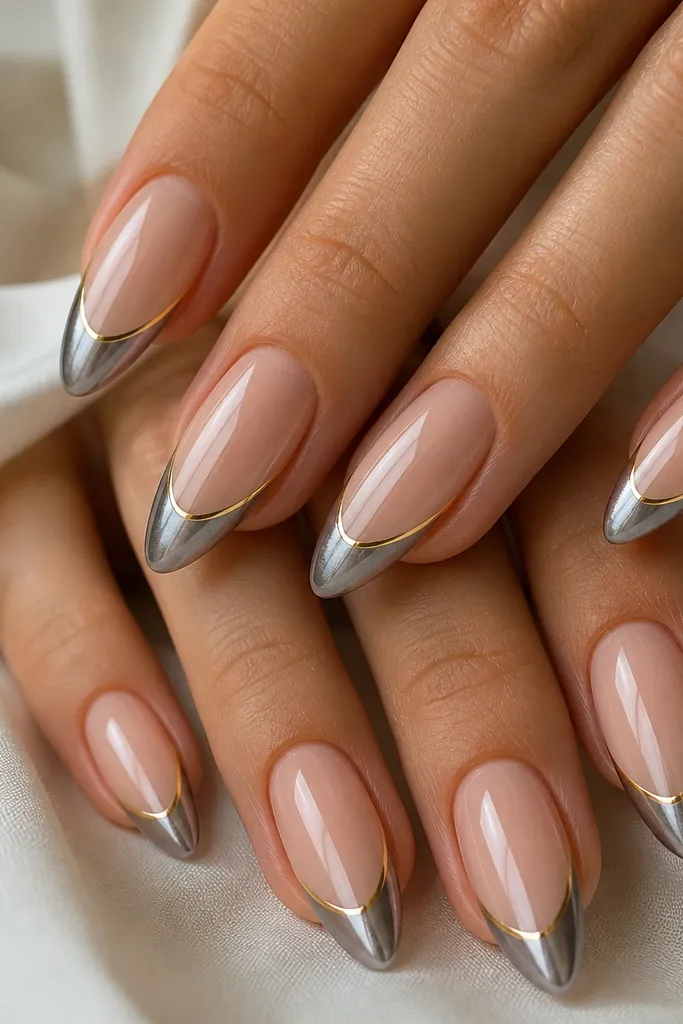
This is the easiest way to make chrome cat-eye feel “luxe jewelry.” The gold outline frames the French tip so the stripe has a border, and the center stripe stays the star. I use it when I want clean, symmetrical nails that still look futuristic. It flatters most skin tones, especially if you wear gold jewelry, because the outline matches the warmth of your accessories. The nude base keeps it wearable so it doesn’t look like costume nails.
Editor's noteKeep the gold outline thickness under 0.5 mm; thicker lines look like sticker art instead of fine jewelry.
Start with a nude base gel and cure. Paint a thin gold line along the smile line as your outline, then cure again. Apply chrome cat-eye pigment inside the outlined tip area only, leaving the outline visible as a border. Magnetize for 10-15 seconds with the magnet directly above the center of each nail. Cure and seal with glossy top coat, then cap the free edge with a final thin layer so the gold outline stays crisp and doesn’t lift.
Skip thisDon’t mix gold and chrome on the same brush strokes — it blurs the border.
15. Aurora Green Cat Eye French Tips with Crystal-Clear Top Coat
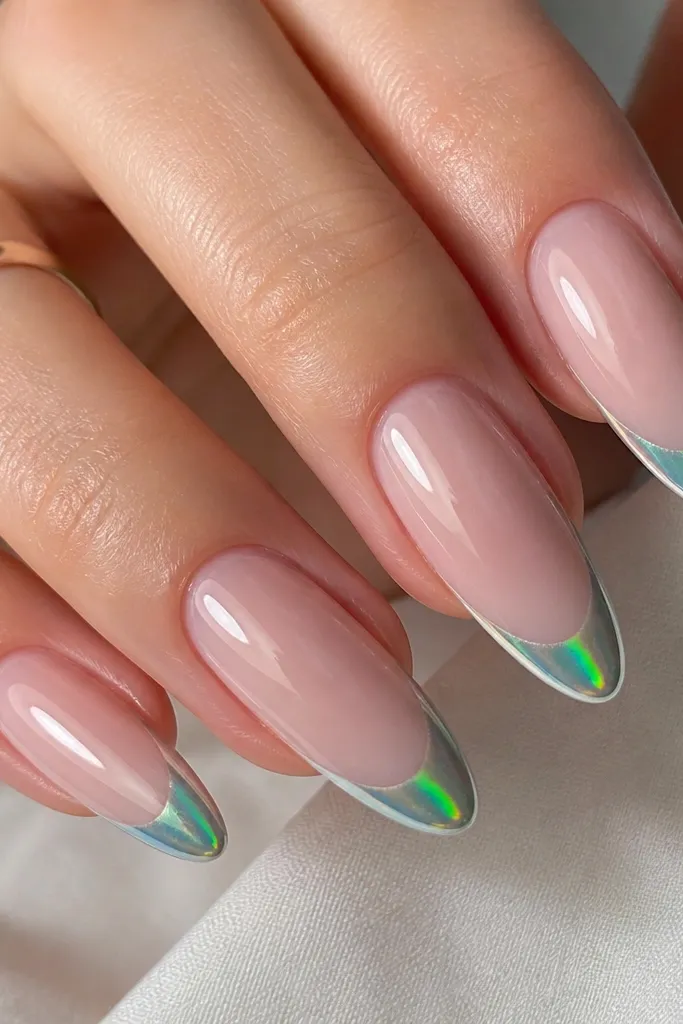
Aurora green is a “futuristic” color that still feels classy. The cat-eye stripe stays bright, and the green shift changes with your angle, so the tips look alive without adding extra art. I like this for concerts, tech events, and nights out because it looks bold in photos but still clean in person. It flatters medium to deep skin tones beautifully, and on fair skin it works when the base is sheer and not overly pink. The crystal-clear top coat matters here — it keeps the shift clean instead of turning it slightly cloudy.
Editor's noteIf your top coat has any yellow tint, switch it — aurora green looks better under crystal-clear formulas.
Apply a sheer nude base gel and cure. Outline a French tip arc with a translucent gel, then add aurora green cat-eye chrome to the tip area only. Magnetize for 12-20 seconds, holding the magnet centered so the stripe stays straight down the nail. Cure and apply a crystal-clear top coat in a thin first layer, curing fully, then a second glossy layer for a mirror finish. Cap the free edge and lightly clean around the tip border so the green doesn’t creep.
Skip thisDon’t use a thick gel top coat right away — it can dull the magnetic stripe.