1. Jet Black Cat Eye French Tip with Micro-Square Clear Edge
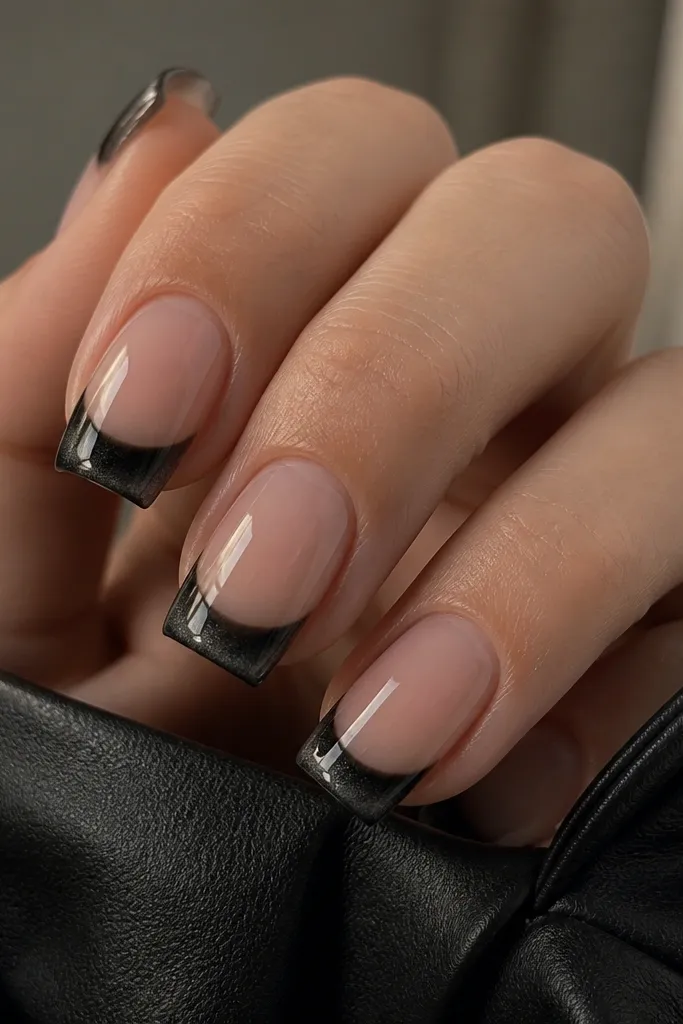
This look is the one I reach for when I want “editorial” but still wearable. The jet black cat-eye creates a steel-like line that catches light as you move, and the clear micro-edge keeps the design from feeling heavy. I’ve worn it on fair skin and medium skin, and the shimmer makes both look sharper — especially under cool lighting. It also flatters hands with shorter nail beds because the arc sits right at the tip. Wear it with silver jewelry for the most consistent look.
Editor's noteFor the sharpest arc, keep the magnet parallel to the nail plate — not angled — and don’t let your fingers hover while curing.
Start by prepping and shaping square tips so the corners are crisp, not rounded. Apply a thin nude or clear base gel, then cure. Next, paint cat-eye gel only on the tip area — about 1/3 of the nail — and hold the magnet directly above the tip for the recommended time without moving your wrist. Clean the edges with a brush dipped in gel cleanser, then cure again. Finish with a thick top coat and cap the free edge so the clear micro-band stays crisp.
Skip thisAvoid loading too much black gel; it makes the shimmer pool and the tip edge looks fuzzy.
2. Emerald Green Cat Eye French Tip with Thin Gold Outline
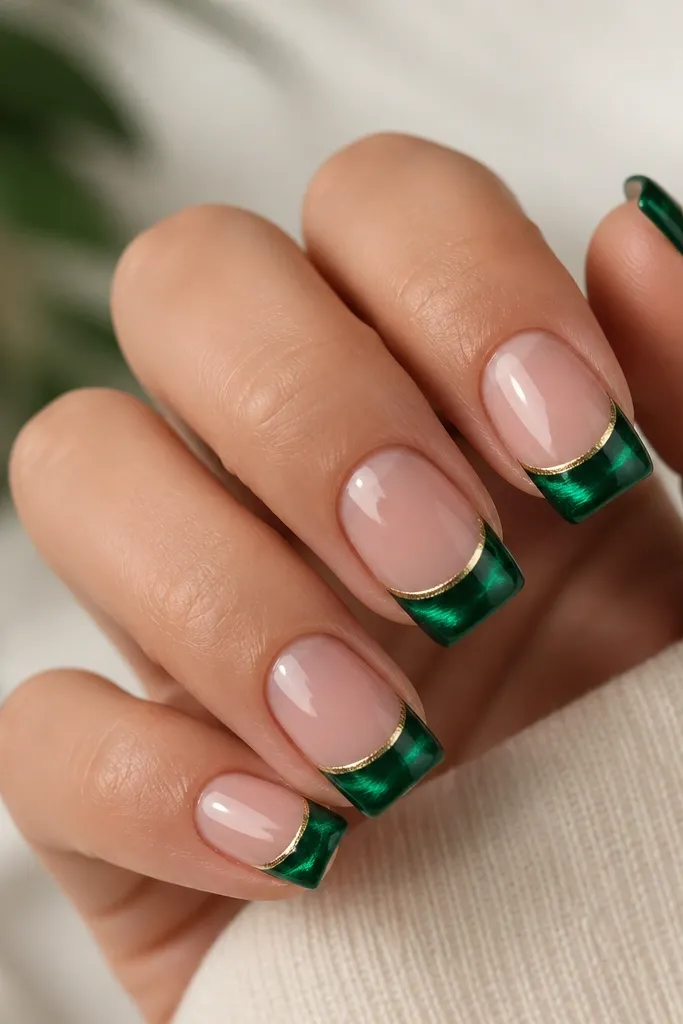
Emerald cat-eye is my go-to when someone wants that “expensive” look without rhinestones. The green arc flashes in both daylight and indoor light, so your hands look lively even when you’re not dressed up. A thin gold outline keeps the french tip looking intentional and helps define the square corners. This flatters medium to deep skin tones the most, because the gold reads warm against the green. It also looks great with neutral outfits — black, cream, and olive — because the nails do the color work.
Apply a sheer nude base and cure. Paint the emerald cat-eye gel on the tip only, leaving a clean boundary at the cuticle — I keep it about 1 mm away from the sidewalls. Magnetize for the brand’s exact seconds, then cure. Use a fine striping brush to draw a gold line just on the outer edge of the french tip — one pass, no scribbling — and cure that line. Seal with top coat, and cap the corners so the gold outline doesn’t lift.
If the gold line looks cloudy, wipe your brush with cleaner, dry it on lint-free paper, then pull one steady stroke.
Don’t outline before the magnet arc is cured — touching the wet shimmer makes the gold bleed.
3. Sapphire Blue Cat Eye French Tip with Matte-to-Gloss Fade
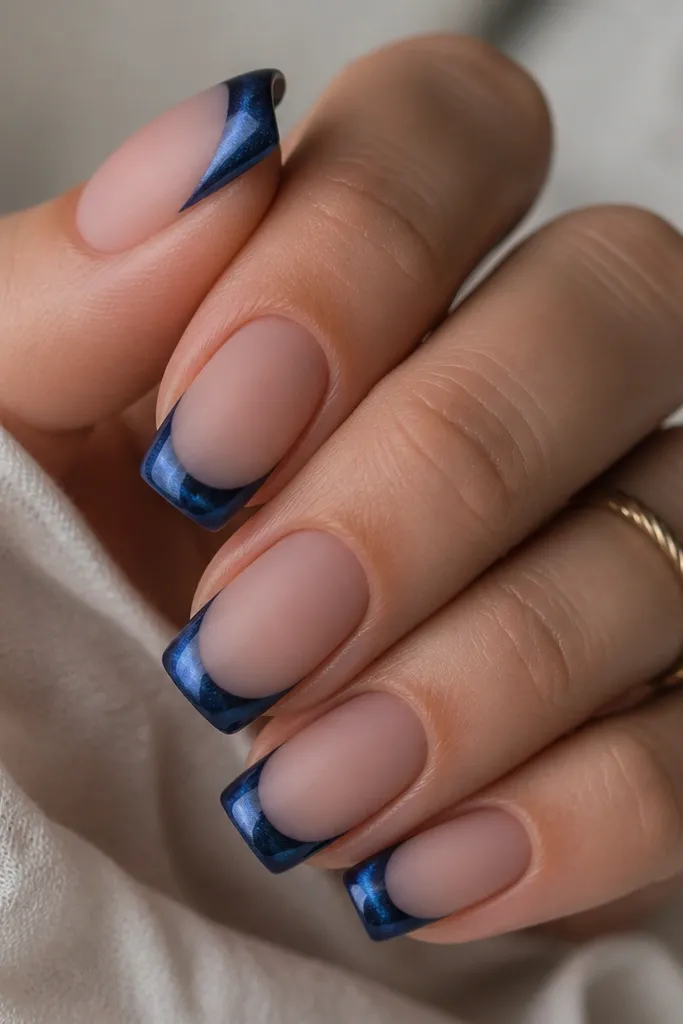
This is the manicure I do when I want something that looks different from every standard glossy french tip. The sapphire cat-eye arc stays crisp, and the contrast between matte and gloss makes the shimmer look like it’s floating. It flatters cool undertones beautifully and makes veins and ring colors look cleaner. I’ve also seen it work on warm skin if you choose a true blue instead of teal — it keeps the overall tone from going muddy. Pair it with denim, silver hoops, and a simple cream sweater.
Editor's noteMark the arc with your brush first using a thin layer of top coat, then magnetize — it keeps the shimmer centered.
Start with a nude base gel and cure, then apply a matte top coat over the whole nail except the french tip zone. Paint sapphire cat-eye gel on the tip, magnetize, and cure — keep your magnet step separate from the matte step. After curing, brush a glossy top coat only over the magnet arc area on the tip, not the whole tip. Cure fully, then tidy the edges with a clean-up brush. Finish by checking the square corners for any matte residue and wipe it off before the final cure.
Skip thisDon’t matte the entire cat-eye tip; you lose the reflective arc that makes this design pop.
4. Rose Quartz Cat Eye French Tip with Blush Nude Base
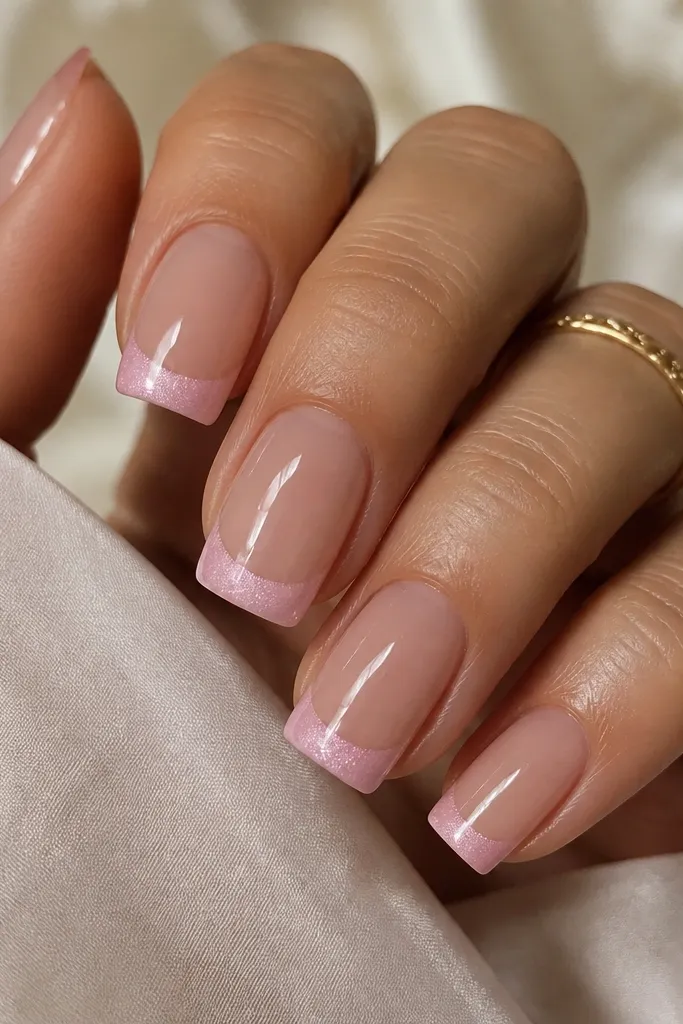
This one looks like a jewelry piece on your nails. Rose quartz cat-eye gives you a gentle arc that still photographs well, and it doesn’t look harsh like black or deep blues. I like it for fair and light-medium skin because it echoes the natural rosy tones in your hands. It also flatters short nail beds since the arc is light and draws the eye forward. For occasions, it’s perfect for weddings, bridal showers, and “I want pretty but not loud” days.
Editor's noteUse a slightly thicker base coat under the tip so the rose cat-eye doesn’t sink into thin areas.
Prep and shape square with slightly softened corners so it doesn’t feel too sharp. Apply a blush nude base gel and cure. Paint rose quartz cat-eye gel on the tip only, then magnetize straight down for the recommended time and cure. If the shimmer looks too sheer, add a second thin cat-eye layer only at the tip and magnetize again. Seal with a full glossy top coat and cap the free edge.
Skip thisAvoid pink bases that are too close to your skin tone — the french edge disappears.
5. Charcoal Smoke Cat Eye French Tip with Single Silver Dot at the Corner
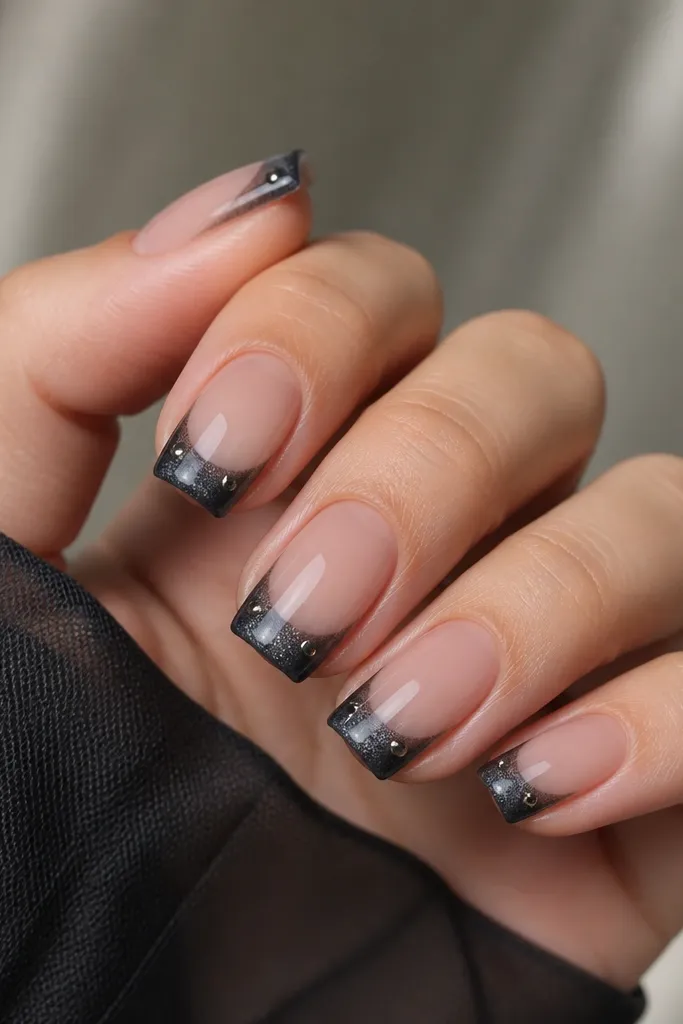
Charcoal cat-eye is my “cool girl” version of french tips. The shimmer reads like a soft smoke line, and it looks clean even when your outfit is busy. The single silver dot gives a focal point without turning into a pattern that crowds the square shape. This is flattering on light to deep skin tones because charcoal sits neutral, and the silver dot adds crisp contrast. I wear this with black coats, gray sweaters, and bold eyeliner.
Apply a sheer nude or cool-toned pink base gel and cure. Paint charcoal cat-eye gel on the french tip area and magnetize to form the arc, then cure. Using a dotting tool, place one tiny silver gel dot at the top outer corner of the french tip — about 1 mm wide — and cure. Keep the dot off the edge so it doesn’t snag on hair or fabric. Finish with top coat, making sure the dot is fully sealed.
If your dot slides, let the cat-eye gel cure fully first — then dot on top of the cured surface before top coat.
Don’t add multiple dots; the square tip already has the arc as a design element.
6. Teal Cat Eye French Tip with White Micro-Curve Line
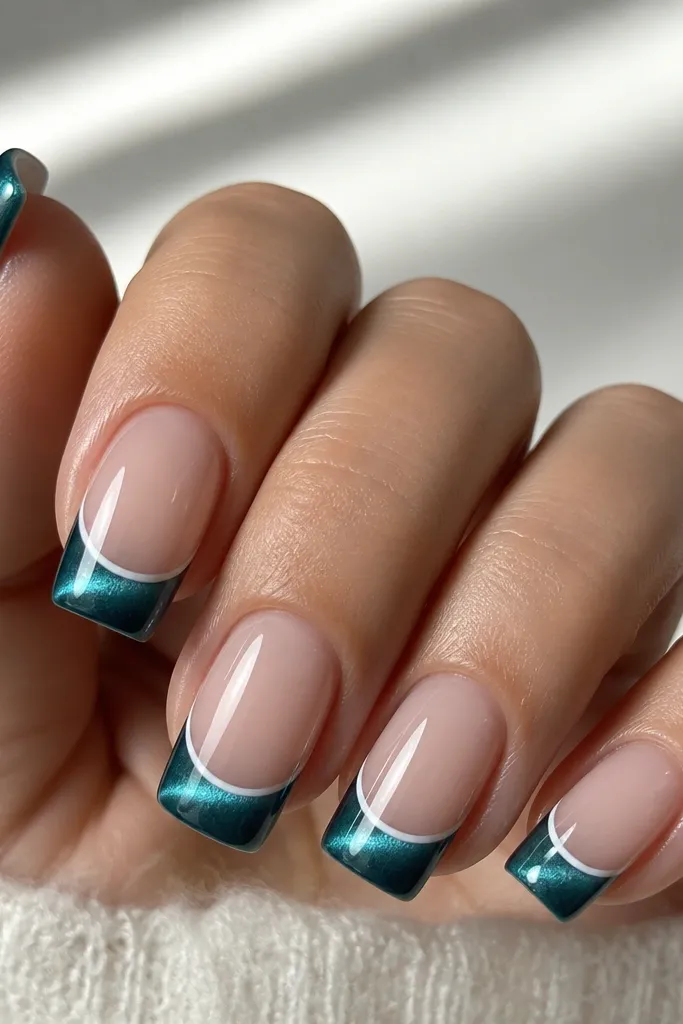
This look gives you the crisp “french” feeling but still uses the cat-eye for the glow. The teal arc pulls attention toward the center of your nail, and the tiny white curve mimics the natural highlight you’d see in a well-done gel manicure. I like it on medium and tan skin because teal makes the hand look brighter. It also works for short square nails because the white line visually lengthens the tip. Wear it with warm neutrals — camel, cream, and light brown — and it looks intentional.
Editor's noteUse gel paint for the white line, not regular nail polish — it stays crisp after curing and top coat.
Start with a sheer nude base gel and cure. Paint teal cat-eye gel on the tip area, magnetize, and cure. With a striping brush, draw a very thin white line across the tip just above the brightest part of the cat-eye arc, keeping it centered. Cure the white line, then apply top coat to blend it into the surface. Seal the corners by brushing top coat along the sidewalls and curing with fingers flat.
Skip thisDon’t make the white line too thick; thick lines cover the shimmer and look like a sticker.
7. Burgundy Cat Eye French Tip with Nude Negative Space Window
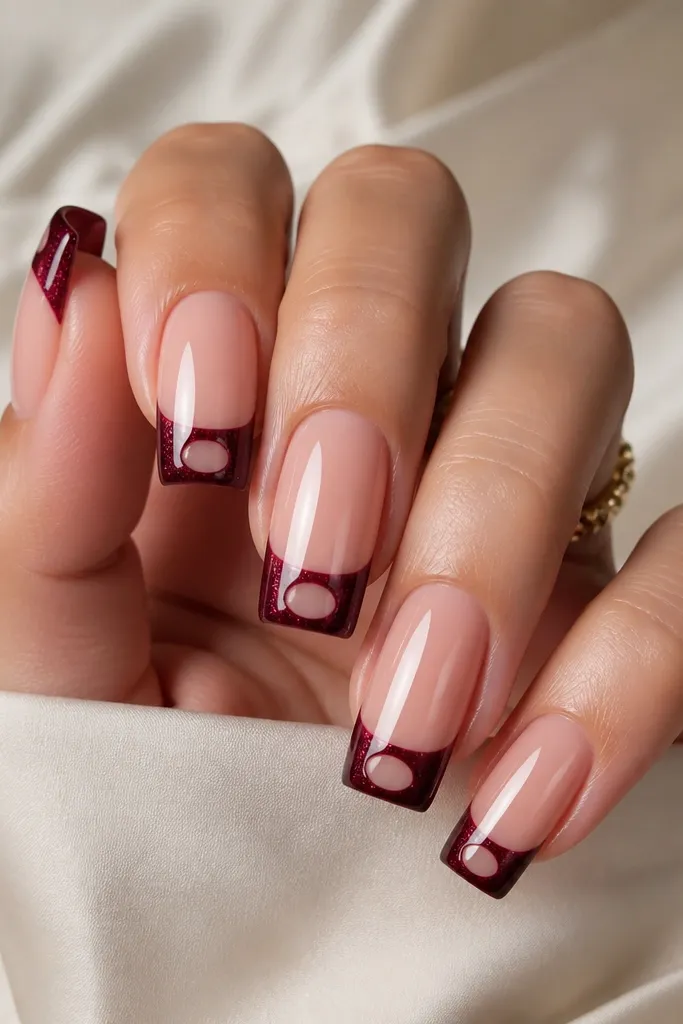
Negative space makes cat-eye tips look modern instead of traditional french. The burgundy arc still does the glow work, but the nude window keeps the design airy and makes the square shape feel clean. This flatters hands with broader nail beds because the gap visually narrows the center. I’ve worn it on both fair and deep skin tones — burgundy stays flattering as long as you choose a true wine shade, not dusty mauve. It looks especially good with gold rings and dark lipstick.
Editor's noteMagnetize with your magnet slightly higher than usual so the arc pulls sideways instead of down the center.
Apply a nude base gel and cure, then leave the center area clean for the negative space. Paint burgundy cat-eye gel on the sides of the tip so there’s a clear center gap about 1.5-2 mm wide — keep it even across all nails. Magnetize so the arc forms within the burgundy sections without pulling gel into the nude window, then cure. If you see gel creeping into the center gap, use a small brush with cleaner to clean the boundary before curing. Top coat over everything, but go light around the nude window so it stays crisp.
Skip thisAvoid thick gel at the tip sides; it tends to slump into the negative space.
8. Silver Chrome Cat Eye French Tip with Clear Jelly Base
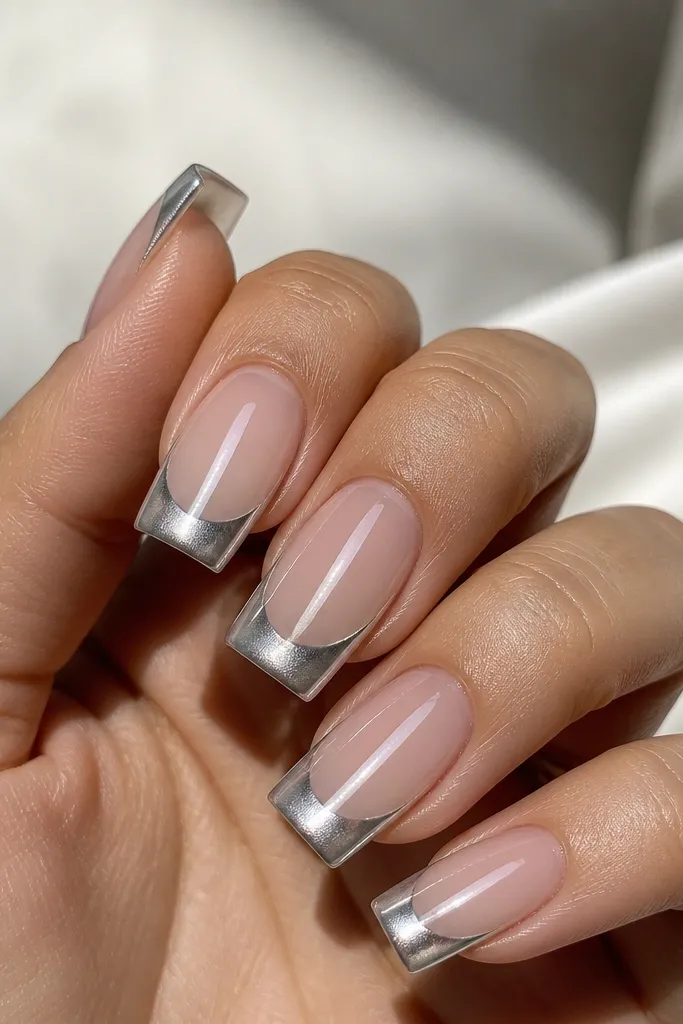
Silver chrome cat-eye on a clear jelly base looks like liquid metal at the tip. The clear base makes the nail look longer and keeps the manicure from feeling heavy, even with a strong metallic shade. I love this on short square nails because the jelly base gives that “glossy extension” look. It flatters cool undertones and also works on warm skin if you keep the chrome more silver than gold. For outfits, pair it with white tees, silver hoops, and a clean manicure vibe.
Editor's noteWipe the nail surface with a gel cleanser after curing before top coat — chrome shows every fingerprint.
Start with a clear jelly base gel — thin coats — and cure. Apply silver chrome cat-eye gel only on the french tip area, keeping the boundary straight across the tip. Magnetize to form the arc, then cure without moving your hand. Add a second ultra-thin cat-eye layer if the arc doesn’t look bright enough, magnetizing again for a short time. Finish with a thick top coat for that glass effect, and cap the free edge so it stays smooth.
Skip thisDon’t use a matte base under chrome; it kills the reflective look.
9. Gold Bronze Cat Eye French Tip Over Caramel Nude
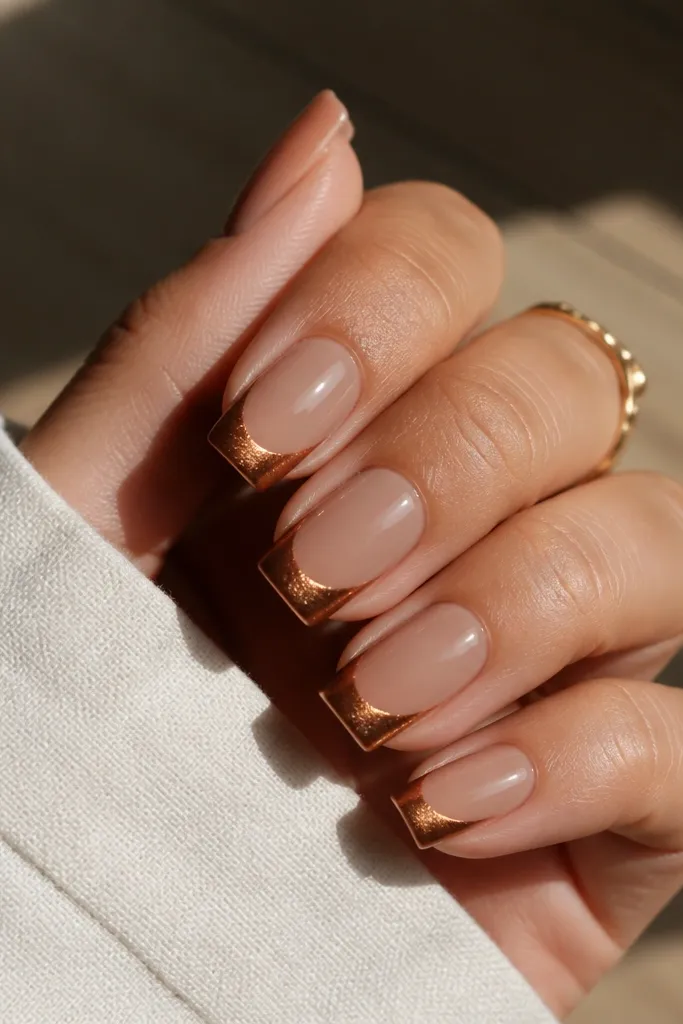
Warm bronze cat-eye over caramel nude makes your hands look sun-kissed without turning orange. The shimmer arc is the star here — it throws a gold line that looks like a highlight on makeup. I’ve worn this on medium skin with olive undertones and it looked especially flattering because the bronze didn’t fight the skin tone. It also looks good on fair skin when you keep the caramel base light, not too dark. This is a great option for fall events, date nights, and anything where you want warm glow.
Editor's noteChoose a caramel base that matches your knuckle tone, not your palm — it keeps the french line looking natural.
Apply a caramel nude base gel and cure. Paint gold bronze cat-eye gel on the tip area in an even layer, leaving a clean 1 mm gap from sidewalls for a tidy finish. Magnetize for the recommended seconds to pull the warm arc, then cure. If you want extra shine, apply a thin second layer of cat-eye gel only on top of the arc area and cure again. Seal with a glossy top coat and cap the corners so the bronze doesn’t dull at the edges.
Skip thisAvoid overly dark caramel; it makes the bronze arc look muddy instead of metallic.
10. Black Cherry Cat Eye French Tip with Tiny Clear Rhinestone Cluster (2 Stones)
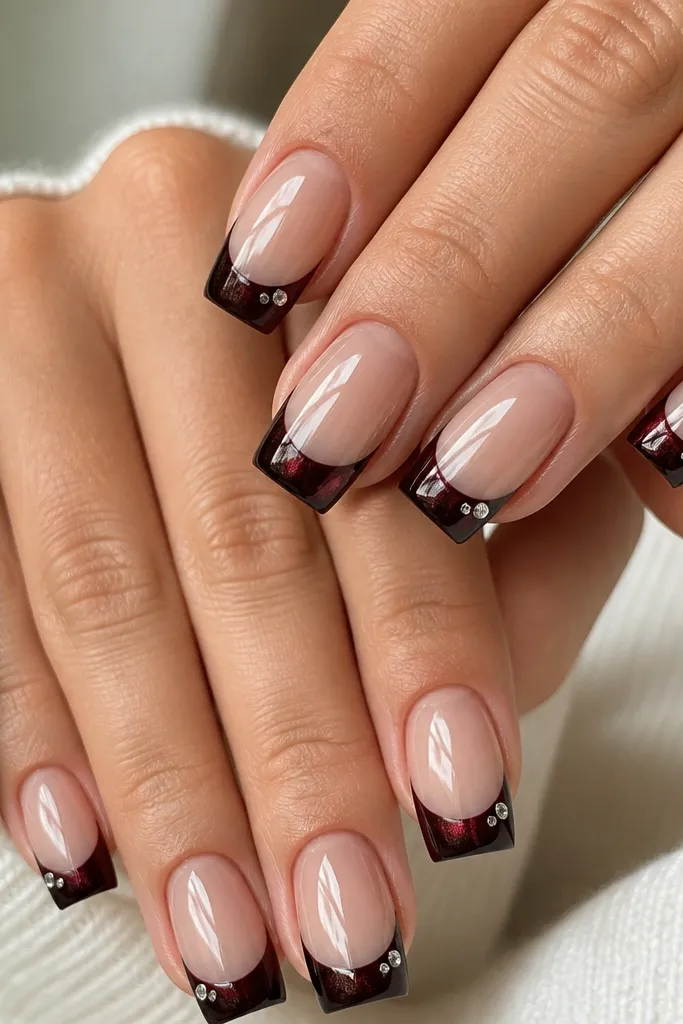
If you want cat-eye french tips that still feel special for nights out, this is the balance I like: one small sparkle cluster, not a full scatter. Black cherry reads dark but has a hint of red shimmer, so it looks flattering under warm lighting and at dinner. Two tiny clear stones keep the design from looking costume-y, and they catch light exactly where the arc starts. This works on almost every skin tone because the base is dark and the rhinestones are neutral. It also looks great with a red manicure vibe, but cleaner.
Editor's noteIf stones catch fabric, file the top coat smooth over the rhinestones after the final cure.
Apply a sheer nude base gel and cure. Paint black cherry cat-eye gel on the tip area, magnetize to form the arc, and cure. Place two tiny clear rhinestones near the outer top corner of the french tip, spaced about 1 mm apart — use gel as adhesive if your kit includes it. Press them gently and cure so the stones sit flat. Finish with top coat, using a small brush to cover around the stones without flooding them so they stay sharp.
Skip thisAvoid big rhinestones; they overpower the cat-eye arc and ruin the clean french look.