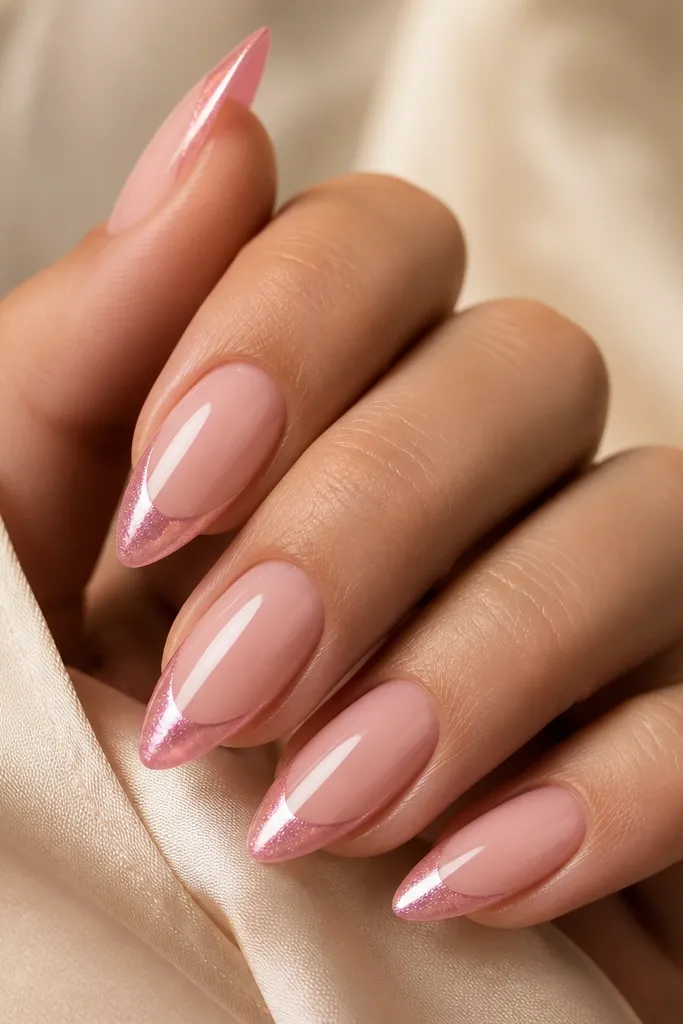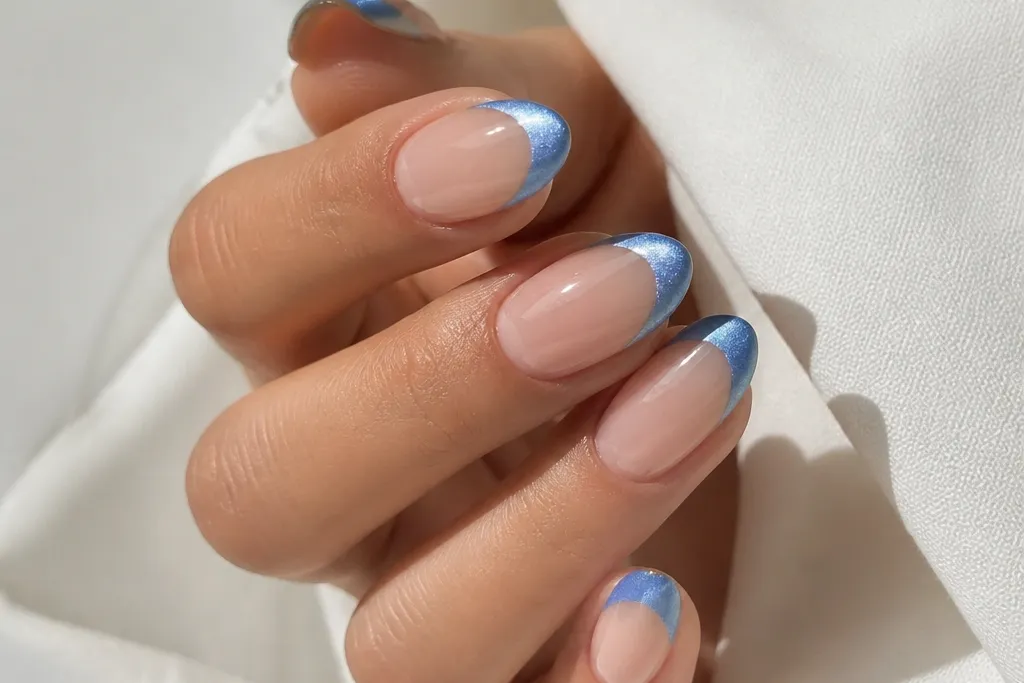
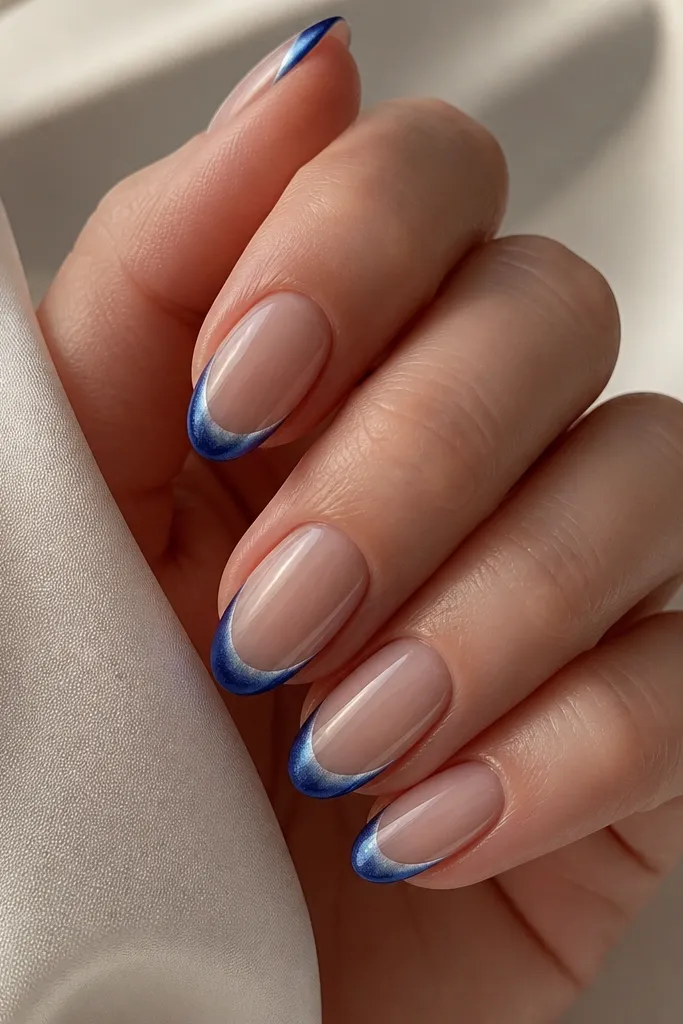
1. Cobalt cat eye French tips on milky nude base
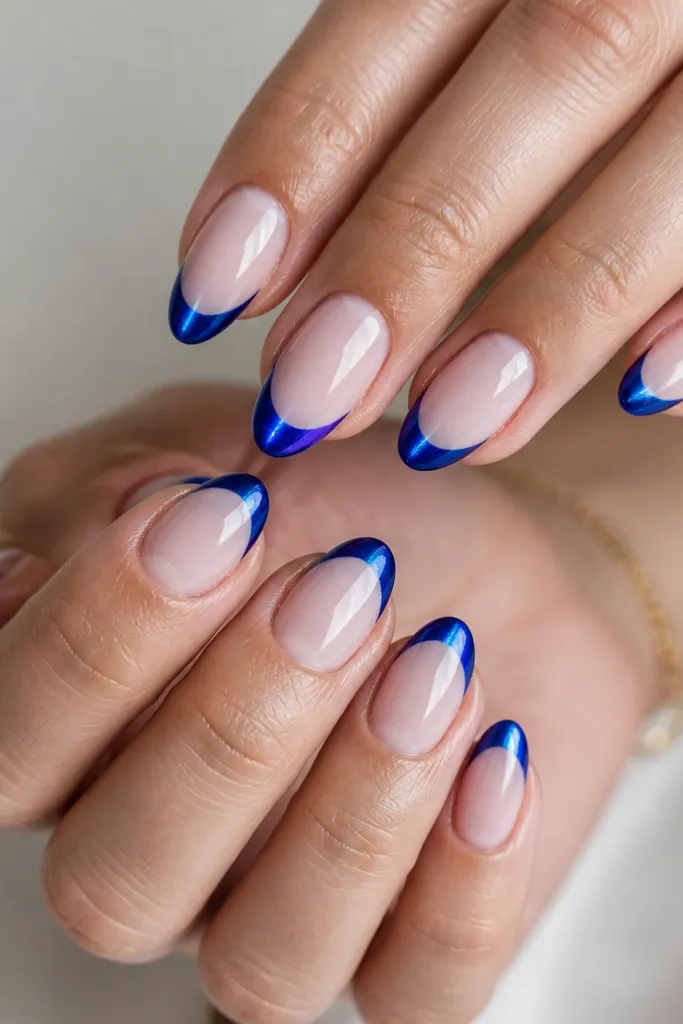
This one is my go-to when someone wants “blue cat eye nails” but still wants them wearable for work. The milky nude base makes your cat eye streak look cleaner because it reflects light softly instead of competing with the blue. I use a true cobalt (not teal) because the magnet stripe shows as a sharp, almost glassy line. It flatters medium to warm skin tones especially well, and it looks great on short almond because the tip takes attention without making the nail look bulky. The key is keeping the French line thin so the magnet stripe stays centered.
Start by prepping and pushing back cuticles, then apply a thin base gel and cure. Paint a milky nude layer and cure fully. Next, outline your French tip smile line with a gel liner brush, then fill the tip area with cobalt cat eye gel. Hold a strong magnet 1-2 cm above the wet tip for 10-20 seconds to pull the streak straight, then cure. Finish with a full-cover glossy top coat, cure again, and wipe if your top coat requires it.
Editor's noteIf your streak wanders, tap the magnet once to settle it before you hold it over the tip. It stops the pigment from drifting.
Skip thisDon’t flood the tip — thick gel makes the streak blur.
2. Denim blue cat eye tips with sheer gray base
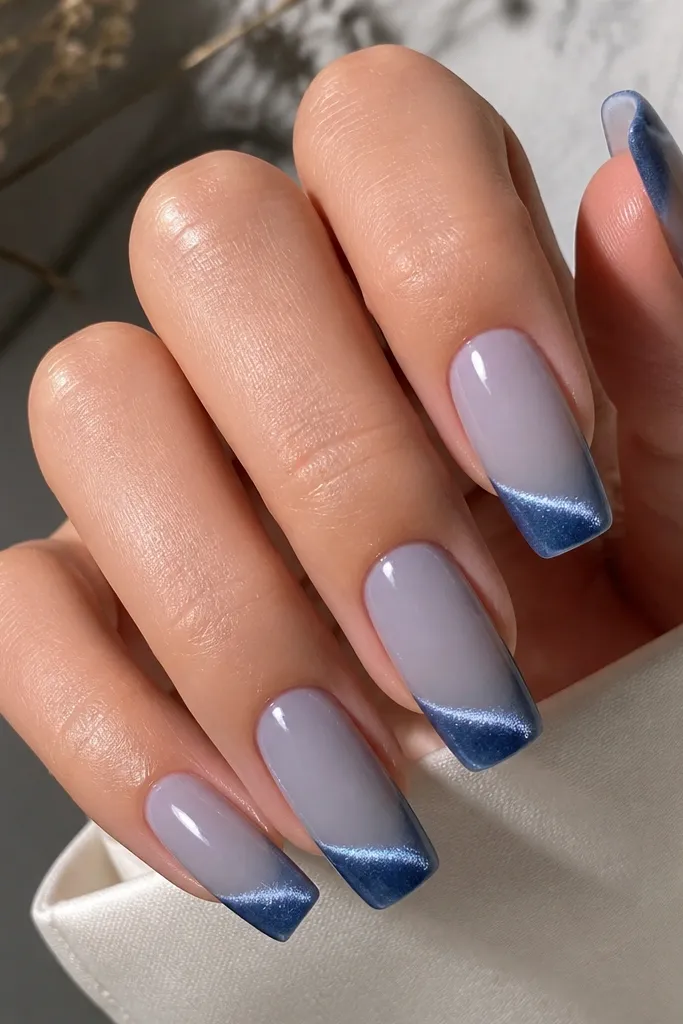
This set reads like a cooler version of classic French. The sheer gray base keeps the whole manicure smoky, so the denim blue cat eye stripe looks brighter by contrast. I angle the magnet slightly so the streak tilts toward the tip, which adds motion and makes the coffin shape look longer. It’s flattering on fair to medium skin tones because the gray base doesn’t wash you out. For events like winter dinners or office days where you want “notice me” nails but not loud glitter, this hits the sweet spot.
Apply a sheer cool gray base in thin coats, curing each time so it stays transparent. Create the French tip boundary with a thin gel line — keep it straight on the sides and slightly curved at the center for a natural smile. Fill only the tip with denim blue cat eye gel. Hold the magnet at a slight angle (about 30 degrees) above the tip for 12-18 seconds, cure, then repeat on each nail to keep the streak consistent. Seal with a glossy top coat and cure fully.
Editor's noteUse a striping brush to clean the smile line edges before curing. One quick pass makes the whole set look salon-level.
Skip thisAvoid using a warm beige base — it turns the blue muddy.
3. Ink blue cat eye French tips with micro-snow flakes
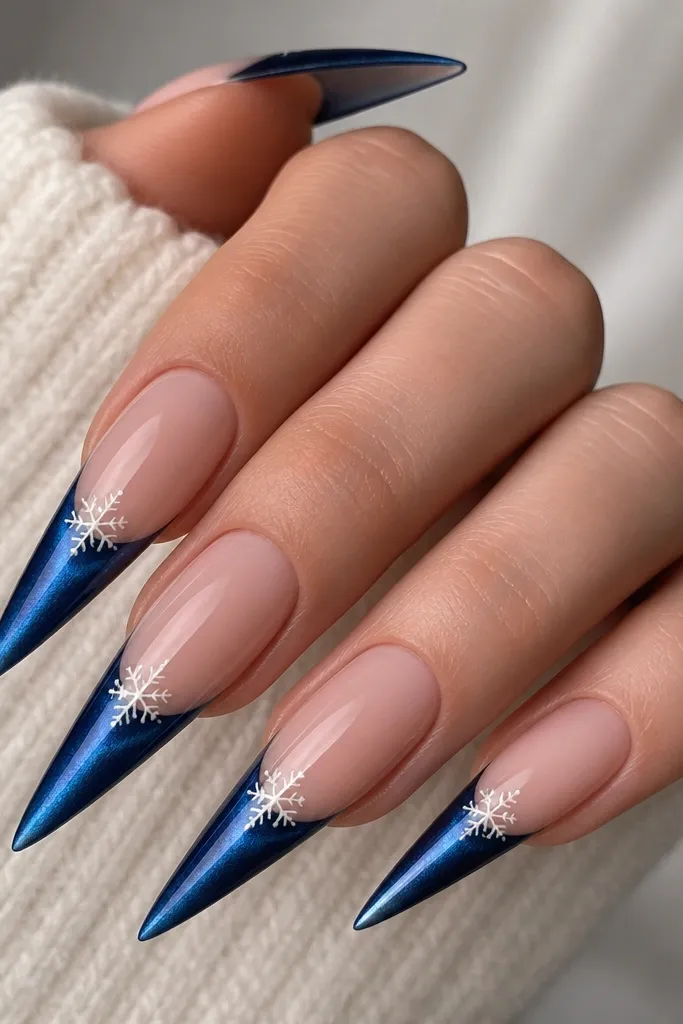
This is “winter but clean” without turning into full-on holiday nail art. Ink blue is darker than cobalt, so the cat eye stripe looks extra intense — like a tiny beam of light. The micro snowflakes are placed close to the cuticle edge of the tip so they don’t overpower the French shape. It looks especially good on long stiletto because the flakes add texture near the top where your eye starts. If you’re wearing silver jewelry, the icy snowflakes make the whole set feel coordinated.
Start with a nude base that matches your skin undertone — I use a pink-beige nude for warm skin and a rose-nude for cool skin. Cure it, then create the French tip shape with a thin ink blue outline. Fill the tip with ink blue cat eye gel, magnet 10-20 seconds straight down the tip center, then cure. Add micro snowflake decals or hand-painted dots only at the inner edge of the tip (one or two per nail), then seal with top coat in two thin layers. Cure between layers to prevent lifting.
If you’re hand-painting snowflakes, keep them tiny: 2-3 mm across. Bigger flakes make the tip look crowded.
Don’t put flakes on the brightest streak area — they kill the light effect.
4. Icy sapphire cat eye tips with pearl white-free edge
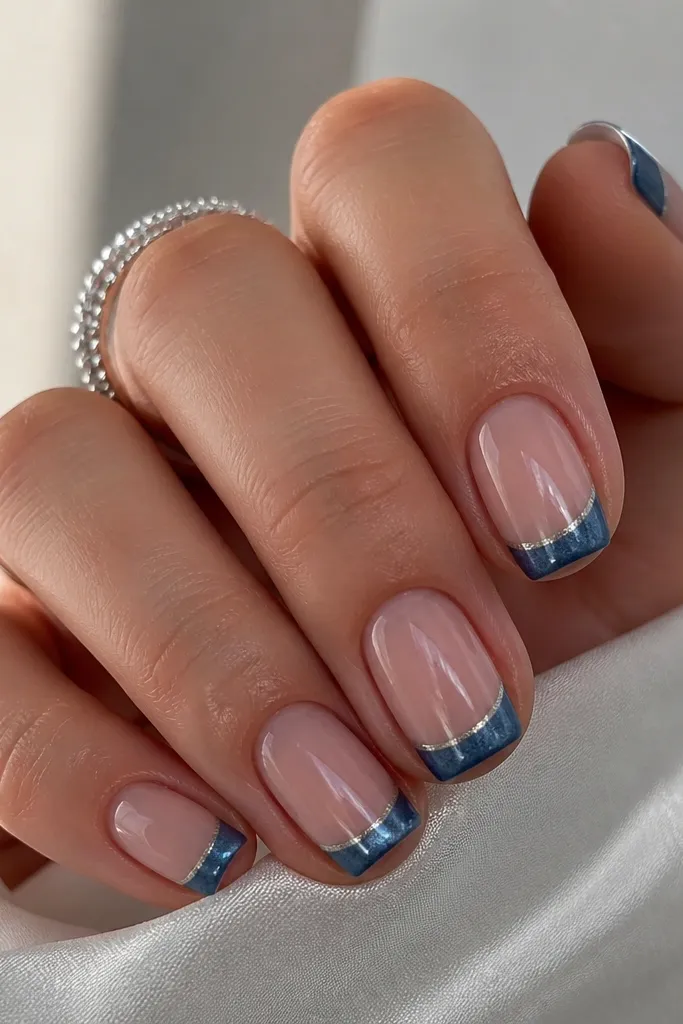
This is for people who hate stark white French tips but still want that “done” look. The icy sapphire cat eye gives you a cool, high-contrast streak, and the pearl-silver edge sharpens the outline without looking chalky. On short squoval, the pearl edge makes the free edge look crisp and neat, which is where short nails often lose definition. It flatters a range of skin tones because the base is sheer and the tip details do the heavy lifting. The principle here is defining the boundary twice — once with gel outline, then again with a thin pearl line.
Apply a sheer nude base gel and cure. Outline the French tip with a fine brush, then fill the tip with icy sapphire cat eye gel. Hold the magnet directly above the center of the tip for 12-16 seconds, cure, and make sure the streak runs from near the smile line to the free edge. With a tiny brush, paint a thin pearl-silver line right along the tip edge and cure. Finish with glossy top coat, cure, and wipe if needed.
Use a striping brush to draw the pearl line in one smooth stroke. Multiple strokes create a thick ridge.
Skip the super opaque white — it makes the whole design look older.
5. Teal-to-blue gradient cat eye French tips
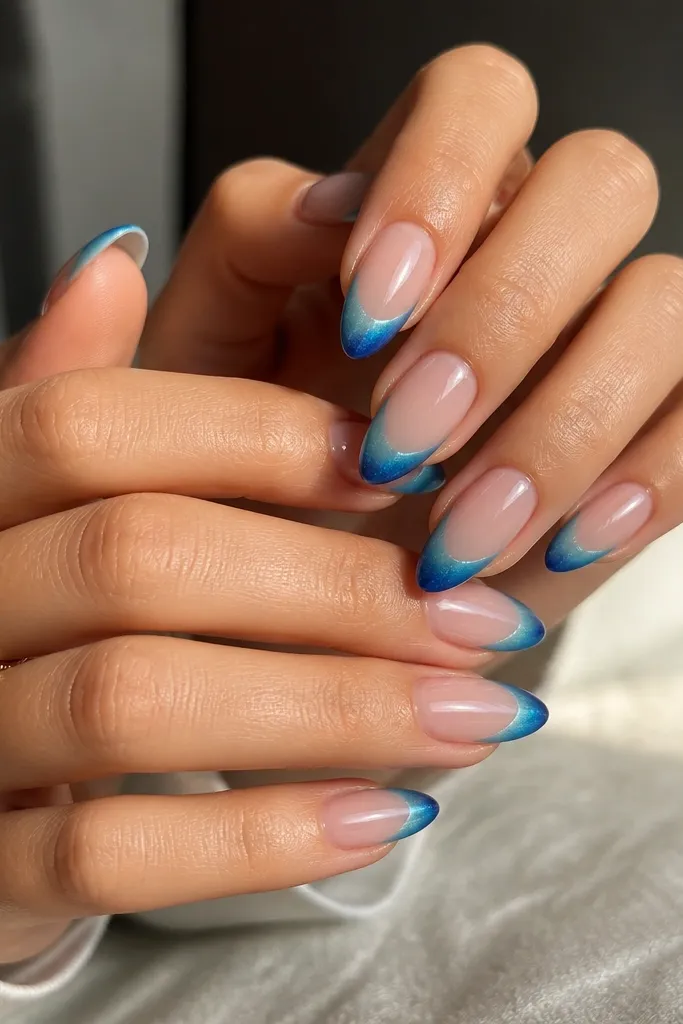
This one looks expensive because it mixes two magnetic shades into a gradient that still reads as a single French tip. I start the magnet stripe near the smile line with teal and let it shift toward blue as it approaches the free edge. The nude base keeps it airy, so the gradient doesn’t feel heavy. It flatters hands that are slightly shorter because the gradient pulls the eye upward rather than stopping at a hard color block. The key is blending the two colors while the gel is still workable, then magnetizing only after the blend sits evenly.
Start with a nude or pale pink base and cure. Create the French tip boundary, then apply teal cat eye gel at the smile line portion of the tip, keeping it about one-third of the tip width. Add deeper blue cat eye gel to the free edge portion, then use a small brush to feather the boundary between them while the gel is still wet. Hold the magnet over the center of the tip and keep it steady for 15-20 seconds. Cure, then top coat with a medium-thick glossy layer.
Editor's noteBlend the colors with a dry brush — it helps you avoid streaky edges before magnetizing.
Skip thisDon’t magnetize each color separately. It makes the streak look segmented.
6. Midnight blue cat eye French tips with silver foil dots
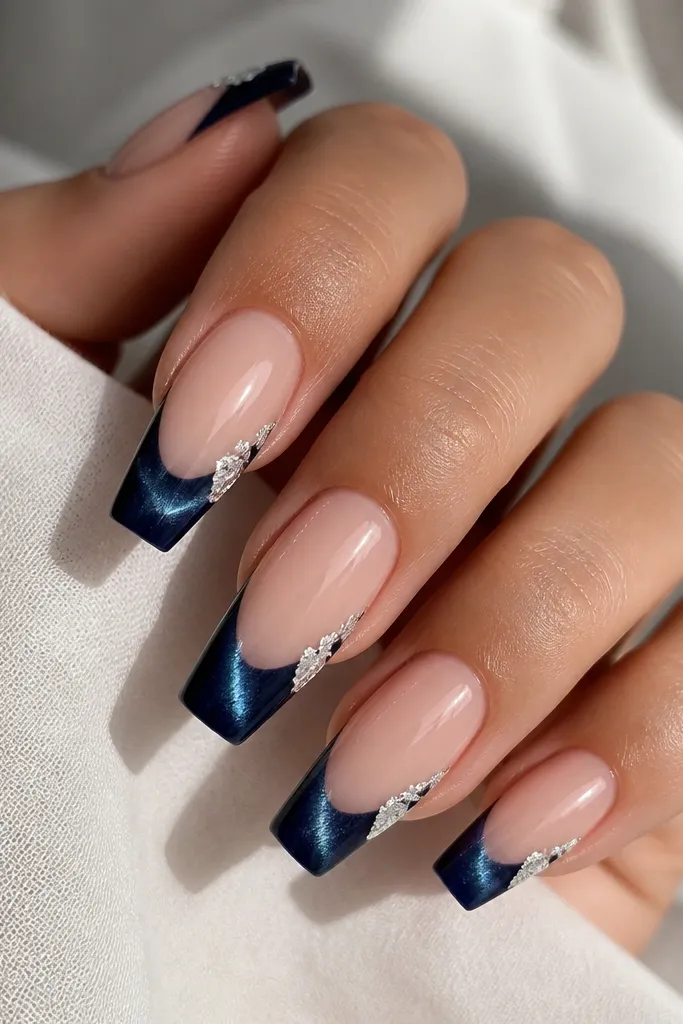
Midnight blue gives you that deep, night-sky look, and the cat eye streak turns it into something almost reflective under indoor lights. Silver foil dots add sparkle without covering the tip, so the French shape stays crisp. This set is good for nights out, but it still looks clean in daylight because the foil is minimal. On darker skin tones, midnight blue looks extra rich and the silver dots pop without needing heavy glitter. The principle is placement: foil goes near the edges so it frames the streak.
Apply a sheer nude base and cure. Outline and fill the French tip with midnight blue cat eye gel. Magnet 10-18 seconds straight down the center, cure, and check that the streak is bright and not smeared. Use a dotting tool to press tiny silver foil pieces only near the outer corners of the tip (about one dot per side). Seal with top coat in two thin coats for durability, curing between coats.
Press foil with a silicone tool, not bare fingers. It stops oils from dulling the foil.
Don’t bury foil under thick gel — it turns silver into gray.
7. Royal blue cat eye tips with micro rhinestone line
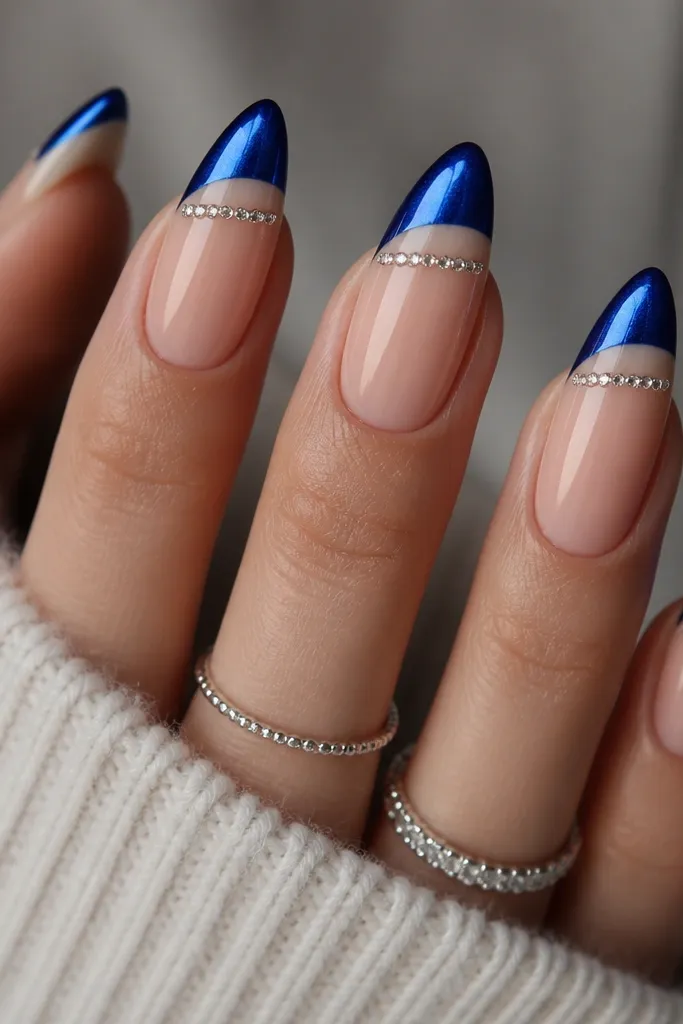
If you want “cat eye French tip” plus a little bling that still looks tidy, this is it. Royal blue is bright enough that the magnet stripe shows even after rhinestones catch light. The micro rhinestone line sits just under the smile line, so the bling looks like it’s part of the tip structure. I like silver stones because they match the cool blue and keep the set from feeling warm. It flatters long almond and oval shapes because the line guides the eye and makes the nail look longer.
Start with a nude base and cure. Build the French tip with royal blue cat eye gel, magnet the stripe for 12-20 seconds, and cure. Add a thin line of clear or tacky gel under the smile line where the rhinestones will sit, then place 3-6 micro stones per nail depending on length. Cure again. Finish with top coat, keeping it slightly thicker over the stones so they don’t catch on fabric.
Editor's noteUse tweezers with a fine tip and place stones while the gel is still tacky, not cured.
Skip thisDon’t place stones on the brightest center streak — it looks crowded and messy.
8. Powder blue cat eye French tips with matte base + gloss tip
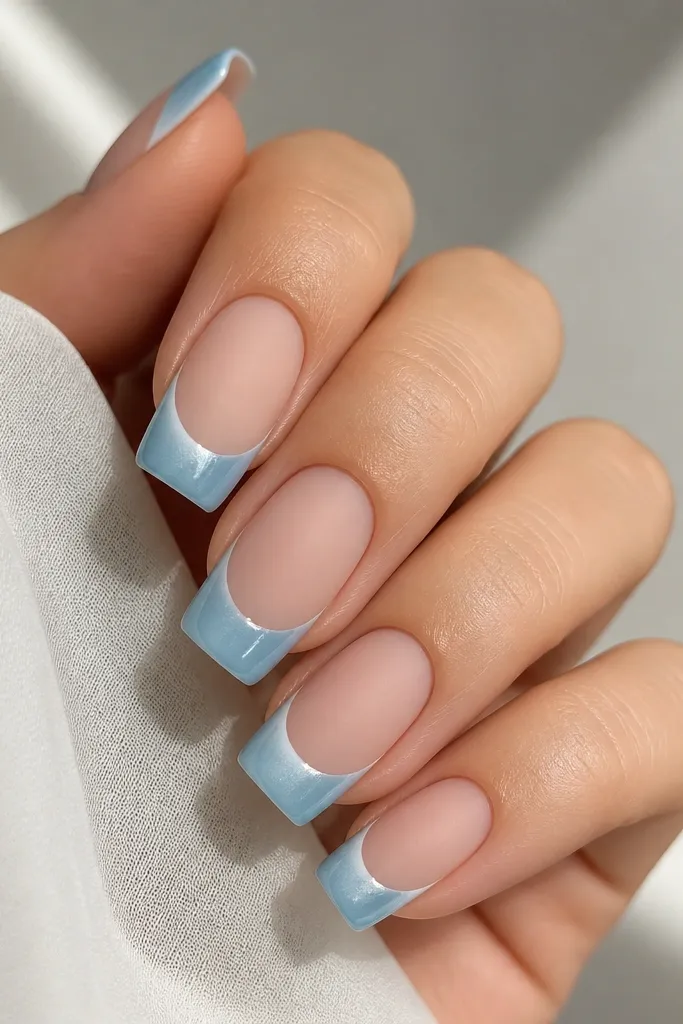
This contrast trick is the reason the manicure looks high-end. Powder blue cat eye on a glossy tip reads smooth and luminous, while the matte base makes the blue look even more “glowing.” Square nails look especially good because the sharp edges catch light at the tip and stay soft on the base. It’s flattering for hands with shorter nail beds because the matte base keeps things even, and the glossy tip adds lift at the free edge. The principle is finish contrast: same color family, different sheen.
Apply your nude base gel and cure. Use a matte top coat on the base area only — I apply it up to the French boundary so the tips stay prepared for gloss. Outline and fill the French tips with powder blue cat eye gel, magnet 10-18 seconds, and cure. Seal the tips with glossy top coat only, cure, and wipe if required. Keep the boundary clean so you don’t smear matte onto the gloss.
Editor's notePaint the matte top coat with a small brush and keep it off the tip edge. Matte smudges make the design look sloppy.
Skip thisDon’t matte the entire nail. The cat eye needs gloss to look like a light beam.
9. Ocean blue cat eye French tips with thin white-free swirl
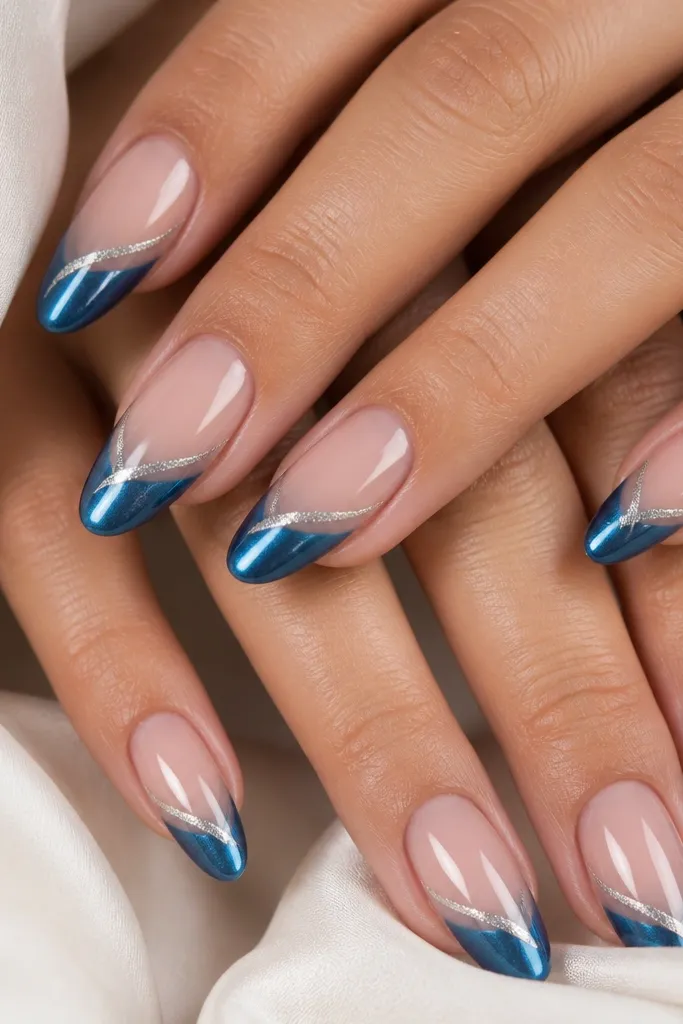
This is a cleaner nail art version of “swirls,” and it stays elegant because the line is thin and the base is controlled. Ocean blue is slightly more green than cobalt, so it makes the cat eye streak feel more dimensional. The icy silver swirl is painted only along one side of the tip, which frames the stripe instead of hiding it. It’s flattering on medium and long almond because the swirl follows the natural curve of the nail. The principle is negative space — leave most of the tip plain so the magnet glow still reads clearly.
Start with a sheer nude base and cure. Create the French tip and fill it with ocean blue cat eye gel, magnet 12-18 seconds straight down the center, then cure. With a fine liner brush, paint a thin icy silver swirl line starting near the smile line and curving toward the free edge along one side of the streak. Cure after the line work. Finish with glossy top coat in a full layer, cure, and avoid flooding the swirl so it stays crisp.
Editor's notePractice the swirl on a nail tip first — a 1 mm line looks sharp, but a 2-3 mm line looks chunky.
Skip thisDon’t cover the swirl with thick gel — it blurs the line.
10. Blue cat eye French tips with aurora shimmer overlay
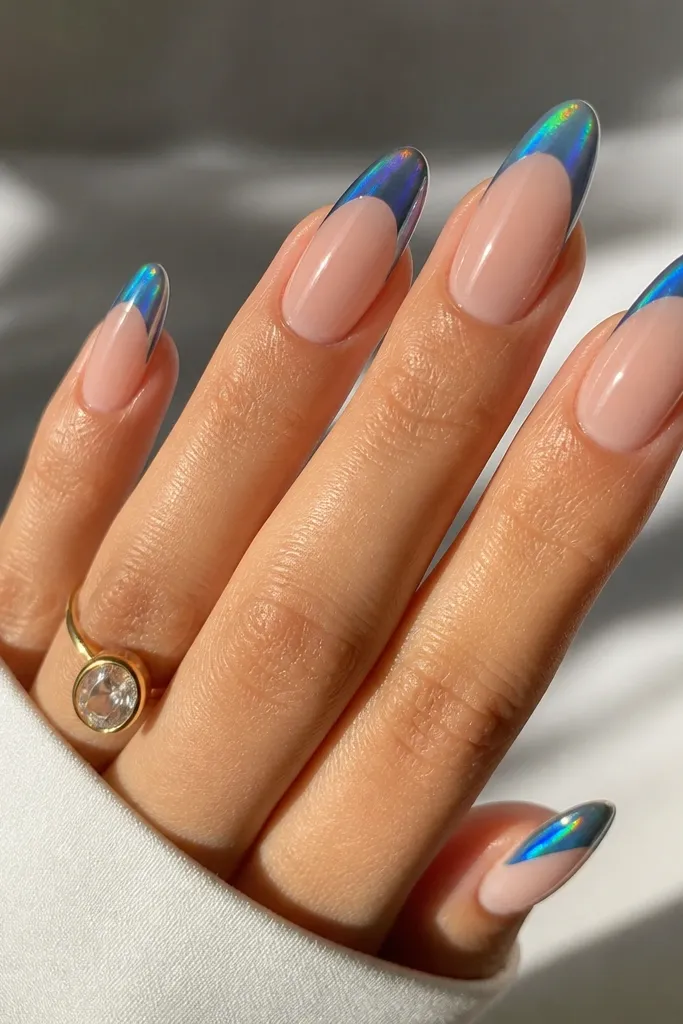
This is the “night club” version of cat eye French tip, but it still looks classy because the shimmer is an overlay, not a full glitter coat. The blue cat eye does the main work — the aurora overlay adds movement when you turn your hand. I use a fine aurora gel over the cured cat eye tip so the streak stays visible underneath. It flatters olive and medium skin tones because the aurora shifts bring out green and gold undertones. The principle is layering: light beam first, color-shift second.
Apply nude base gel and cure. Fill French tips with your blue cat eye gel, magnet 10-20 seconds straight, and cure. Paint a thin layer of aurora shimmer gel over only the tip area — keep it thin so it doesn’t dull the magnet stripe. Cure, then add glossy top coat for full shine. If your aurora gel is sticky after cure, wipe it before top coat so you don’t get bumps.
Editor's noteUse aurora gel that is fine-grit, not chunky glitter. Chunky pieces hide the streak.
Skip thisDon’t magnet after adding aurora overlay. It muddies the stripe.
11. Denim blue cat eye French tips with negative space cutout smile
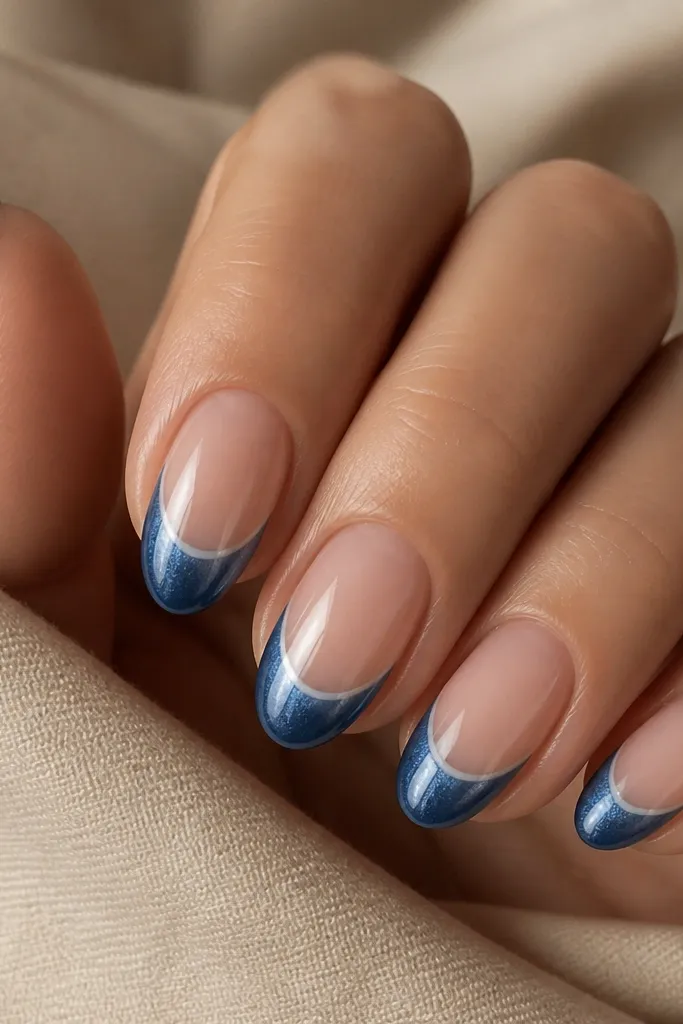
Negative space makes French tips look modern fast, and cat eye makes it look intentional. The denim blue stripe still pulls light, but the tiny gap at the smile line keeps the design airy. I like this for short almond because it visually stretches the tip without adding thickness. It works on fair through deep skin tones because the gap reveals your natural nail or base color. The principle is spacing: leave a consistent 0.5-1 mm gap at the smile line so it looks clean, not accidental.
Start with a nude base gel and cure. Outline the French tip shape but stop short of the smile line by 0.5-1 mm, leaving a small negative gap. Fill only the tip area with denim blue cat eye gel, magnet 12-18 seconds straight down, and cure. Use a thin brush to clean the edges of the blue so the gap stays crisp. Finish with glossy top coat over everything, but avoid flooding into the negative gap area.
If your gel floods, use a slightly thicker cat eye polish or apply in two thin layers.
Don’t make the gap bigger than 1 mm. Bigger gaps look like lifting.
12. Cyan blue cat eye French tips with tiny crescent moons
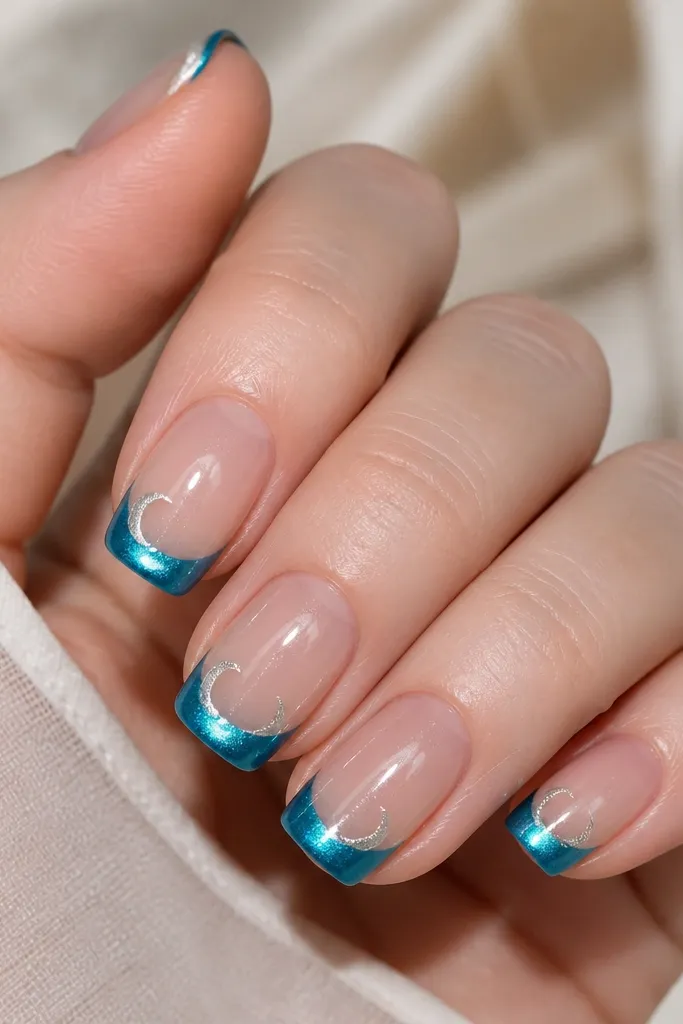
Cyan blue is lighter than most cat eye blues, and it gives a fresh, spring-to-summer feel that still fits evergreen because the shapes are small and clean. The tiny crescent moons sit near the smile line corners, which makes the tip look like it has a frame. This design flatters hands that look better with lighter color — it makes nails look less heavy. It’s also great for people who don’t like rhinestones or full decals. The principle is symmetry: place crescents on both sides so the French tip looks balanced.
Apply sheer nude base and cure. Paint the French tips with cyan blue cat eye gel, magnet 10-18 seconds to pull the streak straight, and cure. Add tiny crescent moons using a silver gel or small decal pieces — place one near each outer corner of the smile line, not in the center. Cure after placing, then seal with glossy top coat. Use a brush to remove any excess around the moons so the surface stays smooth.
Editor's noteIf you use gel moons, keep them flat and thin so they don’t catch on sleeves.
Skip thisDon’t stack multiple moon sizes. One small pair per nail looks intentional.
13. Navy cat eye French tips with glazed donut pearl center
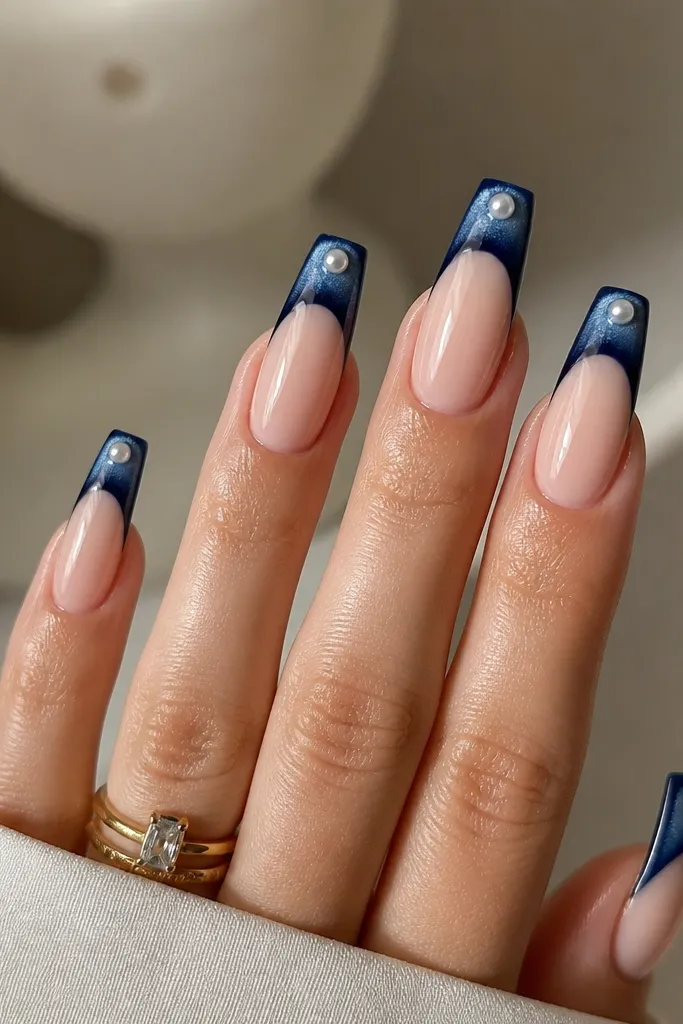
This one is for when you want the cat eye to look like it has a “jewel” in the middle. The navy base creates a strong contrast so the cat eye stripe looks like a spotlight, and the glazed pearl center adds dimension without using bulky 3D pieces. I like the bead effect because it catches light even when the rest of the design is simple. It flatters long coffin and almond shapes because the pearl sits exactly where the eye lands first. The principle is focal point placement: one highlight in the center keeps the manicure from feeling busy.
Start with a nude base gel and cure. Create the French tip and fill it with deep navy cat eye gel, magnet 12-20 seconds straight down, and cure. Mix a pearl gel or use a pearl effect builder gel and place a tiny dot in the center of the tip. Use the brush to shape it into a smooth dome about 0.5-1 mm tall, then cure. Seal everything with glossy top coat, cure, and wipe if needed.
Editor's noteUse a pin tool to place the pearl drop, then nudge it only once. Repeated poking leaves dents.
Skip thisDon’t make the pearl too large. A big bead looks like a sticker.
14. Glacier blue cat eye French tips with frosted nude edges
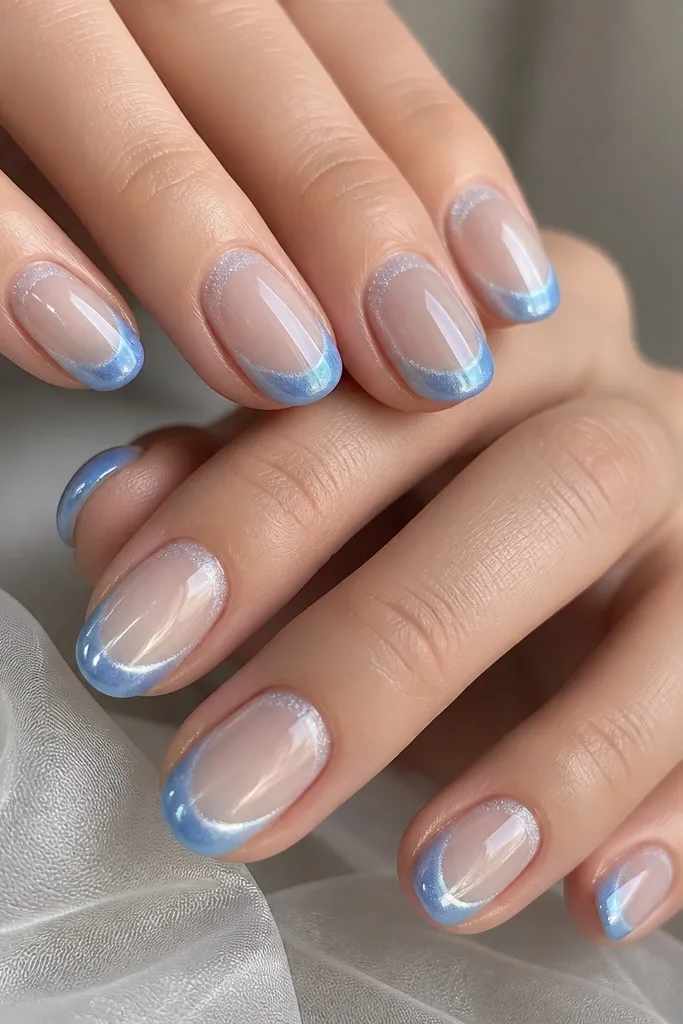
This look is subtle but it photographs beautifully because it’s mostly cool tone and controlled texture. Glacier blue cat eye gives a lighter, icy beam, and the frosted nude edge near the cuticle adds the “winter air” feeling. I do the frosted edge with a sheer shimmer or frost gel that stays matte-ish, then keep the tips glossy so the cat eye stripe pops. It flatters fair to medium skin tones because it doesn’t overpower your natural color. The principle is temperature matching: cool base tones make the blue look intentional year-round.
Apply a sheer nude base and cure. Add a thin frost shimmer gel only at the cuticle edge area (about 1-2 mm wide), then cure. Outline and fill the French tips with glacier blue cat eye gel, magnet 10-18 seconds straight down the center, then cure. Keep the smile line slightly soft by feathering the edge with a thin layer of base nude gel around it. Finish with glossy top coat over the entire tip area and cure again.
If your frost gel gets patchy, apply it in two ultra-thin layers instead of one thick coat.
Don’t frost the whole nail. It kills the clean French look.
15. Smoky Steel Blue Cat Eye French Tips with Chrome Halo
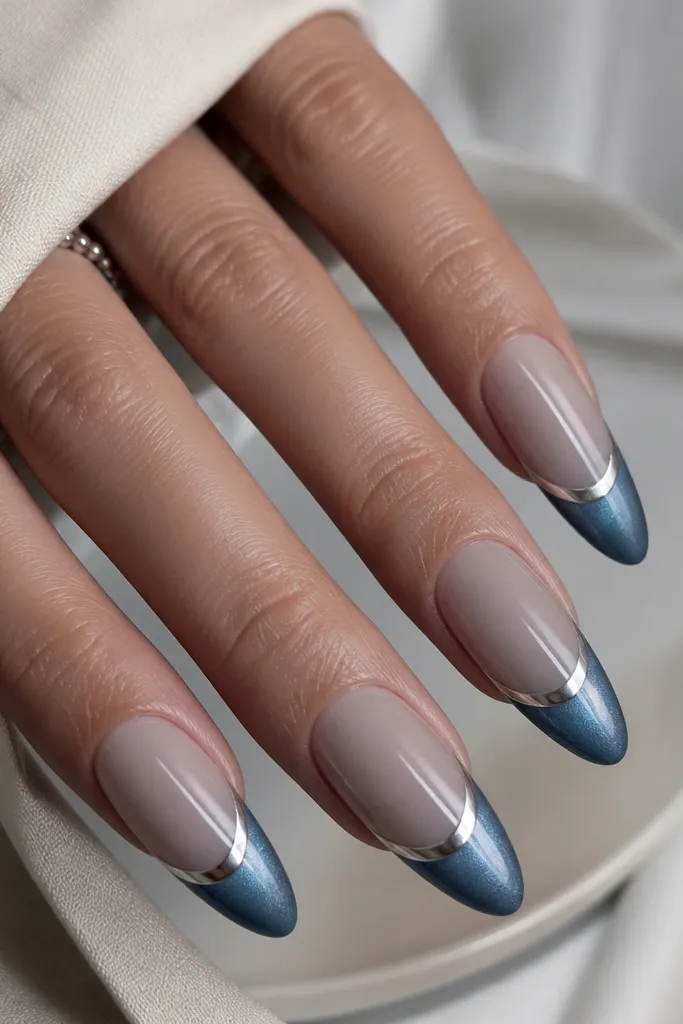
This set gives you the cat eye effect without looking like every other blue French tip. The steel-blue shade reads cooler and more wearable, especially if you wear silver jewelry. The chrome halo ring makes the French line look intentional, not like paint slapped on top. When you magnetize, you get that tight “beam” that curves slightly upward, which makes the tips look longer than they are. I’ve worn this to nights out and it still looks clean in daylight because the base stays muted and the blue only lives on the tips.
Start with a milky smoke-gray nude base gel, cured fully. Paint a thin coat of steel blue cat eye gel on just the French area, leaving a 1 mm gap from the nail’s sidewalls so the light beam stays crisp. Put a magnet over the tip for 10-15 seconds, moving it slightly closer to the center so the beam forms a gentle arc. Cure, then wipe tacky residue and apply a chrome powder or chrome gel ring right at the base of the tips, about 0.5-1 mm wide. Finish with a glossy top coat that does not smear the chrome, then cap the free edge with a final thin layer.
Use a smaller magnet than you think you need. A tighter magnet makes the beam look like it’s coming from a single point, which is what gives the halo French line that “lit from within” look.
Don’t magnetize right after you paint — gel that’s too fresh spreads and your beam turns fuzzy.