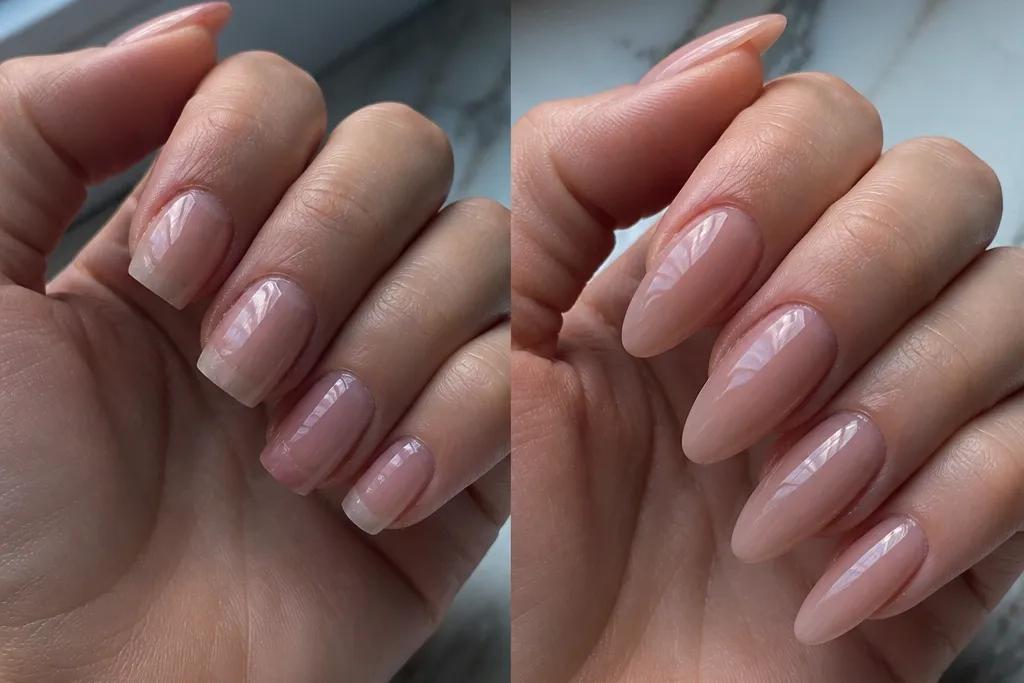
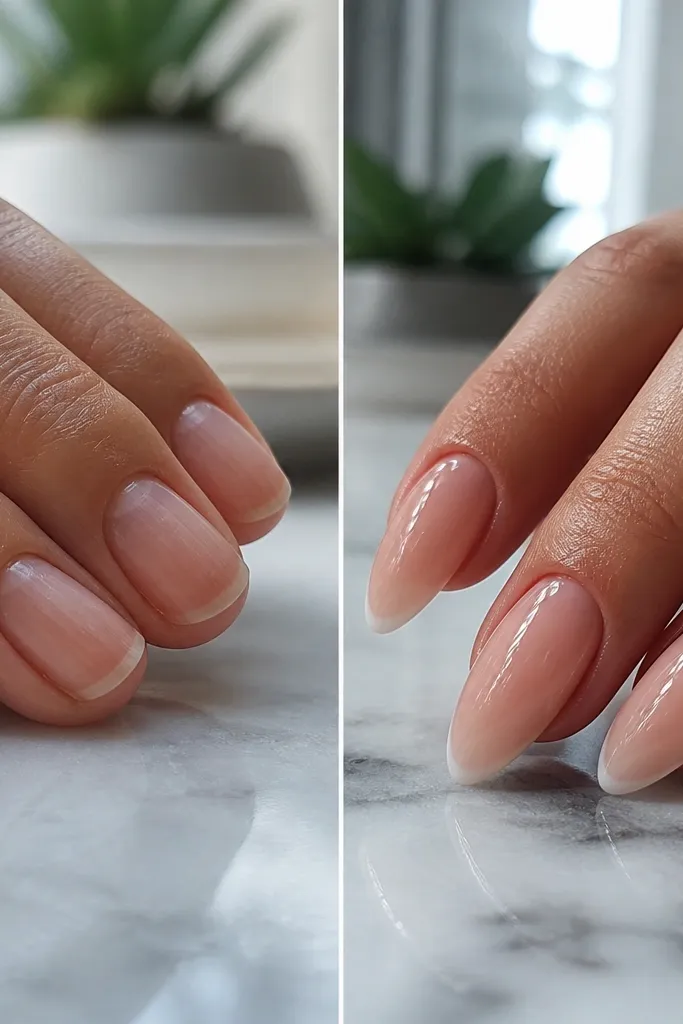
1. Vanilla Milky Nude Almond with Chrome Cuticle Line
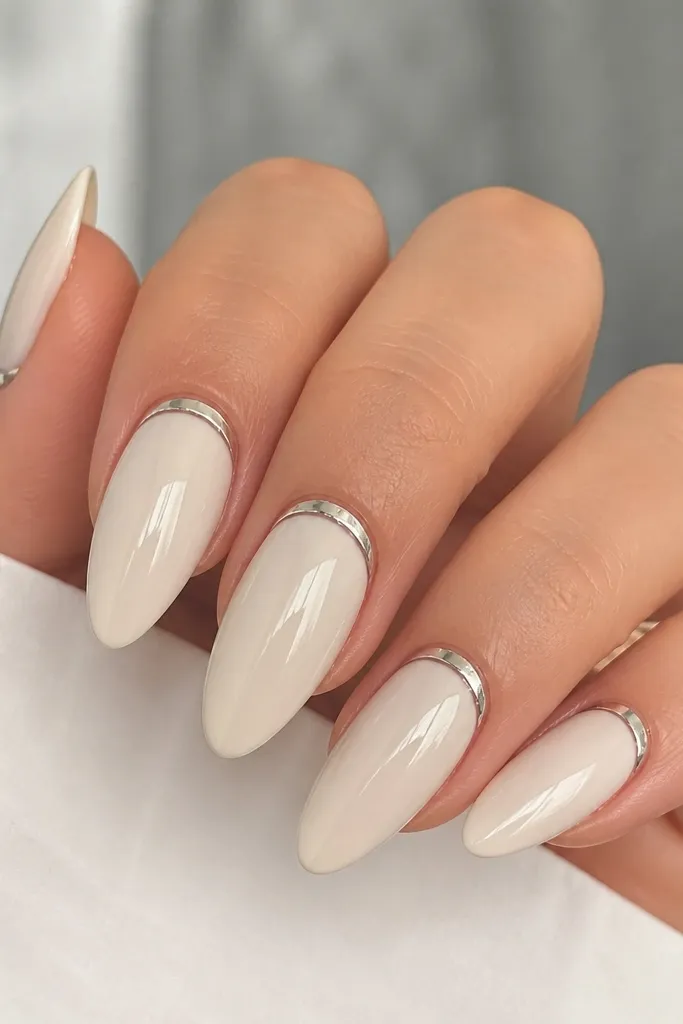
Start by filing your natural nails to a smooth oval-almond shape, then lightly buff the surface so primer grips. Build the acrylic with a milky nude powder, keeping the apex centered and not too tall. After shaping, wipe with slip solution and apply a gel top coat in a thin layer, cure, then paint a super-thin chrome stripe right at the cuticle edge using a striping brush. Finally, seal with one more thin top coat and cure fully for that glassy reflect.
This is the “before and after” nude that makes hands look instantly cleaner. The base is a milky vanilla that’s semi-opaque — it hides uneven nail tone but doesn’t turn chalky. The chrome cuticle line pulls the eye toward the nail bed, so your fingers look longer and more polished. I’ve worn this with warm skin tones and cool skin tones, and it always reads soft and expensive because the nude stays neutral and the chrome adds one sharp accent. Keep the shape almond and tapered so the chrome line looks crisp instead of chunky.
Skip thisDon’t make the chrome stripe thick; a fat line looks like tape and kills the “Kylie clean” look.
Editor's noteIf chrome looks dull on you, rub a tiny amount of gel cleanser on the stripe area before top coat — it helps the reflection stay sharp.
2. Black Gloss Coffin with Red Micro-Foil Tips
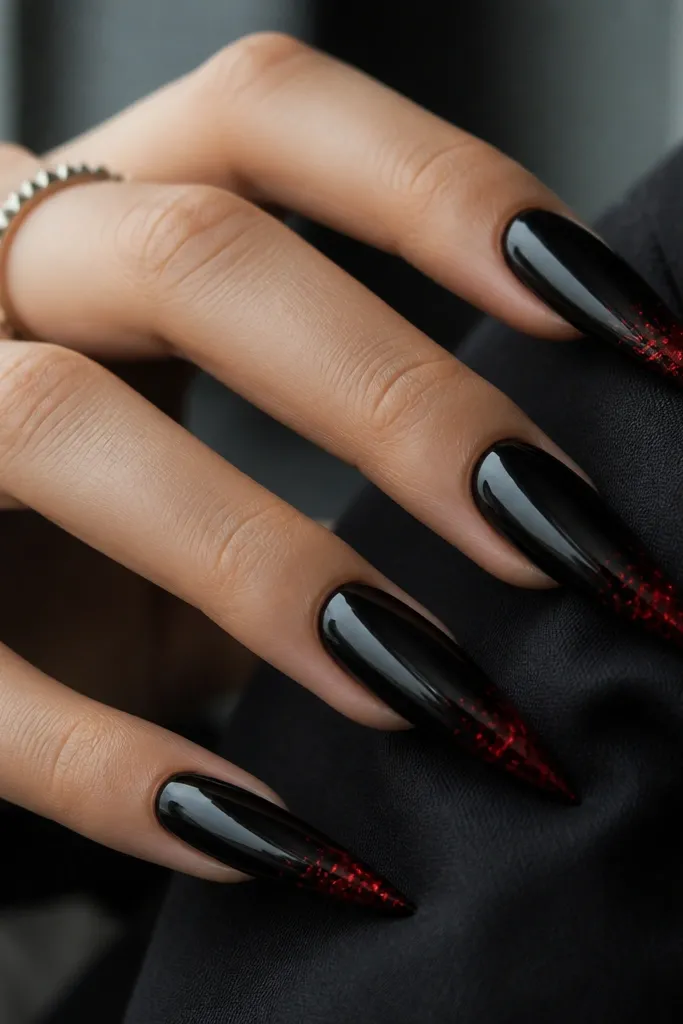
Start by creating a tapered coffin shape with a longer free edge, then apply a glossy black acrylic base. Keep the apex smooth so the nail doesn’t look lumpy under the shine. When you reach the last 2-3 millimeters before the tip, press tiny pieces of red micro-foil into a tacky layer — use less than you think, then spread lightly with a silicone tool. Seal with a high-gloss gel top coat, cure, and do a final wipe of the tacky layer so the black stays mirror-like.
This one is a mood: deep black plus a controlled hit of red at the tip. The black base makes your nail look longer because it visually frames the free edge, and the micro-foil adds sparkle without turning the whole set into glitter chaos. Red foil flecks look best when they’re small and irregular, not solid blocks — that’s what keeps it looking expensive. I’ve worn it for nights out and photo days, and it always photographs well because the black reflects less light while the foil catches it. Go coffin rather than round so the red sits on a clean tip edge.
Skip thisAvoid big foil chunks; they look like costume glitter once the top coat goes on.
Editor's noteUse a dry brush to pull foil slightly inward so you get a gradient, not a hard border.
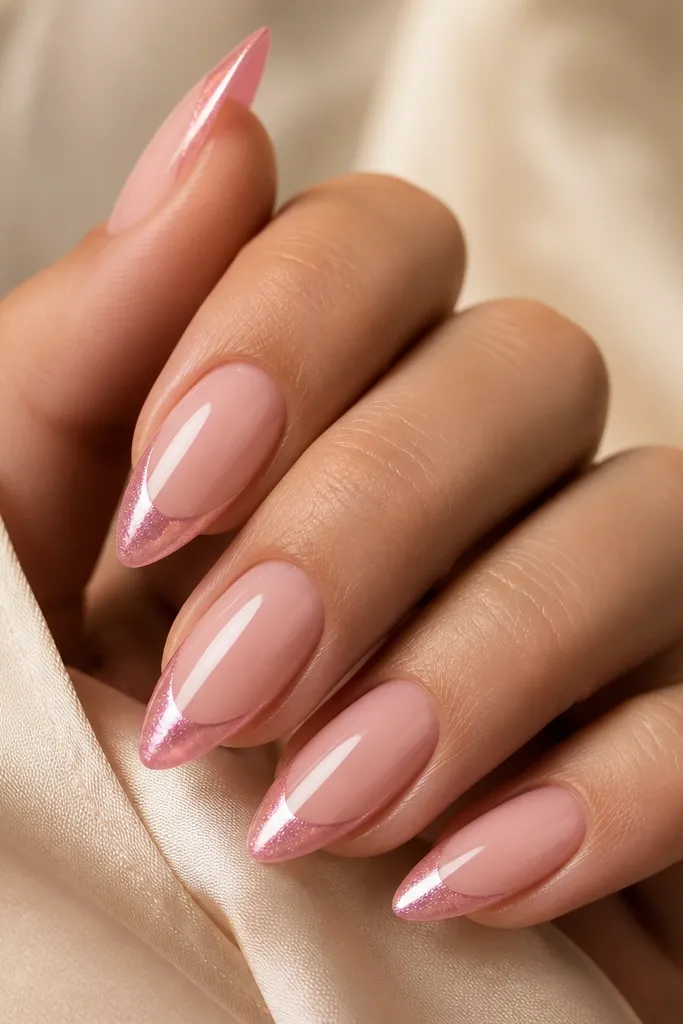
3. Pink Chrome Jelly Almond with Clear Apex
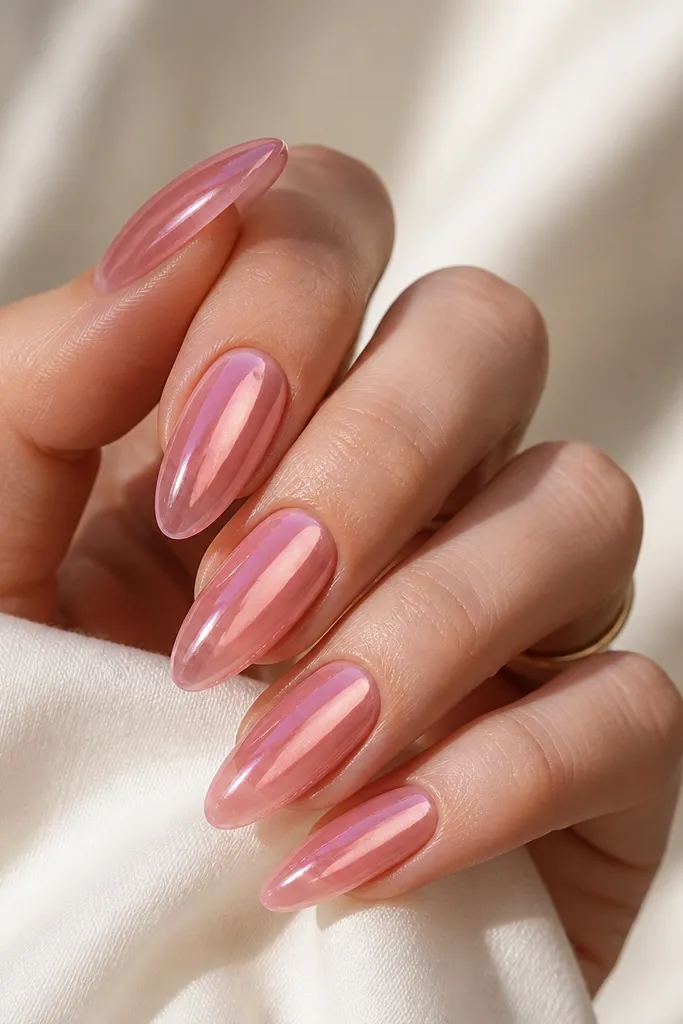
Start by applying a thin layer of clear acrylic or builder gel in the center to create that glassy depth. Build the translucent pink jelly acrylic around it, leaving the apex area slightly clearer. Cure and shape with a gentle taper toward the tip. Buff only the surface enough to remove texture, then apply pink chrome powder with a chrome applicator pad — rub in small circles so it evenly coats. Finish with a gel top coat that stays fully clear, then cure and wipe.
Jelly nails are the cheat code for that “Kylie nails before after” glow because they look like the light is sitting under the surface. The trick is a translucent pink base paired with a chrome overlay so it reads glossy, not flat. A clear-ish apex makes the nail look dimensional, which makes your fingers look smoother and more refined. This flatters fair to medium skin tones especially well, but it also looks good on deeper complexions when the pink is slightly more magenta than bubblegum. Keep the almond shape — it makes the jelly effect feel feminine instead of bulky.
Skip thisDon’t over-buff jelly — it turns from glassy to chalky fast.
Editor's noteIf your jelly looks too opaque, mix in a bit more clear builder next time and build in thinner layers.
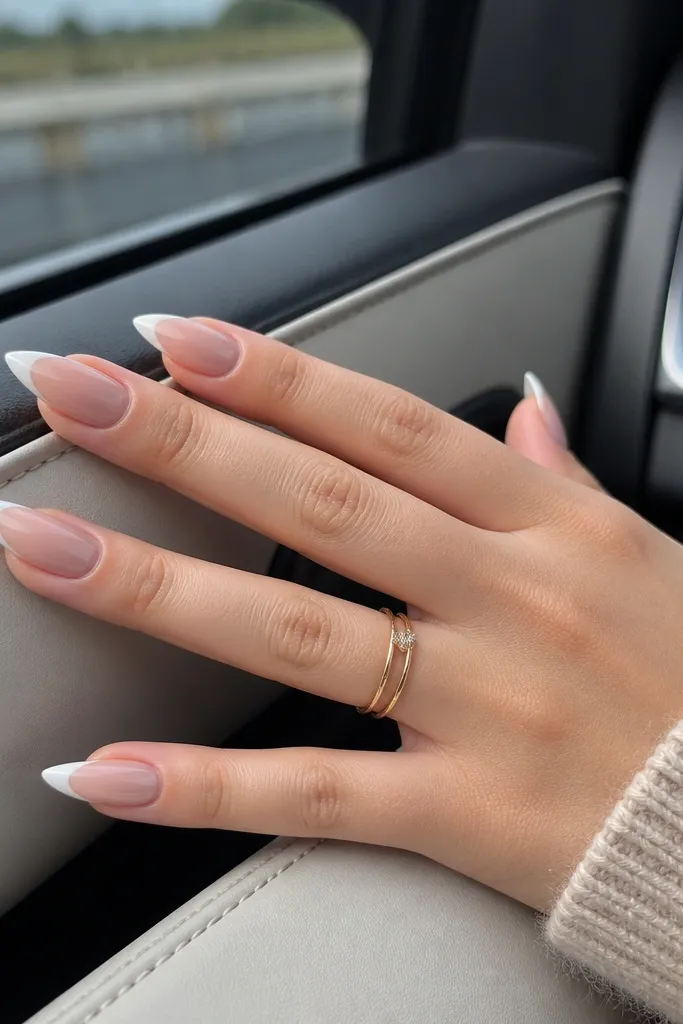
4. Milky White French Almond with Bare-Cuticle Gap
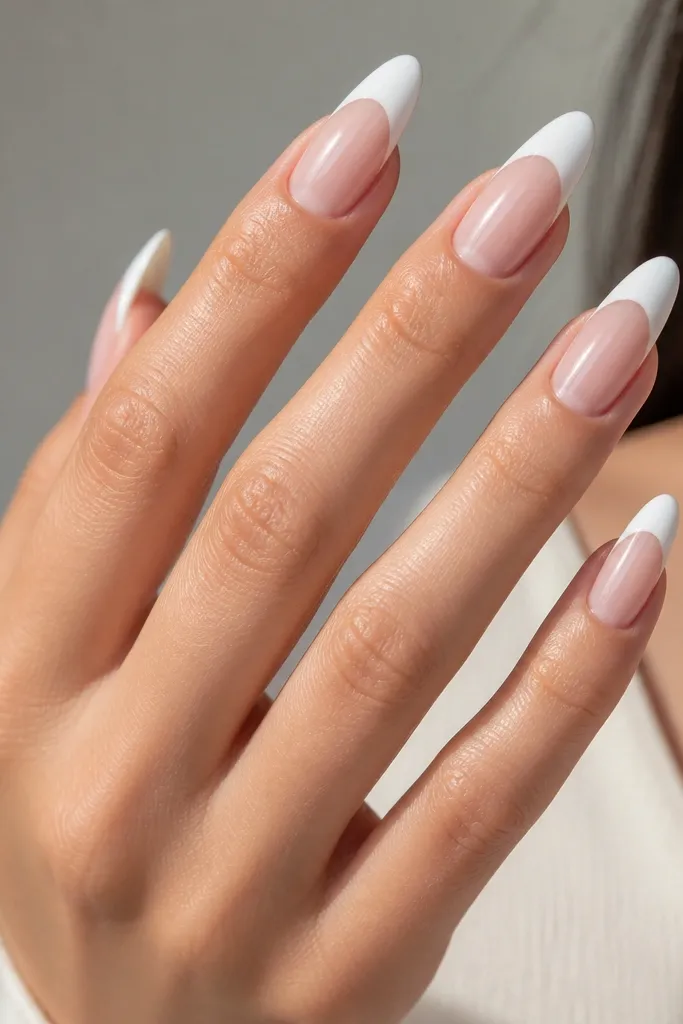
Start with a sheer nude base or clear builder gel so the nail looks natural. File your tip to a crisp almond point, then mark the smile line lightly with a French guide or a striping tape. Paint milky white acrylic or gel only on the tip, keeping the cuticle gap narrow and consistent. Seal with a gel top coat, cure, then check the sidewalls — wipe any excess so the white line stays sharp.
A French that hugs the tip and leaves a clean cuticle gap is the most “Kylie” classic I’ve done. The milky white looks softer than bright optic white, so it flatters hands without making them look harsh. The bare-cuticle gap makes the nail bed look longer because it removes visual clutter near the cuticle. This style works on every skin tone because the white is creamy, not stark. Choose almond and keep the smile line thin and even so it looks like a manicure, not a sticker.
Skip thisDon’t let the French climb too high toward the cuticle; it makes fingers look shorter.
Editor's noteUse a small angled brush and pull the white toward the sidewalls in one smooth stroke per nail.
5. Chocolate Brown Gloss Coffin with Satin Taupe Underside
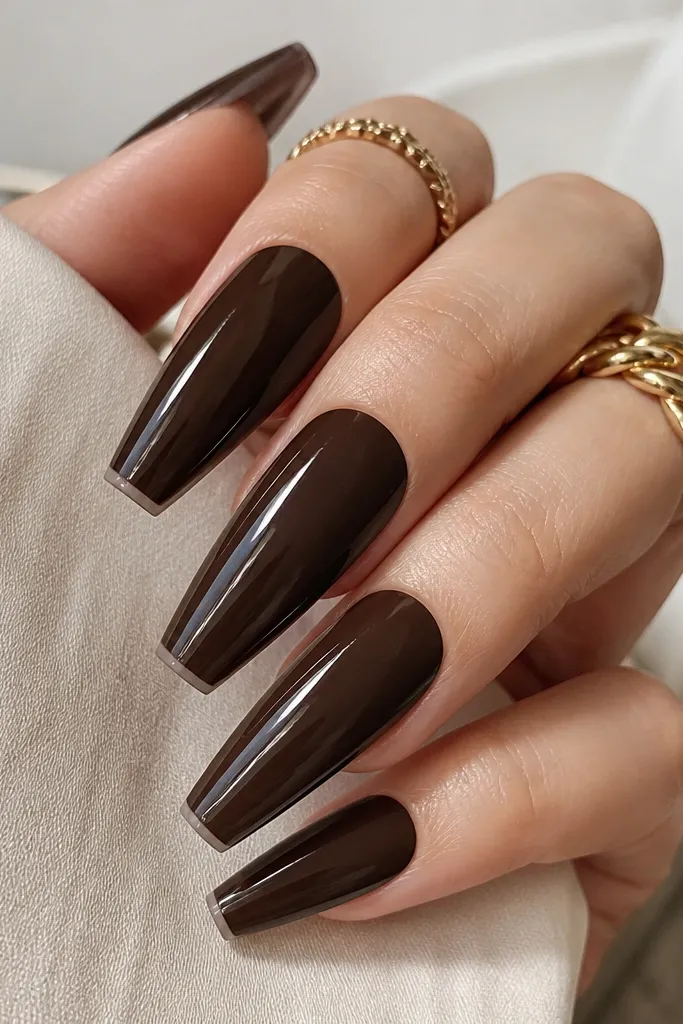
Build the acrylic with chocolate brown glossy powder or gel in a thin, even layer. Shape to a tapered coffin and keep the sidewalls clean. For the taupe, mix a light taupe satin acrylic or use satin-finish gel and apply it just at the underside near the free edge, not across the top. Cure, then buff the top surface lightly so it stays smooth. Finish with a high-gloss top coat on the top side only, so the underside contrast stays satin.
This is for the “warm glam” people who want statement without neon. The deep chocolate gloss makes the nail look rich, while the satin taupe underside gives a soft contrast that you only notice when the hand moves. It’s the kind of detail that makes your manicure look intentional in photos, not generic. I’ve worn it with gold jewelry and it pairs beautifully because the browns sit in the same warm family. Coffin shape helps the underside contrast show along the tip edge.
Skip thisSkip full coverage taupe; it turns into muddy brown instead of that subtle contrast.
Editor's noteWhen applying the satin underside, turn your hand sideways so the brush lays flat on the edge.
6. Ocean Blue Chrome Stiletto with Clear Waterline
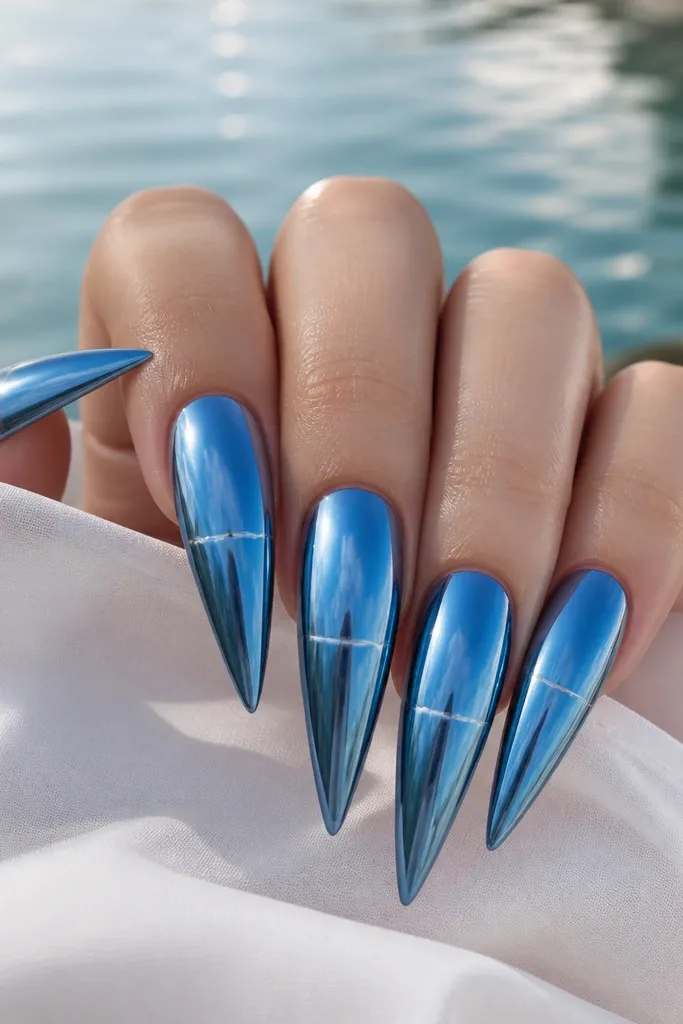
Start by prepping your nails and building a clear base coat so the chrome reflects evenly. Apply ocean blue chrome powder over a tacky gel layer, rub in carefully, and seal lightly with gel. To create the clear waterline, cover the exact line with clear gel using a striping tape as a guide, cure, then remove the tape. After that, re-seal with a final thin top coat so the waterline stays clean and not foggy.
This design looks like a close-up photo of the ocean because the chrome is the star and the clear waterline adds a graphic break. The clear line makes the nail look layered and makes the fingers look longer because it visually slices the nail into a higher and lower section. I like it on medium to deep skin tones because the blue pops without looking icy. Stiletto shape is the right pick here — chrome shows texture fast, so keep the surface smooth and the shape sharp. If you want Kylie-level drama, this is the one.
Skip thisDon’t add glitter over chrome; it dulls the reflection.
Editor's noteUse striping tape for the line — freehand waterlines always wobble on long nails.
7. Soft Sage Matte with Tiny White Dot Cuticle
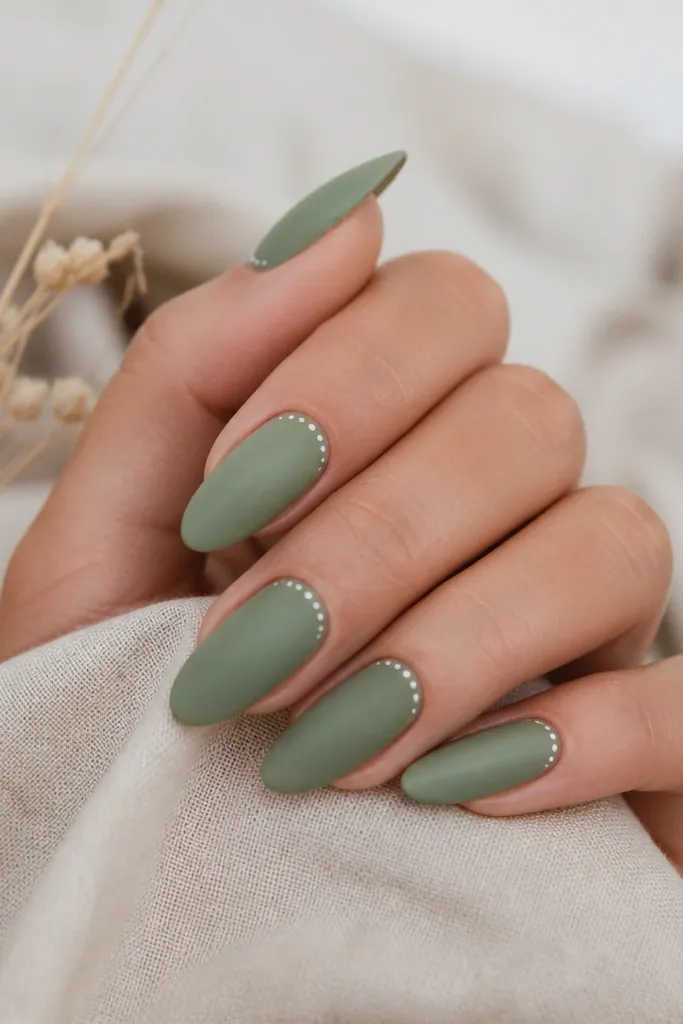
Apply a sage matte acrylic or gel in even layers, then shape to almond. Buff lightly to remove any bumps, then wipe with gel cleanser. Use a dotting tool to place 1-2 tiny white dots on each nail right along the cuticle line — keep them spaced so it looks intentional, not messy. Finish with a matte top coat, cure, and avoid adding gloss over the dots so the whole set stays consistent.
Matte Kylie-style nails look expensive when the color is calm and the detail is small. Soft sage is the sweet spot — it reads fresh instead of earthy, and it makes your hands look clean and modern. The tiny white dot cuticle adds a playful highlight without competing with the matte. This style flatters people who hate high-gloss because it hides small surface imperfections on the nail. Almond shape keeps it feminine, and the dot line keeps it from looking plain.
Skip thisDon’t add rhinestones on matte; they scratch and look dull in photos.
Editor's noteIf your matte looks patchy, apply matte top coat in two thin layers instead of one thick one.
8. Clear Nude with 3D Crystal Teardrop Accent
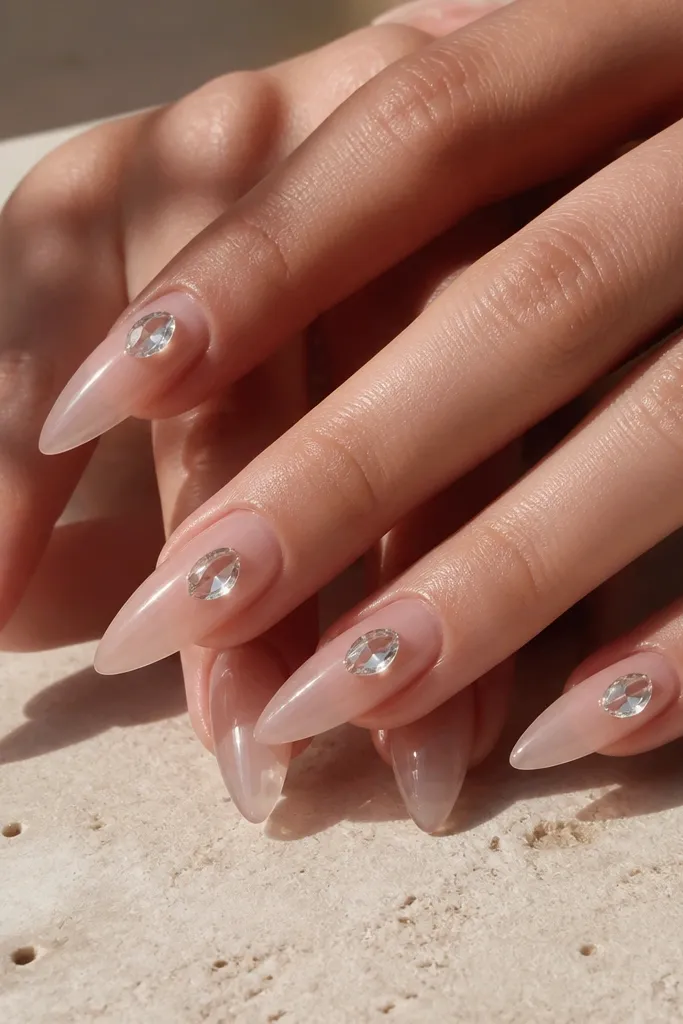
Start with a clear or sheer nude builder gel and build a gentle apex so the crystal sits on a stable surface. Cure fully, then shape to long almond or tapered coffin. Place one teardrop crystal per nail using nail glue or gel adhesive — dab glue on the base of the crystal only. Press gently and cure if using gel. Seal with a thin layer of top coat around the crystal edges, leaving the top of the crystal uncovered if you want maximum sparkle.
This is the “Kylie nails for a special event” look that still feels light. A clear nude base makes the nail look like your natural nail but longer and smoother, and the 3D crystal gives that flash when you move. Teardrop crystals look better than flat studs because they catch light from multiple angles. I’ve done this for weddings and birthdays, and it photographs like jewelry without needing rings. It also flatters short nail beds because the clear base doesn’t visually block the nail bed area.
Skip thisDon’t flood glue under crystals; it creates a cloudy halo under the top coat.
Editor's noteAngle the crystal so the point faces the tip of your nail — it looks more natural and less random.
9. Black Milk Nails with Gold Foil Heart Charm
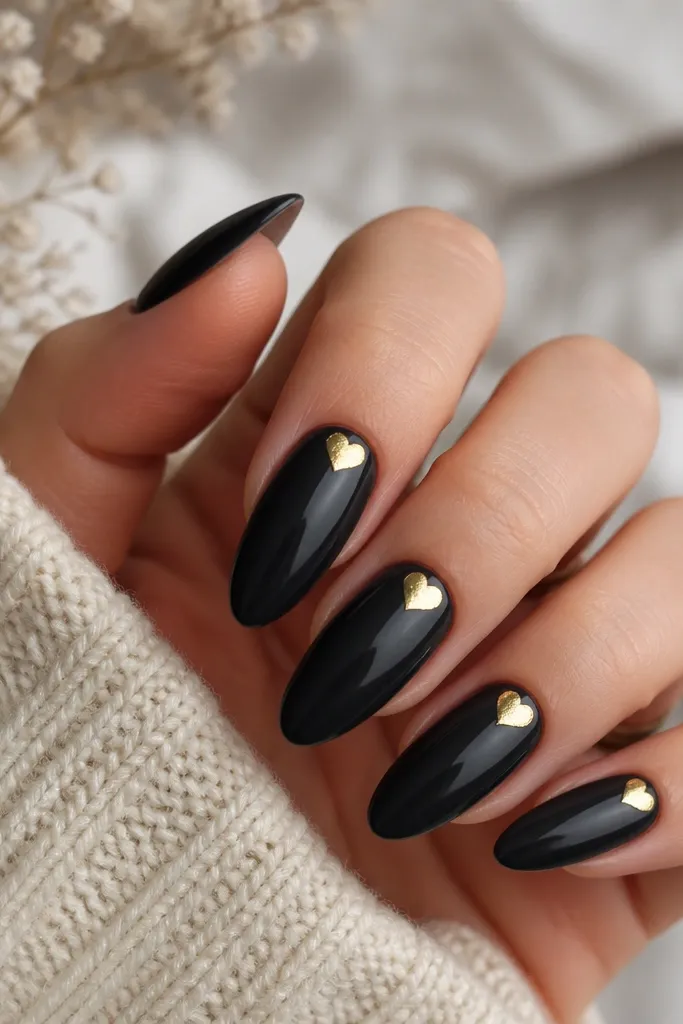
Apply black milky acrylic or gel in two thin layers so it stays smooth and not streaky. Shape to almond and refine the apex so the surface is even. Add a small gold foil heart using a pre-cut foil sticker or stamp — place it slightly off-center near the cuticle. Seal carefully with top coat, using a brush to glide over the heart without pushing it around. Cure and wipe so the foil stays crisp.
Milky black is softer than straight black and it makes the gold heart look like jewelry. The heart charm near the cuticle is a sweet spot — it’s high enough to look intentional, but not so high that it crowds your cuticles. Gold foil in a heart shape adds texture and sparkle without needing a heavy 3D gem. This works best when your nail shape is almond so the heart looks delicate, not bulky. I wear this when I want something dark but still cute.
Skip thisSkip full gold foil coverage; it stops reading as a heart and turns into a blob.
Editor's noteIf the heart edges look soft, add the top coat in thin coats instead of one heavy layer.
10. Hot Pink Gloss Coffin with Micro-Glitter Fade
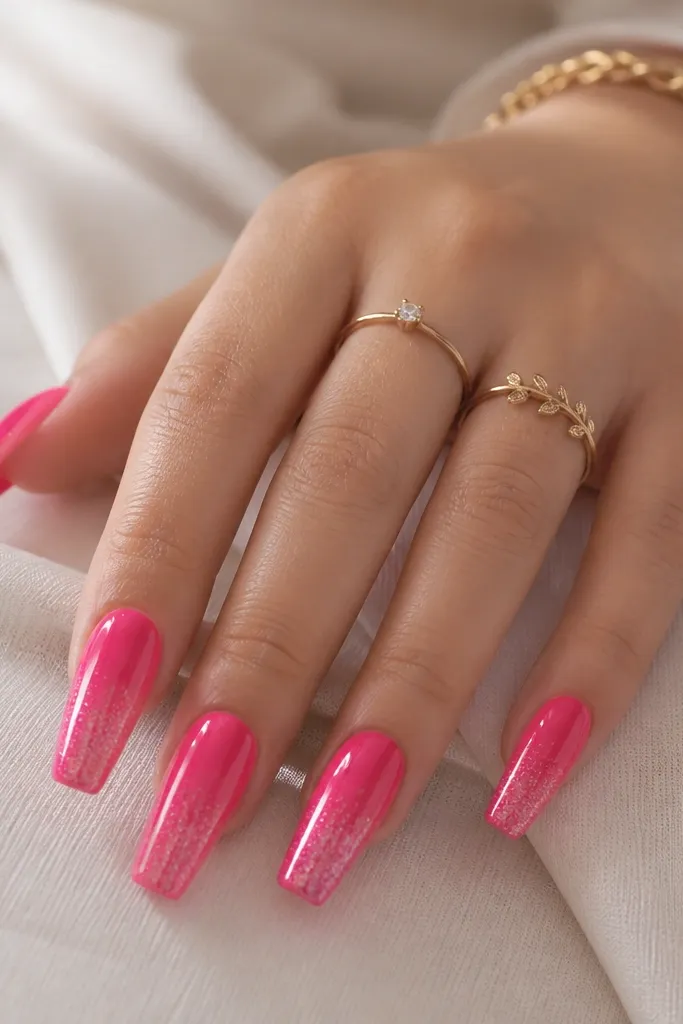
Start with a solid hot pink base in glossy acrylic or gel and build the apex normally. Shape to coffin with a slightly wider tip than your sides so the glitter has a place to sit. Dab micro-glitter gel at the very tip and blend upward 1/3 of the nail — use a sponge tip or a small brush for control. Cure, then seal with high-gloss top coat in two thin layers. After curing, wipe and check for any glitter texture on the sidewalls.
Hot pink plus a micro-glitter fade is the easiest way to get that “statement” look without going over the top. The glitter at the tip makes the nail look longer and gives movement when light hits. I like micro-glitter specifically because it stays premium-looking under top coat; big chunky glitter turns gritty fast. This style flatters medium to deep skin tones and also looks great on fair skin if you use a slightly warm hot pink rather than neon. Coffin shape makes the fade look intentional, like a controlled ombre.
Skip thisDon’t put glitter all the way to the cuticle; it reads messy and grows out fast.
Editor's noteBlend the glitter using a clean brush dipped in gel — it helps the fade look smooth, not speckled.
11. Pearl White Opal Chrome Almond with Clear Sidewalls
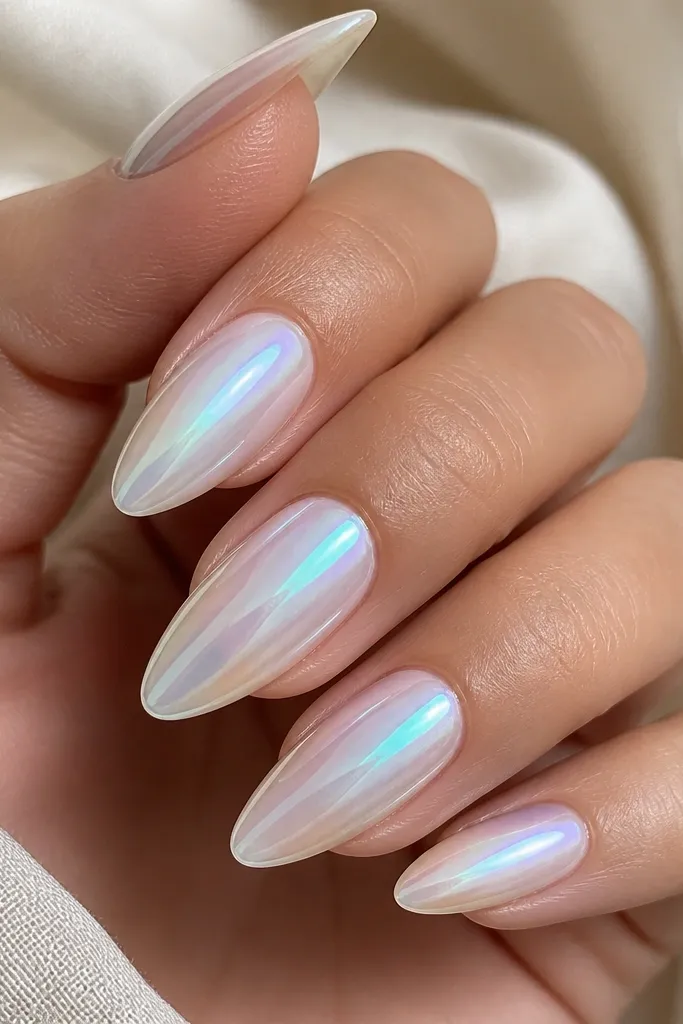
This is a soft-luxury set that looks like opal jewelry. The pearl white opal chrome has a shifting glow that changes with every angle, which is why it looks so good in “before and after” photos. The clear sidewalls add a clean frame around your nail bed, so the nail looks lighter and longer. I’ve seen this work on both short and wide nail beds because the clear edges reduce bulk visually. Choose almond so the chrome stays smooth and doesn’t look like a sticker. The result feels calm but still very Kylie.
Apply a clear base or sheer nude, then build a thin pearl white layer on top. Shape to almond and keep the sidewalls neat. Apply opal chrome powder over the pearl base — rub and buff lightly so it stays even. Before sealing, use a fine brush to paint a thin line of clear gel along each sidewall edge, then cure. Finish with gel top coat to seal the chrome and keep the opal shift intact.
For opal chrome, keep your buffing light — too much buffing dulls the color shift.
Don’t use thick pearl paint under chrome; it creates a chalky halo.
12. Creamy Nude Acrylic with 3D Pink Rosebud Clusters
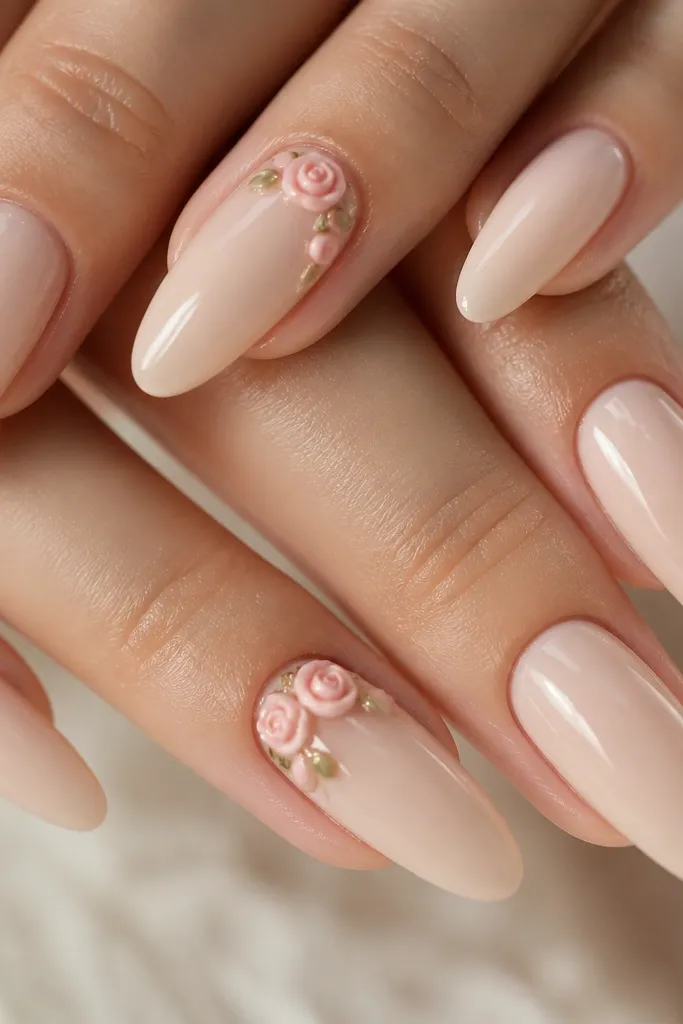
Start with a creamy nude acrylic or builder gel and build a smooth apex. Shape to long almond and keep the free edge thin so it doesn’t look stubby under the art. Place one rosebud cluster on two nails: dab gel adhesive at the base of the buds and press gently. Add one small leaf or bud at most to avoid bulk. Seal with top coat carefully around the edges and cure, then do a final thin coat so the flower outlines stay defined.
Rosebud clusters look romantic, but they can also look heavy and messy if you place them wrong. On a creamy nude base, the 3D pink flowers pop without overpowering your whole hand. I keep the clusters small and concentrated — usually one accent nail per hand — because too many buds look like nail art overload. This set flatters people who like feminine details and want something that still matches everyday outfits. The nude base is key: go creamy and opaque enough to hide unevenness, but not too beige.
Skip thisAvoid putting clusters on every nail; it ruins the “clean Kylie” balance.
Editor's noteIf the flowers lift after a week, your base was too slick — roughen the flower placement spot lightly before sealing.
13. Lavender Lilac Gloss with Aurora Foil Swirl
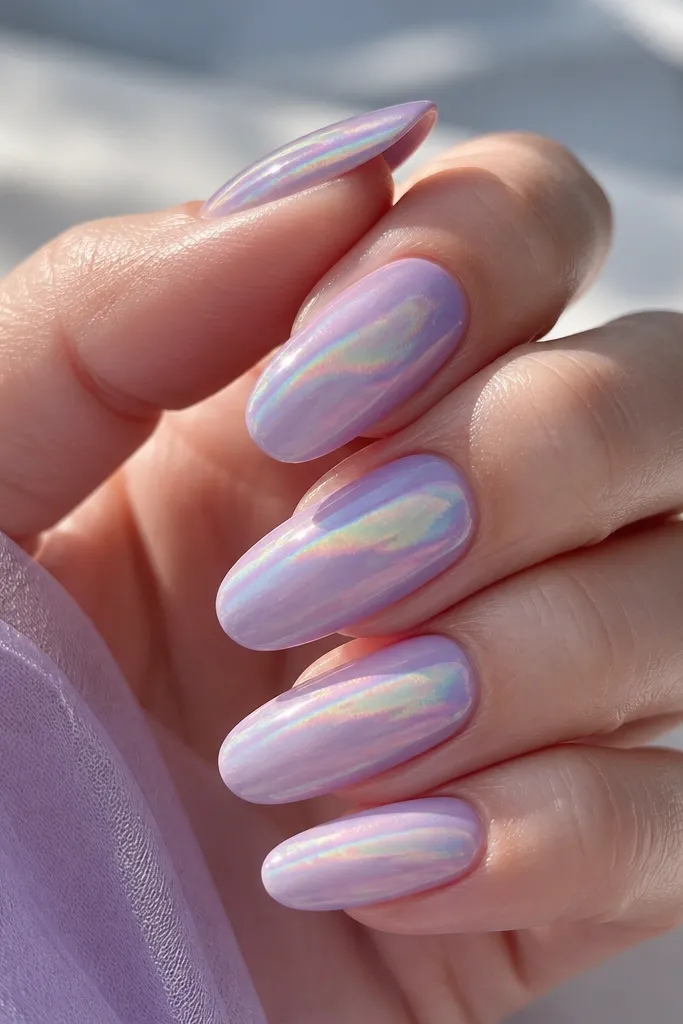
Build a glossy lavender acrylic base and shape to tapered coffin or almond. Apply a tacky gel layer in the area you want the swirl. Place aurora foil strips lightly, then press and drag with a silicone tool to form a swirl shape across the center. Cure and wipe, then seal with a thick-ish gel top coat so the foil edges don’t catch on fabric. After curing, file only the top surface if needed to smooth the swirl line.
Aurora foil swirls look like they’re moving because the colors shift over the lilac base. The lavender gloss gives a smooth, romantic foundation, and the swirl placement makes the nail look longer by directing the eye diagonally. I like this for spring events and nights out because it reads soft in daylight and sparkly under flash. It also flatters fair skin and looks stunning on medium skin because lilac brings out pink undertones. Keep the foil swirl thin and curved, not thick and blocky, so it stays chic.
Skip thisDon’t cover the swirl with a matte top coat; it kills the aurora effect.
Editor's noteUse a small scrap of foil and build the swirl in layers; one heavy layer looks flat.
14. Smoky Taupe Chrome with Black Micro-Lines
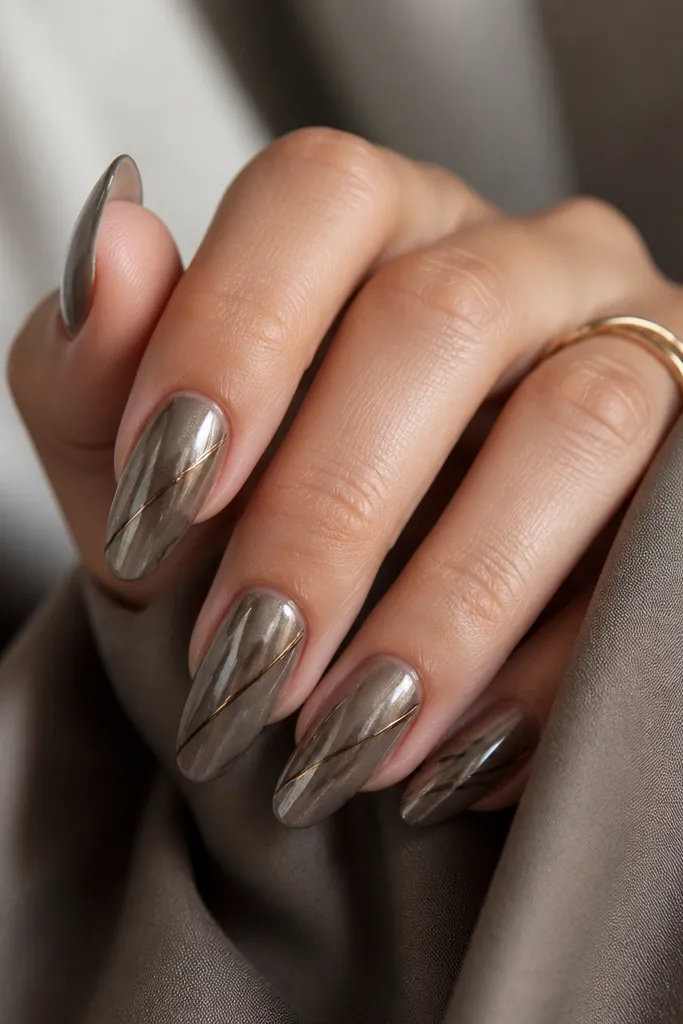
This is the “quiet luxury” Kylie vibe I keep coming back to. Smoky taupe chrome gives you that reflective glow without screaming for attention, and black micro-lines add graphic structure. The lines make the nail look longer because they guide the eye from cuticle toward tip in a diagonal direction. This set flatters almost any skin tone because taupe sits in the neutral lane, and the black lines create contrast. Almond shape keeps it sleek, so the chrome doesn’t look too sharp.
Apply a taupe chrome base over a sheer nude or clear primer. Keep the chrome layer smooth and fully cured so it doesn’t crack under line work. Use a fine liner gel in black and draw 2-3 micro-lines per nail diagonally — keep them thin and spaced. Cure after line work, then seal with a gel top coat in a thin but even layer. Check the surface under a lamp; micro-lines should look raised only if you use a gel line thick enough to hold texture.
If your lines smear, wipe your liner brush on a paper towel before each nail and cure the base longer.
Avoid thick marker-like lines; they turn into clumps on long nails.
15. Clear Jelly Pink with Gold Half-Moon Tips
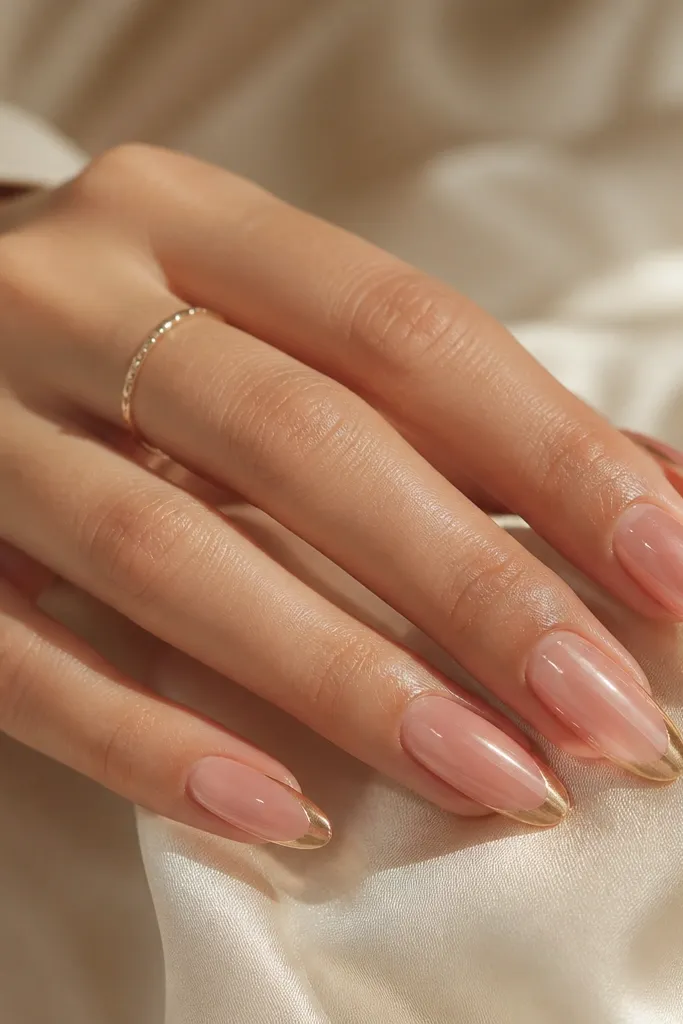
Start with a clear builder gel base and build translucent jelly pink around it, keeping the apex gentle. Shape to long almond and wipe for tack. Use a curved half-moon guide or a thin French guide at the tip edge, then paint gold gel inside the guide. Cure, remove the guide carefully, and clean any gold bleed. Seal with a clear high-gloss top coat so the jelly stays see-through and the gold stays reflective.
This set is pure “Kylie nails before after” because it looks like you grew your nails out perfectly. Clear jelly pink makes your nail bed look clean and natural while still giving color. The gold half-moon at the tip is a jewelry trick — it frames the free edge and makes the tip look crisp. I’ve done this on clients with short-looking nail beds and the half-moon effect stretches the visual length. It also works for both casual and dressy outfits because gold feels neutral and the jelly base stays light.
Skip thisDon’t make the gold half-moon too tall; it should sit at the tip edge, not take over the nail.
Editor's noteIf you want the gold to look more like foil, apply gold gel in two thin layers rather than one thick coat.