1. Glass-Gloss Jet Black Almonds with Micro Shine Topcoat
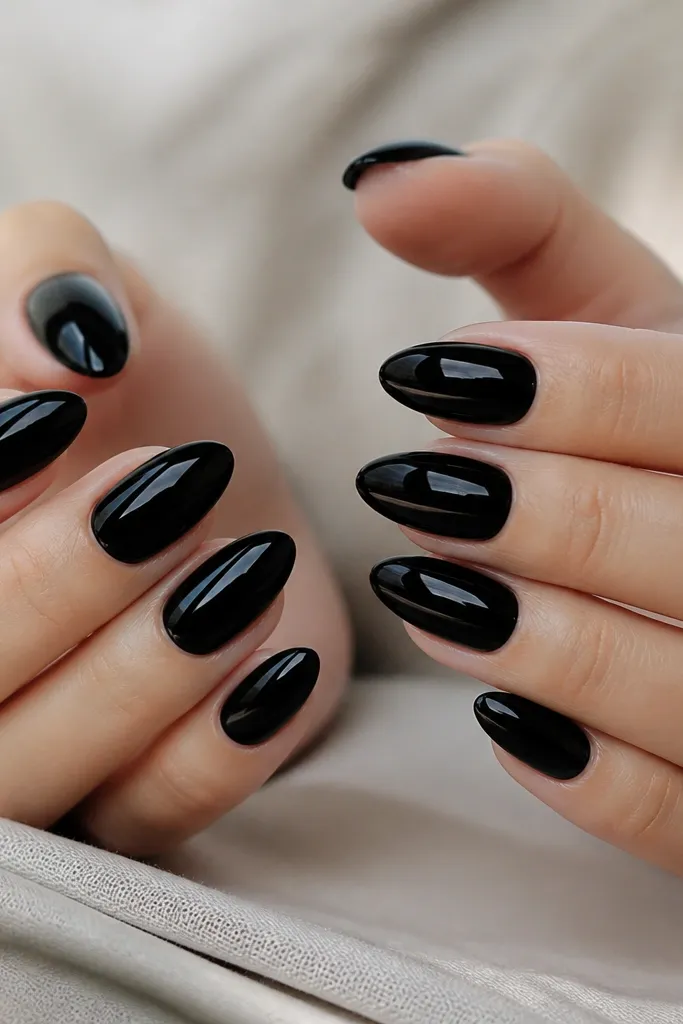
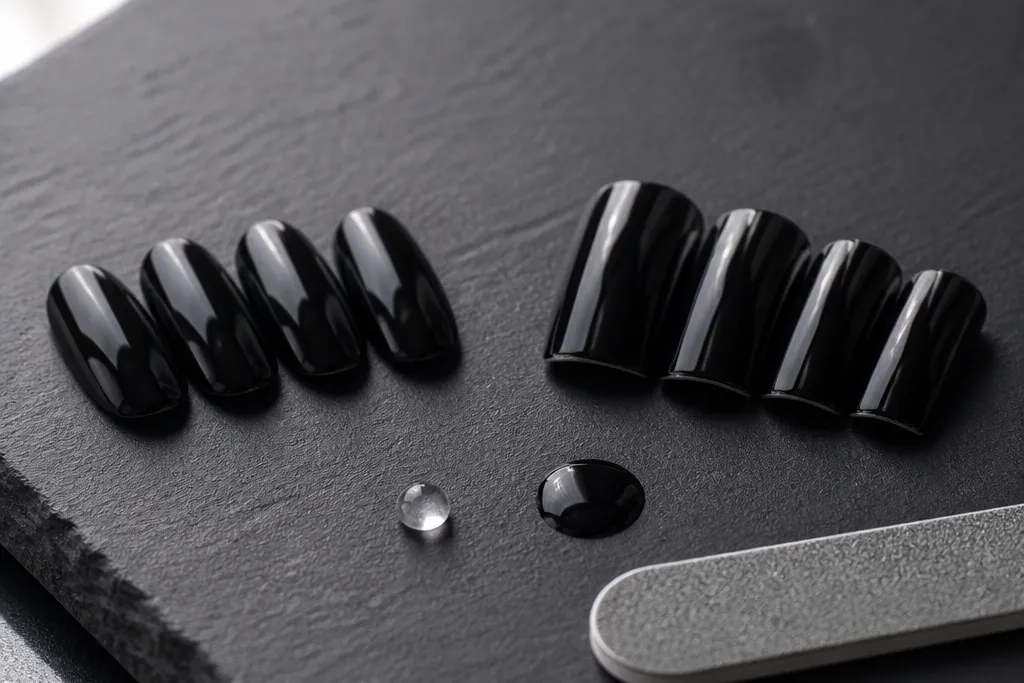
Start with an almond shape because it makes black look longer and softer at the same time. I like a true jet black (not charcoal) because it reads bold under indoor lighting and still looks deep outdoors. This set works on fair, medium, and deep skin tones because black is the anchor color; the shine does the flattering. If you’re choosing kylie jenner nails vs acrylics, this design is easiest to keep neat with acrylic or a gel overlay because it stays level and glossy. The styling principle is simple: one color, one finish, and a hard gloss topcoat.
File your nails into a medium almond, keeping the sides straight and the tip rounded, not pointy. Apply two thin coats of opaque black, letting each coat level before curing or drying. For the top, use a thick, high-gloss gel topcoat (or acrylic-friendly shine top) and cure until it feels hard and slightly tack-free. Wipe with a lint-free pad only if your system requires it, then lightly buff the surface with a very soft buffer to remove any tiny texture. Finally, clean up the cuticle line with a small brush dipped in acetone and wipe off right away.
Ask for a “level topcoat” finish so you don’t get ripples that catch the light in photos.
Avoid thick black coats — they dry bumpy and look cheap up close.
2. Kylie-Style Black French Tips on Squoval Nude Base
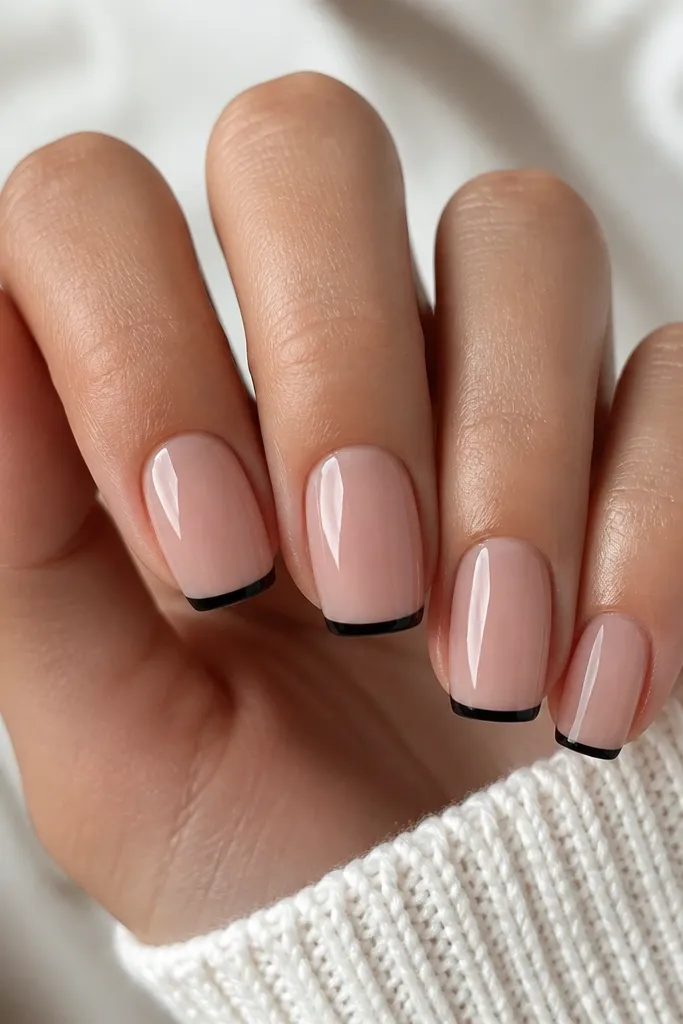
This look gives you that Kylie “clean but edgy” vibe because the nude base makes the black tips look sharper. Squoval is my pick when you want the set to feel wearable — it doesn’t stab your cuticles like a stiletto shape. It flatters short fingers and wider nail beds because the straight sidewalls make your nails look more even. On skin tones, the nude base should match your undertone: pinky nude for cool tones, beige nude for warm tones. If you’re comparing kylie jenner nails vs acrylics, acrylic is great here because it can build a smooth nail bed for the nude base and keep the French line crisp.
Start with a sheer nude builder gel or nude polish that matches your undertone, then cure/dry it fully. Use a French tip guide or freehand with a striping brush to paint a thin black line at the tip, keeping the curve subtle and consistent. Paint two black layers only where needed so the French looks opaque without getting thick. Seal the whole nail with a glossy topcoat and cure/dry it until it levels. Finish by cleaning the sides with a small brush and wiping any gel residue right after curing.
Editor's noteKeep the black French tip around 1.5-2 mm wide so it reads “designer” instead of chunky.
Skip thisDon’t smear black over the nude cuticle line — even a tiny wobble stands out.
3. Matte Black Coffin Nails with One Gloss Accent Ring
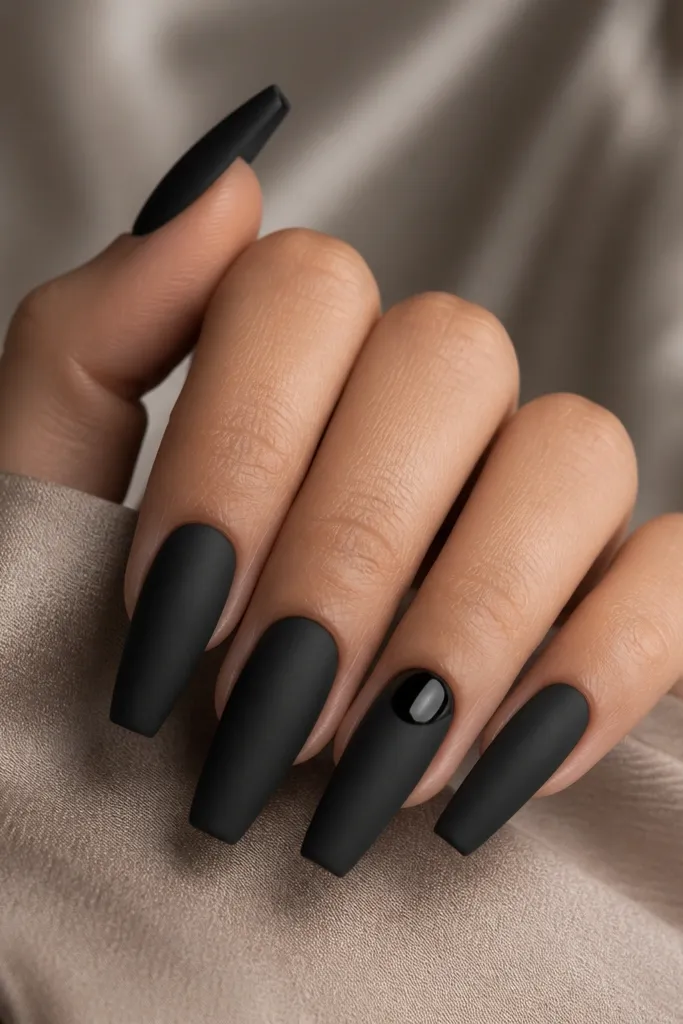
Matte black on coffin nails looks like a fashion shoot. The coffin shape makes the matte finish look sleek, and the matte surface hides tiny natural ridges better than gloss. This set flatters medium to long nail beds because you get clean negative space around the edges. I recommend it for anyone who wants bold without adding extra length drama. If you’re choosing kylie jenner nails vs acrylics, matte is easier to keep even on acrylic because the surface is already smooth before the topcoat. The styling principle is contrast: matte base, one glossy focal point.
Shape to a coffin tip that’s squared at the base and gently tapered, then buff lightly for adhesion. Paint all nails with opaque black in two thin coats. Let it cure or dry completely, then apply a matte topcoat on every nail except the ring finger. On the ring finger, use a glossy topcoat on just a small oval or half-moon panel near the cuticle, then leave the rest matte. Cure the matte top fully, then clean the cuticles with a wipe-soaked cotton swab.
Pick the accent nail based on your most photographed finger — for me it’s always the ring finger.
Avoid mixing matte and gloss on the same nail without a clear boundary — it looks messy.
4. Black Chrome Almond Nails with a Soft Silver Fade
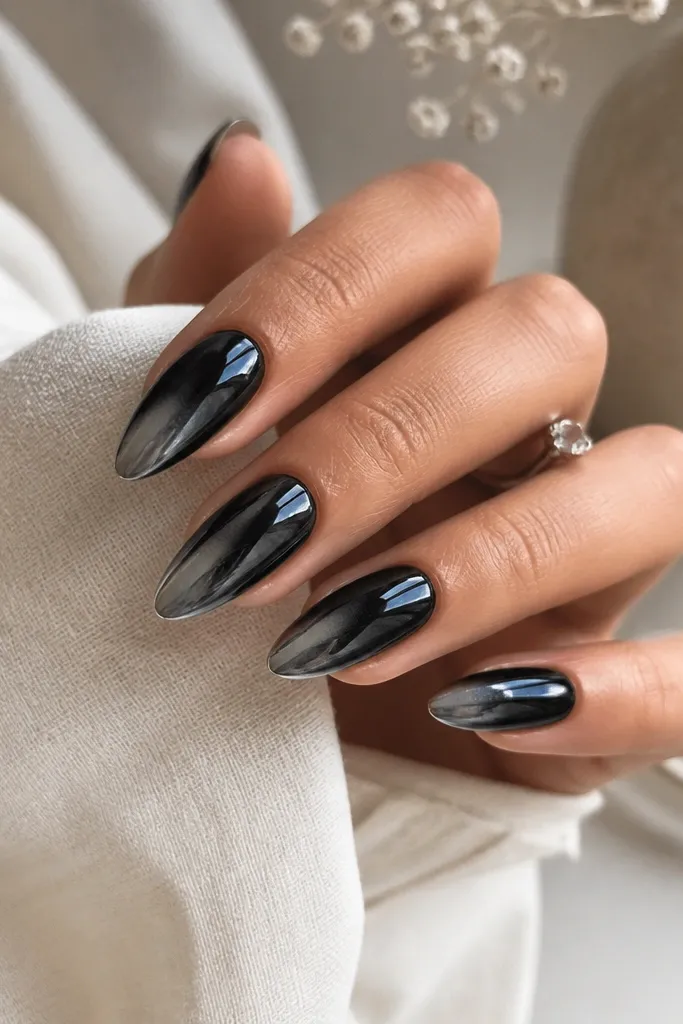
Chrome makes black look expensive because it turns every movement into a highlight. I like the soft silver fade at the tips because it mimics the way chrome catches light, and it keeps black from looking flat. Almond shape keeps it feminine, especially if your fingers are longer or your nail beds are narrow. This works on all skin tones because the chrome reflects, and the silver adds brightness near your fingertips. If you’re deciding between kylie jenner nails vs acrylics, chrome is more forgiving on acrylic because the surface is smoother for even reflection.
Paint a deep black base first (gel or acrylic-compatible black). When it’s tacky or fully cured depending on your system, apply black chrome powder or chrome gel using a sponge applicator, then buff lightly. For the silver fade, tap a small amount of silver chrome powder on the top half of the nail tips and blend with a gentle circular motion. Seal with a chrome-safe topcoat if your system needs it, or leave it uncapped if your product line says so. Finish by filing the sides so the chrome doesn’t build up at the cuticle ridge.
Use a makeup sponge for the fade — it gives a soft gradient that looks like salon work.
Don’t over-buff chrome — you’ll lose the reflective look.
5. Black Velvet Nails with Half-Moon Cuticle Detail
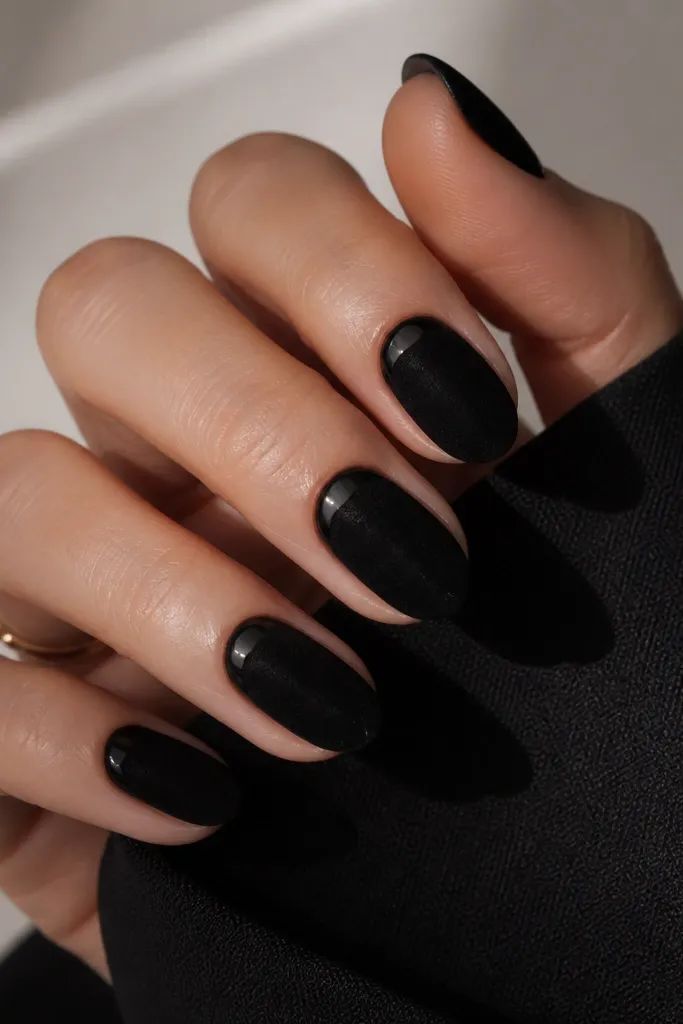
Velvet nails look like they have airbrushed texture. The matte, fuzzy finish makes black look rich without needing length, and the half-moon glossy cuticle detail gives you that Kylie “intentional framing” effect. This is flattering for hands that look dry because the texture visually smooths the look of the nail surface. I like almond for velvet because it keeps the texture from looking too bulky. If you’re choosing kylie jenner nails vs acrylics, acrylic is great for velvet because it creates a uniform platform for the powder to sit on.
Shape to a medium almond and prep with a dehydrator and primer/bonding step if you’re using acrylic. Apply a black base gel and cure fully. Apply velvet powder over the tacky layer in small sections, then tap off excess and brush gently. On the cuticle half-moon, use glossy black gel instead of velvet powder so you get a clean shine arc. Seal carefully if your velvet system requires sealing, or leave it as-is if it says not to cap.
Keep the half-moon shape tight — around 1-2 mm of glossy line — so it looks crisp.
Don’t press the velvet powder down hard — you’ll flatten the texture.
6. Negative Space Black Nails with Clear Center Stripe
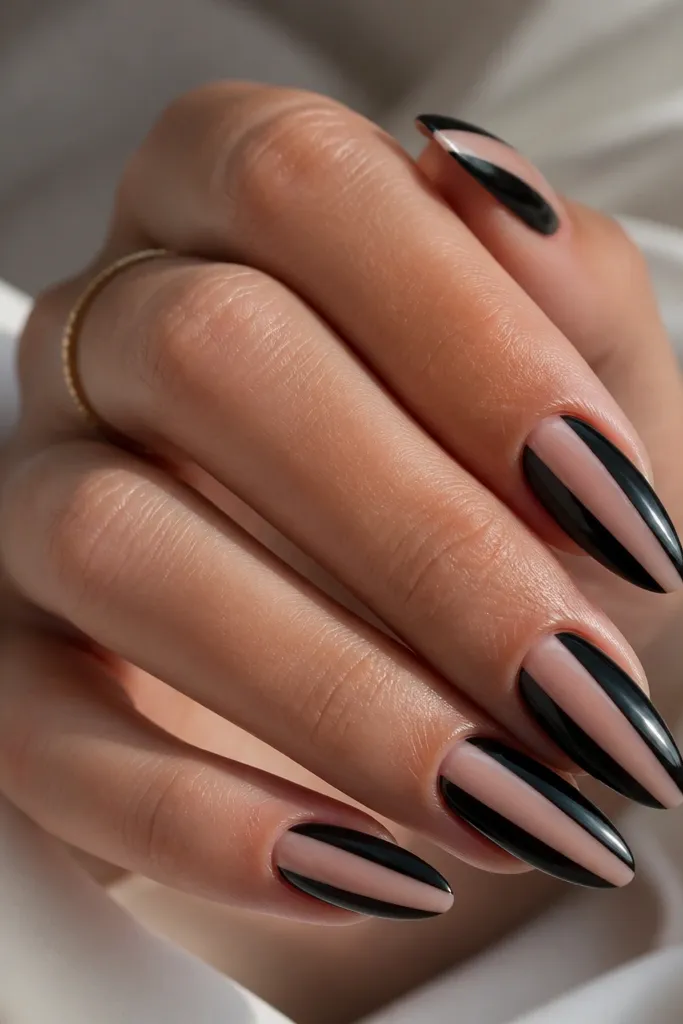
Negative space makes black look modern instead of heavy. The clear center stripe draws the eye down your nail and makes fingers look longer, especially if your nails are on the shorter side. This set flatters different skin tones because the clear base matches your natural nail and the black stays as the structure. It’s also a great choice if you’re deciding between kylie jenner nails vs acrylics because press-ons with a clear base can work, but acrylic gives you the smoothest sidewalls. The styling principle is framing: black borders, one clear strip.
Use a clear builder gel or sheer nude base and cure until it’s smooth. Paint two black side panels along the left and right edges, leaving the center stripe completely clear. Keep the black panels narrow near the cuticle and slightly wider toward the tip for a tapered look. Use tape or a thin striping brush to keep the edges straight. Seal with a glossy topcoat and cap the free edge so the clear stripe stays protected.
Editor's noteOutline the clear stripe first with a tiny brush, then fill the sides — it’s faster than fixing mistakes.
Skip thisAvoid thick black side panels — they make the nail look wider than it is.
7. Black Onyx Marbling on Short Squoval
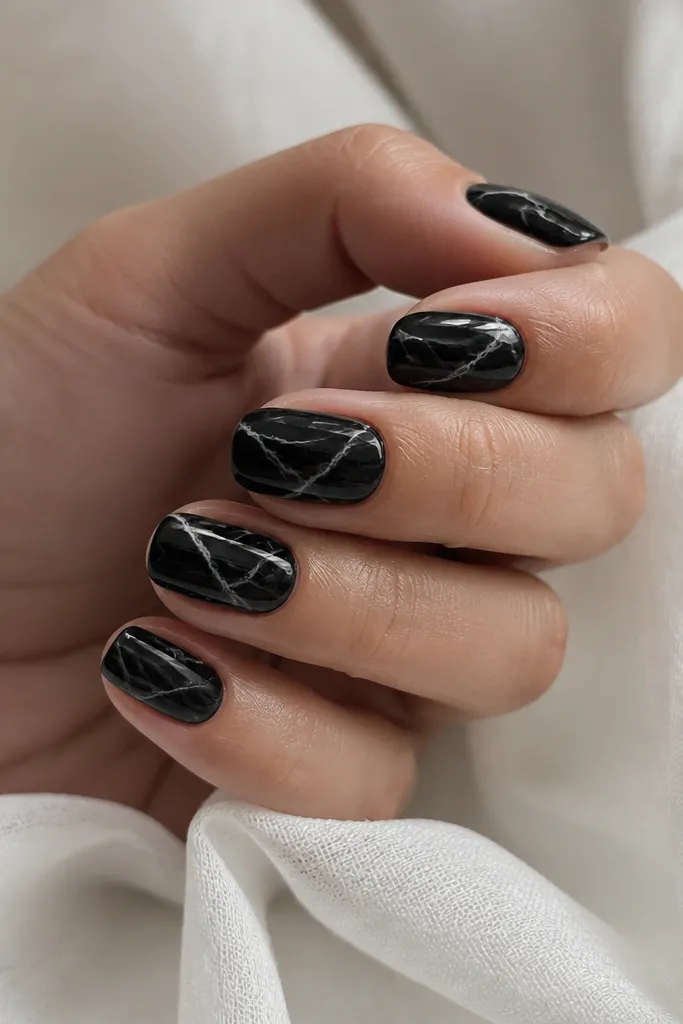
Onyx marbling is the closest thing to “expensive black” without going full gems. The thin gray-white veins break up solid black and look great on shorter nails because the lines create movement. Squoval keeps it practical for daily life and still matches the Kylie edgy vibe. This set looks especially good on medium and deep skin tones because the white-gray veins pop. If you’re choosing kylie jenner nails vs acrylics, acrylic is a win here since you can build a smooth top layer for the marble lines to sit on without sinking.
Start with a solid black base in two thin coats. Add marble lines using a thin liner brush with diluted gray polish or a white-gray gel mixture. Drag the lines in random but controlled paths, then add a few thicker veins for depth. Use a marbling technique by placing one drop of lighter color on a palette, then picking up tiny amounts so the lines stay hair-thin. Seal with a glossy topcoat and cure fully so the marbling looks trapped under glass.
Editor's noteKeep the veins sparse on the thumb and index fingers — too much marble makes it look muddy.
Skip thisDon’t use pure white thick strokes — it turns into cartoon lightning.
8. Jet Black Gloss with Tiny Silver Studs at the Tip
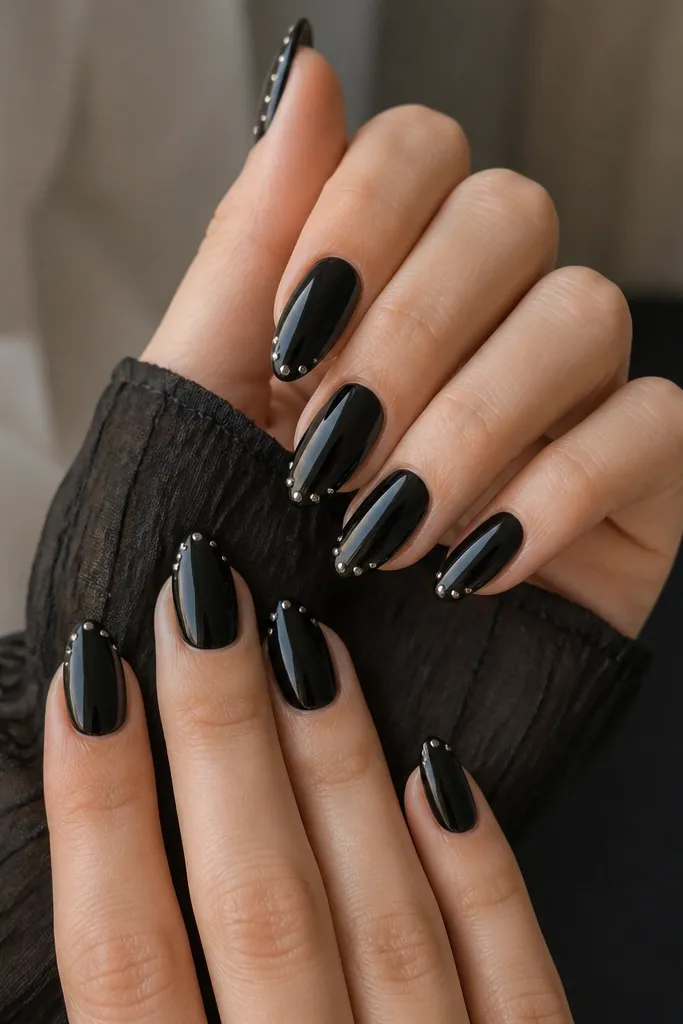
Studs give you that Kylie “night out” detail without covering the whole nail. I like tiny silver studs at the tip because they catch light when you move your hands, and they don’t overwhelm short fingers. Almond shape keeps the sparkle neat and lifted. This set flatters just about everyone because the studs are small and the base is solid black — the contrast is controlled. If you’re comparing kylie jenner nails vs acrylics, acrylic holds studs more securely when you drill or set them into a thin layer of gel, reducing snagging.
Paint two coats of glossy black and cure fully, then apply a thin layer of builder gel on the tip area only. Place 2-3 tiny silver studs per nail along the outer edge, angled slightly toward the center so they look intentional. Cure after each nail placement so studs don’t slide. Cap the studs with a thin layer of clear gel and cure again to smooth the surface. Finish with a glossy topcoat over everything for a uniform shine.
Editor's noteUse tweezers with a fine point and press each stud for 3-4 seconds so it seats flat.
Skip thisDon’t leave studs uncapped — they snag on hair and fabrics fast.
9. Matte Black + Glossy Micro French Tips
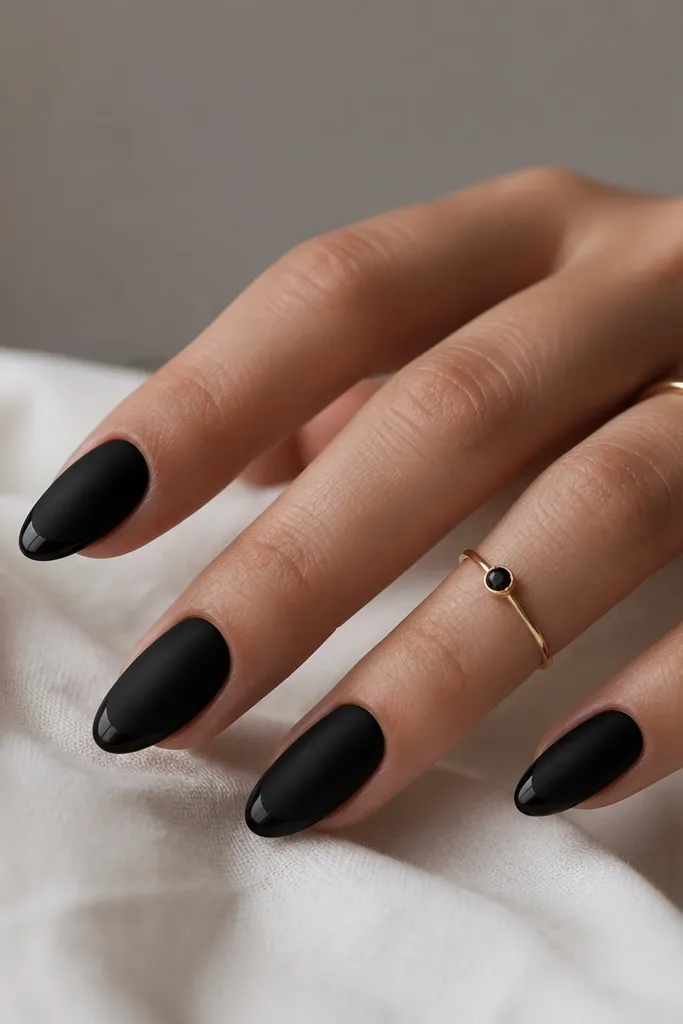
This set is for people who want black that looks clean in daylight and still interesting in photos. The matte base kills shine, while the glossy micro French line adds a razor-thin highlight that makes the nail shape look sharper. Almond or squoval both work, but almond looks more “Kylie” to me. It flatters hands with uneven natural nails because matte hides small surface texture. If you’re choosing kylie jenner nails vs acrylics, acrylic is the easiest way to get a perfectly flat matte base so the micro French line looks straight.
Apply matte black in two thin coats and cure/dry fully. Add matte topcoat across the entire nail and cure. With a striping brush, paint a tiny glossy line right at the tip edge using glossy black gel or a glossy topcoat mixed with black. Keep the line thickness around the width of a fine brush bristle, then cure. Clean any edge smudges with a damp lint-free wipe before finishing with one last glossy seal only on the micro French area.
Editor's notePractice the line on one nail first — the micro French is where most people rush and wobble.
Skip thisAvoid painting the micro French too wide — it turns into a chunky French.
10. Black Cat-Eye Nails with a Straight Silver Rail
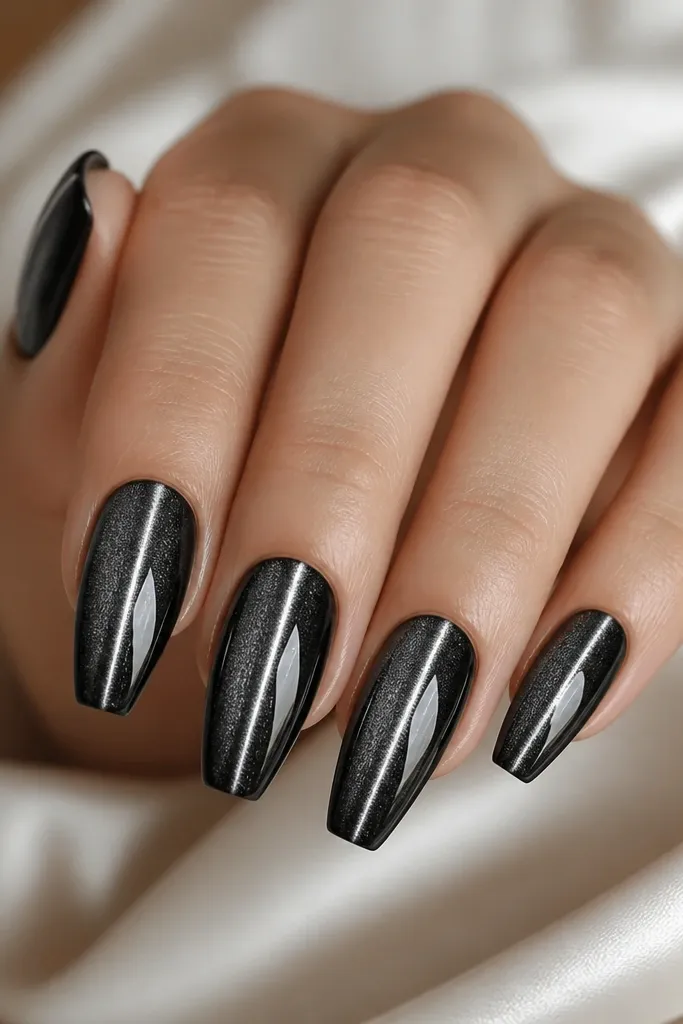
Cat-eye gel is instant drama, and a straight silver rail makes it look intentional instead of smoky. Coffin nails make the highlight feel long and sleek, especially when the rail is centered. This set flatters medium and deep skin tones because the silver line brightens the hand. If your nails are shorter, cat-eye can still work because the highlight draws the eye upward. When you’re deciding kylie jenner nails vs acrylics, acrylic is helpful if you want extra length because it gives you a stable base for the highlight to stay aligned after filing.
Apply a black cat-eye base gel in a thin layer and cure until tacky or per your gel’s instructions. Place the magnet directly above the nail for the exact time listed for your product, keeping it centered so the highlight forms a straight line. Add a second thin cat-eye layer if the rail needs more intensity, then cure again. Seal with a glossy topcoat and cure fully to lock the shine. File the sides lightly after topcoat if needed so the rail stays crisp and centered.
Mark the center of your nail with a dot using a gel pen before you magnet — it makes symmetry easier.
Don’t magnet at an angle — it turns the rail into a curve.
11. Black Glitter Fade Ombré on Almond
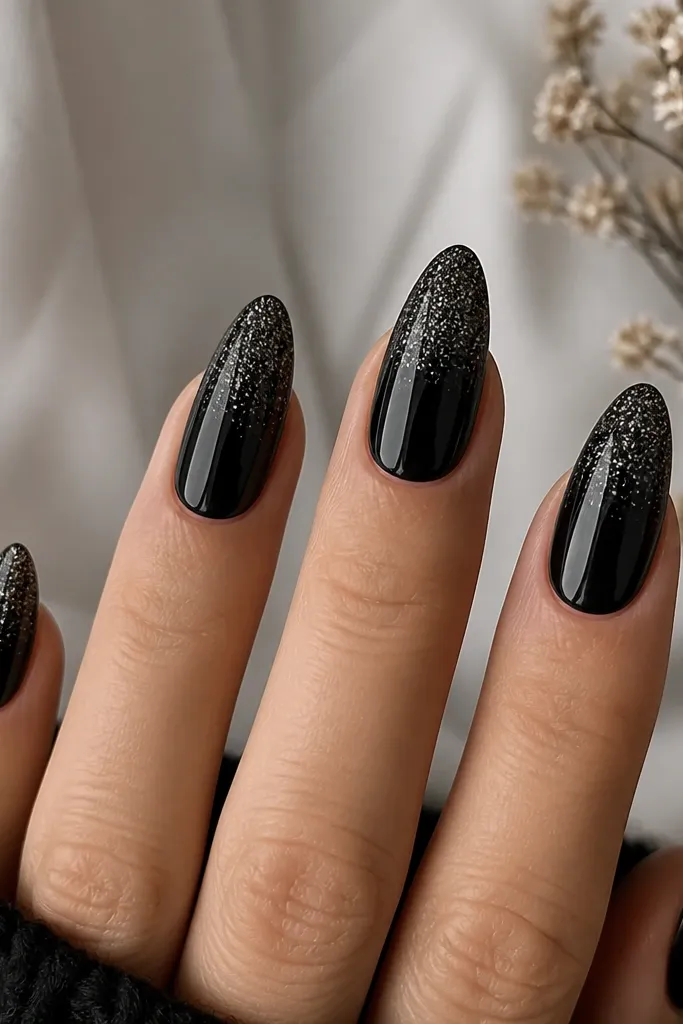
A black glitter fade looks like Kylie’s “soft glam edge” because it’s still black but has movement. The ombré placement at the tips makes your nails look longer and hides any unevenness near the cuticle. Almond shape is the best match because the gradient has room to blend. This works on fair and deep skin tones since the glitter catches light instead of relying on contrast. If you’re comparing kylie jenner nails vs acrylics, acrylic is great if you want a longer fade that stays smooth without thinning at the edges.
Start with an opaque black base and cure/dry fully. Add a thin layer of clear gel at the tip area only, then press glitter into it. Use a makeup brush to pull the glitter upward slightly so it fades, not sharply stops. Repeat with a second layer only where you want more sparkle at the very tips. Seal with a glossy topcoat, making sure you cap the free edge so the glitter doesn’t shed.
Editor's noteUse fine black glitter, not chunky — it blends cleaner and looks more expensive.
Skip thisAvoid piling glitter at the cuticle — it looks gritty and hard to clean.
12. Black Lacquer with Chrome Half-Moon at the Cuticle
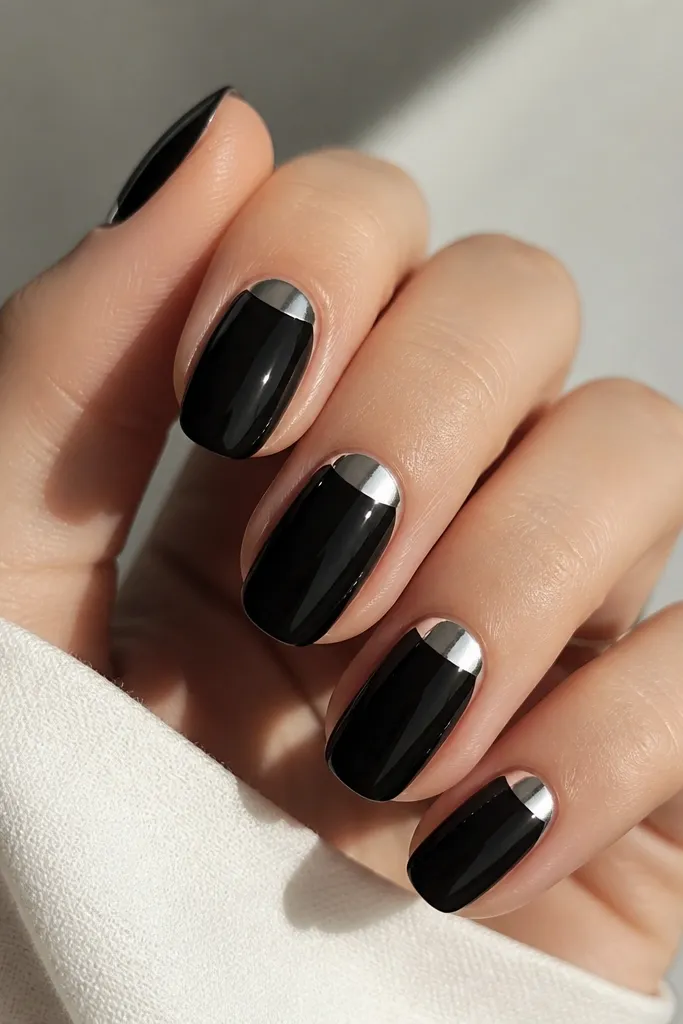
The chrome half-moon is one of those details that always looks intentional because it frames the nail bed. Glossy black makes the chrome pop, and the half-moon shape flatters most nail beds since it follows your natural cuticle line. This set looks amazing with almond and squoval, but I reach for squoval when I want it to feel wearable for work. On any skin tone, the silver arc adds brightness right where hands look most tired. If you’re choosing kylie jenner nails vs acrylics, acrylic is helpful for a crisp half-moon because the surface is smooth enough for chrome to sit evenly.
Paint two coats of glossy black and cure/dry fully. Use a small half-moon stencil or freehand with a fine liner brush to paint a clear gel “window” at the cuticle area. Apply silver chrome powder over the gel window and buff gently to remove excess. Cap with a thin glossy topcoat to prevent dulling, then clean the cuticle edges with a fine brush and acetone on cotton. Keep the chrome arc about 2-3 mm wide so it stays sleek.
If your half-moon smears, wipe the uncured gel immediately and redo — chrome sets fast.
Don’t make the chrome arc too big — it starts looking like a costume nail.
13. Black Snake-Skin Texture with Clear Topcoat
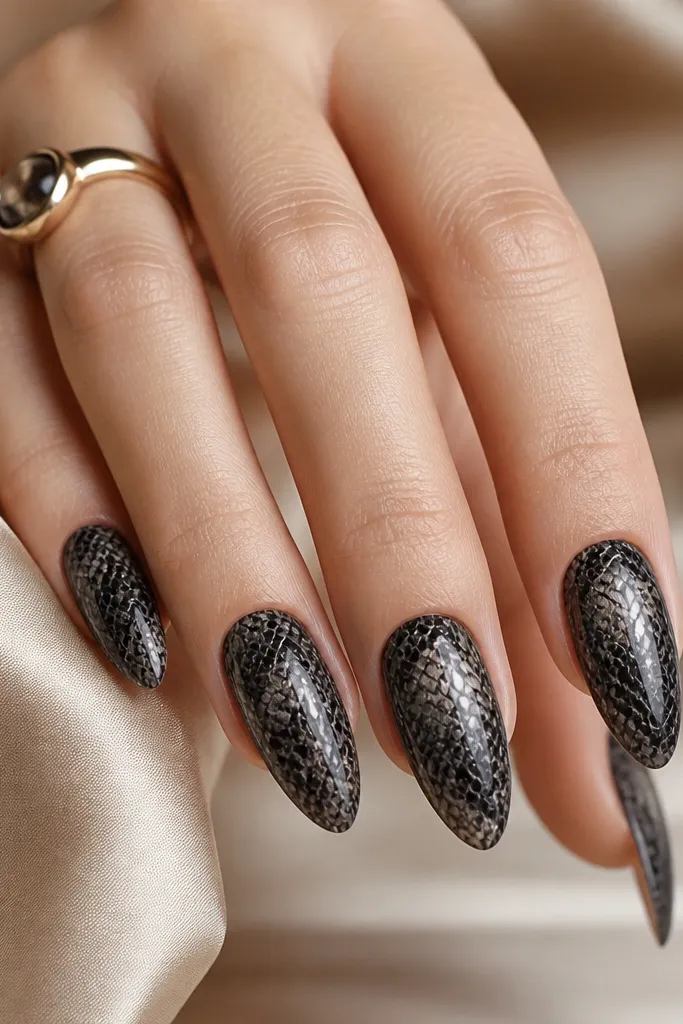
Snake-skin texture turns plain black into something that looks designer because the pattern creates light and shadow. I like it on almond nails because the scales wrap the curve of the nail and look more natural than on a flat square shape. This set flatters hands that want “edge” without adding gems, and it’s great for evening events because it photographs with depth. For skin tone, the texture does the contrast, so you don’t need extra color. If you’re choosing kylie jenner nails vs acrylics, acrylic is my pick because texture transfers look smoother on a built nail surface.
Start with a solid black base in two thin coats and cure fully. Apply a black texture gel or snake-skin nail stamping plate product over the base, then press the pattern evenly so the scales look consistent. Build the texture lightly so it doesn’t become rubbery; two thin texture layers look better than one thick one. Seal with a clear glossy topcoat and cure until it’s hard and glassy. Finally, file the edges so the texture doesn’t catch on fabric.
Editor's noteUse a matte topcoat only if you want a stealth look — gloss gives the snake-skin its depth.
Skip thisAvoid thick texture layers — they lift at the edges and feel rough.
14. Black Skittle Nails with One Jewel Accent on Each Hand
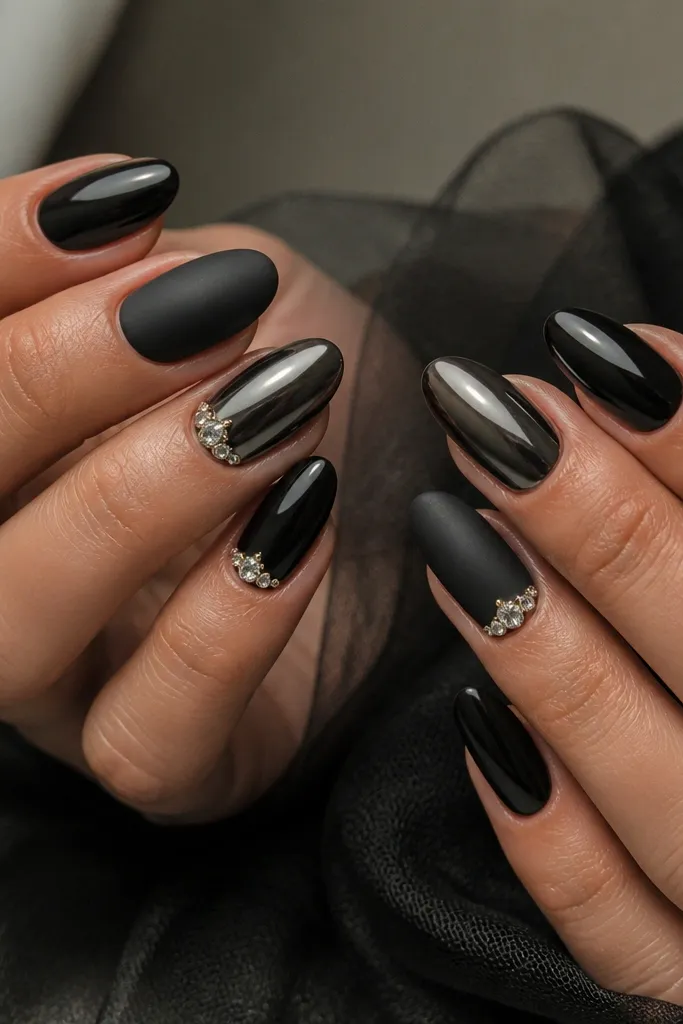
Skittle nails are the easiest way to get Kylie-level variety without making every nail look like a separate theme. I keep the palette strict: black as the base on all nails, then one finish change per hand. The jewel accent stays small so it reads glam, not chaotic. This flatters hands with short nails because you can keep most nails shorter and still get impact from finish differences. If you’re choosing kylie jenner nails vs acrylics, acrylic gives you uniform shape so the different finishes stay aligned and neat.
Pick one main finish for the hand — I usually do glossy black on four nails. On the other nail, switch to matte black, chrome half-moon, or velvet powder, keeping the shape the same across all five. Add one small jewel cluster on the ring finger or index finger per hand, placed 1-2 mm below the cuticle so it looks like a highlight. Use a gel adhesive or builder gel to set jewels, then cap with a clear gel layer. Cure fully and finish with either glossy topcoat on all nails or mixed topcoats only where the design calls for matte.
Editor's noteChoose the accent nail based on where you wear jewelry — it looks more coordinated in photos.
Skip thisAvoid using multiple colors of jewels — mixed tones can fight the black.
15. Ultra-Long Stiletto Black Nails with Thin White Lightning Stripe
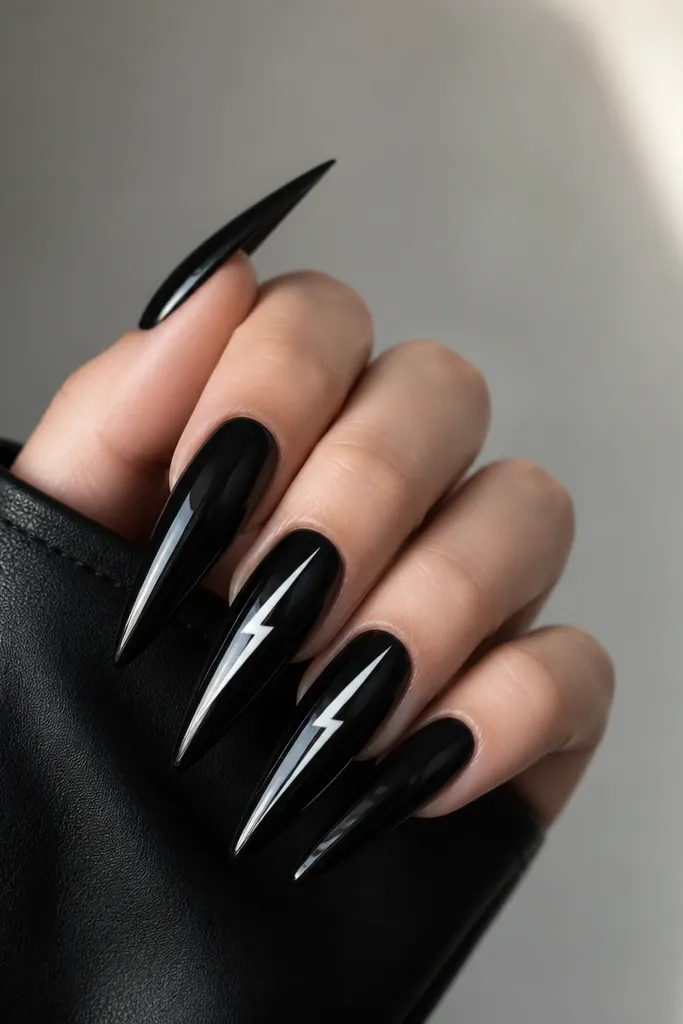
This is the set I do when someone wants “Kylie on a red carpet” energy. Stiletto length plus glossy black looks dramatic even with one tiny detail. The thin white lightning stripe keeps it edgy without turning into a Halloween nail. It flatters long fingers and hands with a longer nail bed because the stripe pulls the eye diagonally. If you’re choosing kylie jenner nails vs acrylics, acrylic is the safer route for stiletto length because you need strength at the apex and a solid apex build so the tip doesn’t flex.
Shape to a true stiletto with a narrow tip and straight sidewalls. Apply two coats of glossy black and cure/dry fully. Pick two accent nails and use a liner brush to draw a thin lightning bolt stripe, keeping the lines sharp and not filled too thick. Add a second micro layer of white only where the stripe looks thin, then seal with glossy topcoat. Cap the sides of the lightning stripe so it doesn’t chip at the edges.
Draw the lightning outline first in white gel, cure it, then fill — it keeps the edges crisp.
Don’t make the white stripe wide — it looks like a sticker instead of a design.