1. Cozy milky French with gold tips and soft black outline
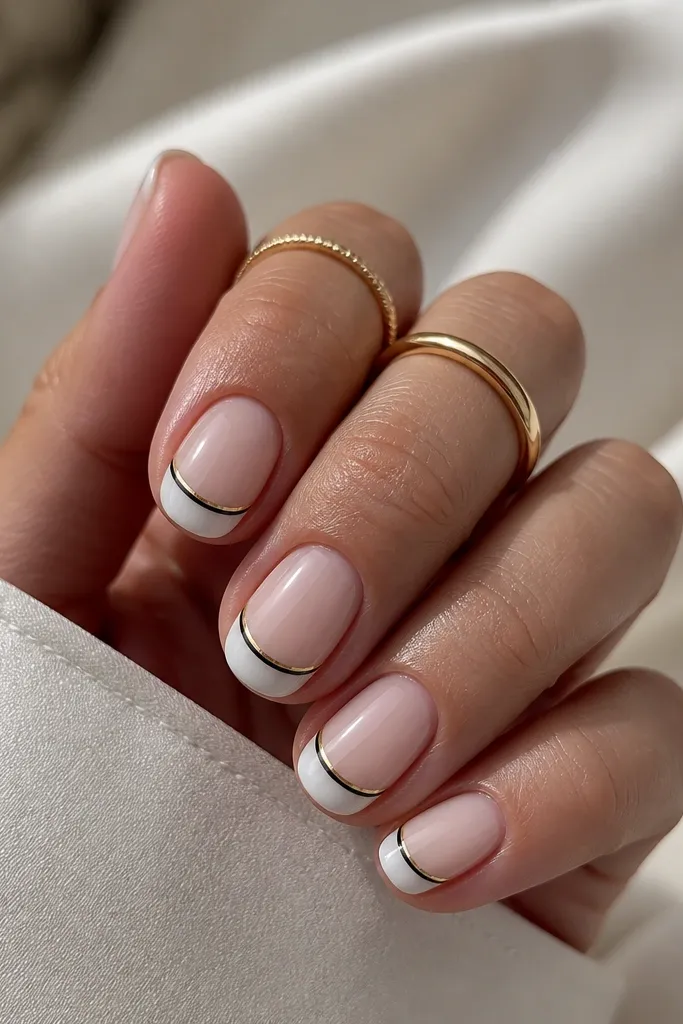
This look is my go-to when you want black, white, and gold to feel warm instead of icy. The milky French keeps the white creamy, and the thin black outline adds structure without covering the whole nail. The gold strip at the very edge reads like a polished cuff bracelet for your fingers. It flatters most skin tones because the contrast sits at the tip where light hits first. I wear it for winter events and office days because the design looks neat even when your hands are moving constantly.
Start by painting a sheer nude base or milky base, then cure. Next, paint the French tips with a creamy white — keep the curve close to your smile line so it doesn’t look wide on short nails. Add a thin black line just inside the outer edge of the white tip using a liner brush or striping tape as a guide. Finally, place a narrow gold striping tape right on the tip boundary, remove the tape if you used it for alignment, and seal with top coat. If you want extra cozy, use a matte top coat over the black outline only and gloss over the gold.
For the cleanest French curve, use a French guide sticker for one hand, then freehand the other hand to match the shape you like.
Avoid chalky white — it makes the black look heavier and the whole set look dry.
2. Black matte base with white crescent moons and gold foil flecks
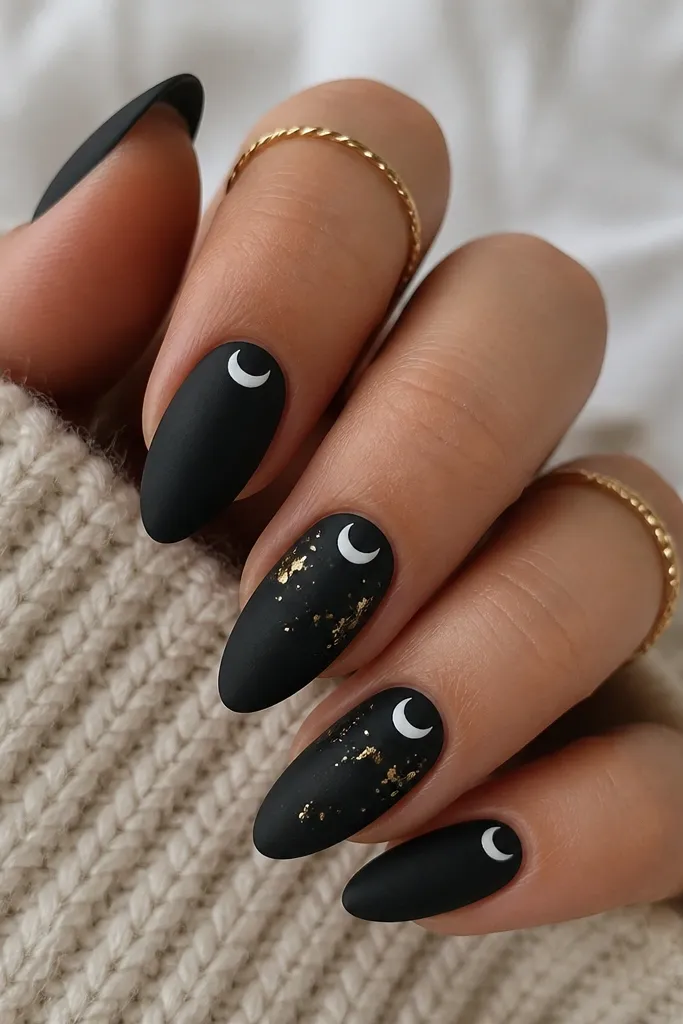
This design looks cozy because the black is matte and the white is a soft crescent, not a hard block. The crescent near the cuticle makes your nail bed look longer, which is great if your nails tend to look short or wide. Gold foil flecks add that expensive “caught in candlelight” effect without covering the nail. I’ve worn this to dinners and it photographs well because matte black reduces glare while gold still sparkles. It’s also forgiving if your moons aren’t perfectly identical since the foil breaks up symmetry.
Begin with two thin coats of black gel, then cure and apply a matte top coat over the whole nail. Use a small detail brush to place a half-moon of creamy white near the cuticle on each nail, leaving a clear gap between the moon and the cuticle line. Add gold foil flecks with a dotting tool on top of the white or slightly beside it, then seal. If you want the foil to look more metallic, press it into a tacky layer right after curing your white crescent. Finish with a matte top coat everywhere except over the gold flecks, where you add a glossy top coat to keep the shine metal-like.
Do the moons first, cure, then add foil — foil stuck to uncured gel smears and looks messy.
Don’t use thick gold glitter — it looks flat against matte black.
3. White marble swirls over black with a chrome gold ring accent
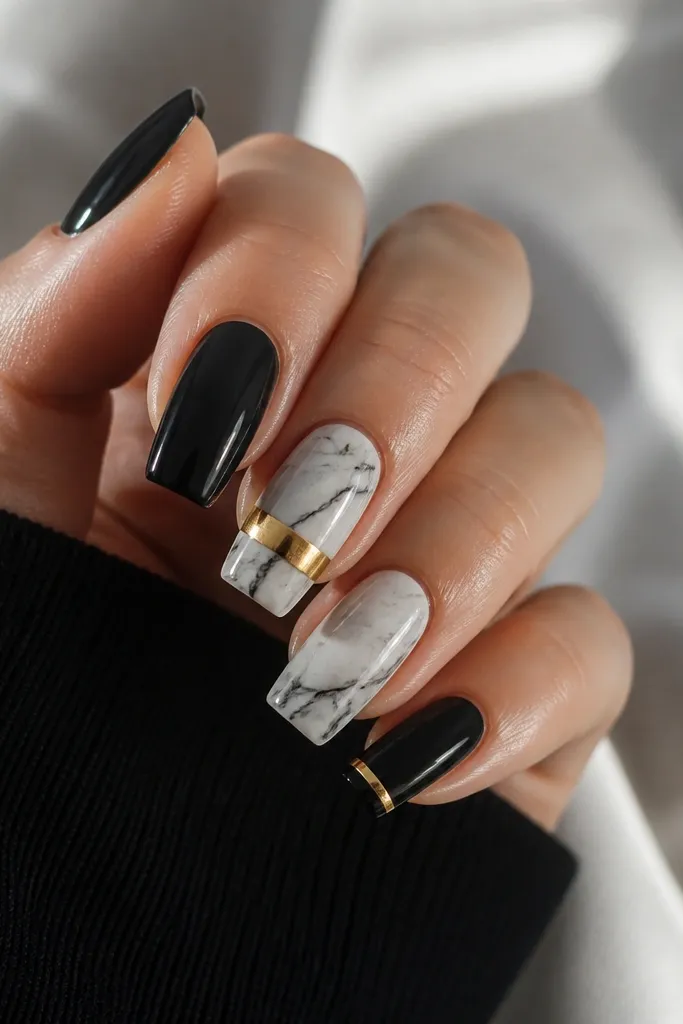
Marble looks luxe when it’s controlled, and black gives the marble depth. The white swirls over black make the set feel bold, but the gold ring accent keeps it warm and wearable. I like using chrome gold here because it looks like jewelry on the nail, not decoration. This style flatters medium to long nails best, since you need space for the swirls to breathe. It also looks great on hands with shorter nail beds because the marble movement pulls the eye upward.
Editor's noteIf your marble looks too opaque, thin the white gel with a drop of clear gel so it turns into wisps instead of blobs.
Paint a glossy black base in two thin coats for full opacity, cure each coat. Create marble using either a white gel with a thin liner brush or a marble stamp plus top coat; keep the swirls wispy so black still shows through. For the gold ring, apply a thin strip of gold chrome powder or chrome gel in a curved band across the middle — aim for it to sit above your nail’s widest point. Add a single thin gold line near the tip on the remaining nails using striping tape as a straight guide. Seal with a high-gloss top coat so the marble and chrome stay crisp.
Skip thisAvoid chunky veining — thick black lines inside white marble make it look like paint, not marble.
4. Black and white checkerboard with one gold diagonal stripe
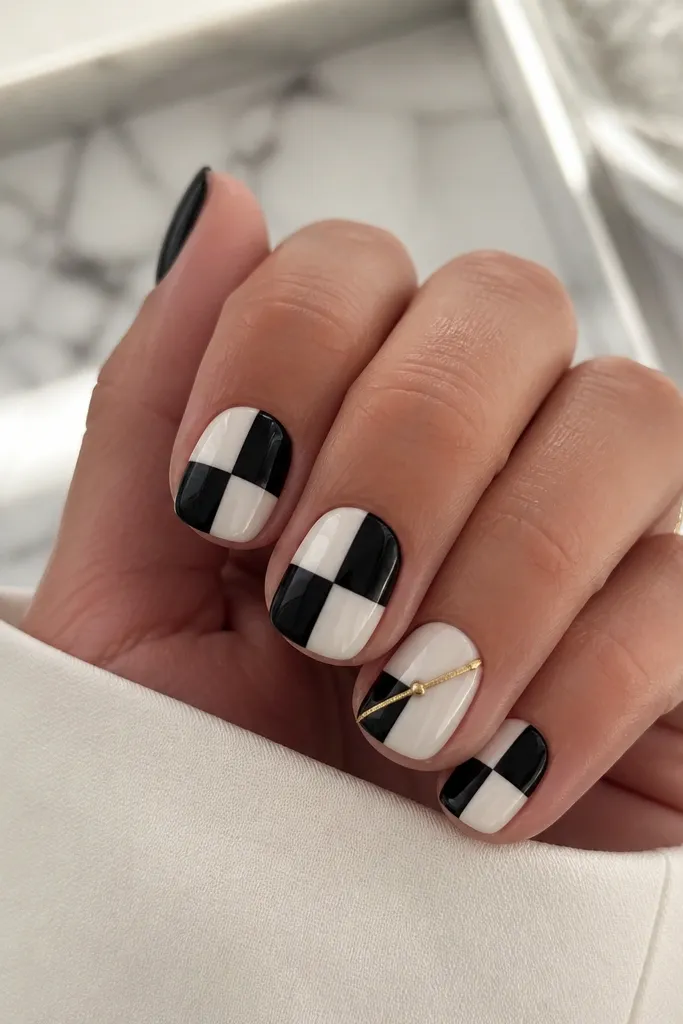
Checkerboard can tip into costume territory, but with black and creamy white it reads clean and cozy. The key is scale: small squares look modern; large squares can look busy. The single gold diagonal stripe turns it into “fashion nails” without adding too many elements. This is a strong pick if you want white to look bright and black to look soft, because the pattern creates crisp edges that still feel controlled. I wear this when I want my nails to look intentional with simple outfits like a black sweater or cream coat.
Editor's notePress the tape down firmly along the edges — lifted tape equals fuzzy checker lines.
Start with a base color that matches your grid — I paint a white base first, cure, then tape the squares. Use striping tape to section the nail into small rectangles, paint black into alternating sections, and remove tape carefully after curing. Repeat on each nail, keeping square size consistent; for short nails, aim for about 2-3 mm squares. On the accent nail, cover the grid area as desired, then place a diagonal gold striping tape from near the sidewall to the tip and seal it. Add one small gold dot using a dotting tool and gold gel, then finish with a smooth glossy top coat.
Skip thisAvoid mixing matte and glossy within the pattern — it makes the squares look uneven.
5. Negative-space bow tie with gold knot on black and white base
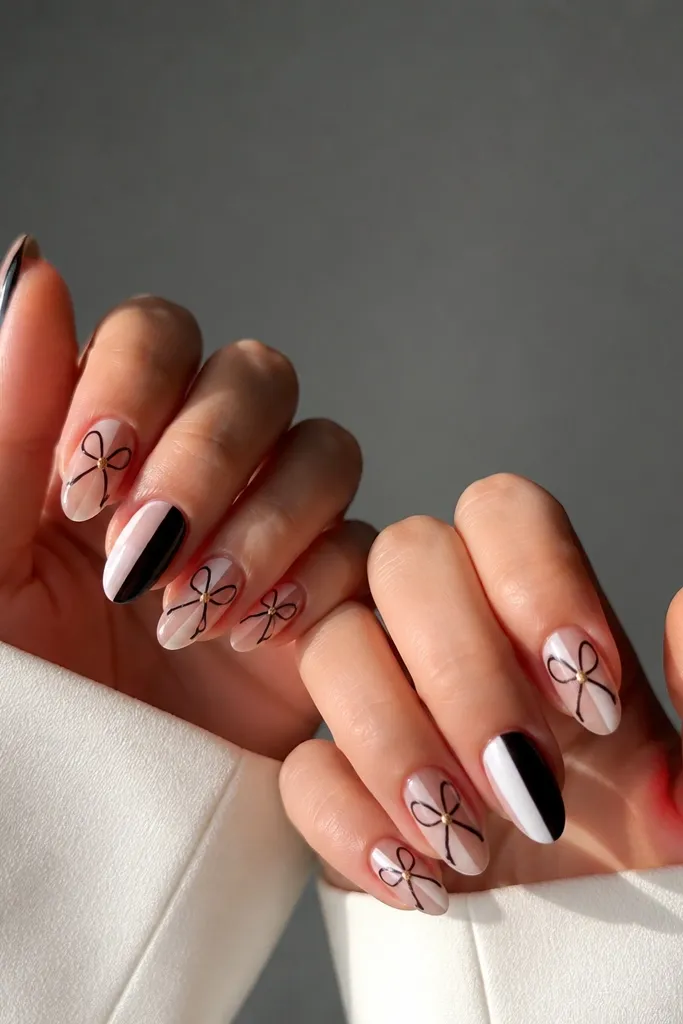
This is cozy-luxury because it uses negative space instead of full coverage art. The bow tie outline looks tailored, and the gold knot in the center gives you that jewelry feel. I like it on medium almond because the shape naturally frames the center design. It flatters a wide range of skin tones since the transparent sections make the hand look light and fresh. If you’ve got nails that chip at the tips, negative space can hide small imperfections because the design isn’t dependent on perfect tip lines.
Editor's noteUse a nail art practice strip to get the bow symmetry right before you touch your real nails.
Start by painting either a vertical half black/half white base on two accent nails, or keep the rest sheer. For the bow nails, leave a clear center area and paint a thin black outline for the bow shape using a liner brush. Add a tiny gold knot in the middle with gold gel and a dotting tool, then cure. If you want the bow to stand out more, place a thin white line under one side of the bow using a fine brush. Seal with a glossy top coat to keep the negative space looking clean and glassy.
Skip thisAvoid thick outlines — they make bow tie art look cartoonish.
6. Gold leaf half-moon over black with creamy white border
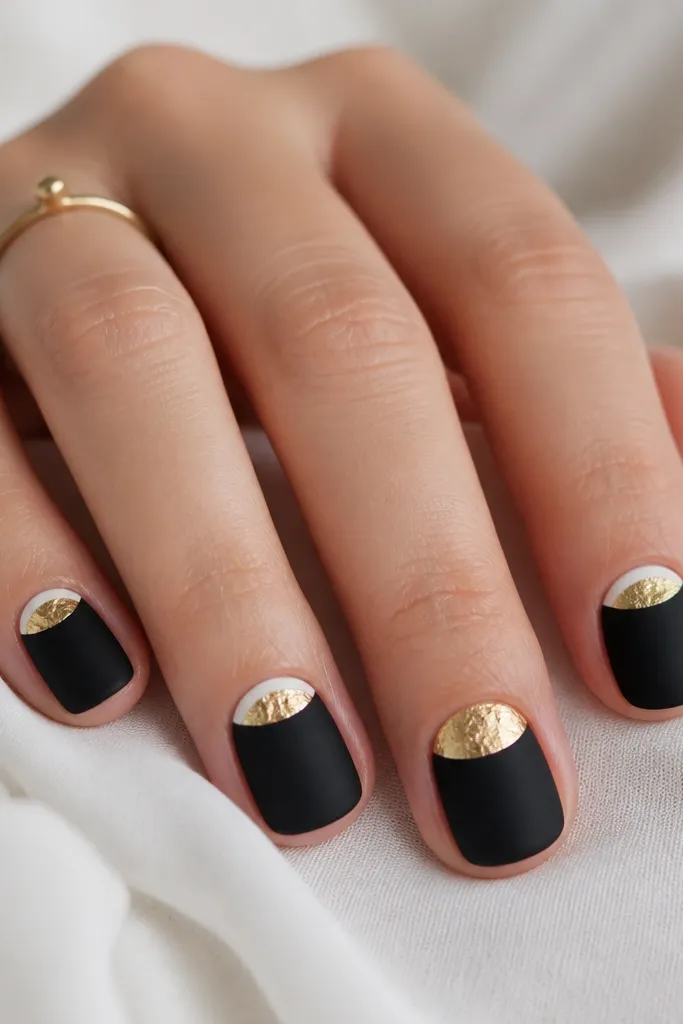
Half-moons at the cuticle make the whole set look intentional and cozy because they mimic the natural nail shape. Matte black anchors the look, while a thin creamy white border keeps it crisp. Gold leaf gives texture — it’s not uniform like foil, so it looks like real metal leaf. This set looks great on short nails because it doesn’t require long tip space. I’ve worn it on busy weeks when I wanted something that still looked “done” even with minimal time at home.
Editor's notePress gold leaf gently with a silicone tool — rubbing hard smears it into dull flakes.
Paint two coats of matte black and cure fully. With a thin liner brush, draw a narrow creamy white border along the top edge of the nail, staying about 1 mm from the free edge. For the cuticle half-moon, apply a small amount of gold leaf adhesive or tacky base at the cuticle and press gold leaf into it, then cure. Add a second layer of gold leaf on one accent nail for variation. Finish with glossy top coat over the gold leaf only and matte top coat over the black to keep the contrast.
Skip thisAvoid putting matte top coat over gold leaf — it kills the shine.
7. Black satin base with white dot cluster and gold micro-line accents
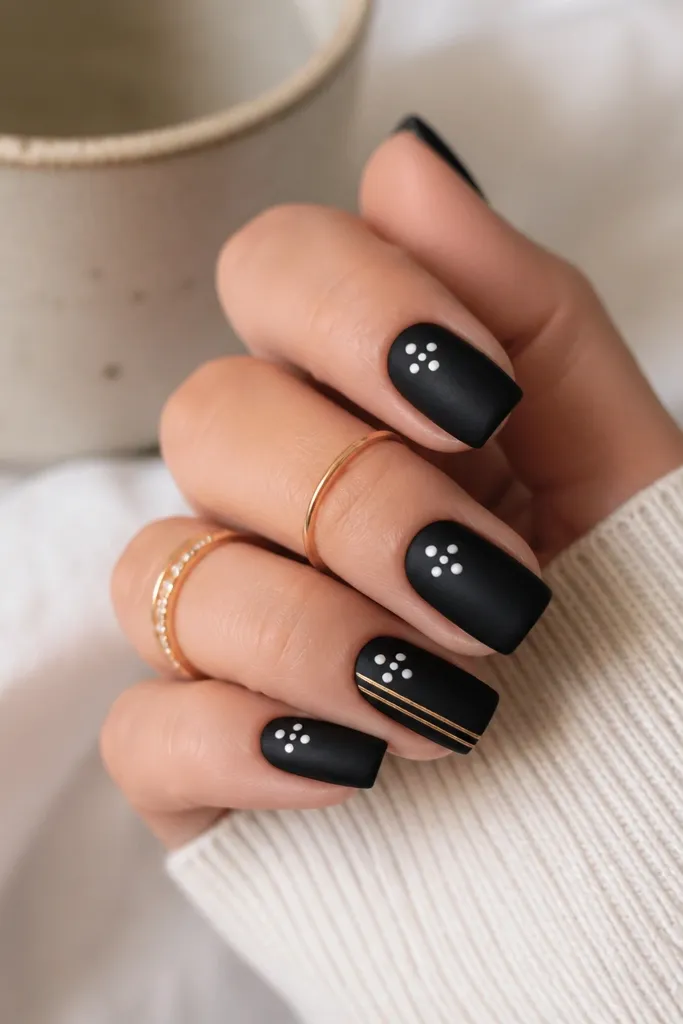
Dots feel cozy when they’re clustered and spaced correctly. The satin black keeps the background soft, and the white dots look like tiny pearls against it. Gold micro-lines add just a hint of structure, like jewelry clasps. This is flattering on hands with shorter nails because the dots sit higher and give the illusion of a longer nail bed. I love this for casual weekends because it looks cute without needing a full graphic scene.
Start with satin black gel (black plus a satin or matte top coat), cure, and make sure the surface is smooth. Use a dotting tool to place 5-7 creamy white dots in a cluster, keeping the biggest dot closest to the cuticle. Add gold micro-lines on one or two nails using striping tape cut into tiny slivers, or paint a thin line with a liner brush. Keep the gold lines short — about one-third of the nail length — so they don’t overpower the dots. Seal everything with a glossy top coat only if you want the dots to look more like pearls; otherwise keep it satin for a softer vibe.
Use two dot sizes: one medium dot for the center and a smaller one for the edges. It looks intentional instead of random.
Avoid uneven dot sizes on every nail — it makes the cluster look sloppy.
8. Alternating black and white nails with a gold script initial
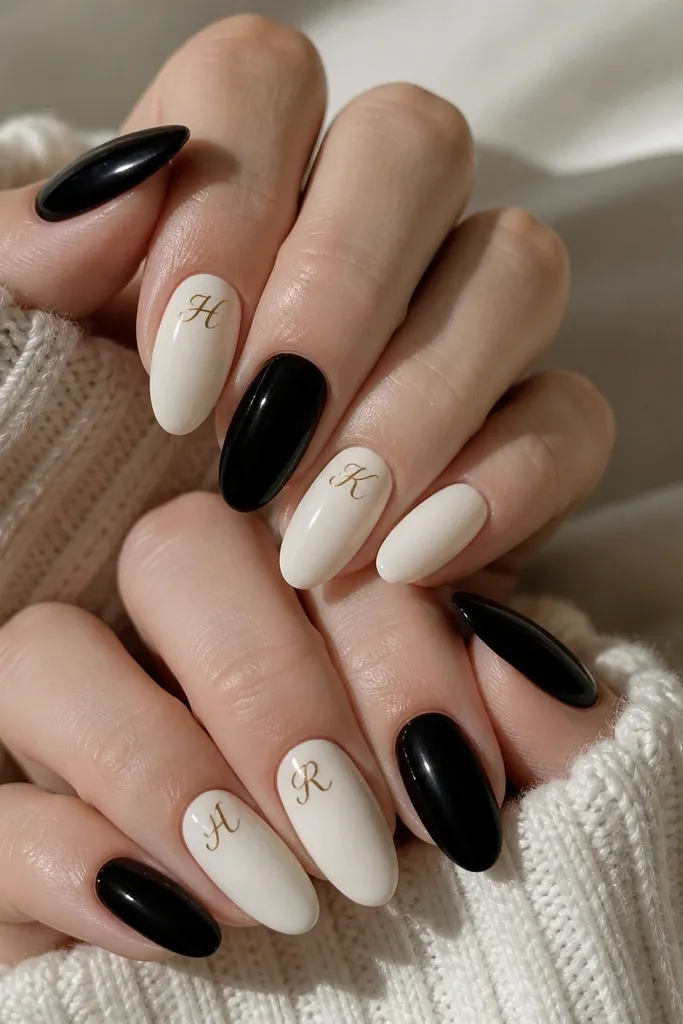
This one is bold but still cozy because the design is simple and the gold is fine-lined. Alternating black and white gives you that clean contrast, and the gold script initial makes it personal without turning into a full nail mural. I recommend keeping the script close to the cuticle so your nail still looks neat as it grows out. It flatters hands of any tone because it uses high-contrast blocks that read clearly in photos and real lighting. I do this when I want something that looks like “my nails” even if I don’t have time for complex art.
Editor's notePractice the letter on a scrap nail tip first. Script looks best when your hand learns the curve before it’s on your real nails.
Paint alternating nails in solid black satin or matte on some nails and creamy white opaque on others, curing each coat. On the accent nails, apply a thin layer of gold gel or chrome paint and write a single letter using a striping brush — keep strokes narrow and consistent. Place the initial about 2-3 mm away from the cuticle line so it doesn’t touch your skin. Cure, then add a second thin gold pass if the letter looks streaky. Finish with a glossy top coat over the gold and satin over the rest if you want the cozy look to stay consistent.
Skip thisAvoid thick gold lettering — it turns into a blob and loses the jewelry effect.
9. Gold chrome French reverse with black and white checker corners
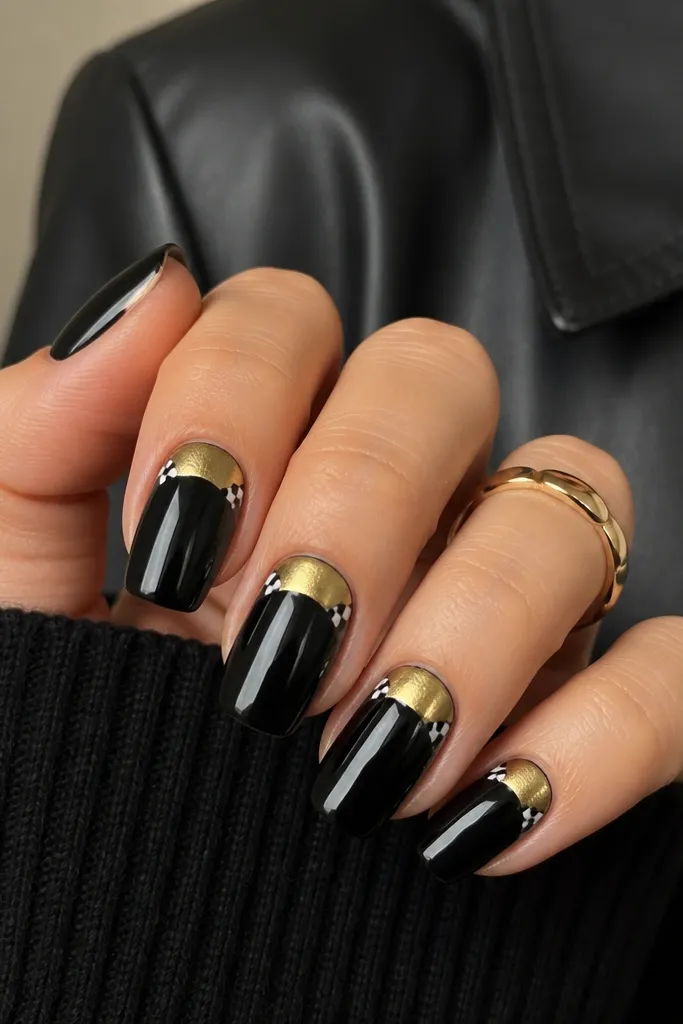
Reverse French makes the whole set look fashion-forward, but the gold arc keeps it cozy because it sits where light naturally hits. The black base gives depth, while the white checker corners add a fun detail without covering the whole nail. Gold chrome is key here — it reflects light sharply and makes the arc look like a metal bracelet around your nail. This is best on longer nails because the arc needs room to breathe. If your hands look better with strong nail shapes, reverse French also emphasizes your cuticle line in a flattering way.
Editor's noteKeep the arc slightly thicker in the center — it makes the arc look more curved and less flat.
Start with a black base in two thin coats and cure. Build the reverse French arc by placing a French guide sticker near the cuticle and painting gold chrome gel or applying chrome powder over a tacky guide line, then cure. Remove the guide to keep the arc crisp. Add checker corners by painting two tiny squares on each side near the cuticle: one black square and one creamy white square, keeping them small and aligned. Seal with a glossy top coat to lock in chrome shine.
Skip thisAvoid a thin, uneven arc — it looks like tape residue instead of a deliberate design.
10. Matte white coffin nails with black half-knot and gold center dot
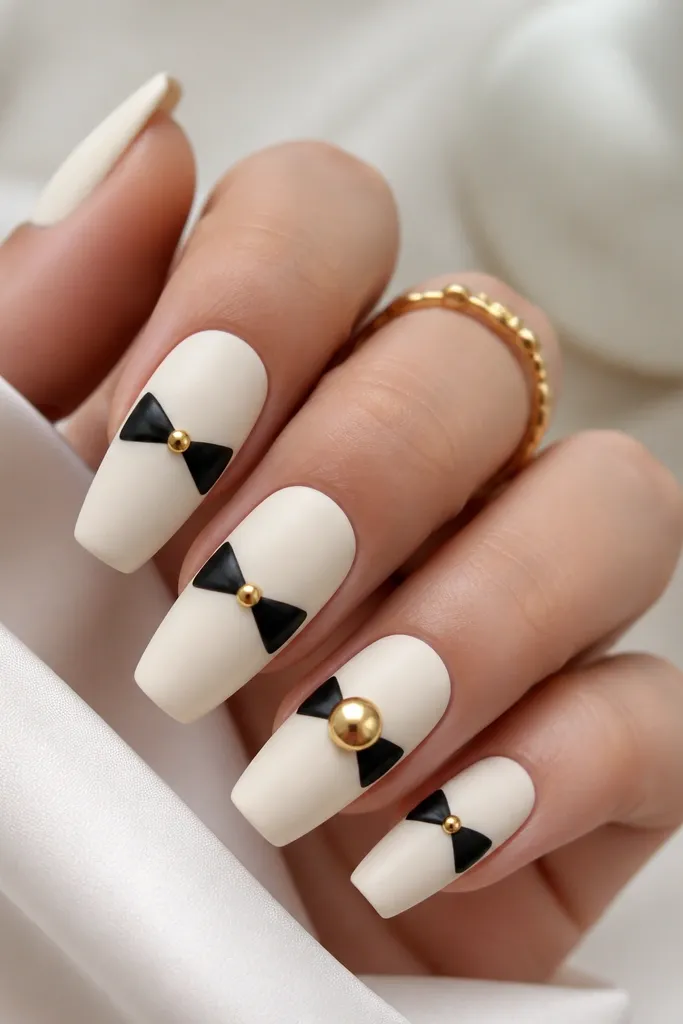
This is the coziest version of a graphic nail because the base is matte and the pattern is soft-edged. Matte white makes the set feel warm, and the black knot gives it structure without looking aggressive. The gold center dot is small but powerful — it makes the design feel like jewelry, not a sticker. I think this flatters hands with longer fingers because the coffin shape already elongates, and the knot sits in the right visual center. It’s also a great pick for winter weddings or holiday parties because it reads classy from a distance.
Paint two coats of matte creamy white and cure, then add matte top coat if your white isn’t already matte. Use a fine liner brush to draw a black half-knot across the middle — one side higher than the other — leaving small gaps so it doesn’t look like a solid blob. Place a single gold dot in the center of the knot using gold gel and a dotting tool, then cure. Add a second gold dot on one accent nail but make it slightly larger so you get focal variety. Finish with a glossy top coat only over the gold dot; keep everything else matte.
Wait a full cure before touching the black knot edges. If you adjust too soon, matte white smears and the knot looks fuzzy.
Avoid glossy on the whole nail — it makes matte white look slippery and less cozy.