1. Classic French Tip with Mirror Gold Line
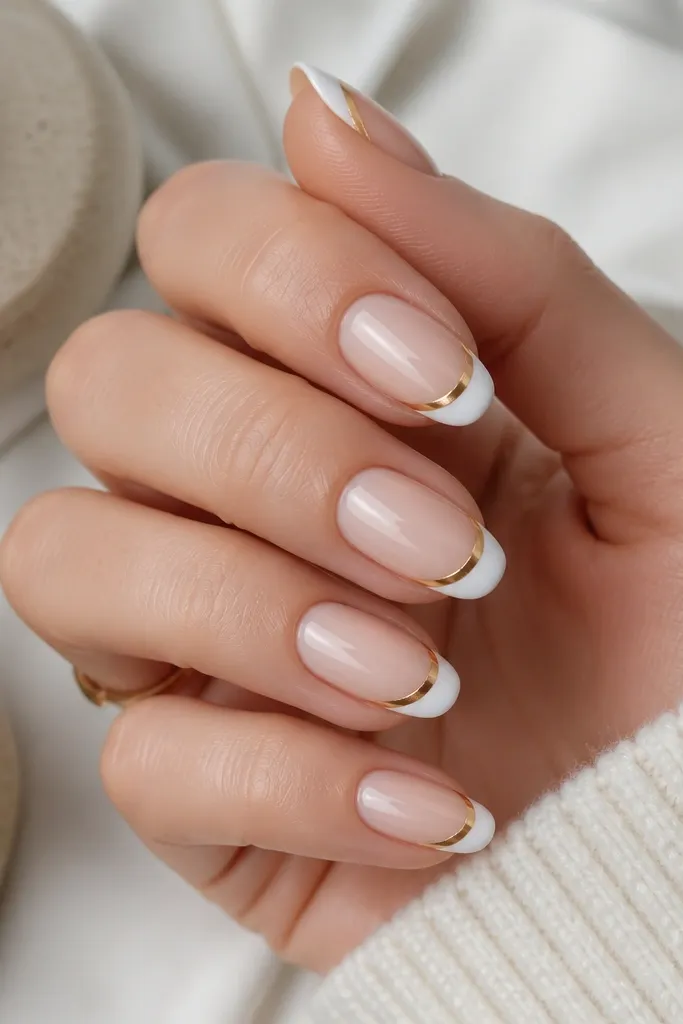
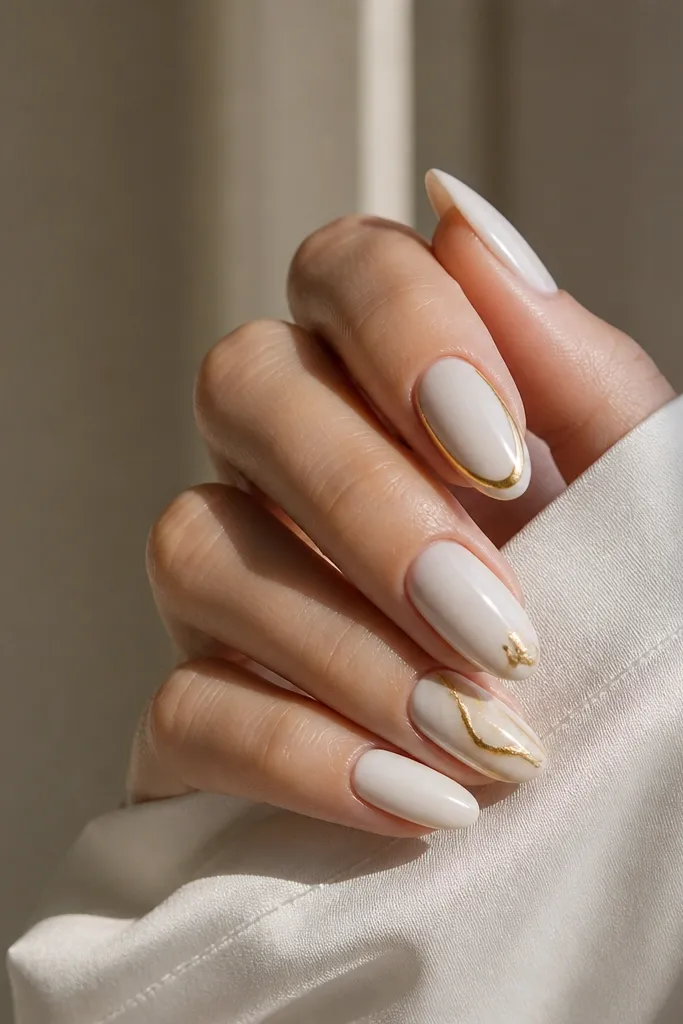
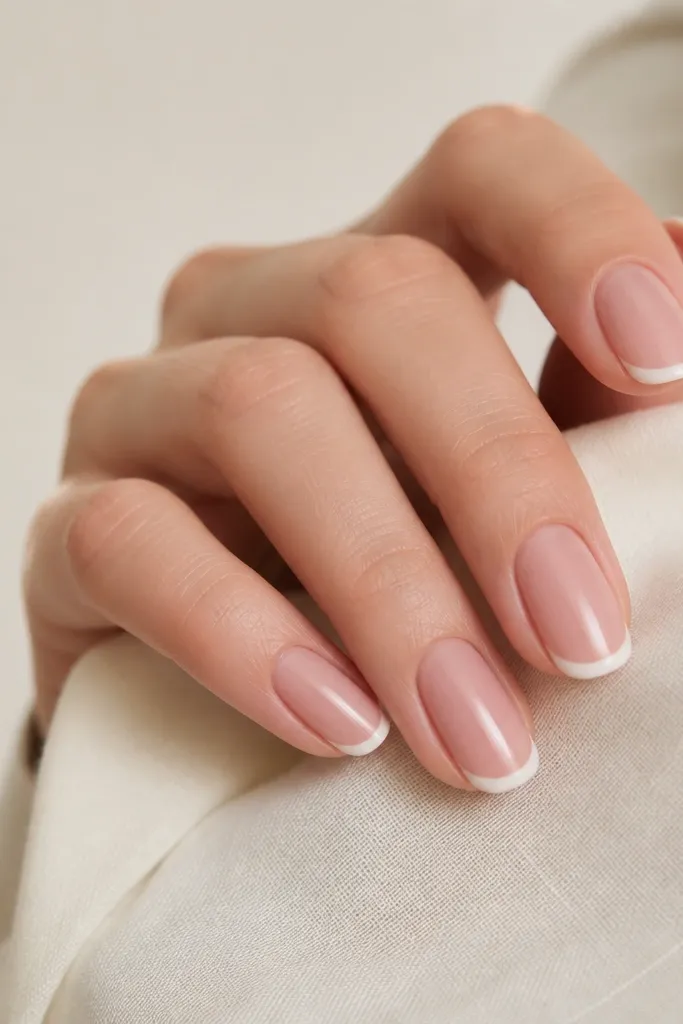
This is the first set I teach because it’s hard to mess up and it reads expensive fast. The white tips stay bright and clean, and the mirror gold line gives you that jewelry sparkle without covering the whole nail. I like this on medium to warm skin tones because the white pops and the gold warms the look. It also flatters shorter nail beds because the gold stripe is thin and sits right at the tip edge, visually extending the nail.
Start by painting a sheer base coat and letting it dry fully. Then apply two thin coats of opaque white for the French tip, keeping the tip width about 2-3 mm on short nails. While the white is tacky (or after it dries if you’re using polish), draw a straight mirror-gold line right along the smile line using a striping brush. Finish with a glossy top coat so the gold looks smooth instead of textured.
Use a nail guide sticker for the French edge if your smile line is uneven — peel it off while the polish is still slightly wet for the cleanest border.
Skip chunky glitter gold for this one, because it creates a bumpy ridge that catches lint and looks messy.
2. White Milky Base with Gold Half-Moon Cuticles
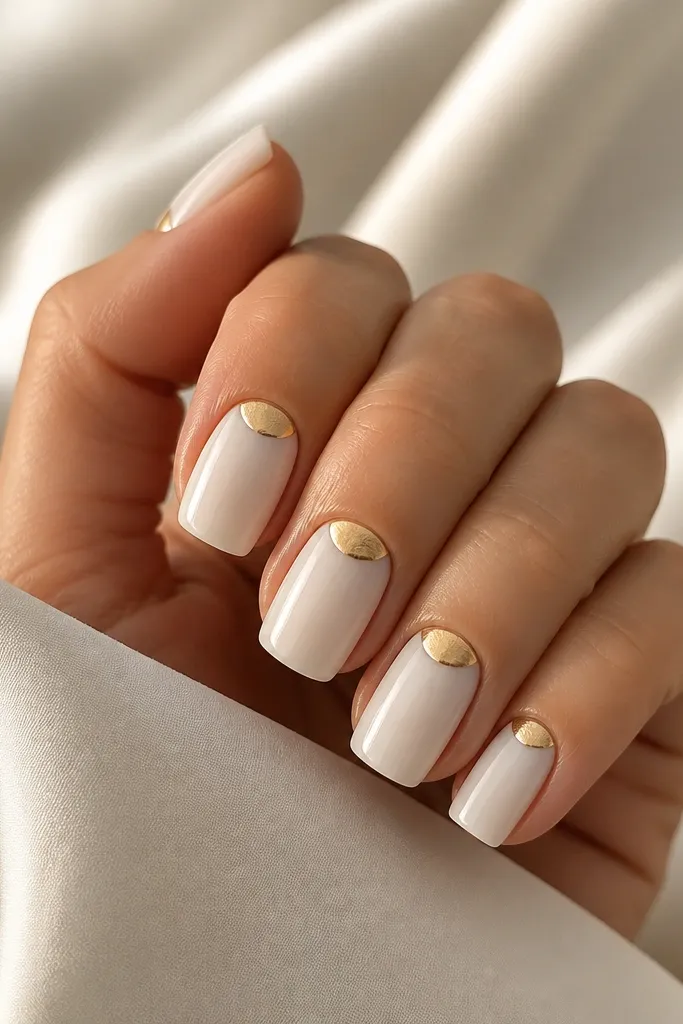
Start with a milky white polish or milky gel, painted in two thin coats for full opacity. Use a small piece of gold foil or a gold chrome powder applied with a sponge — keep it limited to a half-moon area about 1.5-2 mm tall. Press the foil gently at the cuticle curve, then seal with a thin top coat to lock it in. Finally, clean the edges with a brush dipped in acetone so the half-moon stays crisp.
This design looks like tiny jewelry at the base of your nails, so it feels fancy without needing art skills. The milky white makes the gold foil stand out, and the half-moon shape flatters most hand shapes because it follows the natural cuticle arc. I’ve worn this on pale and deeper skin tones and it always looks intentional. It’s also a great choice if you want something that grows out nicely since the gold sits near the cuticle and the rest is clean.
Skip thisDon’t paint the gold too wide — if it reaches the center, it starts looking like a smear instead of a cuticle accent.
Editor's noteIf your foil sticks unevenly, press it with a cotton swab wrapped around a flat edge — you get a smoother curve.
3. White Marble Veins with Gold Leaf Flecks
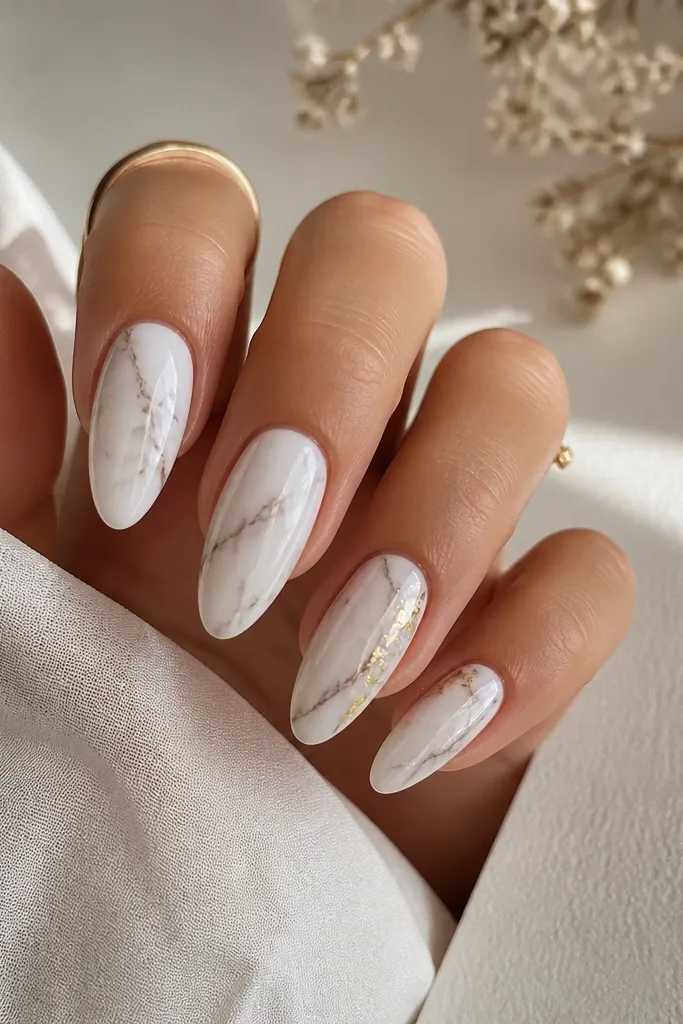
Marble is forgiving because your lines don’t have to match perfectly — veins look good even when they vary slightly. The white base keeps it bright, while the gold leaf flecks add that high-end “stone and metal” vibe. I like this on medium-long nails because there’s enough real estate for the veins to flow; on very short nails it can crowd. It flatters hands with broader nail beds too, since the veining gives a subtle lengthening effect.
Paint a creamy white base in two coats and let it dry completely. Use a thin detail brush to drag soft gray or off-white lines through the base, then blur one edge with a clean brush so it looks like marble, not cracks. Press tiny pieces of gold leaf onto the side of the nail and tap them down, then seal with a thick top coat or builder gel to smooth the surface. Repeat the same placement on two nails so it looks coordinated, not random.
Practice on one nail first — marble veins look best when you keep them thin and let the base show through.
Avoid using heavy glitter over marble — it hides the stone effect and makes it look holiday-themed.
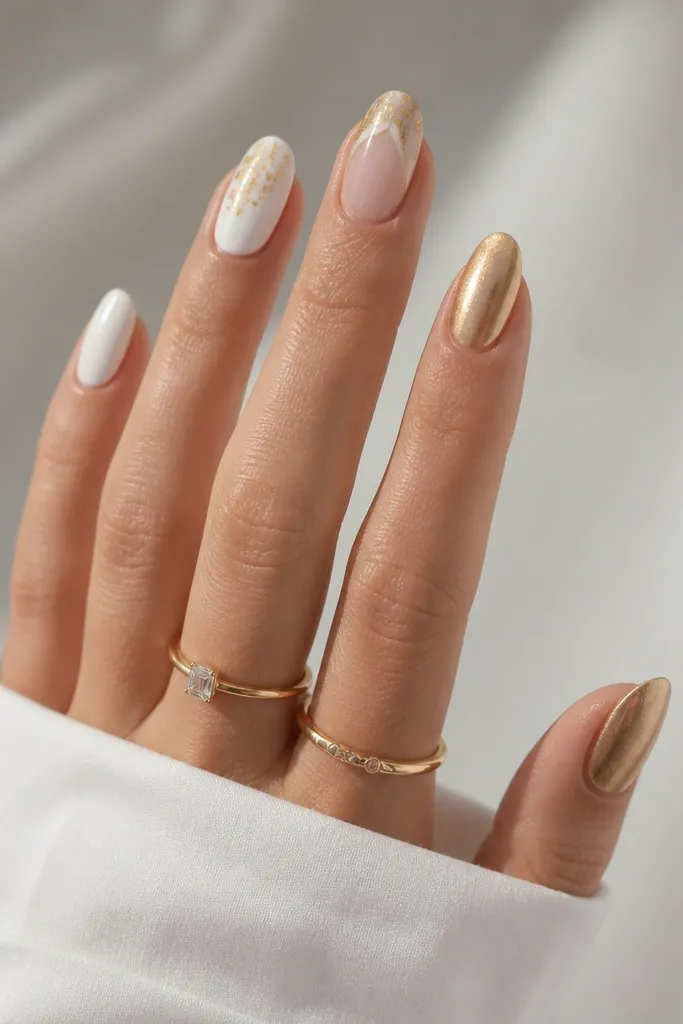
4. Gold Foil Confetti Over Bright White
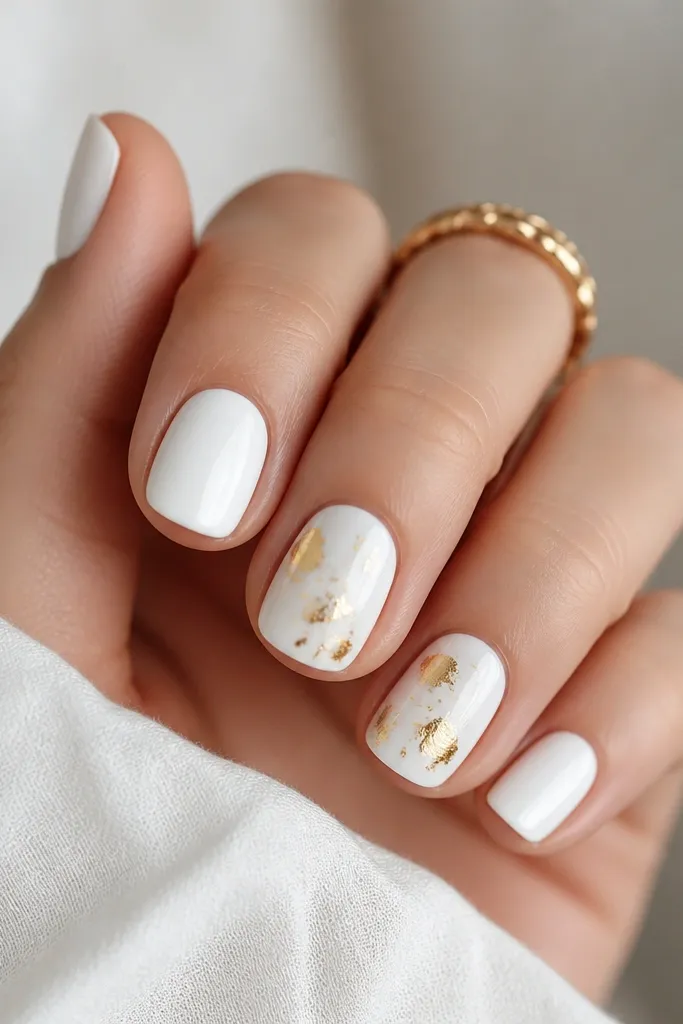
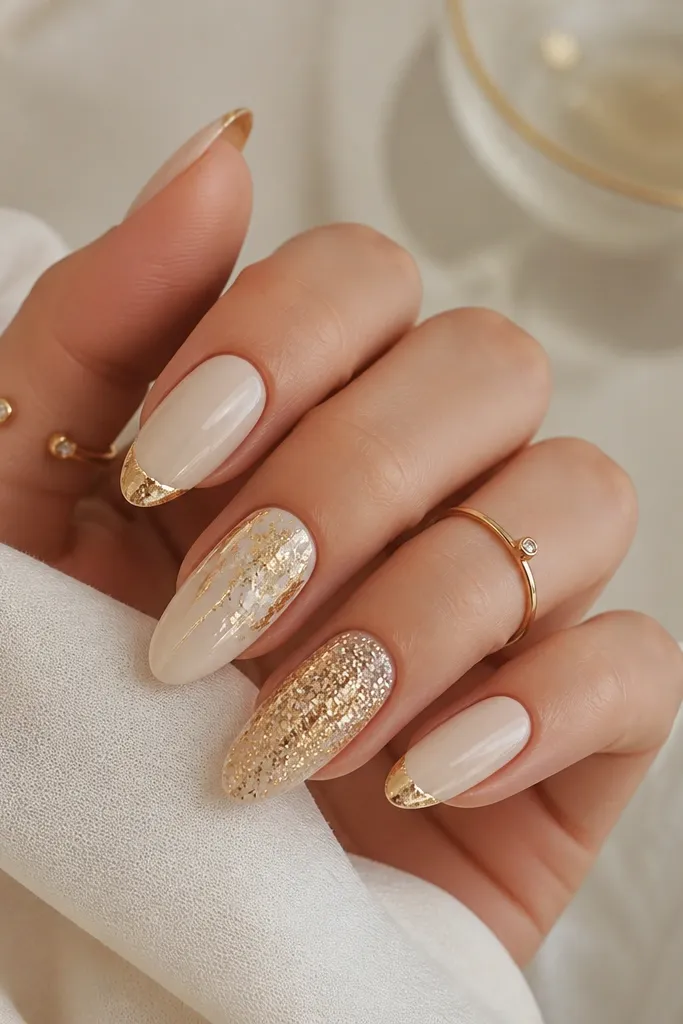
Start with two thin coats of bright white polish so the base is fully opaque. Add gold foil bits on only two nails, placing them more densely toward the center and leaving breathing room near the cuticle. Press each piece down lightly, then seal with a gel top coat or multiple thin coats of regular top coat. Clean up the edges with a detail brush and acetone so foil doesn’t creep onto your skin.
Confetti foil is the easiest way to get that “sparkly” look without drawing. The bright white base makes every gold piece pop, and the scattered placement keeps it from feeling heavy. This works great for beginners because you’re not trying to draw perfect lines; you’re placing bits. I’ve seen it flatter all skin tones because the contrast is clear, and it looks especially cute for holidays, birthdays, and date nights.
Skip thisDon’t cover every nail — the set looks better when the spark is concentrated.
Editor's noteIf your foil won’t stick, paint a thin layer of tacky top coat first, place foil, then seal.
5. Thin Vertical Gold Stripe on White Base
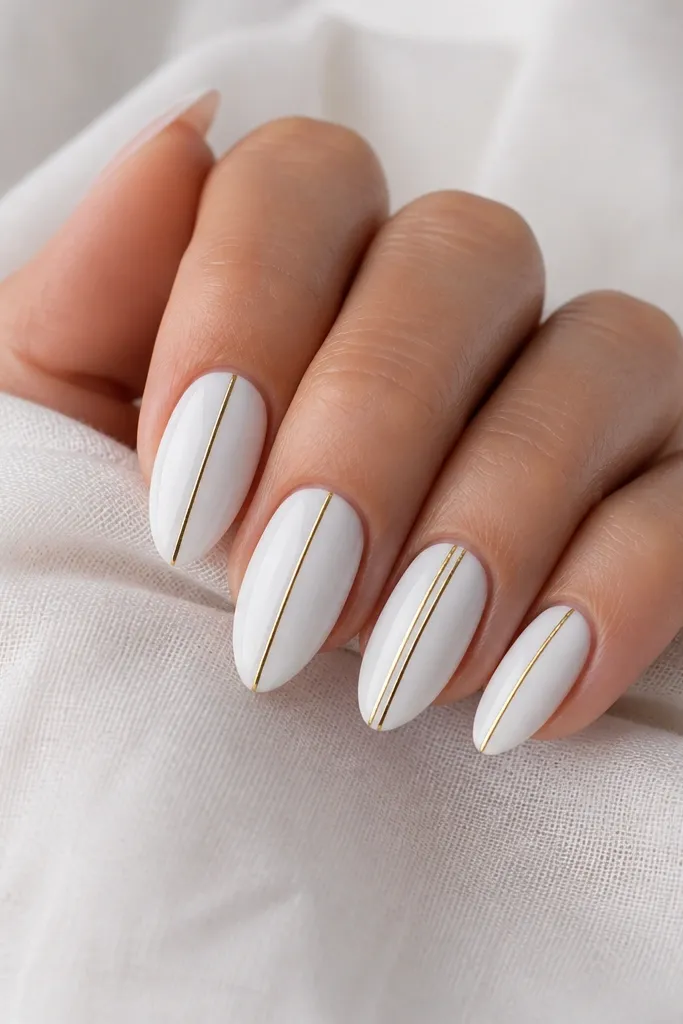
Vertical lines are the fastest way to make nails look longer and more structured. The gold stripe adds warmth and gives your eye a straight path from cuticle to tip. I like this design on short to medium nails because it visually lengthens without adding bulk. It also looks clean on hands with wider nail beds since the stripe stays centered and the rest is solid white.
Paint your nails with two coats of opaque white and let them cure/dry fully. Place a small dot at the center near the cuticle using a dotting tool, then draw a straight line down with a striping brush or metallic gel in one steady stroke. Keep the stripe width around 0.5-1 mm so it stays delicate. Finish with a high-shine top coat and cap the free edge to prevent chipping.
Use tape as a temporary guide: press a tiny strip of tape on both sides of where the stripe will go, paint the gold, then remove the tape while wet.
Avoid thick stripes — they turn from elegant to chunky fast.
6. White Base with Gold Dot Cuticle Line
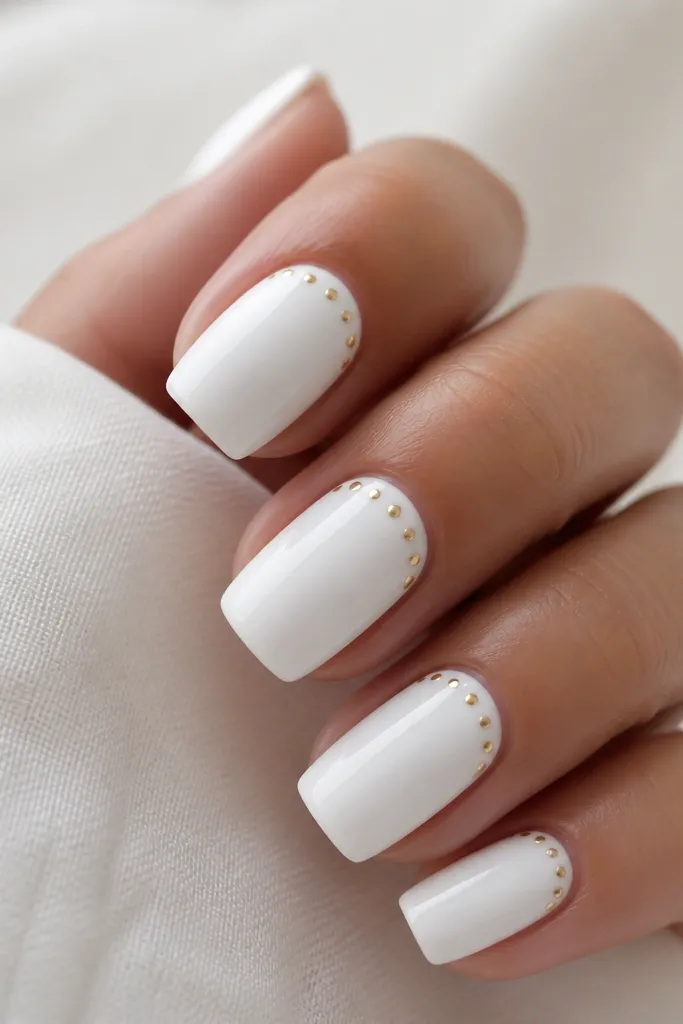
This is a beginner-friendly way to make gold feel intentional instead of random. The dots create a “beaded necklace” effect that looks tidy and flattering because they follow the natural curve of your cuticle. The white base keeps everything bright and clean, which matters if your nails have any texture. I like it on short nails too since the dots are compact and don’t require big space.
Start with a smooth white base in two thin coats. Load a dotting tool with metallic gold polish (or gold chrome powder mixed with a drop of gel) and press dots in a line across the cuticle arc. Make the dots about the size of the dotting tool tip and keep spacing even. Cure/dry, then seal with top coat — if you see bumps, apply one extra thin top coat layer.
Count your dots per nail (like 4 or 5) so they match across your hand.
Skip big dots — oversized beads look heavy and block the clean cuticle shape.
7. Gold Foil Tip with Soft White Fade
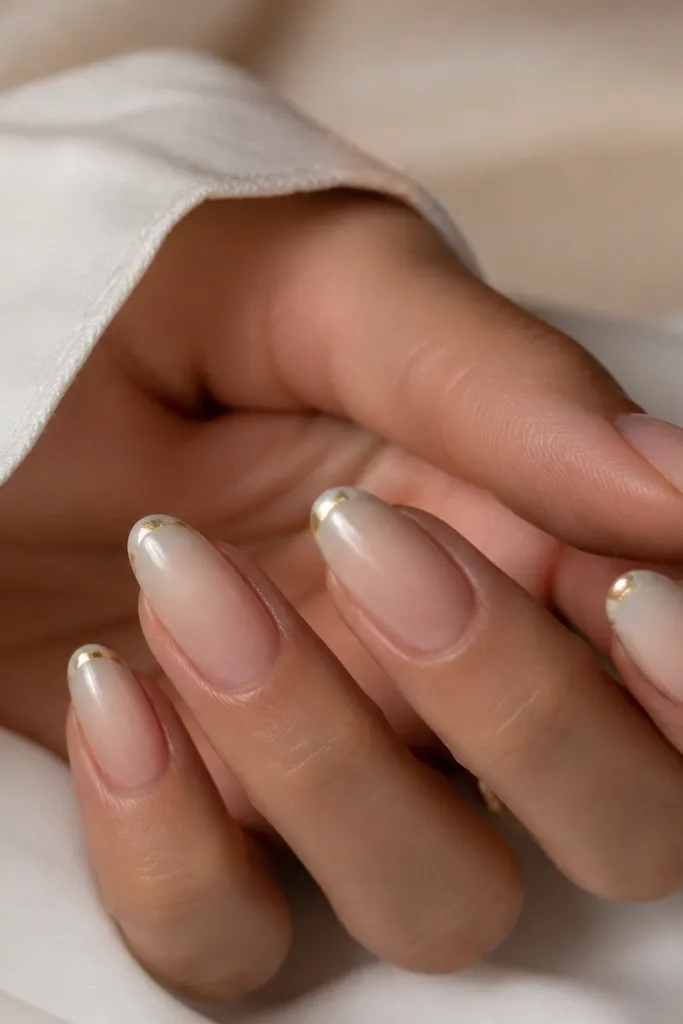
Paint a sheer nude or natural base first, then sponge on a milky white fade from mid-nail to the tip. Use a makeup sponge and dab lightly — stop before you reach the top third so the fade looks airy. Apply gold foil only as a thin band across the very tip edge using foil transfer or a gold leaf press, then seal. Finish with top coat and gently cap the free edge so the gold doesn’t lift.
This design looks like a luxury gradient because the white fades instead of stopping abruptly. The gold foil band at the tip gives you the “wow” without covering the whole nail. I like it on hands with slightly longer nail beds because the gradient creates a smooth runway for the gold edge. It’s also forgiving if your nail line isn’t perfectly straight because the fade hides tiny mistakes.
Skip thisAvoid hard tape lines across the nail — the look should melt, not look like a sticker.
Editor's noteDo the fade in two light sponge layers instead of one thick layer — it keeps the gradient smooth.
8. White French with Micro Gold Corners
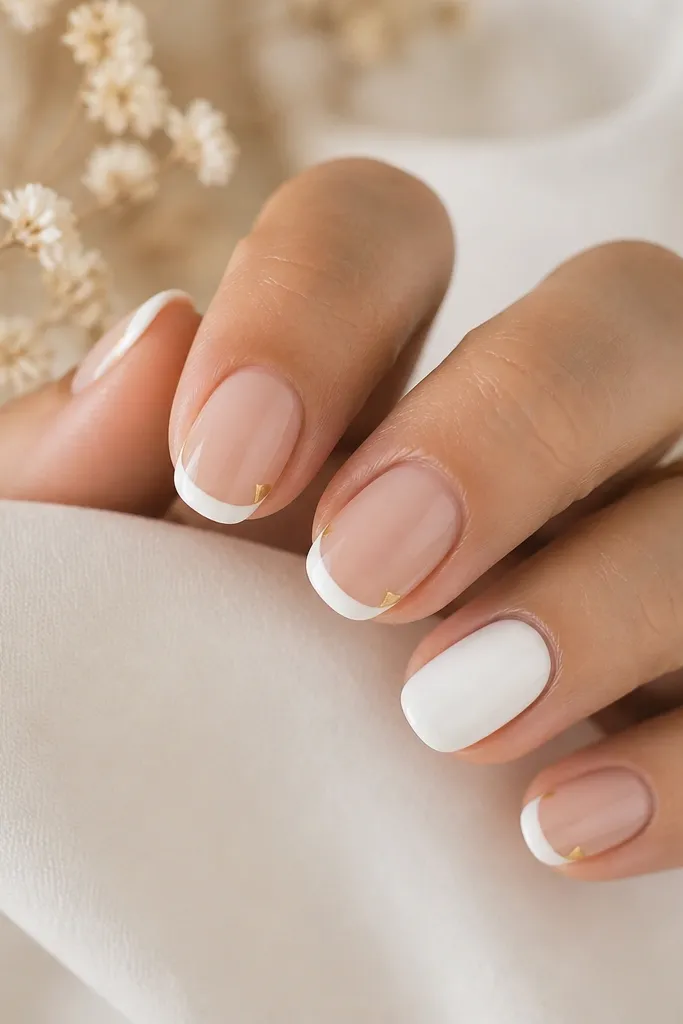
Apply your sheer base and cure/dry. Paint a classic French tip in opaque white, keeping the tip shape even across all nails. Use a tiny striping brush to paint a small gold triangle at each side corner of the French tip — aim for about 1 mm wide at the base. Seal with a glossy top coat and clean around the corners with a thin brush for sharp lines.
Micro corners make French tips feel modern. The gold sits only at the side edges, so it frames the white tip without overwhelming it. This flatters short nails because you’re adding detail at the corners, which draws attention outward and makes the nail look more polished. It also works well for cooler undertones since the white stays crisp and the gold adds warmth at the frame.
Skip thisDon’t put gold in the center too — corners only keeps it elegant.
Editor's noteIf triangles are hard, use a toothpick to place a tiny gold dot, then drag one edge into a triangle.
9. Gold Chrome Half Tip on Milky White
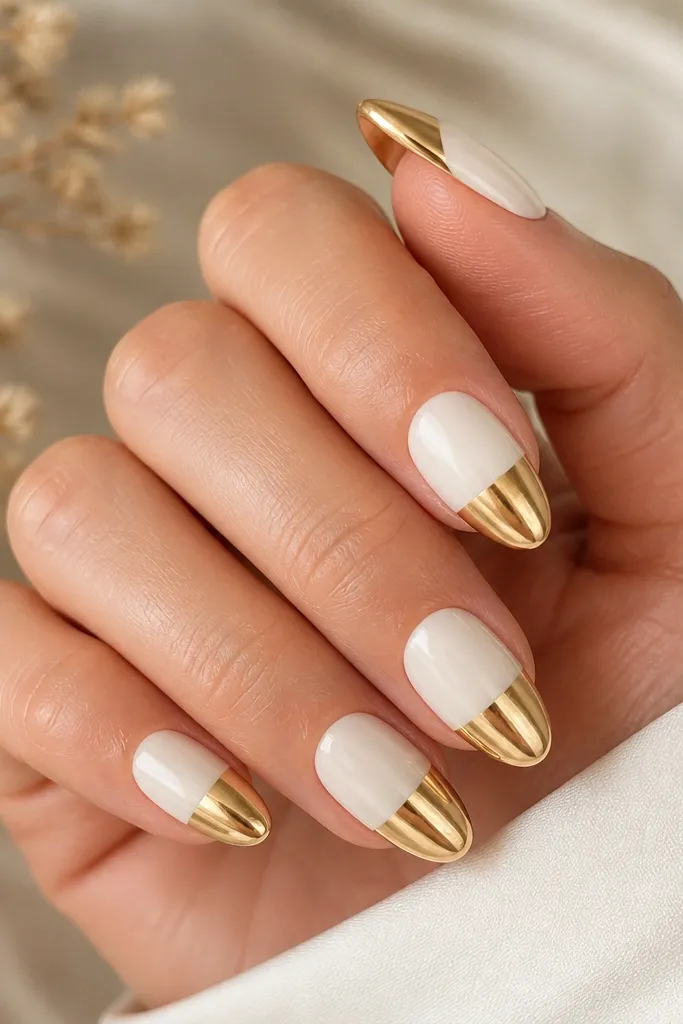
Chrome makes white look like it belongs on a runway. The half-tip placement feels bold but still clean because it’s one straight division. I like this on medium almond nails because the shape reflects light nicely, and the chrome band catches it at the right angle. On deeper skin tones, the gold reads warmer and gives a flattering glow; on pale skin, the contrast looks crisp and bright.
Start with a milky white base in two coats and cure/dry fully. Apply a strip of tape where you want the chrome stop line, then remove after you’ve painted the chrome so you get a sharp edge. Rub gold chrome powder over a tacky gel layer at the tip half, then buff lightly and seal with top coat. Remove tape carefully, then cap the free edge with top coat so the chrome doesn’t chip.
Use a matte top coat on the rest of the nail if you want extra contrast, then leave chrome glossy.
Avoid skipping the tacky layer — chrome that isn’t properly activated flakes and looks patchy.
10. White Daisy Petals with Gold Center Dots
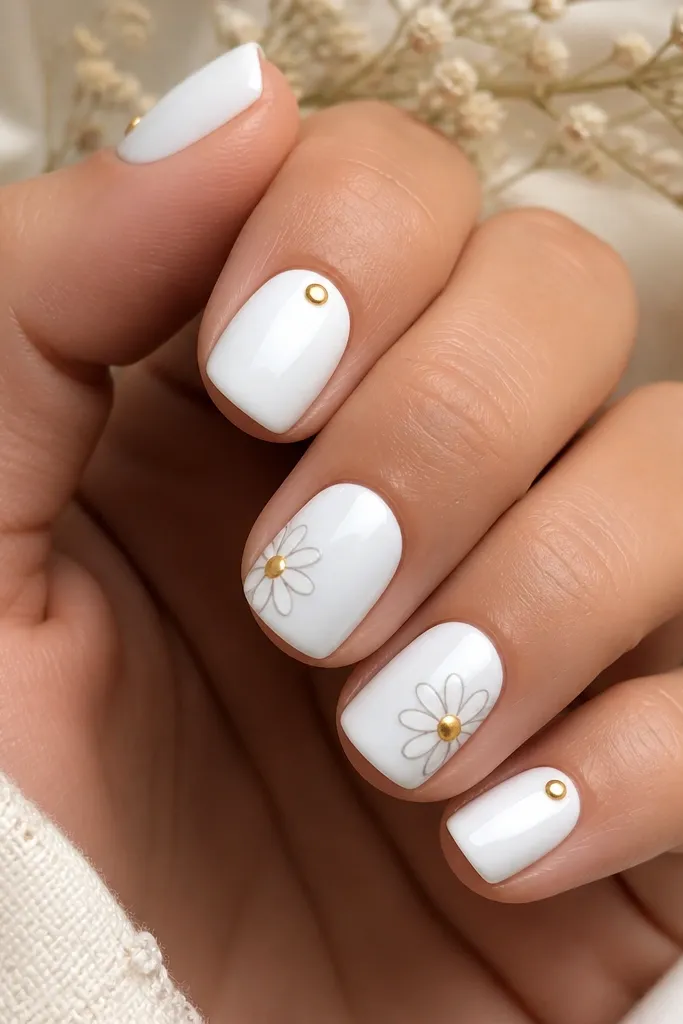
This is playful, but it still fits the gold-and-white theme because the gold is only the center sparkle. The white petals keep the look bright and fresh, and the gold dot gives a focal point without turning the design into a busy mess. It flatters anyone who likes cute details but doesn’t want heavy art on every nail. I’ve worn a version of this on spring events where it photographed really well under daylight.
Paint all nails white in two coats. On accent nails, use a dotting tool to place 6-8 small petal dots around a center circle, then drag each petal slightly to form a teardrop shape. Add a tiny gold dot in the center with metallic gold polish or chrome powder mixed with a drop of gel. Outline lightly with a gray liner if you want extra definition, then seal with a glossy top coat.
Make the petals slightly uneven — perfect symmetry looks artificial on nails.
Avoid thick outlines — they make daisies look like stickers.
11. Gold Outline French on White Base (No Filled Tips)
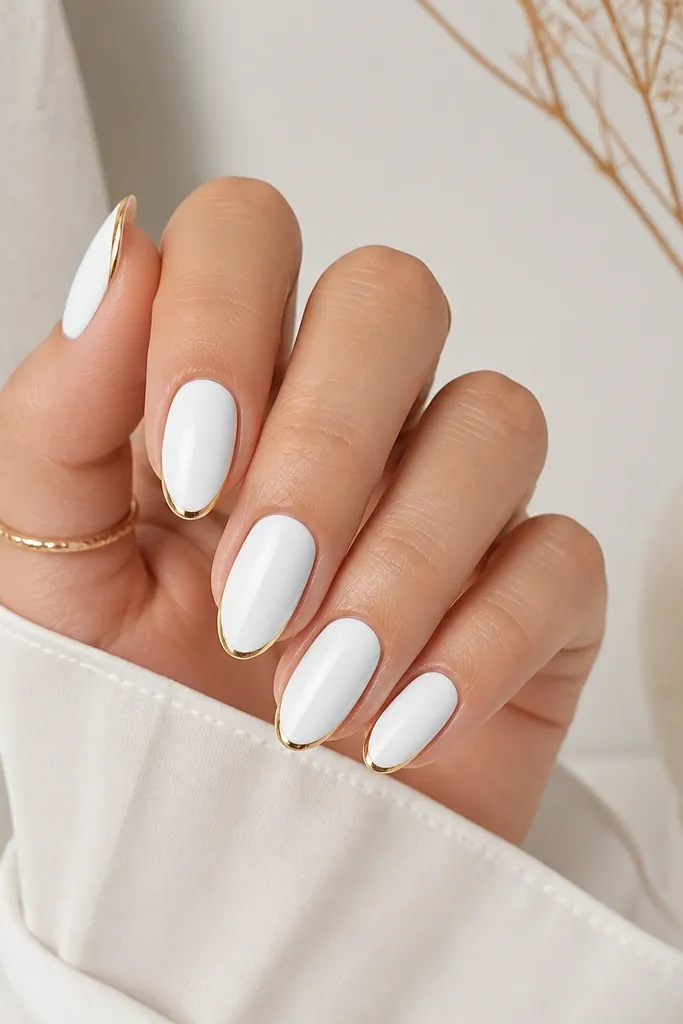
Start with two coats of opaque white and cure/dry fully. Use a striping brush loaded with metallic gold gel to draw the French smile line — keep the line thin and only trace the edge. If you want extra precision, place a tiny bead of gold gel at each side corner first, then connect them with one controlled stroke. Cure/dry, then finish with glossy top coat to lock the outline in place.
This is the cleanest way to get gold French without the risk of uneven white tip filling. Because the inside stays white, your nails look neat even if your smile line isn’t perfectly centered. The gold outline adds definition and makes the tip look sharper, which flatters both short and medium nail beds. I also like it for workdays because it looks polished and not too sparkly.
Skip thisDon’t double the outline thickness — it turns from chic to clunky quickly.
Editor's noteIf your line wobbles, clean the edge with a flat brush dipped in acetone before curing.
12. White Grid Nails with Gold Corner Frames
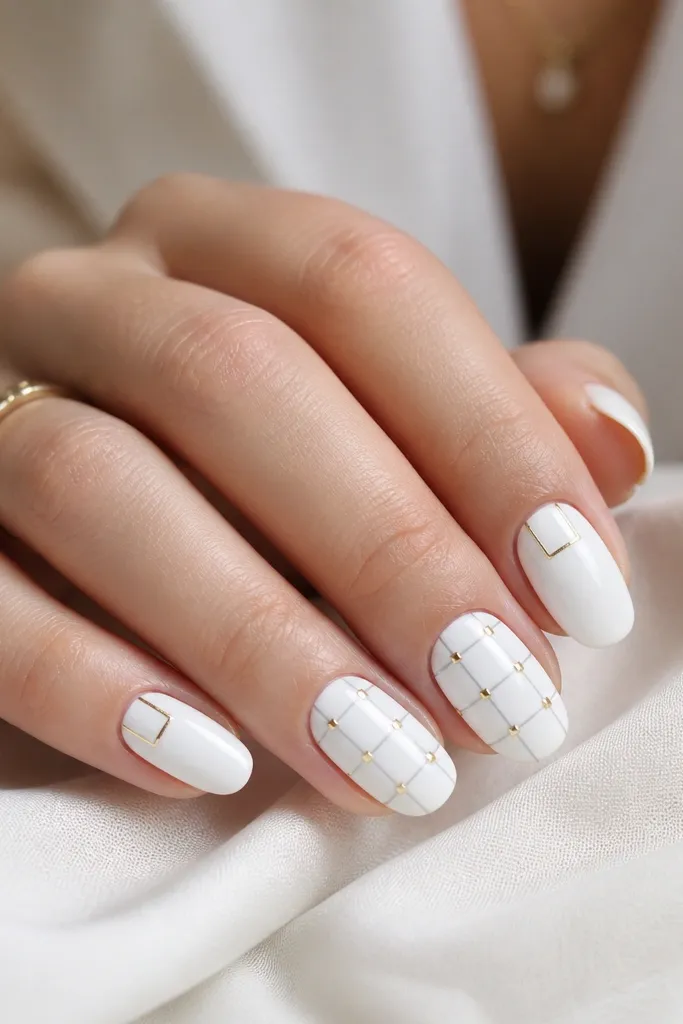
Grid patterns look modern and structured, and gold corners make them feel like design rather than doodles. The white base keeps it bright, and the thin gray grid lines give shape without competing with the gold. I like this on short square nails because the grid lines match the nail shape and make hands look tidy. It also looks great on medium skin tones because the gray lines add a cool contrast while gold warms it up.
Paint all nails glossy white in two coats. On the nails you want patterned, use a thin liner brush to draw vertical and horizontal lines, spacing them evenly to create small squares. At each corner of the grid, add a tiny gold square or gold dot and connect it with a micro line if you want a frame effect. Seal with top coat, and apply one extra thin coat on patterned nails to smooth over the lines.
Use a nail art mat with measurement marks so your grid spacing stays consistent across nails.
Skip thick lines — thick grid lines look like marker instead of nail art.
13. Gold Leaf Accent Side with White Negative Space
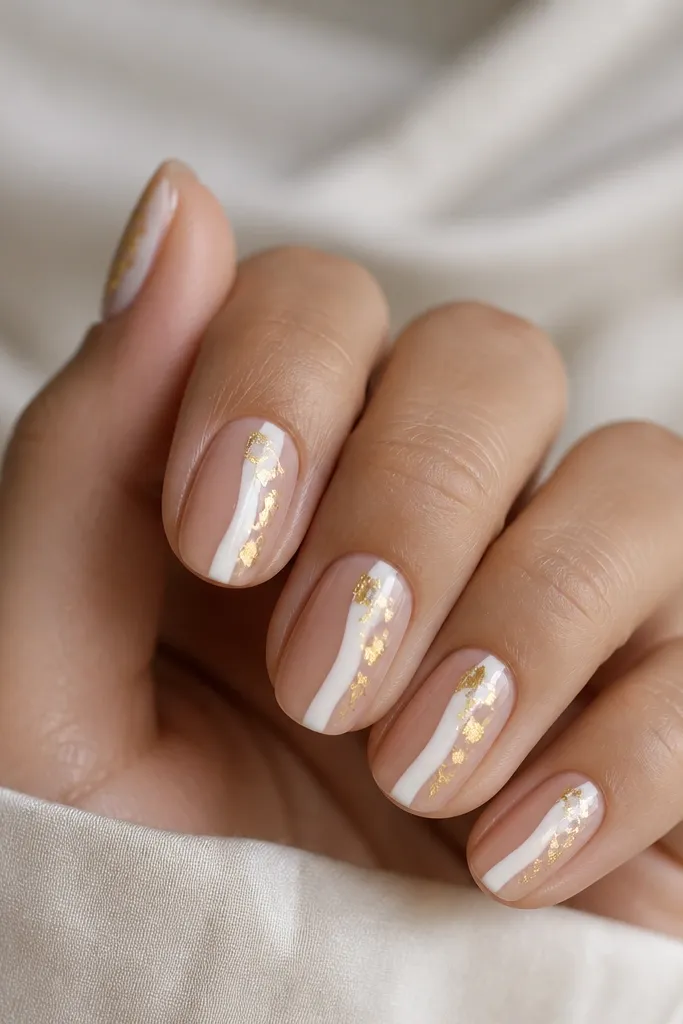
Start with a sheer nude base, then paint a narrow vertical strip in opaque white on one side of each nail. Keep the strip width about 2-3 mm, stopping about 1 mm away from the cuticle and tip edges. Press small pieces of gold leaf into the nude area right next to the white strip, then seal with a thick top coat. Clean up with a detail brush so the leaf doesn’t spread onto the white stripe.
Negative space makes this look cleaner and more modern than full coverage designs. The white side stripe adds the classic white look, and the gold leaf on the nude area gives a light-catching accent without covering everything. I like it on medium almond nails because the vertical stripe elongates the nail. It also flatters hands with long fingers by keeping the design narrow and intentional.
Skip thisAvoid full gold leaf coverage — it turns negative space into clutter.
Editor's noteIf your gold leaf placement feels random, place it only on two nails for a more expensive look.
14. White and Gold Marble French Tips
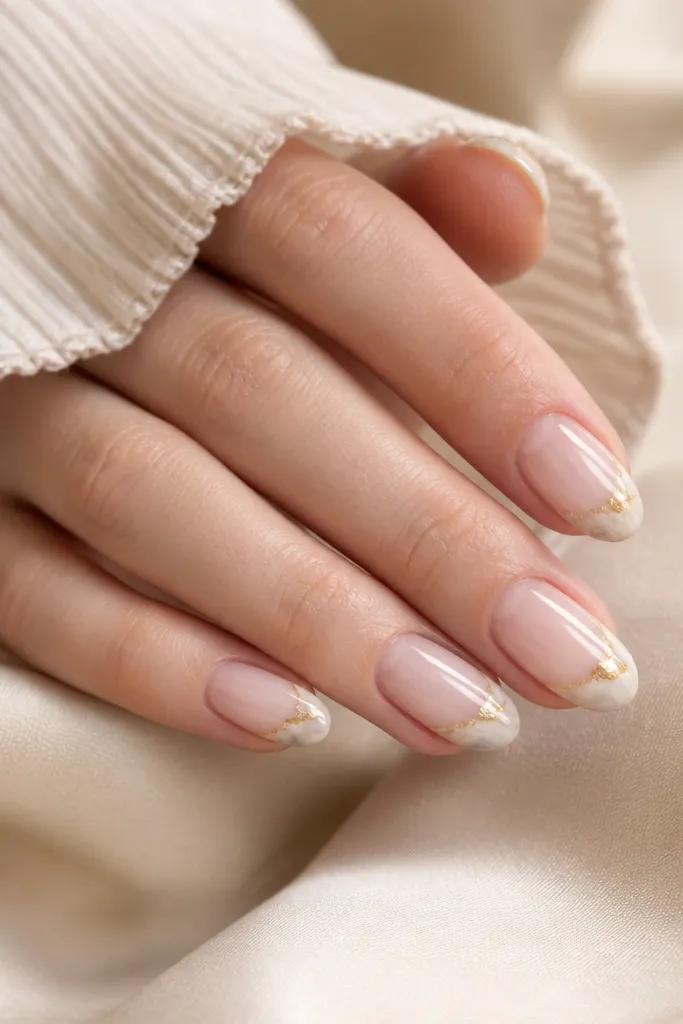
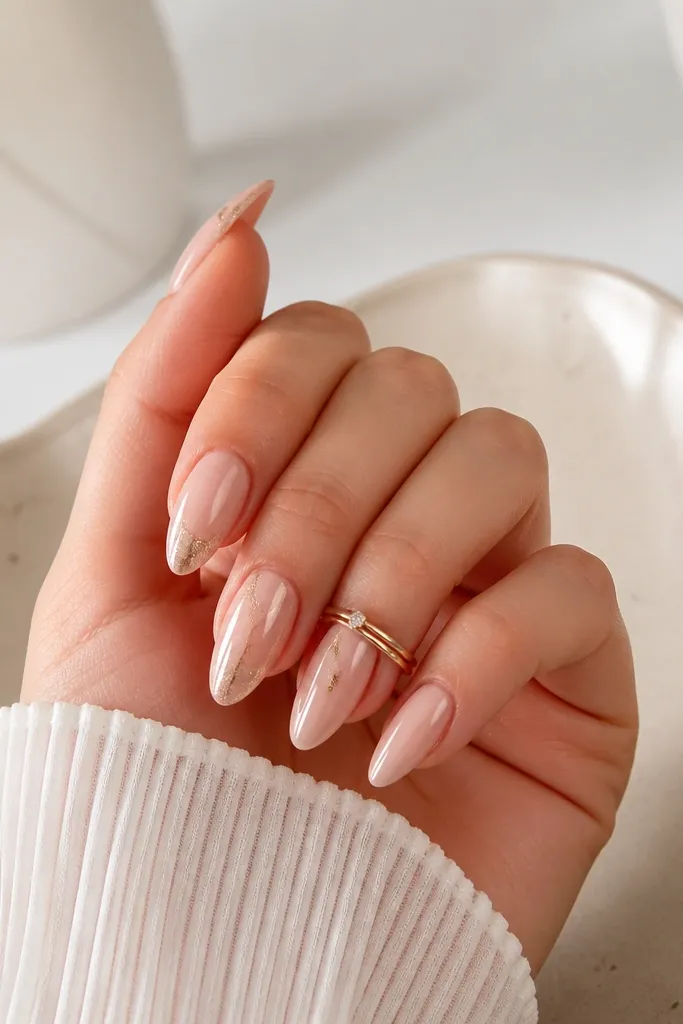
Start with a sheer base coat and let it dry. Paint French tips in milky white, then add faint gray marble lines with a detail brush — keep the veins thin so the white stays dominant. Add a thin gold foil streak across part of the marble near the tip edge, and press it lightly before sealing. Finish with glossy top coat, making sure you fully cap the free edge so the foil doesn’t lift.
This one looks like a designer manicure because the gold sits inside the French tip, not on top of it. The marbled white tip gives depth, and the gold streak adds that metallic highlight. I like it for evenings because it looks understated at first glance and then sparkles as you move your hands. It flatters short nails too since the French shape naturally lengthens, while the gold streak stays thin enough to avoid bulk.
Skip thisDon’t mix heavy glitter into the marble — it ruins the stone look.
Editor's noteUse foil as a streak, not a chunk — drag a strip of foil with tweezers for a long highlight.
15. Gold Outline Hearts on White Background
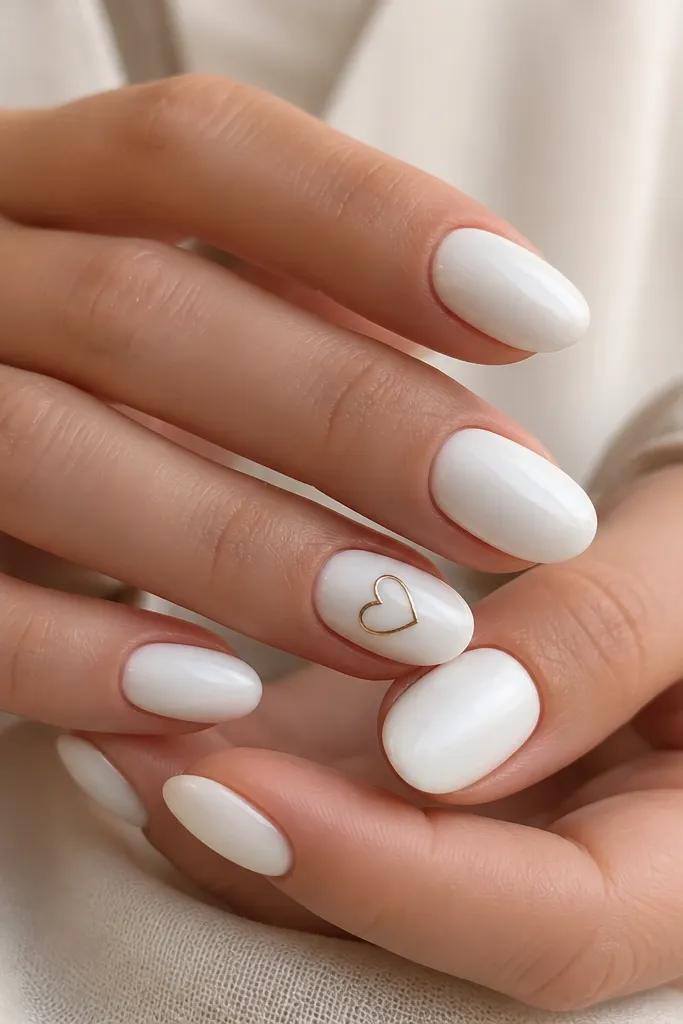
Paint all nails white in two coats and cure/dry fully. With a fine liner brush or nail art pen, draw one small heart on each of two accent nails — about the size of a pea in width. Trace the heart outline with gold, then add a tiny gold dot at the top point if you want a little shine detail. Seal with glossy top coat, and keep the heart outlines thin so they stay smooth.
Hearts can look cheesy fast, but gold outlines keep them classy. The white background makes the hearts clean and readable, and the thin gold lines look like jewelry wire. I like this for date nights, anniversaries, or anytime you want something cute without going full pink. It flatters hands because the hearts sit centered and don’t sprawl toward the cuticle.
Skip thisSkip filled-in hearts — thick gold fill looks heavy and can chip around the edges.
Editor's noteIf your heart looks wobbly, redraw once while it’s still wet — don’t wait and then try to fix it after it dries.