
1. Sheer Nude + One-Line Gold Arc
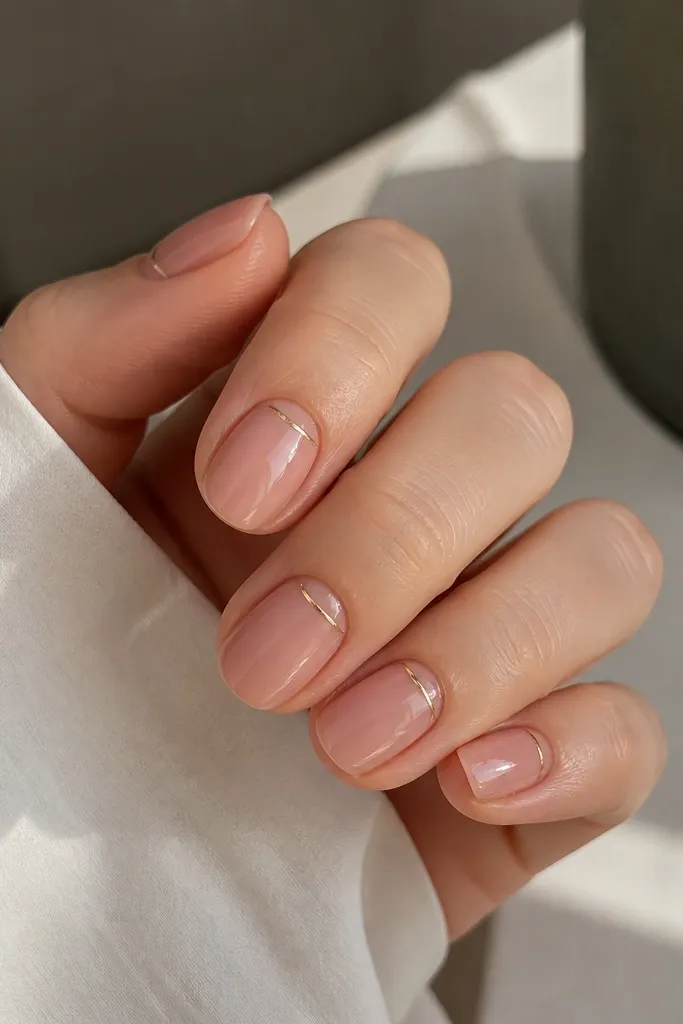
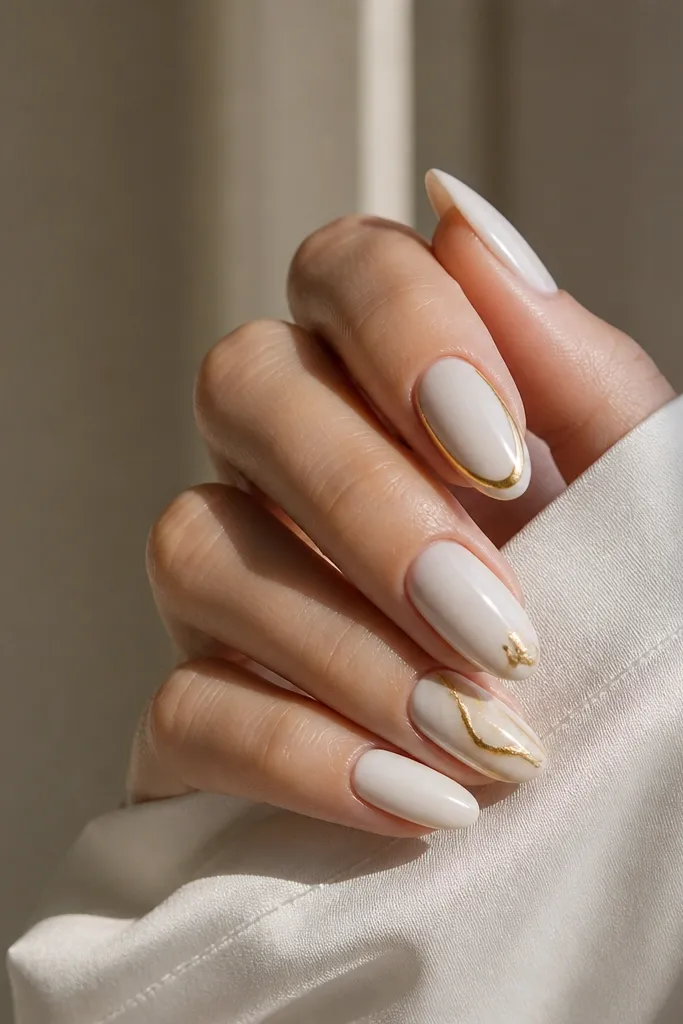
This look is my go-to when I want “date night nails” without committing to complicated art. Start with a sheer rosy nude that matches your undertone — peachy-nude for warm skin, pinky-nude for cool skin. The single gold arc near the cuticle elongates the nail visually because it draws the eye upward without adding bulk. It also works on both short and medium nails; the key is keeping the line thin so it doesn’t look like a sticker. I’ve worn this to office days and dinner plans, and it photographs really clean because the base stays translucent and the gold reads crisp.
Editor's noteIf you don’t have gold line art tools, use a gold foil transfer sheet and cut a tiny curve shape with scissors, then seal over it.
Paint two thin coats of sheer nude, letting each coat dry until it looks evenly satiny. Use a striping brush or a fine gold nail art pen to draw one arc starting about 2-3 mm from the sidewall, curving toward the center, and stopping before you reach the other side. Keep the arc about 1/3 of the nail width and place it 1 mm above the cuticle line. Seal with a glossy top coat, dragging the brush over the tip to lock the edges. If your gold looks patchy, do one quick pass, then add a second pass only where the line needs coverage.
Skip thisAvoid thick gold bands — they make the manicure look costume-y on a sheer base.
2. French Tips in Cream White (Not Bright White)
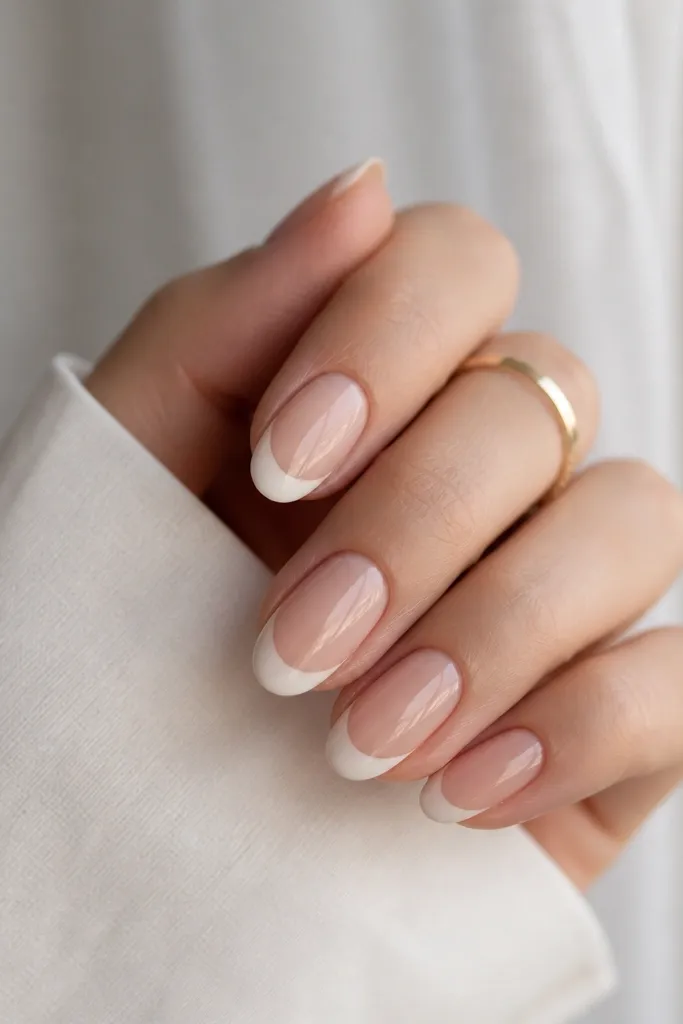
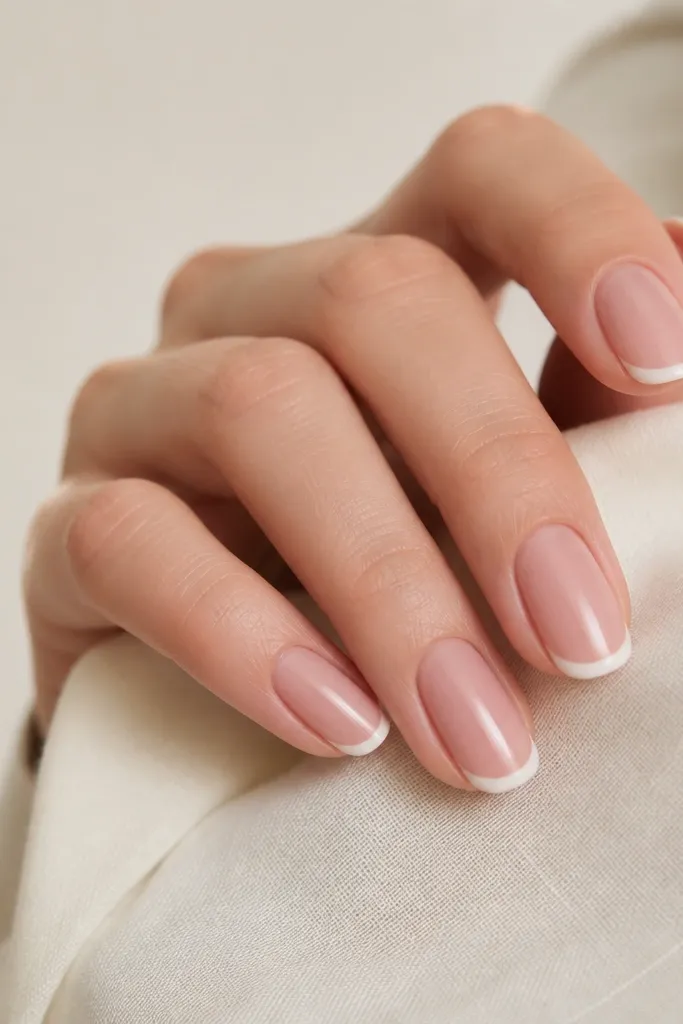
Cream white French tips look classy because the color sits softer than bright optic white. The nude base should be sheer but warm — think beige-pink or nude with a hint of caramel — so your nails don’t look too stark against your skin. This style flatters most skin tones, especially if you choose a nude that matches your undertone instead of a random “pink nude.” I like this on squoval or short almond because the tip curve looks neat and doesn’t overpower the nail bed. It’s also one of the easiest ways to make cheap polish look expensive since you only need clean edges on the tips.
Editor's noteUse tape as a stencil: stick a small strip at an angle, paint the tip, then peel while the polish is still slightly tacky.
Start with a sheer nude base in two thin coats, then clean up the edges with a small brush dipped in acetone. For the tips, paint a thin guideline first — a light arc that follows your natural smile line — then fill in from the guideline outward. Keep the tip thickness about the width of a credit card corner — thin and even — and keep the smile line slightly higher at the sides for a lifted look. Let it dry completely, then add glossy top coat over the entire nail. If you’re doing this on short nails, aim for a tip width of about 1-2 mm so it doesn’t shrink the nail.
Skip thisSkip bright white — it can make budget French tips look harsh and uneven.
3. Latte Brown Micro-Foil Accent
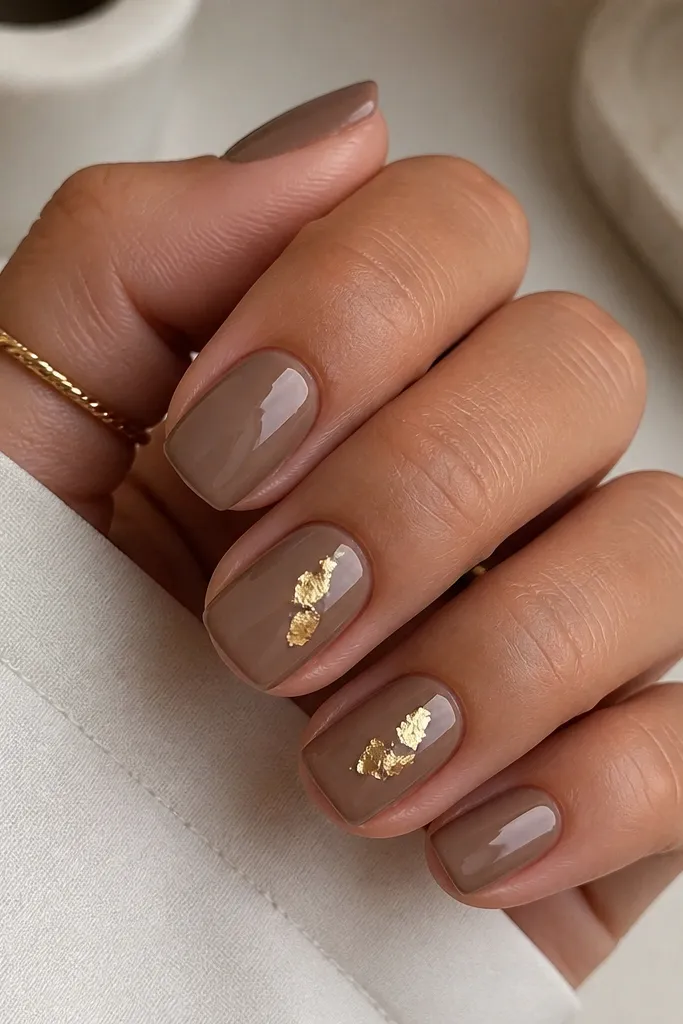
Latte brown is classy in a way that black sometimes isn’t, especially if you want something that looks polished but still cozy. Choose a cream latte shade, not a glossy chocolate — the cream finish makes it feel more “dressy” and less like a plain dark polish. The gold foil accent adds sparkle without turning the manicure into full-on glitter. This flatters medium to deeper skin tones beautifully, but it also works on fair skin if you keep the brown slightly warmer and not too ashy. I wear this when I want my nails to look intentional with sweaters, long sleeves, and simple jewelry.
Apply two coats of the latte brown, letting the second coat level out for a smooth look. Add a glossy base of clear top coat on the accent nails where you want the foil, then press small foil fragments lightly with tweezers. Keep the foil cluster under the center of the nail, about 3-4 mm wide, so it reads as a highlight instead of decoration. Seal with one generous layer of top coat, then do a second thin top coat after it dries to smooth any sharp foil edges. If you get foil stuck in the cuticle area, remove it with a cotton swab soaked in acetone before sealing.
Pat foil onto a tacky top coat, not a fully wet layer — it sticks in smaller pieces and looks more expensive.
Avoid big foil chunks — they look bulky and can catch on hair and fabric.
4. Blush Pink Jelly + Tiny Pearl Dot
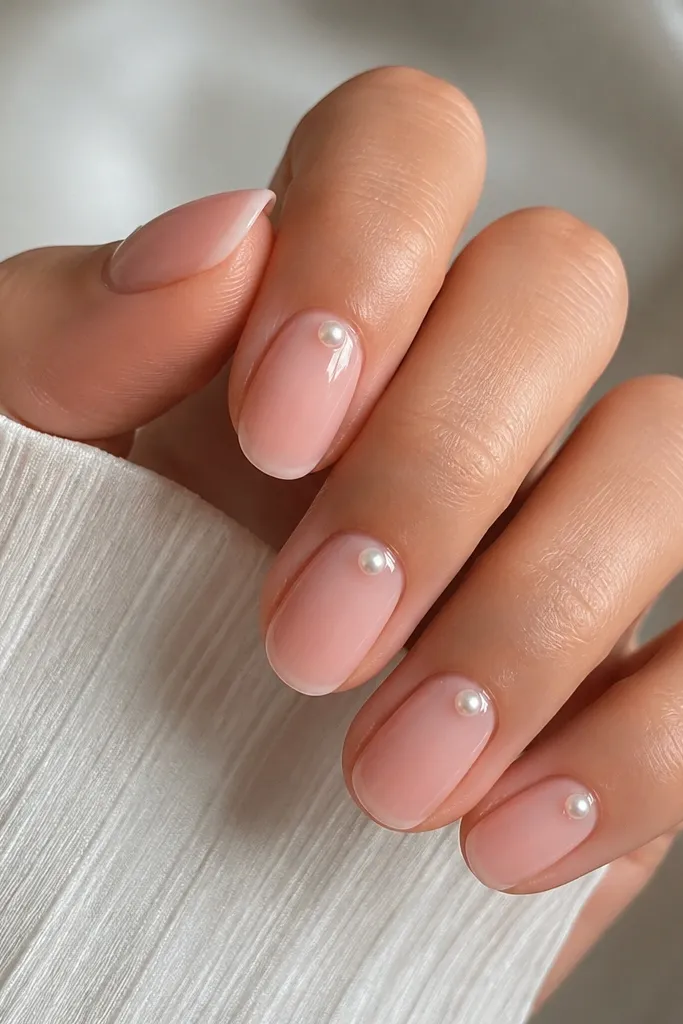
Blush jelly polish gives that “soft, expensive” look because it’s semi-transparent and catches light like glass. The pearl dot is small enough to feel classy, not bridal-cliché, especially when you place it just off the cuticle center. This style flatters fair to medium skin tones by adding a rosy glow, and it looks great on nails that are slightly uneven because the jelly finish smooths the visual. I like it for events because it looks delicate without being fragile-looking. If your hands get photographed a lot, this one reads well because the gloss and pearl catch highlights.
Editor's noteIf your jelly polish streaks, do thinner coats and let each one set 2-3 minutes before the next.
Start with a clear or pink-tinted base coat, then apply two to three thin coats of blush jelly so you keep the semi-transparent look. Cure or dry fully between coats so it doesn’t get streaky. For the pearl, use a dotting tool to place a tiny amount of nail glue near the cuticle center, then press one pearl bead into it. Keep the pearl size small — like a pinhead — and don’t add more than one per nail. Finish with a top coat that you apply gently around the pearl so it doesn’t lift.
Skip thisAvoid large pearls — they overpower the jelly and make the look heavy.
5. Mocha Nude Cream with Negative-Space Half Moon
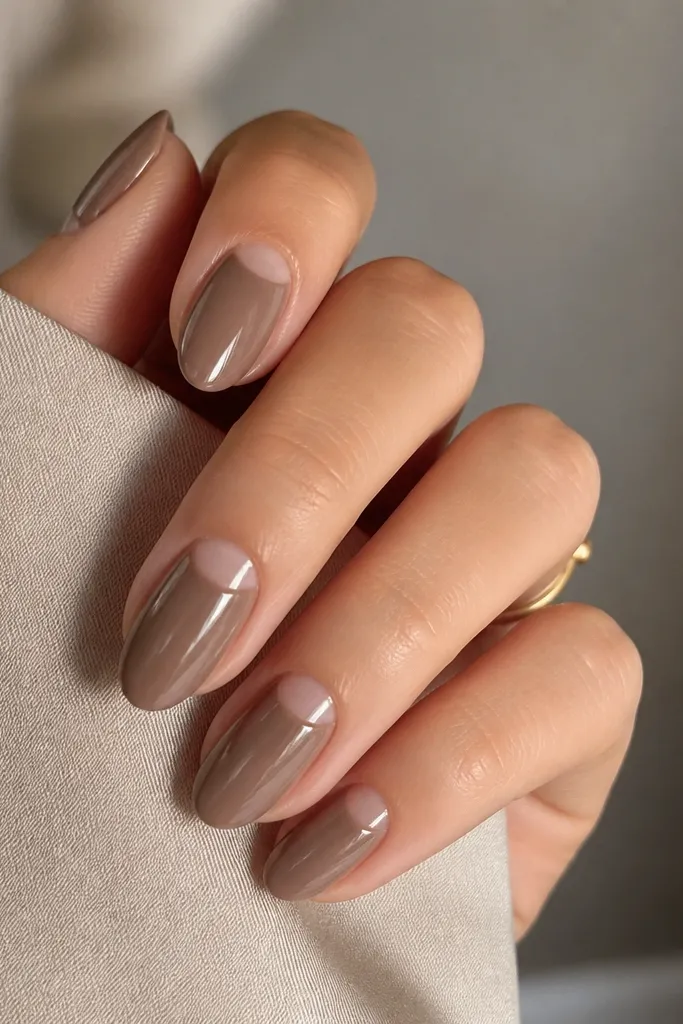
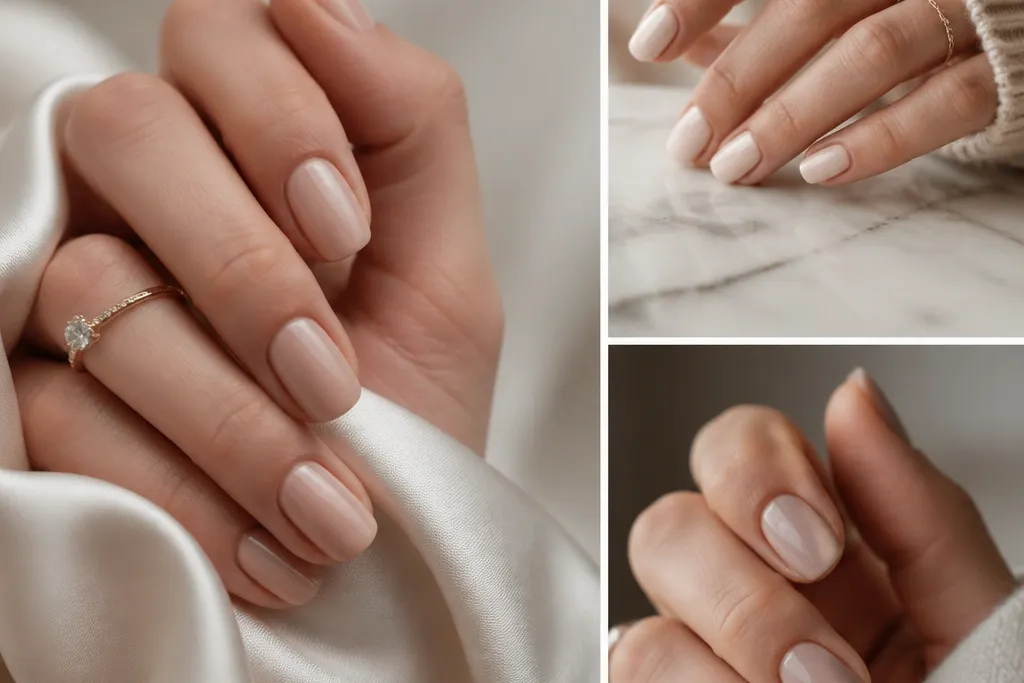
This half-moon negative-space look is classy because it keeps the design clean and architectural. The mocha nude cream adds warmth and looks good with gold jewelry, while the negative space makes the manicure look intentional and modern. It flatters most skin tones because the nude shade is warm and forgiving, but you should choose the closest match to your natural nail bed undertone. On short nails, the negative space makes the nail appear longer by creating a clear boundary at the cuticle. I’ve done this for work weeks when I want my nails to look polished without constant touch-ups from heavy art.
Editor's noteUse a stencil for the first attempt; freehand half moons look uneven fast on budget polish.
Paint the nails with a base coat, then sponge or paint a mocha nude cream in two even coats. To keep the half moon clear, use a small piece of vinyl or a half-moon nail stencil placed at the cuticle line — you want the curve to sit 1 mm below your actual cuticle. Paint over the stencil with the nude, then carefully peel the stencil while the polish is still slightly tacky or after it fully dries, depending on your stencil material. Clean the edges with a tiny brush dipped in acetone. Finish with glossy top coat, sealing around the half-moon edges so the negative space stays crisp.
Skip thisAvoid dragging polish into the negative space — it kills the clean half-moon shape.
6. Classic Rose Pink with Matte Topcoat + Glossy Cuticle Line
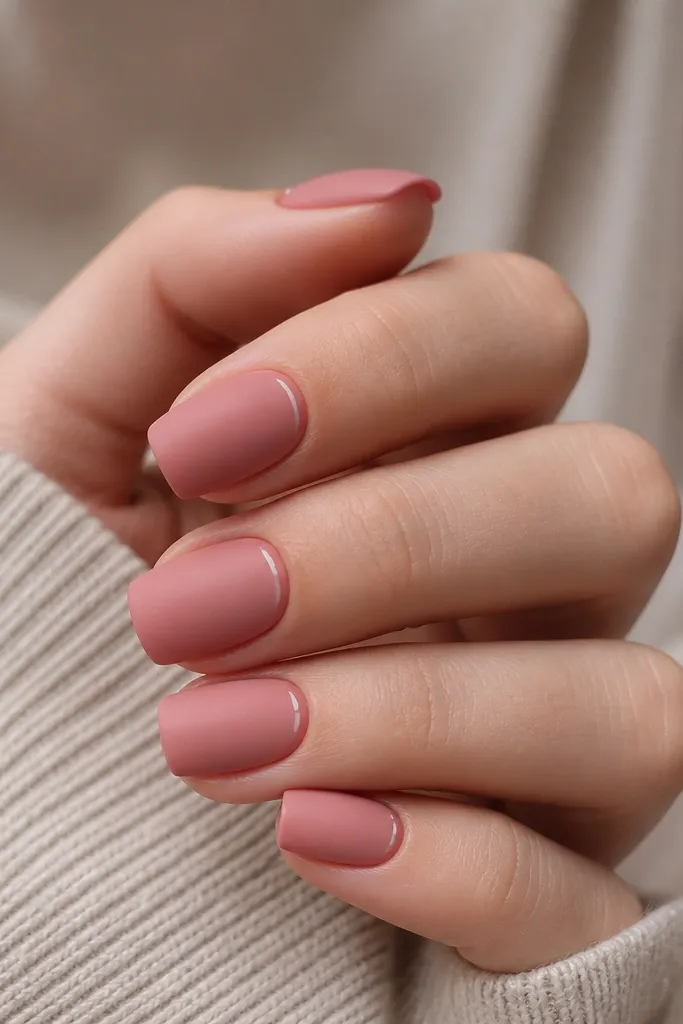
Matte topcoat makes rose pink feel grown-up, not juvenile. The glossy cuticle line is my favorite trick because it gives you one reflective detail while keeping the rest soft and velvety. This flatters fair skin by preventing rose pink from looking too bright, and it flatters medium skin tones by adding a smooth, even finish across the nail. The look works for everyday because it doesn’t require tiny art or glitter. I wear it when I want my nails to look “put together” even when I’m not doing anything fancy with outfits.
Editor's noteIf your matte top coat dries patchy, use a thinner layer and avoid going back over the same spot repeatedly.
Apply two coats of rose pink cream polish and let it dry fully. Seal with a matte topcoat across all nails, then wait 10 minutes so the matte finish sets. Using a fine brush, paint a thin glossy line right along the cuticle curve using glossy top coat or a clear gel top coat. Keep the line narrow — about 0.5-1 mm — and follow the natural cuticle shape. Cure or dry the glossy line separately if your top coat requires it, then check for any smudges near the cuticle and clean with a cotton swab.
Skip thisAvoid thick glossy lines — they make the manicure look like tape residue.
7. Champagne Shimmer Half-French
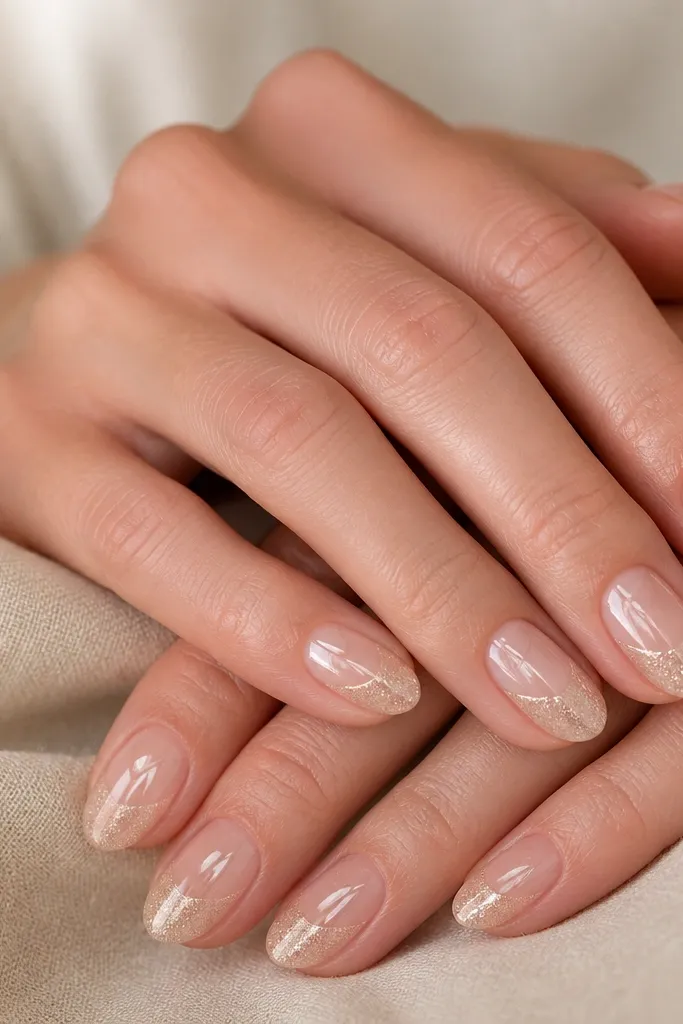
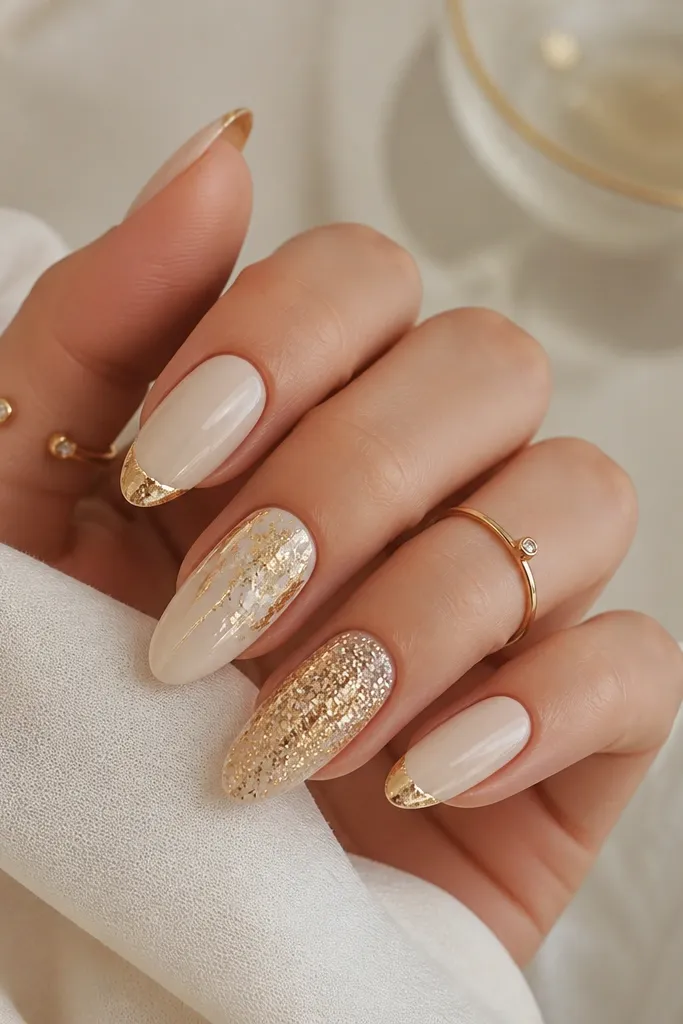
Champagne shimmer half-French looks classy because it gives sparkle only where your nails already catch light. The sheer nude base keeps it wearable, and the shimmer layer reads like jewelry instead of glitter. This works on fair, medium, and deeper skin tones because champagne has a neutral gold tone that doesn’t clash with undertones. I like it for nights out and birthdays because it looks festive without needing full glitter. On short nails, the half-French keeps the nail from looking too “tipped,” so your hands still look delicate.
Editor's noteUse shimmer polish with fine particles; chunky shimmer makes the half-French feel rough.
Start with a nude sheer base in two coats. Paint a thin guideline across the tip area where you want the shimmer to start, then fill the top half of the tip with champagne shimmer polish. Keep the shimmer band about 2-3 mm tall on short nails and slightly taller on medium nails. Clean the edges with a brush dipped in acetone so the line stays sharp. Finish with a glossy top coat, and apply extra top coat on the shimmer area so it smooths and doesn’t feel gritty.
Skip thisAvoid full shimmer tips — they look louder and can tip into “party” instead of elegant.
8. Deep Emerald with Thin Nude Side Stripe
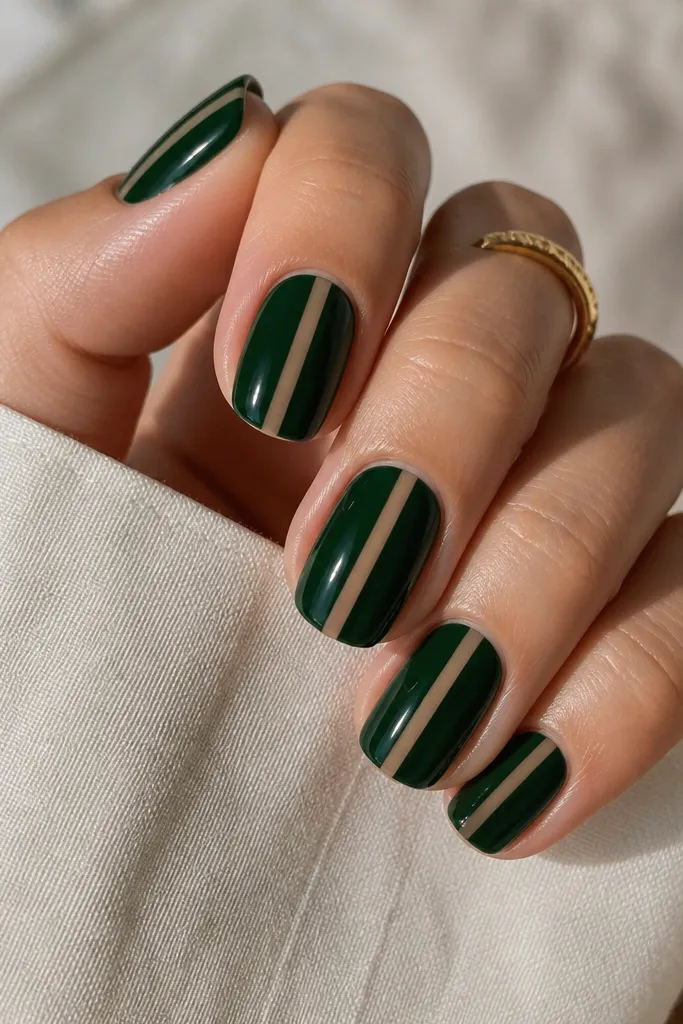
Deep emerald is one of the few dark colors that still looks classy, especially when you pair it with nude. The thin nude side stripe breaks up the darkness and makes the nail look longer, like a tailored sleeve. This flatters cool undertones and also looks stunning on warm skin because green has that contrast effect. I’ve worn it to holiday dinners and even casual weekends because it doesn’t require glitter to be interesting. Keep the stripe narrow and clean — that’s what makes it look intentional rather than messy.
Paint two coats of deep emerald cream polish, letting each coat dry until it’s no longer tacky. For the nude stripe, use a nude polish that matches your skin undertone and apply it with a striping brush — aim for 1 mm wide. Place it slightly off-center if you want a more modern look, but keep it consistent across all nails. Let the stripe dry, then seal with a glossy top coat, dragging the brush over the tip to lock the stripe edges. If your stripe bleeds, wipe the brush and try again rather than spreading the mess.
If you don’t have a matching nude, mix a tiny drop of peach or pink into a clear base to get a custom stripe tone.
Avoid wide stripes — they make the green look like it’s cut with tape.
9. Soft Nude Ombre with Clear Gloss Sealer
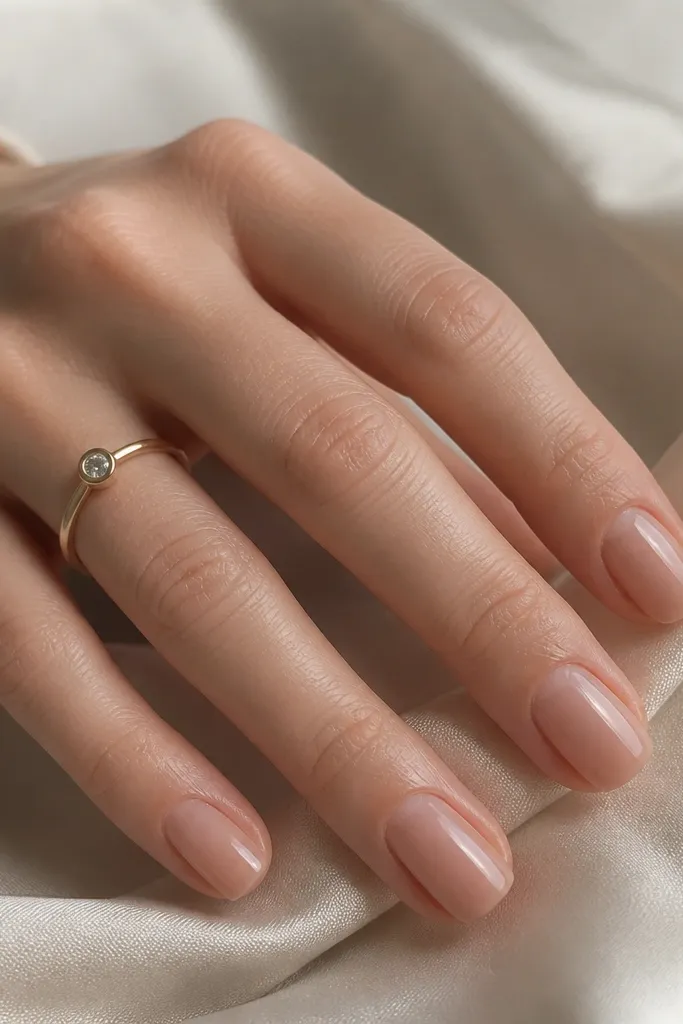
Ombre looks classy when it’s subtle. This nude ombre version is all about a gentle fade from a sheer cuticle to a slightly deeper nude tip, so your nails look longer and smoother. It flatters nearly everyone because you’re using nude tones close to your natural nail bed color, which means it doesn’t fight your skin. I like this for days when I don’t want visible lines from nail art, and it grows out better than a harsh color block. The key is getting a soft blend — the finish should look like your nail naturally fades, not like you used a sponge too hard.
Editor's notePractice on one nail first with a tiny amount of polish on the sponge so you learn the right pressure for your brand.
Apply a sheer base coat first. Sponge a sheer nude at the cuticle and blend it toward the middle using a makeup sponge dabbed lightly — less pressure gives you the clean fade. Then apply the deeper nude only at the tips and blend upward with a few gentle dabs until the transition disappears. Let it dry, then add a clear glossy top coat in two layers, especially at the tips. The second top coat makes the fade look seamless and gives that “gel-like” shine even with regular polish.
Skip thisAvoid hard edges at the blend line — that’s what turns ombre into a stripe.
10. Black Micro Dot Accent on Nude Base
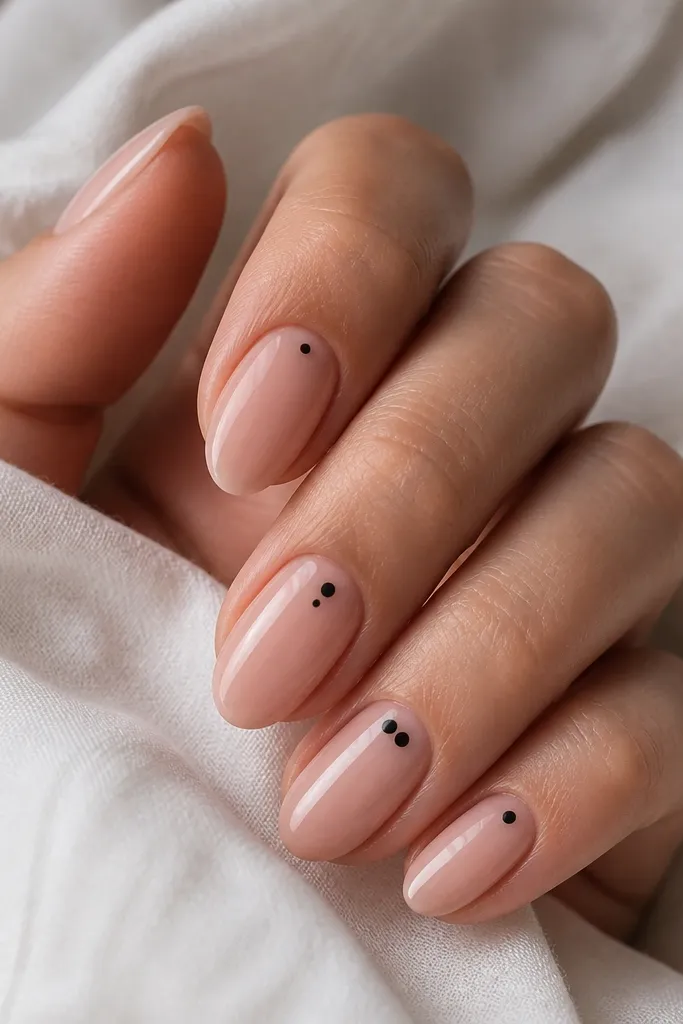
Tiny black dots on a nude base are classy because they’re graphic, controlled, and easy to read from a distance. The nude keeps it wearable, and black adds contrast without turning the manicure into a heavy pattern. This works across skin tones because black is neutral and the nude base ties the design to your hand. I love it for minimalists who still want something that looks styled. On short nails, the dots make your nail look neat because they’re small and placed in predictable spots.
Editor's noteIf your dotting tool drags, wipe it on a paper towel between nails so the polish isn’t too wet.
Paint a nude pink base in two coats and let it dry completely. Use a dotting tool loaded with black polish to place one dot about 1-2 mm from the cuticle center on each nail. On two accent nails, add a second dot near the same sidewall but keep the spacing consistent. If you want the dots to look extra crisp, do them on fully dry polish and then seal right away. Finish with a glossy top coat, applying gently over the dots so they stay domed and don’t smear.
Skip thisAvoid big dots — larger circles start looking like accidental stains.