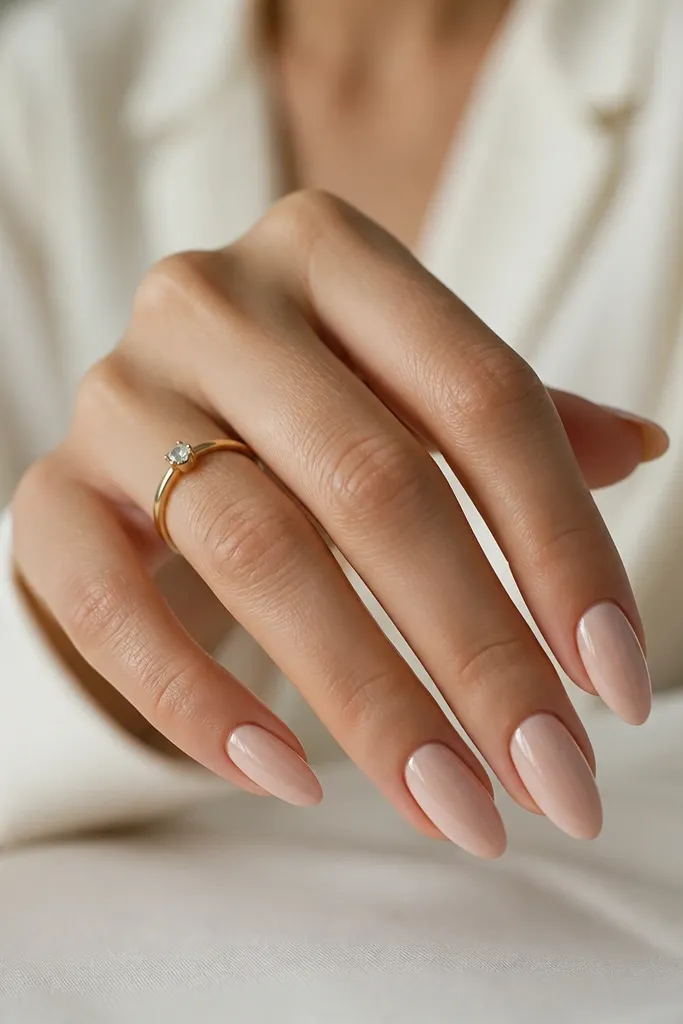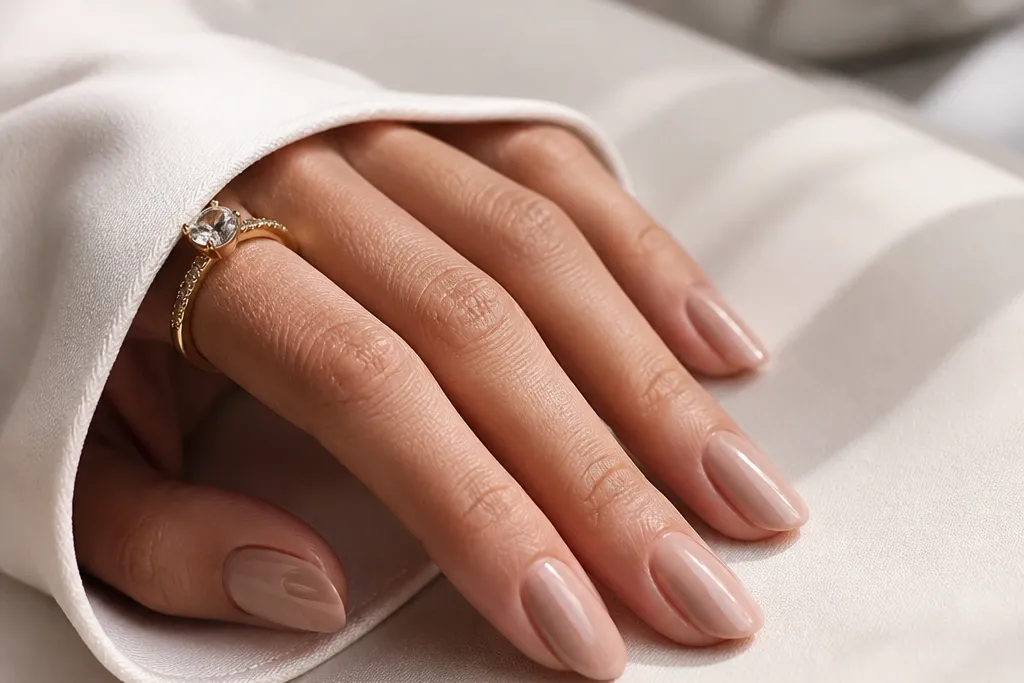
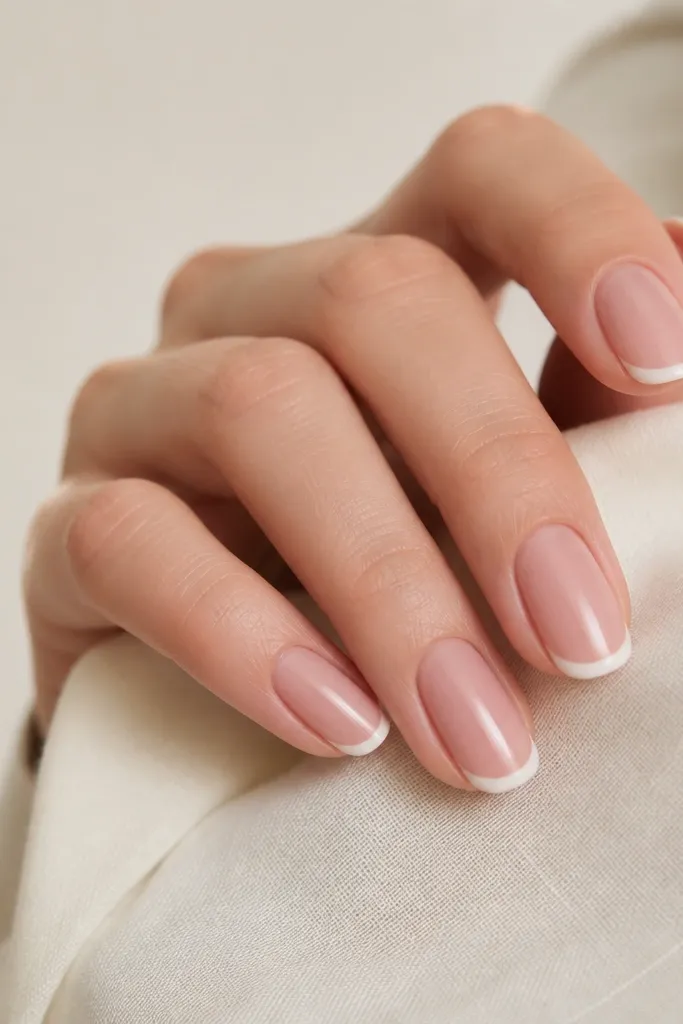
1. Micro-French on Sheer Blush
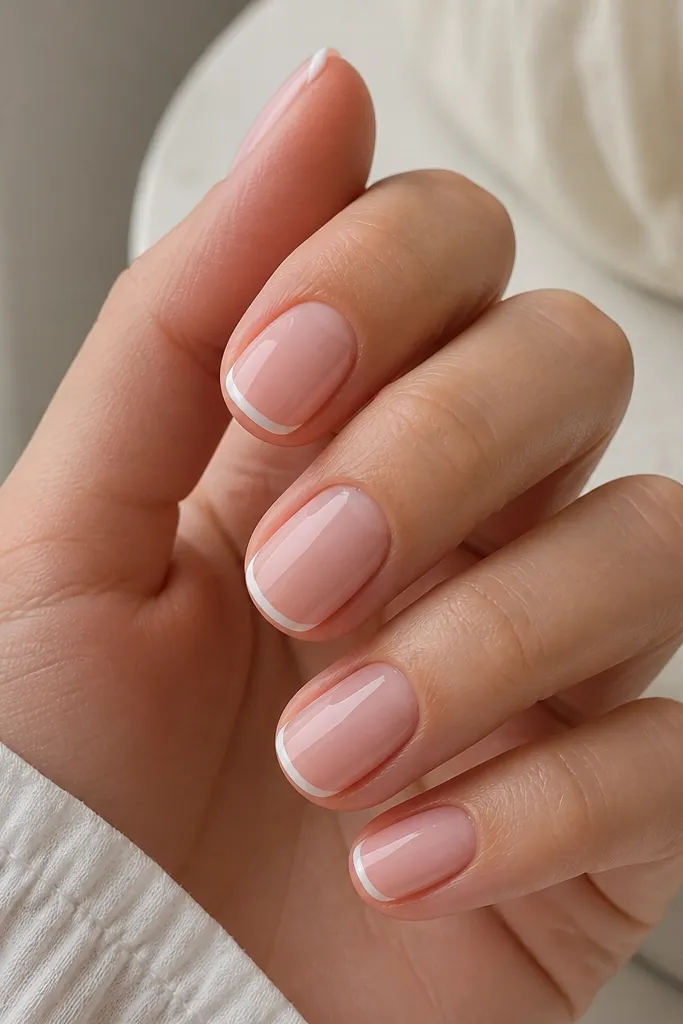
I love this on small nail beds because the French line is tiny enough that your nails still look airy. Start with a sheer blush that matches your skin’s warmth — if you’re more peachy, choose rose-peach; if you’re cooler, choose dusty pink. The micro line stretches the nail visually without making it look like you’re wearing thick nail art. It reads classy in person and in photos because the negative space near the cuticle stays calm.
File your nails into a short oval, keeping the sidewalls smooth so the tip doesn’t flare. Apply two thin coats of sheer blush, letting each coat level out before curing or drying. Place striping tape just off-center from the edge so the white line stays thin, then paint white and remove the tape while the polish is still slightly tacky. Finish with a glossy top coat, and cap the free edge so the tip stays crisp longer.
Use a white polish that covers in one pass; watery white makes the line look streaky.
Don’t make the French line too thick — it turns into “cute” instead of expensive.
2. Oyster Nude with One Pearl Accent
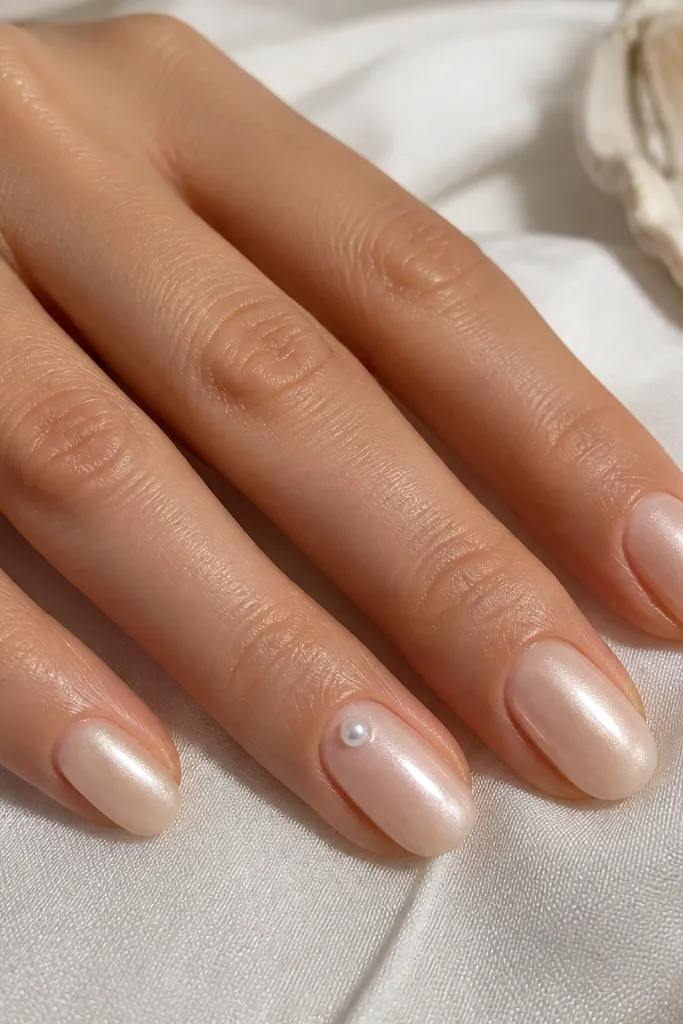
This look is classy because the base already has dimension, so you don’t need heavy designs. Oyster nude flatters most skin tones because it sits between beige and pink without going too yellow. The pearl accent is small — placed near the cuticle it looks intentional, not costume-y. I’ve worn this to dinners and casual work days; it makes hands look polished even when you’re not wearing jewelry.
Start with a nude base that has a micro-shimmer, then add a second coat for opacity so the shimmer looks smooth. On the ring finger, use a dotting tool to place a small bead of clear gel or nail glue where you want the pearl. Press the pearl in gently and wipe any squeeze-out with a lint-free wipe before curing. Add one more thin layer of top coat over everything, keeping it smooth around the pearl so it doesn’t snag.
Choose a pearl with a slightly matte halo — it looks more natural against glossy nails.
Don’t place pearls in the center of the nail; near the cuticle looks cleaner on short lengths.
3. Chocolate Brown Gloss with Gold Outline
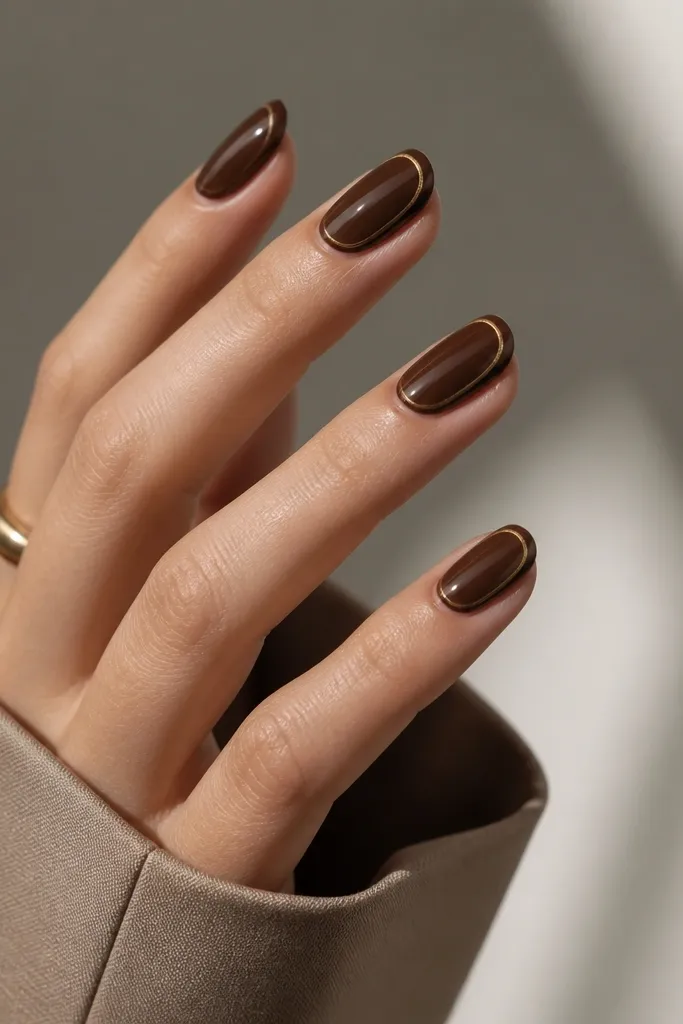
Paint two coats of chocolate brown, keeping the center slightly thicker so the shine catches evenly. Use a fine striping brush with gold gel or gold chrome liner to draw a thin outline: trace the tip curve first, then lightly connect down the sides. Keep the outline about 1 mm away from the cuticle so it doesn’t look crowded. Cure/dry, then seal with a glossy top coat to lock the gold in and smooth any brush texture.
Chocolate gloss looks expensive because it’s rich and opaque, and the shine makes it look freshly polished. It’s especially flattering if you have warm undertones or darker skin tones — the brown ties in with your natural warmth and makes the nail bed look longer. The gold outline stays classy because it’s thin and evenly spaced. I like this for fall, but honestly it works year-round because brown + gold never looks random.
Skip thisAvoid thick gold outlines — they look like costume jewelry.
Editor's noteIf your gold looks too bright, mix gold liner with a touch of clear gel so it looks more like metal leaf than glitter.
4. Blackened Teal with Tiny Dot Cluster
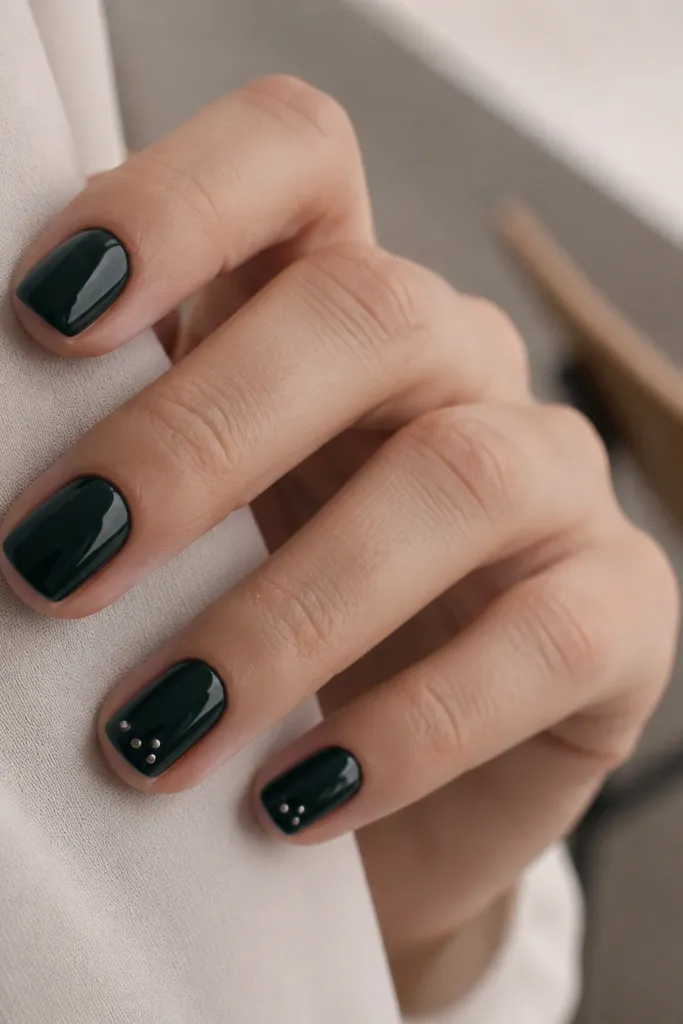
Blackened teal looks classy because it’s dark but still interesting, and it photographs better than plain black. It flatters cool and neutral undertones and makes veins and rings look crisp. The tiny dot cluster is the only detail, so the nail stays clean. This is one of my go-to “going out but minimal” looks because it doesn’t fight your outfit.
Apply two thin coats of blackened teal and check coverage under a bright lamp. On the accent nails, use a dotting tool dipped in silver chrome powder mixed with clear gel (or silver acrylic paint) to place three micro dots. Arrange them as a tight triangle close to the free edge, not in the middle. Cure/dry, then apply a glossy top coat that covers the dots so they don’t snag.
Make the dots smaller than you think — micro dots look intentional, big dots look childish.
Don’t use chunky glitter — it dulls the “expensive” feel fast.
5. Soft Taupe with Diagonal Nude Stripe
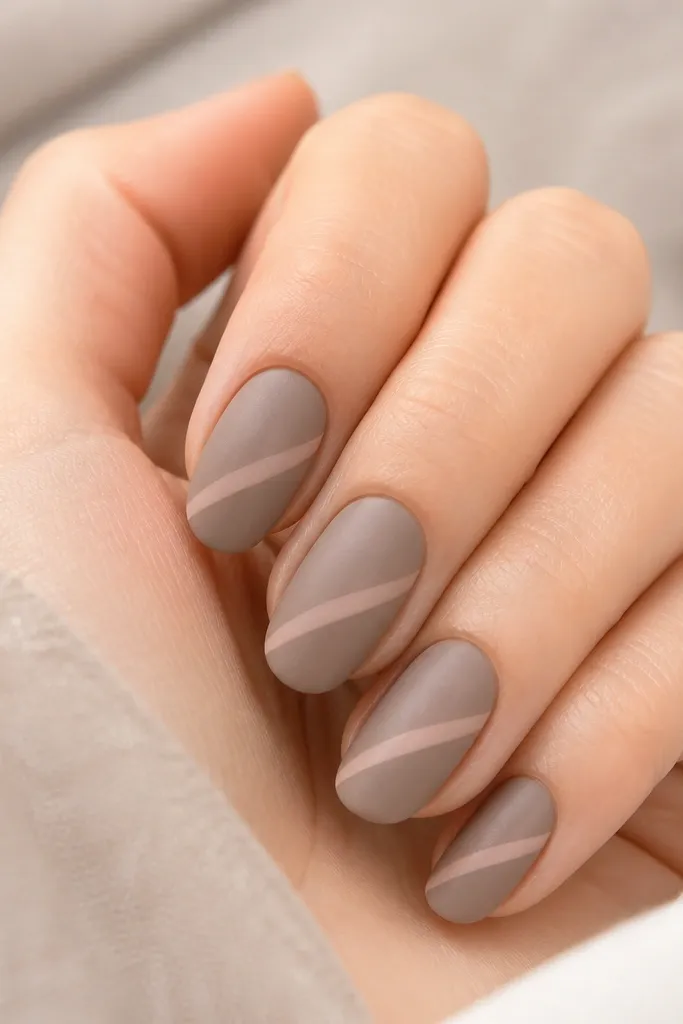
Paint two coats of soft taupe, then let it dry fully before top coat. Use striping tape to create a diagonal path; press it down firmly so you get a clean edge. Paint the stripe with a sheer nude (or a nude gel in a similar tone) in one thin coat, then peel the tape. Seal with a matte top coat over the nails, but keep the stripe edges crisp by applying a thin final coat only after the stripe is fully set.
Taupe plus a nude stripe makes nails look longer because the diagonal line draws the eye across. I like this on short nails because the stripe is thin and keeps the shape sleek. The taupe flatters most skin tones since it’s neither too gray nor too pink; it’s the “middle” shade that plays nice with everything. The matte-satin finish reads chic when the color is smooth and not patchy.
Skip thisSkip thick tape lines — they make the stripe look chunky on small nails.
Editor's noteIf your stripe looks uneven, redo it before top coat — matte hides flaws less than gloss does.
6. Glazed Rose Ombré Tips
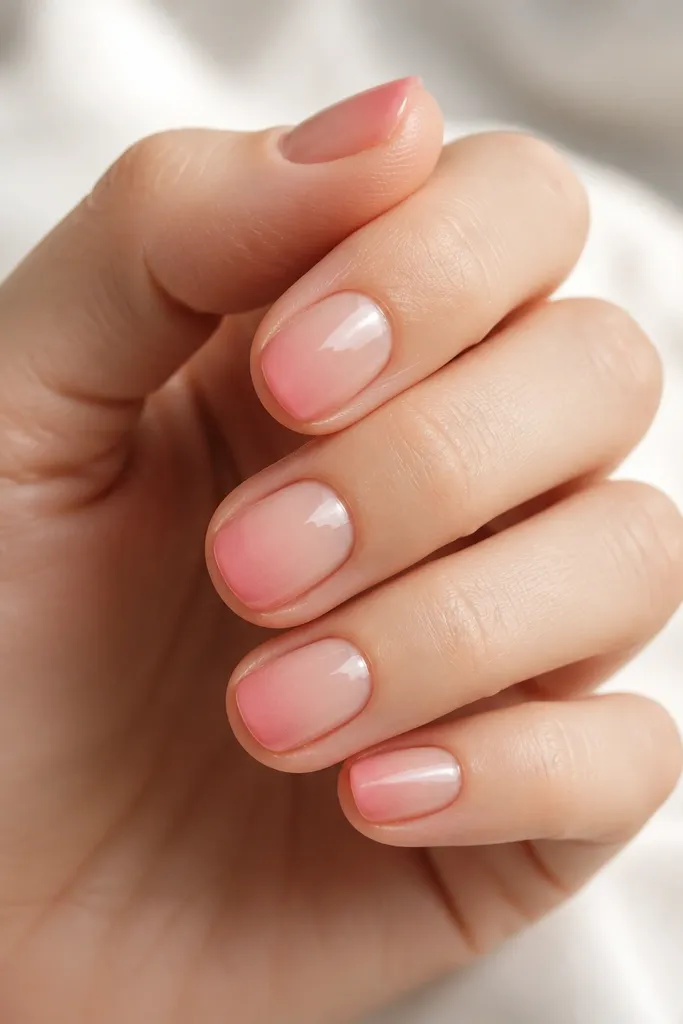
This is the kind of ombré that looks expensive because it stays subtle and stays at the tips. A glazed rose fade flatters fair to medium skin tones because the pink stays soft instead of neon. The key is leaving the cuticle area untouched so your nails look clean and neat. I use this when I want “pretty” without committing to a full design on every nail.
Start with a glossy nude base, two coats for even coverage. For the ombré, sponge a slightly darker rose-pink only on the upper tip area, then blend downward with light pressure. Clean up the sides with a flat brush dipped in acetone-friendly cleaner (or a gel wipe) so the fade stays crisp. Finish with a glossy top coat, and cap the free edge so the ombré doesn’t lift at the border.
Use three sponge dips max — too many passes make the fade muddy.
Don’t drag the sponge all the way to the cuticle; it makes the whole nail look stained.
7. Clear Jelly Base with Red Micro-Heart
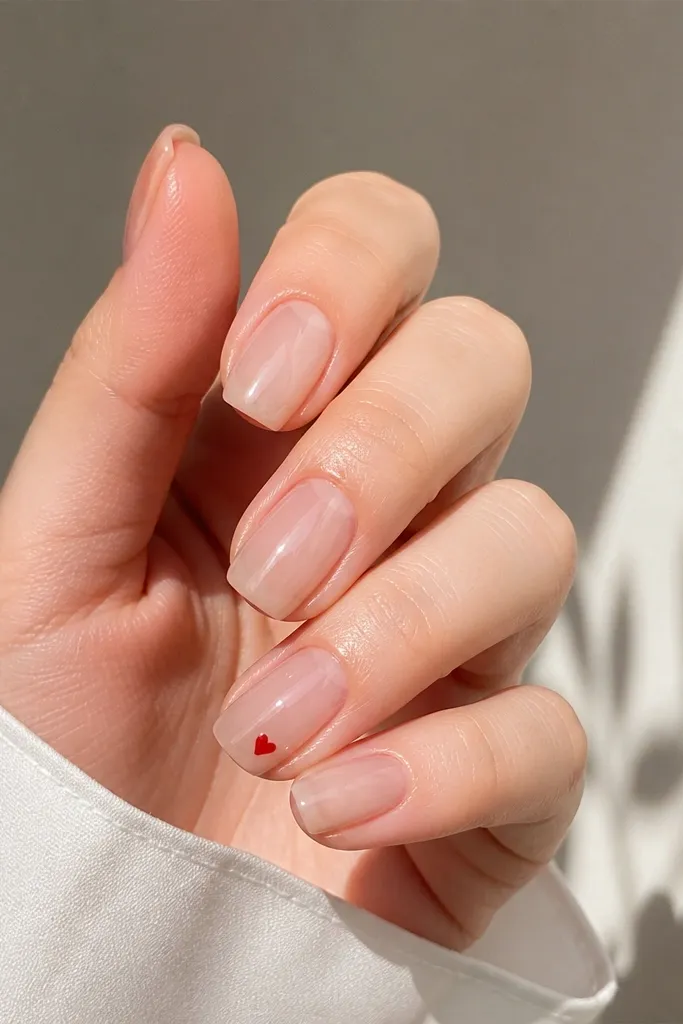
Apply a clear jelly base in two thin coats, keeping it slightly thicker at the center for that glassy look. On the accent nail, place a tiny dot of red gel near the tip area using a dotting tool. Use a toothpick or heart stamp to shape it into a small heart, then cure. Seal with a glossy top coat, making sure the top coat smooths the heart so it doesn’t catch.
Clear jelly with a micro heart looks classy because it’s cute at a small scale. The transparent base makes your nail bed look healthy and the red heart adds just enough contrast. This flatters shorter nails because the heart sits near the tip and doesn’t take up space. I wear this for Valentine season and also for days when I want a playful detail without going full cartoon.
Skip thisDon’t put the heart near the cuticle — it crowds the nail bed and looks messy.
Editor's noteIf you can’t freehand the heart, use a tiny heart sticker backed with clear gel so you can correct placement.
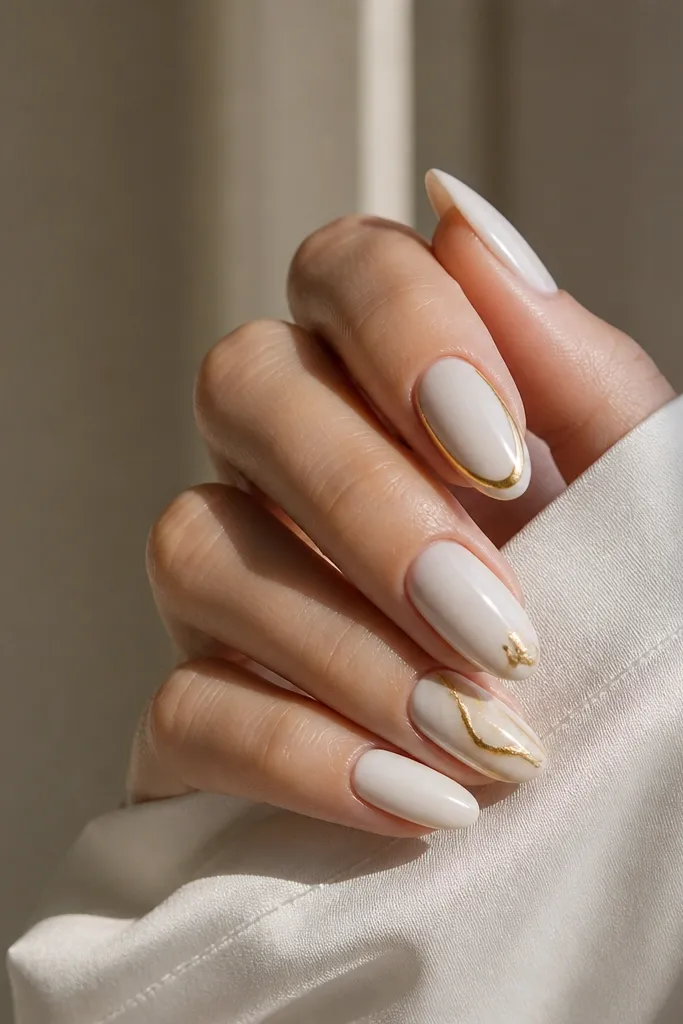
8. Ivory Cream Nails with Gold Foil Flick
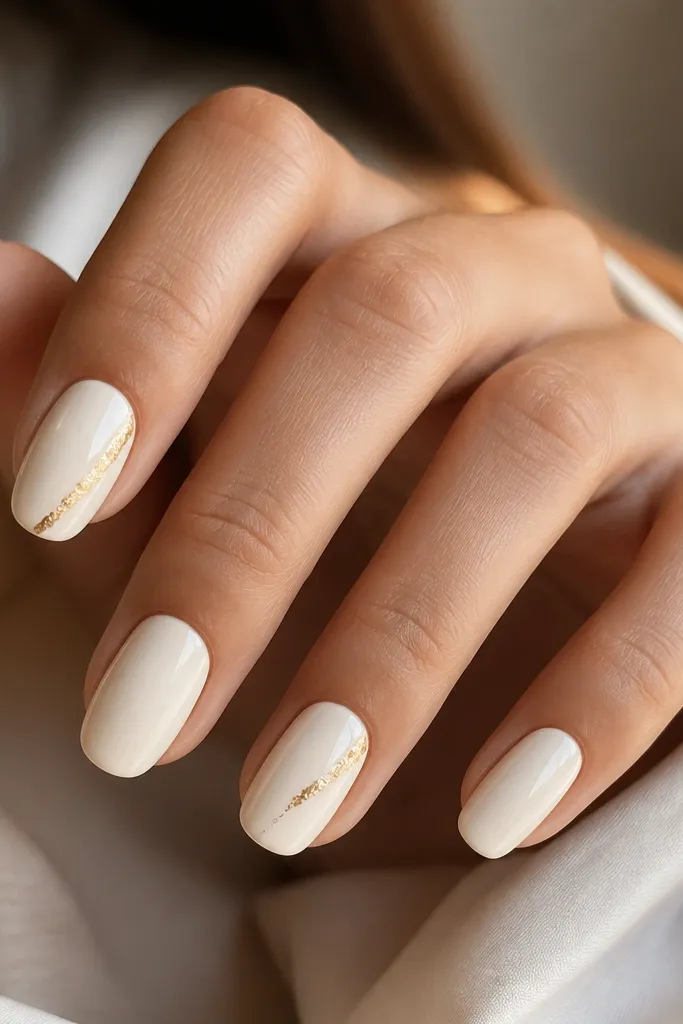
Ivory cream reads expensive because it’s soft, clean, and bright without being stark white. It flatters almost everyone, especially if you wear gold jewelry, because the warm ivory matches that tone. The gold foil flick is subtle enough to keep the nails elegant even on short lengths. This is a great “dress up a plain manicure” option when you don’t want full nail art.
Paint two coats of ivory cream, check for streaks under light, and smooth any uneven spots with a top coat layer before curing. For the foil flick, use a small piece of gold foil and a dab of tacky base where you want the flick. Press the foil lightly, then lift — you should get a thin irregular edge. Seal with a glossy top coat, and keep the foil area small so it stays delicate.
Gold foil looks best when it’s uneven in size — aim for one small flick, not a big patch.
Don’t cover the whole nail with foil; it looks like a craft project.
9. Navy Velvet Matte with One Clear Crystal
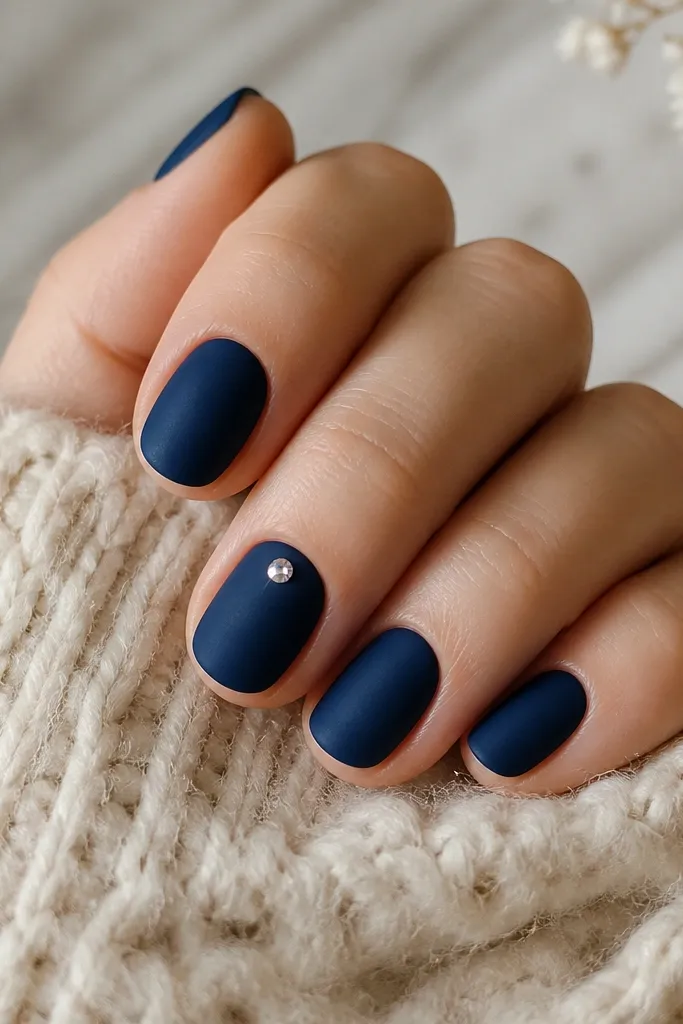
Apply two coats of navy polish, then finish with a matte top coat or a velvet matte powder topper made for nails. Let it dry fully so the surface stays soft. Place one clear crystal near the cuticle on the ring finger using nail glue or a tiny dot of clear gel, then cure. Add a thin gloss top coat only over the crystal area if needed, or keep everything matte for a more fashion-forward look.
Navy velvet matte looks classy because matte hides minor ridges and the deep color looks clean and grown-up. It’s flattering on medium to deep skin tones and also looks striking on fair skin. The single clear crystal adds shine without turning the set into bling overload. I like this for nights out because the crystal catches flash photos.
Skip thisDon’t use a gritty matte over chunky glitter — it turns rough and cheap.
Editor's notePress the crystal down for 5 seconds so it doesn’t lift at the edges.
10. Mocha Nude with Micro Chrome Half-Moon
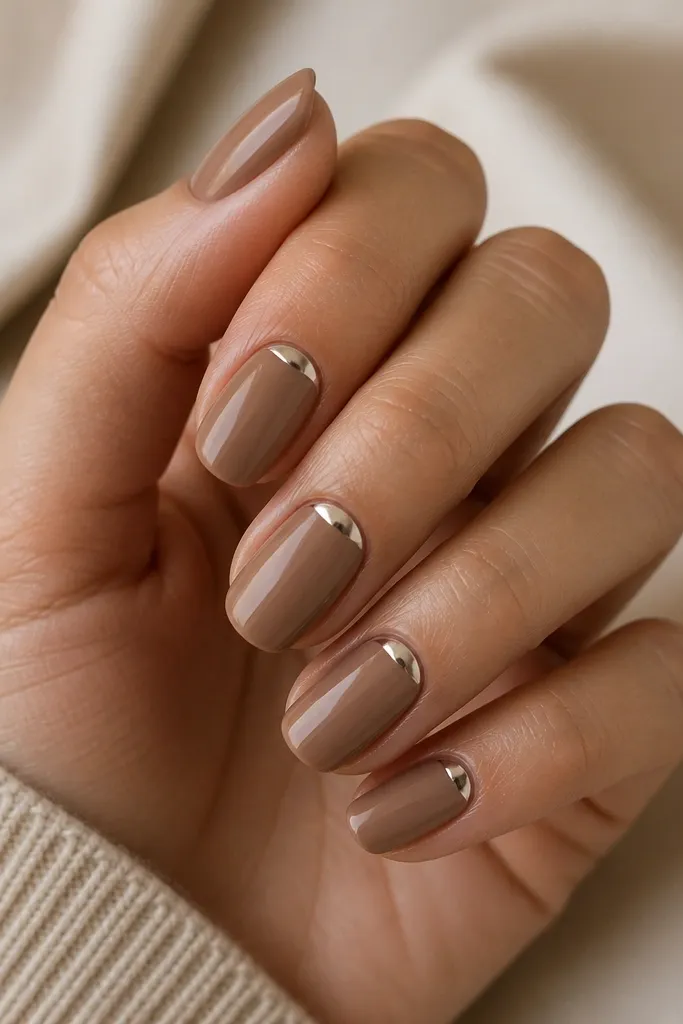
Paint two coats of mocha nude and keep the cuticle area clean with a careful edge brush. Use a small stencil or freehand with a thin liner brush to paint a half-moon shape right at the cuticle line, leaving a small gap from the skin. Apply chrome powder over the tacky line, then wipe off excess with a soft brush. Seal with a glossy top coat, but use a thin layer so the chrome stays bright.
A micro chrome half-moon makes nails look expensive because it mimics the clean look of a manicure line without heavy art. Mocha nude works when your skin reads neutral-warm, and it looks especially good with gold rings. Keeping the half-moon small is what makes it classy; it looks like a detail from a high-end salon. This is a great option if you want something that feels “done” but still minimal.
Skip thisAvoid putting chrome too high — it can look like a grown-out ring stain.
Editor's noteUse a liner brush that’s small enough to control — chrome spreads if your line is too wide.
11. Pearl Grey with One Thin Silver Side Line
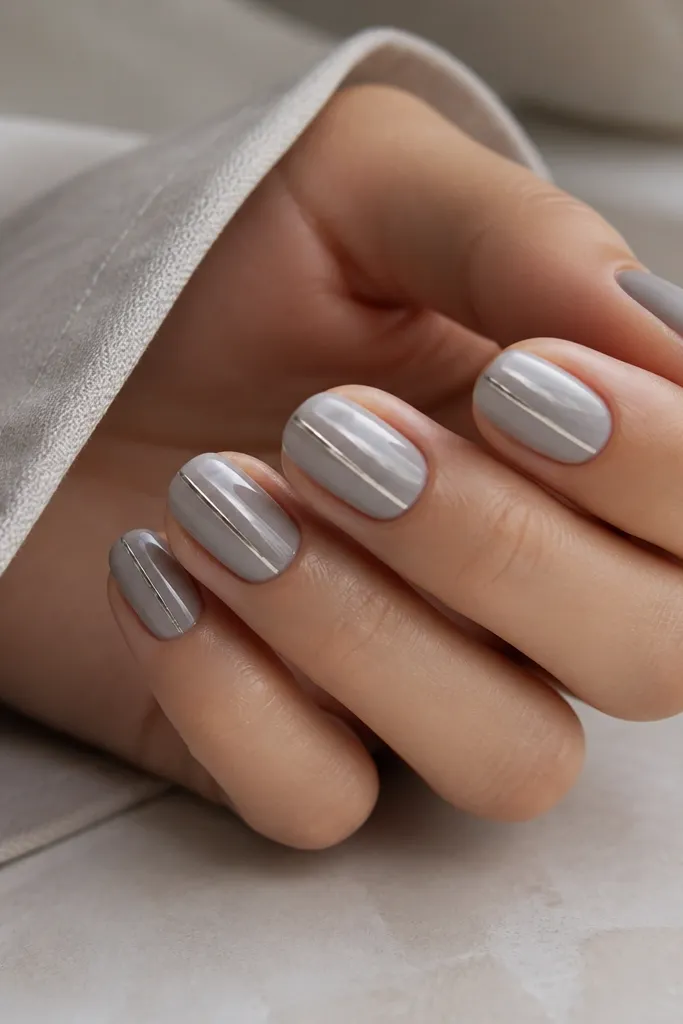
Apply two coats of pearl grey, then let it level before top coat. Use striping tape to mark a straight line on one side of each nail, about 1-2 mm from the side edge. Paint silver along the tape, remove the tape carefully, and cure/dry. Finish with a glossy top coat, keeping the silver line smooth so it doesn’t show brush ridges.
Pearl grey is classy because it looks like polished stone, not a flat gray. It flatters cool undertones and makes your hands look crisp. The thin silver side line creates a slimming effect because it guides the eye along the nail’s length. This is one of my favorite “small space” designs because you only need to place one line per nail, and it hides uneven nail width.
Skip thisDon’t add a line on both sides — it turns into a divider and looks busy.
Editor's noteIf your lines wobble, place the line slightly farther from the sidewall — it forgives small errors.
12. Sheer Nude with Tiny Black Bow on Ring Finger
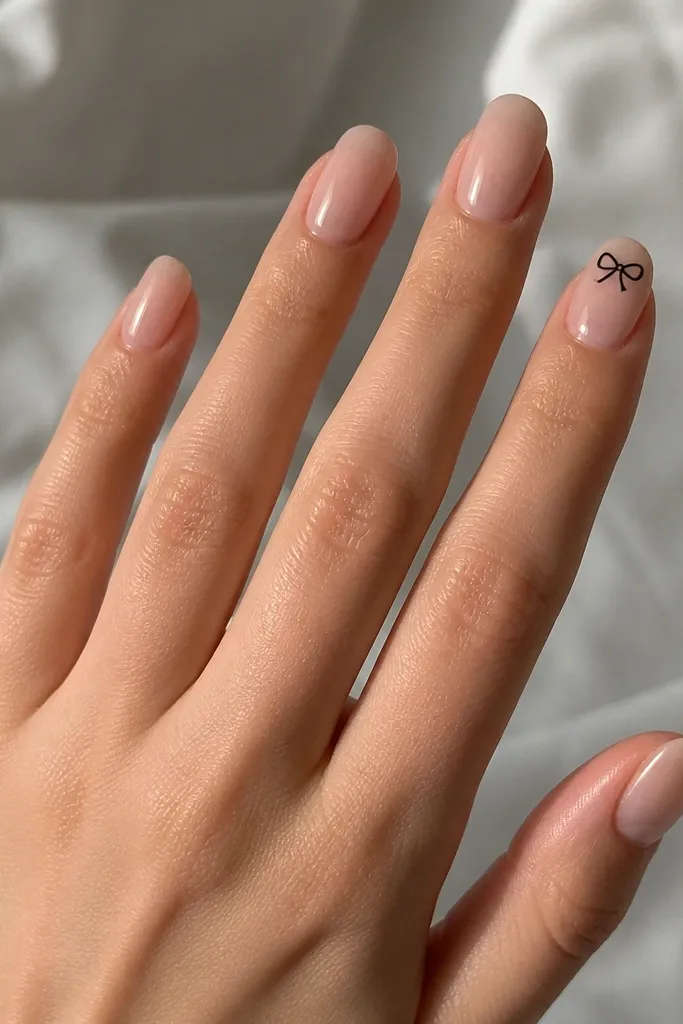
This is classy because the bow is tiny and placed like jewelry, not like a cartoon. Sheer nude keeps the nail looking natural and makes the black detail feel intentional. It flatters short nails because the bow is near the tip and doesn’t take over the nail bed. I wear this when I want a feminine detail but I’m still going for that polished, expensive vibe.
Start with a sheer nude base in two thin coats and keep the cuticle clean. On the ring finger, use a dotting tool to place two small black dots that you shape into bow loops with a fine brush. Add a tiny third dot in the center for the knot. Add a thin top coat layer around the bow first so the edges don’t blur, then seal fully with gloss.
Make the bow about the size of a sesame seed — bigger bows look trendy in a cheap way.
Skip thick black paint; it soaks into the base and makes edges look fuzzy.
13. Rose Quartz Pink Chrome Dust
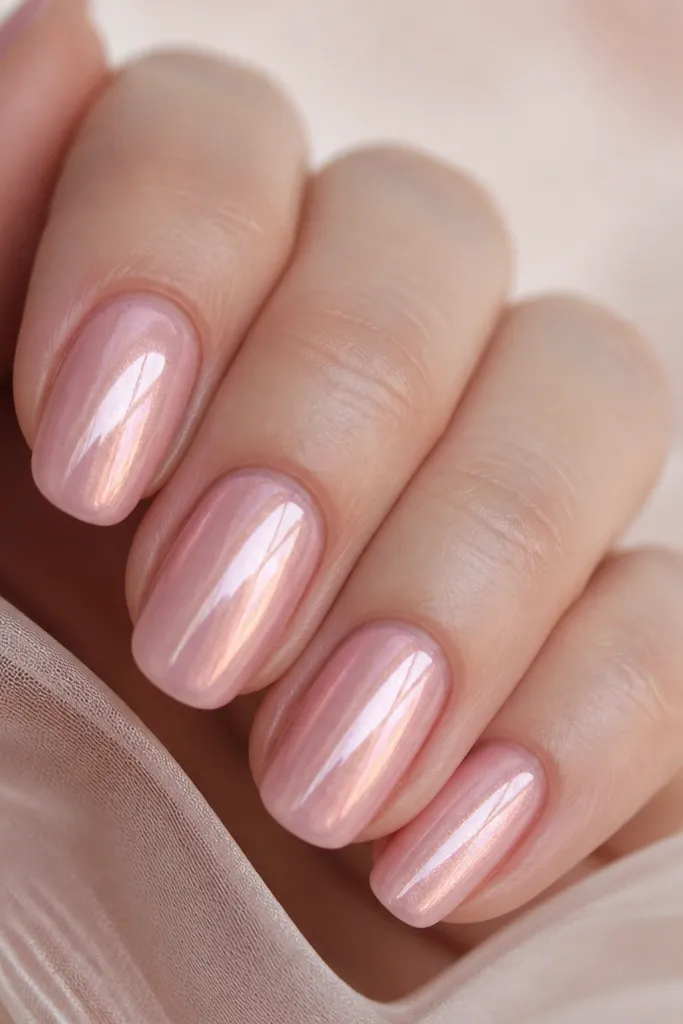
Rose quartz chrome dust looks expensive because it has that soft color shift instead of chunky sparkle. The effect flatters fair to medium skin tones because the base stays light and the shimmer warms up your hands. On short nails, chrome dust still reads luxe because the shimmer is evenly distributed and doesn’t require a pattern. I use this when I want the manicure to look like expensive glass.
Paint two coats of rose-pink gel polish or regular polish with a gel-like top if you’re using chrome. Apply a tacky layer or chrome base, then lightly press rose quartz chrome powder on with an applicator sponge. Buff gently so you keep a fine dust layer rather than a heavy coating. Seal with a glossy top coat that is compatible with chrome so it doesn’t dull the shift.
Do one nail at a time — chrome dust looks best when it’s applied before the tack layer sets.
Don’t pile chrome thickly; it turns grainy and loses the glassy effect.
14. Creamy White with Soft Nude Cuticle Half-Rim
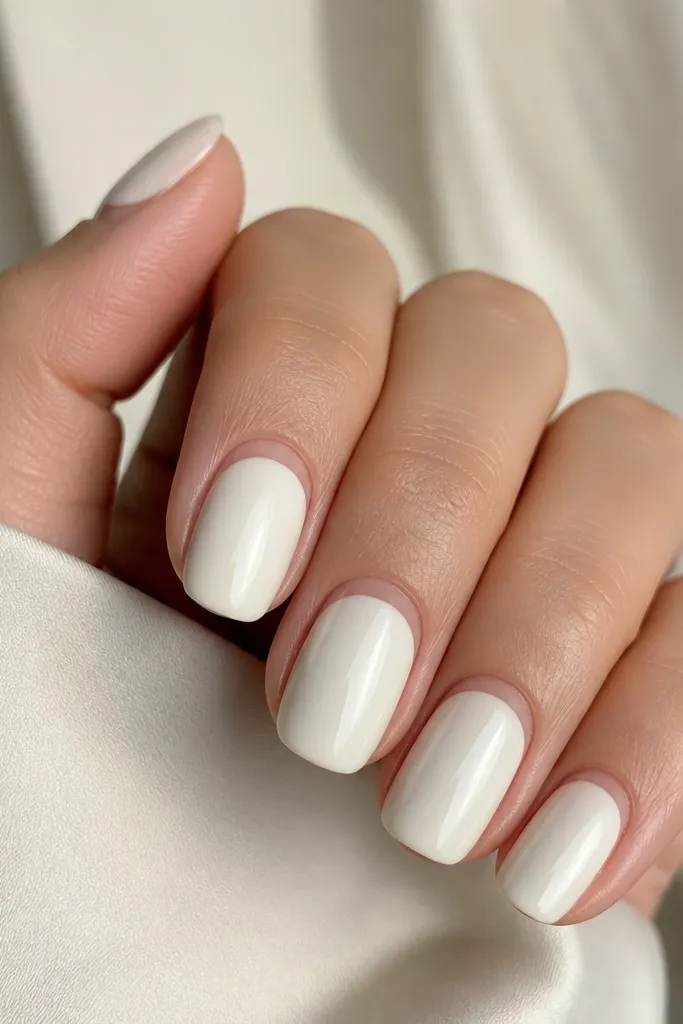
Creamy white looks classy when it’s warm, not chalky. The soft nude half-rim near the cuticle makes the manicure look custom and clean, especially on short nails where a full French can crowd. This flatters everyone because the nude crescent matches your skin tone and makes the nail bed look longer. It’s also a great choice if you wear silver jewelry because the creamy white keeps the set neutral.
Apply two coats of creamy white, thin and even, and check for streaks under direct light. Use a thin liner brush to paint a nude crescent exactly along the cuticle line, leaving a small gap from the skin so it doesn’t smear. Keep the crescent narrow — about 0.5 to 1 mm. Cure/dry, then finish with a glossy top coat that seals the crescent edges.
If your nude crescent looks too dark, mix it with clear to lighten before painting.
Avoid bright, icy white — it can look stark and cheap next to your skin.
15. Champagne Nude with Two Straight Gold Stripes
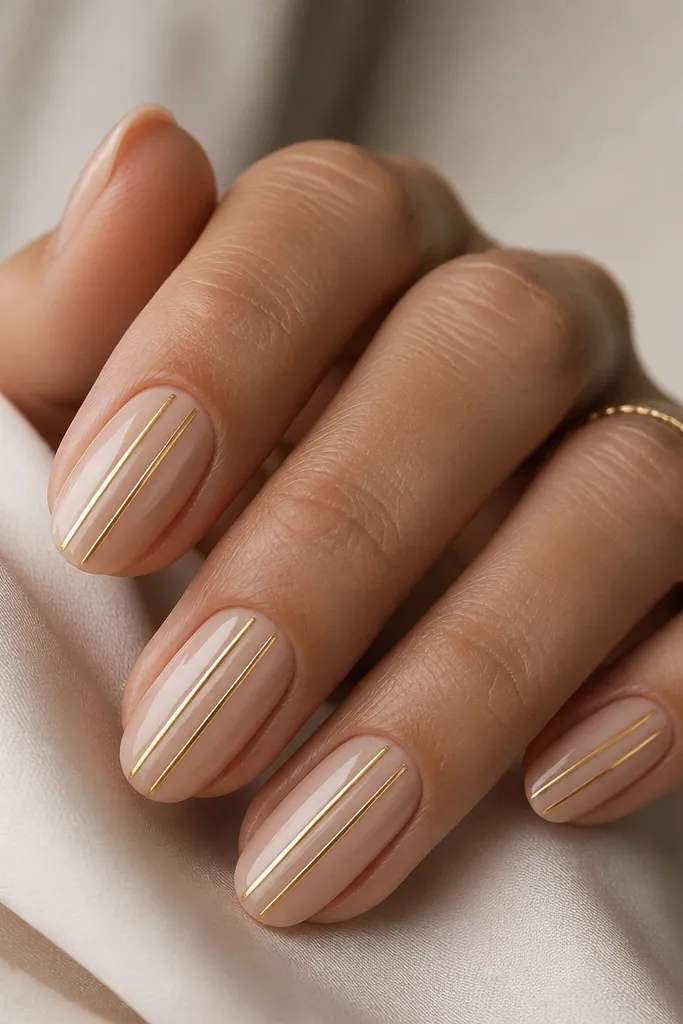
Paint two coats of champagne nude, then cure/dry and apply one thin top coat to smooth the surface. Place two pieces of striping tape to mark parallel lines about 2-3 mm apart, centered on each nail. Paint gold along the tape, remove tape while the paint is still slightly tacky, and cure. Finish with a glossy top coat, and cap the free edge so the stripes don’t lift.
This look is classy because it uses straight lines and negative space to create structure. Champagne nude flatters warm and neutral skin tones, and it looks especially good with gold rings. The two vertical stripes make the nails appear narrower and longer, which is the exact trick for small nail beds. I’ve done this for events and it still looks clean when my nails grow out.
Skip thisDon’t make the stripes too close — merged lines look messy.
Editor's noteKeep the stripes straight by anchoring tape to the center of the nail first, then press outward.