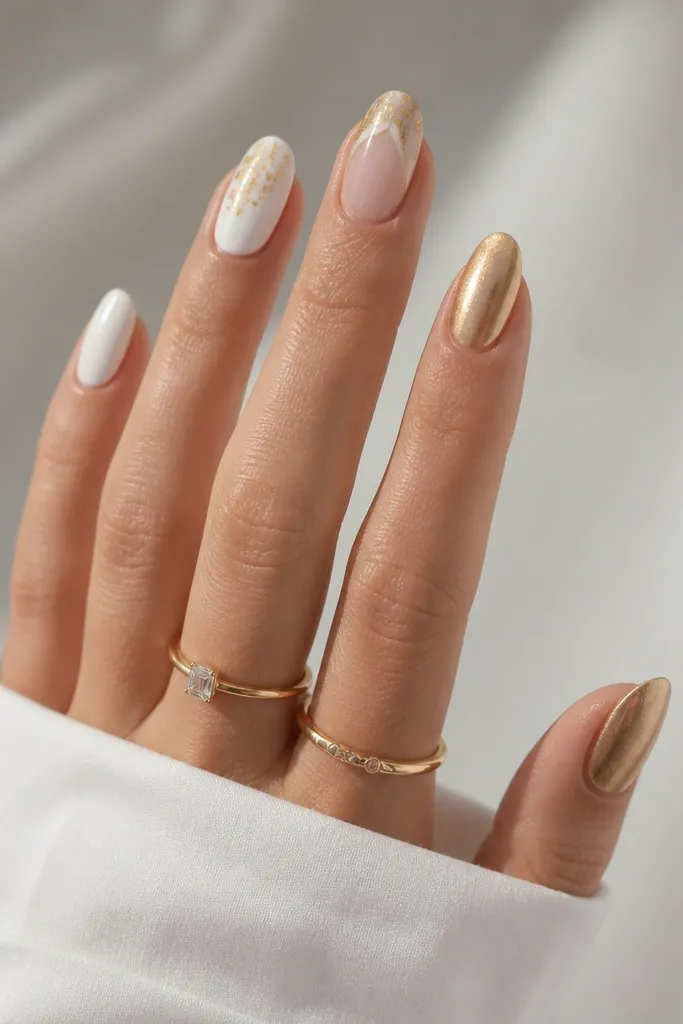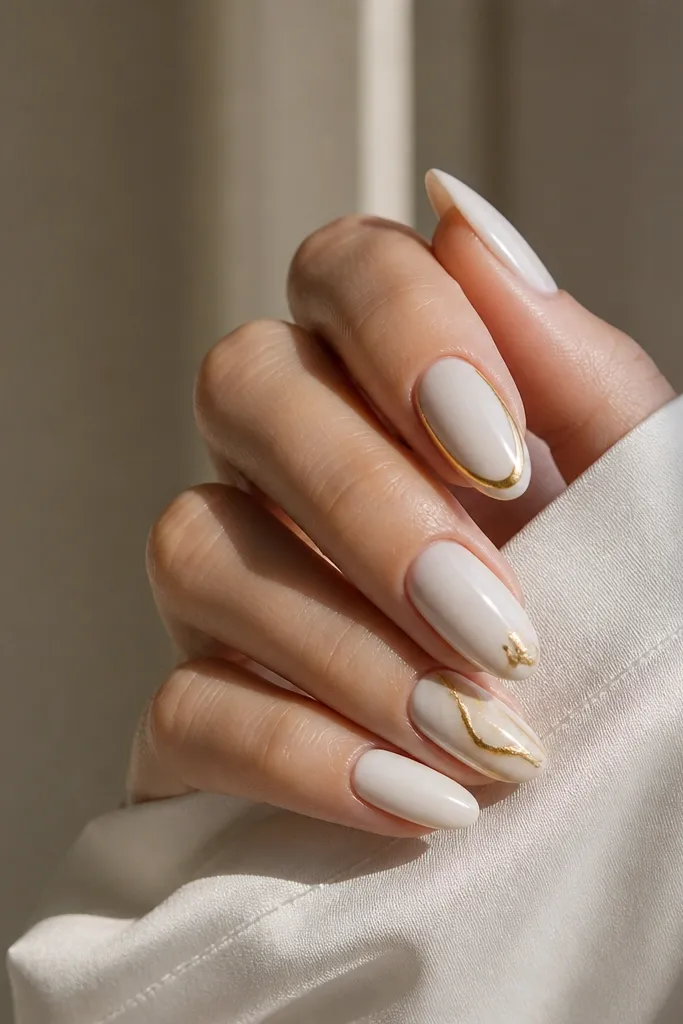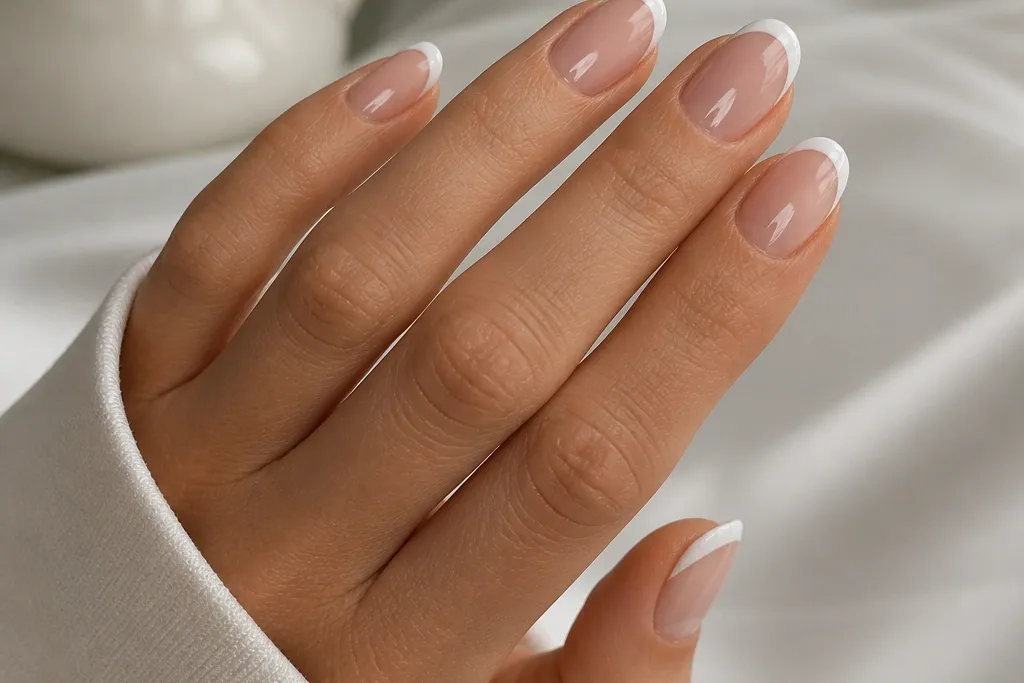
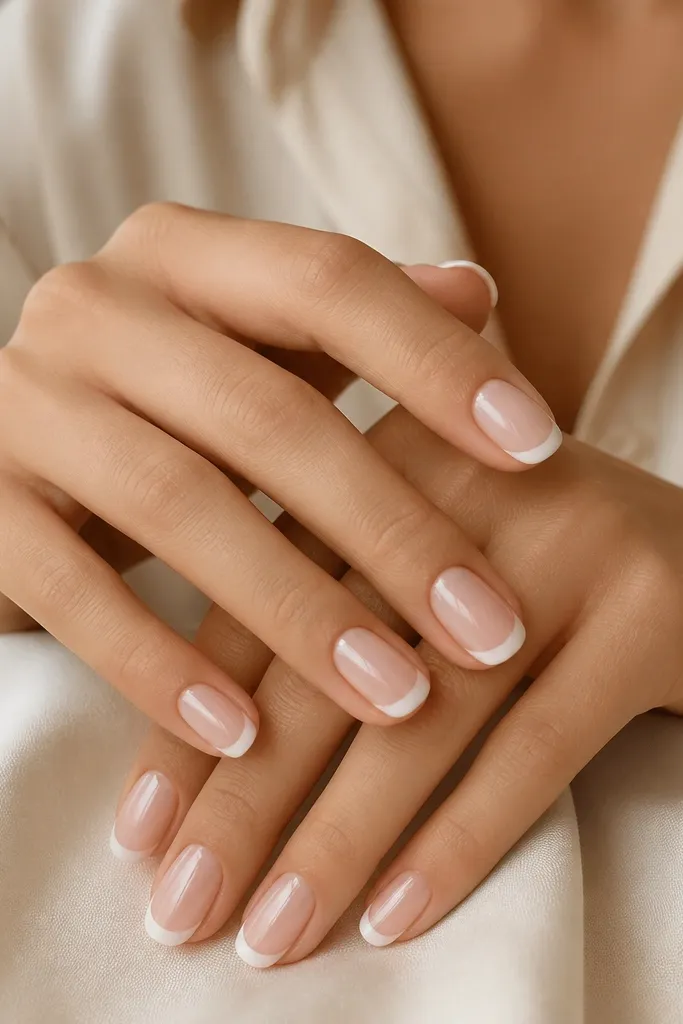
1. Creamy Milky Base with Soft Oval French Tips
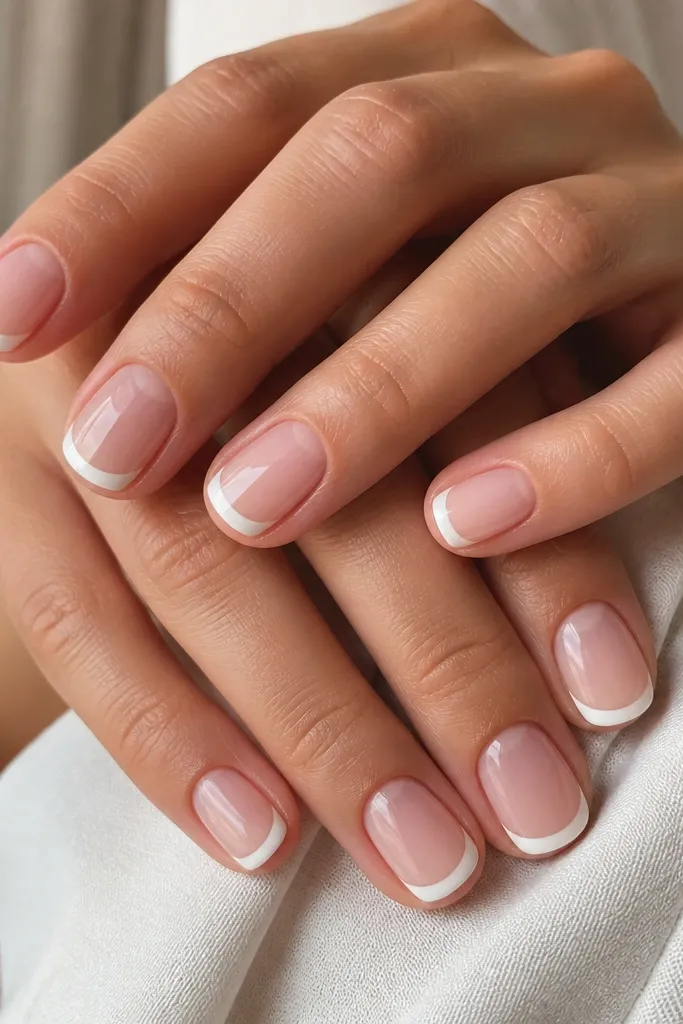
This look is classy because it reads “clean” instead of “decorated.” The sheer milky pink base blends into most skin tones, and the creamy off-white tip has enough warmth that it doesn’t look stark as your nails grow. I like it on shorter nails and on people whose nail beds run slightly shorter, because the soft oval tip keeps the eye moving horizontally. It also works for office days and casual weekends since there’s nothing that catches on clothing. The styling principle is simple: narrow, rounded tips plus a sheer base make the manicure look intentional even after a week.
Start by prepping nails and pushing cuticles back, then apply a sheer milky pink base coat in 2 thin layers. Use French tip guides if you’re getting shaky lines, placing them so the tip width stays around 2 mm at the widest point. Paint creamy off-white onto the guide, then gently smooth the smile line with the brush tip — don’t over-stretch the curve. Finish with a thick glossy top coat, and cap the free edge on every nail so the tip edge stays sealed.
Editor's noteIf you’re doing polish, wait 5-8 minutes between layers so the off-white doesn’t streak. Seal once more over the tip after the last coat dries for extra corner protection.
Skip thisAvoid a sharp, high smile line that reaches too far up the sides — it shows growth fast.
2. Classic White French with Micro Tip Width
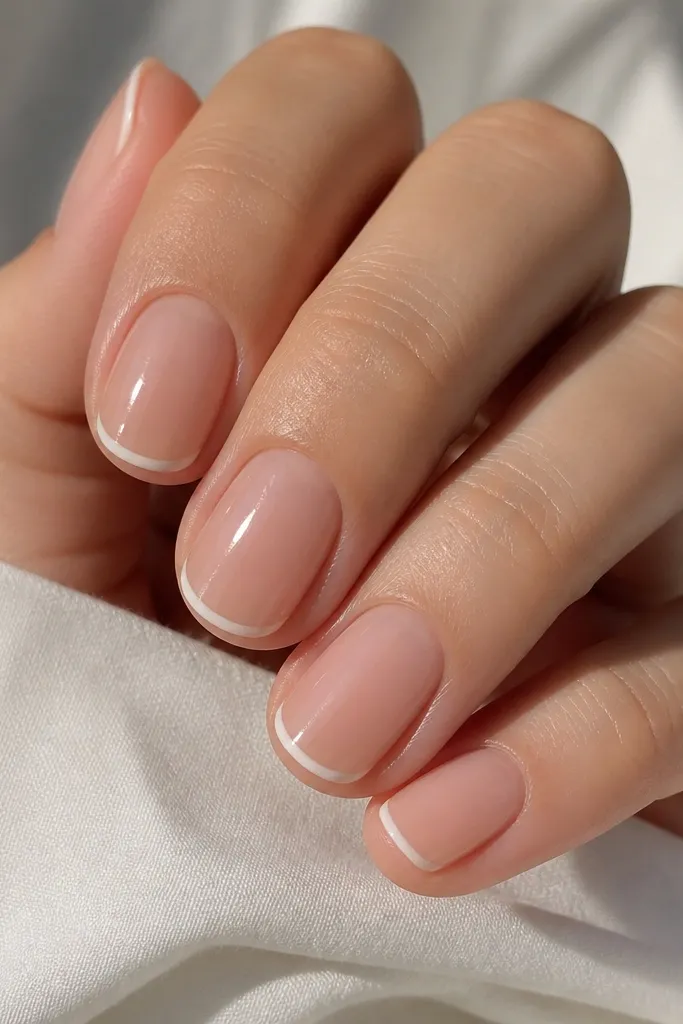
This is the French tip version of “minimal but polished.” The micro tip width keeps it elegant on shorter nails, and bright white still looks classy because it stays small and controlled. I’ve seen this work especially well on fair and light-medium skin tones because the nude base doesn’t compete with the white. If your hands run a little dry, the thin line draws attention to the nail shape without making you notice rough cuticles as much. The principle here is restraint: small tip area means fewer visible imperfections when you’re between touch-ups.
Apply a nude-pink base coat that matches your skin’s warmth, then cure or dry fully. Use a liner brush to paint a thin white French tip, keeping the widest part under 2 mm. Pull the brush in one smooth stroke for the smile line, then fill the tip edge with a second light pass. Clean the sides with a flat brush dipped in acetone-free remover, then top coat with a glossy finish and cap the tip.
Editor's noteUse a liner brush with a short, tight bristle — it keeps the white from flooding under your cuticle line.
Skip thisDon’t thicken the white to “hide” unevenness; it makes the whole set look like a sticker.
3. French Ombre Tip in Sheer Pink to White Fade
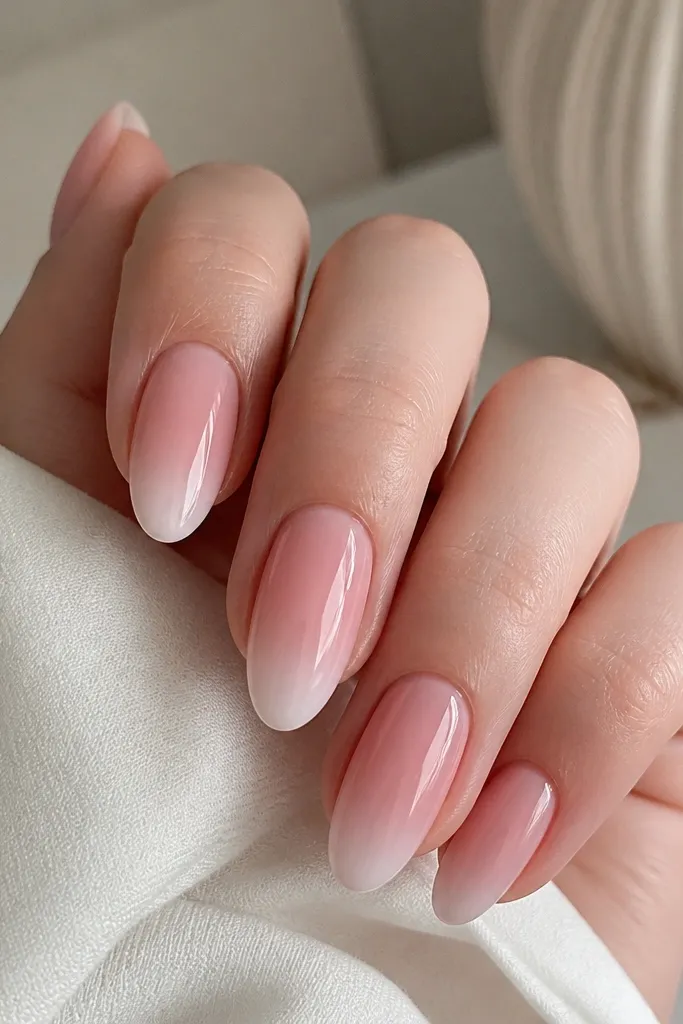
An ombre French tip looks expensive because there’s no hard line to grow out. The fade lets your manicure keep its “fresh” look longer since the transition blends into the base. I like this for medium lengths and for people who hate the idea of a crisp smile line showing mistakes. It’s also flattering if your nail beds are uneven — the gradient hides the unevenness better than a straight tip. The principle is blending: keep the fade soft, not foggy, and let the white only hit the outer edge.
Start with a sheer rosy pink base and cure/dry completely. Sponge on a very light layer of white at the very tip area, then dab a bit of sheer pink over the sponge area to blend the center. Use a small makeup sponge and press lightly — you want a smooth gradient, not texture. Clean up the edges with a flat brush, then seal with glossy top coat, dragging the brush over the tip edge to lock it in.
Editor's noteDo the fade in two thin passes instead of one heavy sponge — it stays smoother and less streaky.
Skip thisAvoid a full white tip block; that removes the grow-out forgiving effect.
4. Nude Base with Ivory French and One Side Dot
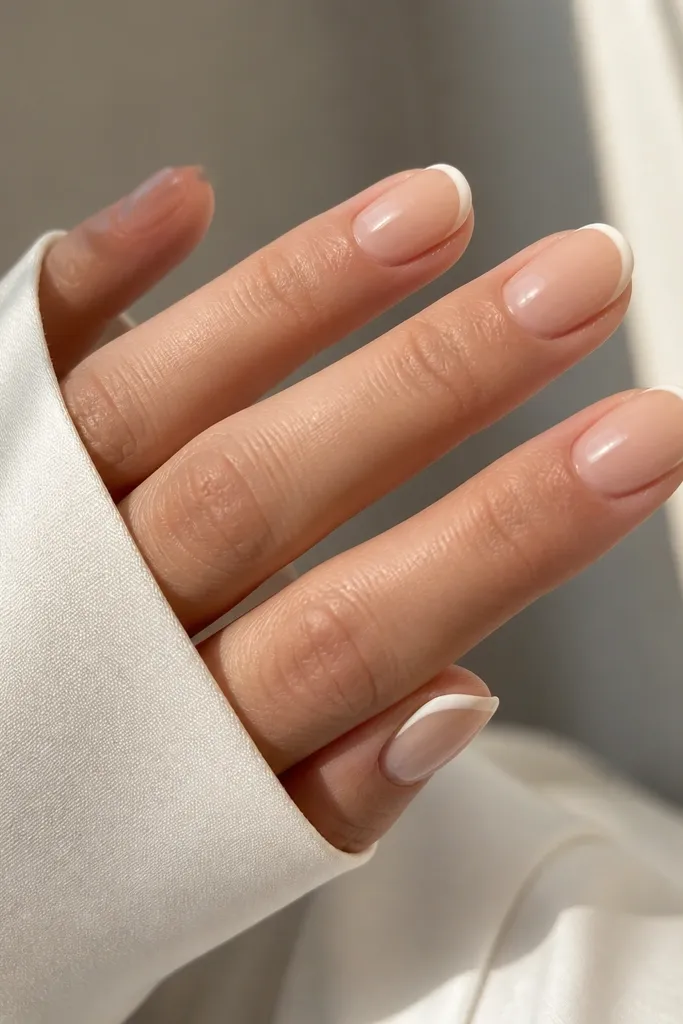
This is French tip with a tiny twist that still reads classy. The ivory tone feels softer than bright white, and the nude base makes it look like a natural enhancement. The single side dot is small enough to feel intentional, not busy, and it gives you a focal point without turning the set into a full design. I wear something like this when I want my nails to look special for events but still fit daily life. The styling principle is one accent only, placed where your eye already lands — near the cuticle on one nail.
Paint nails with a nude-beige base in 2 thin coats, then cure/dry. Use a guide or steady hand to paint an ivory French tip with a rounded smile line. Add a single tiny dot using a dotting tool or the tip of a toothpick on the ring finger — place it just off-center near the cuticle, not on the tip. Finish with top coat over everything, and cap the tip edge so the dot stays sealed.
Editor's noteFor the dot, use a lacquer that dries fully opaque — sheer dots look like smudges.
Skip thisSkip adding dots on every nail; it turns into a pattern and loses the classy feel.
5. French Tip with Blush Pink Micro Glitter Edge
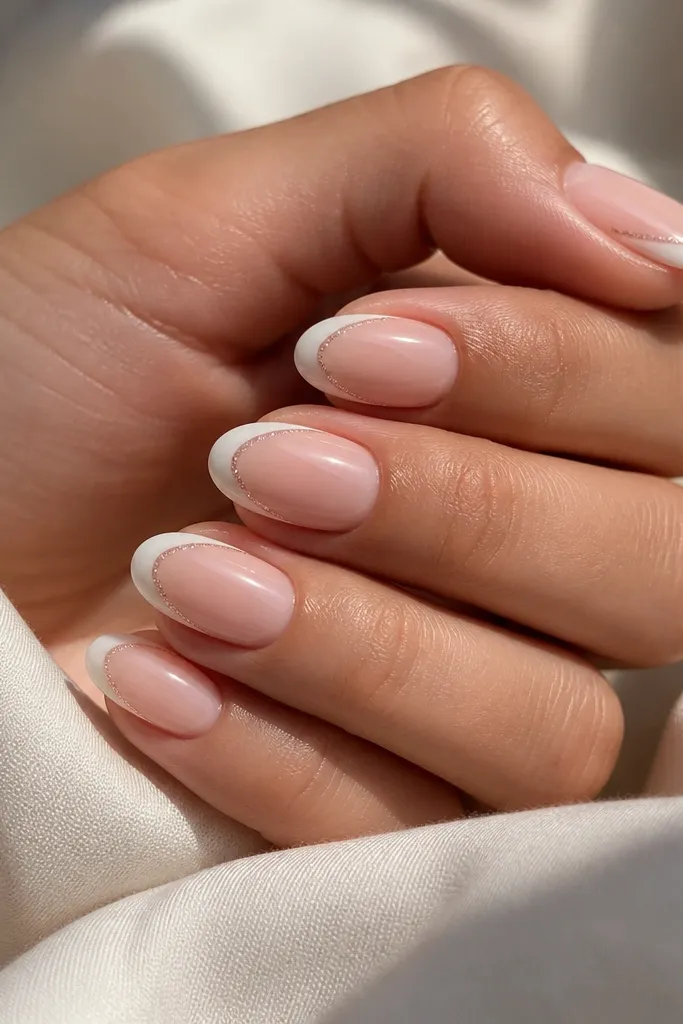
Micro glitter at the tip edge looks like jewelry without covering the whole nail. The blush-pink glitter line picks up warm light and makes the manicure feel dressed up, while the white stays clean. I like this for dates and holiday parties when you still want low maintenance — the glitter is only on the outer border, so chips don’t look dramatic. It also flatters medium and warm undertones because the blush glitter echoes skin warmth. The principle is placement: keep glitter to a thin border so the set stays neat as it grows.
Apply a sheer blush base and cure/dry. Paint a soft white French tip with a narrow width, then immediately place a tiny amount of blush micro glitter only along the outermost tip edge. Use a clean brush to push the glitter into a straight line, then seal with a thick top coat. If you use gel glitter, cure each step so it doesn’t smear. Clean around the sides with a cotton swab dipped in remover before the final cure.
Editor's noteUse a fine glitter, not chunky craft glitter — chunky bits catch on hair and fabric.
Skip thisDon’t glitter the center of the tip; it looks flat and messy when it grows out.
6. Sheer Nude Base with French Tips in Gray-White
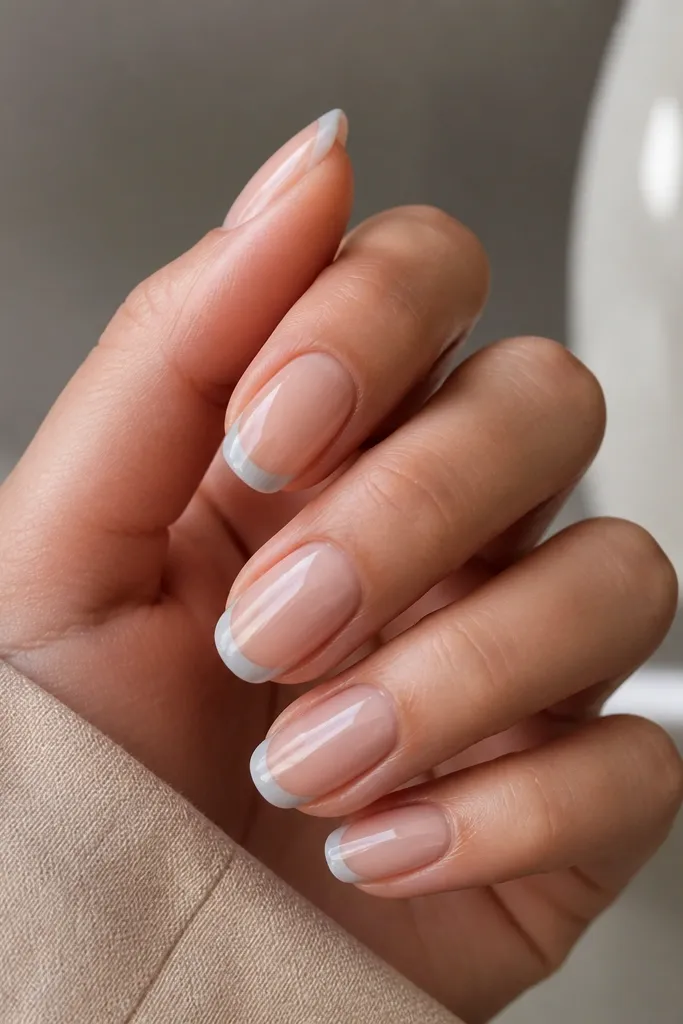
Gray-white French tips look classy in a modern way. They don’t pop as harshly as bright white, so the manicure looks tidy longer when you’re overdue for a touch-up. This shade flatters cool undertones and also looks great on neutral skin because it doesn’t compete with your complexion. I’ve done this for winter months and it makes hands look cleaner against darker sweaters. The styling principle is tone matching: pick gray-white that matches the temperature of your base nude.
Start with a sheer nude base that matches your natural nail color, then cure/dry. Paint the gray-white tip using a liner brush, keeping the curve close to the natural nail edge. Keep the tip width around 2 mm and avoid dragging the color up the sidewalls. Finish with glossy top coat and cap the free edge — gray pigments can show wear, so sealing matters.
Editor's noteIf the gray looks too dark, add a drop of white to your tip shade on a palette and test on one nail.
Skip thisAvoid thick, opaque gray coverage that makes the nail look flat.
7. French Tips with Clear Jelly Rose Base
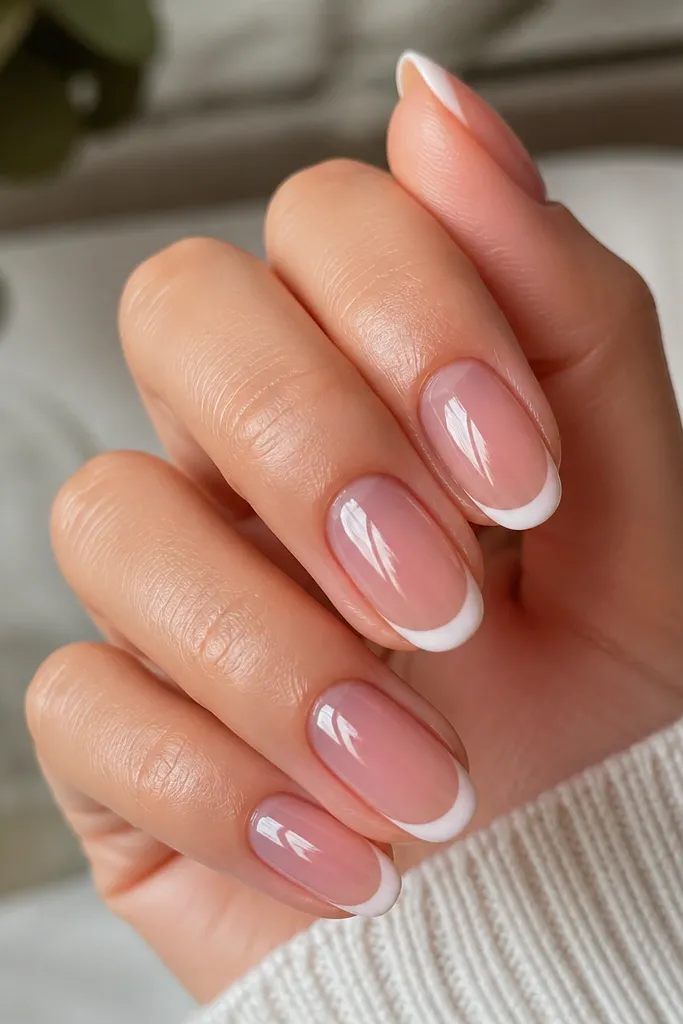
A jelly rose base is the easiest way to make French tips look expensive without extra art. It gives that glassy, healthy look, and the translucency makes the nude blend with your skin. I like this when my nails are a little dry because the jelly base visually “plumps” the nail bed. It flatters nearly everyone since the rose tone is sheer and forgiving. The principle is optical: translucency plus a clean tip line makes the manicure look fresh even as it grows.
Prep nails and apply a clear jelly rose base in 2 thin layers, curing each coat. Paint creamy white French tips with a narrow width and a smooth curve, using guides if you need them. Keep the tip edge thin and crisp — don’t flood it. Seal with a thick glossy top coat that levels out the jelly shine and caps the tip edge.
Editor's noteIf your jelly base looks streaky, do thinner layers instead of one thick layer.
Skip thisAvoid matte top coat; jelly bases look best with glassy shine.
8. Soft Square French Tips with Beige Nude Center
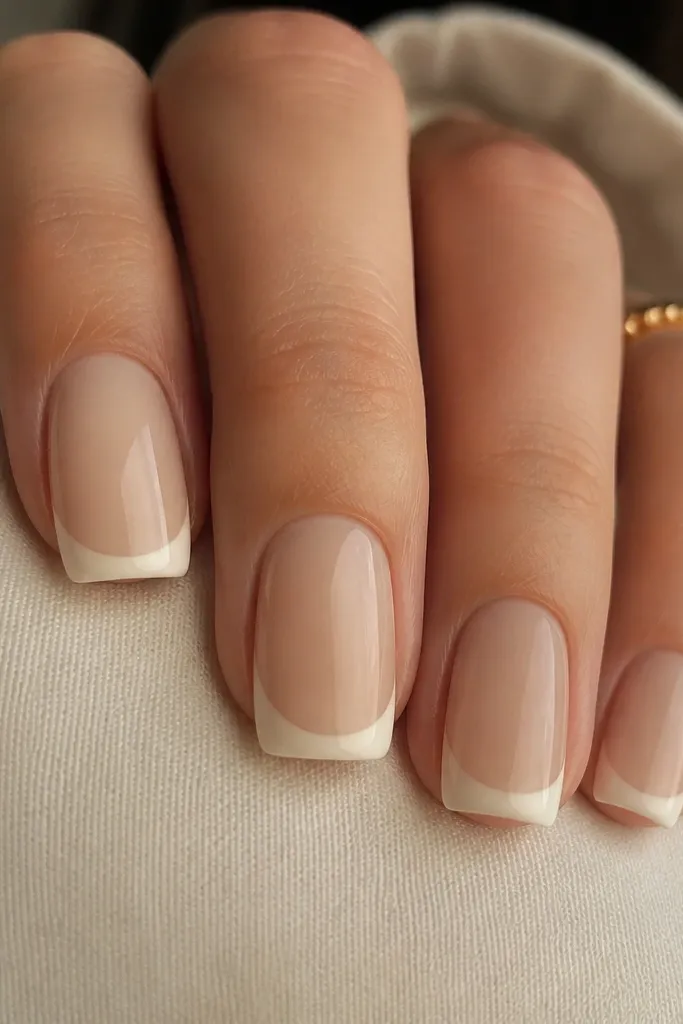
Soft square French tips look classy when the corners are rounded by the top coat, not by the nail shape alone. The beige nude center makes the set look warm and polished, and it hides uneven nail tone better than pink-only bases. This works great for people with wider nail beds because the soft square shape visually balances width. I’ve used it for everyday work because it doesn’t feel too delicate, and it doesn’t snag as easily as a sharp square. The principle is shape control: keep the square outer corners softened and the tip line straight across.
File nails into soft square, then apply a beige nude base. Use a guide to paint the off-white French tip with a straight outer edge, keeping the tip width close to 2.5 mm. Clean the sides so the tip meets your natural sidewall neatly. Finish with a glossy top coat and be sure to cover the corners — that rounding effect makes it look smooth instead of sharp.
Editor's noteWhen filing, stop at a smooth 240-grit finish so the soft square doesn’t look rough under shine.
Skip thisAvoid pointy corners; they chip first and look messy fast.
9. French Tip with Tiny V-Cut at the Cuticle Line
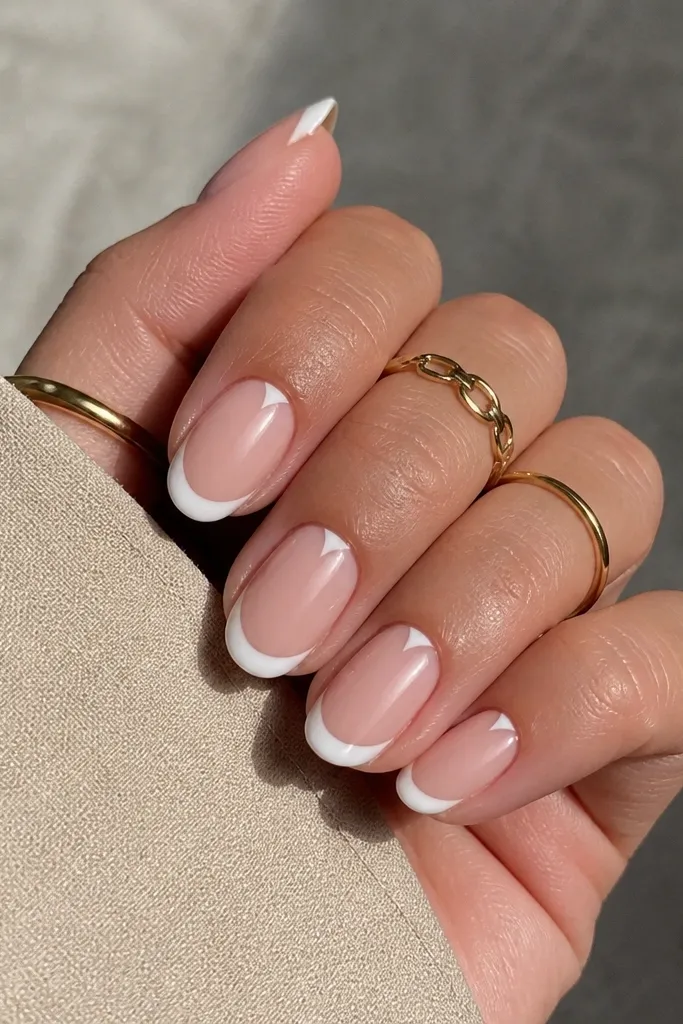
That tiny V-cut accent makes the manicure feel tailored without adding bulk. The French tips stay simple and classy, while the V adds a subtle design element that looks like a salon detail. I like it for ring fingers because it gives you a focal point in photos and under jewelry without turning every nail into an art project. This flatters hands that have a little extra nail length because the V visually guides the eye upward. The principle is micro-geometry: one small line detail plus clean tips reads intentional.
Apply a sheer nude base and cure/dry. Paint creamy white French tips using guides, staying narrow-to-medium at about 2 mm. On the ring finger only, use a fine liner brush to draw a tiny V just under the cuticle — the points should be close to the sidewalls, not wide. Fill the V with the nude polish color so it blends, then top coat all nails with a glossy layer.
Use a steady hand and rest your pinky on a table while you paint the V line.
Skip the V on every nail; it looks like a pattern instead of a classy accent.
10. Two-Tone French Tip in White and Blush Stripe
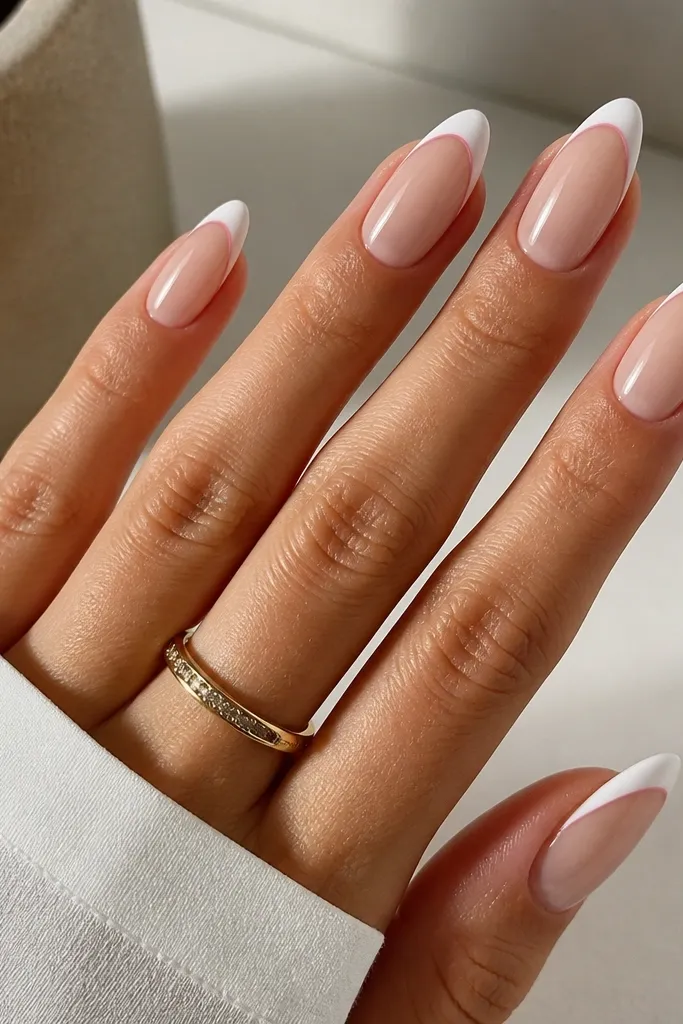
This is for when you want French tips that look a little more designer. The two-tone effect is subtle: white does the main work, and the blush stripe adds a soft frame so your tips look dimensional. I like it on almond nails because the curve makes the stripe look smooth rather than jagged. It flatters warm undertones and also looks good on cool skin if the blush stripe is dusty instead of neon. The principle is contrast control: keep the stripe thin and close to the inner edge so it stays elegant.
Start with a sheer nude base and cure/dry. Paint the main French tip in soft white with a guide, keeping it around 2-3 mm wide. Let it cure, then add a thin blush stripe using a striping brush on the inner edge of the tip — think hairline thickness. Clean the sides and cap everything with glossy top coat so the stripe doesn’t catch.
Editor's noteIf the stripe bleeds, clean your brush on a paper towel before touching polish again.
Skip thisAvoid thick stripes; they look like tape and ruin the classy feel.
11. Reverse French with Creamy Tip Over a Nude Base
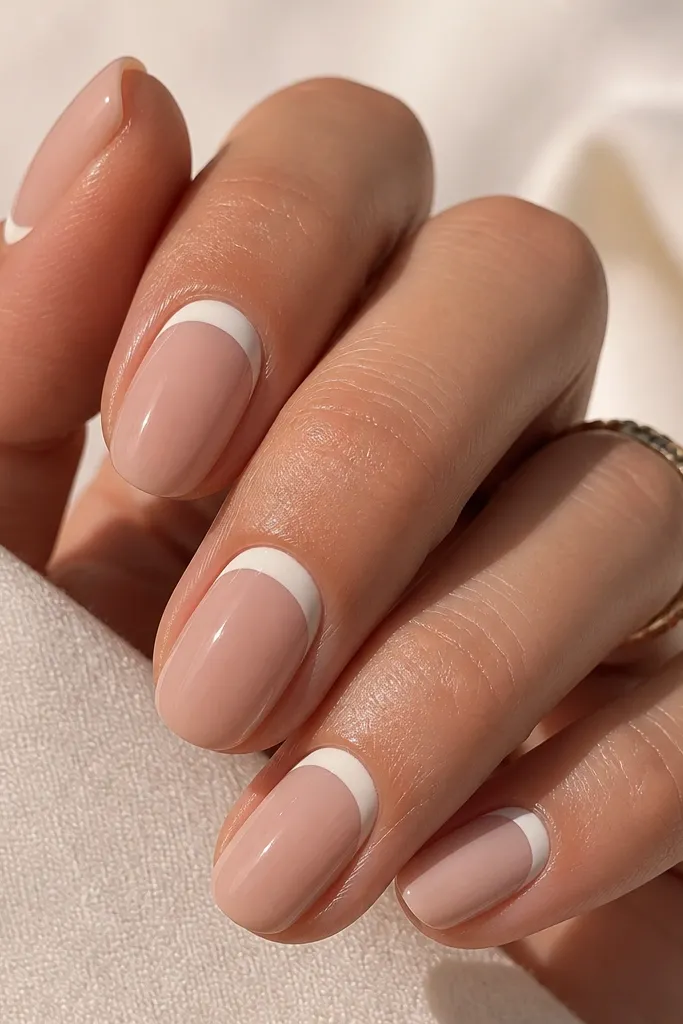
Reverse French is the cheat code for low-maintenance because you’re not drawing the line at the free edge. As your nail grows, the accent stays closer to the natural nail bed area, so it looks intentional longer. Creamy off-white at the cuticle feels classy and soft, especially on nude bases. I’ve worn this when I didn’t want bright tips touching my cuticles by accident. The principle is location: put the crisp design where growth is less obvious.
Apply a nude base and cure/dry completely. Use a small curved brush to paint creamy off-white along the cuticle line, leaving a tiny gap for a natural look. Keep the curve thin and centered, and avoid flooding onto the skin. Once it’s dry/cured, add one more thin nude layer if needed to clean the edges. Finish with a glossy top coat and cap the tips lightly so the set stays smooth.
Use a cuticle stencil or a very small brush — a wide brush makes the reverse French look bulky.
Don’t paint onto the skin; it lifts at the edges and looks sloppy by day three.
12. French Tips with Micro Pearl on One Accent Nail
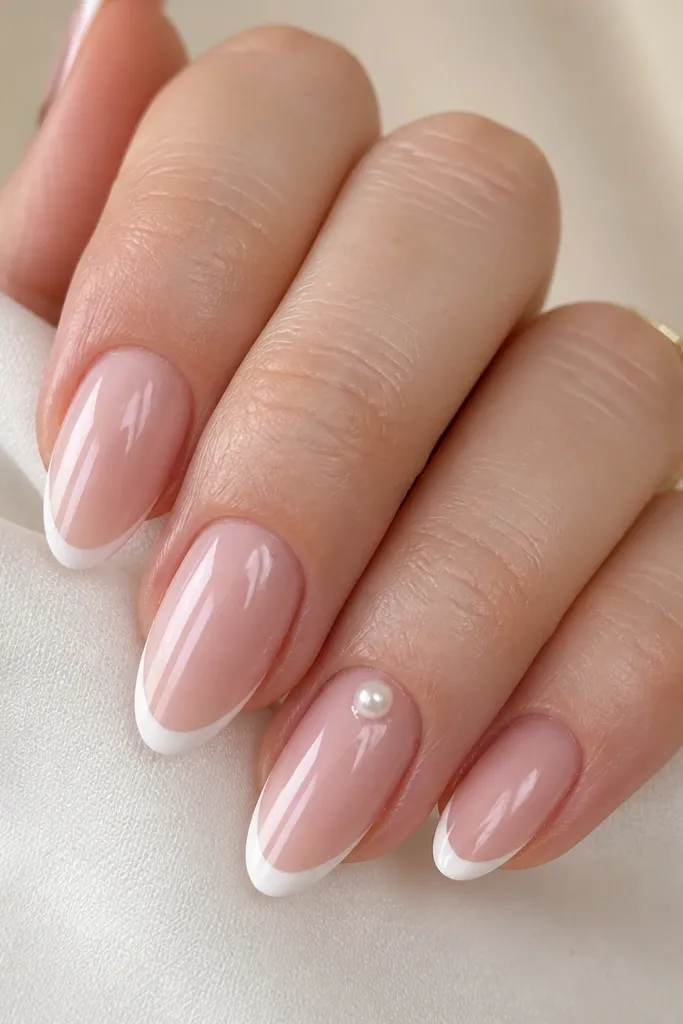
A micro pearl makes French tips look like you tried harder, but it stays classy because it’s one bead, not a whole cluster. The tiny size sits flat and doesn’t snag, so it still feels low maintenance for everyday life. I like it on medium-short nails because the pearl looks proportional and doesn’t fight the nail length. This works across skin tones since the pearl is neutral and the French tips do the main color work. The principle is restraint: one accent point and clean negative space.
Paint nails with a sheer pink base and cure/dry. Apply creamy white French tips with a narrow-to-medium width, around 2 mm. On the ring finger, place a micro pearl using gel glue — dab gel where the pearl will sit, then press the pearl gently. Cure, then top coat over the rest of the nails and lightly seal over the pearl so it doesn’t snag. Keep the pearl placement near the cuticle, not on the tip, so it stays readable as you grow out.
Editor's noteIf your pearl pops up, add a tiny dot of clear gel around the base and cure again.
Skip thisAvoid big pearls or multiple stones; they turn the French tips into a full glam set.
13. French Tips with Champagne Nude Base and Warm White
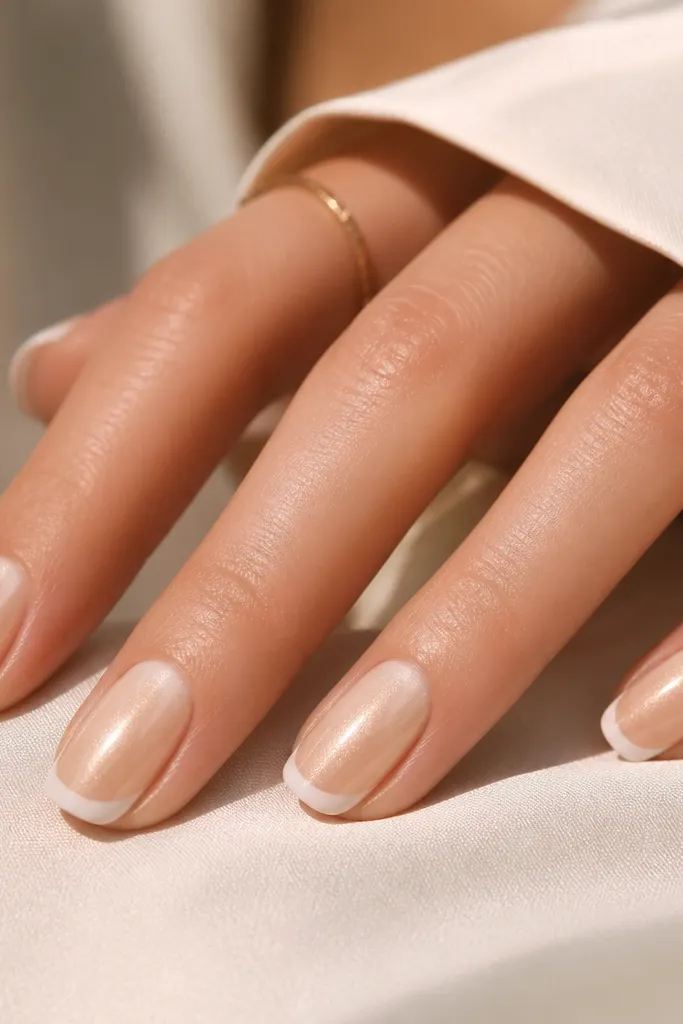
Warm white over a champagne nude base looks expensive because it flatters warm undertones and doesn’t feel stark. The base has a slight golden glow that makes hands look healthier, even when your skin is a bit dry. This set is great for formal events because it catches light without looking glittery. I also like it for medium skin tones because the warmth makes the nails look like a match rather than a contrast. The principle is temperature matching: warm base, warm tip, clean line.
Apply a champagne nude base in 2 thin layers, curing/drying until it looks smooth and glossy. Paint warm white French tips using guides, keeping the tip width around 2-2.5 mm. Use a light hand on the smile line so the curve looks natural, not painted-on. Finish with a glossy top coat and cap the free edge, especially on the index and middle fingers where chips happen first.
Test warm white on one nail first — some whites go too cool and look gray against a champagne base.
Avoid mixing warm base with icy white tips; it looks mismatched under indoor lighting.
14. French Tips with Clear Nail Art Line Through the Tip
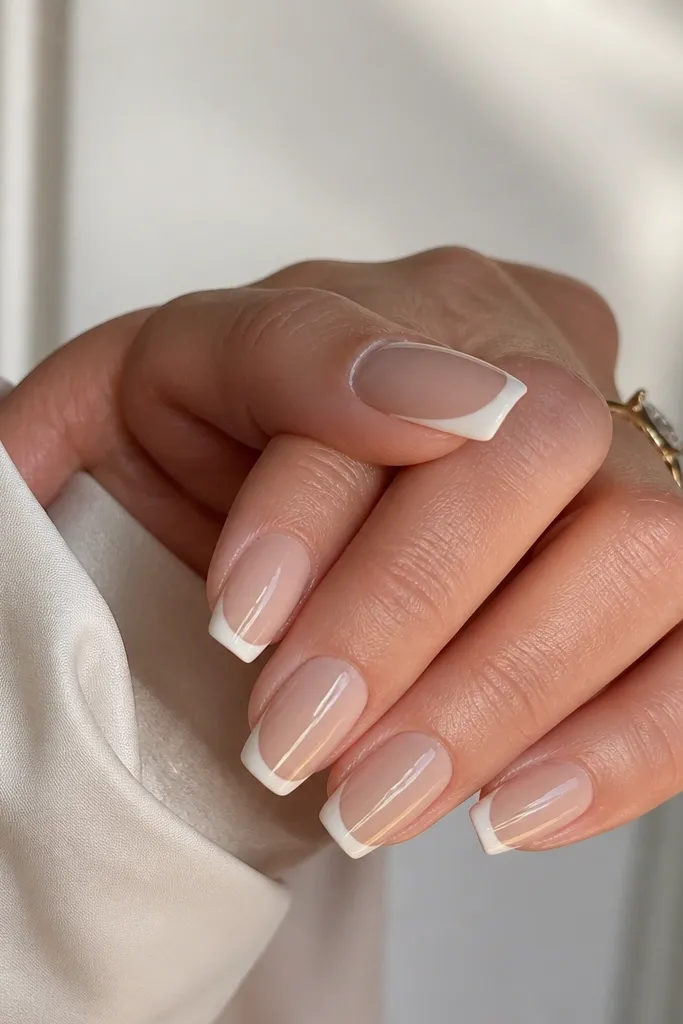
That clear line makes the tip look like it has dimension without changing the color palette. You still get the classy white French look, but the extra glossy stripe creates a “glass” effect that looks good in photos and in real life. I like it when you want something slightly different but still low maintenance — it doesn’t require tiny painting details on every nail. This flatters nails that are medium length because the line has space to show. The principle is light: clear gel creates shine and separation without adding pigment.
Start with a nude base and cure/dry. Paint creamy white French tips with a guide, keeping the width around 2 mm. While the top layer is still tacky (if using gel), place a thin clear gel line down the center of each tip using a liner brush. Cure, then seal with glossy top coat over everything, making sure the clear line edges are fully covered so they don’t peel.
Editor's noteUse clear gel, not clear polish, for a sharper line and better wear.
Skip thisAvoid a thick clear stripe; it turns into a ridge instead of a sleek highlight.
15. Reverse French Half-Moon with Classic White at the Tips
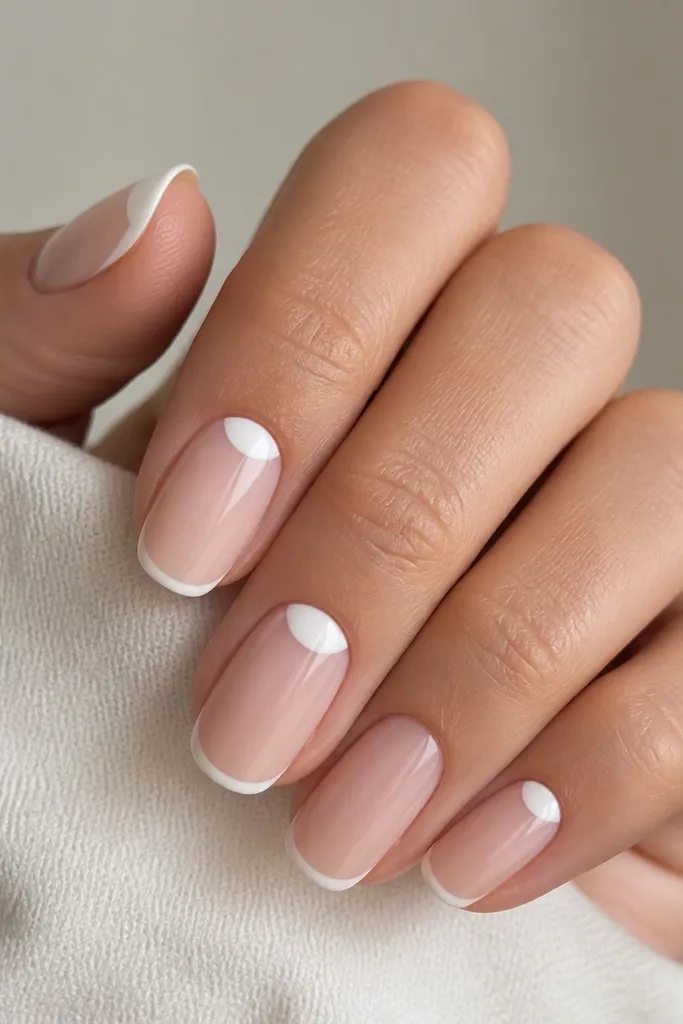
This mix looks classy because it keeps the design minimal but adds interest where your eye naturally goes. The half-moon at the cuticle is crisp and clean, but it doesn’t take over the entire nail like full nail art. I like doing it on two nails per hand — ring finger and middle finger — so it stays balanced and not busy. The classic white stays readable on most skin tones, especially when your base is sheer nude. The principle is controlled repetition: match the same white shade in two places, then let the rest stay plain.
Apply a sheer nude base and cure/dry in 2 thin layers. Paint classic white French tips on every nail first, using guides for consistent width. On the middle and ring fingers, paint a small half-moon at the cuticle by placing the white along the cuticle curve and leaving a thin nude gap in the center. Clean edges carefully with a brush, then finish with glossy top coat and cap the free edge.
Keep the half-moon smaller than the nail bed width — if it gets too big, it looks like a sticker.
Avoid using different whites; mismatched shades make the set look uneven.