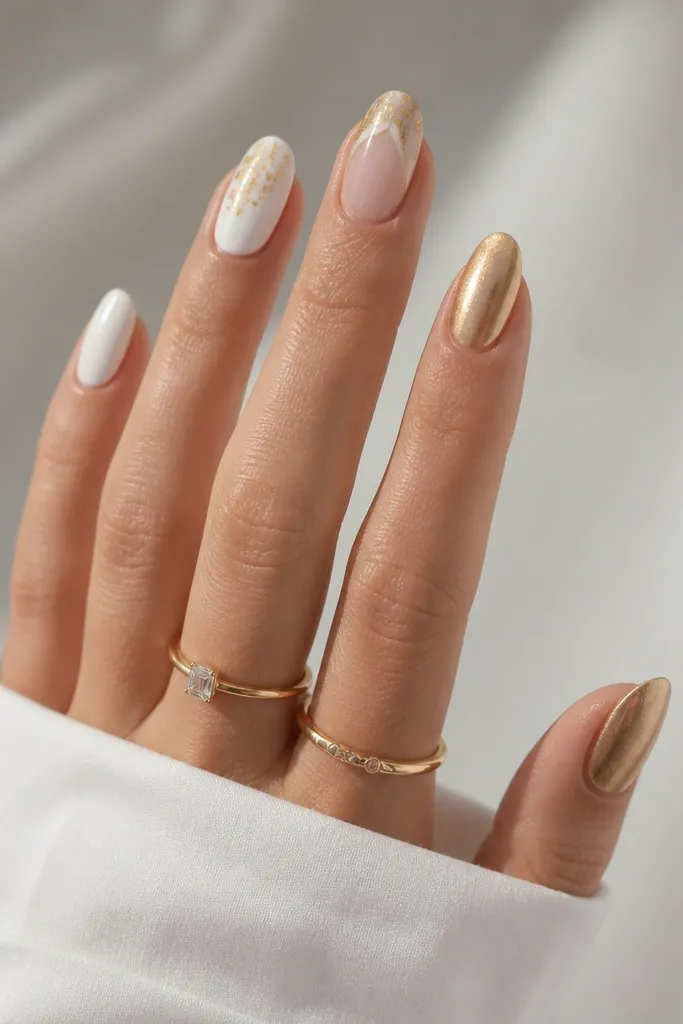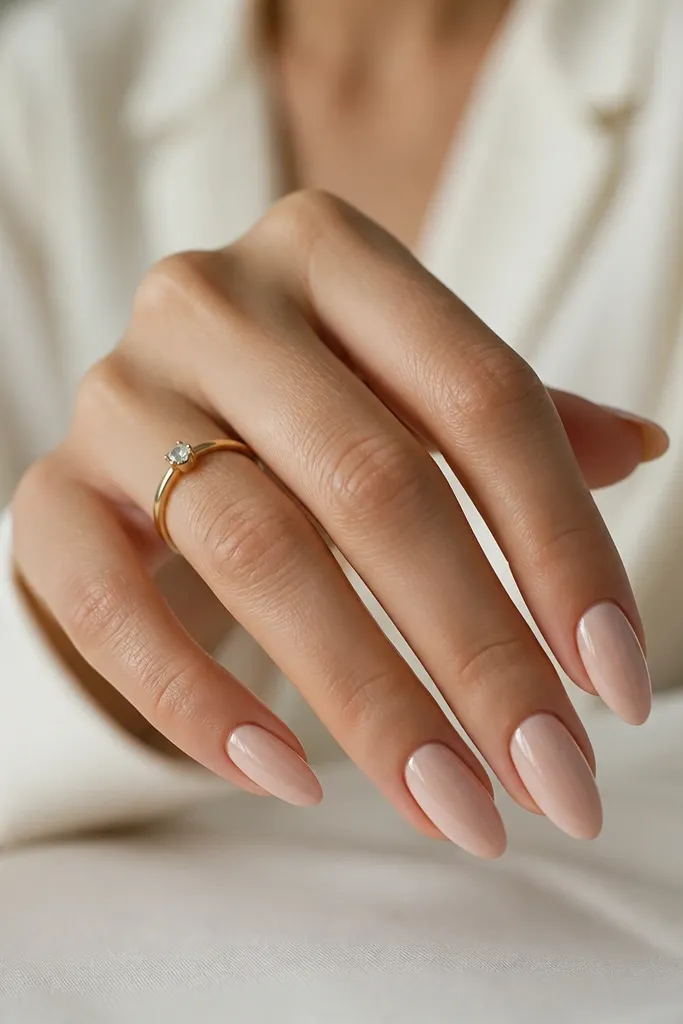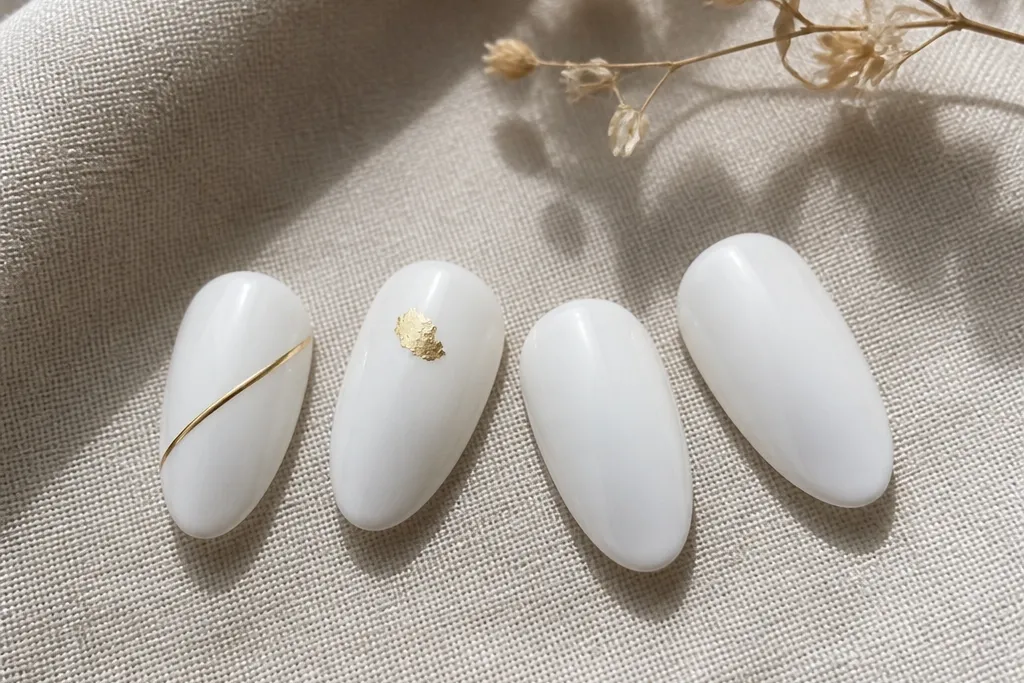
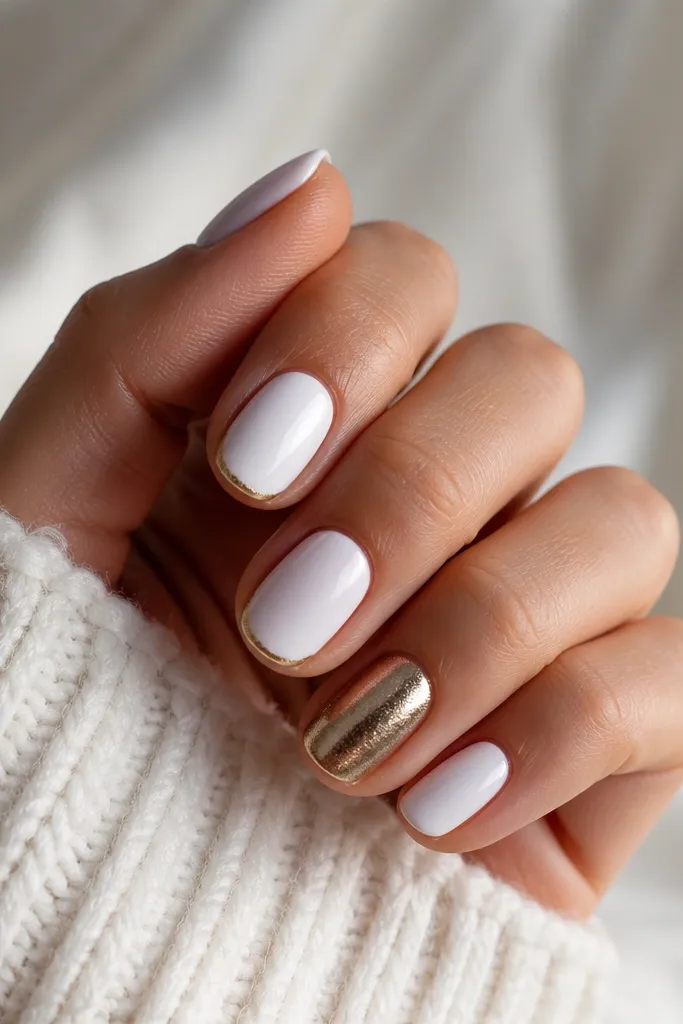
1. Snow-White Half-Moon with Thin Gold Rim
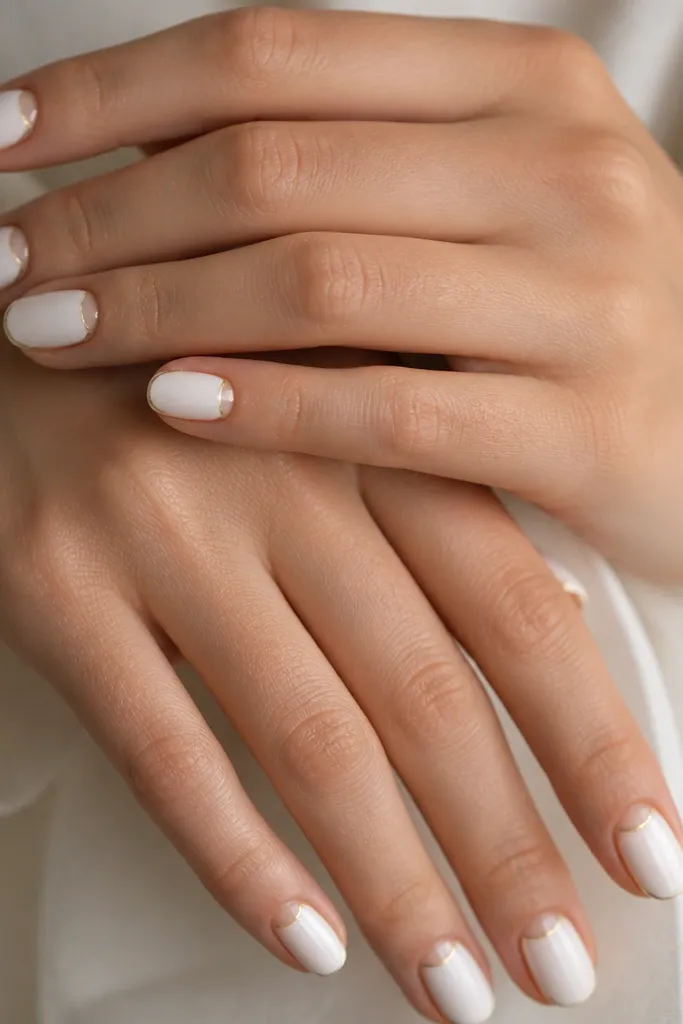
This one looks polished even when your nails grow because the detail sits right at the cuticle line, where growth is least noticeable. I use a bright snow-white because it makes the gold rim look like real jewelry, not yellow paint. It flatters most nail beds, especially medium to short lengths, since the half-moon creates a neat frame. If your skin runs warm, the snow-white can look a bit crisp — I fix that by switching to a slightly creamy white version of the same design.
Start by prepping and pushing back cuticles, then apply a rubber base and cure. Paint 2 thin coats of opaque white, curing fully between coats. Use striping tape or a micro brush to place a thin gold rim exactly along the half-moon edge, then cure. Remove tape carefully, then seal with a high-shine top coat, dragging the brush over the free edge once.
Editor's noteAfter the top coat cures, wipe with alcohol and check the sidewalls with a light — if you see any edge gaps, add a second thin top coat just on the rim.
Skip thisDon’t make the gold rim thick; chunky gold near the cuticle lifts first.
2. Milky White French Tips with a Gold Side Stripe
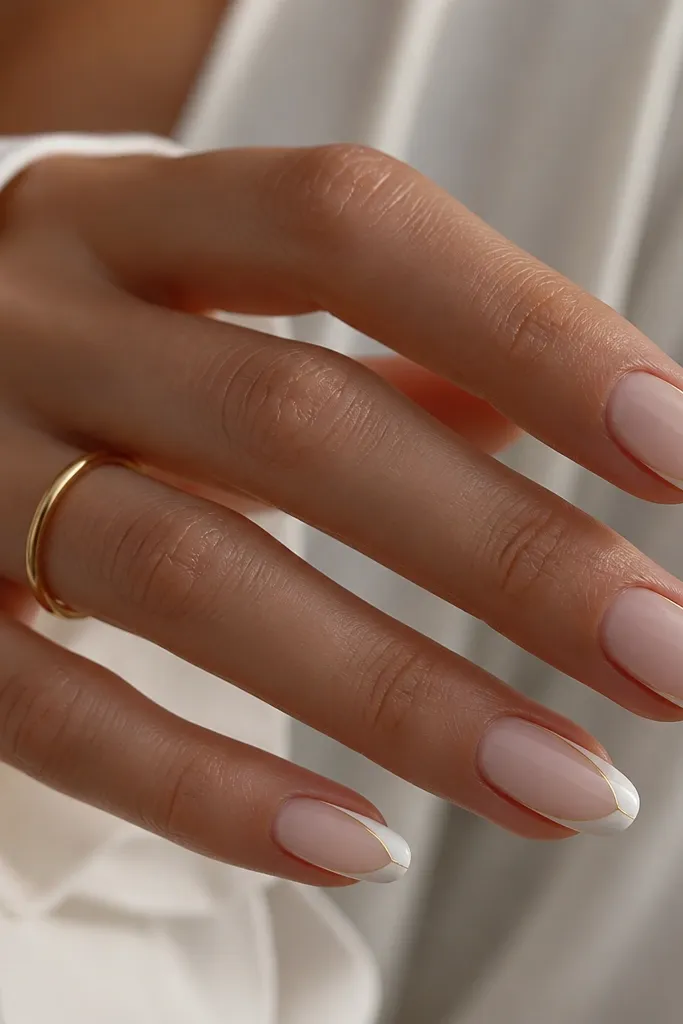
This is my go-to when I want “clean and put together” without committing to full nail art. The milky French tip makes the nail look longer, and the tiny gold stripe adds interest without covering the whole surface. It suits fair to deep skin tones because the base stays neutral and the contrast comes from the white tip, not the skin. If your nails are short, keep the French line narrow and slightly higher up — it still reads intentional.
Start with a sheer nude base that matches your skin tone, then cure. Create the French tip using a guide or a striping stencil and paint 2 thin coats of milky white on the tip area, curing each coat. Place a strip of thin gold striping tape along one side of the nail from the middle of the tip down about two-thirds, then remove after curing (or keep it and seal if your tape is gel-safe). Finish with top coat, making sure the stripe edges are sealed.
Editor's noteUse striping tape for the stripe even if you’re good at freehand — it keeps the line straight after growth and washing.
Skip thisAvoid a wide gold stripe; it turns into a “painted-on” look once the nail grows out.
3. White Marble Swirl with Gold Speckle Trace
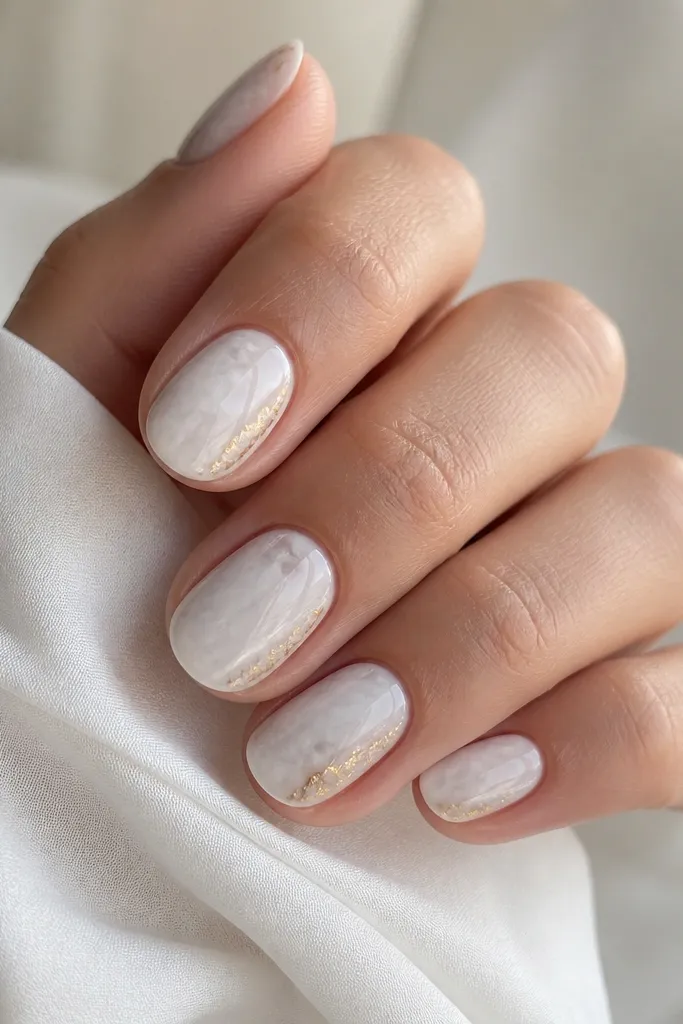
This design hides chips because marble looks like it belongs even when the nail has wear at the edges. I keep the marble light — think milky white with faint smoky veins — so it stays sophisticated with gold. The gold is minimal: a speckle trace that sits like the last touch of jewelry, not glitter everywhere. It’s flattering on hands with slimmer fingers because the organic swirls add movement without bulk.
Start with a base coat and cure, then apply 2 coats of milky white (or a white marble gel base if you have one). For the marble, use a thin detail brush and drag a couple of faint gray-white lines through the wet polish, then feather the edges with a clean brush. Add gold specks using a dotting tool with gold chrome or gold foil gel, keeping them clustered along one side only. Seal with 2 coats of top coat, since marble textures need extra smoothing.
Editor's noteIf you want it to last longer, do the marble on day one and gold specks on day two — the base cures harder after full cure time.
Skip thisDon’t do heavy gray veins; dark marble makes chips obvious on white.
4. Opaque White Base with Gold Foil Cuticle Crescent
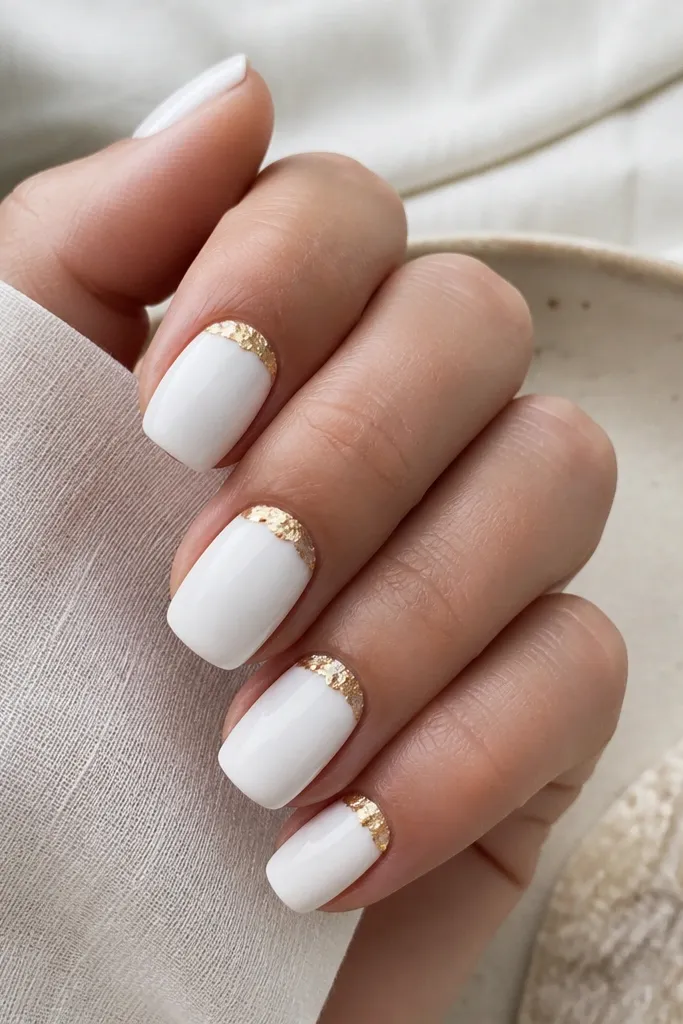
Gold foil looks expensive because it has texture, and the cuticle crescent placement keeps it low maintenance. Even when the nail grows, the foil stays close enough to the cuticle that it looks intentional. I like foil over chrome here because foil hides micro scratches from daily life. This flatters most skin tones, and it’s especially pretty if your hands have a warm undertone, since foil reads buttery.
Apply a rubber base and cure, then paint 2 thin coats of opaque white gel polish. For the foil, apply a small amount of tacky foil gel or adhesive only in the cuticle area, then cure until it’s tacky (follow your product instructions). Press gold foil into the tack using a silicone tool, then peel back to reveal a crescent shape. Seal carefully with top coat, brushing around the foil edges so they don’t snag.
Editor's noteCut your foil into smaller pieces before you start; bigger sheets fold and create messy clumps near the cuticle.
Skip thisAvoid putting foil all over the nail; it lifts faster and looks messy when it grows out.
5. White Dot Accent on One Nail with Gold Outline
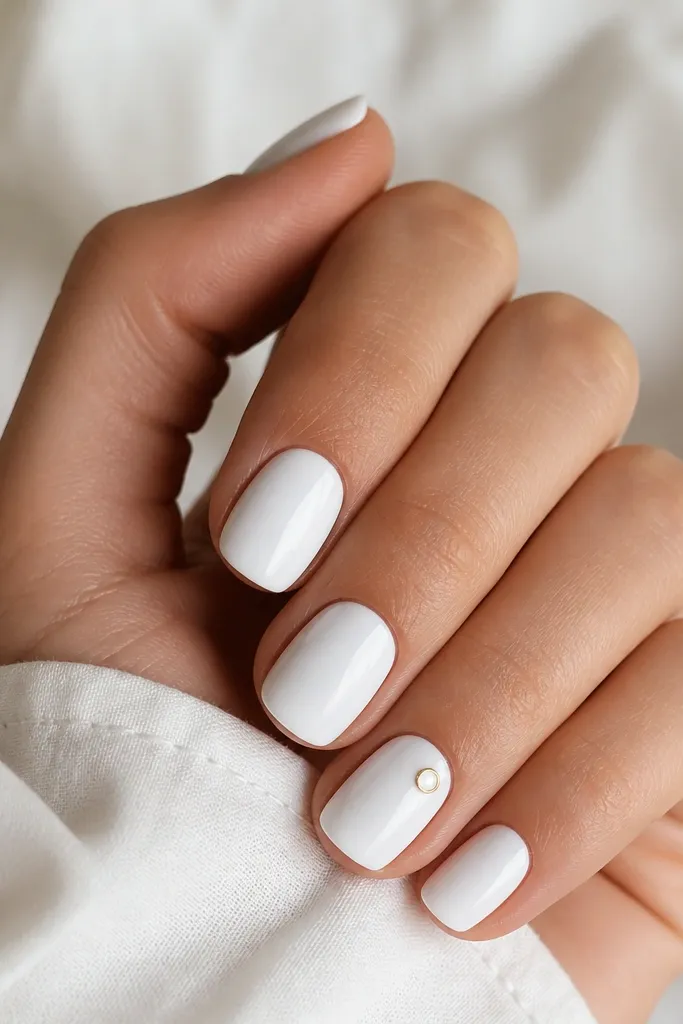
This is the least fussy option that still looks designed. The base is fully opaque white, so you don’t have to worry about patchiness. The gold outline around one small dot adds focus and keeps the look from being “plain white nails,” which can sometimes feel too stark. It flatters short nails because the detail is compact and centered, and it works for both cool and warm undertones since the gold is the only warm element.
Paint all nails with 2 thin coats of opaque white, curing each coat, then top coat lightly. On the ring finger, use a dotting tool to place a small dot in the same white shade (or a slightly brighter white gel) and cure. Add a thin gold outline around the dot using a striping brush or gold chrome pen, keeping the outline tight and even. Finish with one full top coat over every nail, then cure again.
If your dot looks uneven, wipe the brush with alcohol and use the brush tip to nudge the edge before curing.
Don’t outline the whole nail in gold; it loses the clean, modern feel.
6. Vertical White Center Line with Gold Side Borders
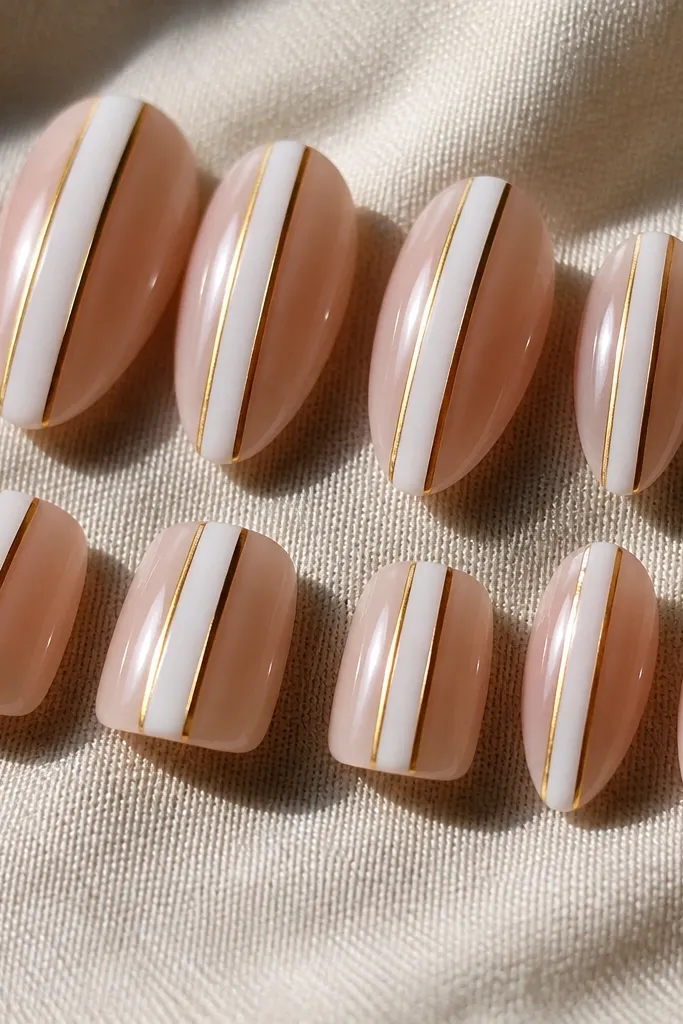
This design makes nails look longer because the eye follows the vertical line. It’s also low maintenance because the nude base can grow out without looking messy, while the white and gold stay crisp as accents. I like it on almond and square shapes, but it’s fine on short nails if the line is slim. It flatters hands with any undertone since nude softens the contrast and the gold borders add warmth.
Start with a sheer nude base that matches your skin tone and cure. Create the center line with a striping brush using opaque white gel, 1 coat for a thin line, then cure; add a second pass if needed for full coverage. Place two thin gold striping tape lines on each side of the white line (or paint with a fine gold gel), keeping the spacing equal. Seal with top coat, and drag the brush over the tip edges so the tape or painted lines don’t lift.
Measure the spacing by eye using your nail width — keep the white line about one-third of the nail width.
Skip thick lines; a chunky center stripe makes the nail look wider instead of longer.
7. White Glazed Nails with Gold Chrome Half-Moon
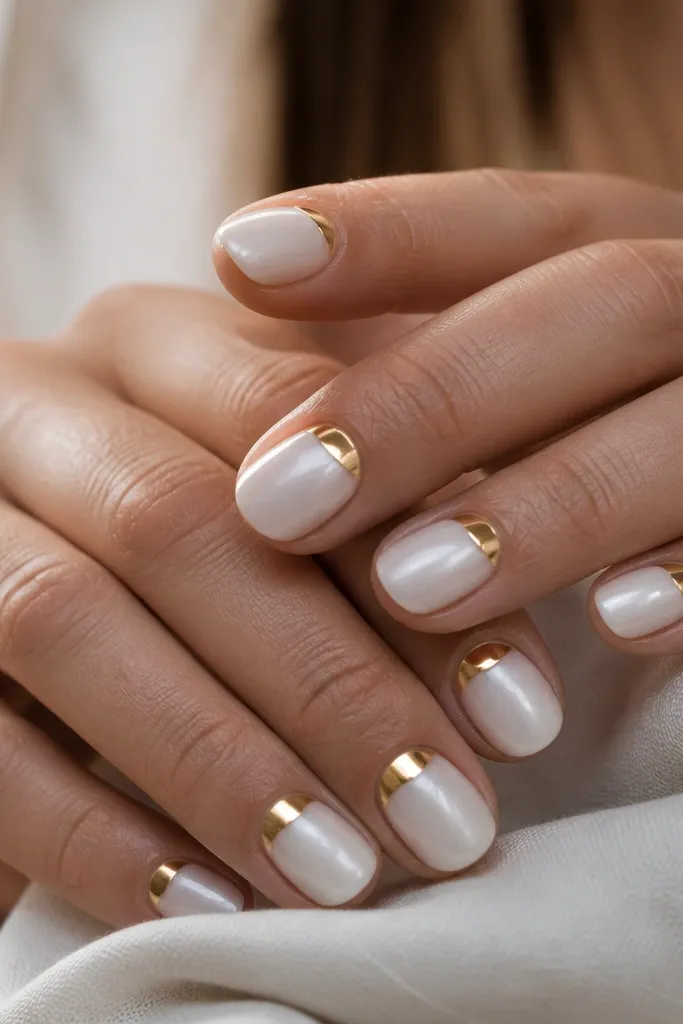
Glazed white looks clean because it has depth without needing detailed art. The gold chrome half-moon adds that “done” look while staying small enough to grow out nicely. I use this when I want something that matches a simple outfit but still reads special in photos. It flatters medium nail beds, and the half-moon placement helps balance nails that are a little wide.
Apply base coat and cure, then do 2 coats of opaque white gel. For the glazed look, apply a thin layer of top coat (or a glaze gel if you have one), cure, then lightly buff once with a very fine buffer to remove tacky texture. Apply gold chrome powder over a small half-moon tack area near the cuticle, then rub off excess with a soft brush. Finish with a final top coat that preserves shine — keep it thin so the chrome doesn’t dull.
Editor's noteIf your chrome looks patchy, press the powder in with a foam applicator for 5-8 seconds before brushing off.
Skip thisDon’t over-buff the white before chrome; you’ll lose the glazed depth.
8. Crisp White Frame Nails with One Gold Corner
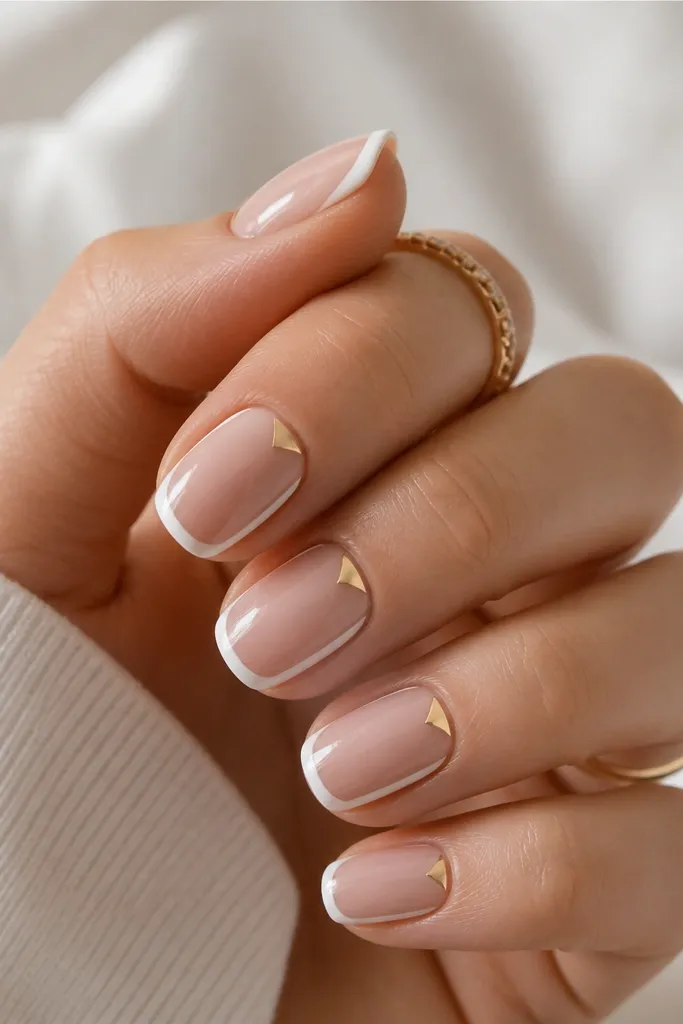
Framed nails look structured, and structure is what makes them feel “clean” as they grow out. The white frame creates a crisp boundary, while the gold corner keeps the look from feeling too graphic. This suits people who like minimal art but still want something that reads manicure, not just polish. On deeper skin tones, the nude base makes the white frame pop without looking harsh; on fair skin, it keeps the gold from disappearing.
Start with a nude base and cure, then apply a thin layer of top coat for smoothness. Use a striping brush to paint a white outline: start at one side near the cuticle, follow down the sidewall, curve along the tip edge, and connect to the other side. Keep the lines thin and leave a bit of nude space inside the frame. Add a small gold corner at the lower cuticle corner using a fine brush or a tiny triangle of gold foil gel, then cure and seal with top coat.
Use nail tape to guide the frame lines if your brush tends to wander — remove tape right after you cure the outline.
Avoid painting over the cuticle skin; gold and white catch on fabric and lift there.
9. White Ombre Tips with Gold Foil Thread
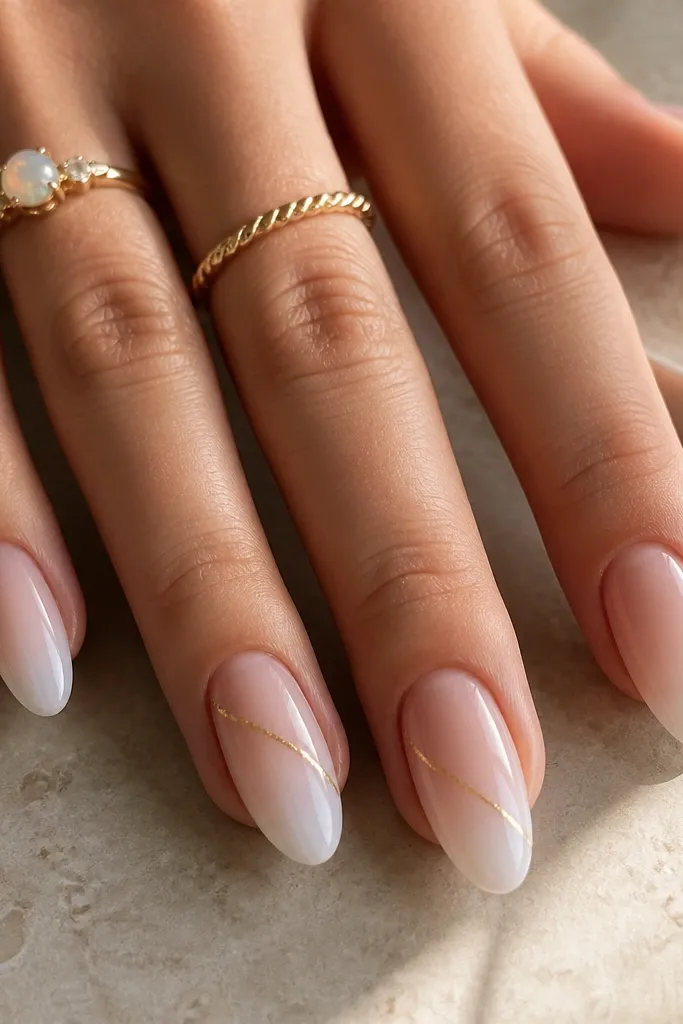
Ombre tips are low maintenance because the fade blends growth — the line you’d normally see in a French manicure is gone. The white-to-nude gradient looks soft and clean, and the diagonal gold thread adds movement without covering the whole nail. I like this on medium length because the diagonal has room, but short nails still work if the thread is kept tiny. It flatters hands with dry cuticles too, since the nude base hides slight texture near the cuticle edge.
Apply nude base and cure, then sponge on white gel at the tip for a smooth ombre. Use a makeup sponge or ombre brush, and blend in thin layers until the fade looks airy, then cure. For the gold thread, apply a thin strip of foil adhesive or tack gel along a diagonal path, cure until tacky, then press gold foil into it and peel. Seal with top coat, making sure you cover the edges of the gold thread so it doesn’t snag.
Editor's noteWork with thin layers for ombre; one thick layer makes the white look chalky and chips sooner.
Skip thisDon’t place the diagonal thread too close to the sidewall — it lifts from friction.
10. All-White Matte with Gold Glossed Accent Line
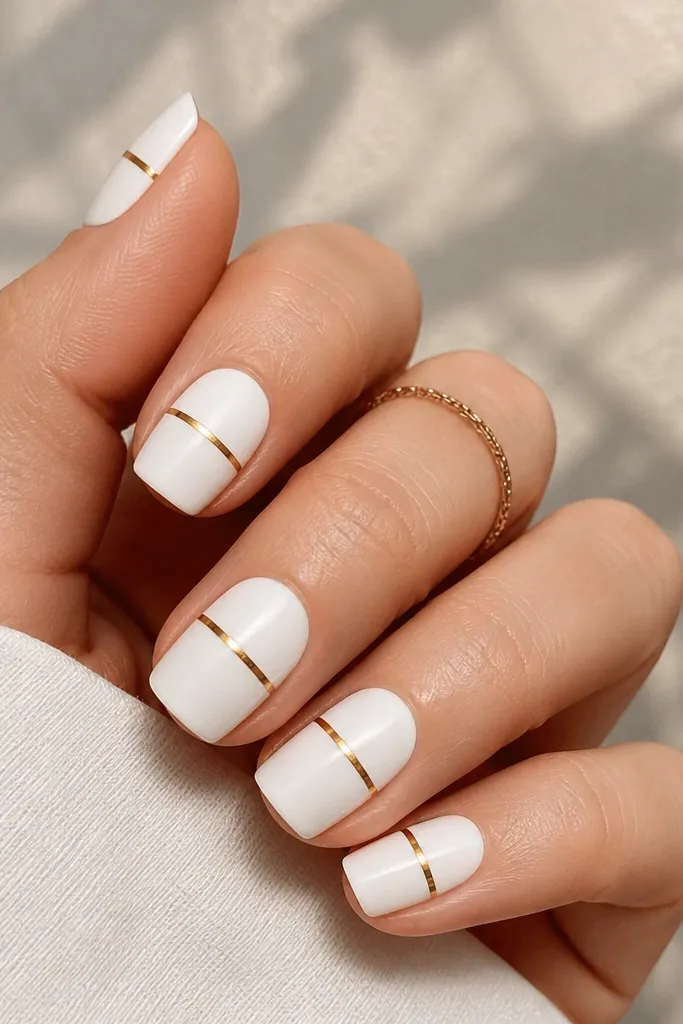
Matte white hides tiny ridges and makes small imperfections less obvious, which is why it stays looking tidy longer. The glossy gold line pops hard against matte, so you still get that clean, sophisticated contrast without heavy art. I like this for winter outfits and office days because it reads modern and calm. It flatters short to medium nails since matte reduces the shine that can highlight uneven nail shape.
Prep and apply base coat, cure, then paint 2 thin coats of opaque white gel and cure. Apply a matte top coat across all nails and cure fully. Use striping tape to place a thin gold line, or paint a fine gold gel line, then cure; remove tape after cure if you used it. Finish by sealing only the gold line with a glossy top coat so it stays bright while the rest remains matte.
Editor's noteKeep the gold line at least 1-2 mm away from the sidewalls so it doesn’t wear down first.
Skip thisAvoid glossy top coat over the whole nail; it ruins the matte effect that makes this low maintenance.