1. Half-Moon Cuticle Gold on Milky White
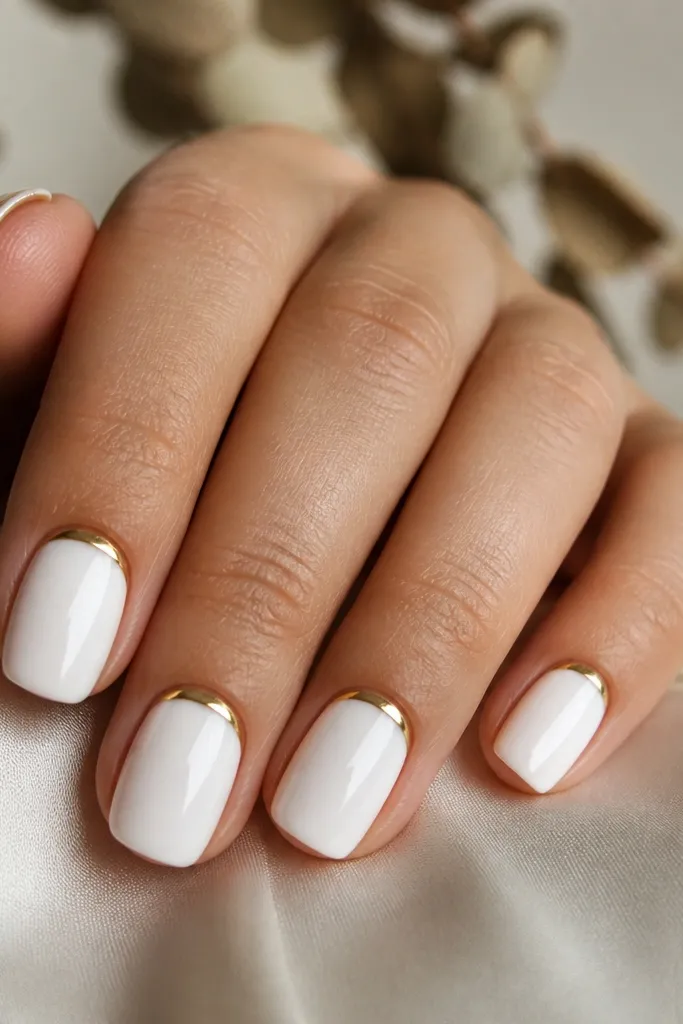
This is the first milky white and gold set I recommend because it makes nails look polished even with tiny length. I paint the nail with a creamy milky white that’s opaque enough to cover ridges but still translucent at the edges. Then I place a gold half-moon right at the cuticle line, staying about 1-2 mm wide so it reads delicate. The gold color should be pale yellow if you’re cool-toned, and slightly buttery if you’re warm-toned. This set flatters hands with short nails and wider nail beds because the gold frames the base without shrinking the nail.
Start by pushing cuticles back gently and buffing the shine off the nail plate with a light 180-grit block. Apply a thin base coat, cure, then add milky white in 2 thin coats, curing each coat fully so it doesn’t turn streaky. For the gold, use a striping gel or fine brush and paint a half-moon that follows your cuticle curve, leaving a hairline gap from the skin. Cure, then seal with a glossy top coat in one smooth stroke across the center and sides. Finish with a wipe of cleanser if your top coat leaves a tack layer.
If your cuticle grows irregularly, make the half-moon slightly thicker in the center so it looks even after growth.
Avoid painting gold all the way to the sidewalls — it looks bulky and can snag on sleeves.
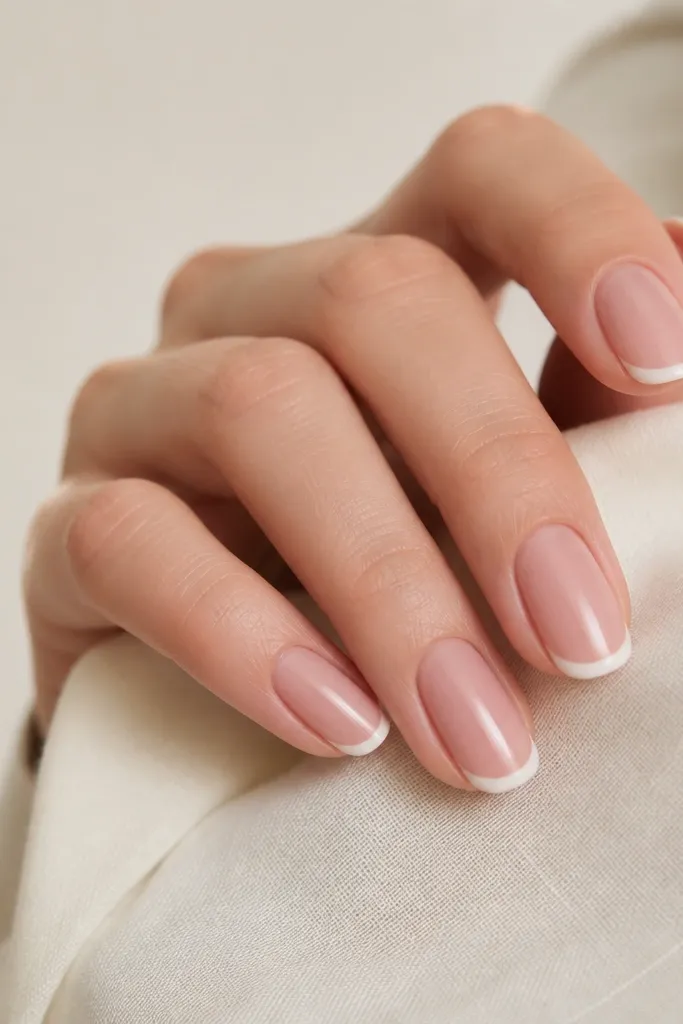
2. Gold Micro-Stripe Over Milky White French Tip
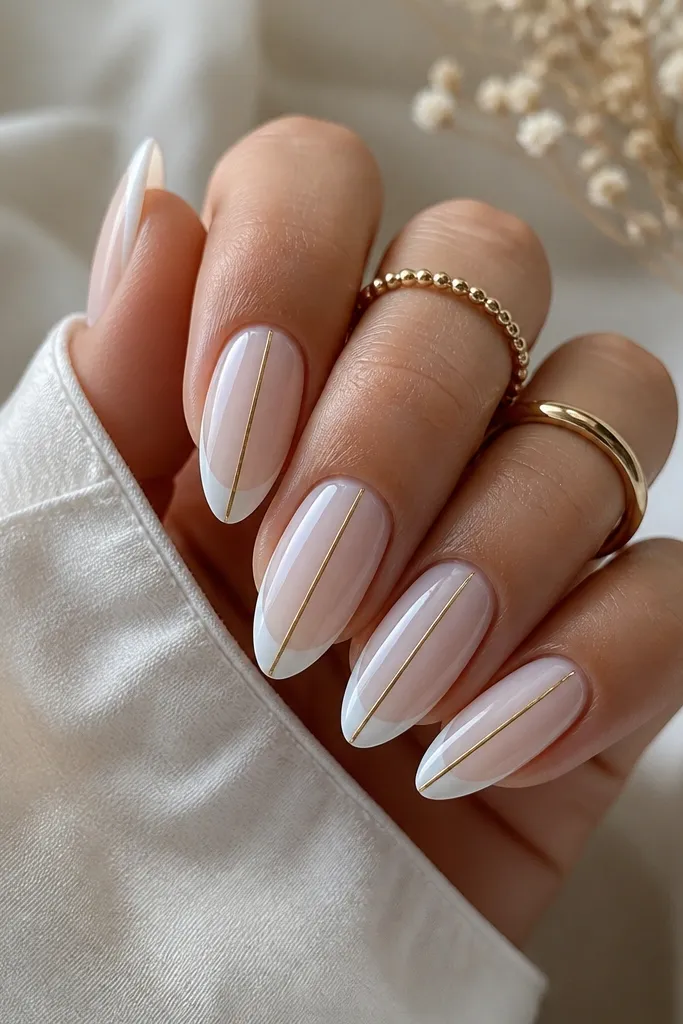
This look gives you that French-tip polish but with a modern jewelry twist. The milky base softens the contrast, so the tips don’t look stark or bridal-only. I like it most on almond or squoval because the center stripe visually lengthens without needing extra length. The gold stripe should be thin — about the width of a sheet of printer paper — so it glints instead of taking over. It flatters olive, neutral, and fair skin because the white stays creamy and the gold adds warmth.
Editor's noteUse a nail guide sticker for the French edge, then remove it while the gel is still slightly tacky so the edge stays crisp.
Apply milky white as your full coverage base in 2 thin coats. For the French tip, use a French brush or nail guide and create a milky white tip about 2-3 mm at the edge, staying soft and curved. Let the tip cure fully, then place a gold striping gel line down the center from just below the tip to the middle of the nail. Cure, check symmetry, then top coat with a glossy layer that covers the stripe edges. If you see any raised line, cap the stripe with a second ultra-thin top coat.
Skip thisSkip thick gold stripes — they turn the set into a chunky accent instead of soft luxury.
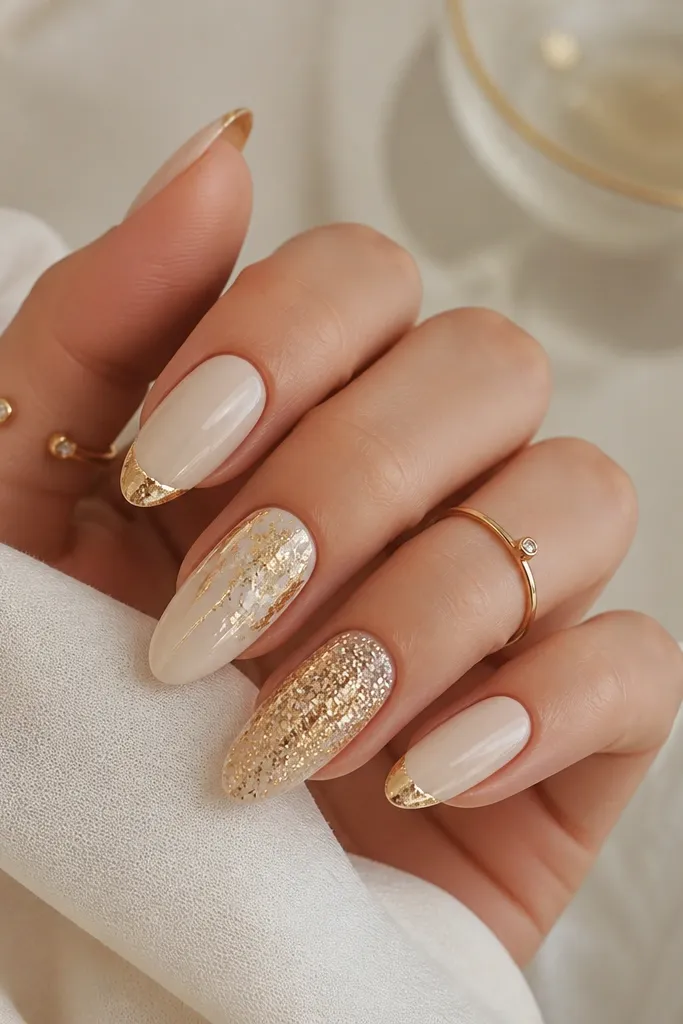
3. Milky White Ombré with Gold Foil Edge
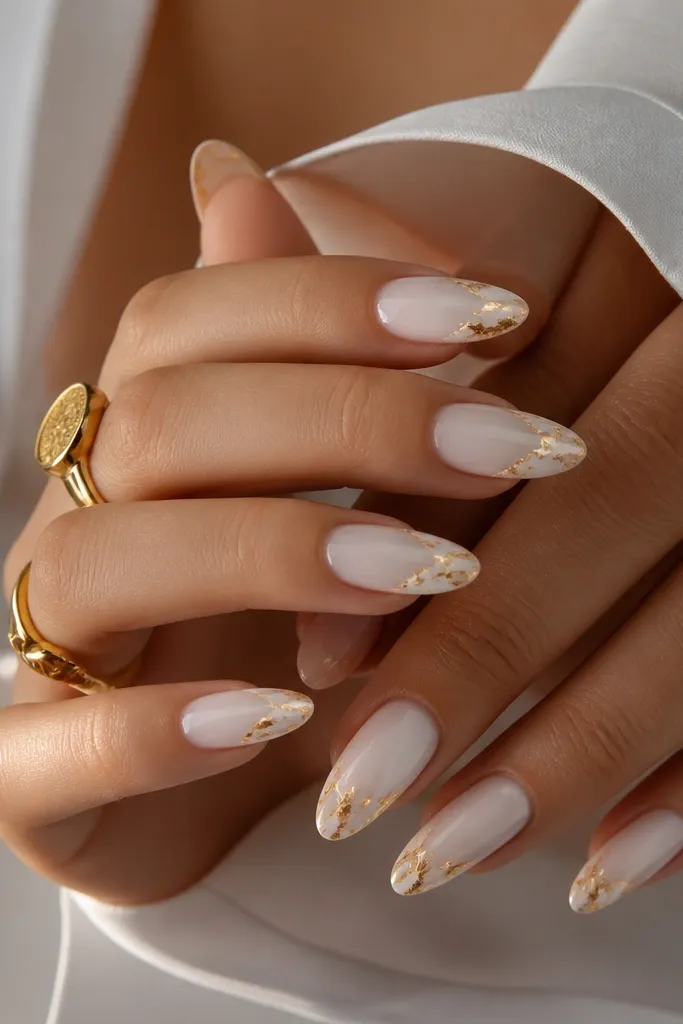
This one looks expensive because the gold sits like a sunlit border. I start with milky white at the cuticle and blend it down with a sheer milky or clear base so the center looks lighter, not chalky. Then I press gold foil fragments along the outer edge near the tip so you get sparkle where light hits your hand. It’s flattering on medium almond and helps hands look longer because the fade pulls the eye toward the center. For skin tones, it works across the board, but it’s especially pretty on warm undertones because the gold edge warms the milky fade.
Editor's notePress foil with a silicone tool, not tweezers, so you don’t tear the pattern into random chunks.
Start with a base coat and a sheer nude or clear underlayer if your natural nail is very pigmented. Apply milky white at the base in a thin coat, then sponge-blend toward the center with a makeup sponge for a soft ombré. Cure, then add one more milky layer only at the cuticle to keep it glowing. For foil, dab a small amount of foil gel on the outer edge 1-2 mm wide and press foil pieces, then cure. Seal with a top coat that fully encapsulates the foil so it doesn’t catch on hair or fabric.
Skip thisDon’t put foil across the entire nail — it looks busy and kills the soft-luxury feel.
4. Creamy Milky White with Gold Dipped Tips
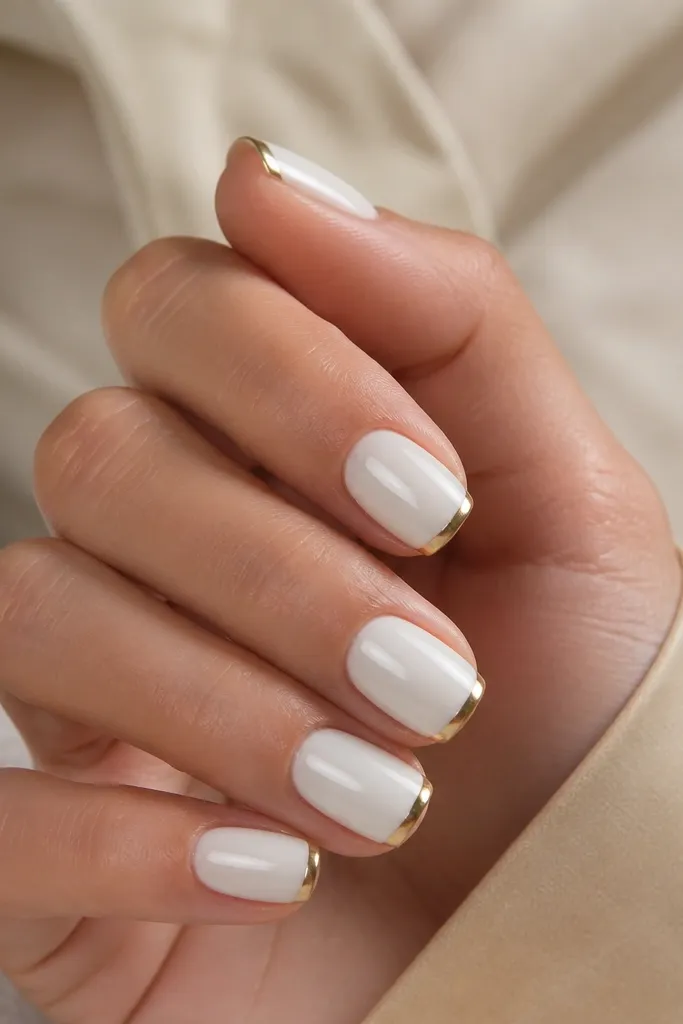
Gold-dipped tips look like jewelry without needing a full design. I do this with a creamy milky white base because it gives a smooth canvas and makes the metallic gold look brighter. The gold area should be a clean band at the free edge, not a messy gradient, so the set reads intentional. This flatters short nails because the gold band adds a crisp “cut line” that makes the nail look neat. It also works well if you’re starting from bitten or uneven tips, since the metallic band can hide tiny imperfections.
Editor's noteKeep the gold band slightly higher on the sidewalls if your nail plate curves down — it balances the shape.
File and shape, then buff lightly so the base sticks. Apply milky white in 2 thin coats, curing each one, and make sure the edges are fully covered. For the gold dip, use a metallic gold gel or gold powder method with a thin adhesive zone: paint a small band where you want the dip, 2-3 mm tall. If using powder, apply gel, dust gold powder over it, then tap off extra and cure. Finish with top coat and cap the free edge so the metallic doesn’t chip.
Skip thisAvoid dipping too far down the nail — it turns into a thick “gold tip” instead of a delicate accent.
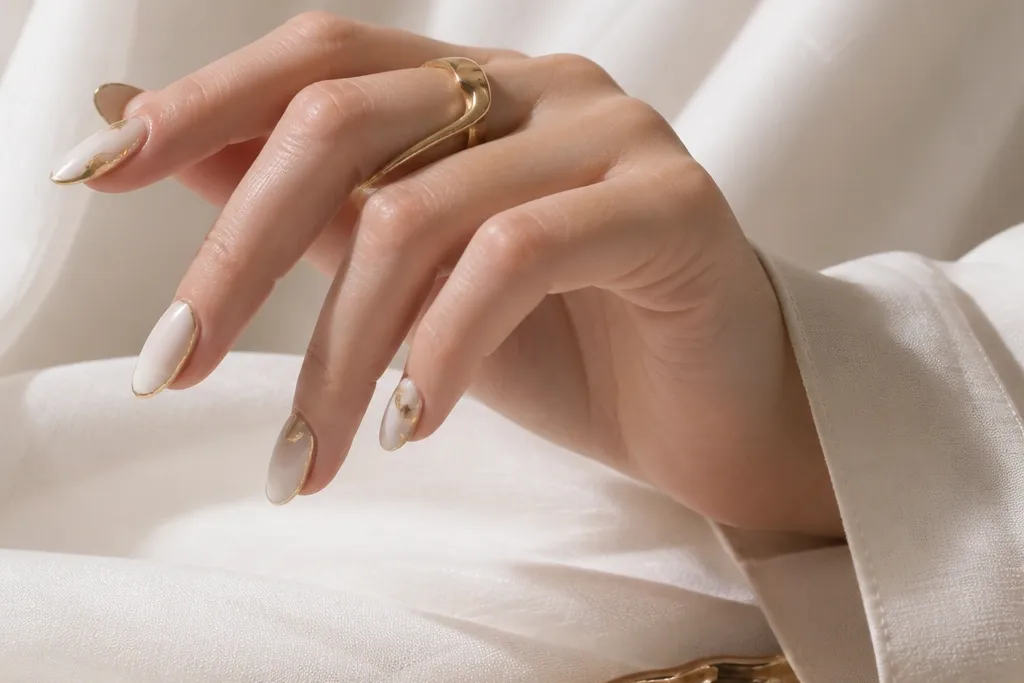
5. Milky White Marble Veins with Gold Leaf Lines
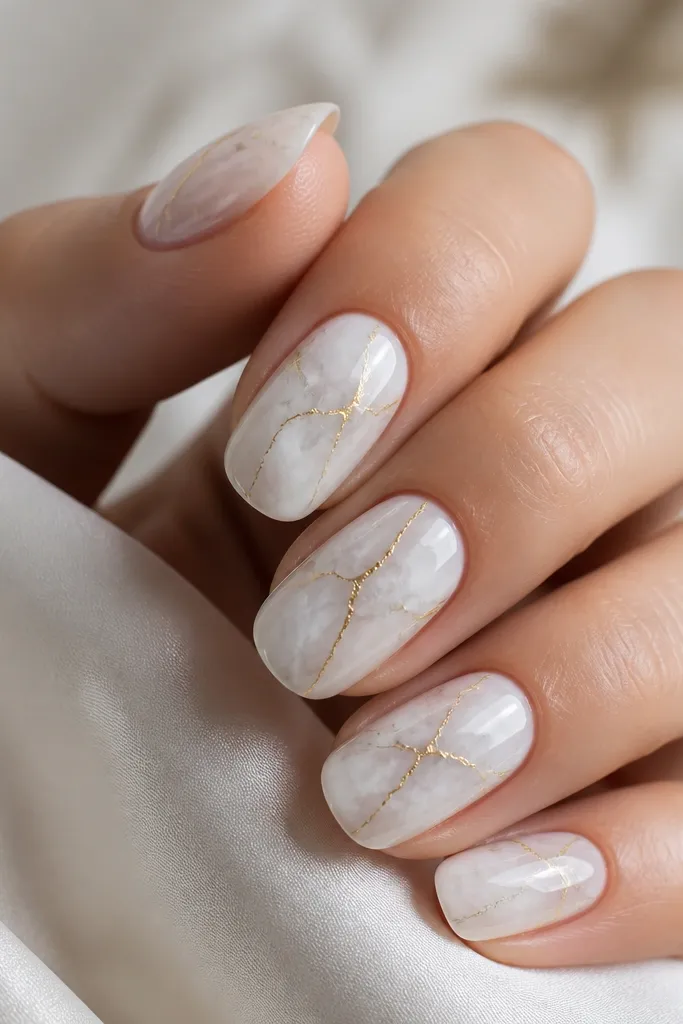
Marble works because it adds movement while still staying in the milky-white family. I keep the marble subtle with very light gray or taupe swirls so it doesn’t look like heavy stone. Then I add gold leaf lines over the marble veins — just a few strokes — so it looks like natural mineral sparkles. This set is best for medium lengths and almond or squoval shapes because the veins look more fluid. It flatters most skin tones, and it’s especially pretty if you wear gold jewelry since the leaf mimics that warm shine.
Editor's noteUse a matte top coat for one week if you want the marble to look more soft and cloudy, then switch back to glossy for events.
Start with milky white base in 2 coats, cure well, and wipe if needed. For marble, use a thin liner brush with a diluted gray gel (or a marbling tool) and drag a few wisps diagonally, then soften edges with a clean brush. Cure, then place tiny pieces of gold leaf on top of specific vein lines using foil gel. Press lightly and cure again. Seal with glossy top coat in 2 thin layers if you used a lot of leaf so it stays smooth.
Skip thisDon’t overdo the gray — thick marble makes the set look dated and messy.
6. Milky White Glass Nails with Gold Foil Confetti
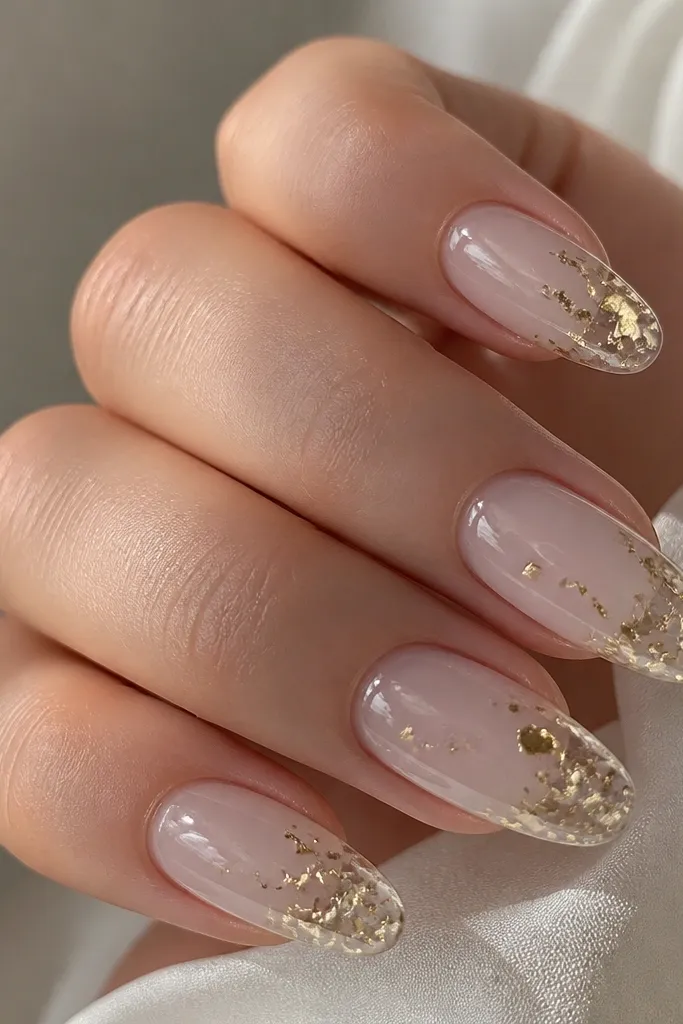
This is the “clean girl” version of milky white and gold, and it looks unreal in sunlight. I build it with a sheer milky white so you still see a hint of nail depth, then I add gold foil confetti in micro pieces near the free edge. The confetti placement matters: too close to the cuticle and it looks like glitter bombs, too low and it disappears. It flatters short-to-medium nails because the glass effect makes the nail surface look longer and smoother. It’s also forgiving if your nails have slight natural ridges, since the glassy layers blur them.
Editor's noteFor extra shine, cap the free edge with top coat and avoid wiping the foil gel zone after applying.
Prep and buff lightly, then apply a clear base or strengthening base coat. Add milky white in thin, see-through layers (3 thin coats), curing each one, and keep the edges tidy. For confetti, use foil gel in a narrow zone near the tips and press tiny foil pieces with a silicone stick. Cure, then apply a thick glossy top coat layer that smooths the surface and fully seals the foil. If you feel any texture, add one more thin top coat after curing and buffing lightly with a soft file.
Skip thisDon’t use chunky glitter foil — it breaks the glass look and makes the nails feel rough.
7. Milky White with Gold Cuticle Scallops
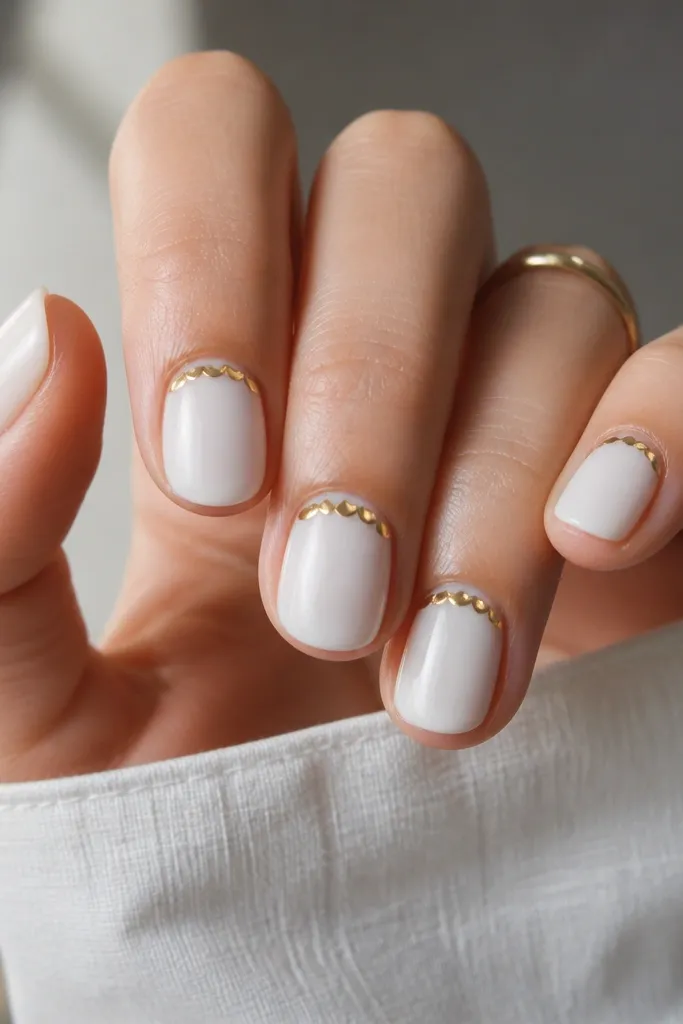
Scallops give you that lace-like detail without using actual lace. I use milky white as the base so the gold arches look crisp and clean. The scallops should be small and evenly spaced — about the width of a matchstick head — and they sit right along the cuticle curve. This is flattering on oval and squoval nails because the cuticle line is already curved; it makes your nail bed look more defined. If you wear warm neutrals and gold rings, this set looks like it was made for that combo.
Editor's noteWork on two nails at a time to keep the gel workable and avoid uneven scallop heights.
Apply milky white in 2 thin coats and cure. Use striping gel and a dotting tool to place tiny gold dots along the cuticle, then connect each dot with a thin gel brush stroke to form scallop arches. Cure after the pattern is set so it doesn’t smear. Clean the edges with a lint-free wipe and acetone on a detail brush if needed. Finish with a glossy top coat, making sure you cover the scallop ridges so they feel smooth under your fingers.
Skip thisAvoid giant scallops — they look like costume nail art instead of soft luxury.
8. Milky White French with Gold Side Bar
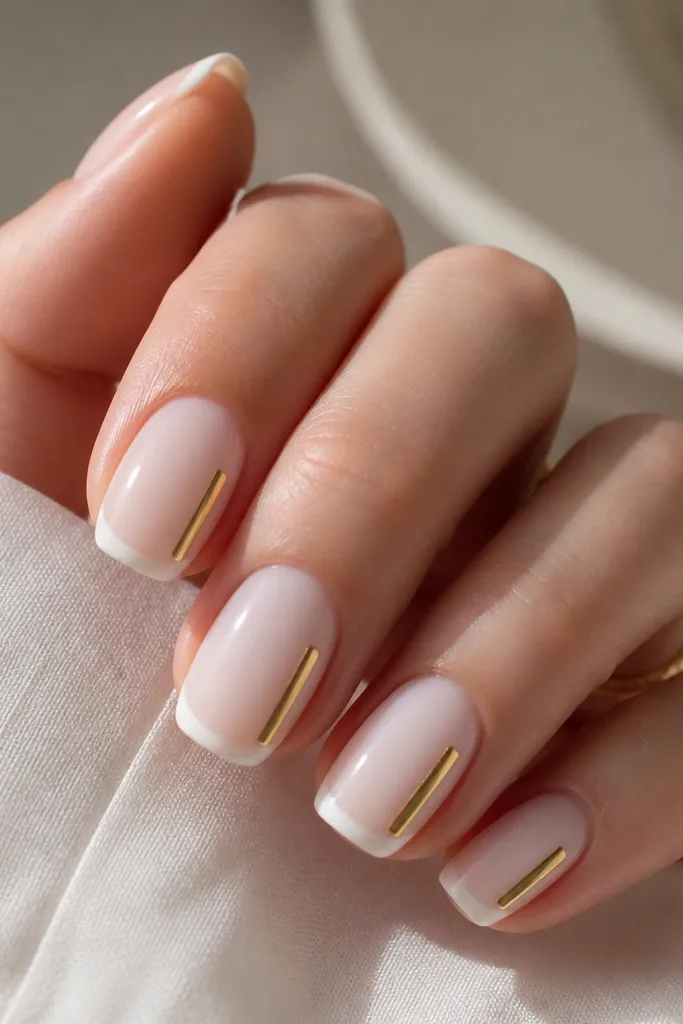
This is the asymmetrical version that still looks balanced. The milky French keeps it bright and clean, while the gold side bar adds a slim jewelry line. I like placing the bar on the same side of every nail so your hands look coordinated when you gesture. It flatters short nails because a vertical line creates length, and it flatters wider nail beds because it doesn’t cover the whole tip. For skin tones, it looks great on both cool and warm — the gold tone just needs to match your jewelry.
Editor's noteUse a silicone stamper or nail guide sticker to keep the bar straight — it’s faster than trying to freehand it on every nail.
Start with milky white base, 2 thin coats, cure fully. Paint a French tip about 2 mm at the free edge, then cure. For the gold bar, use a thin striping gel brush and paint a vertical line from just under the tip down to about the midpoint, staying 1-2 mm from the sidewall. Cure, then apply top coat, pulling it over the gold bar edges to keep it from catching. If the French edge looks too opaque, thin the milky white coats to keep it soft.
Skip thisDon’t put the gold bar too close to the cuticle — it can look like a mistake instead of design.
9. Gold Foil Half-Sheet on Milky White Nude Base
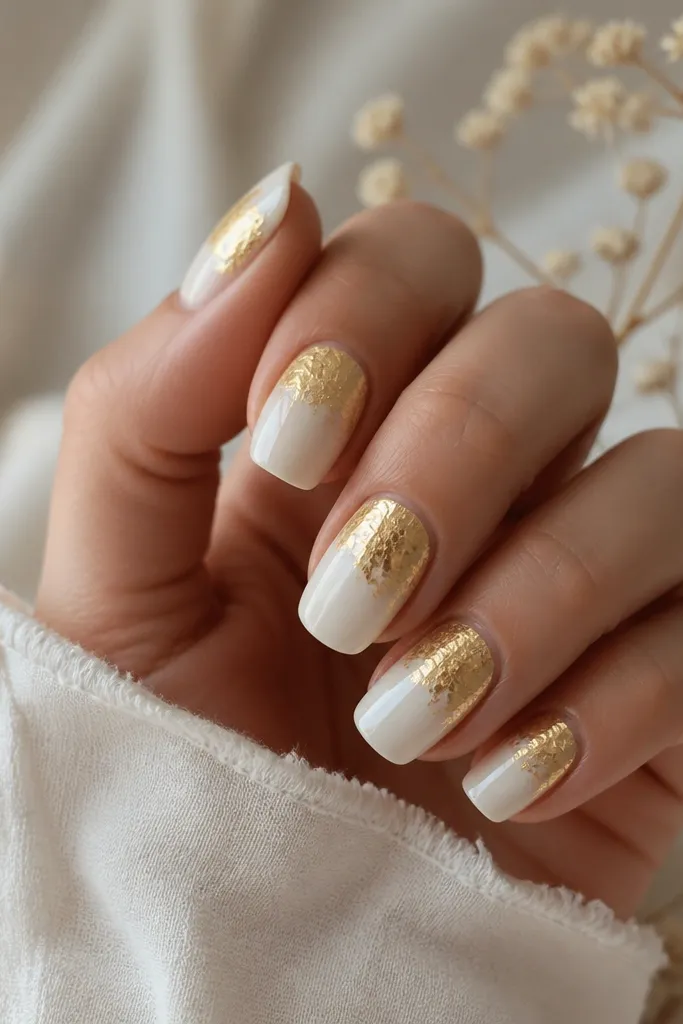
This one feels artsy but still wearable. I use a milky white nude base so the gold has a soft background and doesn’t look like you slapped on foil. The foil is placed as a half-sheet in the upper third, leaving negative space at the lower half. That negative space is what keeps it from looking heavy. It flatters medium length nails and hands with slightly longer nail beds because the foil occupies the top and the base stays clean. It also photographs beautifully because the foil edges catch light.
Apply a milky white nude base in 2 coats, cure, and make sure the surface is smooth. Add foil gel in the upper third area only, roughly starting 2-3 mm below the tip line. Press gold foil pieces so they cover most of that zone, then trim excess foil at the edges with a small file. Cure and then seal with glossy top coat, using two thin layers to fully smooth over foil texture. For the cleanest look, cap the sidewalls gently so the foil doesn’t lift.
If your foil looks patchy, add one more small foil piece only where the light hits — don’t blanket the whole nail.
Avoid full foil coverage — it turns into a loud gold set instead of the milky white and gold aesthetic.
10. Milky White Dots with Gold Thread Lines
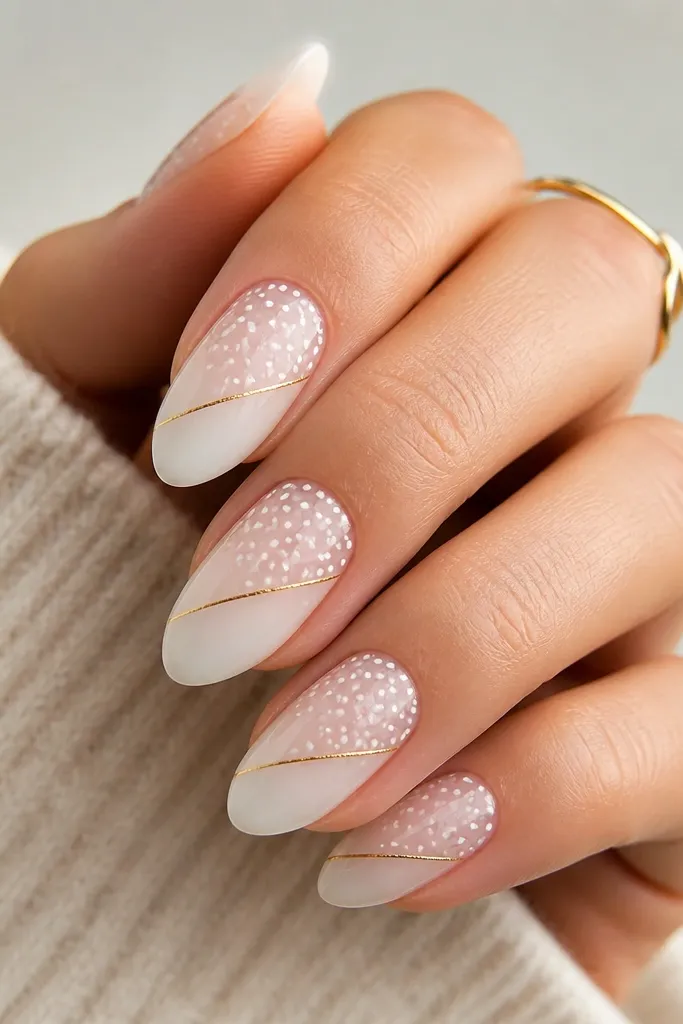
Tiny dots and a single gold thread line look like jewelry packaging details. I use milky white as the base, then add dots in a slightly different milky shade so they show without turning into pure white confetti. The gold thread line is thin and diagonal, placed so it guides the eye from lower left to upper right. This set flatters short nails because the diagonal line adds length, and the dots stay small so they don’t crowd. It looks especially pretty on fair skin and on hands with cool undertones because the milky whites stay soft.
Paint milky white base in 2 thin coats and cure. For dots, use a dotting tool dipped in milky white or opaque white gel — keep the dot size consistent and place them in a subtle cluster near the center. Cure the dots. Then apply a thin diagonal gold line with striping gel, starting just below mid-nail and ending near the tip but not touching the edge. Cure and finish with glossy top coat, making sure the gold line is sealed so it doesn’t snag.
Use a toothpick for dot spacing if you don’t trust your dotting tool — dip, touch, lift, repeat.
Don’t make dots too large — large dots read childish and flatten the manicure.
11. Milky White Aura Center with Gold Crescent
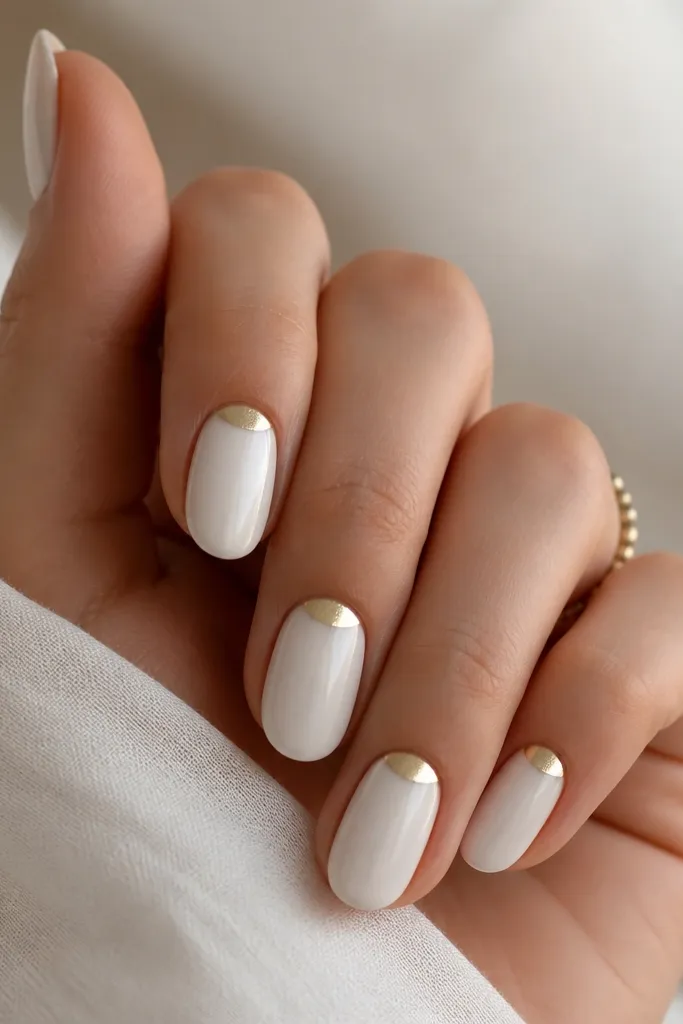
Aura nails look soft because the center glow feels airy, not painted. I do milky white aura by using a slightly lighter milky shade or sheer milky layer in the center, blended outward with a sponge so it fades gently. Then I add a small gold crescent at the cuticle like a comma shape. The crescent is smaller than a traditional half-moon, so it feels delicate. This set flatters medium almond and oval shapes because the aura reads well on curved surfaces. It also works for people who hate full nail art but still want something special.
Apply milky white base in 2 coats and cure. For the aura, use a makeup sponge to dab a lighter milky shade in the center area only, blending outward until you see a soft halo. Cure and wipe if needed. Add a gold crescent at the cuticle using striping gel, keep it narrow and centered, then cure again. Top coat with a glossy layer that smooths the sponge texture; if you see patchiness, add one more thin top coat after a light buff.
Blend the aura with a nearly dry sponge so you don’t lift the base coat.
Avoid putting gold too wide — a wide crescent makes aura nails look crowded.
12. Milky White Cable Knit Texture with Gold Outline
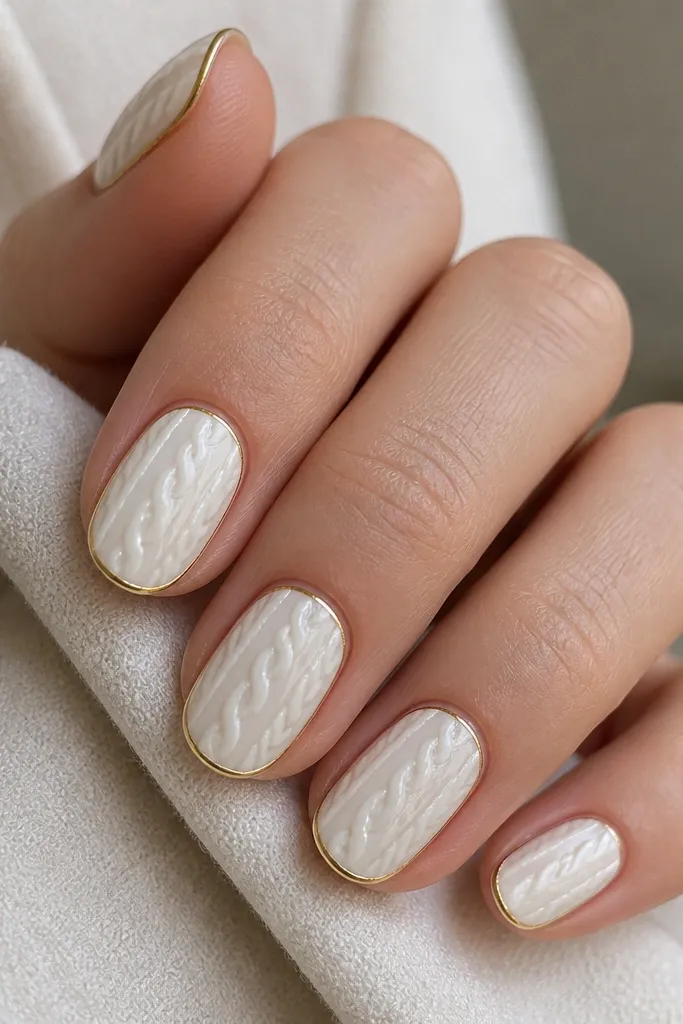
This is the manicure I do when I want winter vibes without using obvious snowflakes. The raised cable knit texture gives you dimension, and the gold outline makes it look intentional instead of bulky. I keep the base milky white creamy, then build the knit lines with a sculpting gel or thick gel in thin channels so the texture stays controlled. The gold outline is a thin border around the knit pattern, not a fill. It flatters hands with slightly longer short nails because the texture needs space to read. If you wear sweaters, coats, or gold jewelry, this set just fits.
Editor's noteIf the texture feels rough, buff the top coat lightly after curing — do not buff the gel lines themselves.
Start with a smooth milky white base in 2 coats, cure, and top with a thin layer if your texture gel needs grip. Use a cable knit stamping plate or freehand with a striping brush to make the raised lines, keeping each channel about 1 mm thick. Cure after building each section so it doesn’t slump. Then outline the knit pattern with striping gel in gold, tracing only the outer edges. Cure and finish with glossy top coat, adding a second top coat layer around the texture so it feels smooth.
Skip thisAvoid thick texture gel — it can crack at the free edge and looks uneven.
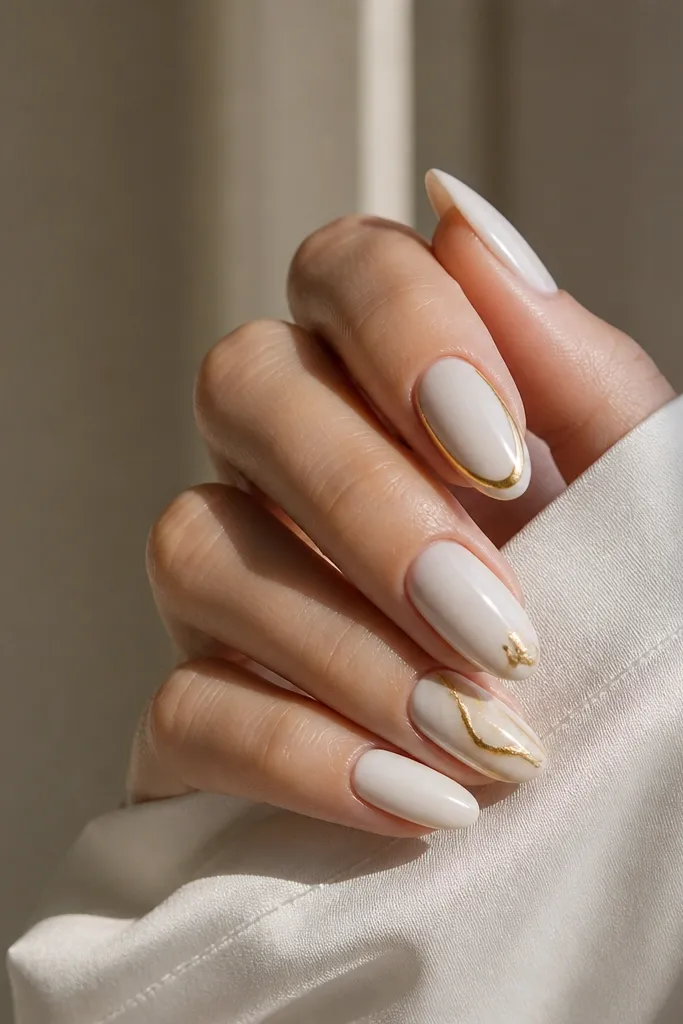
13. Milky White Negative Space with Gold Frame
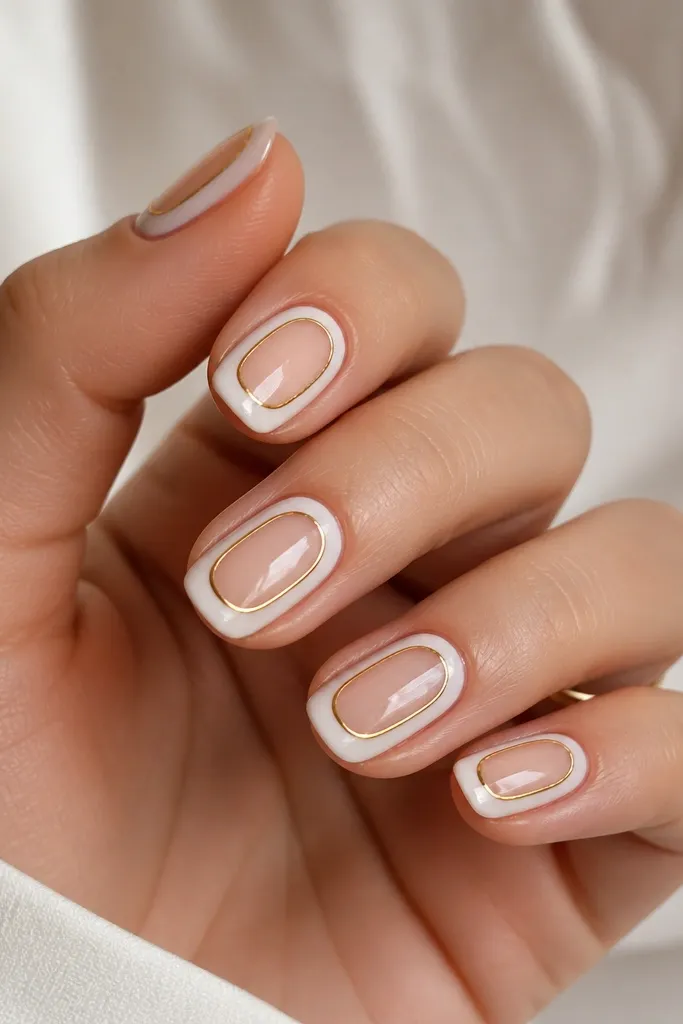
Negative space is what makes this look feel modern, not bridal. I paint milky white only in a frame shape around the center, leaving a clear window so the nail looks airy. Then I add a thin gold outline around the milky frame, like a picture border. The gold should be super fine and consistent in thickness; that’s what keeps it from looking messy. This flatters hands with narrower nail beds because the window draws attention to the center and makes the nails look longer. It also looks great on medium oval and almond shapes where the frame can curve cleanly.
Editor's noteUse clear nail forms or small tape strips as temporary guides while you paint the frame so the window stays centered.
Prep and apply base coat. Paint a milky white frame: use a striping brush to outline a curved rectangle or almond window shape, leaving the center clear. Cure, then add a second milky coat only in the frame area for even opacity. For the gold, outline the outer edge of the milky frame with striping gel, keeping a hairline gap from the window edges. Cure and top coat, pulling the top coat across the clear window without flooding the frame edges.
Skip thisDon’t flood the negative space with milky white — it kills the airy effect.
14. Milky White Sheer Blush with Gold Speckled Tips
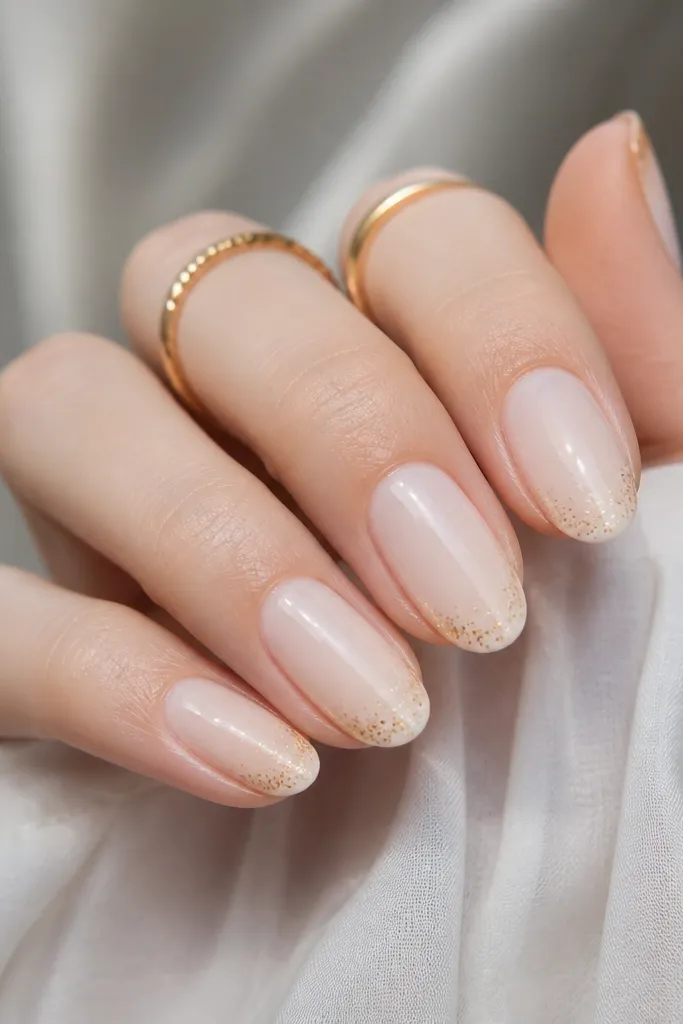
This is the “barely there” milky white and gold aesthetic that still looks special. I use a sheer milky white that’s almost like a tinted gel, then build it in thin layers so it looks even but not opaque. Gold speckles at the tips create a soft sparkle that doesn’t look like chunky glitter. It’s flattering on short rounded nails because the speckles add interest without requiring a big design. It also works on deeper skin tones because the milky base stays visible and the gold pops.
Apply a sheer milky white base in 3 thin coats, curing each one until you get an even blush layer. Leave the tips slightly lighter if you want the gradient effect, or keep it uniform if you prefer ultra-clean. For gold speckles, use a gold gel with a dotting tool or a fine brush loaded lightly so you get tiny points. Place the speckles only within the top 1-2 mm at the free edge. Cure and finish with glossy top coat, sealing the speckles so they don’t snag.
Practice on one nail first — speckles look best when they’re uneven in a controlled way, not perfectly dotted like a stamp.
Avoid heavy gold dusting across the whole nail — it turns into a glitter nail instead of a delicate accent.
15. Milky White Halo Ring with Gold Dot Center
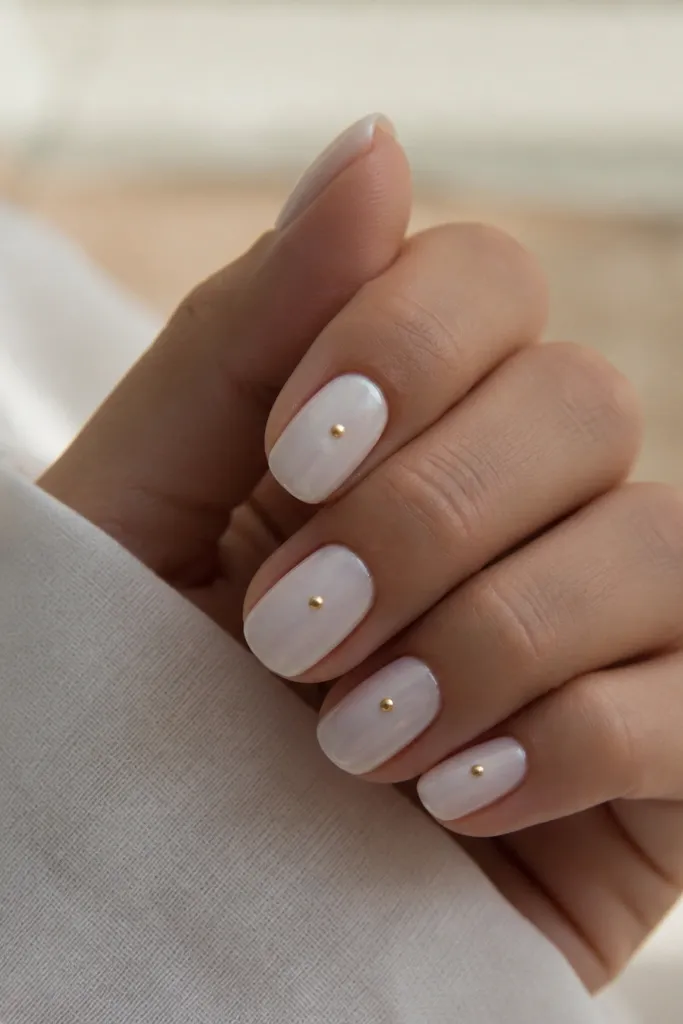
A halo ring is subtle, graphic, and still soft, which is why I keep coming back to it. I create the halo using a lighter milky shade blended around a central circle, so it looks like a glow. Then I place one small gold dot in the center like a tiny ring stone. This set flatters almond and oval nails because the circle sits nicely on the curve. It also looks great for people who want gold but don’t like lines or foil texture.
Editor's noteUse a top coat drop to help the dot self-level — it makes the gold dot look like a bead of light.
Start with milky white in 2 coats and cure. For the halo, blend a lighter milky gel or sheer milky shade in a circle around the center using a sponge or a small brush, then feather the edges outward. Cure and make sure the halo is soft, not sharp. Add one gold dot using a dotting tool or a tiny brush, placing it exactly in the center of the halo. Cure and top coat with a glossy finish in one smooth layer to keep the edges clean.
Skip thisSkip multiple gold dots — one center dot looks intentional; clusters look scattered.