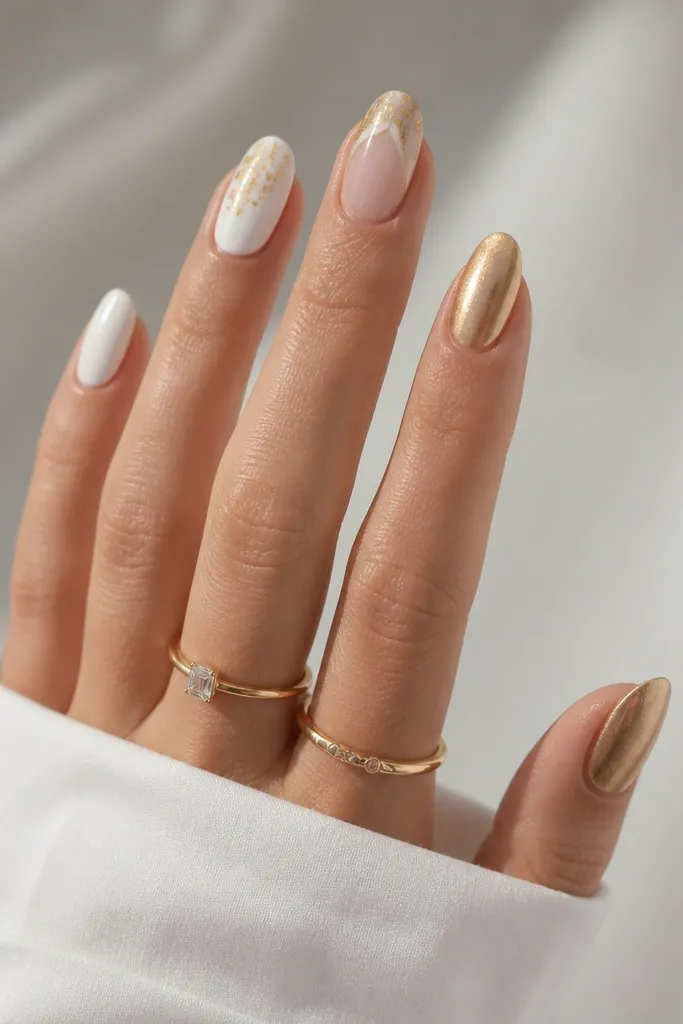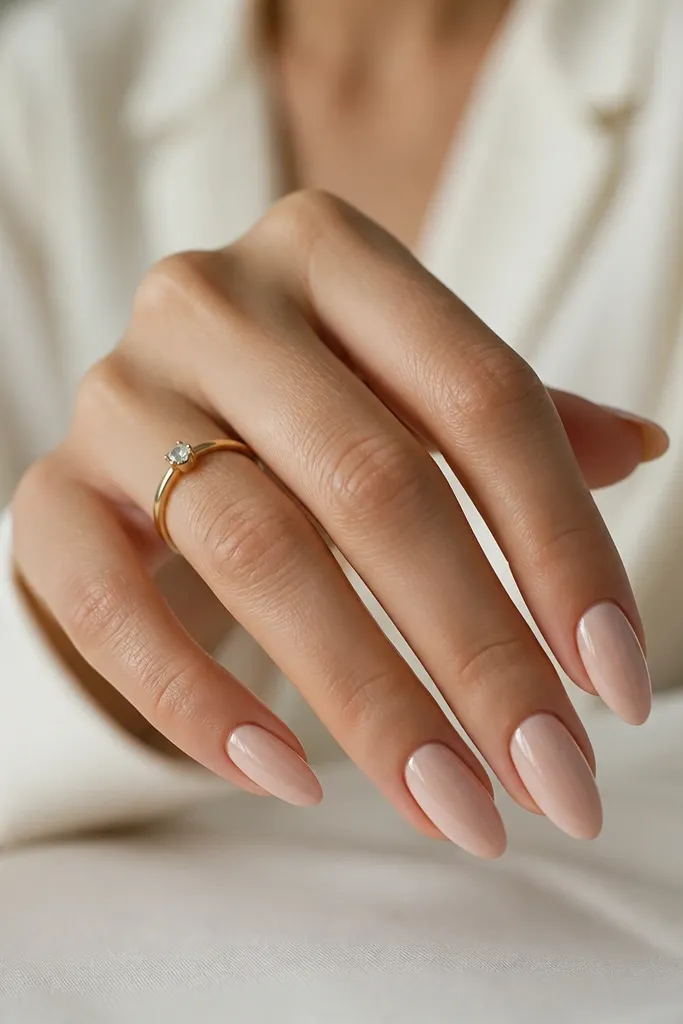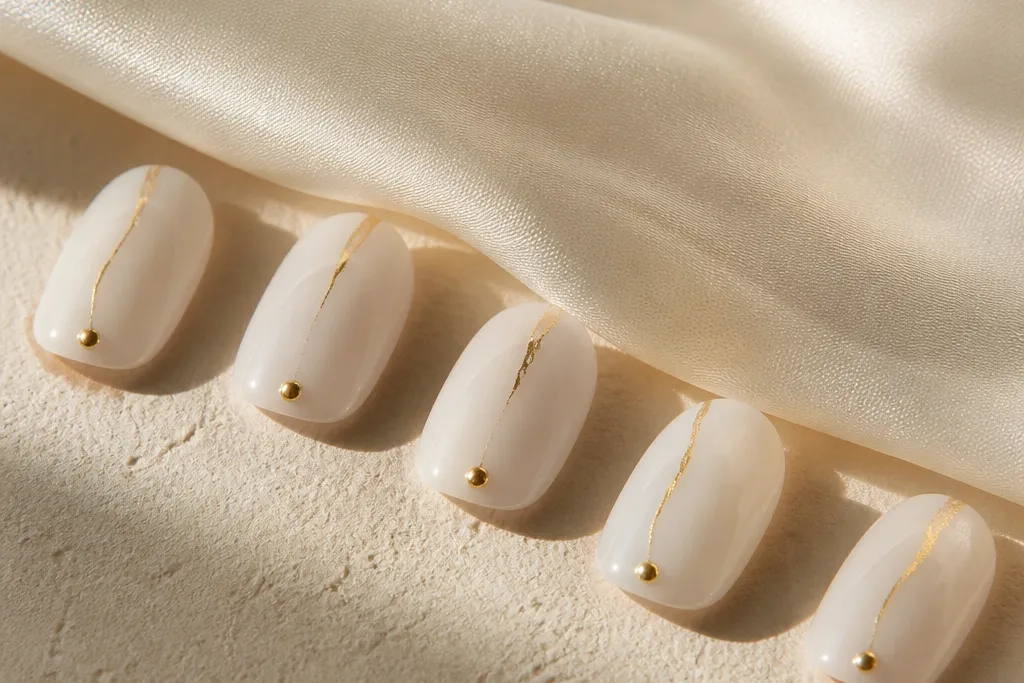
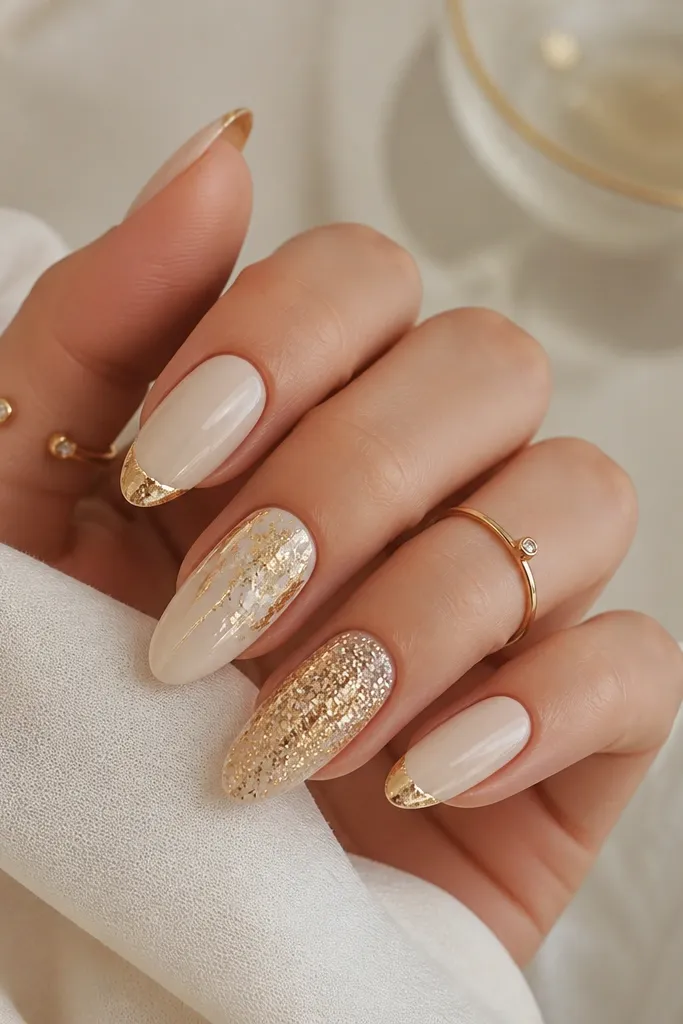
1. Milky White French with Champagne Foil Edge
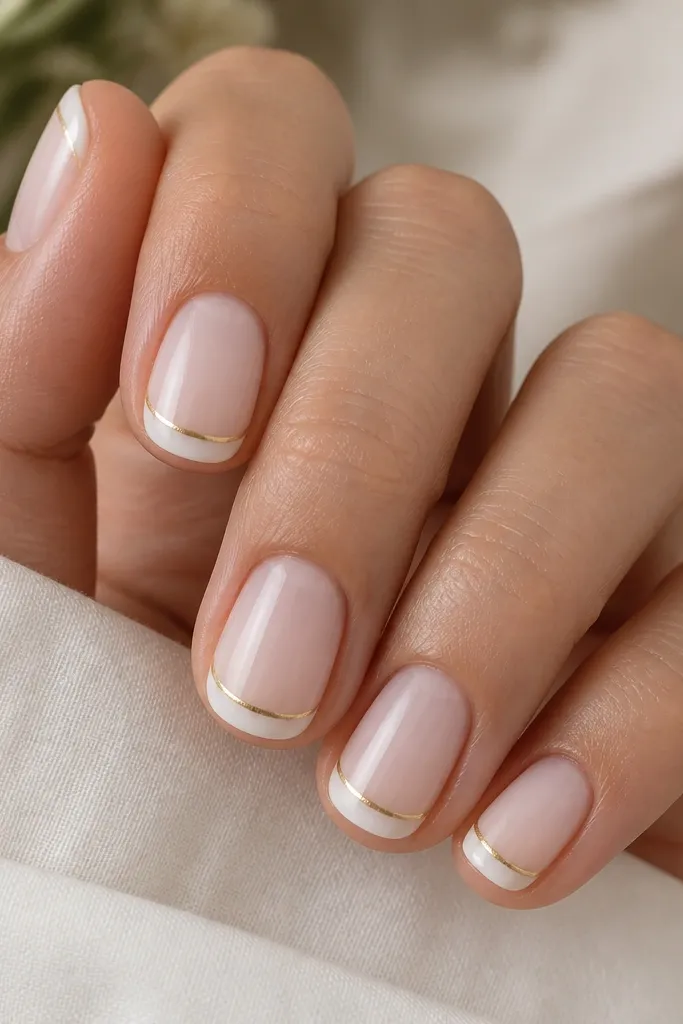
Start by pushing back cuticles and lightly buffing the shine off your natural nail. Apply a milky pearl white base in two thin coats, curing each coat fully if you’re using gel. Paint a French tip with opaque white, using a guide strip so the curve is even across all nails. While the French is tacky (or right after you apply foil adhesive), press a thin strip of champagne gold foil along only the outer edge of the tip, then seal with a glossy topcoat. Finally, clean up the sidewalls with a small brush dipped in gel cleanser so the gold stays crisp.
This look is my go-to when I want white and gold birthday nails to look sharp in photos without feeling loud. The base is a sheer milky white so your nail bed still looks natural, and the French tip is opaque enough to read clearly. The gold foil sits as a whisper on the outer edge of the tip, so it catches flash but doesn’t thicken the nail. It flatters most hands, especially if you want a "clean glam" vibe with short to medium lengths. On warm skin tones, champagne foil looks like jewelry; on cool tones, it still works if you keep the white milky and not too creamy.
Skip thisSkip a thick gold band at the tip; it makes short nails look wider.
Editor's noteIf your foil tears, overlap two tiny pieces instead of trying to force one strip — it looks more intentional on camera.
2. Gold Chrome Half-Moon Cuticles over Sheer White
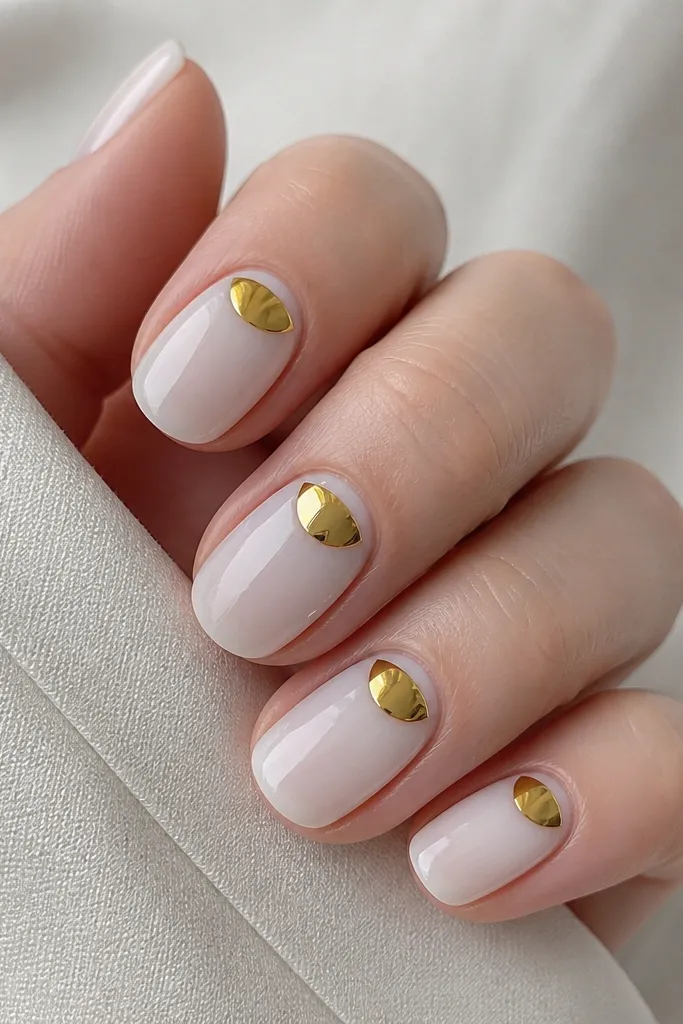
Prep your nails and apply a sheer milky white base coat in one or two thin layers. Use a half-moon stencil (or a small detail brush) to paint the curve at the cuticle, leaving a tiny white gap for crisp contrast. Apply gold chrome to the half-moon area, pressing lightly so it goes on smooth, then cure if your product requires curing. Seal with a non-wiping high-gloss topcoat so the chrome stays mirror-like. Repeat the same placement on every nail so the half-moons line up visually.
This is the birthday version of a manicure that still looks like you did something, not like you piled on glitter. The sheer white base makes your nails look hydrated and smooth, while the gold chrome half-moon near the cuticle adds that “jewelry detail” effect. I like it on people who get dry cuticles or have ridges because the sheer base evens the look without hiding everything. It’s also flattering if you have shorter nails, because the gold sits high up and visually lifts the nail length. With cool skin tones, bright gold chrome looks extra clean; with warm skin tones, keep the chrome bright rather than rose-gold.
Skip thisDon’t cover the whole nail in chrome; the half-moon is the point.
Editor's noteUse a cuticle pusher to create a tiny “moat” in the white area so the gold doesn’t creep onto the skin.
3. White Marble Veins with Micro Gold Flakes
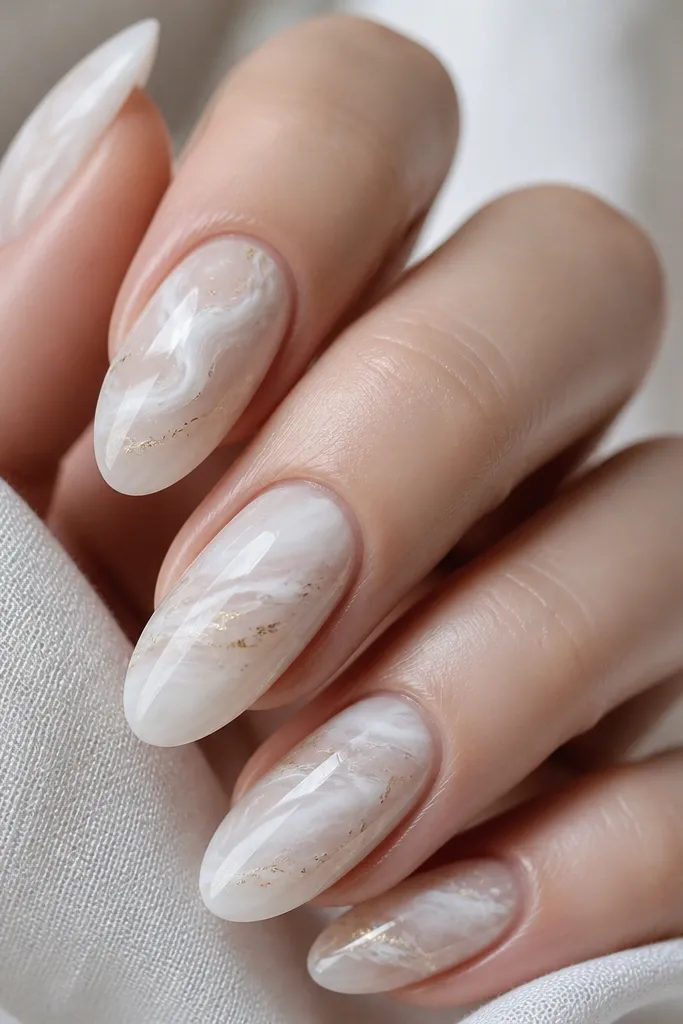
Paint a sheer milky white base in two thin coats, curing between layers. Add marble veins with a thin liner brush using white and a touch of grayish white (keep it subtle). Drag the liner in short, irregular lines, then soften the edges by lightly tapping with a clean brush so it looks natural. Sprinkle micro gold flakes onto the center vein area while the top layer is tacky, then press gently so flakes stick. Seal with a glossy topcoat in two coats if you want extra smoothness.
Marble looks fancy because it has movement, and white-and-gold birthday nails need movement to feel celebratory. I start with milky white as the main color, then add marble veining with a very light hand so the lines look like ink, not thick paint. The micro gold flakes are placed sparingly, mainly where the marble veins are thicker, so they look like light catching stone. This flatters hands with longer nail beds because the pattern has space to flow, but it also works on medium nails if you keep the veins narrow. If you’re fair-skinned, the marble stays airy; if you’re deeper skin-toned, the contrast looks luxe because the white is milky, not stark.
Skip thisSkip heavy gold scatter across the whole nail; it turns marble into glitter.
Editor's noteIf you’re using flake powder, work over a piece of paper so you can reuse what falls off.
4. Gold Line Dot French with Milky White Base
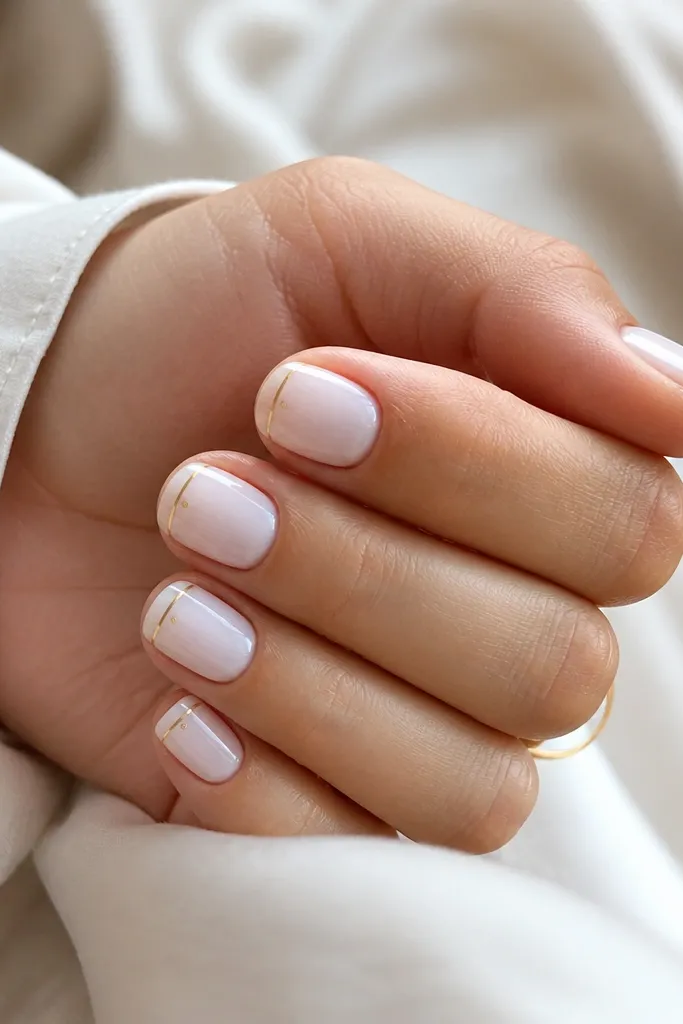
Apply milky white in two coats, curing fully so it levels out smoothly. Draw a thin gold line across the tip using a striping brush — keep it parallel to the smile line so it looks even. Add one tiny dot near the outer edge of the tip with a dotting tool, then repeat on each nail with the same placement. Clean up the edge with a brush dipped in cleanser so the line stays sharp. Finish with a thick glossy topcoat to lock the gold and smooth the surface.
This design gives you the “French manicure but make it party” look without needing big art skills. The milky white base keeps things soft, while the thin gold line adds structure and makes the tips look crisp. The little gold dots act like punctuation — they catch light and make the design feel intentional. I like this on short nails because the gold is narrow and doesn’t weigh the tip down. It also looks great on medium nails if you want a clean set that still reads birthday in photos.
Skip thisDon’t make the gold line thick; thick lines make the tips look stubby.
Editor's noteFor perfectly matched dots, dip the dotting tool once, then wipe off excess before touching the nail.
5. White Bow Accent with Gold Outline on One Nail Per Hand
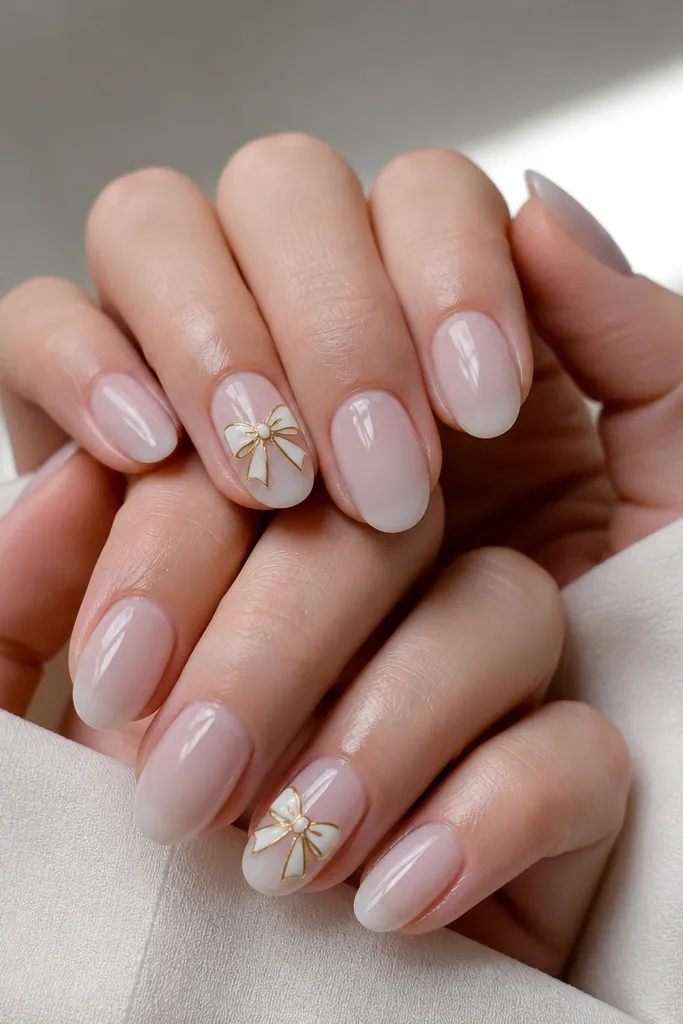
If you want birthday nails that look cute in close-up photos, this is the one. The base is sheer white so the accent pops, and the bow is sculpted in white so it has dimension, not flat paint. A thin gold outline frames the bow, giving it that “gift ribbon” vibe without turning the nail into clutter. I’ve worn this for my own birthday photos and it reads playful even with a simple outfit. It flatters most hand shapes; it looks especially good on medium-length almond or oval nails because there’s room for the bow to sit centered.
Start with a sheer milky white base in one to two coats, then cure fully. On one accent nail, build a small bow using a gel sculpt or acrylic gel: place two loop shapes first, cure, then add the center knot. Use a fine liner brush with gold gel to outline the bow edges carefully, then cure. Add a small dot or tiny gold highlight on the knot if you want extra sparkle. Seal everything with a glossy topcoat, using a careful swipe over the bow loops so it stays smooth.
Keep the bow slightly higher than center so it looks lifted when your hands are relaxed.
Skip a big bow on every nail; one accent nail is what keeps it looking intentional.
6. White and Gold Confetti Tips on Clear Base
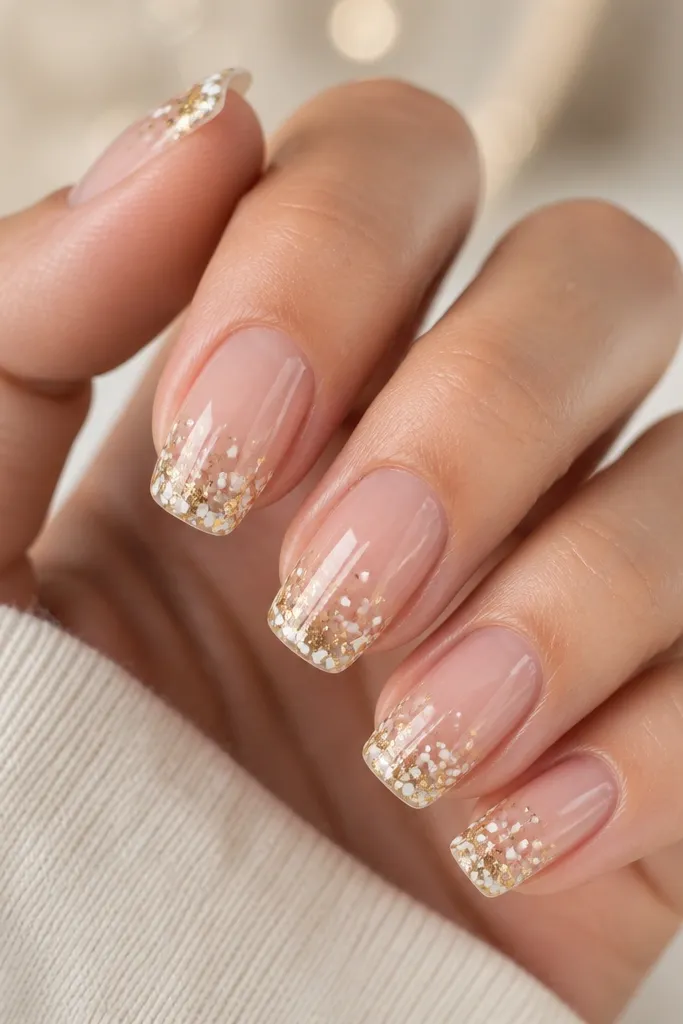
Prep and apply a clear base layer, then cap with a glossy gel base if you want extra strength. For the tip, apply a thin layer of tacky gel only on the last third of the nail. Press white confetti pieces into the gel, then add small gold foil shards on top so they land randomly but mostly near the outer tip. Cure and then add one more thin layer of gel over the confetti to “bury” it slightly for a smooth feel. Finish with a full topcoat and clean around the cuticle so it stays neat.
Confetti tips look like you captured a birthday moment on your nail. The secret is concentration — the confetti should sit at the tip, not spread over the whole nail, or it gets messy fast. I use clear or sheer base so the nail looks fresh and long, while the white confetti reads crisp against the transparency. Gold foil shards add irregular sparkle that feels more festive than uniform glitter. This works best on medium to long nails, but you can shrink the confetti density for short nails. On darker skin tones, the clear base makes the white confetti pop without turning chalky.
Skip thisDon’t flood the whole nail with confetti; it makes the manicure look chaotic.
Editor's noteUse a fine brush to push confetti away from the sidewalls before curing — it prevents gritty edges.
7. Gold Foil Vertical Stripes over Milky White
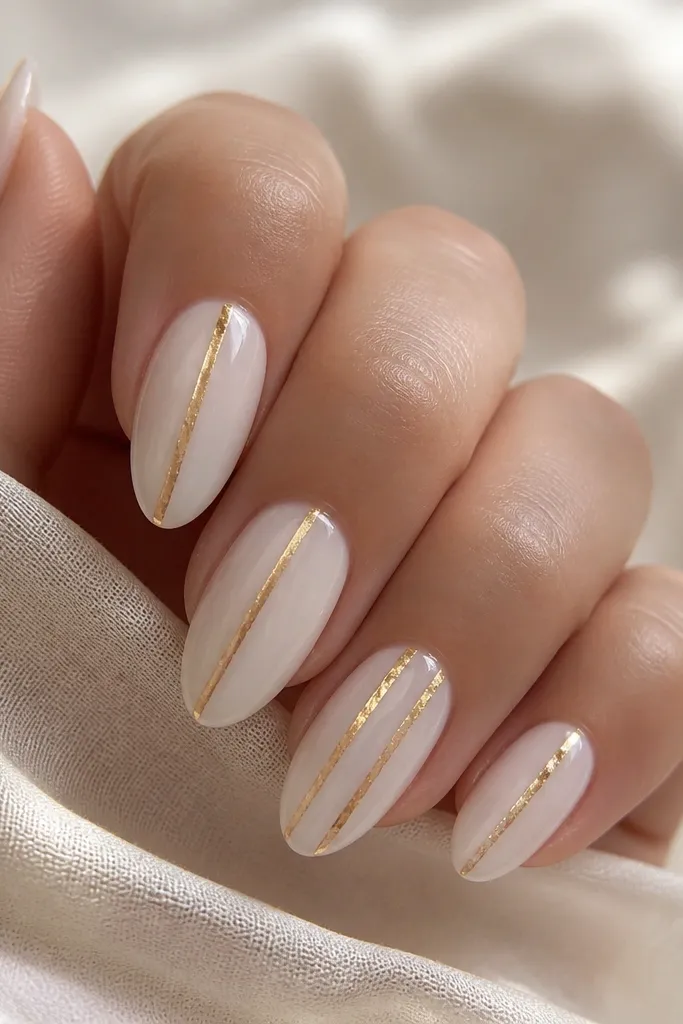
Vertical stripes are how you get that “longer nail” effect without changing your length. The milky white base keeps the look soft and clean, while narrow gold foil stripes add shine and celebration. I like this for birthdays when you want something flattering across different hand sizes because vertical lines guide the eye down. On short nails, keep it to one stripe per nail, centered or slightly off-center. On medium nails, two stripes look good if the spacing stays even. It flatters warm and cool skin tones equally because the white is neutral and the gold foil is the hero.
Apply milky white in two coats and cure thoroughly. Use a gold foil adhesive (or tack layer) and place narrow foil strips vertically, starting just below the cuticle so they don’t touch skin. Press gently with a silicone tool so the foil adheres, then trim any overhang at the tip edge. Seal with a glossy topcoat in two layers if the foil is textured. Keep stripe placement consistent across fingers so it looks designed, not accidental.
Angle the stripes a tiny bit toward the thumb side — it looks more natural when your hands are relaxed.
Skip wide stripes; they overpower the white and make nails look blocky.
8. White Pearl Base with Gold Studs at the Smile Line
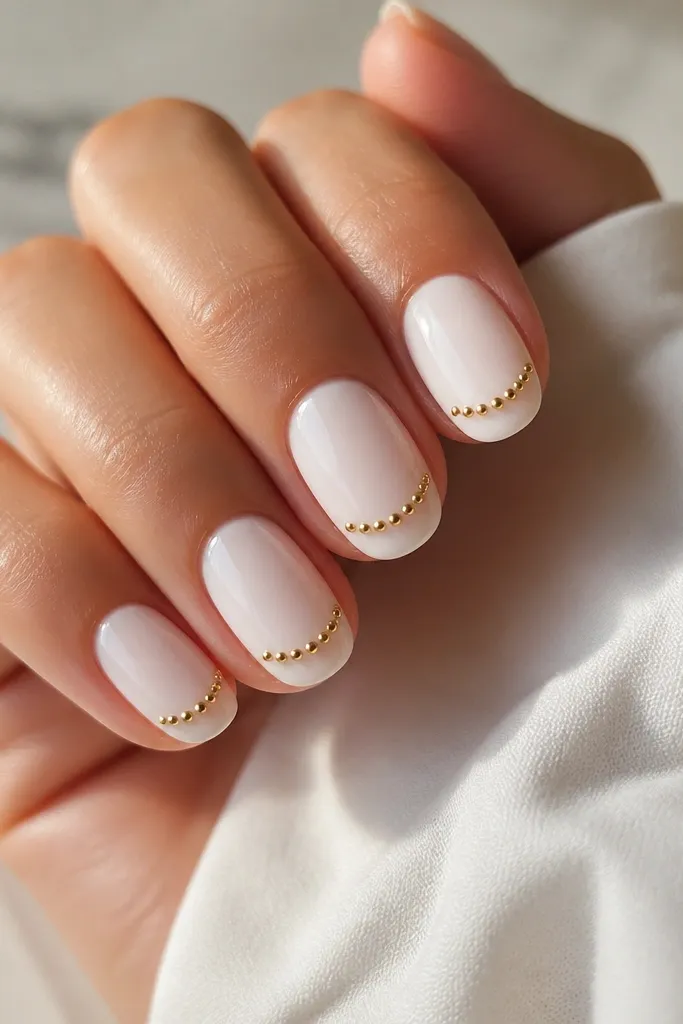
Start with a pearl-milky white base in two thin coats, then cure. Mark the smile line lightly with a guide — I use a strip of tape as a temporary boundary. Place 2-4 tiny gold studs per nail along that curve, using gel adhesive or a stud-setting gel, then cure. If studs sit unevenly, adjust before curing by nudging gently with a toothpick. Finish with topcoat, making sure you cap around each stud so the surface feels smooth when you run your finger over it.
This one looks like jewelry because the studs sit where your nail naturally curves. A pearl-milky white base gives you glow without glitter, and the gold studs add that real sparkle you can see without flash. I like it for birthday dinners or parties where you’ll wear rings — the studs echo that shine. It flatters hands with short to medium nails because the studs are placed at the tip boundary, not the whole tip. For fair skin, it looks bright and clean; for deeper skin tones, it looks crisp and high-contrast.
Skip thisDon’t place studs too close to the center; it breaks the clean smile-line effect.
Editor's noteUse the same stud size across the set; mixing sizes makes the curve look messy.
9. White Galaxy Swirl with Gold Foil Stars
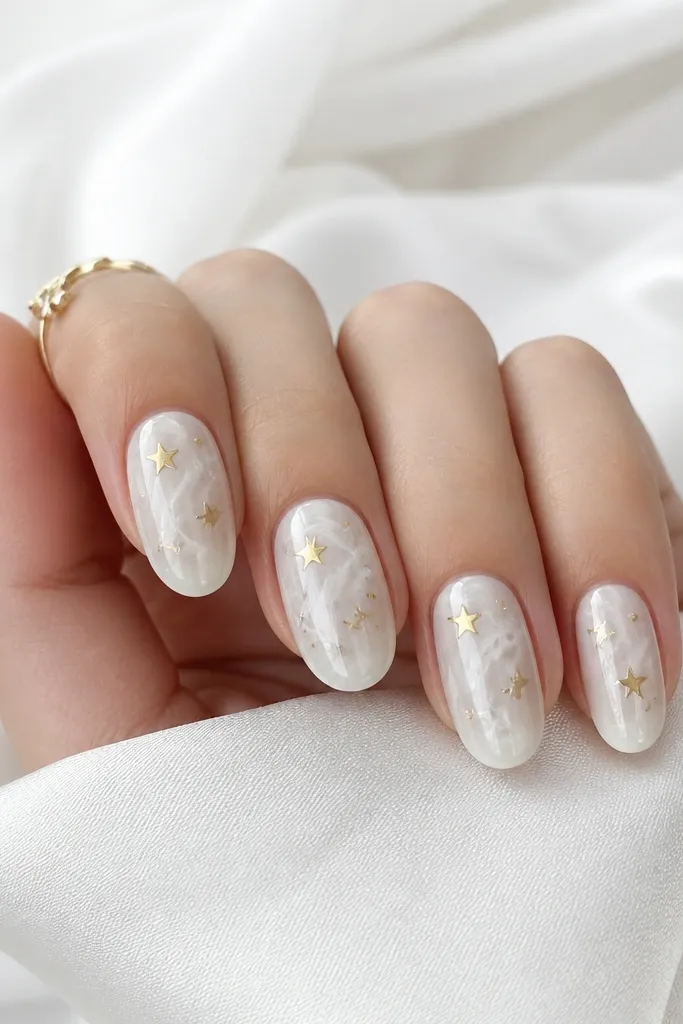
Paint a milky white base in two coats and cure. Create galaxy swirls with a thin brush using a slightly diluted gray-white gel, pulling soft curves from the center toward the sides. Keep swirls faint so white stays the main color. Add gold foil star accents by placing tiny star-shaped pieces or cutting foil into star-like bits, then pressing onto tacky areas. Seal with a glossy topcoat, then check under light to make sure stars aren’t buried.
A soft galaxy manicure makes birthdays feel magical without going full dark. I keep the background milky white, then add faint swirls in lighter gray-white so it looks like clouded space, not a heavy night-sky. The gold foil stars are irregular and slightly reflective, so they look like real twinkling bits. This flatters hands because the swirls create movement, and the sparse stars keep it airy. It’s especially pretty on medium almond nails where you can spread the swirls without crowding the cuticle.
Skip thisSkip dark blue or black in this look; it stops reading as white-and-gold birthday.
Editor's noteIf your swirls look too strong, wipe your brush and lightly drag over the lines to soften them.
10. Gold Foil Ribbon Across the Nail with White Base
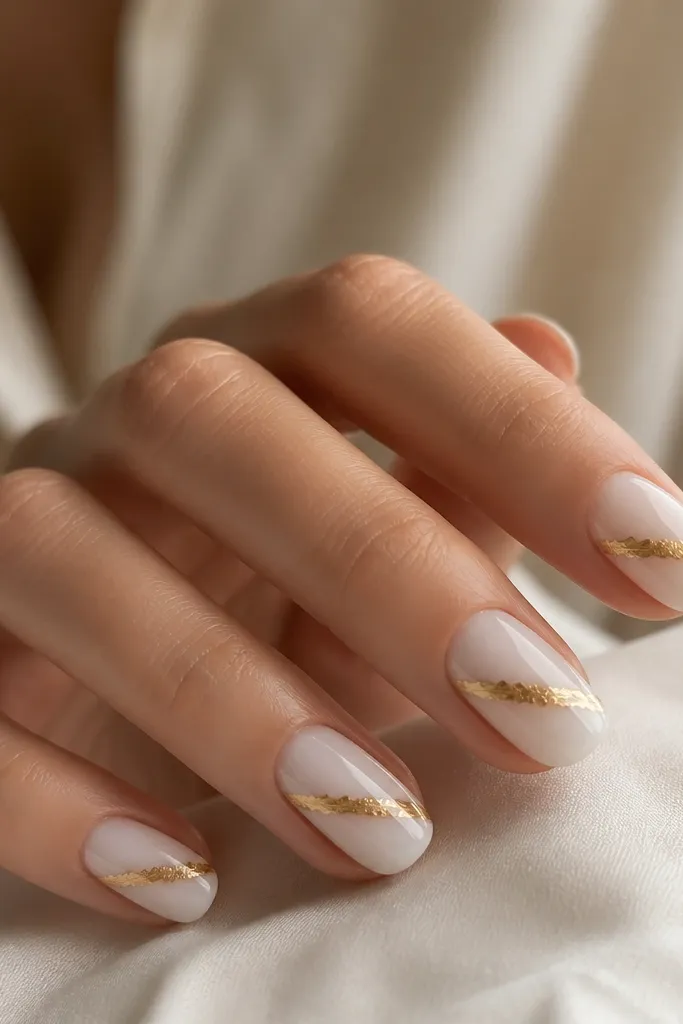
Apply a sheer milky white base in two thin coats, curing well between layers. Decide your diagonal path and lightly mark it with a tiny dot at the cuticle edge and a dot near the tip edge. Add foil adhesive along that diagonal strip, then press gold foil onto the adhesive so it grabs only where you planned. Use a file to gently even the tip edge if foil sticks up, then seal with two coats of glossy topcoat. Repeat the same diagonal direction on each nail so the set looks coordinated.
This design looks like you wrapped a gift ribbon around your nails, and it’s one of the fastest ways to get a glam result without full nail art. The sheer milky white base makes the ribbon look like it’s floating, while the diagonal placement adds energy and makes fingers look longer. I like it on medium-length nails and almond shapes because the diagonal ribbon follows the nail’s natural curve. On warm and cool skin tones, it works as long as the white is milky and the gold is true yellow-gold or bright chrome. It also looks great with gold rings because the ribbon line repeats that jewelry vibe.
Skip thisDon’t let the ribbon touch the cuticle line — leaving a small white gap keeps it crisp.
Editor's noteKeep the ribbon width narrow (about 1-2 mm) for a cleaner, more expensive look.