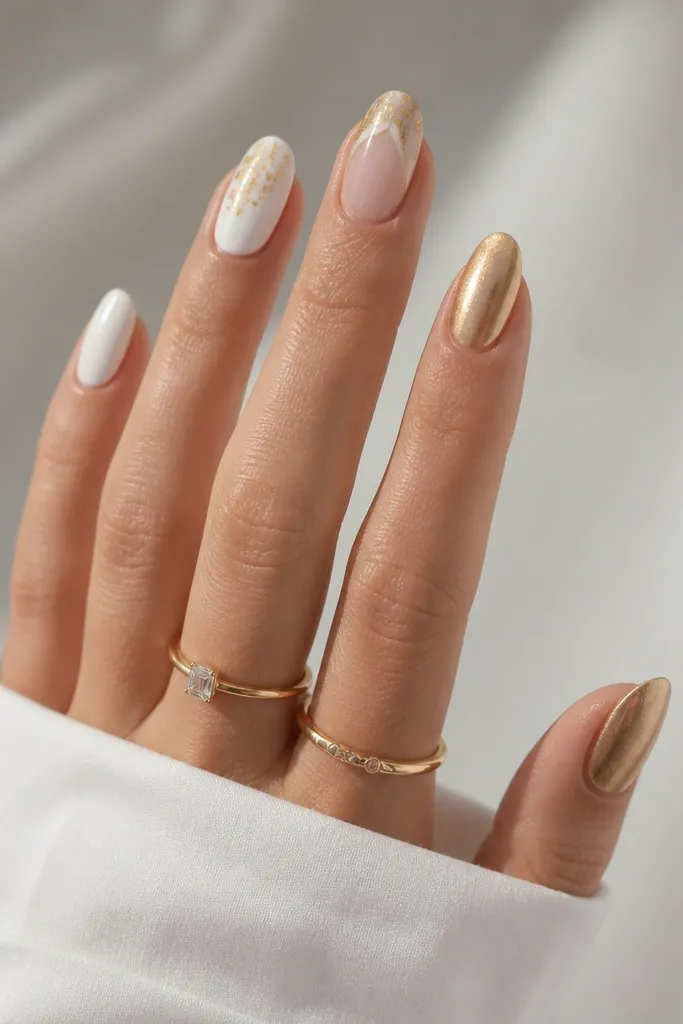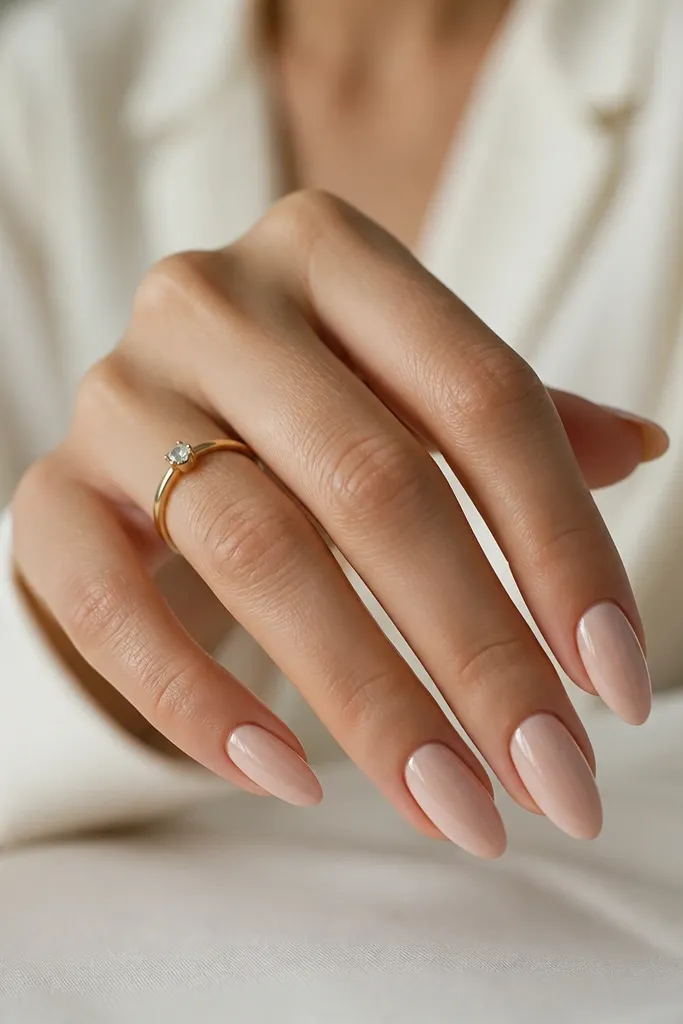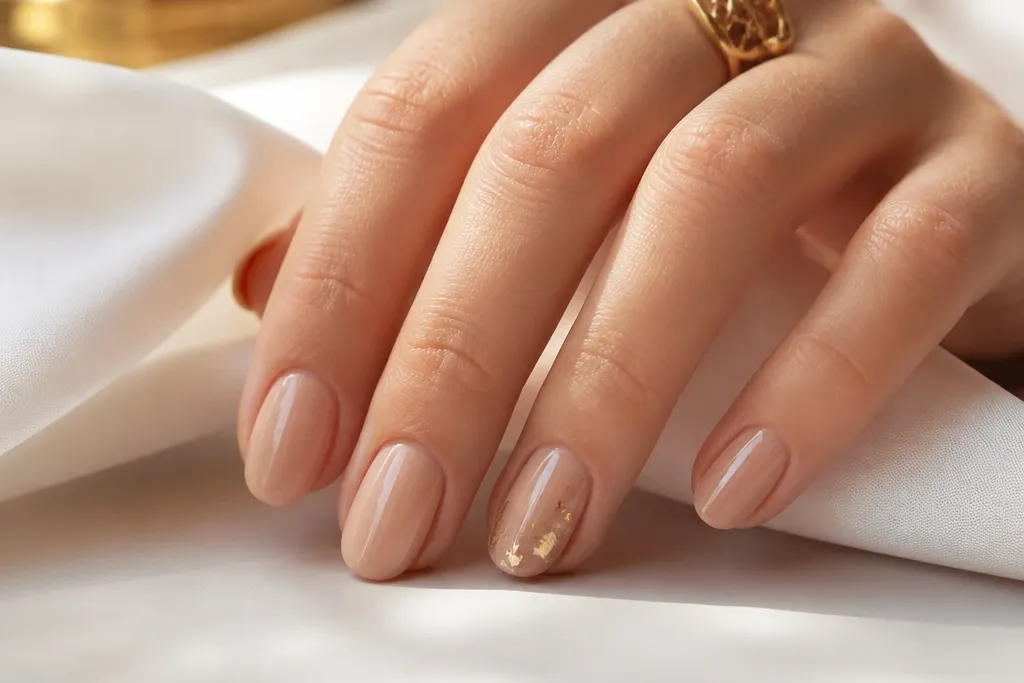
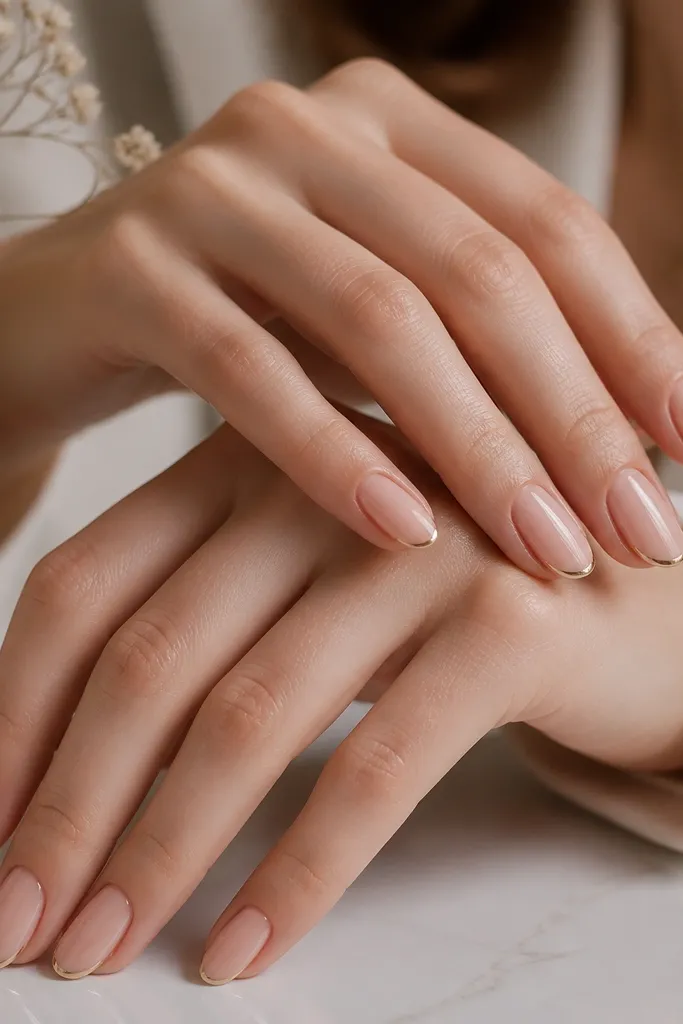
1. Milky Taupe French with a 1mm Latte Chrome Tip
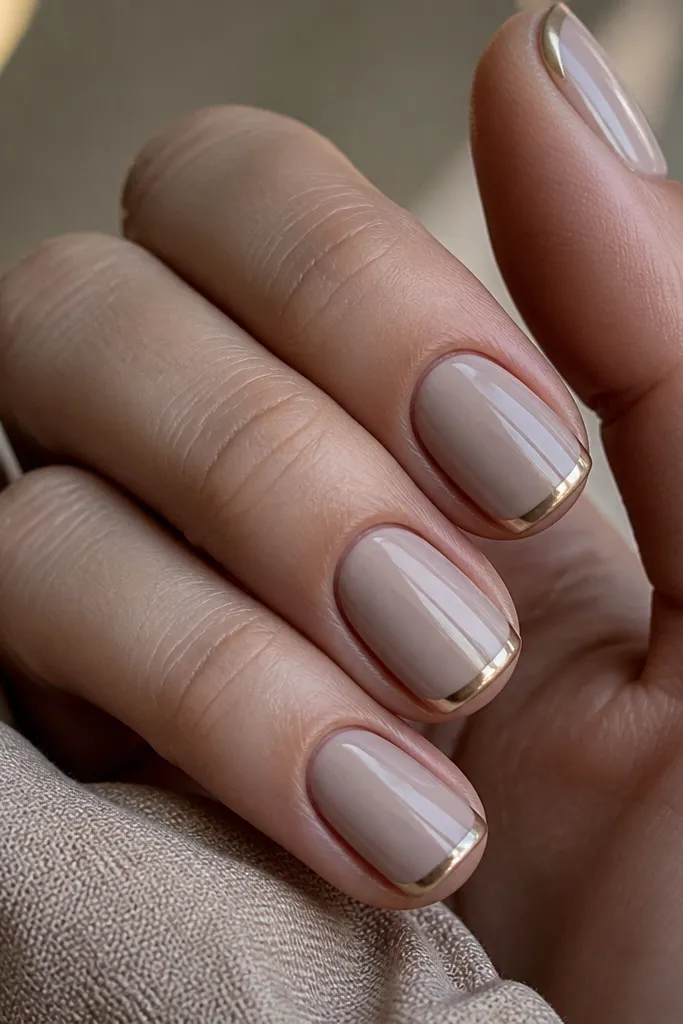
This look is my go-to when I want classy and cozy without going full glitter. The milky taupe base flatters light to medium skin tones because it adds softness around the nail bed and avoids the “gray cast” that some taupes have. On deeper skin tones, the milky finish still looks smooth because it reflects light instead of absorbing it. The thin French line keeps the shape crisp, and the 1 mm chrome tip adds a luxe glow that doesn’t overpower your sweater sleeves. I like this for workdays and date nights because it reads polished even when your hands are moving under warm lighting.
Start by applying two thin coats of milky taupe gel or polish, letting each coat dry fully. Then place a French guide or use a steady hand with a fine liner brush to paint a 1 mm tip line in warm latte-gold chrome gel or chrome powder over a sticky layer. Cure or set the chrome, and wipe off any excess so the line stays sharp. Finish with a glossy top coat, sealing the free edge on every nail so the tip doesn’t peel first. Keep the chrome line the same width across all nails; uneven tips are what make this look cheap.
Editor's noteIf your chrome powder looks patchy, buff the cured sticky layer lightly before applying powder, then seal with a thicker top coat.
Skip thisAvoid a wide French tip — anything over 2 mm starts to look costume-y on short nails.
2. Warm Rose Jelly Base with Micro Rhinestone Half-Moons
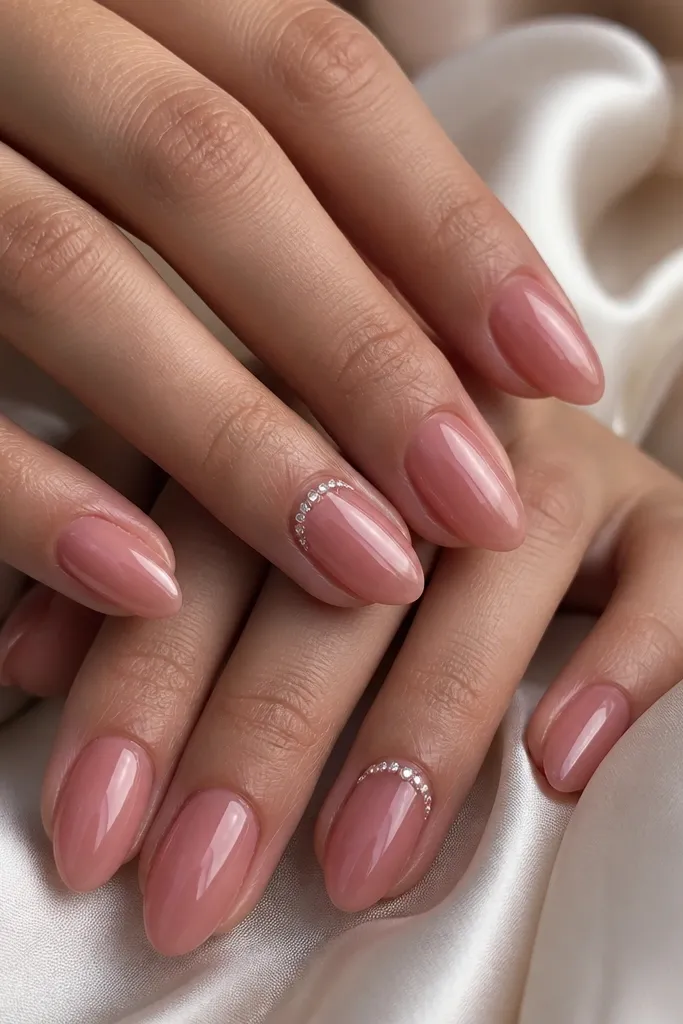
Warm rose jelly gives that “skin but better” vibe, and it looks cozy because it has a translucent glow instead of a flat opaque coat. I reach for it when the rest of my outfit is neutral — cream, camel, or charcoal — because the pink warmth makes the whole look feel softer. For fair skin, it flatters because it adds warmth without turning your nails orange. For medium and deep skin tones, the jelly depth looks rich and clean, especially under indoor lighting. The micro rhinestone half-moons add sparkle only where your eyes already focus — near the cuticle.
Apply two coats of warm rose jelly base, keeping it slightly sheer at first so you can build to full coverage. Choose two accent nails per hand and place micro rhinestones in a gentle arc at the cuticle, leaving about 1 mm of clear space between stones so it looks intentional. Use gel adhesive or a tiny dab of clear builder gel to set each stone, then cure. On the non-accent nails, skip stones and just seal the glossy top coat. Finish by capping the stones with a thin layer of top coat so they don’t snag and start lifting.
Pick stones in AB or light rose tones so the sparkle looks warm, not icy.
Avoid putting rhinestones on every nail — it turns elegant into busy fast.
3. Cocoa Brown Matte with One Glossy "Satin Stripe" Nail
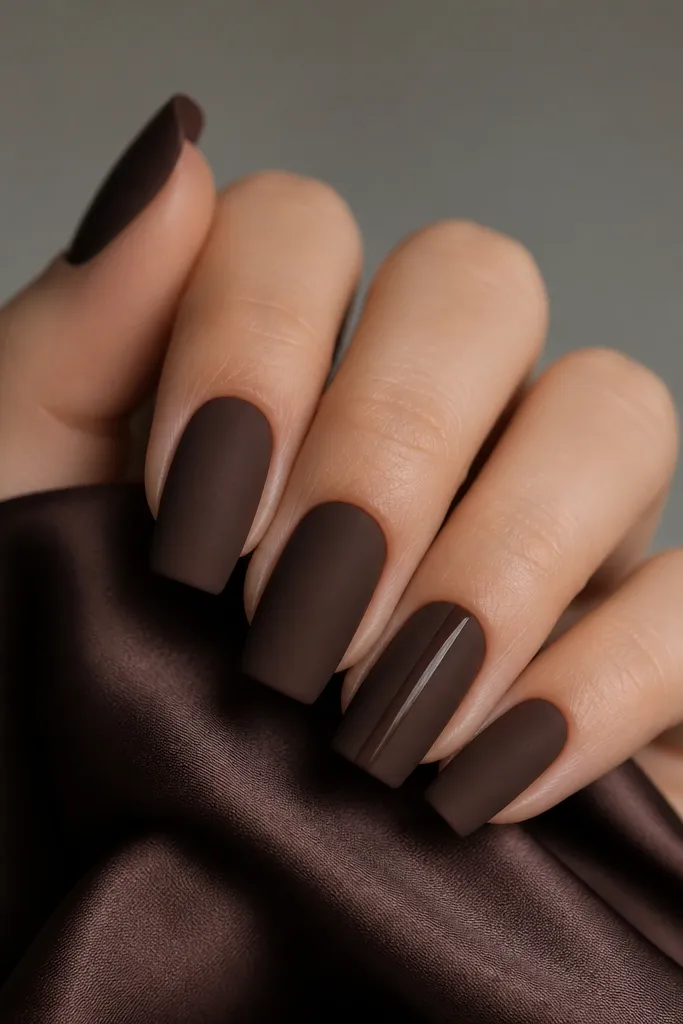
Matte cocoa brown is cozy in a way bright colors can’t touch. It looks expensive because matte finishes hide small imperfections and create a velvety surface that pairs perfectly with knit textures and leather bags. On cool-toned skin, cocoa prevents the “muddy” look that some browns can have; it stays warm and flattering. On warm-toned skin, it reads like a rich chocolate manicure that still feels grounded. The one glossy satin stripe adds contrast without adding clutter, so the nails look designed instead of random.
Start with two coats of cocoa brown polish or gel, then let it level before curing. Apply matte top coat to all nails except one accent nail. On the accent nail, apply a glossy top coat, then use a striping brush to paint a thin vertical line down the center — about 1.5 mm wide — with the same cocoa color but in glossy gel so it stands out. Clean up the edges with a brush dipped in acetone, then cure again. Finish by keeping the accent nail glossy and the others matte so the contrast is clear.
Editor's noteIf your matte top coat makes the color look flat, add a slightly thicker glossy stripe so it catches light.
Skip thisAvoid matte on a design with lots of texture — it can make bumps look more obvious.
4. Creamy Vanilla Nude with a Thin Espresso Outline
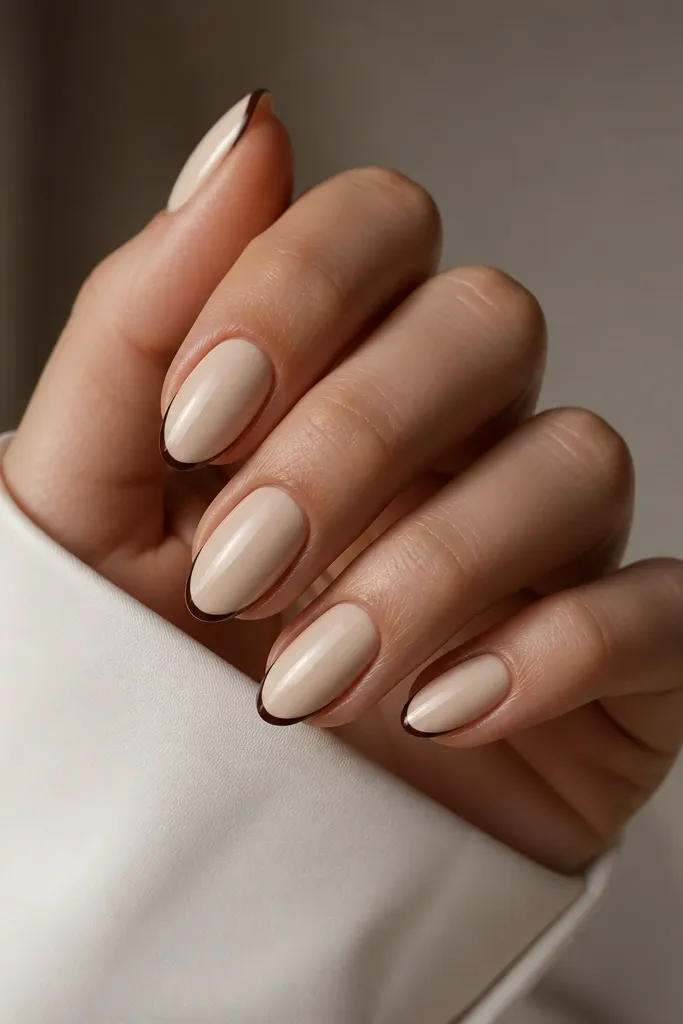
This is a classy option when you want something simple but not boring. The creamy vanilla nude works on a wide range of skin tones because it’s light, warm, and slightly milky, which makes the nail look healthy. The thin espresso outline gives structure and frames your nail bed, which makes fingers look longer. I like it for everyday because it doesn’t require fancy art tools beyond a steady hand or a fine liner. It also photographs well because the outline creates clear separation between nail and skin.
Apply two coats of creamy vanilla nude and cure fully between coats. Using a 10/0 liner brush, draw a thin espresso outline around the outer edge near the tip — keep it about 1 mm in from the sidewalls so it doesn’t look like a stain. Leave the center of the nail unlined for a clean, airy look. Seal with one or two glossy top coats, pulling the brush over the free edge. If your outline gets shaky, wipe the brush clean and redo one nail at a time instead of trying to fix a whole set.
Editor's noteFor a salon-clean edge, use a slightly thicker espresso gel than you think you need so the line holds shape.
Skip thisAvoid thick outlines — they make the manicure look like nail polish “smudged around the edge.”
5. Satin Peach Glaze with Soft Ombré at the Tips
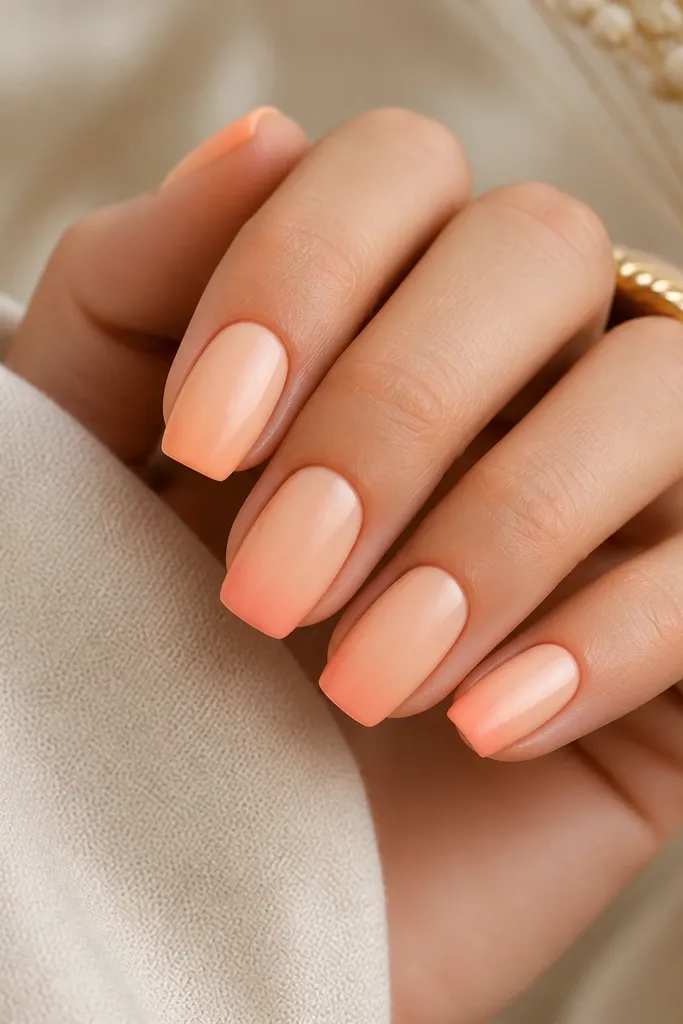
Peach glaze with a gentle ombré is the cozy sweet spot between nude and color. The satin finish makes it feel warm and soft, and it flatters hands because it smooths how light bounces across the nail. On fair skin, peach reads fresh instead of pale. On deeper skin tones, it adds a warm glow that doesn’t look washed out. The ombré at the tips lengthens the nail visually because the darkest area stays at the end. I wear this when I want my nails to look “date-ready” but still comfortable with casual outfits.
Start with a sheer-to-medium peach glaze base in two thin layers, keeping the center of the nail slightly lighter. For the ombré, sponge a deeper peach only at the tip, then blend upward using a clean makeup sponge or ombré brush — stop blending when you have a soft fade about halfway down the nail. Clean the sides with a brush dipped in remover so the gradient stays smooth. Finish with satin top coat for that fabric-like glow. Make sure the ombré is strongest at the very edge; a weak fade is what makes it look unfinished.
Editor's notePractice the gradient on one nail first — peach ombré is easy to overdo, and a lighter hand looks more expensive.
Skip thisAvoid harsh lines between colors; the gradient has to melt.
6. Ivory Base with Tiny Gold Star Dots on Two Accent Nails
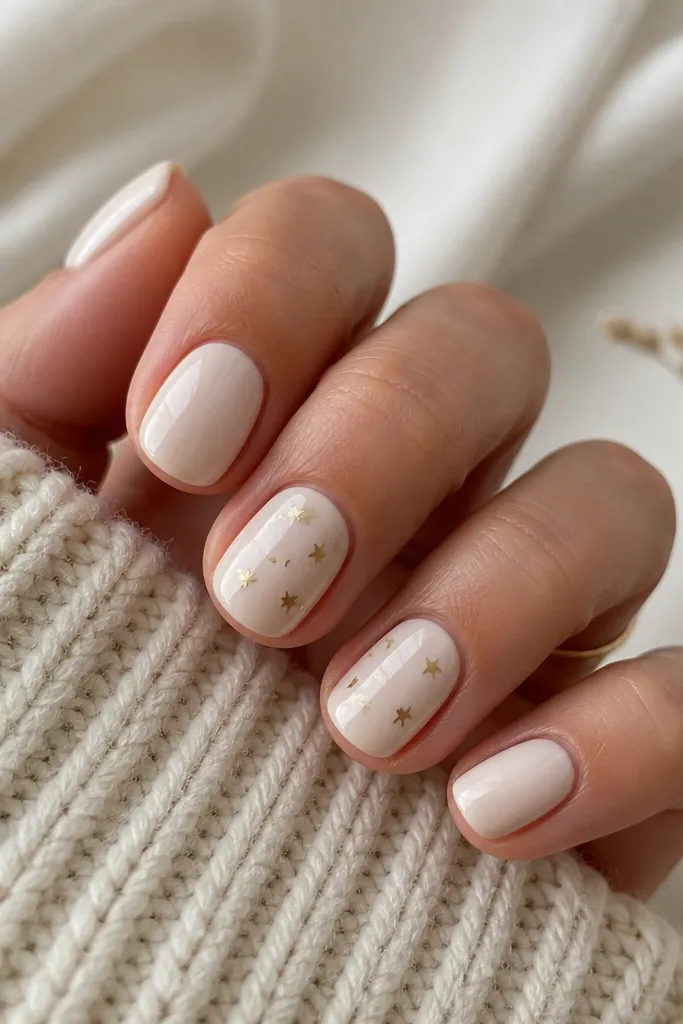
Ivory nails look classy because they’re clean, not loud. The key is choosing an ivory that leans warm, not blue — it makes your hands look cozy instead of washed out. I do this set when I’m wearing cream sweaters, white tees, or gold jewelry, because the tiny gold stars tie everything together. On fair skin, ivory brightens the nail bed and looks like you have naturally well-kept nails. On medium to deep skin tones, it creates contrast that still feels soft because ivory is not stark. The star dots stay elegant because you place them sparingly on two nails, not across the whole hand.
Apply two coats of warm ivory, cure fully, then clean the edges with a lint-free wipe. On two accent nails, dot tiny gold star decals or hand-paint small gold stars using a dotting tool — keep them about 2-3 mm apart. If you’re painting, let each tiny star dry before adding another so the gold doesn’t smear. Seal everything with one glossy top coat, then do a second thin top coat for durability. Keep the stars away from the cuticle line so the look stays neat as your nails grow out.
Gold foil stars look sharper if you press them down with a silicone-tipped tool before sealing.
Avoid large stars — they read cartoonish fast on short nails.
7. Deep Emerald Micro-Flecks with Clear Jelly Top
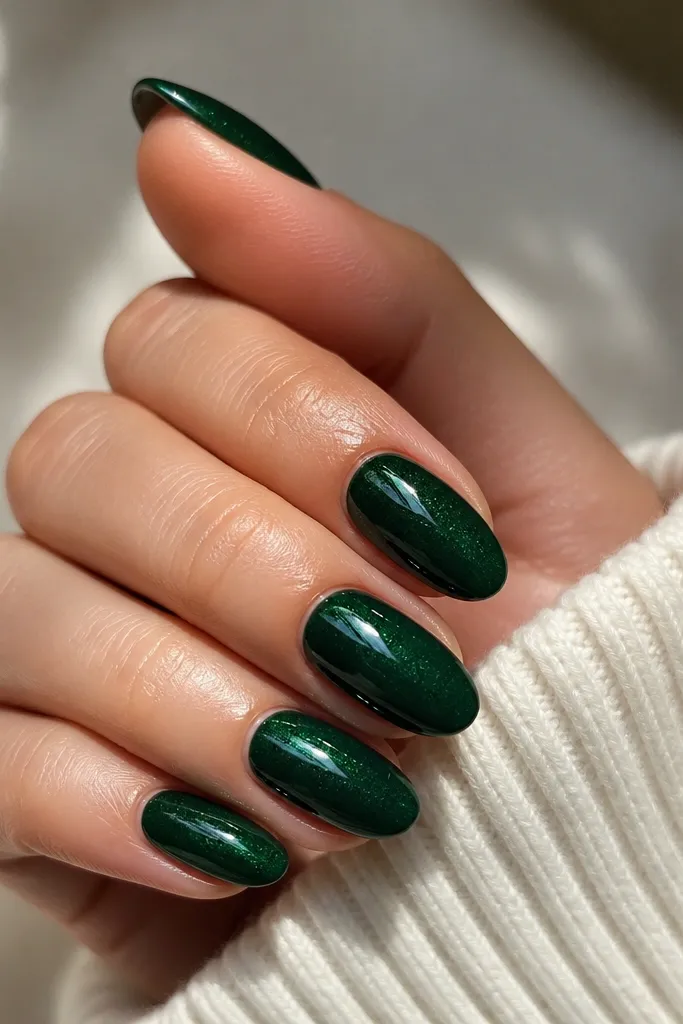
Deep emerald is rich without turning into dark-and-heavy. The reason this looks classy is the shimmer is micro-scale, so it doesn’t look chunky or messy on your nail bed. I love it for fall and winter, especially with gold rings and darker coats, because emerald makes your skin look warmer. Fair skin gets a flattering contrast, while medium and deep skin tones get a deep, jewel-like glow. The clear jelly top coat is the secret — it makes the flecks look suspended instead of sitting on top.
Start with two coats of deep emerald gel or polish, curing until fully opaque. Add micro-fine shimmer by mixing a small amount of emerald-toned glitters into a clear gel, then apply a thin layer over the nail — you want coverage to stay solid, not glitter-dense. Cure, then apply a clear jelly top coat in two thin layers to build a smooth dome. Cap the free edge each time. Wipe the tacky layer clean if your system needs it so the surface stays glossy and not grabby.
Editor's noteUse a small amount of shimmer and build slowly — a little micro-fleck goes a long way.
Skip thisAvoid chunky glitter; it catches on sweaters and feels rough.
8. Champagne Nude with a Soft "Half-Glitter" Tip Fade
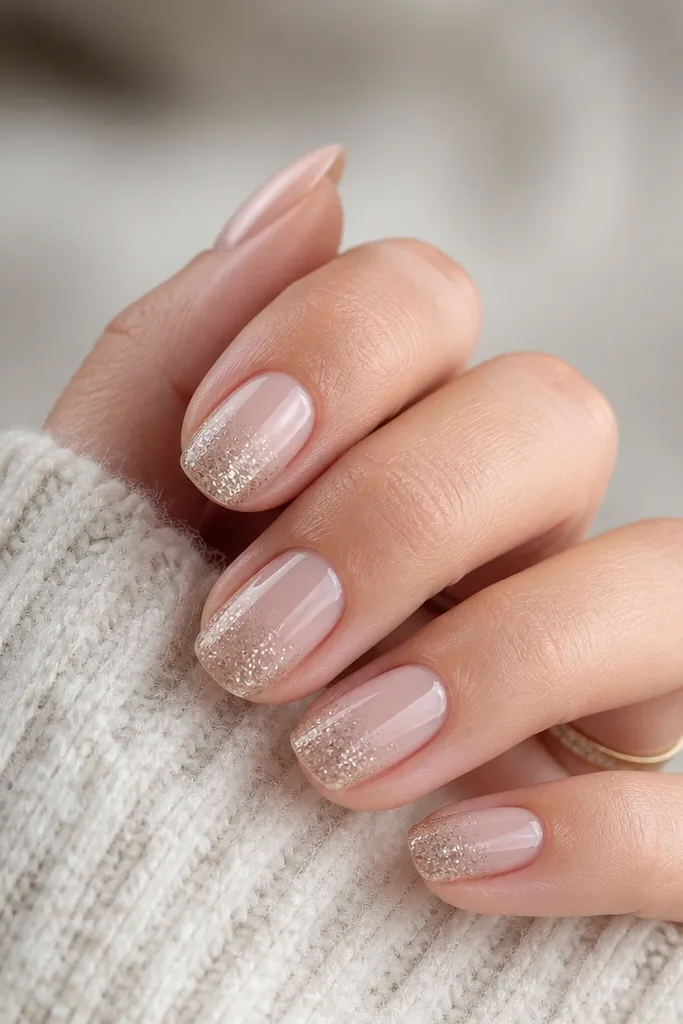
Champagne nude is the classy cozy color I reach for when I want nails to look festive without looking like holiday overload. The nude base flatters because it’s warm and close to skin tone, and the glitter fade adds light without covering the whole nail. On fair skin, champagne looks elegant instead of dusty if you pick a slightly golden shade. On deeper skin tones, it creates a glow that looks expensive under warm lighting. The half-glitter tip keeps everything balanced: sparkle at the end, calm in the middle.
Paint two coats of champagne nude and cure until smooth. For the glitter, use a fine champagne glitter or glitter gel — apply it only to the last third of the nail. Blend the glitter upward with a sponge or by dabbing lightly with a flat brush so the top edge looks feathered, not straight. Cure, then seal with a glossy top coat, focusing extra attention on the glitter boundary so it doesn’t catch. If you want it more cozy, keep the glitter coverage lighter and let the nude show through.
Editor's noteUse a makeup sponge for the fade; it gives the soft edge that looks like a professional gradient.
Skip thisAvoid a solid glitter band — a hard line is what makes it look like a sticker stuck on.
9. Powder Blue Gray with Matte Top and One Pearl Dot
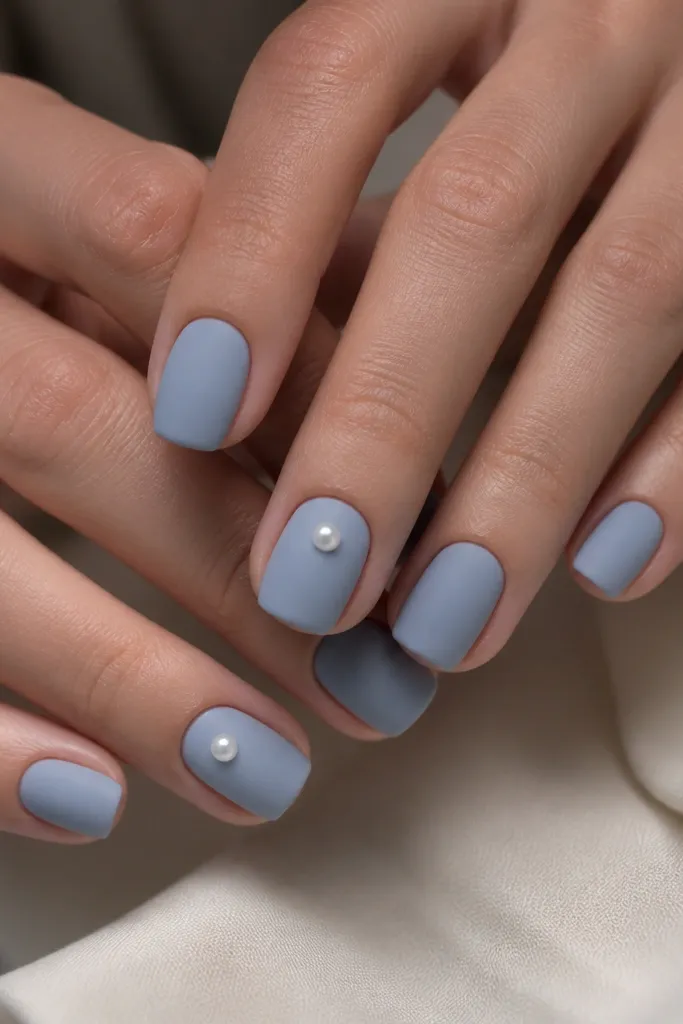
Powder blue gray is an elegant twist that still feels cozy because it’s muted, not icy. Matte makes the color look soft and cozy against winter clothing, and it hides tiny imperfections better than glossy. This shade flatters cool-toned skin and also works on neutral skin because the gray keeps it grounded. If you wear silver jewelry, this manicure looks extra clean because the pearl echoes that cool shine. The single pearl dot keeps it classy: one focal point reads intentional, not like random decoration.
Apply two coats of powder blue gray, cure fully, then use matte top coat across all nails. Choose the ring finger on each hand and set one pearl dot using gel adhesive or a dot of clear builder gel. Place the pearl slightly above the center so it looks like it’s floating, then cure. For a cleaner look, add a tiny smear of top coat around the pearl edge so it blends into the matte surface. Keep pearls flat and small so they don’t snag — the look should feel smooth when you run your finger across it.
Editor's noteIf your pearl looks too bright, use an off-white pearl with a soft luster instead of ultra-white.
Skip thisAvoid multiple pearls per nail; three or more starts to look heavy.
10. Toffee Brown Gloss with Micro Glitter Cuticle Halo
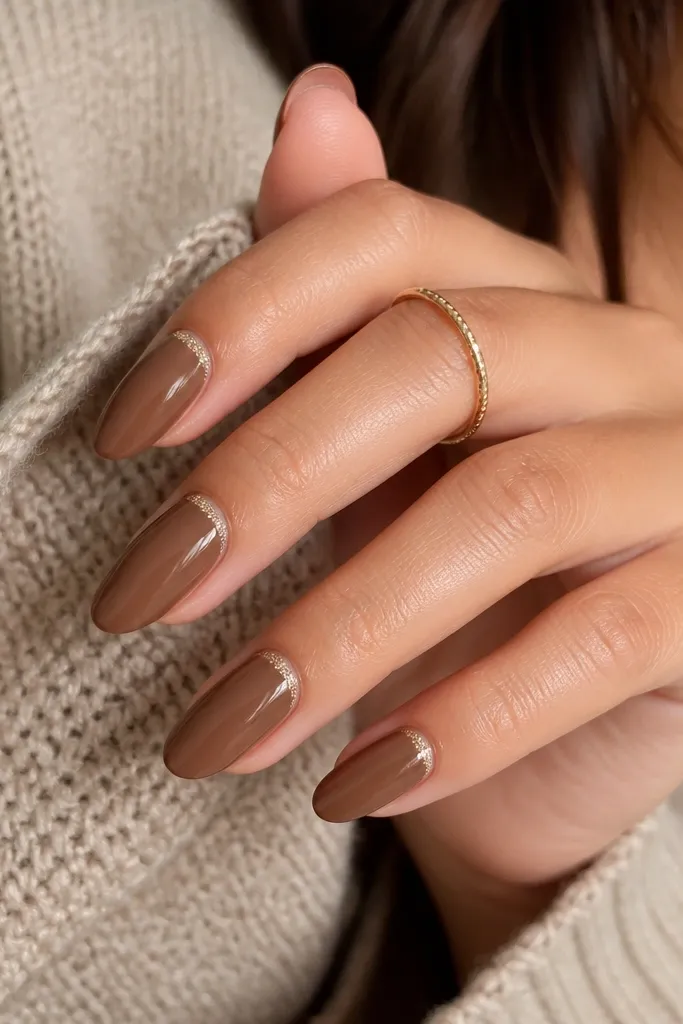
Toffee brown is cozy luxury in one color. It looks warm, flattering, and it makes your hands feel “done” even when the design is simple. The micro glitter cuticle halo is the detail that elevates it: it catches light right where your hands move, but it doesn’t cover the whole nail. On fair skin, toffee adds warmth without making you look sallow. On medium and deep skin tones, it looks rich and buttery, especially under gold and amber lighting. This is the manicure I choose when I want elegance that still feels wearable for everyday errands.
Start by applying two coats of toffee brown glossy gel or polish, making sure the base is even and fully opaque near the cuticle. Use a thin liner brush to paint a small clear gel ring at the cuticle curve, then sprinkle or press micro glitter onto that ring. Tap off the excess so you only keep the halo, not a glittery mess up the nail. Cure, then seal with a glossy top coat, dragging the brush over the cuticle area gently. If you see any gritty texture, add one more thin top coat and cure again.
Editor's noteWork with a small amount of micro glitter — a thin halo looks expensive, while extra glitter turns it rough.
Skip thisAvoid getting glitter onto the skin; it lifts and looks messy when it grows out.