1. Icy Lilac Micro-French with Glass Top
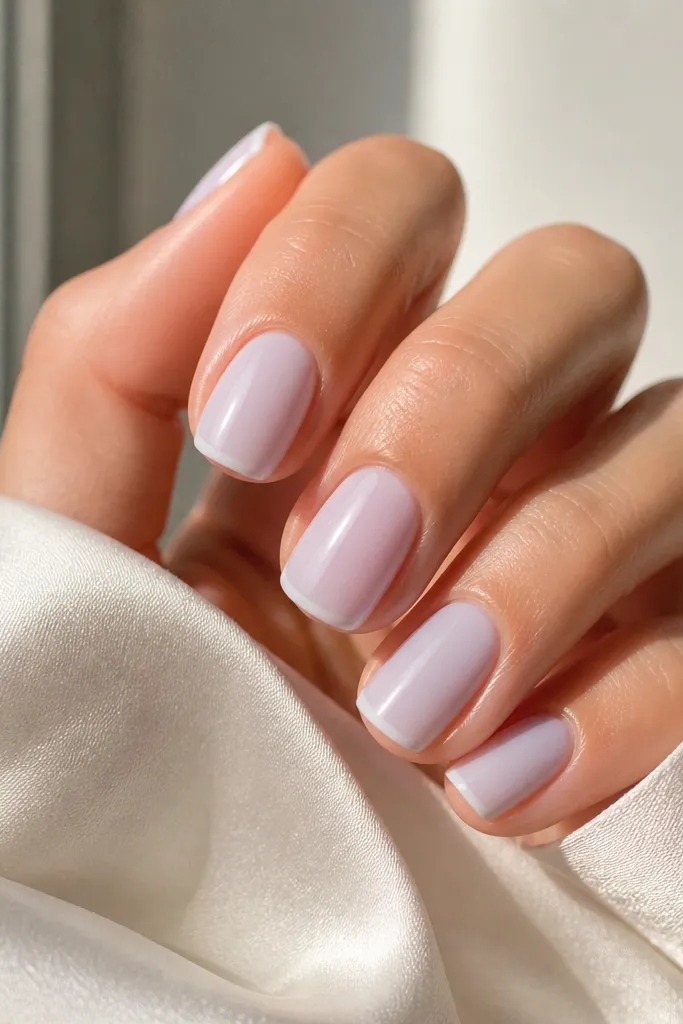
This is the winter manicure I reach for when I want “clean and classy” without thinking too hard. The sheer milky lilac base makes your nails look naturally healthy, and the micro-French line stays crisp even when your nail grows out. I use a cool-toned lilac so it doesn’t turn gray under indoor bulbs. It flatters fair to medium skin tones and looks especially good with silver rings and knitwear sleeves. Keep the tips thin — thick French lines look heavy on winter nails.
Start by pushing back cuticles and lightly buffing the nail surface so the base clings. Apply a sheer milky lilac in two thin coats, curing fully between coats. Then paint a micro-French: place a tiny amount of lilac-white at the tip edge and drag it only about 1-2 mm inward, keeping both sides even. Finally, cap the free edge with top coat and add a glassy high-shine top coat in one smooth layer.
Editor's noteIf your French line smudges, use a striping brush and paint the center first, then fill the left and right edges to match. Cure longer than you think for the final top coat — it locks the shine down.
Skip thisAvoid a thick French band — it makes the manicure look bulky and less “elegant nails classy.”
2. Cranberry Jelly Accent with Skinny Side Stripe
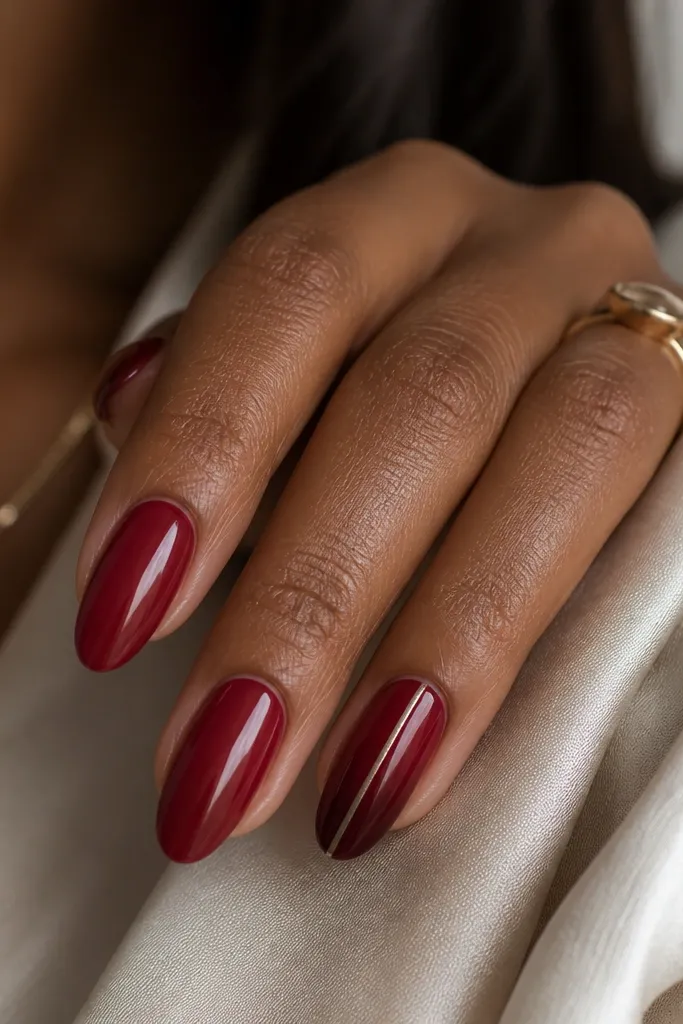
Cranberry jelly is the winter shade that looks expensive because it has depth without turning opaque and chalky. The sheer base lets your nail show through, so it looks fresh even as it grows. The skinny side stripe gives you that “jewelry” effect, and silver stays classy with winter neutrals. This manicure flatters most skin tones because cranberry shifts toward your natural undertone instead of overpowering it. It’s also perfect for parties, since the jelly catches light without glitter everywhere.
Apply a sheer cranberry jelly base in two thin coats, focusing on smooth coverage at the center of each nail. On the ring finger, add a deeper cranberry jelly at the tip area — keep it narrow so it reads like a soft accent rather than a block. Use striping tape or a steady hand to place a single thin silver stripe down the middle; cure after painting the stripe. Finish with a glossy top coat over every nail and cap the stripe edges so they don’t lift.
Editor's noteUse a gel silver paint that levels — watery metallic stripes look patchy. Wipe the stripe area with alcohol after curing to remove any tacky residue before top coat.
Skip thisSkip chunky glitter or too many stripes — it turns classy into busy fast.
3. Taupe Cream with One Pearl Cuticle Dot
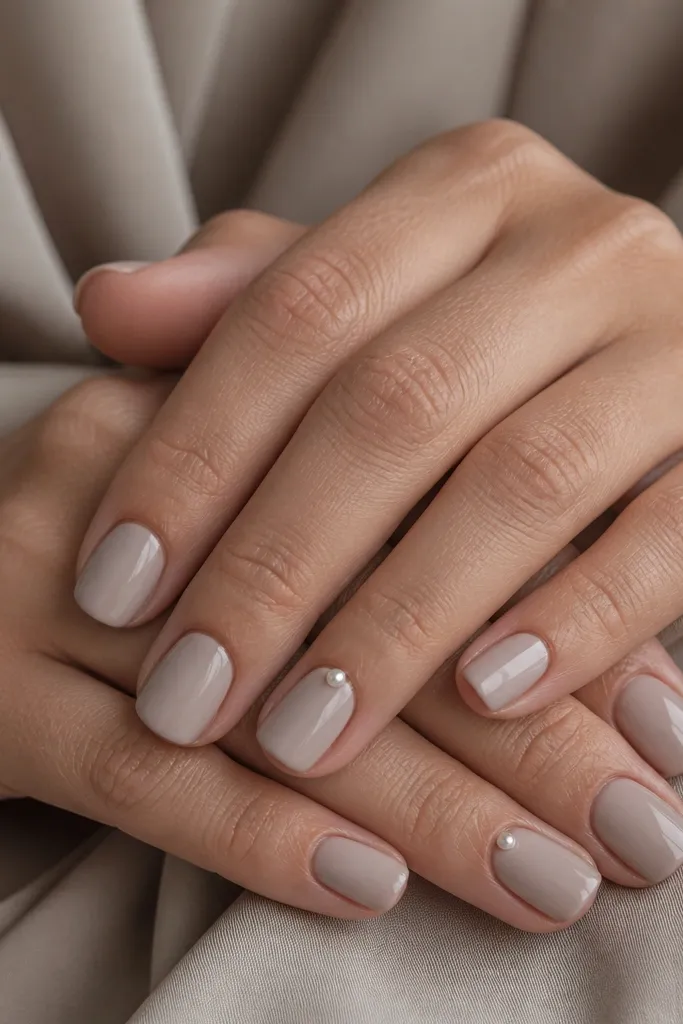
This one is for people who want winter nails that look tidy even in harsh daylight. A taupe cream hides staining and makes nails look evenly toned, and the warm base pairs with camel coats and beige sweaters. The single pearl dot at the cuticle line gives a “lift” effect — your eyes go to the center of the nail instead of the edges. I’ve worn this with both gold and silver jewelry; it looks best when your rings match the pearl tone, not the base. It’s flattering on short nails because the detail is tiny and placed high.
Start with a taupe cream in two coats, keeping the first coat slightly sheer so the second coat smooths it out. Apply the top coat lightly around the cuticle line so it doesn’t flood the pearl area. For the pearl dot, use a dotting tool or the back of a bobby pin to place a small bead of pearl gel at the cuticle — about 1 mm wide. Cure the pearl dot, then seal everything with one full glossy top coat.
Make the dot slightly off-center on one nail — it looks more natural and less like a sticker. If your pearl gel is too thick, mix it with a drop of clear gel to control the shape.
Don’t place pearl dots low on the nail; it looks like accidental glitter.
4. Velvet Dark Green with Half-Moon Negative Space
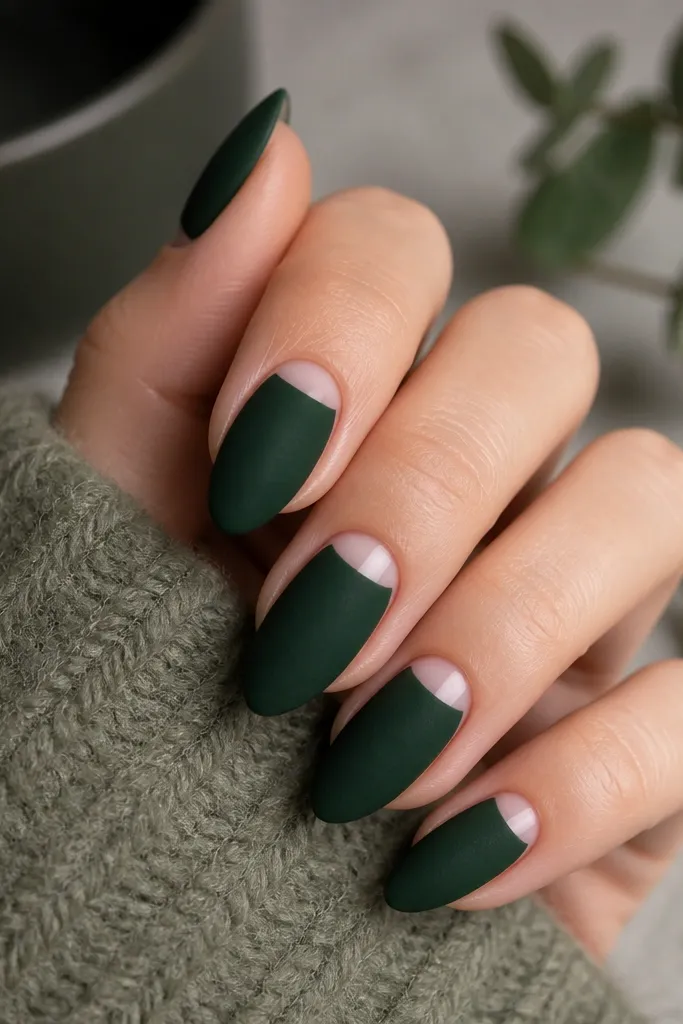
Deep forest green in a velvet-matte finish reads wintery without looking like holiday decorations. The half-moon negative space keeps it modern, and it also helps your manicure look intentional even as you grow out. This style is flattering because it frames the nail bed and makes fingers look longer — especially on medium almond shapes. It works best with cool undertones, but medium skin tones still look great if the green is truly forest and not blue-black. Pair it with dark knitwear and gold rings for that classy contrast.
Paint the nails with a base coat, then apply deep forest green in two thin coats. Before curing the final coat, use a clean brush to keep the half-moon area open — or use half-moon nail shields to protect the cuticle shape. If you’re painting freehand, stop the green about 1-1.5 mm away from the cuticle line and shape the curve evenly across nails. Top with a velvet-matte top coat, and avoid adding any glossy top over the green so the matte stays even.
If your half-moon edge looks jagged, fix it with a fine brush dipped in gel cleanser after curing, then re-cure a tiny patch. Use matte top coat carefully — it shows streaks if you overwork it.
Avoid glossy top on velvet matte — the contrast looks cheap and uneven.
5. Soft Blackened Blue with Micro Star on One Nail
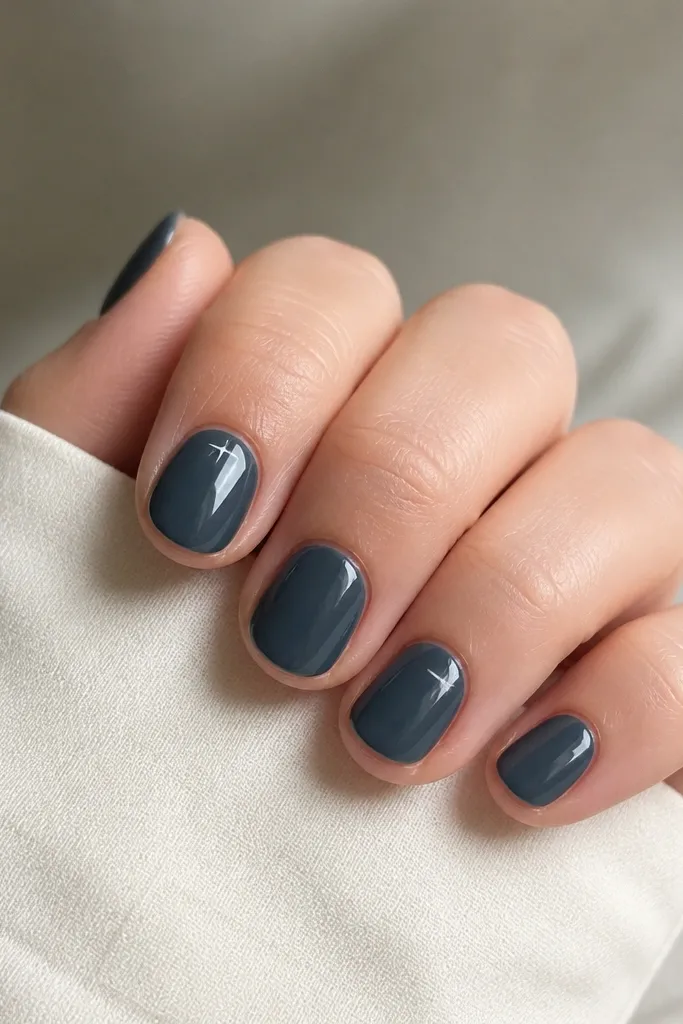
Blackened blue is my favorite winter alternative to plain black because it looks softer on skin and doesn’t feel harsh. The micro star is small enough to stay classy, and the pale silver keeps it icy instead of flashy. This manicure looks great on short round nails because the design stays centered and doesn’t overpower the shape. It flatters medium and deeper skin tones especially well, but it also works for fair skin if the blue stays cool and not navy-warm. Wear it with denim, leather, and silver jewelry.
Apply a soft blackened blue polish or gel in two coats, using a thin layer to avoid pooling at the sides. Leave the star nail for last so you’re not rushing. Draw a tiny three-point star with a dot-and-line technique: place one dot for the center, then drag two short lines out to form the points. Cure after the star line and then finish with one glossy top coat on all nails.
Use a toothpick for the star points if your brush is too thick. Keep the star smaller than a pencil eraser — scale is what makes it classy.
Skip full glitter stars — they look like party nails instead of winter classy modern.
6. Champagne Nude with Thin Gold Ring Outline
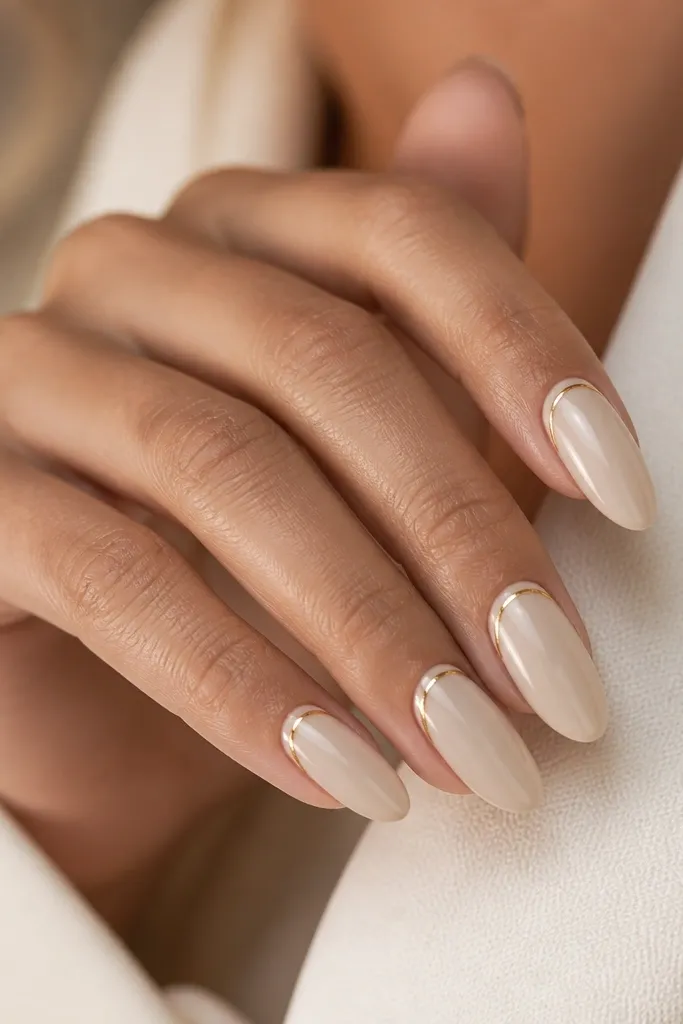
Champagne nude is the winter nude that doesn’t wash out in dim light. The cream base has a warm glow, and the thin gold ring outline looks like jewelry without needing a full accent nail. I like this on long almond because the ring shape visually lengthens the nail bed. It flatters warm undertones and looks amazing with gold bracelets. Keep the gold line super thin — it should look drawn, not painted like a thick stripe.
Start with a champagne nude cream in two coats, making sure the cuticle edge is sealed cleanly. Use a fine liner brush to paint a thin gold outline ring about 1-2 mm above the cuticle line, leaving a small gap so it looks like a halo. Paint the ring as a continuous curve and connect the ends neatly, then cure. Finish with a glossy top coat and cap each free edge so the gold line stays crisp.
Editor's noteIf gold paint floods, wipe your brush on a lint-free wipe before you touch the nail. Cure the gold line separately if your gel brand needs it — it prevents smearing.
Skip thisDon’t make the ring too close to the cuticle — it can look messy and grow out awkwardly.
7. Icy White Gel with Diagonal Skittle Lines (2 Nails)
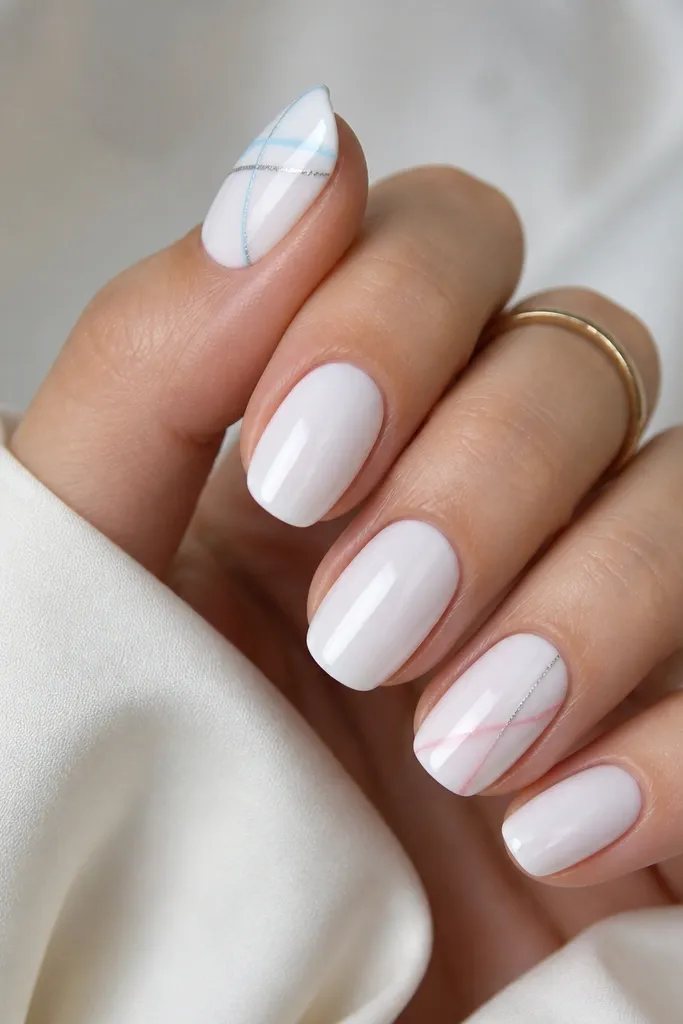
Icy white makes winter nails look bright and fresh, but it can feel plain. The diagonal skittle lines fix that by adding motion and interest without turning it into a full graphic design. I keep the lines only on two nails to maintain that classy, modern balance. This looks best on almond or squoval because the diagonal lines follow the nail’s natural length. It flatters fair to medium skin tones because white brightens the hand, and the pale colors keep it winter-soft.
Apply icy white gel in two thin coats so it stays smooth and not streaky. Choose two accent nails and plan the diagonal direction before you paint — tilt it from lower-left to upper-right for a consistent look. Paint thin pale blue and silver lines on one accent nail, and pale pink with silver on the other, using a striping brush. Cure each color, then top coat all nails with glossy top coat, sealing the line edges.
Do one line at a time and cure after each color to avoid muddy blending. Keep line spacing even — your brain reads it as intentional.
Skip neon colors — icy white plus neon looks harsh and not winter classy.
8. Berry Brown Ombre with Clear Center Sheer
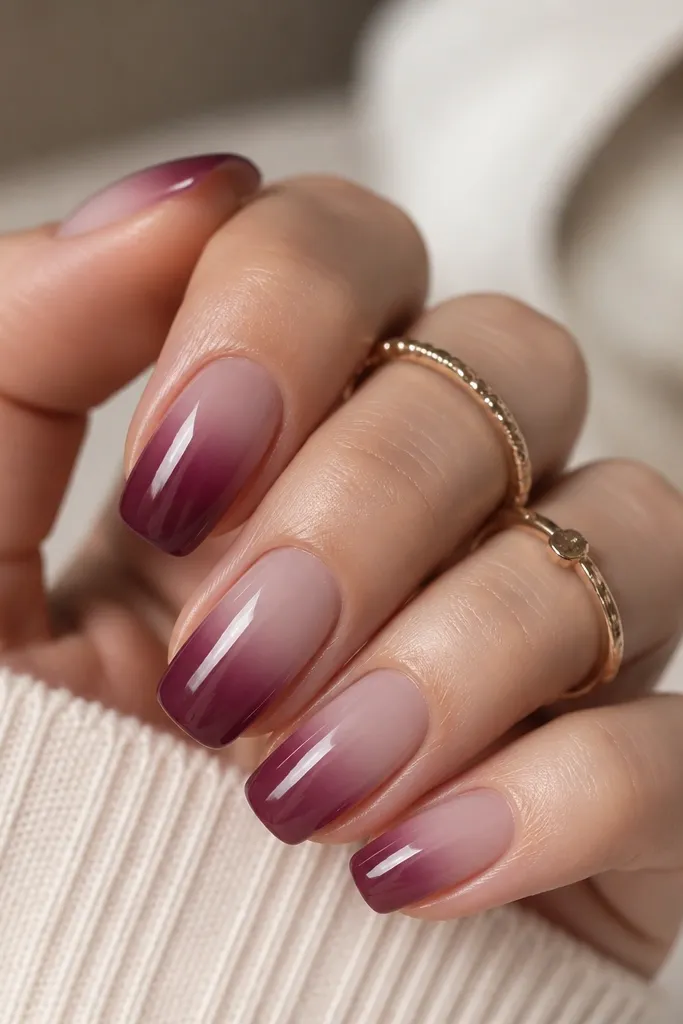
This is the ombre that looks soft and expensive, not like a manicure you did in a hurry. The clear center keeps the nail looking light and healthy, and the berry-brown tips add winter depth. I use berry-brown because it sits between burgundy and chocolate, so it matches both warm and cool outfits. It flatters almost every skin tone because the gradient starts near your natural nail color. This also works if your nails are short — the ombre makes them look longer without needing length.
Start with a clear or sheer nude base and cure it well. Sponge on a berry-brown color at the tips only, keeping the sponge pressure light so the gradient fades upward. Use a small makeup sponge and blend in circular motions, then wipe the edges with a brush dipped in gel cleanser. Clean up the cuticle line and then add a glossy top coat to smooth everything.
Practice the gradient on one nail first — you want the fade to start about halfway up the nail. Use a dense sponge so the color lays down evenly.
Avoid a hard ombre line — it ruins the classy effect instantly.
9. Rosewood Red Cream with One Matte Accent Nail
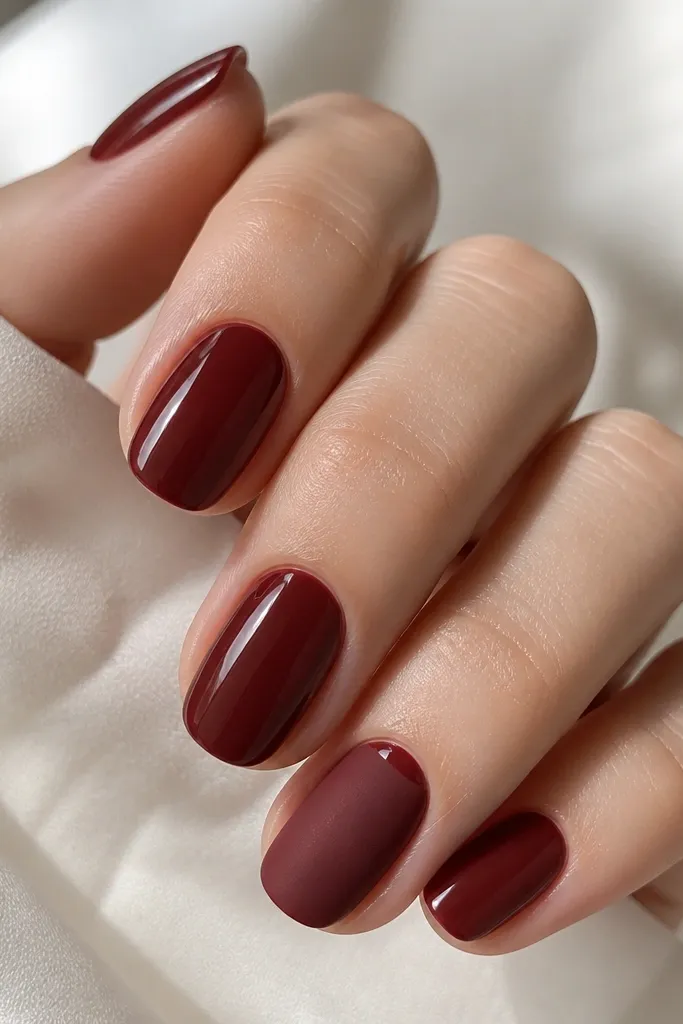
Rosewood red is winter red that doesn’t look childish. The cream color has a slight brown undertone, so it flatters hands and looks smooth under indoor lighting. I like one matte accent nail because it adds texture without adding extra patterns. The thin glossy crescent near the cuticle keeps the matte from looking flat and makes the nail look styled, not unfinished. This manicure is great for medium and deeper skin tones, but fair skin looks beautiful with rosewood because it stays warm.
Paint all nails with rosewood red cream in two coats and cure fully. On the ring finger only, apply matte top coat after the last color coat cures. Then, with a fine brush, paint a tiny glossy crescent near the cuticle using glossy top coat or a clear gel and cure it. Finish by sealing around the edges so the matte and glossy meet cleanly.
Editor's noteKeep the glossy crescent thin — 1 mm is enough. If the crescent touches the cuticle skin, clean it up before curing.
Skip thisDon’t matte every nail — matte overload makes red look heavy.
10. Glazed Silver Chrome with Nude Base (Half Nail)
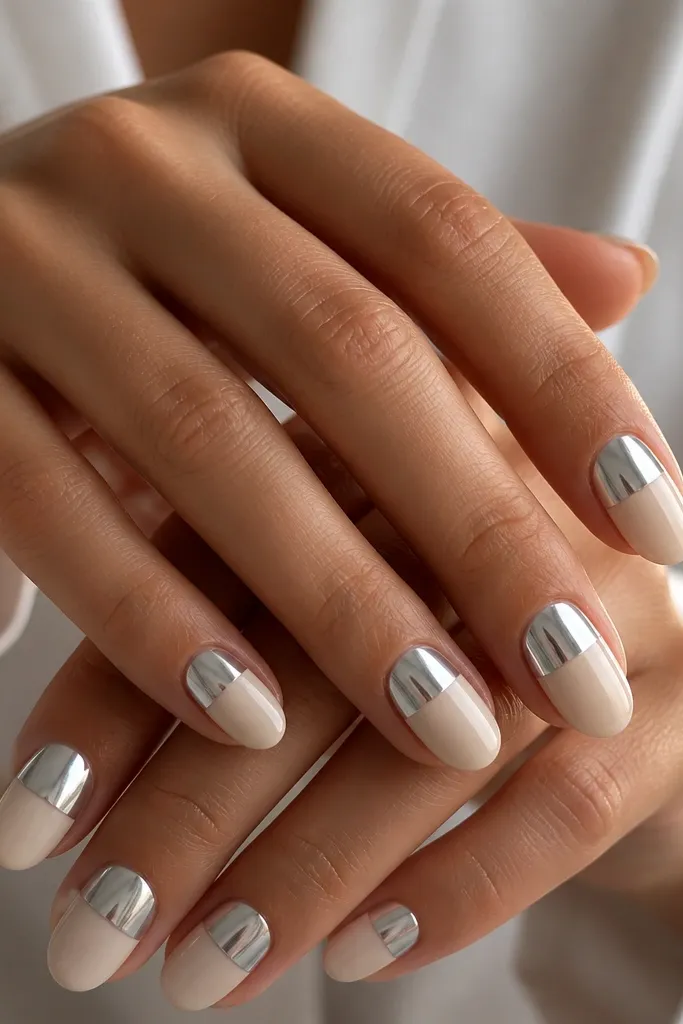
Glazed silver chrome looks wintery in a way that still reads classy, especially when it’s split cleanly. I do this as a half-nail chrome so it feels modern instead of party-ready. The nude beige bottom half keeps it wearable and softens the shine so it doesn’t overpower your hand. This flatters fair to medium skin tones because the nude base warms the look, and the silver reflects light across your fingers. It’s also perfect for holiday events where you want your nails to look sharp in photos.
Start with a nude beige cream base in two coats and cure thoroughly. Use a curved guide — either a thin striping tape or just a steady hand — to mark the boundary where the chrome starts, about halfway up the nail. Apply chrome gel to the upper section only, then apply silver chrome powder or foil transfer and buff lightly once it’s set. Seal with a chrome-safe top coat so the mirror finish stays intact, then remove any tape cleanly and re-cure.
Press the chrome lightly and evenly — heavy pressure dulls it. Wipe dust off before sealing so you don’t trap specks under top coat.
Avoid applying chrome over a sticky layer — it causes patchiness and dull spots.