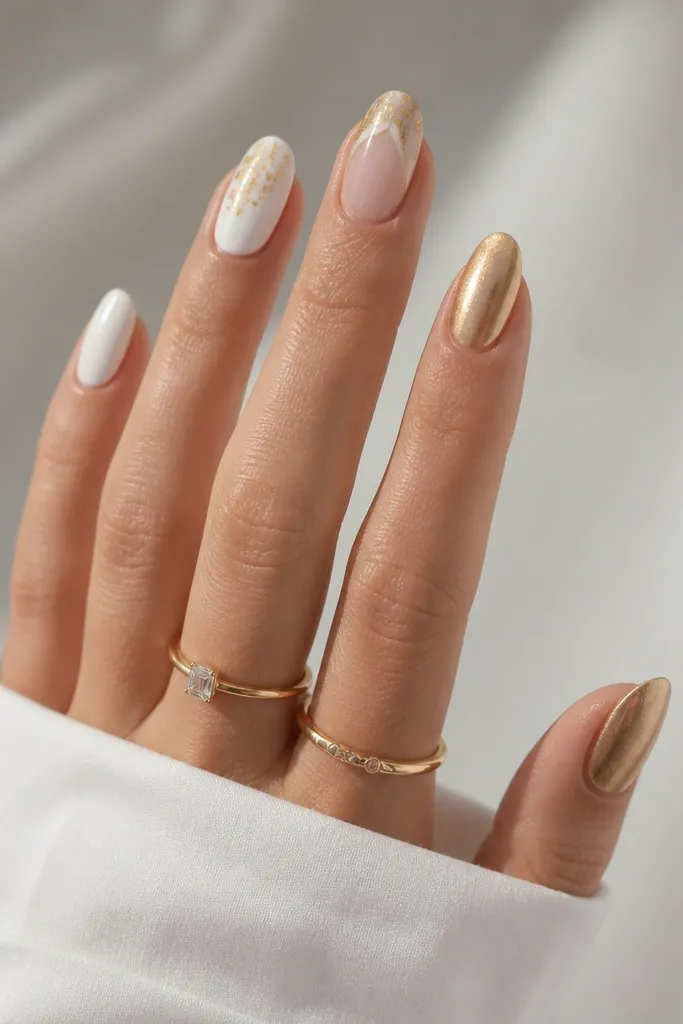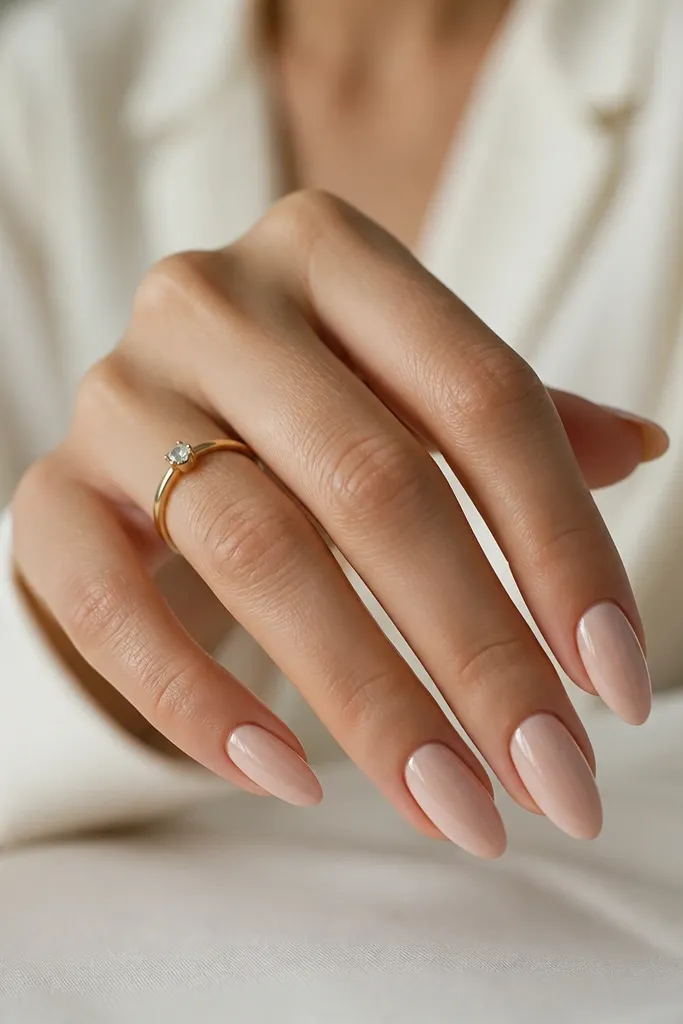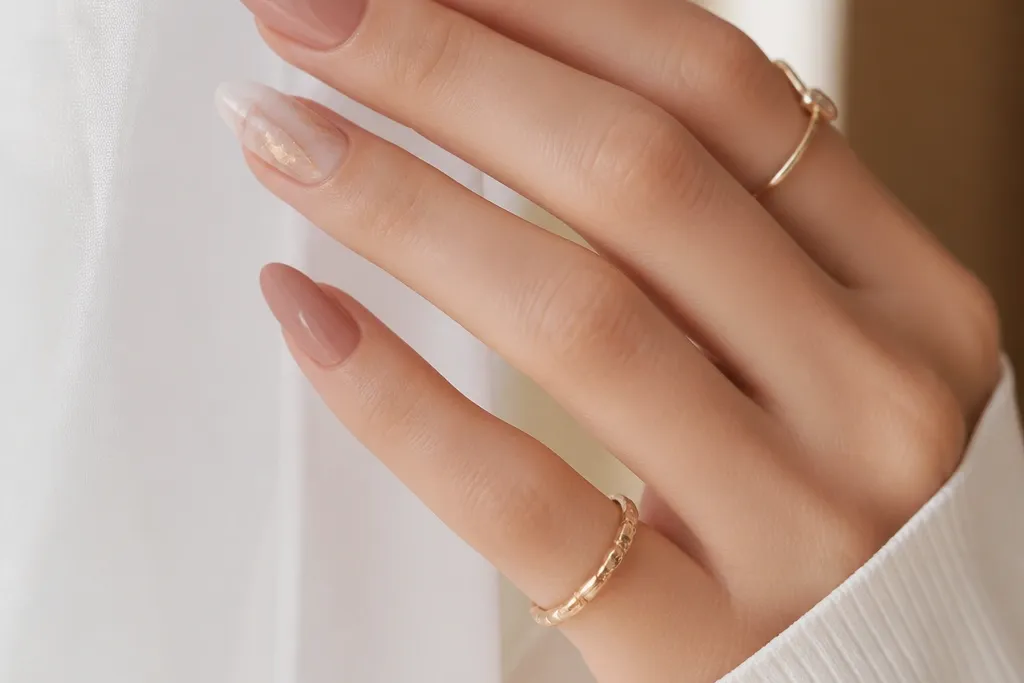
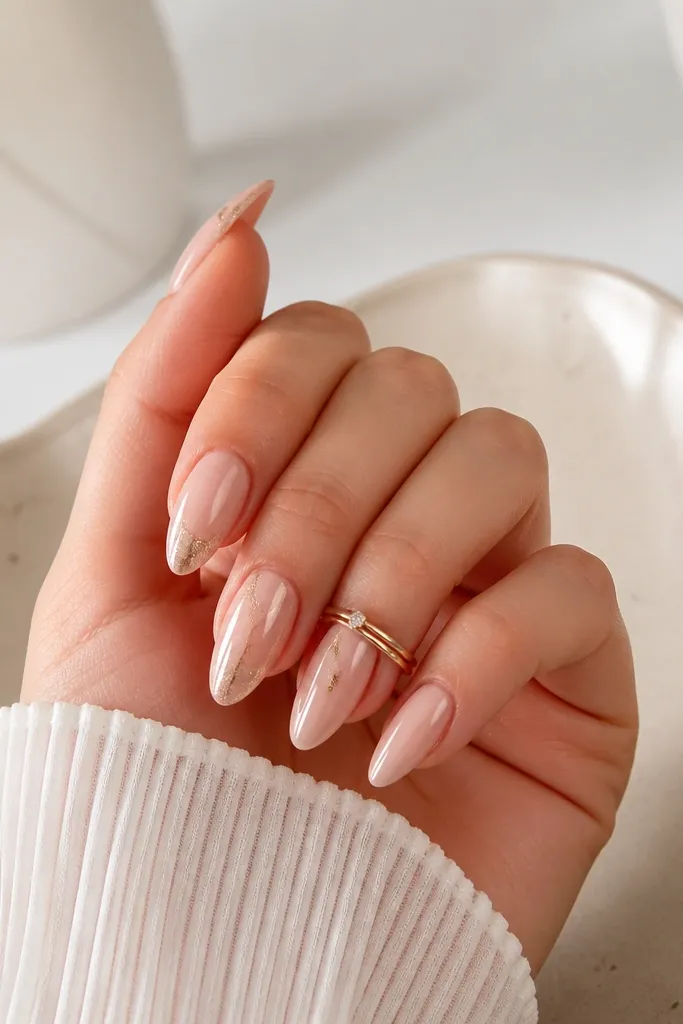
1. Micro French in Milky Rose
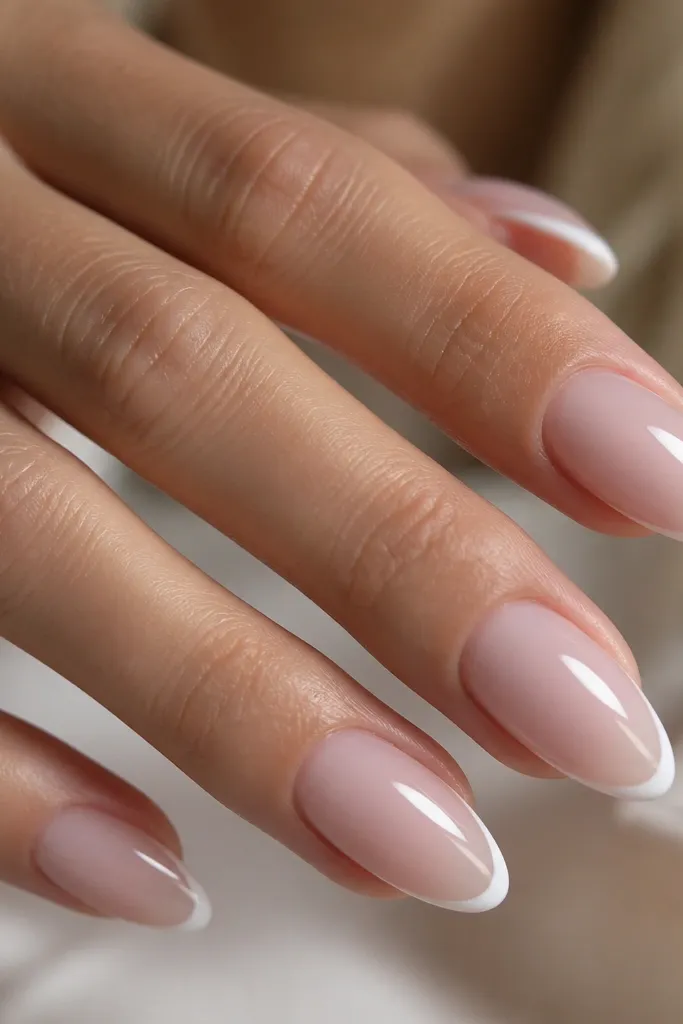
This one is the safest “elegant classy nail designs aesthetic” choice because it reads clean even when your nails grow out. The milky rose base is sheer enough to blend with your natural nail color, so it looks flattering on fair, medium, and deep skin tones. The micro French line is where the refinement happens — it’s narrow, so it doesn’t overpower shorter nails or make your hands look wider. I love it for work days, brunch, and any time you want neat hands without obvious decoration.
Start by buffing the nail surface lightly and pushing cuticles back with a wooden stick so the base sits flat. Apply a sheer milky rose gel in two thin coats, curing each coat fully, then wipe the tacky layer if your product requires it. Use a fine liner brush to paint only the tip — keep the line about 1-2 mm wide and follow the almond curve. Clean the edges with a small flat brush dipped in gel cleanser, then finish with a glossy top coat on all nails. Cure extra time for a hard, smooth surface that doesn’t snag.
Editor's noteIf your white line looks streaky, thin the white gel with a drop of gel medium instead of layering thick coats.
Skip thisAvoid painting the French line too wide — wide tips are where “classy” turns into “store-bought stickers.”
2. Half-Moon Nude + Champagne Foil
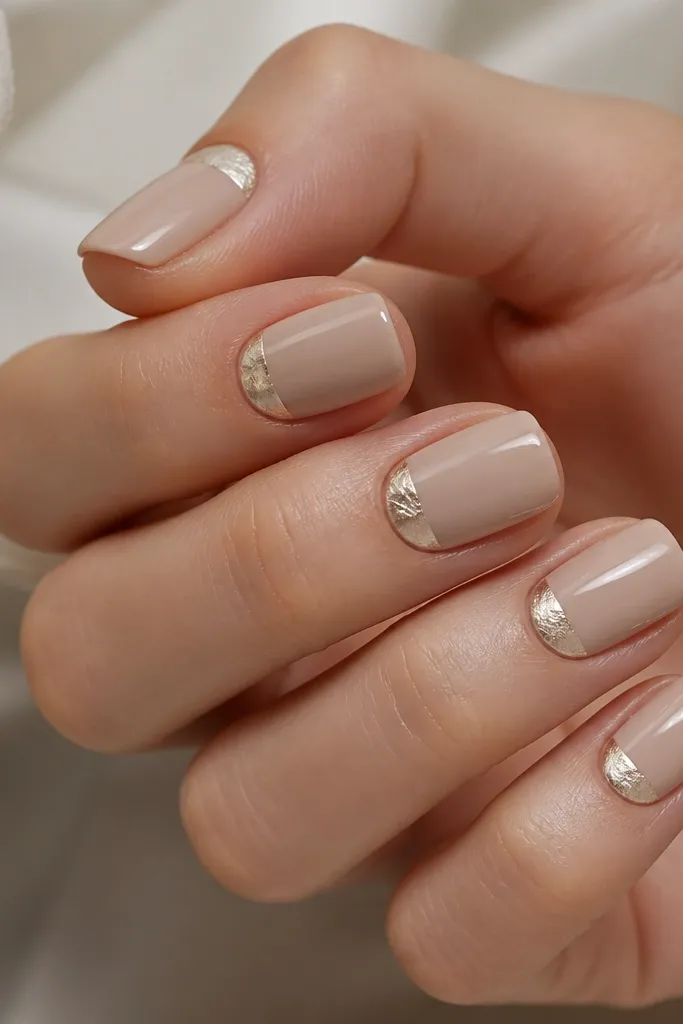
Half-moon designs make hands look instantly dressed up because they frame the cuticle area. The nude beige base keeps it refined, while champagne foil adds a warm glow that flatters both cool and warm undertones. I’ve seen this look best on medium to deep skin tones because the foil pops without turning icy. It’s also great for people who hate full glitter — the shimmer stays concentrated near the center of the nail.
Start with a nude beige gel base that matches your skin tone closely, then cure. Use a half-moon stencil or freehand the shape with a thin brush, placing it just above the cuticle line — leave a hairline gap so it looks intentional. Press champagne foil over the half-moon area using foil glue if you’re using loose foil, then seal it with a thin clear gel coat. Finish with glossy top coat, and keep the foil area flat by applying a second thin seal coat if you feel texture.
Use a cuticle oil after curing and wipe the nail with alcohol before top coat if your foil glue is sensitive to oils.
Skip a messy foil edge — if the foil bleeds into the nude, it reads sloppy instead of elegant.
3. One-Stripe Glossy Black on Sheer Blush
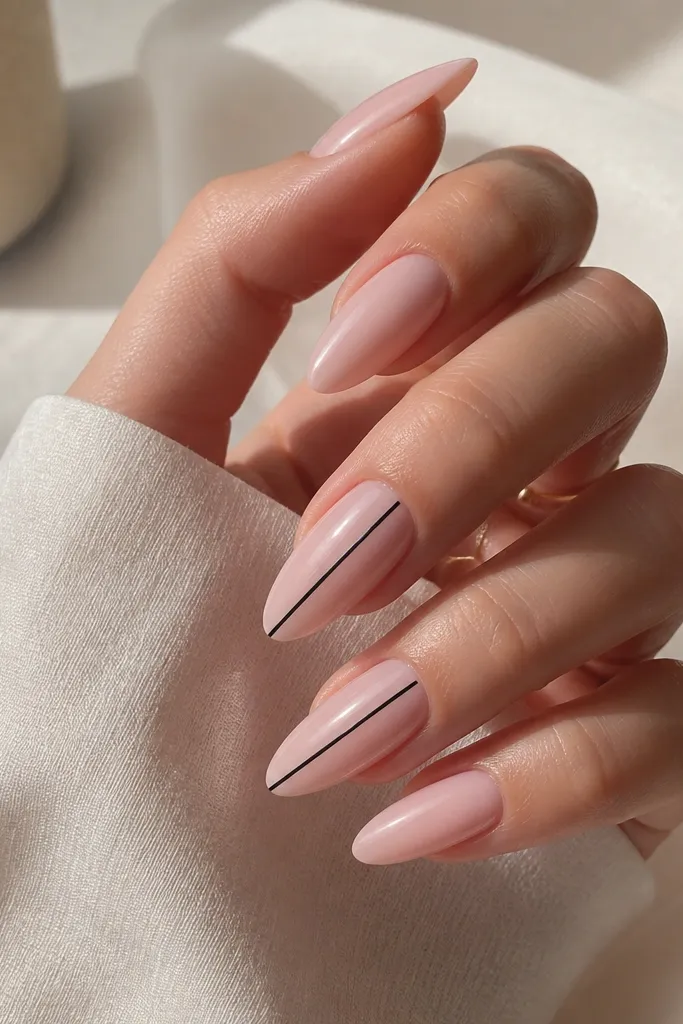
This design is minimalist but still looks “put together” because the stripe is perfectly placed. A sheer blush base keeps it feminine, and black adds definition without needing sparkle. The vertical stripe lengthens the nail visually, which is why I like it on shorter nails too — the shape still looks longer. It works across skin tones, but I especially love it on fair and light-medium skin because the blush glow softens the contrast.
Apply a sheer blush gel base in two thin coats, curing each layer. On the accent nails, use a striping brush and black gel to paint one centered line from just below the cuticle to near the tip — stop short so it doesn’t touch the sidewalls. On the non-accent nails, keep them plain but still finish with a glossy top coat so they match in shine. Clean up the stripe edges with a liner brush dipped in cleanser, then seal everything with top coat.
Editor's noteIf the stripe wobbles, wipe the brush, then re-stroke once while the gel is still workable before curing.
Skip thisDon’t do the stripe on every nail — full sets of stripes look graphic instead of classy.
4. Pearl Dot Cuticle with Clear Jelly Pink
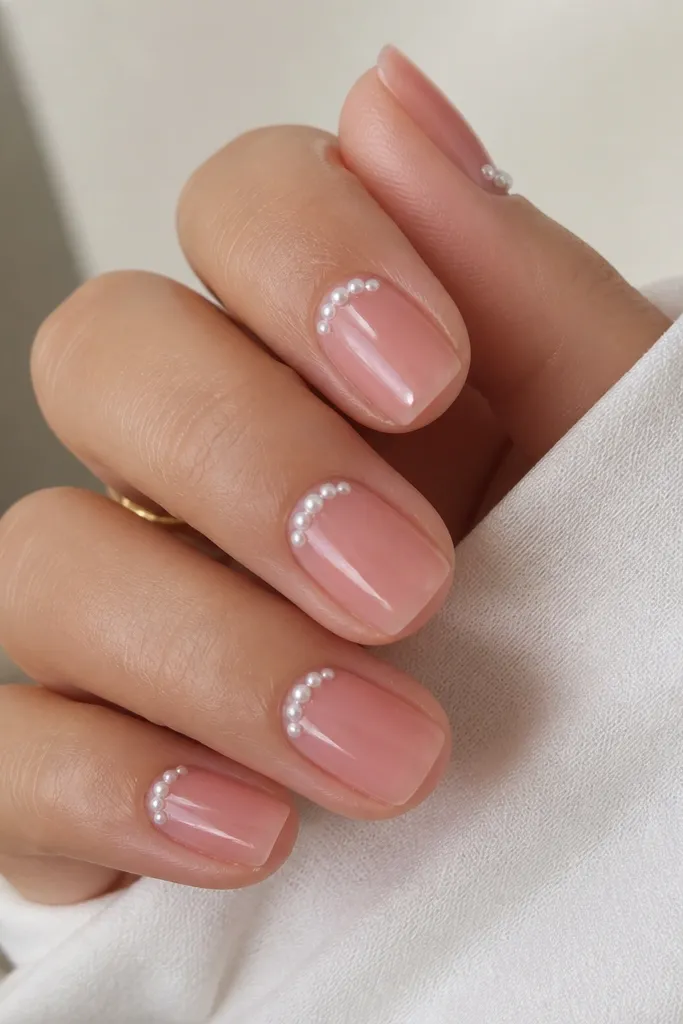
Pearl dots at the cuticle area give a soft, romantic look that stays elegant because it’s small-scale. The clear jelly pink base makes your nail bed look juicy and healthy, and the pearls read as “jewelry” rather than decoration. This set flatters hands with shorter nail beds because the jelly pink doesn’t overpower the space. I’ve worn this to weddings and date nights — it looks expensive in photos without screaming for attention.
Start by applying a clear jelly pink gel base, keeping it slightly sheer so your natural nail shows through. Place a few tiny pearl dots near the cuticle — I use 2-3 dots per nail, centered, with the arc following your cuticle curve. If you’re using pearl studs, fix them with a dot of gel and cure carefully to avoid shifting. Seal with a thin layer of glossy top coat, then do a second top coat if the pearls feel raised.
Let each pearl set cure for a full count of 20-30 seconds so they don’t slide when you cap with top coat.
Avoid giant pearls — big stones near the cuticle look heavy and can snag on hair and collars.
5. Champagne Shimmer Ombré Tips
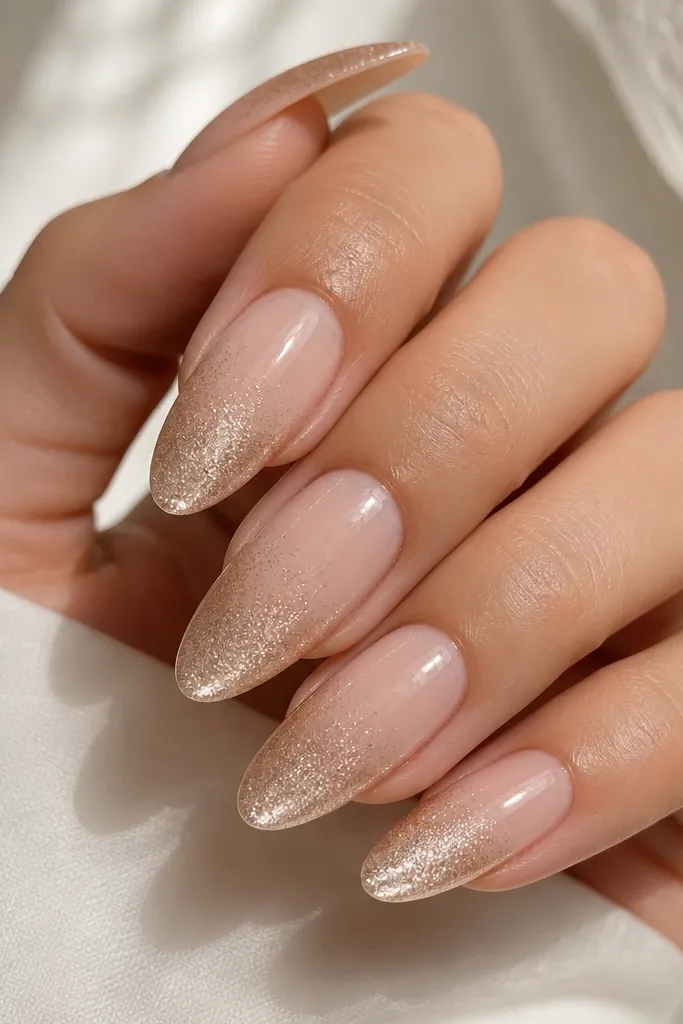
An ombré shimmer tip is refined because the sparkle follows a gradient instead of sitting in one block. The nude base keeps the nails looking natural, and champagne shimmer looks classy because it’s warm and wearable. I like this on medium and deep skin tones because the warm shimmer blends with skin warmth, but it also looks gorgeous on fair skin when the nude base is milky. It’s a great option when you want something more special than micro French without going full glitter.
Apply a milky nude base in two thin coats and cure. For the shimmer, use a sponge or makeup wedge and lightly tap champagne shimmer gel onto the tips — start at the free edge and blend upward about one-third of the nail length. Build density gradually by repeating thin taps rather than one heavy layer. Clean the blend line with a small flat brush dipped in cleanser, then cap the whole nail with glossy top coat. Cure thoroughly so the sponge texture levels out.
Editor's noteUse a slightly tacky top coat layer before adding shimmer if your gel system needs extra grip.
Skip thisDon’t stop at matte — shimmer looks best under a glassy finish for a classy effect.
6. Soft Sage Accent with Negative Space
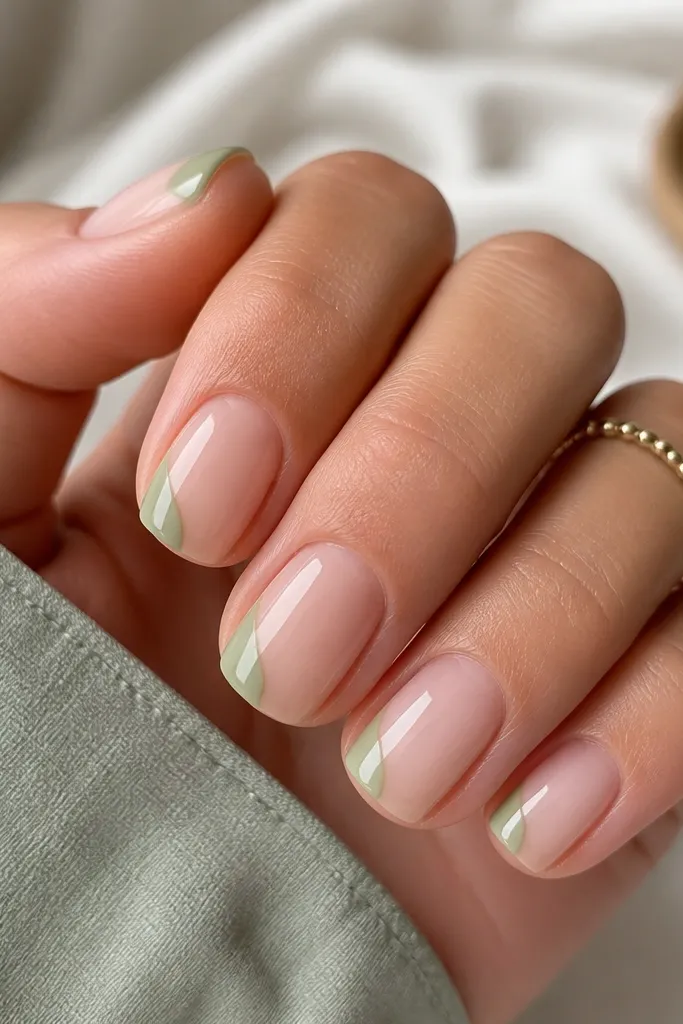
Negative space makes nails look modern and tidy, and the soft sage keeps the vibe feminine instead of harsh. The sheer nude base makes the sage look like it belongs to your skin tone rather than sitting on top. I’ve found this design works especially well for people who want something different from pinks and nudes but still want “classy.” It also looks great year-round because sage reads gentle, not seasonal.
Start with a sheer nude base that matches your natural nail — I use a pink-beige that’s semi-transparent. For the accent, draw a thin curved shape along one side of the nail using sage gel, leaving a clear negative space gap between the curve and the center. Keep the accent narrow — about 2-3 mm wide — and extend it from just above mid-nail to near the tip. Cure, then add a glossy top coat over the entire nail, making sure the curve edges feel sealed.
Editor's noteIf your sage looks streaky, mix it with a clear gel rather than adding more pigment.
Skip thisAvoid filling the whole nail with sage — negative space is what keeps it elegant.
7. Clear Crystal Cuticle Line
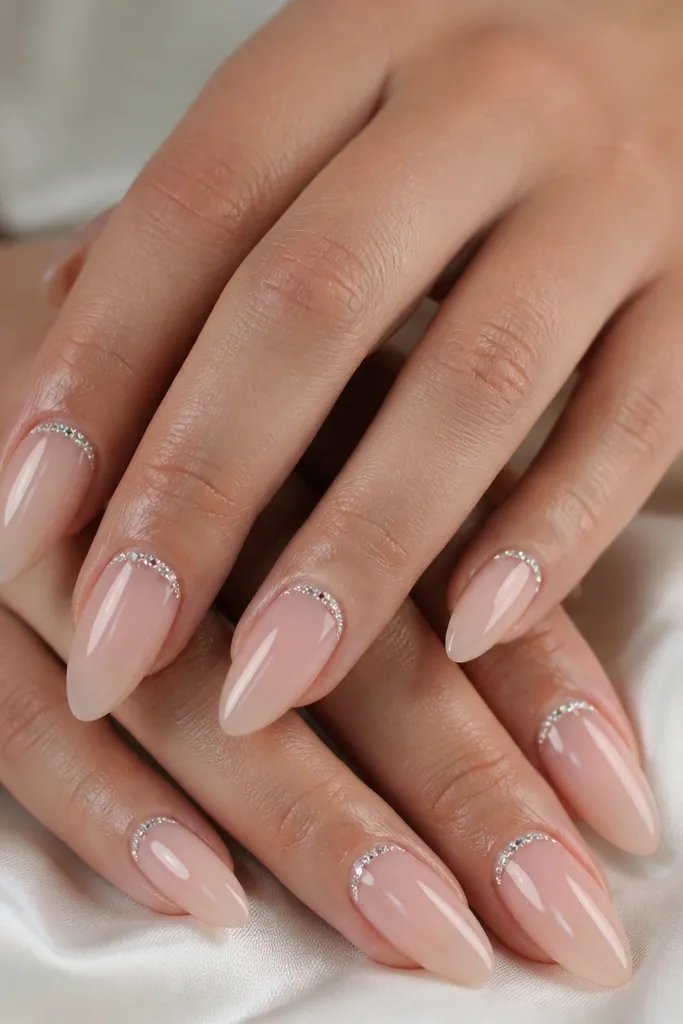
This is one of my favorite “refined feminine” looks because it acts like a necklace for your nails. The base stays nude and clean, while the micro crystals add sparkle only at the cuticle line — that’s where the eye naturally goes. Clear crystals look classy because they don’t clash with your outfit the way colored stones can. I’ve done this on both short and medium lengths; on short nails, the crystal line makes the nail feel longer without adding bulk.
Apply a sheer nude base in two thin coats and cure. Use a fine gel brush to draw a narrow line across the nail just above the cuticle — leave a tiny gap at both sidewalls. Place micro crystals on the gel line using tweezers, spacing them tightly but evenly. Cure, then cap with a thin clear gel layer so the crystals don’t snag. Finish with glossy top coat and cure until fully hard.
Press each crystal lightly with the end of a clean dotting tool so they sit flat before curing.
Skip chunky gems — large stones at the cuticle look bulky and can lift faster.
8. Toffee Brown Micro Swirl Tips
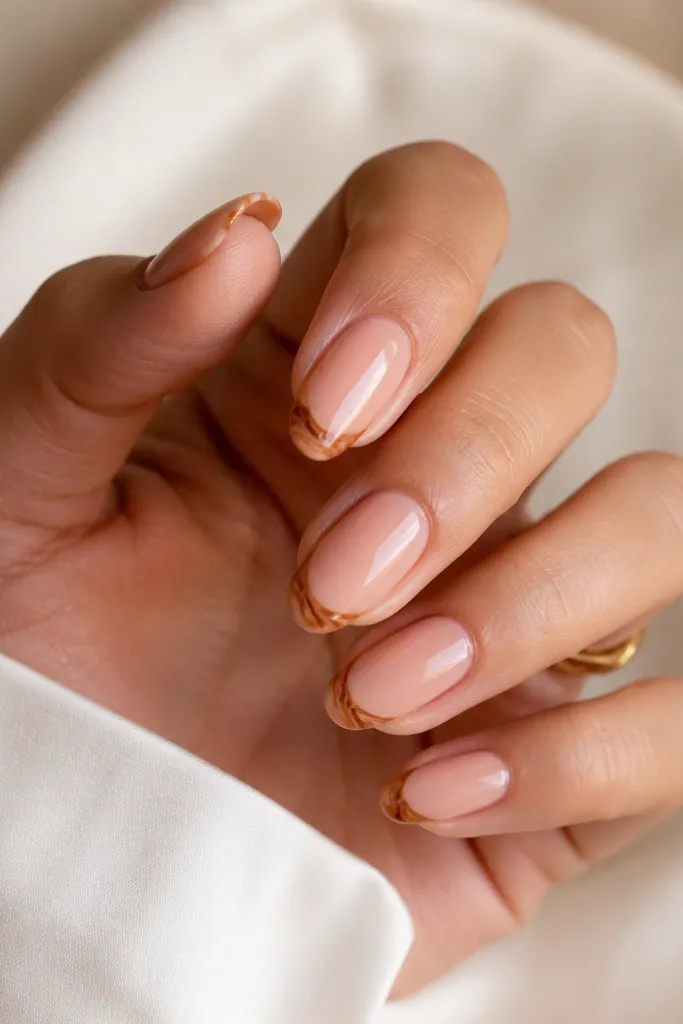
Warm toffee-brown swirls feel classy because they look like hand-drawn details, not mass-produced patterns. The nude base keeps it soft, and the swirl marks are small enough to stay elegant even on everyday nails. I like this on medium to deep skin because the warm brown looks like it belongs to the undertone of your hands. It also works for fall without locking you into one season — the swirls are subtle, not themed.
Start with a warm nude base, slightly beige rather than pink, and cure in two thin coats. Paint the swirls only on the tips — about 1/4 of the nail — using a fine detail brush and toffee-brown gel. Make 1-2 micro swirls per nail, centered or slightly off-center, keeping them consistent in size. Clean edges with gel cleanser and a lint-free wipe, then seal with glossy top coat. If the swirls sit raised, do a thin gel cap before top coat.
Editor's notePractice the swirl motion on paper first — you want a tight curl, not a looping blob.
Skip thisAvoid dark brown full coverage at the tip — it turns into a blunt French instead of a refined detail.
9. Rose Quartz Half-Overlay Marble
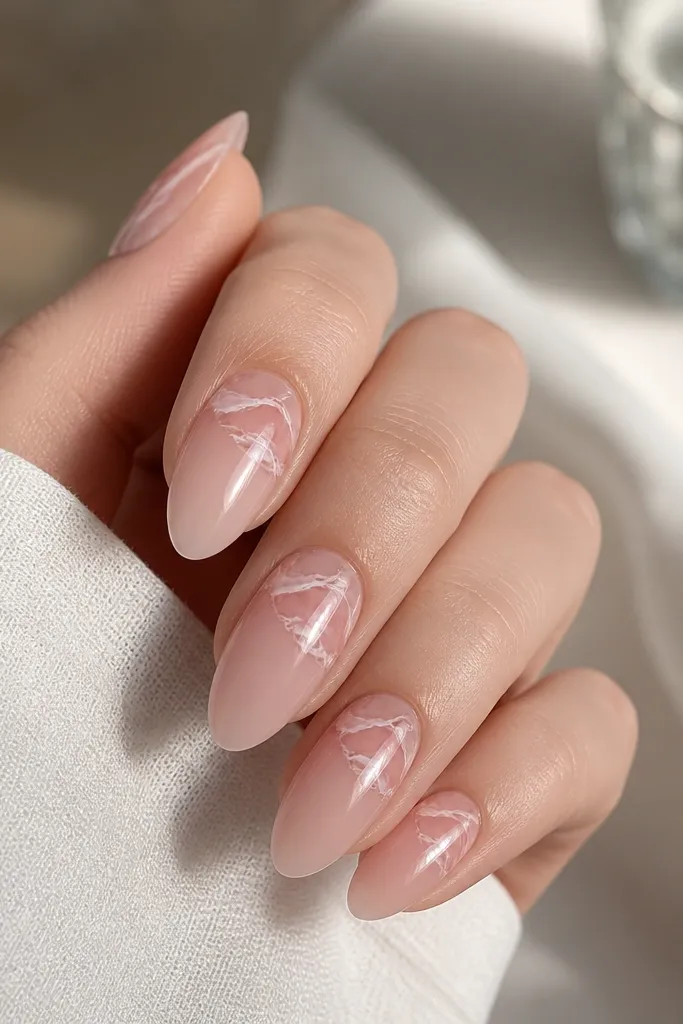
Half-overlay marble looks upscale because it gives you movement without covering the whole nail. The rose quartz palette — pale pink, milky white, and a hint of translucent gray — reads delicate instead of loud. I’ve found this flatters all skin tones because the base is sheer and the marble lines stay thin. It’s perfect for nights out when you want something that looks like stone jewelry but still feels feminine and refined.
Apply a sheer blush base and cure completely. For the marble, work only on the upper half: add wisps of milky white and pale pink gel, then drag tiny lines with a thin brush so the pattern looks like veins. Use a small amount of translucent gray for depth, then keep the lines thin and airy. Add a glossy top coat over everything, and do a second top coat only if the marble looks textured. Keep the lower half clean and plain so the design stays intentional.
Use a toothpick for the “vein” lines — it gives you hairline movement that a brush sometimes over-paints.
Avoid thick marble blocks — chunky stone patterns look heavy and less classy.
10. Soft Nude Velvet Matte with Glossy Edge
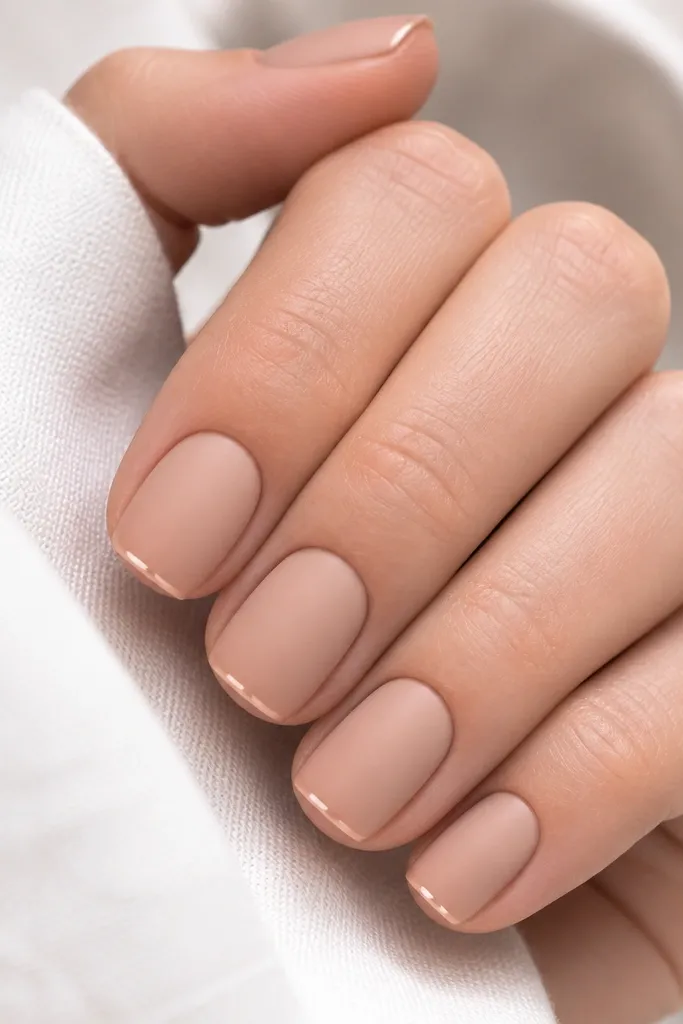
This combo is refined because it plays with texture instead of adding more color. The velvet matte finish makes the nude look smooth and expensive, and the glossy edge keeps the tips crisp so the nails don’t look dull. I like it for everyday wear because matte hides tiny surface scratches better than gloss, but you still need clean prep. It flatters hands with natural ridges when you’re using a smoothing base, and it looks great with gold jewelry because the nude tone stays warm.
Start with a soft nude base and cure. Apply a velvet matte top coat to the full nail for the plush look, then cure according to your matte system. Add a thin glossy strip at the tip using a micro French technique - keep it 1 mm wide and centered, then cure. Finish by sealing the glossy strip edges so it doesn’t smear into matte. If your matte top coat makes the nail feel dry, use cuticle oil and massage it in after curing.
If matte grabs on clothing, buff the free edge lightly before adding matte top coat.
Avoid matte on sloppy cuticle lines — matte makes cleanup mistakes obvious.