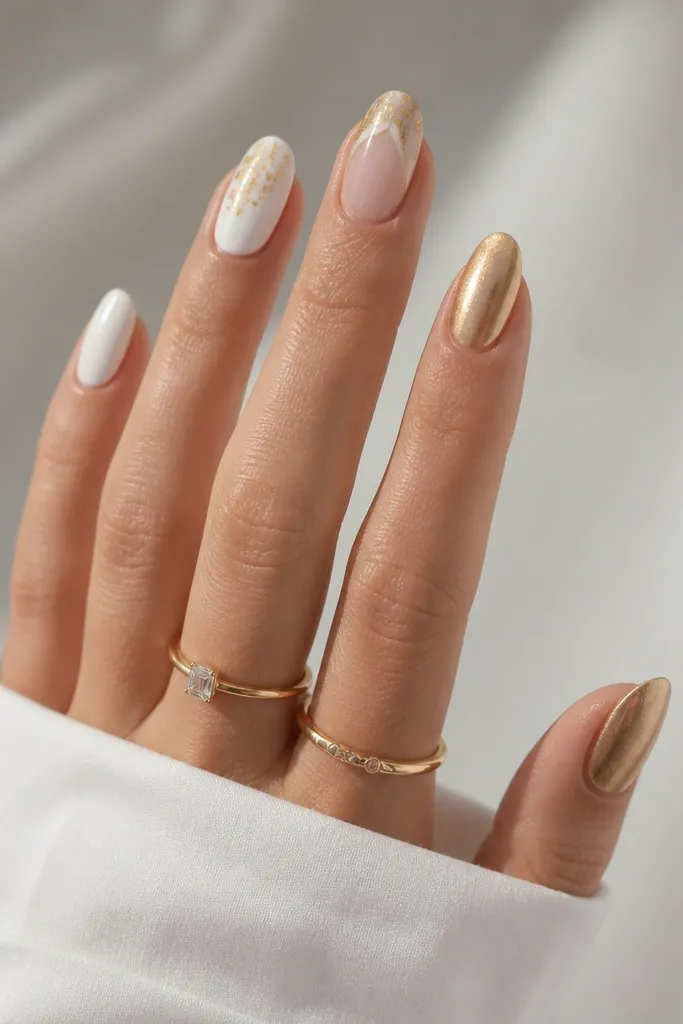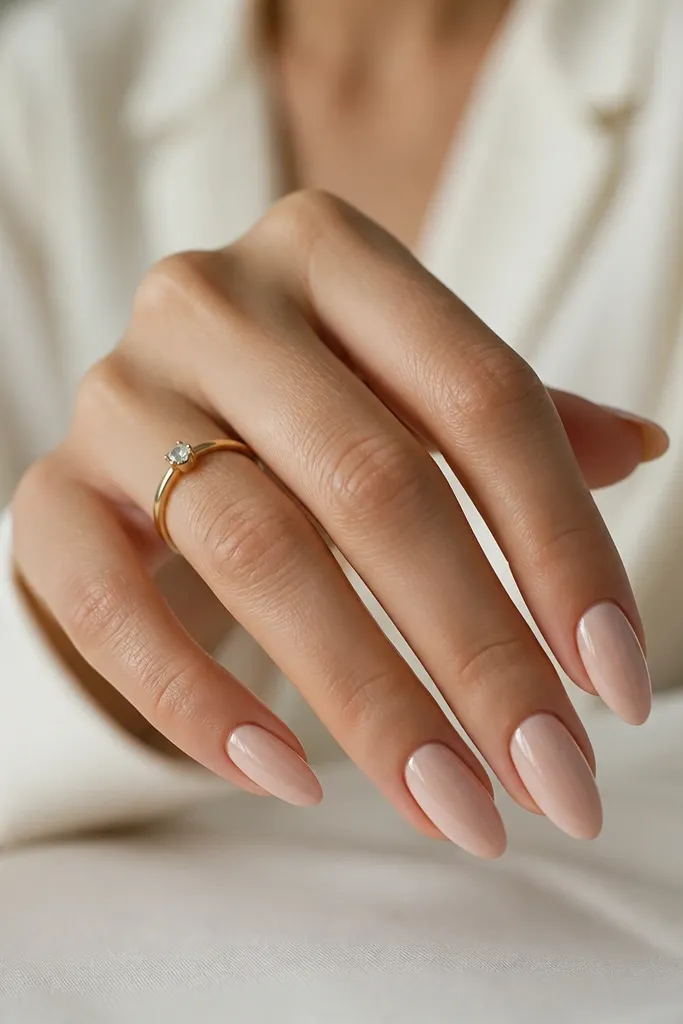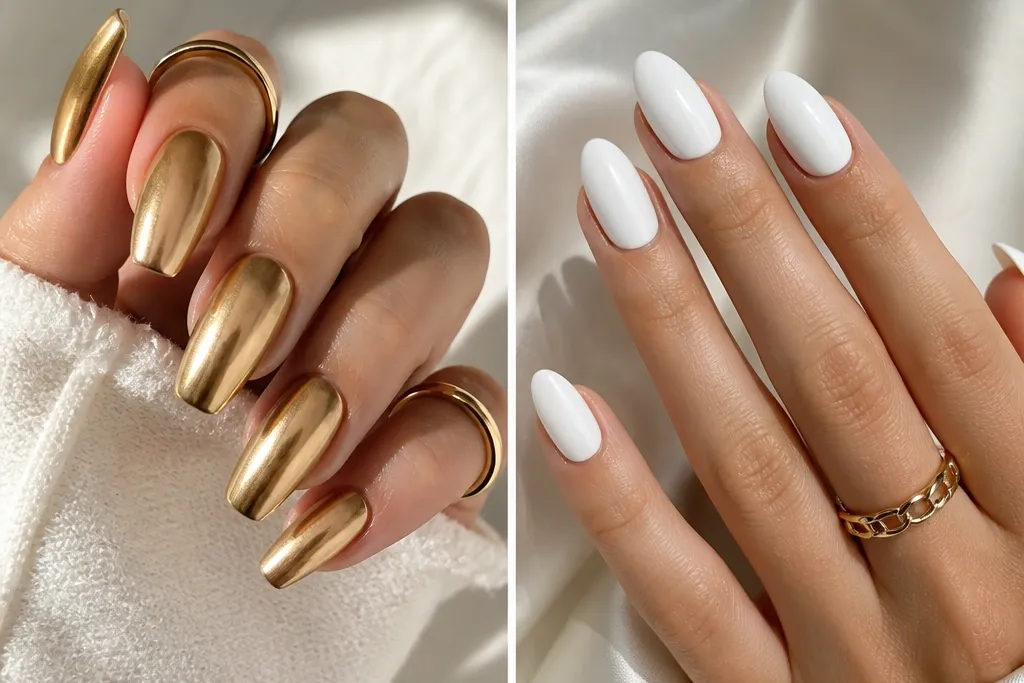
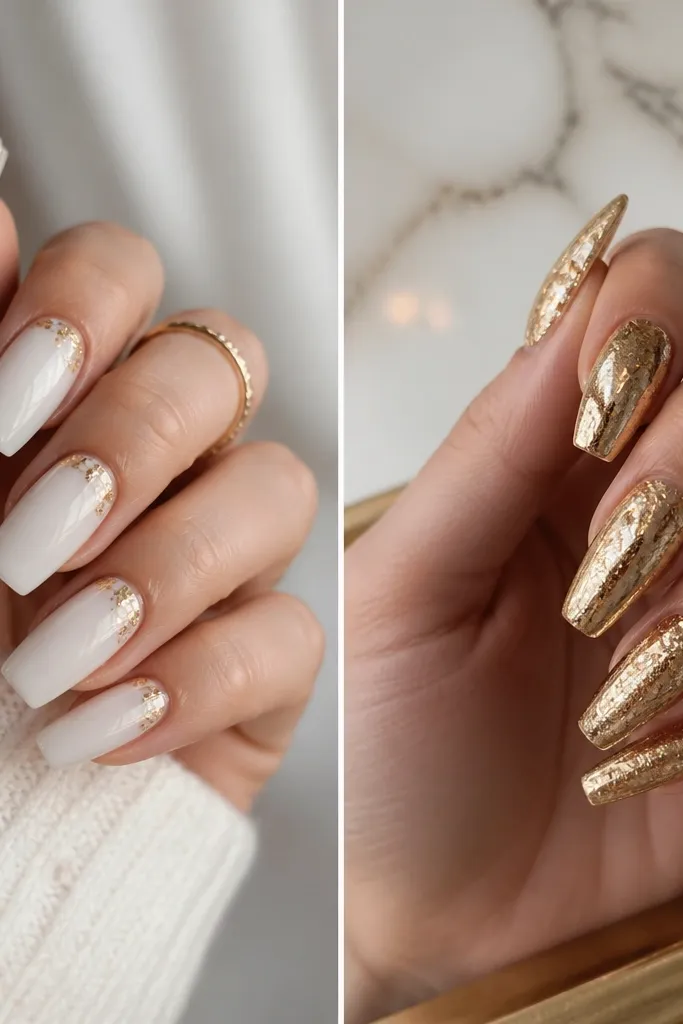
1. Milky White Base with Gold Foil Crescent Tips
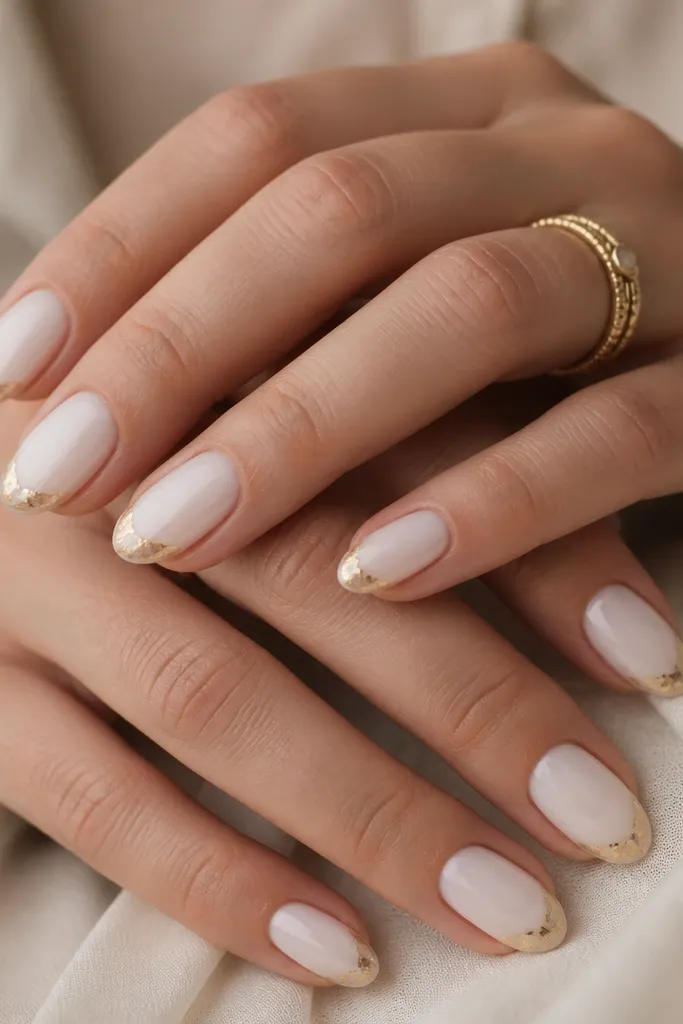
This look is my go-to when you want gold to look expensive but still forgiving. The milky white base stays opaque under indoor lighting, so the gold foil reads as intentional rather than uneven. The crescent placement keeps the foil concentrated near the tip, which makes growth less obvious because the gold doesn’t start at the cuticle. It flatters most skin tones because the white is bright and the gold is warm — I’ve worn it on fair, medium, and deeper complexions and it always brightens the hand. If you keep your nails short to medium, the foil crescent also reduces the chance of lifting at the corners.
Start by prepping the nail surface and applying a thin acrylic base in opaque milky white. File to a short almond shape and keep the apex centered, not too flat. Then press gold foil flakes onto the free edge zone — aim for a crescent arc that stops about 1-2 mm before the sidewalls. Seal with a medium-gloss top coat in two thin layers so the foil doesn’t snag and lift. Finally, refine the edges by lightly buffing only the top coat surface, not the foil texture.
Editor's noteAsk your nail tech to use gold foil that is fine-flake, not chunky leaf, because it lays flatter on short almonds.
Skip thisDon’t drag gold foil from sidewall to sidewall — that makes the set look messy and increases lifting.
2. Pearl White Gloss with Mirror Gold Half-Moons
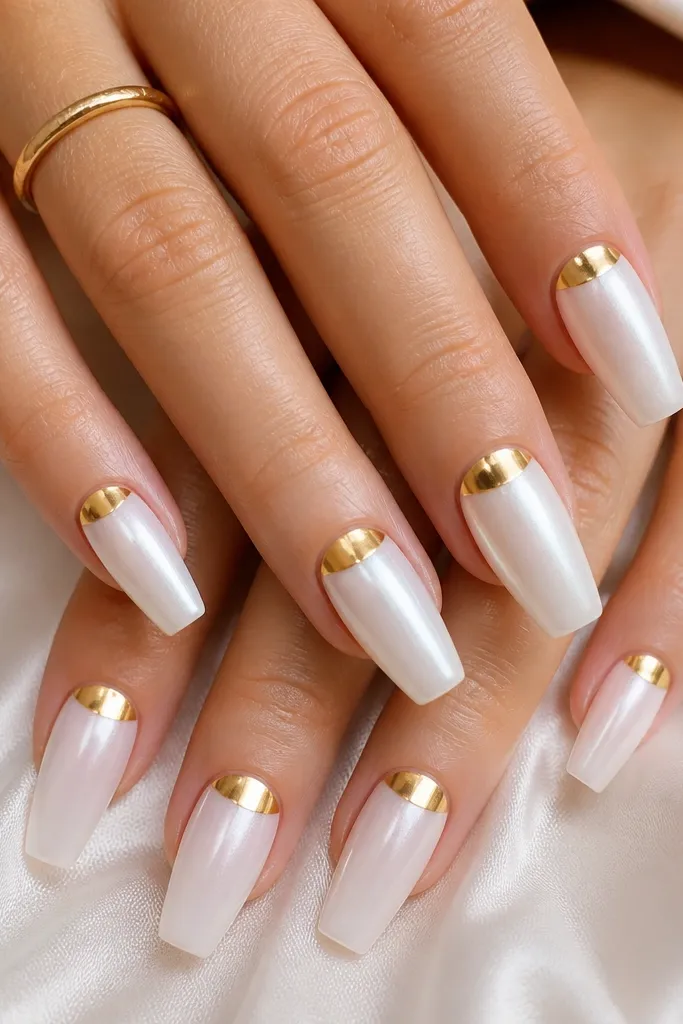
This is the clean, polished glam version of gold and white. The pearl-white gloss gives you a smooth reflection that makes mirror gold look like jewelry instead of pigment. Half-moons at the cuticle are flattering because they visually lengthen the nail bed and frame your nail shape — it’s especially nice if your nail plate is slightly shorter. On deeper skin tones, the gold pops hard; on fair skin, the pearl white keeps it soft and bright. I wear this when I want my hands to look “done” without busy art.
Start with a glossy pearl-white builder in a medium coffin shape. Cure and file with a light hand so you don’t thin the apex — mirror chrome shows unevenness. Then apply mirror gold half-moon either with chrome powder and a tacky base or with gold foil adhered in a smooth arc at the cuticle. Keep the half-moon about 2 mm tall to avoid covering too much white. Seal with a high-gloss top coat, then wipe with a lint-free pad to remove any residue before the final coat.
Editor's noteUse a non-dulling top coat; mirror gold can look cloudy if the top coat is too matte or thick.
Skip thisDon’t blend the half-moon edges — the crisp line is what makes it look high-end.
3. White Marble Veins with Gold Crackle Lines
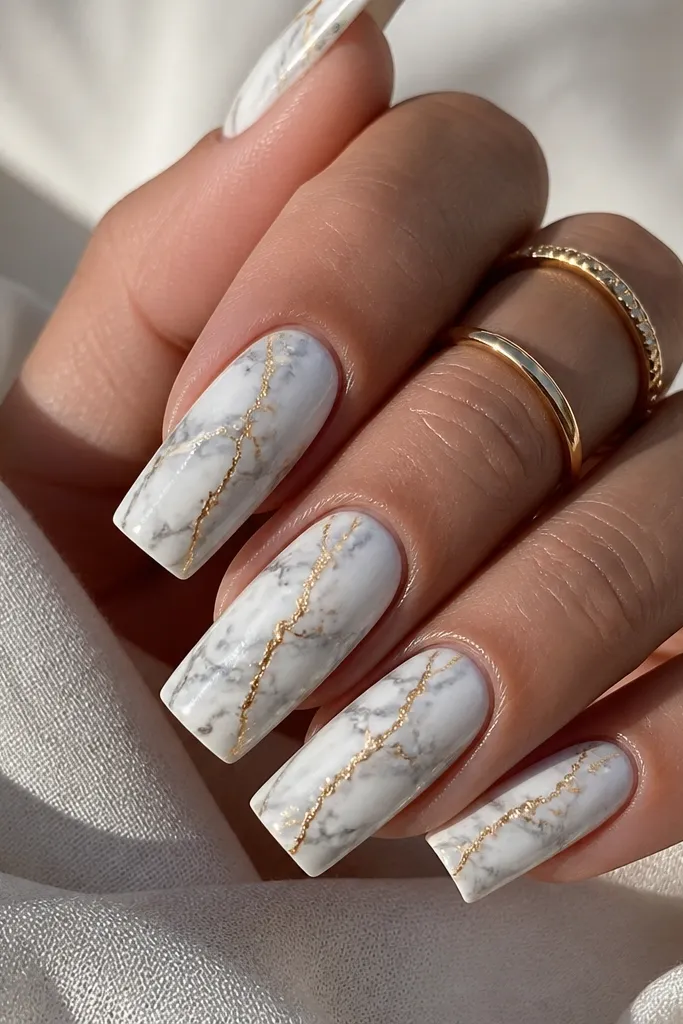
Marble plus crackle makes the set look like real stone with jewelry detail. The key is that the marble base is creamy and opaque so it doesn’t turn translucent — you want veins to look like depth, not smudges. Gold crackle lines add movement and keep the design from looking flat, because the texture catches light differently than smooth chrome. This style flatters hands with longer fingers because the diagonal veins guide the eye across the nail length. If your nails are shorter, keep the design smaller and centered so it doesn’t crowd the sidewalls.
Start by sculpting long square or soft squoval nails with an opaque creamy white base. Then add marble veining using a thin striping brush and a diluted gray-white gel or acrylic paint, pulling lines diagonally with light pressure. After curing, paint gold crackle lines over the marble — use a small liner brush and keep the crackle thin and varied, not uniform. Seal with two glossy top-coat layers, and wipe the surface clean between coats so the crackle stays crisp. Finish by lightly buffing the top coat only; don’t sand the marble lines.
Editor's noteDo one or two nails with stronger gold crackle and keep the others lighter — the contrast looks intentional in photos.
Skip thisAvoid thick gold lines. Chunky crackle makes the marble look cheap and can lift at the edges.
4. Gold Glitter Fade French on Milky White
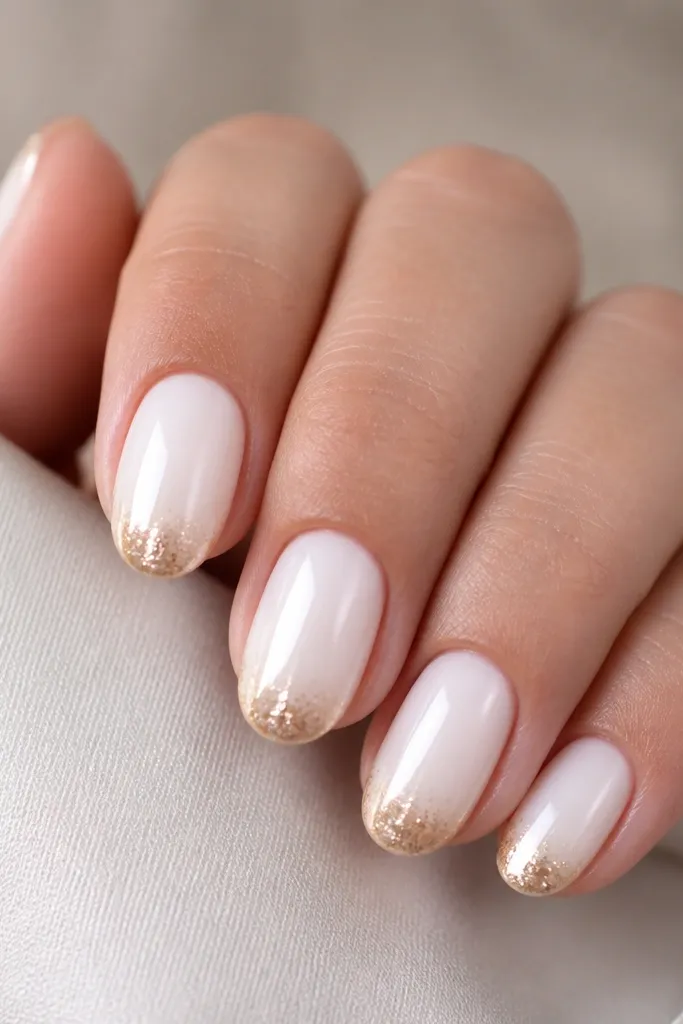
This set looks like a salon French but with gold that actually blends. The milky white base keeps the gradient clean, and the glitter fade hides tiny filing imperfections because glitter breaks up light. I love it for events because it looks sparkly without needing heavy gold foil placement. It also flatters almost everyone because the French shape follows your nail curve — it makes fingers look longer when you keep the glitter line thin at the edges. If you want something that grows out well, this one wins because the main sparkle is at the tip.
Start with milky white acrylic laid smooth and opaque across the entire nail. File to a short oval or almond, then carve a subtle smile line at the tip so the French arc looks natural. Use a gold glitter acrylic or glitter gel and build it from the center outward, keeping the sides lighter. Aim for a gradient height of about 2-3 mm — not a full thick cap. Seal with a glossy top coat that is slightly thicker on the tip so the glitter surface feels smooth when you run your finger over it.
Editor's notePress the glitter into the wet gel and then drag the brush lightly to soften the fade edge.
Skip thisDon’t paint glitter right up to the sidewalls. Leave a clean 0.5 mm gap to prevent lifting.
5. Satin White Nails with 3D Gold Bead Cuticle Dots
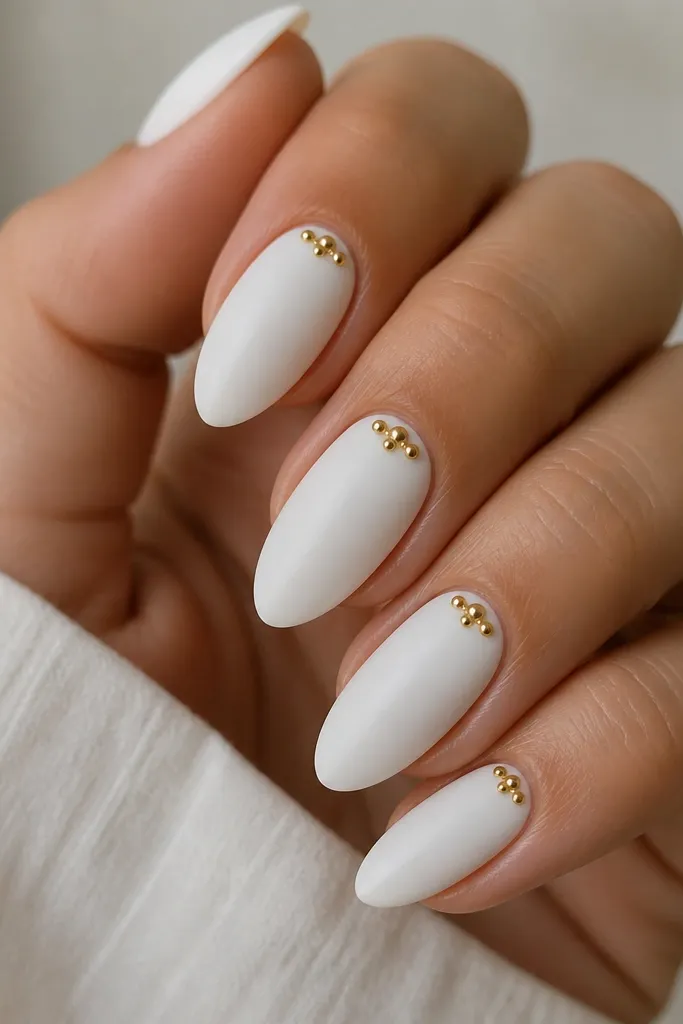
Matte-satin white makes gold beads look like actual charms. The satin finish is a big reason this set looks upscale in person, because it kills the harsh glare that cheap chrome can create. The bead dots sit at the cuticle, which draws attention upward and makes the nail bed look fuller. I like this for medium lengths because the beads are visible without snagging, and it looks especially good on warm undertones since gold and cream-toned white match naturally. It’s also a good choice if you want something glam but not covered in foil.
Start by building satin white acrylic or a satin-finish gel over a smooth opaque base. File to medium almond with a gentle apex — don’t over-thin the center. Apply small gold bead accents by using gel as adhesive and placing 3-5 tiny 3D gold spheres near the cuticle, spacing them evenly but slightly off-center per nail for a natural look. Cap each bead with a thin layer of clear acrylic so they don’t pop off. Finish with satin top coat on the white areas, but keep the beads glossy so they reflect light.
If your cuticles get dry, moisturize before the appointment — matte white shows flaking around the edges fast.
Don’t use beads that are too large. Big beads catch on hair and clothes and you’ll feel them all day.
6. White French Tips with Thin Gold Outline (Ultra Clean)
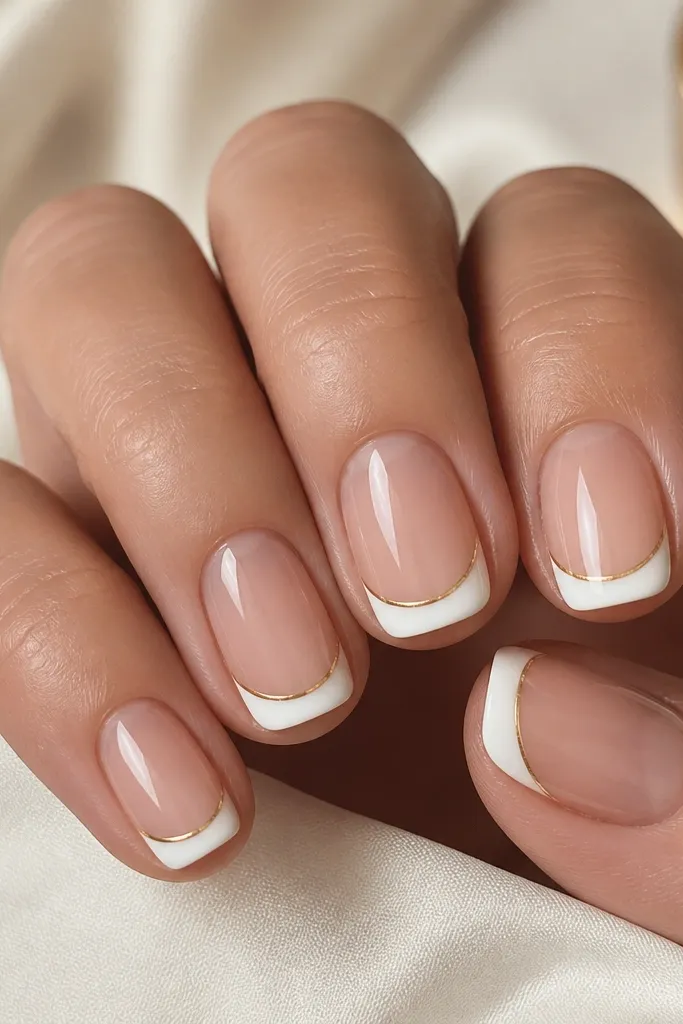
This look is for when you want gold to look like jewelry trim, not confetti. The white French is bold and defined, and the thin gold outline makes the tip look sharper without adding bulk. It flatters short nails because the outline makes the free edge look intentional and straight — you get a cleaner hand shape. On fair skin it reads classic and bright; on deeper skin it contrasts hard in a good way. I’ve worn this for work events where glitter would feel too loud, and it still gets compliments.
Start with a nude-beige base or clear nude layer, then build the white French tip in opaque acrylic. Shape to a short square and keep the smile line consistent across nails. Outline the top edge of the French with a thin striping gel in gold, using a liner brush and steady pressure. Cure fully, then add a glossy top coat that covers the outline without flooding it. Clean up the sides with a small brush so the gold line stays razor-thin.
Editor's noteUse a striping brush with a sharp point. If the brush is frayed, the gold outline turns wobbly.
Skip thisDon’t thicken the gold outline. A chunky border makes it look like costume nail art.
7. White Ombré Base with Gold Flake Side Panels
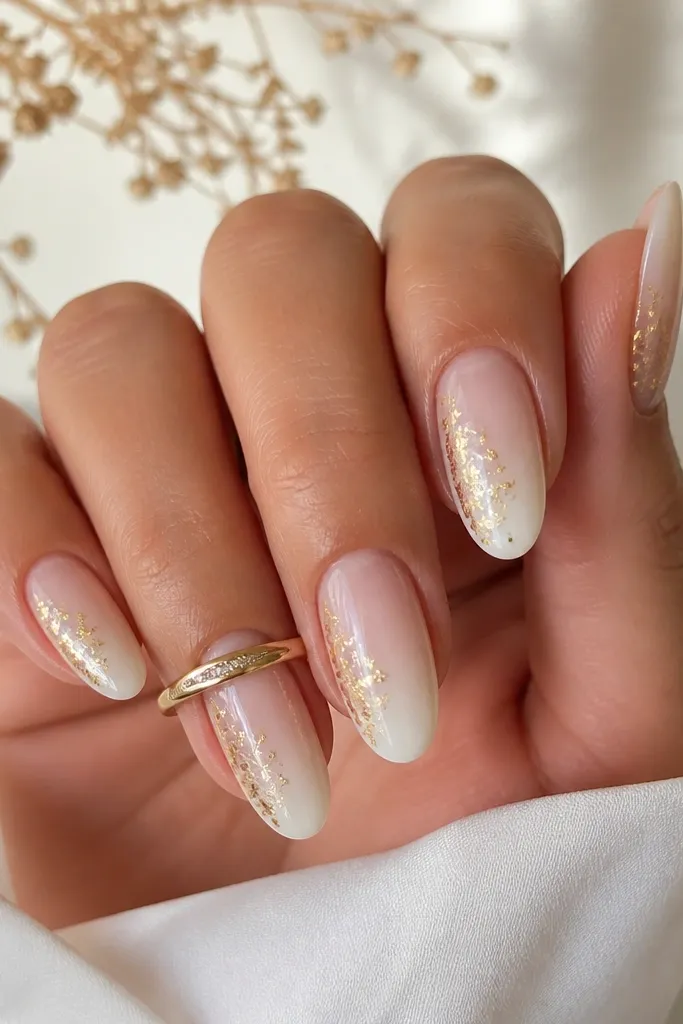
This is the “grown-out friendly” gold and white set. The ombré base means you don’t get a hard line when your nails grow, and the gold flake side panels add sparkle without covering the entire free edge. I like it for medium lengths because the side panels elongate the nail bed and make fingers look slimmer. It also works well if you have ridges, because the ombré transition softens the visual texture. For skin tones, it’s forgiving across the board because the white is the lead color and the gold is placed like a highlight.
Start by prepping nails and applying a semi-sheer white ombré base, keeping the cuticle area slightly lighter. Build up to full opacity at the tip over a gentle almond shape. Press small gold flakes onto one side panel per nail, leaving the other side mostly white for balance. Keep the flakes away from the sidewall edge so they don’t lift when you bump your nails. Seal with gloss top coat in two layers, making sure the second layer smooths over the flake edges.
Editor's notePlace the side panel slightly higher on two accent nails. It makes the set look designed, not accidental.
Skip thisAvoid full coverage gold flakes. It turns into a heavy look that chips faster at the edges.
8. Pearl White "Liquid" Chrome with Gold Drip Accent
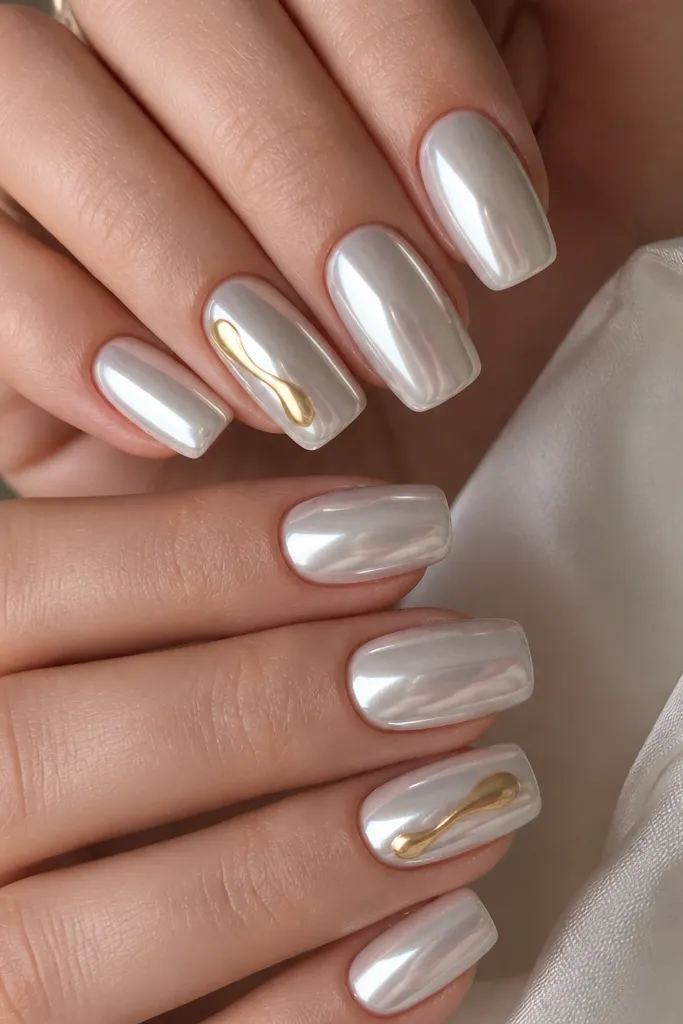
This one is pure glam because the pearl white is reflective like chrome but still reads soft. The liquid effect makes the white look expensive, and the gold drip adds drama without covering the entire nail. It’s flattering on longer lengths because the drip guides the eye down and makes the nail look slimmer. If you have fair to medium skin, the pearl chrome looks like jewelry; on deeper skin, it looks like high-contrast polish that still feels classy. I wear this for nights out because it photographs like a filter.
Start with an opaque pearl-white base and file to long squoval so the surface is smooth. Apply pearl chrome powder or chrome gel over the white base in a thin, even coat so you get that liquid shine, then cure properly. Add a gold drip on 1-2 nails using a thick gel or acrylic mix, pulling it downward from the center with a small brush. Keep the drip thickness narrow at the top and slightly wider at the bottom. Seal with a glossy top coat that doesn’t dull chrome — use a top coat labeled chrome-safe if you can.
Editor's noteCure in shorter bursts and check the gel — over-cure can turn the drip grainy.
Skip thisDon’t buff the chrome surface hard before top coat. You’ll lose the smooth “liquid” look.
9. White Negative Space with Gold Bar Crosses
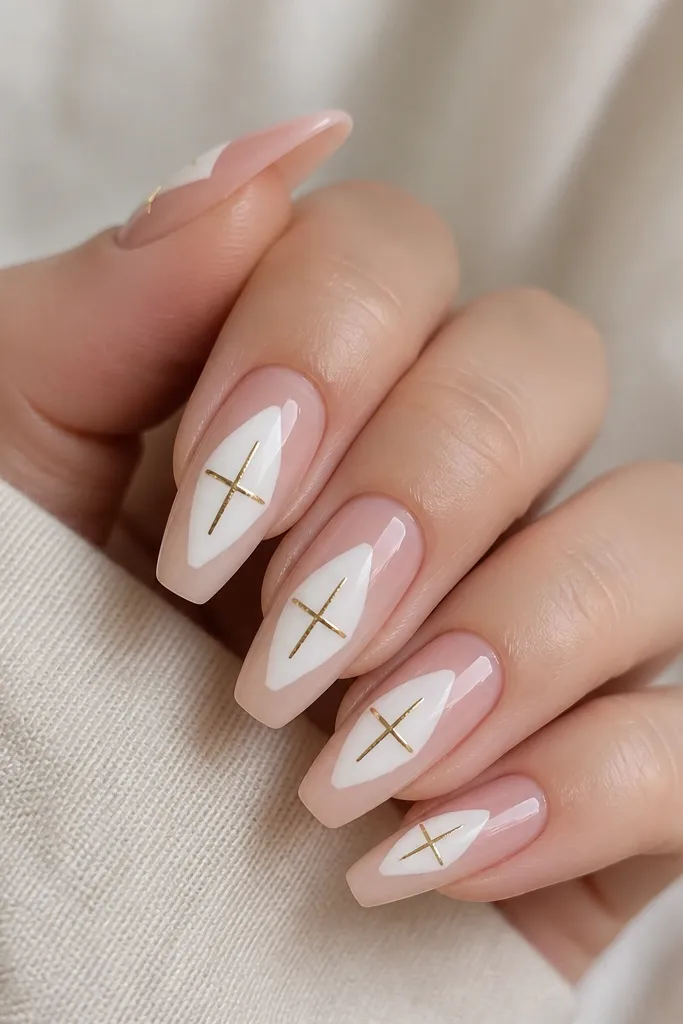
Negative space makes this look modern and cleaner than full coverage art. The translucent nude base keeps it light and airy, while the white geometric blocks give structure. Gold bar crosses add a graphic accent that reads neat, not busy, because the gold pieces are thin and controlled. This flatters hands with shorter nail beds because the nude area makes the nails look longer. I like it for everyday wear because it doesn’t feel costume-y, and it still looks intentional when you’re in daylight.
Start with a translucent nude builder or sheer acrylic so the base stays clear. File to medium coffin and keep the surface smooth. Add white geometric blocks using a gel liner or acrylic paint — make the shapes crisp with straight edges and leave gaps of nude around them. Place gold bar crosses over the white shapes with thin striping gel, keeping each cross centered and the bars equal width. Seal with glossy top coat, and cap the edges of the gold so it stays snag-free.
Use striping gel for the gold bars. Paint can spread and ruin the straight lines.
Avoid thick white blocks. If the white is too tall, the design looks bulky and knocks the negative space out.
10. Gold Chrome Speckle Over White Marble Base
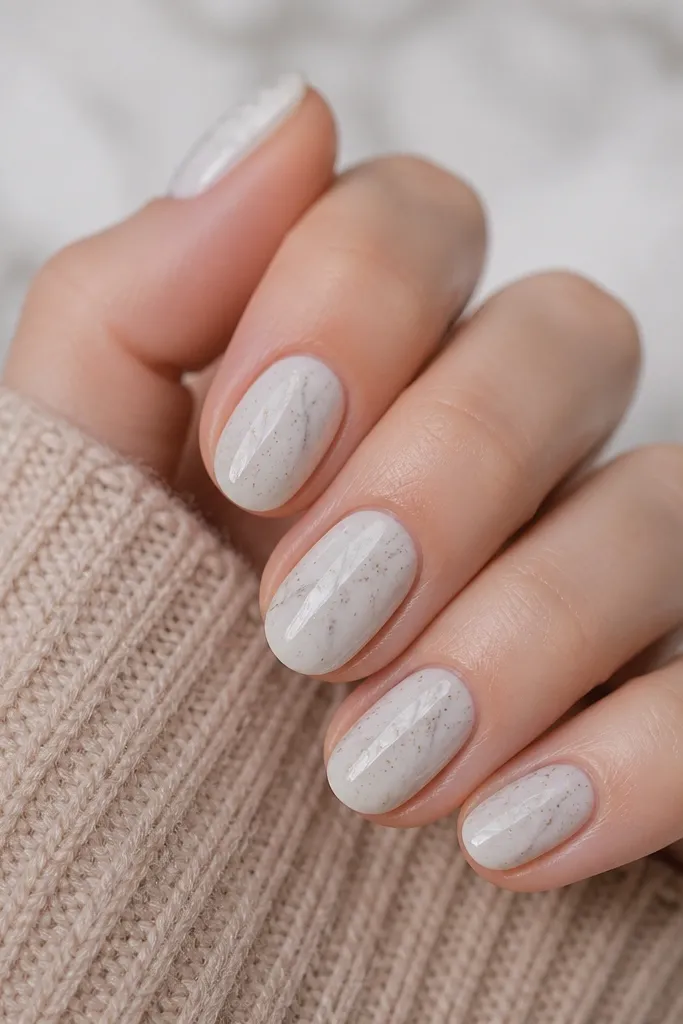
This set is for people who want sparkle but hate the gritty look of chunky glitter. The gold chrome speckles sit on top of the marble base, so you get movement when your hand moves — it flashes like jewelry dust. Because the speckles are small, the set looks refined even on short nails. It flatters most skin tones because the white marble has depth and the gold is scattered, not plated in one heavy area. I’ve worn this for weddings and it still looks fresh after a week of wear because the speckle pattern hides minor growth lines.
Start with an opaque creamy white base and add soft marble veining using a light gray-white mix. File to short almond and keep the surface smooth so the speckles sit evenly. Apply gold chrome powder in a controlled scatter — tap a tiny amount with a speckling brush or stiff brush, and stop while it still looks slightly sparse. Seal with a glossy top coat in two thin layers; thick top coat can mute chrome speckle shine. Clean the edges carefully so speckles don’t migrate to the sidewalls.
Editor's notePractice on one nail first. Chrome speckle is easier to build than to remove.
Skip thisDon’t over-saturate the speckles. Too many dots make it look like dirt instead of glam.