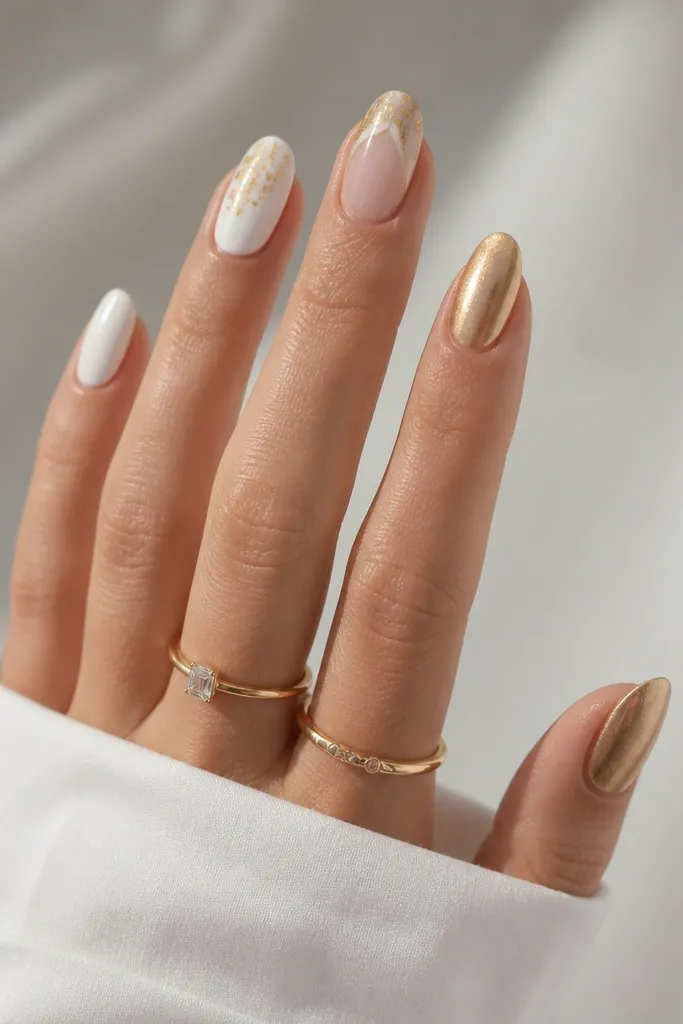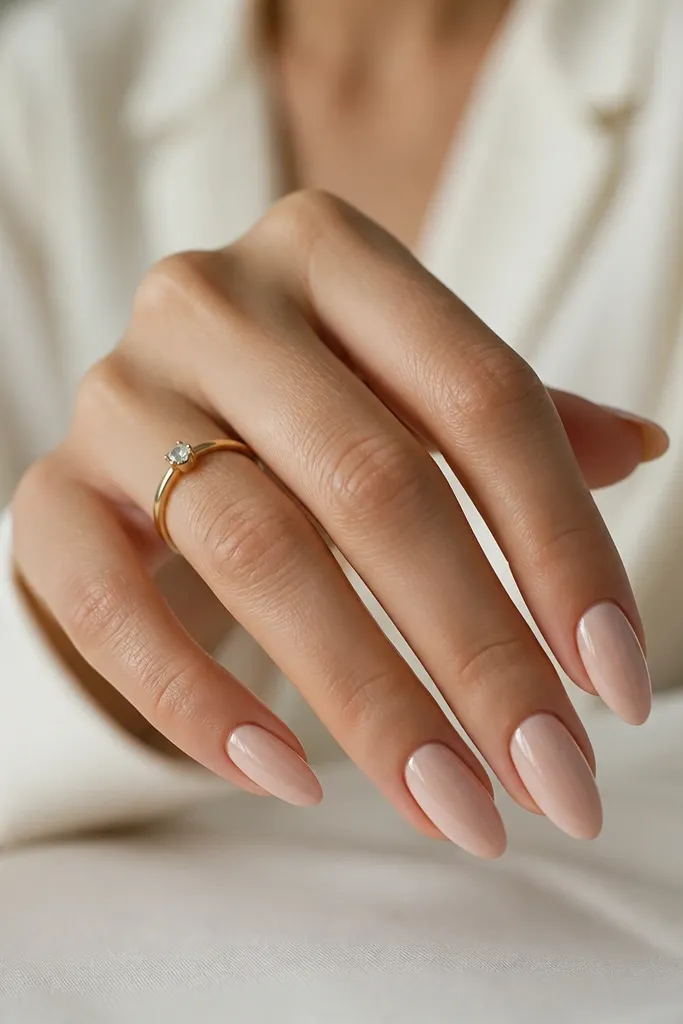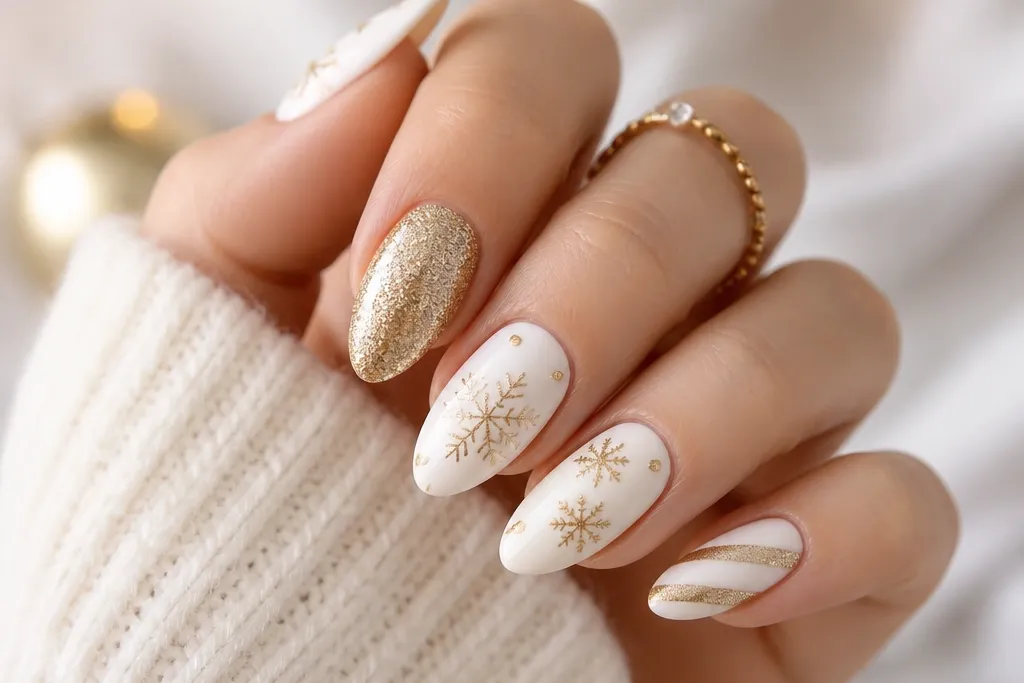
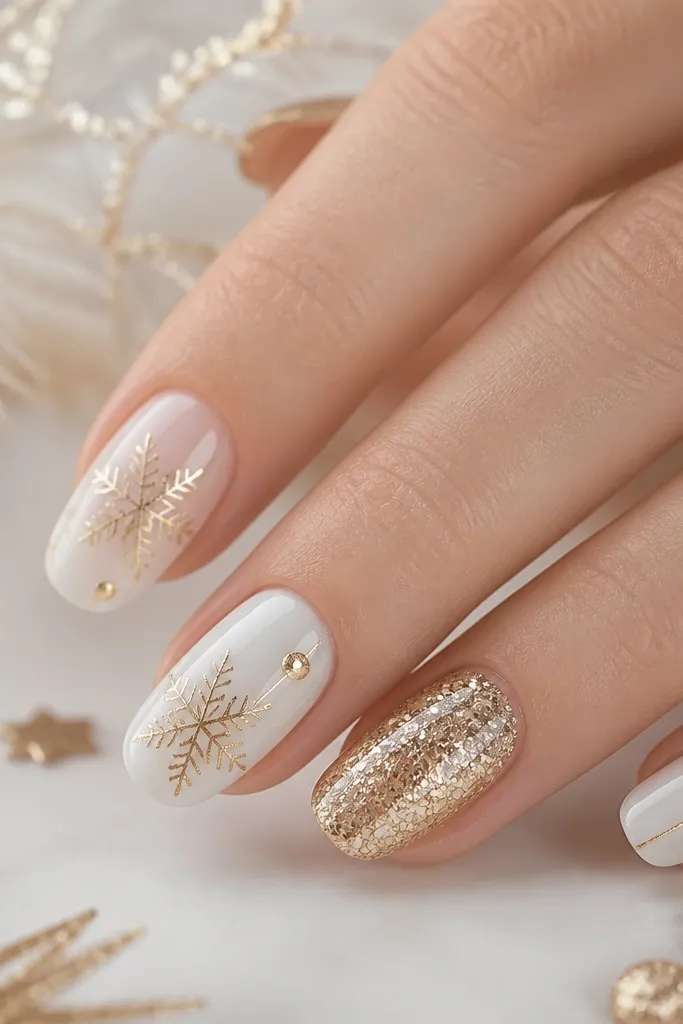
1. Crisp French Tip with Wire-Thin Gold Lines
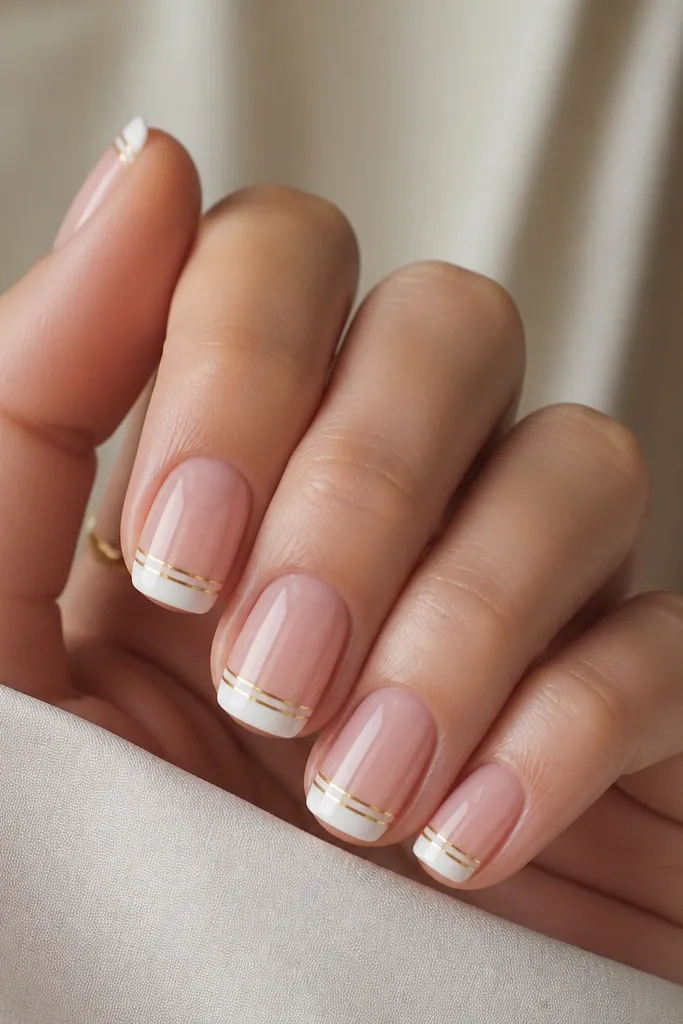
I love this set when I want Christmas nails that still look like “clean manicure” in the office. The creamy white French tip reads bright in cold weather light, while the wire-thin gold lines add a jewelry feel without filling the whole nail. This flatters most skin tones because the nude-pink base keeps it warm and not stark. If your nails are short, the thin lines make your nail bed look longer — the gold stays tight to the tip. It’s modern because the design stays structured and leaves plenty of breathing room near the cuticle.
Start by prepping and shaping to soft squoval, then buff the surface lightly so gel adheres. Apply a nude-pink base and cure, then paint a smooth French tip in opaque creamy white, curing again. With a fine striping brush (or a 00 liner brush), place two gold lines on top of the white, leaving a tiny 1-2 mm gap from the sidewalls. Finish with glossy top coat, making sure you cap the free edge so the thin lines don’t lift.
If your gold line keeps bleeding, let the white cure fully and wipe tacky residue before adding gold.
Don’t make the gold lines thick — chunky lines on a French tip look heavy and cheap.
2. White Marble Veins with Gold Leaf Accent
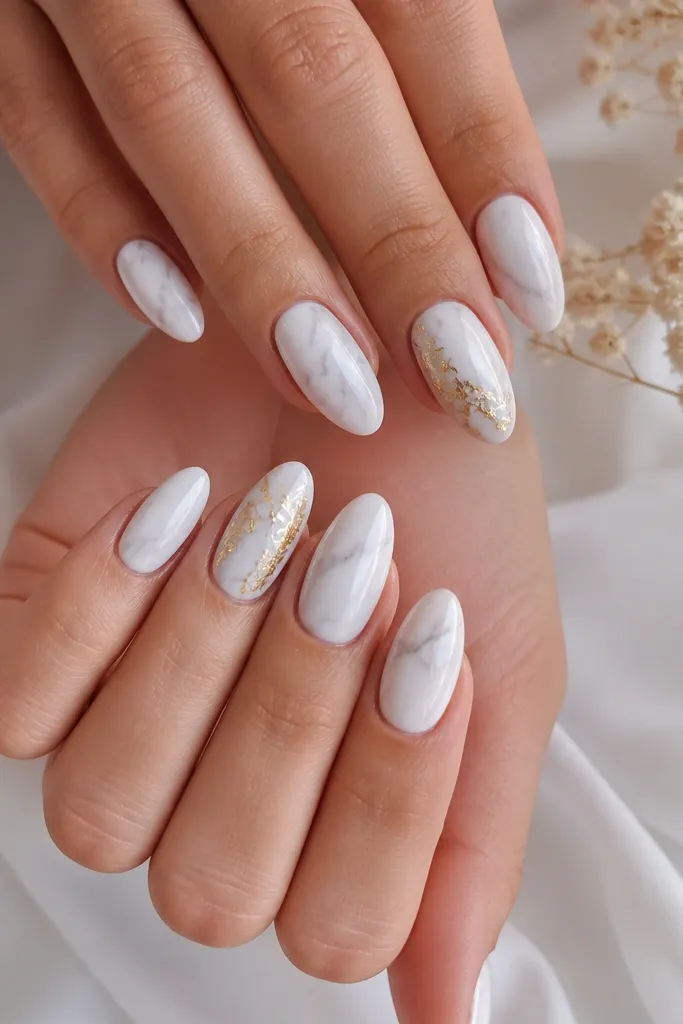
Marble nails look modern because they feel like snowdrifts caught in light, not cartoon holiday art. The milky white base gives that icy look, while the gold leaf adds warmth and texture that catches in flash photos. This works especially well on medium almond and oval shapes because the swirls follow the curve of the nail. On fair skin, the white reads bright and fresh; on deeper skin tones, the gold leaf keeps it festive without turning the nails dull. I use marble when I want the set to look different from the usual snowflakes.
Begin with a milky white opaque base and cure. Use a thin detail brush with a diluted grey-white or cool taupe gel to draw 2-3 wispy veins per nail, then lightly drag the edges with a clean brush tip so it looks smoky. Press small pieces of gold leaf onto one accent nail per hand, then seal immediately with a gel top coat. Cure thoroughly and finish with a second top coat for a smooth glassy surface.
Gold leaf sticks best when the surface is slightly tacky — don’t add it to fully cured, dry gel.
Avoid heavy glitter or thick gold paste over marble — it hides the veining and kills the modern feel.
3. Negative Space Snowflake with Gold Outline
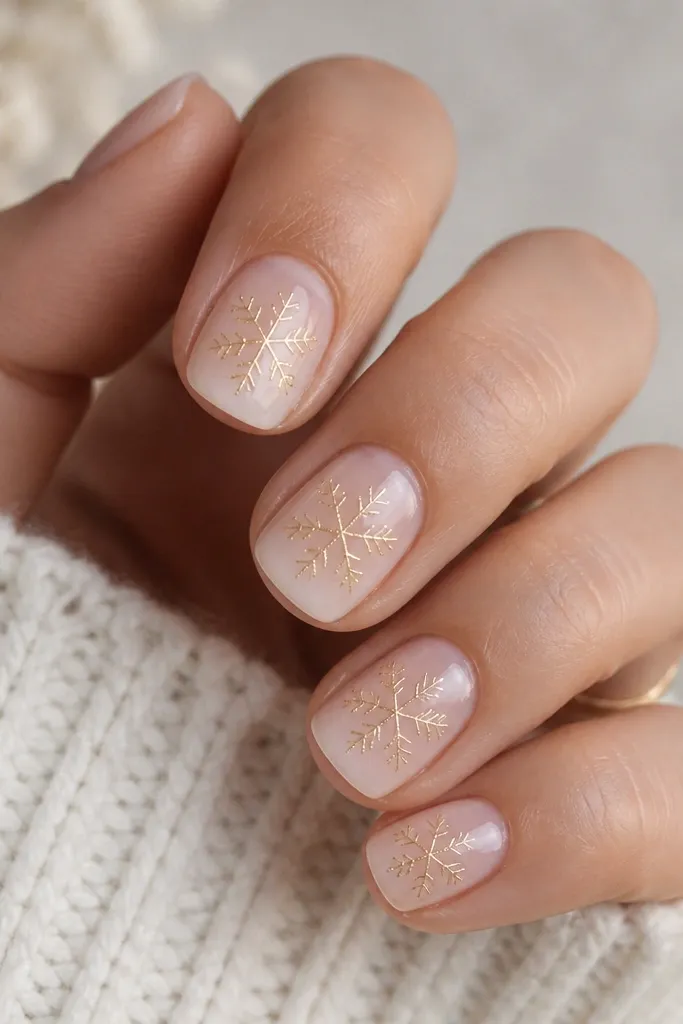
This is my go-to when I want Christmas nails that look tasteful on short nails. The negative space keeps the design airy, and the gold outline feels elegant instead of childish. The nude-pink base makes it flattering for everyone because it blends with your natural nail bed. If you have small nails or a narrow nail shape, this works because the snowflake sits in the middle without expanding to the sides. It also photographs well because the gold lines stay sharp under bright indoor lighting.
Apply a sheer nude base and cure, then add a very light white wash only at the top edge of each nail if you want extra winter contrast. Use a dotting tool to place small points for the snowflake, then connect them with a fine liner in gold gel. Add a second pass to thicken the lines slightly so they don’t look translucent. Top coat over everything, focusing on smoothing the gold edges so they don’t catch on fabric.
Use a stencil snowflake guide under your nail or on a nail mat — it helps keep symmetry without redoing the whole nail.
Don’t fill the snowflake with white paint — a filled snowflake looks bulky and less modern.
4. White Ombré Tips to Warm Gold Chrome
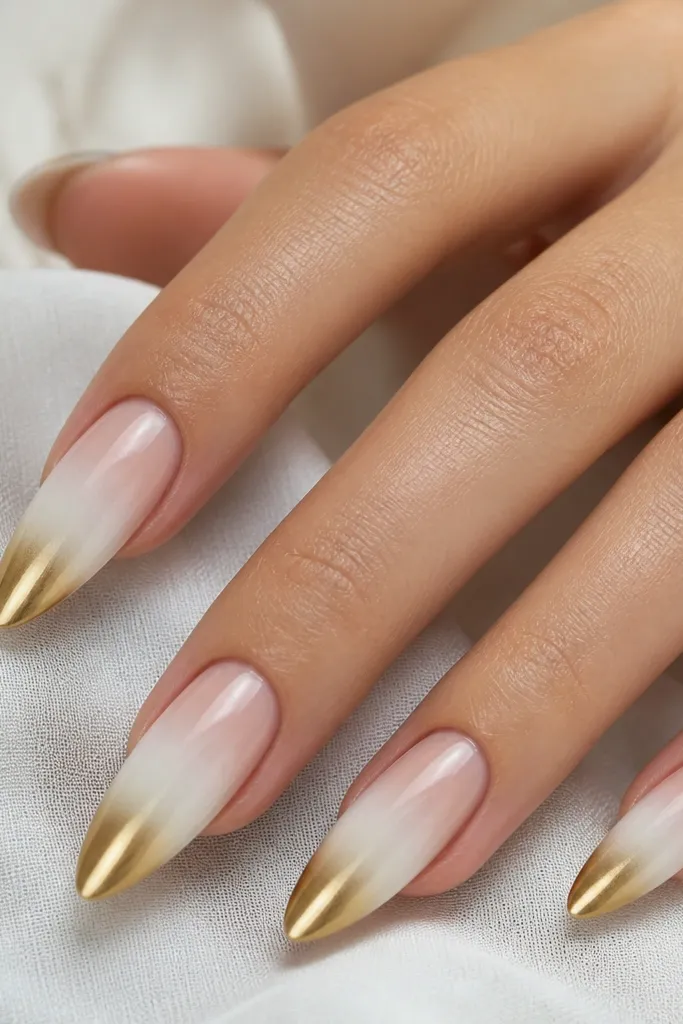
This set is holiday without looking like you glued on ornaments. The ombré from nude to creamy white keeps it clean, and the warm gold chrome at the tip looks like melted metallic foil — it’s shiny but still sleek. Long almond shapes make the gradient feel intentional and elongate your fingers. On medium to deep skin tones, the warm gold reads extra flattering because it matches undertones. I wear this when I want my nails to look like they belong in a holiday party photo.
Start with a nude base and cure, then create the ombré by sponge-painting creamy white from the mid-nail toward the tip in thin layers, curing each layer. Clean up the edge with a brush dipped in remover around the sides before the final cure. For the gold chrome, apply a gold chrome gel or tack layer only on the last third of the nail, then rub gold chrome powder in and press gently with a foam applicator. Seal with a non-wipe top coat that keeps the chrome reflective.
Do the gold last — chrome powders grab dust, and the earlier steps can leave residue.
Avoid going straight from white to gold with a harsh line — it looks like two separate polishes instead of a modern gradient.
5. Gold Foil Half-Moons with Milky White Base
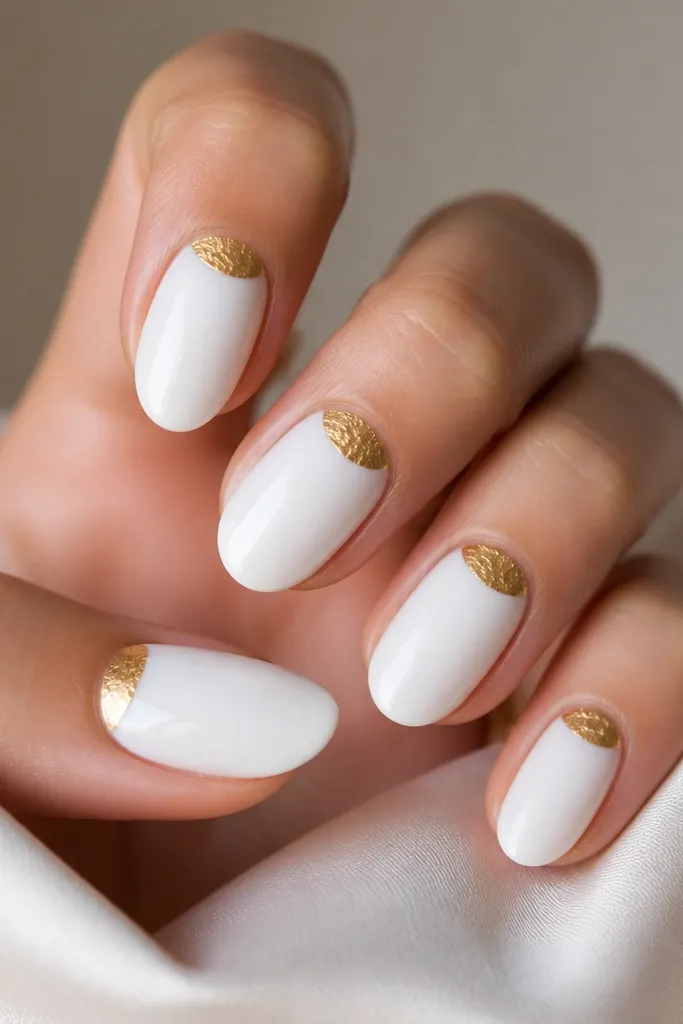
Half-moons at the cuticle look elegant because they frame your nail bed instead of covering the whole nail. A milky white base makes the gold crescent pop, and gold foil adds that holiday texture you can see from across the room. This flatters hands with shorter fingers too, because the gold shape near the cuticle visually lifts the nail area upward. If you like a set that feels “grown-up Christmas,” this is it. It also hides minor nail plate unevenness since the white base is opaque.
Prep and apply a milky white opaque gel in two thin layers, curing each. Cut small pieces of gold foil and press them at the cuticle, forming a crescent with your brush tip or a silicone tool. Lightly pat so the foil adheres, then seal with a thick gel top coat that bridges any foil edges. Cure fully and do a second top coat for a smooth, glassy finish.
Keep the crescent narrow — about 1/8 to 1/6 of the nail width — for that modern “jewelry” look.
Don’t overfill the cuticle — gold foil too wide can make nails look messy and harder to clean.
6. White Velvet Matte with Gold Outline Stars
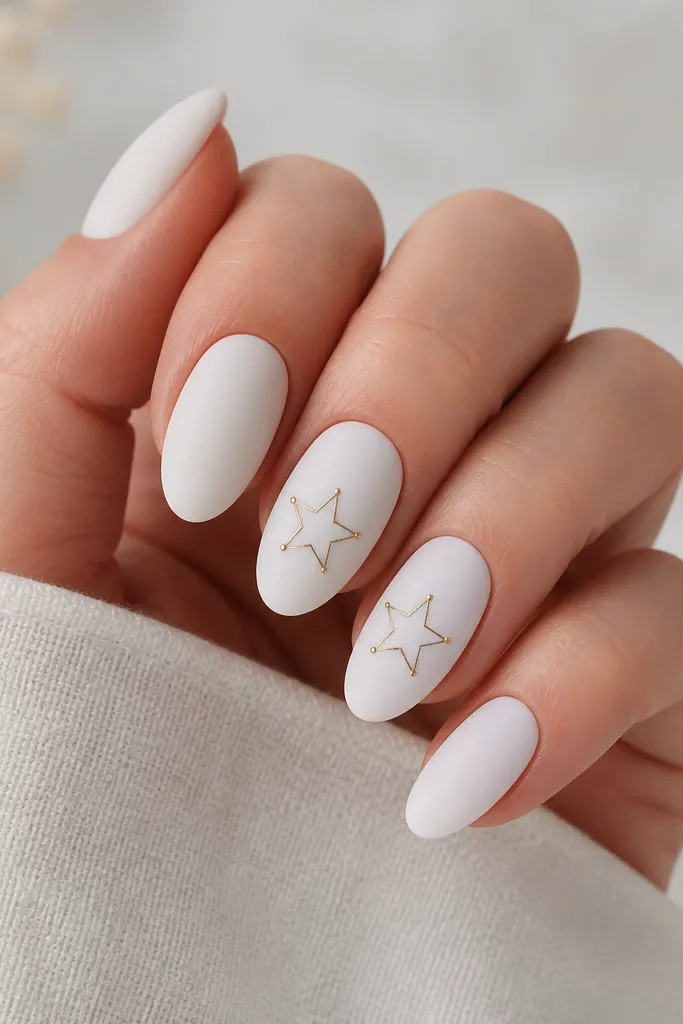
Apply a white gel base, cure, then buff lightly only if your surface is bumpy. Set the matte look using a velvet matte top coat, curing according to your product timing. With a fine liner brush, draw small five-point stars on accent nails using gold gel or gold paint, then cure. Finish with one thin glossy top coat only over the gold lines so the stars look like metallic ink on matte snow.
Matte white feels winter-soft, and it makes gold look sharper. The velvet-matte finish hides small surface imperfections and gives a cozy holiday vibe without glitter. Outlined stars keep it modern and airy, and the gold metallic catches light in a way that looks expensive. This is flattering on hands with ridges because matte can blur texture, and it works on short to medium lengths. I choose this set for daytime events and brunch because it doesn’t scream “party” but still looks festive.
Skip thisAvoid putting glitter on matte — it turns dusty and can look uneven under indoor light.
Editor's noteIf your matte top coat smears the gold, let the gold cure fully and wait 30 seconds before top coating.
7. Glitter-Free White Stripes with Micro Gold Confetti
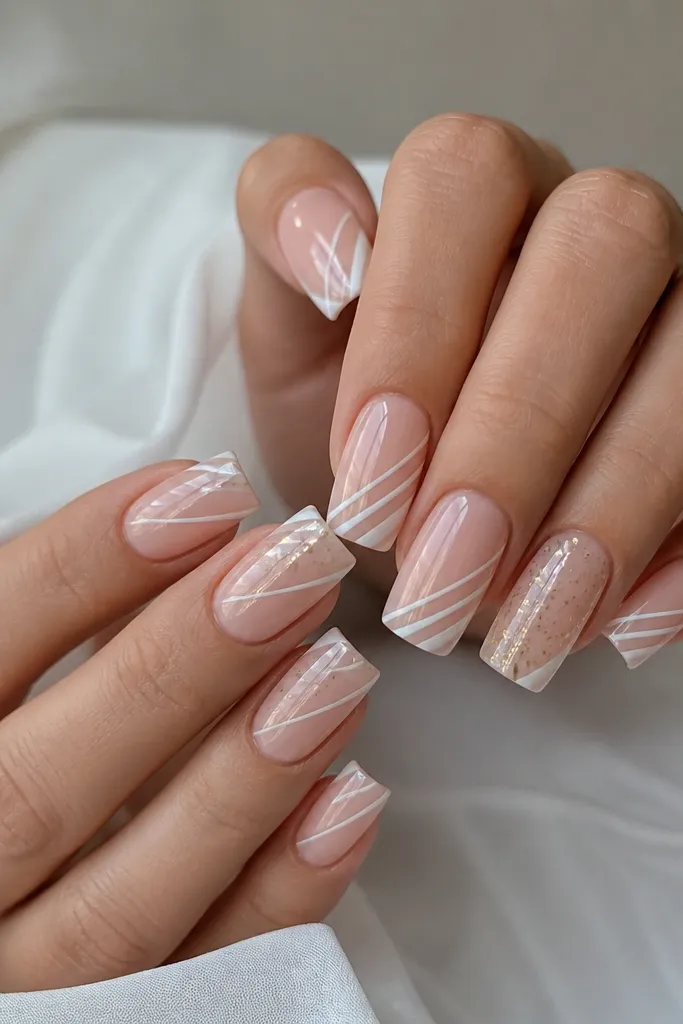
This is for when you want Christmas sparkle but hate chunky glitter. The white diagonal stripes create motion and modern structure, and micro gold confetti gives a subtle holiday twinkle. The nude base keeps it wearable and makes the stripes look intentional instead of opaque blocks. This style flatters most nail beds, especially if you like length but want a clean, not busy, look. Under warm lighting, the micro gold specks catch without looking like craft glitter.
Start with a nude base and cure. Apply white gel stripes using striping tape or a steady hand, placing stripes diagonally from mid-nail toward the sidewall, leaving negative space between them. For the confetti nail, dab micro gold flakes or fine gold pigment onto the stripe-free section using a tack layer, then lightly press so it doesn’t smear. Top coat with a medium-viscosity glossy top coat to avoid flooding the tape lines or moving the confetti.
Use striping tape for one hand first — once you see the spacing, you’ll match it perfectly on the other hand.
Don’t pack confetti thick — heavy flakes turn gritty and ruin the clean modern look.
8. White Pearl Beads on a Single Gold Band
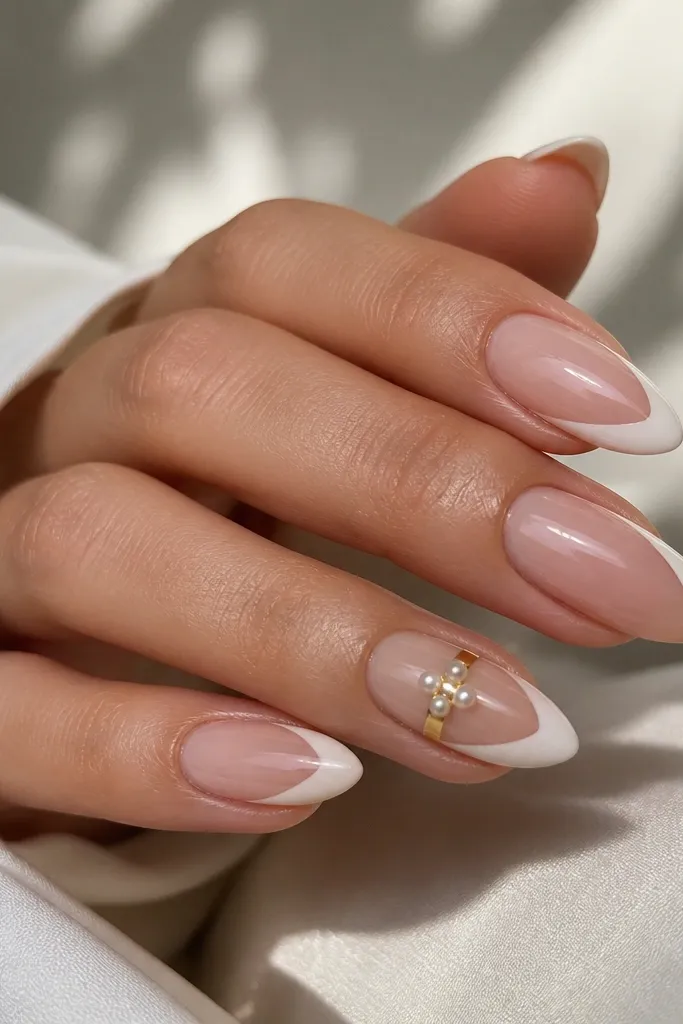
Pearls read holiday luxury without needing holiday characters. The key here is restraint: one gold band anchors the design, and the pearl beads add dimension. The creamy white beads match the base and look cohesive, while the gold band keeps the set from feeling bridal instead of Christmas. This flatters longer almond or oval nails because the horizontal band breaks up length in a flattering way. On fair skin, the pearls look crisp; on deeper skin tones, the gold band gives warm contrast that makes the nails stand out.
Apply a sheer nude base and cure, then paint creamy white accents on two nails per hand using a thin brush, keeping them close to the tip. On the accent nail, draw a horizontal gold band across the center with gold gel, keeping it straight and about 1-2 mm thick. Place three micro pearl beads on the band with gel as adhesive, then cure. Seal with top coat in two layers so the pearls feel smooth when you run your finger across the surface.
Let the first top coat sink into the edges around pearls before the second coat — that’s what prevents snagging.
Skip big pearls — oversized beads look like costume jewelry on nails.
9. Gold Chrome Half-Top with Snowy White Base
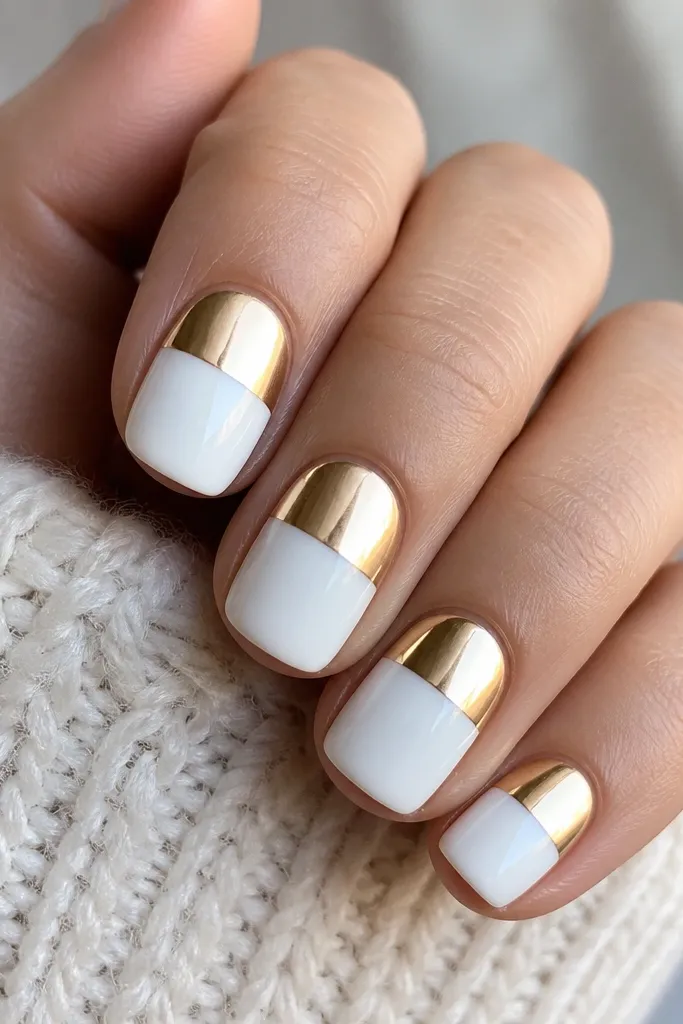
Start with a snowy opaque white gel base and cure fully. Tape a straight line across the nail about halfway up using striping tape, then apply gold chrome gel on the taped-off top area only. Rub gold chrome powder in, tap off excess, and remove the tape carefully while the gel is still controlled. Seal with a top coat that is safe for chrome and cure, then check for any gaps along the split line and touch with a thin layer of top coat.
Geometric half-and-half nails look modern because the line is clean and the color blocking is deliberate. Snowy white at the bottom keeps the Christmas signal, and gold chrome at the top adds that metallic holiday glow. This works especially well on short squoval because the split line makes nails look neat and gives a “designed” look even with minimal art. It flatters hands with thicker cuticles too since the chrome draws the eye upward. I like this when I’m rushing but still want a set that looks intentional.
Skip thisAvoid a wobbly split line — uneven edges make it look like an accident.
Editor's notePress tape down firmly at the edges so the split stays razor-straight.
10. White Candy Cane Tips with Thin Gold Twist
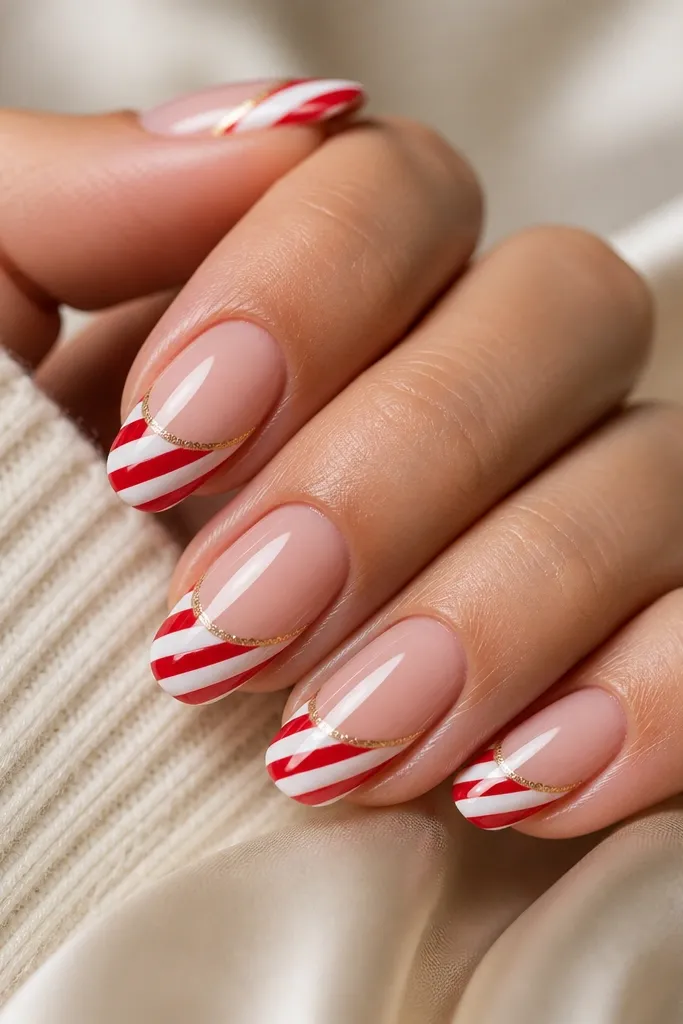
Apply a nude base and cure. Paint diagonal candy cane stripes on the tip using striping tape as a guide, then fill the stripes with opaque white and a classic red gel, curing each color. Add a thin gold twist line along one stripe using a 00 liner brush, keeping it narrow so it doesn’t compete. Finish with glossy top coat, and cap the free edge so the stripes don’t lift at the tip.
Candy cane nails can look playful, but this version stays modern because the gold twist line is thin and the base is nude. The white-and-red diagonal stripes give the holiday vibe fast, and the gold twist adds that elegant holiday jewelry feeling. Medium oval nails flatter most hands because they keep the tip shape soft. If you have shorter nails, keep the candy stripes confined to the last third of the nail. This set is great for holiday parties where you want fun without going full cartoon.
Skip thisDon’t extend the candy stripes too far toward the cuticle — it makes nails look shorter and busier.
Editor's noteUse tape for the stripe angles — your hands will thank you later when you see how clean it looks.
11. White Lace Look with Gold Corner Frame
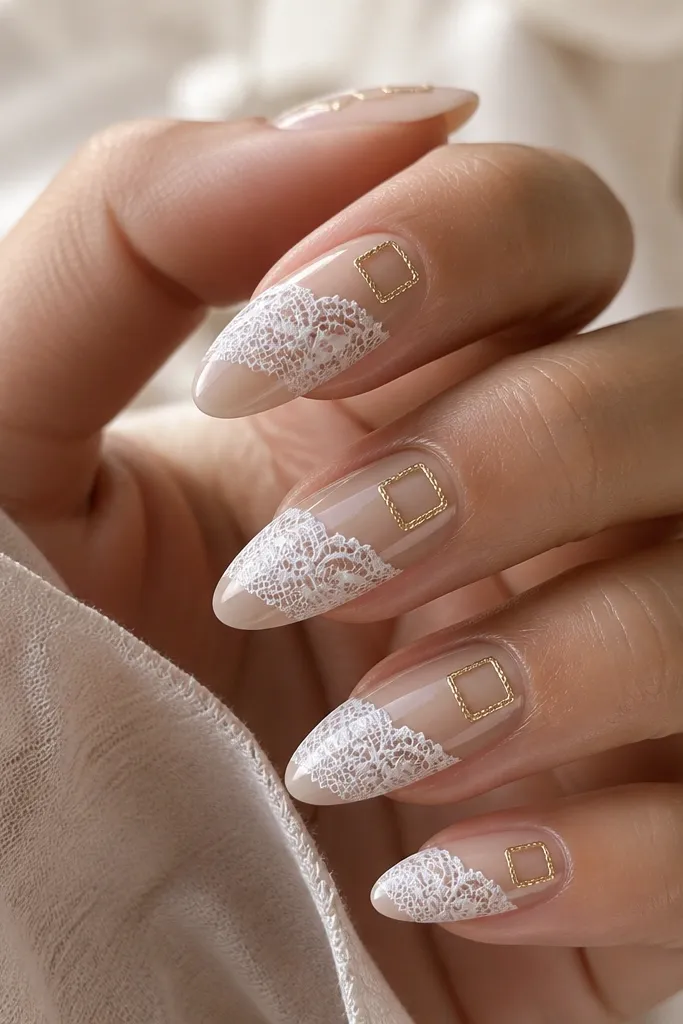
Start with a nude base and cure, then apply a thin layer of white gel as the lace background. Use a lace stamping plate or a lace decal, then press and seal so the pattern stays sharp. On each nail, add a gold corner frame near the upper side — think small L-shapes or a tiny rectangle — using gold striping gel and a fine brush. Cure and apply a glossy top coat in two layers to flatten the lace texture for a smooth feel.
Lace nails feel holiday-fancy without needing snowflakes everywhere. The white lace over nude gives a delicate, modern texture, and the gold corner frame adds a structured finish that keeps it from looking too bridal. This looks best on almond and oval because the lace pattern naturally follows the nail curve. It flatters different skin tones because the nude base ties it to your hand while the white lace stays bright. I use this when I want something that looks like it took longer than it did.
Skip thisDon’t cover the lace with thick glitter top coat — it blurs the pattern.
Editor's noteIf the lace looks fuzzy, clean your stamper with acetone and dry fully before stamping again.
12. White Snowfall Dots with Gold Drip Accent
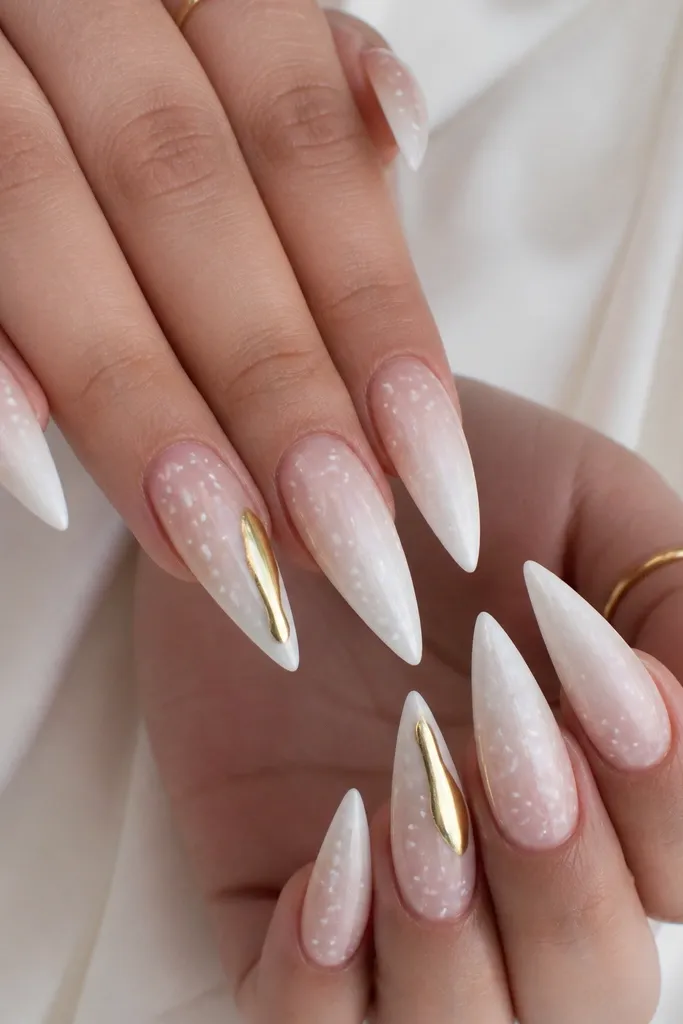
Apply a milky white base and cure, then lightly sponge the cuticle area with a thinner white layer if you want softness. Use a dotting tool to place tiny dots in clusters — vary sizes slightly so it looks like real snowfall. On one accent nail per hand, draw a gold drip with gold gel using a fine brush, starting thick at mid-nail and tapering toward the tip. Cure and seal with glossy top coat, making sure the drip edges are fully covered so it doesn’t snag.
Snowfall dots look modern because they’re scattered, not drawn as full snowflakes. A milky white base keeps everything cohesive, while the gold drip adds a fashion-forward twist. On long stiletto, the drip pulls the eye downward and makes the nail shape look sharper. This set works well for fair to deep skin tones because white is bright and gold warms the overall look. I wear this for evening events because it looks especially good under flash photography.
Skip thisAvoid drawing large gold blobs — a drip should feel intentional and narrow.
Editor's noteKeep dot spacing uneven — perfect grids look fake fast.
13. Gold Confetti French with Opaque White Base
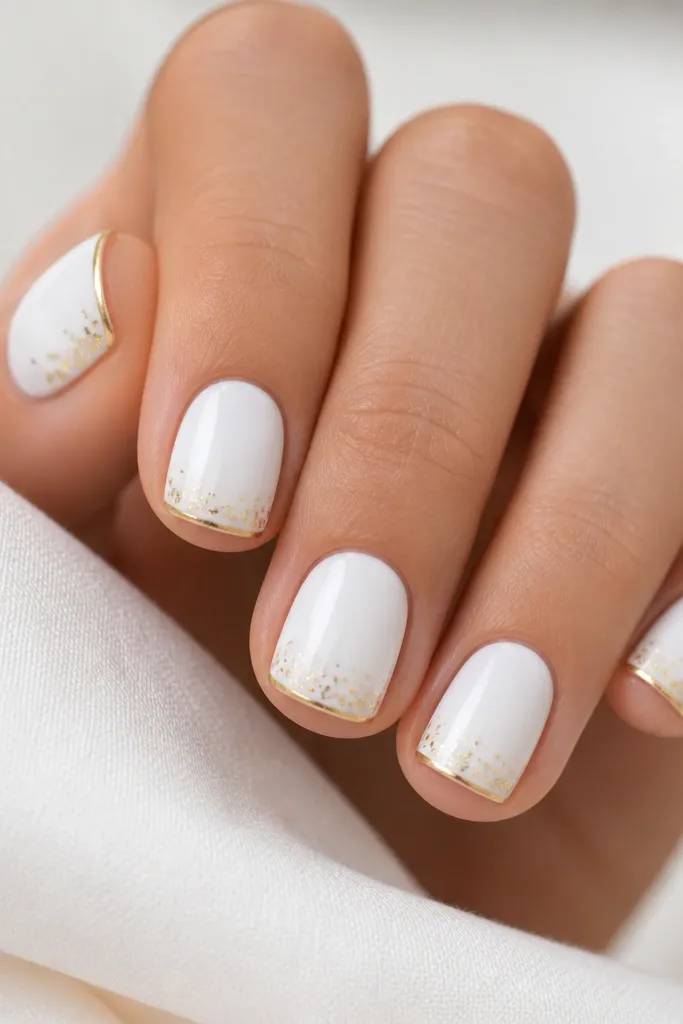
Start with two thin coats of opaque white, curing each layer until it’s fully solid. Paint a thin gold line exactly at the tip edge — about the thickness of a credit card marker line — then cure. While the gold line is slightly tacky, dab micro gold confetti above it using a small sponge or a fingertip, then tap off excess. Finish with glossy top coat, cap the free edge, and check sidewalls for stray flecks.
This is the “holiday clean” look. Because the base is fully opaque white, you get a smooth canvas and the gold confetti reads like ornaments without needing a lot of art. The gold French line anchors the design so it stays modern and not scattered. Short square nails look strong with this because the design sits right at the tip and doesn’t require long space. It flatters hands with shorter fingers because the solid white makes nails look uniformly neat. I also like it for people who hate tiny details — this one is bold and readable.
Skip thisSkip thick gold glitter top coats — they turn the confetti flat and dull.
Editor's noteIf confetti falls off, press it gently with a silicone tool before top coat.
14. White Micro-Glitter Fade with Warm Gold Chrome Tips
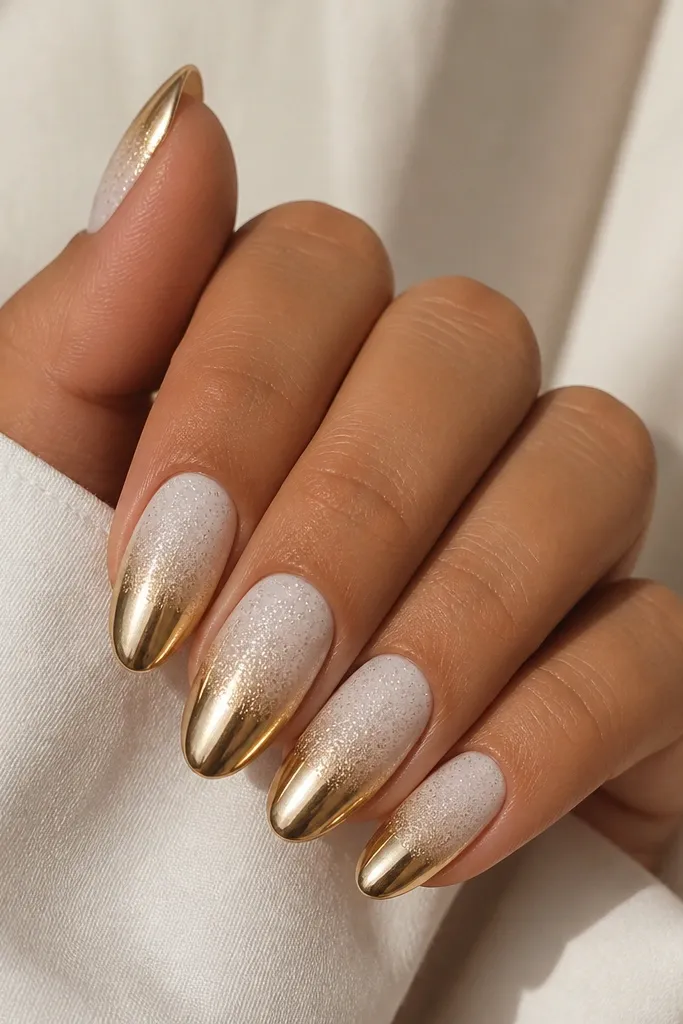
Apply a creamy white base and cure. Add a thin layer of micro-glitter gel or fine white shimmer gel from cuticle down to mid-nail, then cure and make sure it’s even with a light brush pass. Apply gold chrome gel to the last third of the nail and rub warm gold chrome powder in, then press lightly. Seal with a chrome-safe top coat, and do a second top coat only if you see any roughness from powder.
Micro-glitter fade is the middle ground between plain white and full glitter party nails. The white base stays creamy, the micro sparkles catch without looking chunky, and the warm gold chrome tips make it feel like Christmas jewelry. This is flattering on medium almond because the fade softens the transition and keeps everything smooth. On deeper skin tones, the white sparkle brightens the whole hand; on fair skin, the gold chrome keeps it warm and not icy. I like this set when you want “wow” at a glance but still want a clean manicure vibe.
Skip thisDon’t use chunky glitter — it bunches at the fade line and looks messy.
Editor's noteUse a fan brush to remove loose glitter before you cure — it prevents texture under top coat.
15. White Crystal Squares with Gold Border on Accent Nail
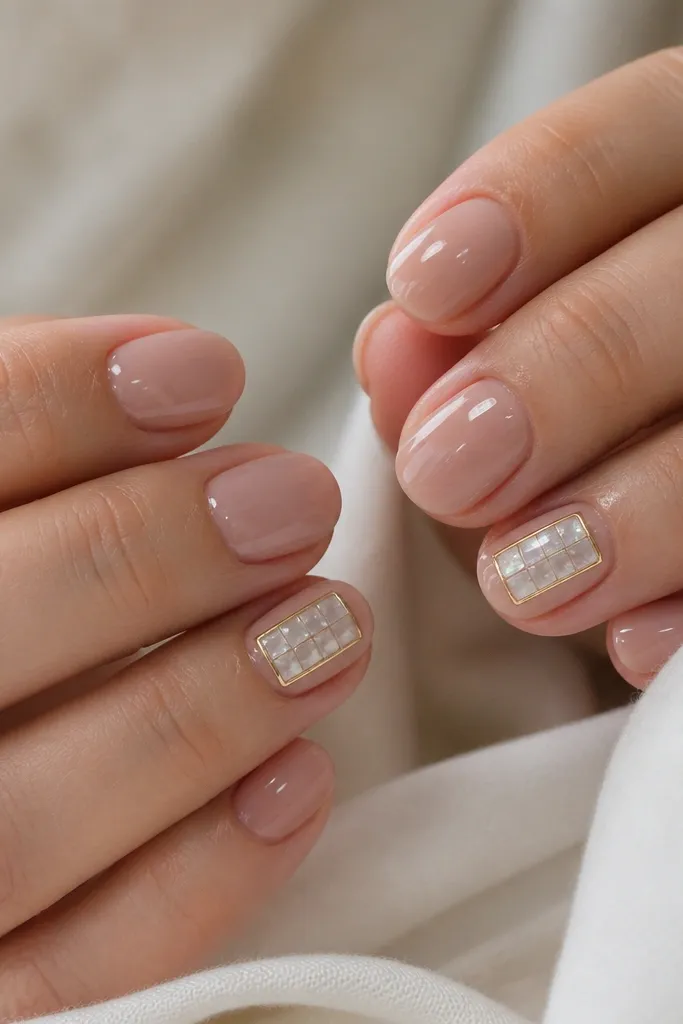
Start with a sheer nude base and cure. On each hand, pick one accent nail and outline a small rectangle area with gold gel, keeping the border thin and even. Place small square crystals or rhinestones inside the rectangle using gel adhesive, press gently so they sit flush, then cure. Cover with a thin gel layer to seal around the gems without flooding, cure again, and finish with glossy top coat over the whole nail for a smooth surface.
Crystal squares look modern when they’re organized and framed. The sheer nude base keeps the set wearable, and the white-clear crystals catch light like tiny ice cubes. The thin gold border makes it feel designed, not random sparkle. This flatters hands with shorter nails because the crystal area sits in the center rather than taking over the tip. It also photographs incredibly well because the gems reflect light in crisp points. I use this for events where you want a little drama without painting a whole nail scene.
Skip thisAvoid oversized stones — the grid looks sloppy when the pieces don’t match in scale.
Editor's noteIf stones lift, add a tiny dab of gel around the edges instead of covering the entire nail.