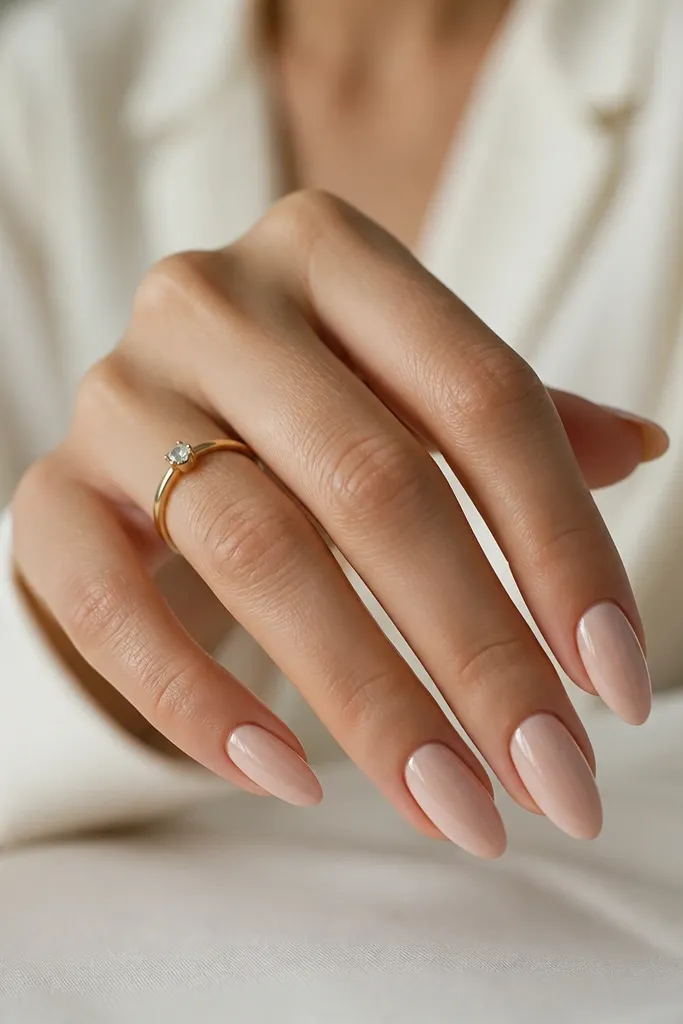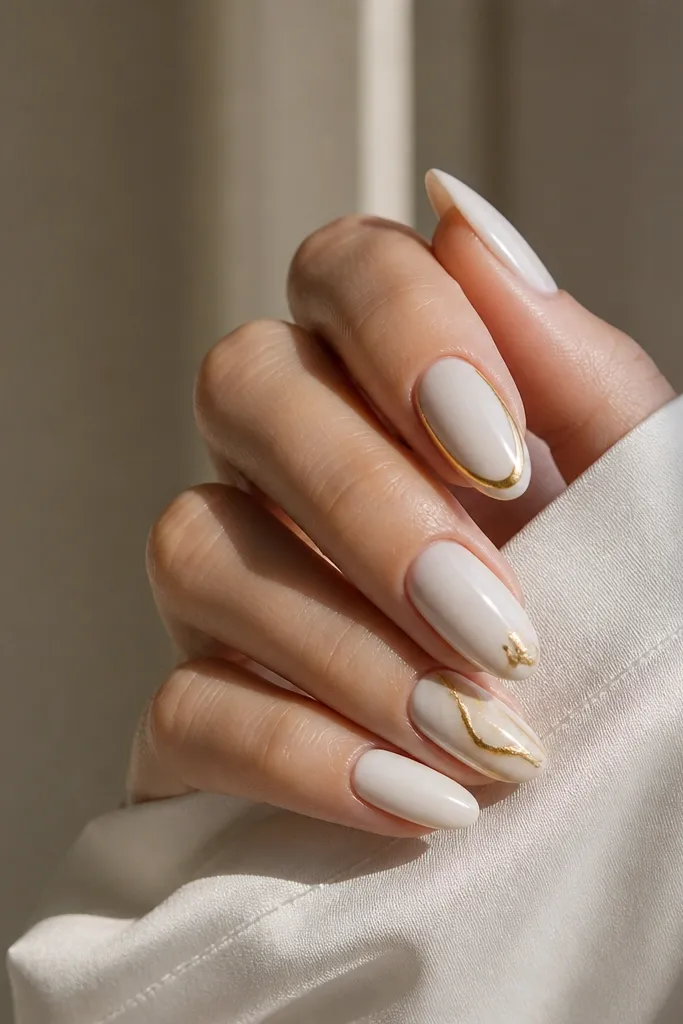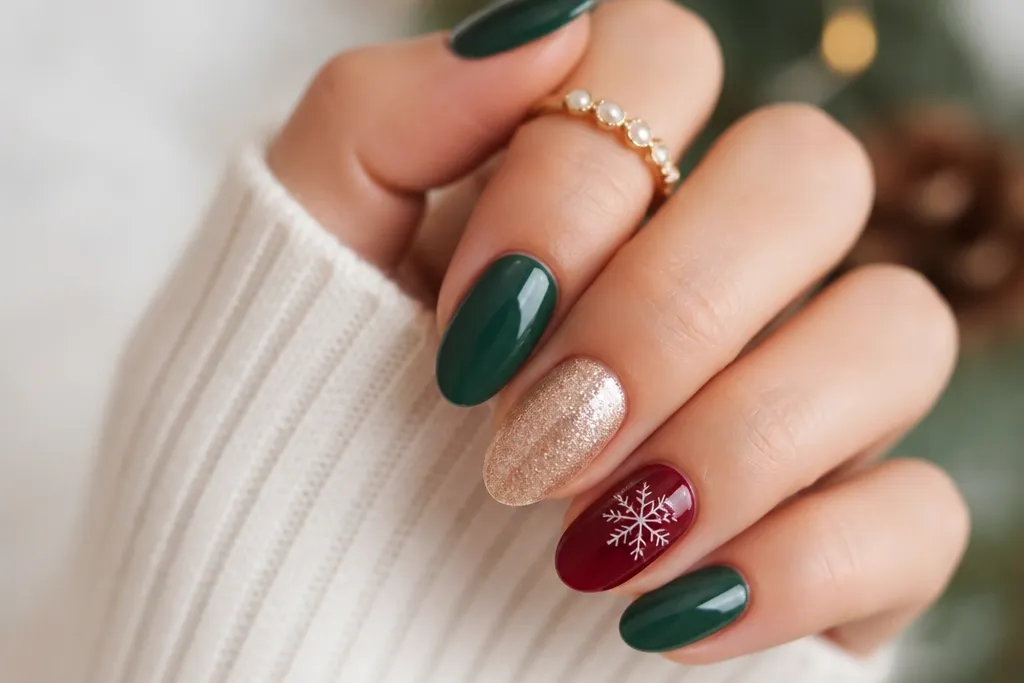
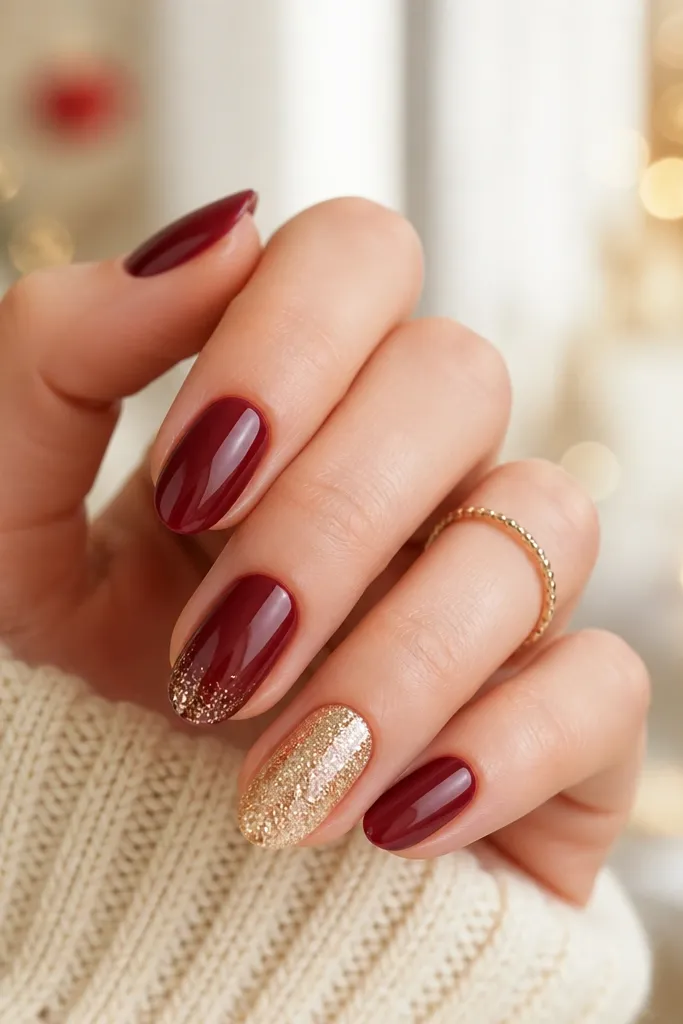
1. Cranberry French with Gold Dot Crescent
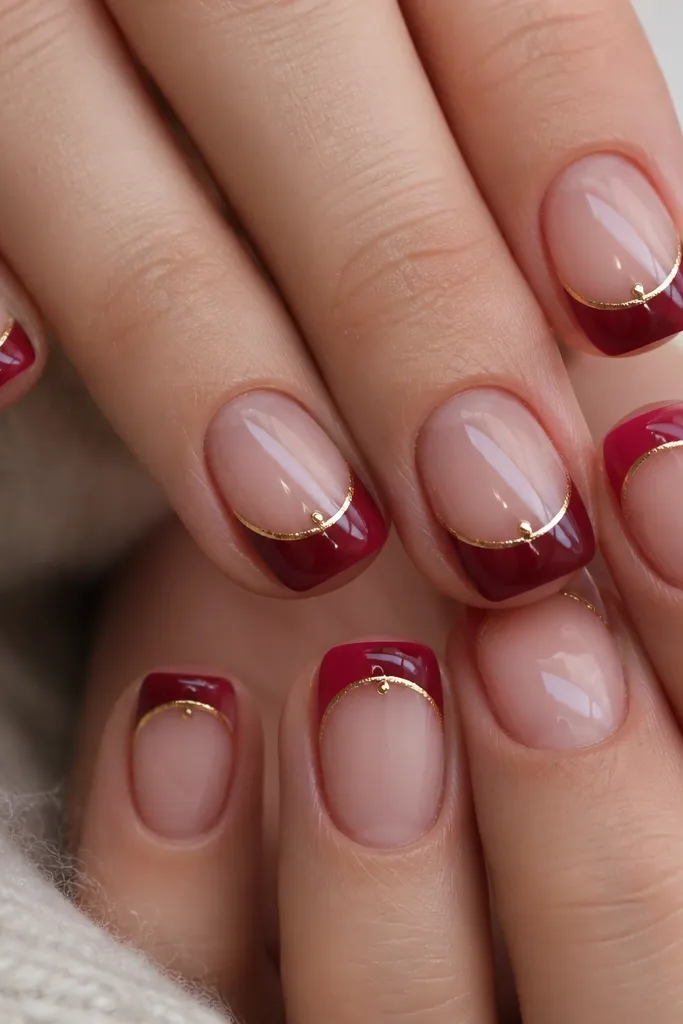
This look gives you that “holiday dinner” polish without turning into full-on glitter. The cranberry base reads classic against fair and medium skin, and it flatters warm undertones because the red isn’t too blue. The thin gold crescent under the French line makes your nails look longer by creating a visual lift near the tip. I use this when someone wants elegant Christmas nails that still look clean at work the next day. It’s also forgiving on short nails because the art sits high and doesn’t spill down the nail.
Start by prepping and pushing back cuticles, then apply a thin base coat and cure. Paint a full layer of cranberry gel, cure fully, then do a French arc at the tip using a striping brush. Before top coat, add a thin gold line slightly below the smile line — I keep it about 1 mm thick. Finish by placing one tiny gold dot in the middle of the crescent on two nails, then seal everything with a glossy top coat and cure.
If your French line wobbles, wipe the brush with gel cleaner and re-trace while the layer is still tacky.
Don’t run gold all the way to the cuticle — it makes the set look cluttered.
2. Champagne Nude with Micro Snowflake Negative Space
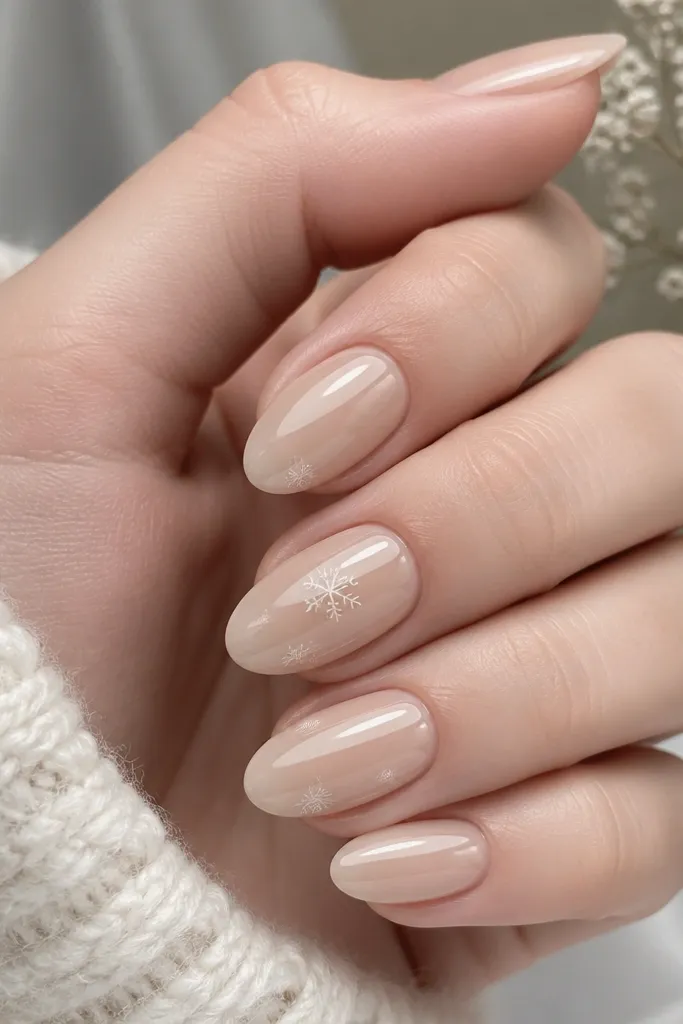
This is my go-to classy Christmas set for people who hate dark polish. Champagne nude flatters almost everyone because it sits close to skin tone but still reads winter when paired with crisp white detail. The negative space matters — it keeps the design airy and prevents the nails from looking busy. I like it on short rounds because the snowflakes stay small and centered, and on medium almonds because the pattern looks intentional. It also photographs beautifully in indoor light since the nude base doesn’t swallow the design.
Start with a champagne nude gel that matches your undertone: peachy beige for warm skin, pink-beige for cool skin. Cure that base, then use a thin liner brush to draw micro snowflakes on two or three accent nails. Leave small gaps around each snowflake so you get that floating effect. Add a dot at each arm tip if you want extra sparkle without glitter, then seal with a glossy top coat.
Use white gel that’s slightly opaque, not watery - micro snowflakes need solid coverage to stay crisp.
Skip full coverage white snowflakes — they turn cartoony on small nails.
3. Forest Green Velvet Finish with Thin Champagne Stripe
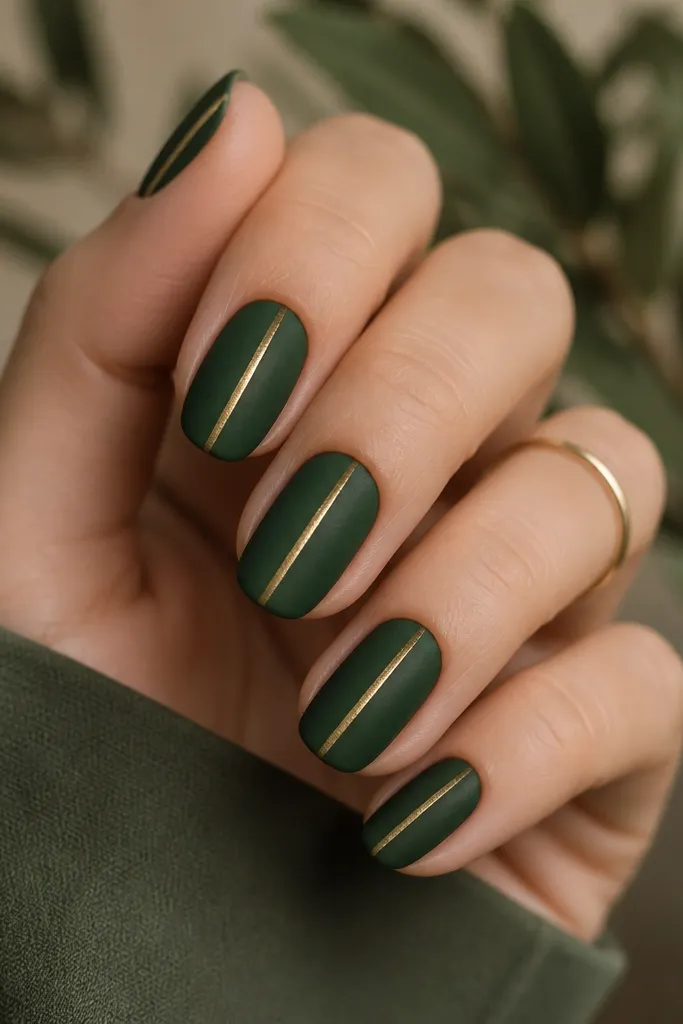
Forest green reads expensive when the finish is controlled. I love a velvet matte because it makes the color look like it has depth, especially under candlelight at holiday parties. The champagne stripe adds the classy contrast — warm metal on green looks luxe on both olive and fair skin. This set is perfect if you want holiday nails that don’t look like you tried too hard. It also hides tiny application imperfections because the velvet finish smooths out shine variation.
Editor's noteIf you’re doing this at home, practice the stripe on a nail tip first so your line width stays even.
Apply a base coat, then paint forest green gel in two thin coats to avoid streaks. Cure each coat, then switch to a velvet/matte top coat and cure according to your product instructions. With a striping brush, paint a single thin champagne stripe down the center of each nail, aiming for about a third of the nail width. Cure and then add a glossy top coat only over the stripe area if you want extra light catch.
Skip thisDon’t add glitter on top of velvet — it looks gritty instead of refined.
4. Red Velvet Ombré with Frosted Edge
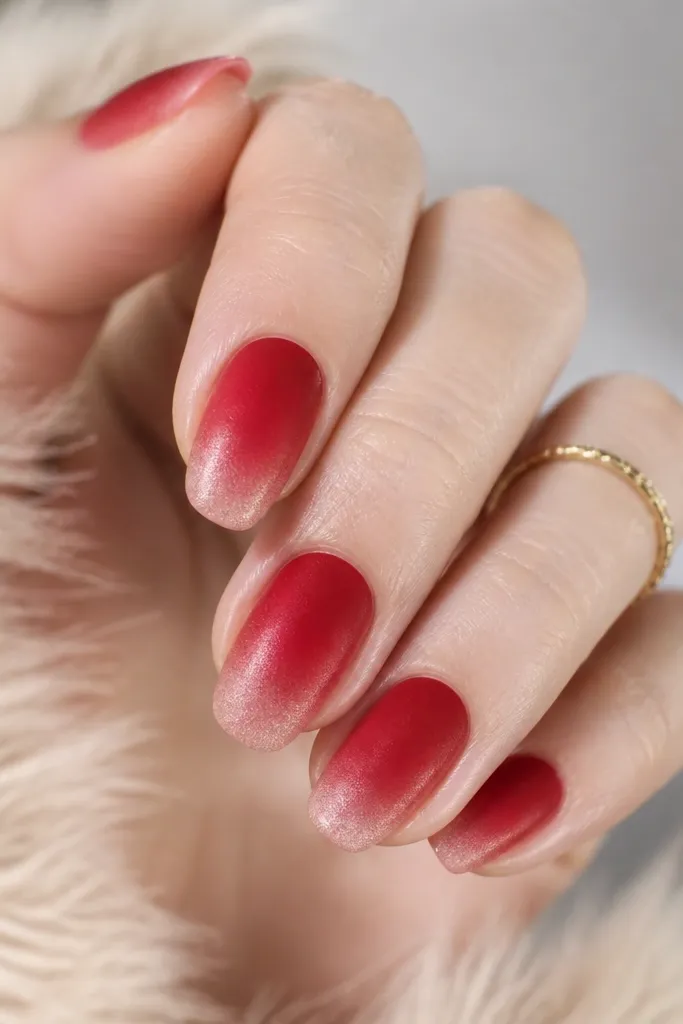
This design looks like holiday lights reflected on glass. The ombré keeps it elegant because the color fades smoothly instead of looking like a harsh tip. I use a deeper red at the base for richness, then blend into a lighter frosted red for that winter feel. It flatters hands with longer nail beds because the fade makes the nails look longer. If you have shorter nails, keep the ombré transition high so it doesn’t shorten the overall shape.
Editor's noteWipe the sponge edge between nails so the gradient stays smooth, not muddy.
Start by painting a deep red gel at the cuticle area, leaving a small gap for blending. Sponge-blend the next lighter red into the middle using a makeup sponge, curing after you reach the fade you want. For the frosted edge, tap a sheer red-rose gel with a frosted finish onto the very tip and blend lightly upward. Seal with a matte top coat if you want the velvet look, or glossy if you want it to pop under flash.
Skip thisDon’t rush the blending — harsh lines kill the “frosted” effect.
5. Black Cherry Nails with Thin Silver Bow Accent
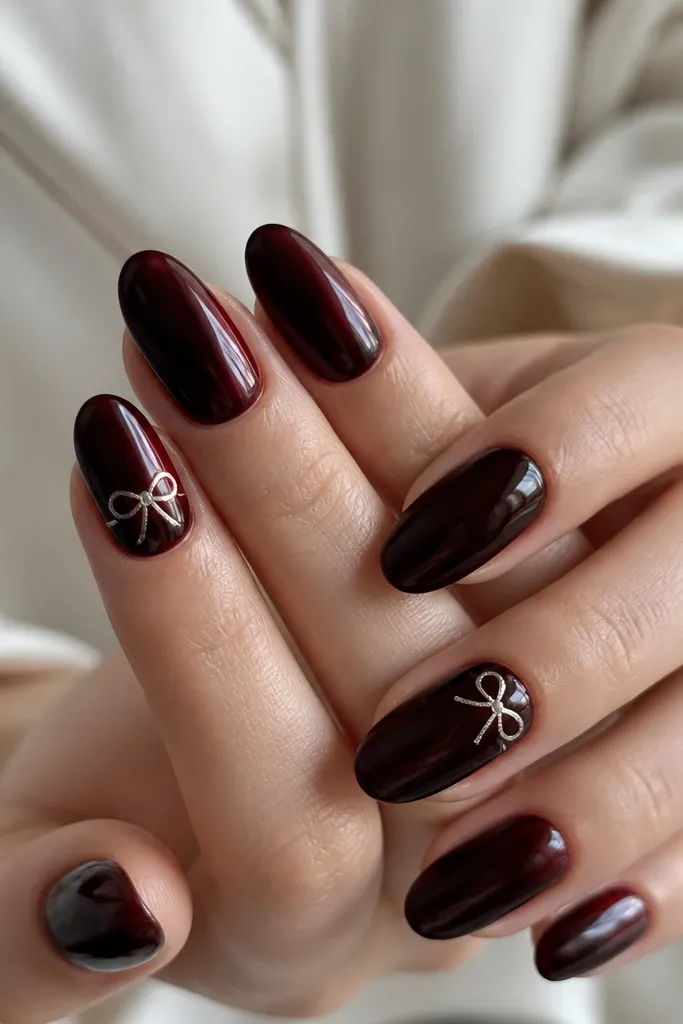
Black cherry is the classy holiday shade when you want drama without loud sparkle. The dark color makes your hands look slimmer, and the wine undertone looks great on most skin tones. The thin silver bow adds a gift-wrap vibe that reads holiday in a tasteful way. I like this for holiday office parties because it’s festive but still looks grown-up. The key is keeping the bow tiny and line-based — it should look like jewelry, not a sticker.
Paint all nails black cherry gel in two thin coats for full opacity, then cure. On two nails, draw a small bow near the cuticle using a striping brush and silver gel, keeping each loop about the width of the nail’s center. Add a tiny silver dot at the center where the bow knot would be. Clean up edges with a gel brush dipped in cleaner, cure, then finish with glossy top coat.
If your lines go shaky, do the bow in two passes: outline first, then thicken the final lines.
Don’t cover the whole nail with silver — the bow should be the only focal point.
6. Ivory Base with Gold Holly Berries and Leaf Tips
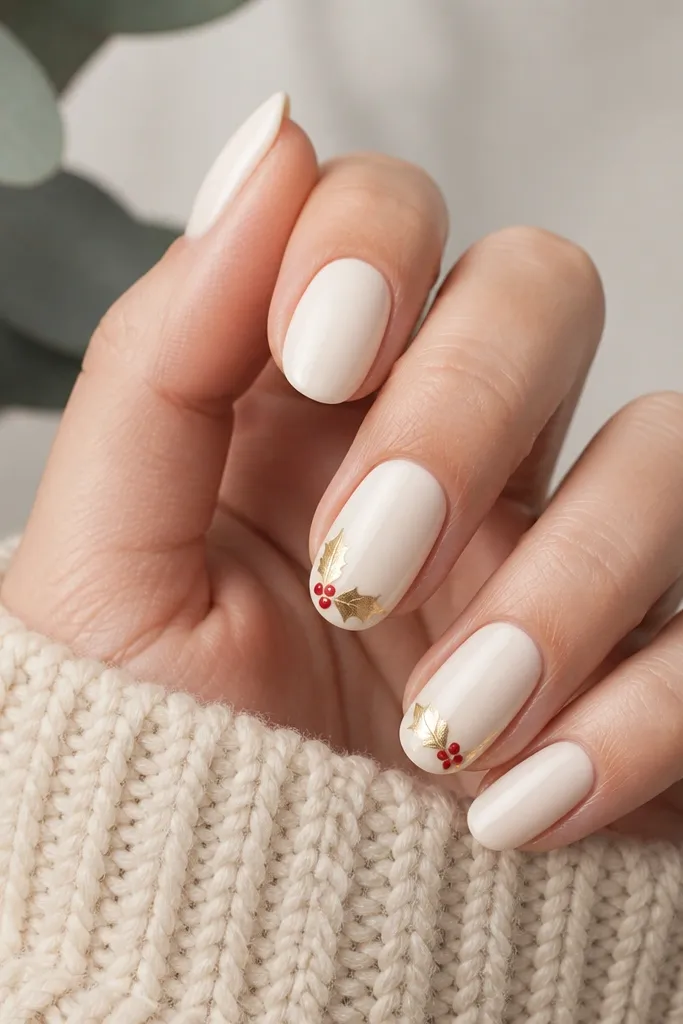
Ivory holly looks clean and expensive compared to the usual red-and-green overload. The ivory base flatters fair skin and makes red berries pop, and it also looks great on medium skin because it warms up the hand. Gold leaf tips add a metallic holiday glow without needing chunky glitter. This set is ideal when you’re wearing a cream sweater, black dress, or gold jewelry. The design works because the holly sits at the tip, so it’s visible in photos but doesn’t crowd the cuticle.
Editor's noteUse dotting tools for berries — it keeps them perfectly round and gives that “hand-painted but neat” look.
Start with an ivory gel base that’s opaque in two coats, cure fully. On two accent nails, paint a small gold leaf cluster at the tip using a fine detail brush. Add three tiny red berry dots just below the leaf edge, spacing them like a triangle. Optional: add one short green line under the berries with a darker green gel for leaf definition, then seal with glossy top coat.
Skip thisSkip thick holly lines — bulky gel makes the leaves look like blobs.
7. Rose Gold Chrome Tips with Sheer Pink Base
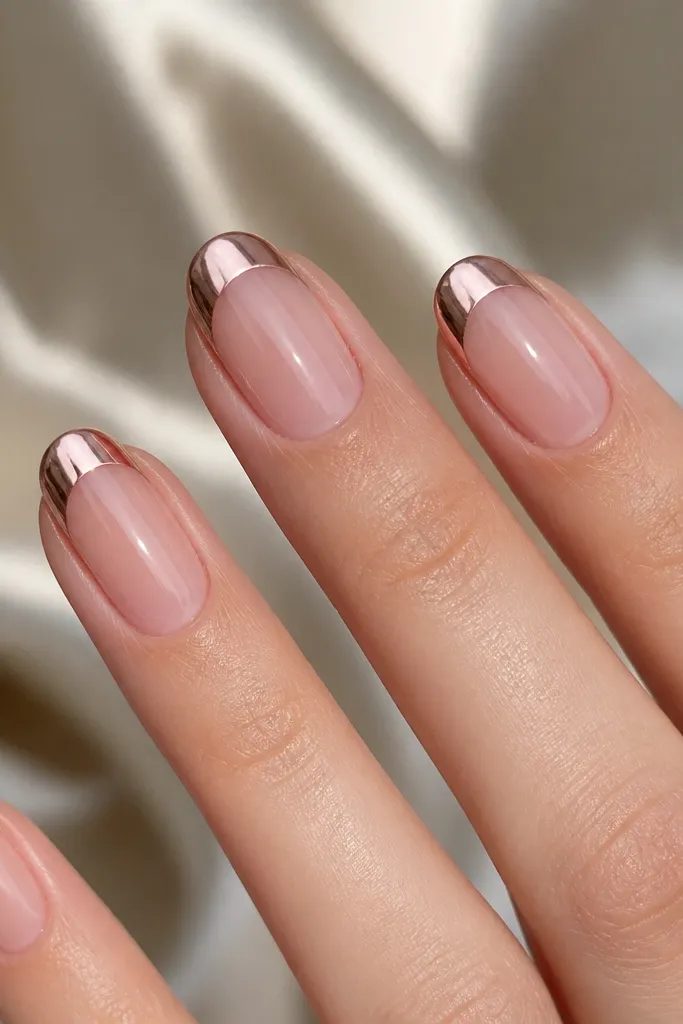
This is classy holiday nails done the modern way — chrome only where the light hits. The sheer pink base keeps it soft and flattering, and the rose gold chrome looks great with warm and neutral jewelry. I like it on almond and squoval because the tip shape gives you a sleek line. It also works if you want holiday glam without snowflake art. The chrome reads luxe under flash, while the sheer base keeps it airy and not heavy.
Editor's noteKeep the chrome only on the top third of the nail — going lower makes it look like a costume.
Apply a sheer pink gel base, cure, then add a thin layer of base coat where the chrome will go at the tip. Create a sharp curved tip line using a guide or tape, leaving a clean boundary. Rub rose gold chrome powder onto the tacky gel at the tip, then buff gently to remove excess. Seal with a non-wipe glossy top coat carefully so you don’t dull the chrome.
Skip thisDon’t use a thick top coat over chrome — it can dull the mirror finish.
8. Burgundy Marble with Gold Vein on Accent Nails
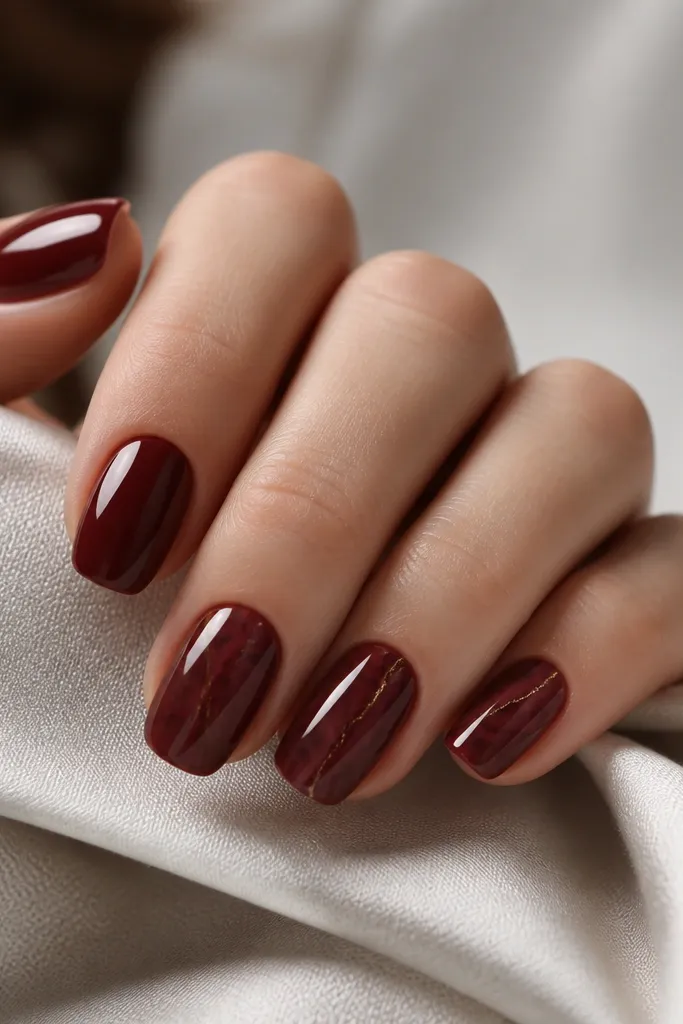
Marble looks upscale when you keep it subtle and let the gold do the talking. Burgundy has that holiday warmth, and the gold vein makes it feel like ornaments without turning into glitter. I use this when someone wants “classy but different” because it looks custom. It flatters hands with short to medium nail beds because the marble movement draws the eye across the nail. The secret is restraint — fewer swirls, more spacing.
Paint all nails burgundy gel in two coats, cure. On accent nails, add a second burgundy layer slightly thicker, then drag a darker wine gel through it with a toothpick or thin brush to form marble veins. Add a single thin gold line over one area of the marble using gold gel and cure. Finish with glossy top coat, and do not over-blend the marble — you want clear, separated swirls.
Use a small toothpick, not a thick brush, so the marble lines stay hair-thin.
Don’t make big marbling loops — they look messy instead of marble.
9. Classic Red with Tiny Pearl Studs at the Tip
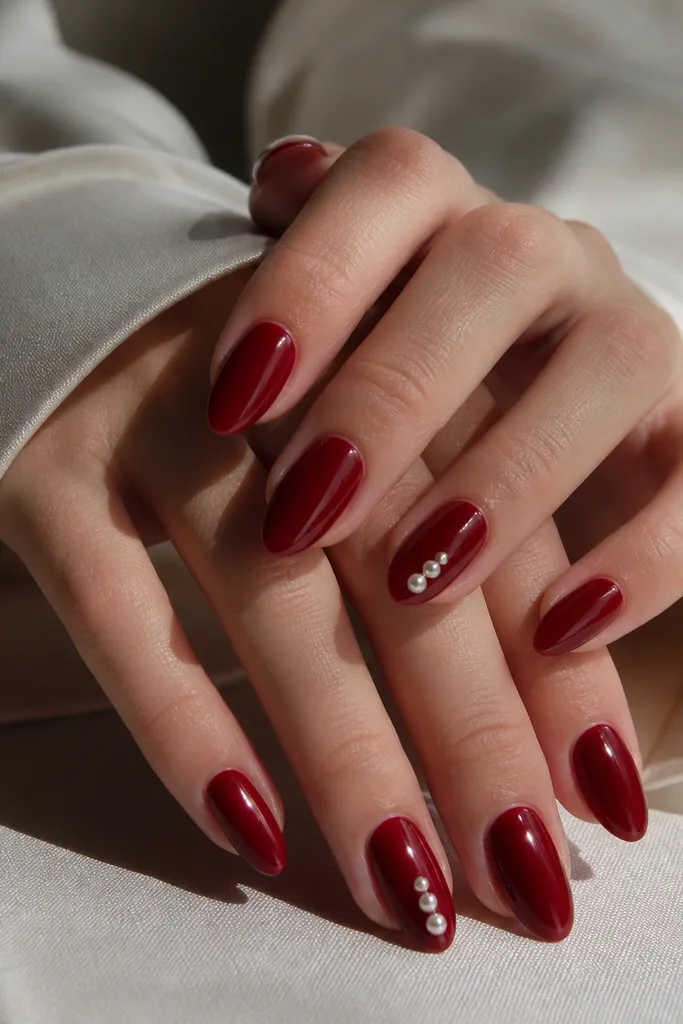
Pearls make red nails look instantly classy, like you’re wearing earrings with your manicure. The deep red base flatters most skin tones and looks especially good with gold rings. I keep the pearls small — tiny studs at the tip look like ornament beads, not chunky decorations. This is a great option if you want holiday nails that feel formal but still simple. It also lasts well because the design is placed at the tip where chips are easiest to cover with a quick touch-up.
Editor's noteSeal the edges of pearls with a thin brush of top coat so they don’t lift over time.
Paint all nails a classic red gel and cure, then apply a glossy top coat lightly on plain nails. On two accent nails, skip top coat and apply a small dot of thicker gel at the tip area where you want pearls. Place tiny pearl studs and press gently, then cure firmly. Add top coat around the pearls, not directly smothering them, then cure again for a smooth finish.
Skip thisDon’t put pearls near the cuticle — snagging and lifting happen fast.
10. Navy Midnight with Starry Silver Confetti
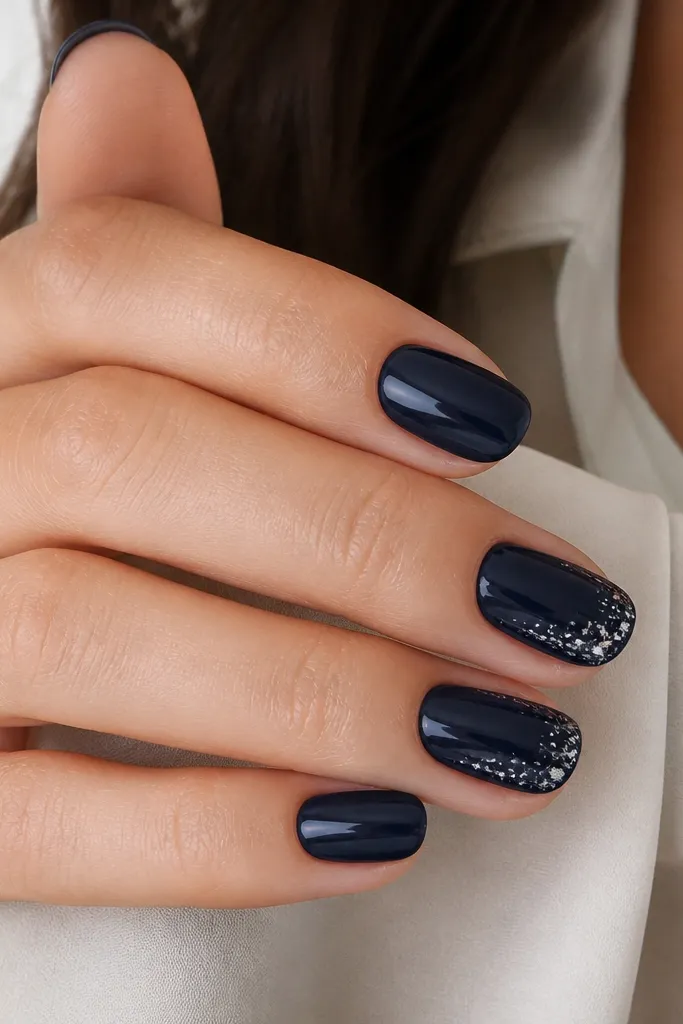
Navy is the holiday color nobody uses enough, and it looks sharp in photos. The cool base flatters fair skin and makes warm-toned jewelry pop. The starry silver flecks give you that winter night vibe without looking like you dumped craft glitter on your nails. I concentrate the confetti near the tip so the center stays clean and elegant. This set fits parties, New Year’s, and even holiday travel because it hides small scuffs better than bright reds.
Start with two coats of navy gel, cure each coat. On accent nails, add a thin layer of clear or sheer gel at the tip area only. Tap tiny silver foil flecks into the tacky gel with a small sponge or foil applicator, then cure. Brush off loose bits, then seal with glossy top coat to lock everything in.
Use a lighter hand than you think — the best “star” effect looks sparse, not packed.
Avoid chunky glitter — it reads cheap on navy.
11. Sage Green with Gold Half-Moon and Clear Topcoat
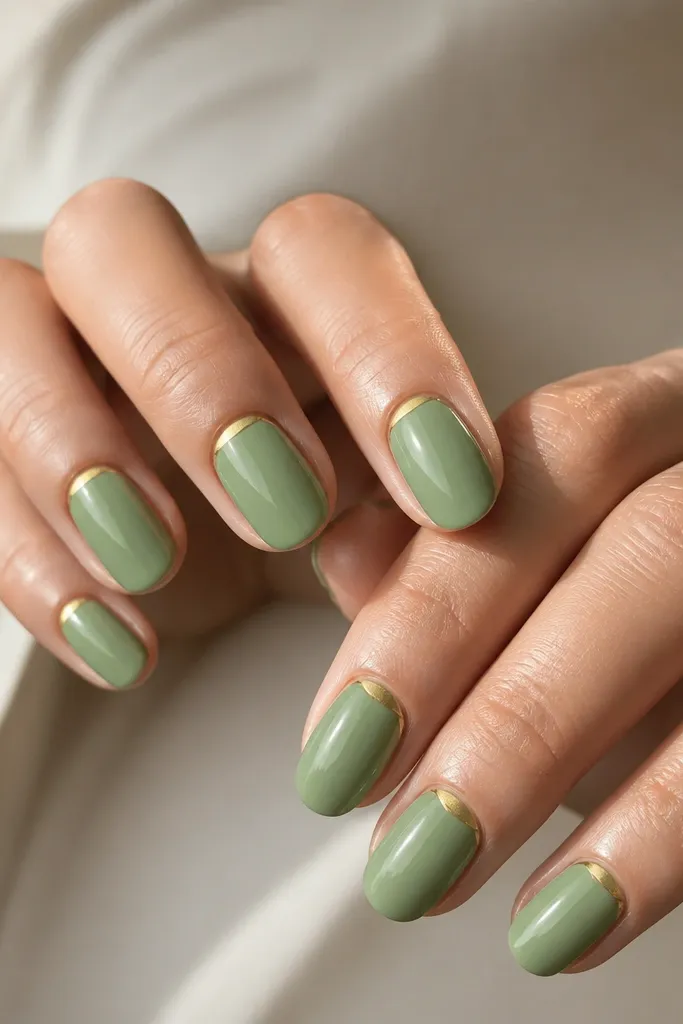
Sage green is my pick when you want holiday nails that don’t look like they belong to a candy cane. The muted green looks soft and classy and works with both warm and cool wardrobes. The gold half-moon at the cuticle makes the nails look tidy and frames your nail bed like a ring. This is especially flattering on hands with longer cuticles because the half-moon draws attention to the shape instead of hiding it. It also looks great if you wear neutrals, cream knits, or gold jewelry.
Editor's noteIf your half-moon looks too thick, scrape it down with a liner brush after the first cure, then re-cure.
Apply a sage green gel base in two thin coats, cure. With a half-moon stencil or freehand using a striping brush, paint a thin gold arc at the cuticle — I keep it narrow so it looks like jewelry. Clean the edges with a small brush dipped in cleaner. Cure, then apply glossy top coat over the whole nail to blend the gold smoothly into the finish.
Skip thisDon’t let gold touch the skin — it lifts faster and looks messy.
12. Sheer Nude with Red Velvet Micro Lines
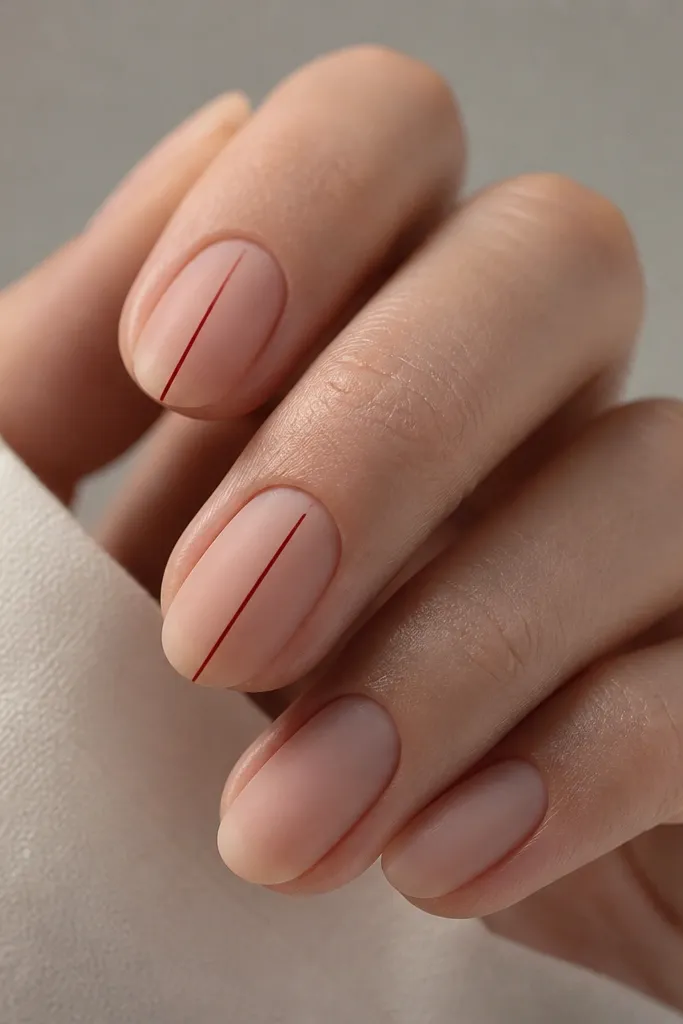
This set looks classy because it’s controlled and graphic, not busy. The sheer nude base makes your nails look clean, and the velvet finish gives that soft holiday sweater vibe. Tiny red micro lines add just enough Christmas color to feel festive without covering everything in red. I like it on short squoval because the vertical lines elongate visually. It also pairs well with silver rings and simple outfits because the design is subtle but intentional.
Start with a sheer nude gel base, cure. Apply velvet matte top coat over all nails, cure. On two accent nails, use a thin liner brush to paint one or two vertical red lines, keeping them centered and about 1 mm wide. Cure, then add a glossy top coat only on the red lines if you want them to look like lacquered accents.
Use gel paint straight from the bottle for micro lines so they stay opaque at small sizes.
Skip thick lines — they overpower the nude base and look clunky.
13. Glitter Tip in Fine Champagne with Bare Center
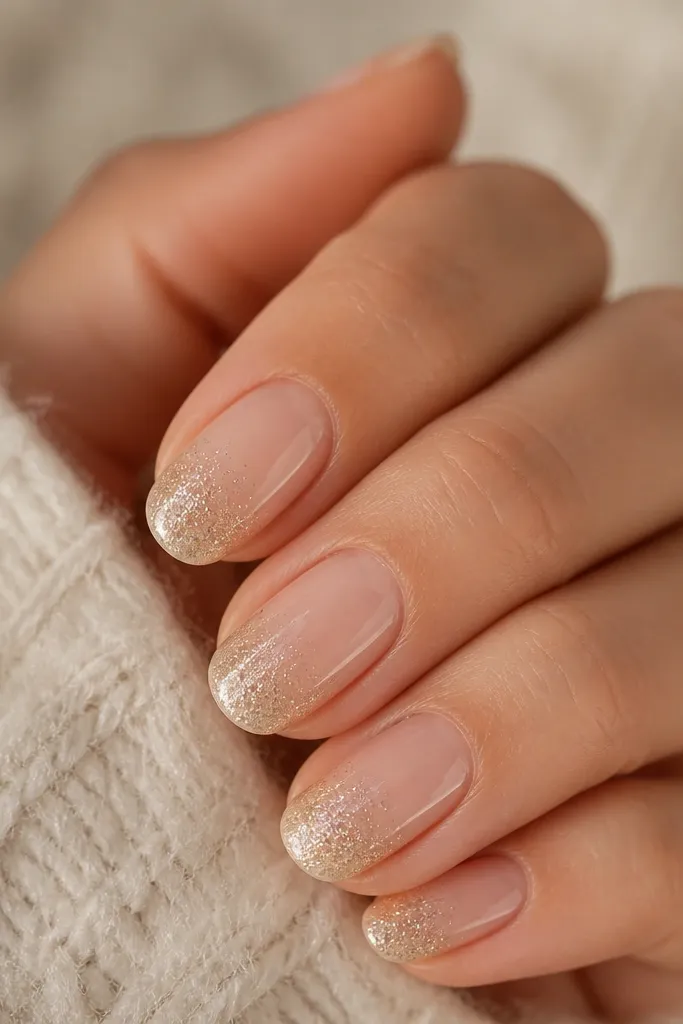
This is the “classy sparkle” method that actually looks good when you eat and move around. Fine champagne glitter at the tips reads like ornament dust and doesn’t overwhelm the nail. Leaving the center bare keeps the set light and helps your hands look clean. It flatters all skin tones because champagne matches warm undertones, and it also works if you want a natural look that still feels holiday. I use this when someone wants something pretty but doesn’t want to maintain a full coverage glitter set.
Apply a sheer base gel and cure, then lightly buff for smoothness. Create a tip boundary at about the top third of the nail. Apply glitter gel or a thin clear gel where the tip will be, then pack fine champagne glitter onto the tip and blend slightly downward with a sponge. Cure and seal with a glossy top coat, making sure the glitter is fully encased so it doesn’t feel gritty.
For extra class, clean the underside of the free edge after curing so glitter doesn’t catch on hair ties.
Don’t use chunky glitter — it catches on fabric and looks uneven.
14. Red and Green Plaid Diagonal on Two Accent Nails
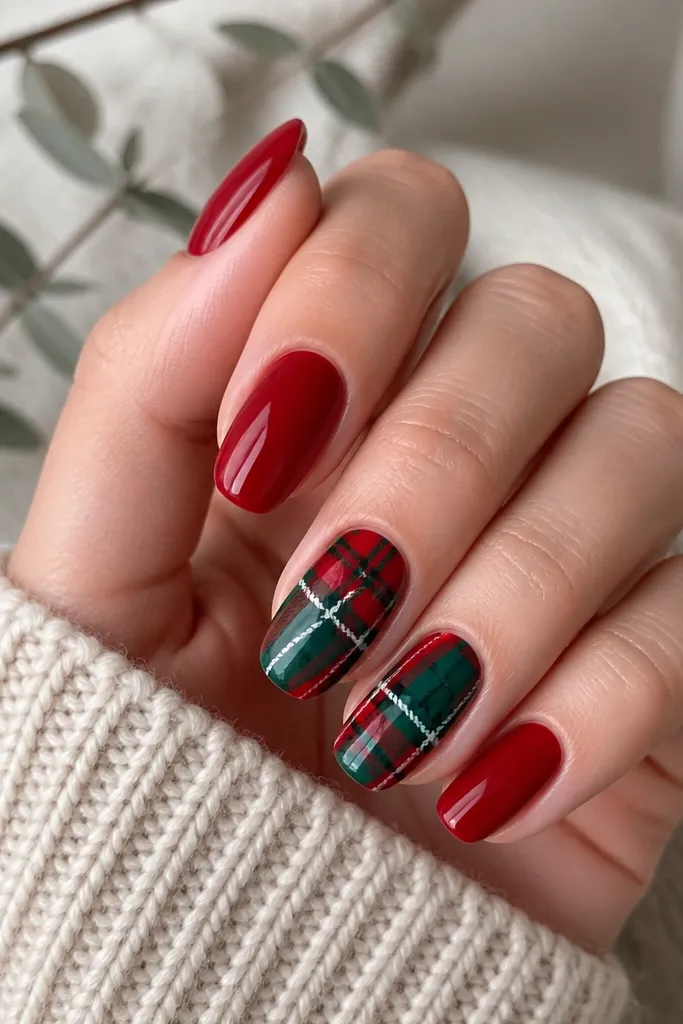
Plaid can look country-fair if you go too thick, so I keep it clean and diagonal. The red base anchors the holiday theme, and the green lines bring that familiar Christmas color story. Diagonal plaid feels more modern than a full grid, and it flatters most nail shapes because the lines guide the eye toward the tip. I like this for holiday photos because it reads from a distance. It also works best on two accent nails so the rest of your set stays elegant and wearable.
Paint all nails glossy red gel in two coats, cure. On two accent nails, use a striping brush to draw a diagonal stripe from lower left to upper right in deep green, then cure. Add thin black lines crossing the green stripe to form the plaid, keeping line thickness about the width of a hair. Add tiny white dots or thin white intersections at the crossing points if you want a crisp finish, then seal with glossy top coat.
Use a nail tape strip as a guide for your first diagonal line — it makes the whole plaid look intentional.
Don’t fill the plaid with thick blocks of color — it reads like fabric prints, not manicure art.
15. Gold Foil Frame with Clear Negative Center
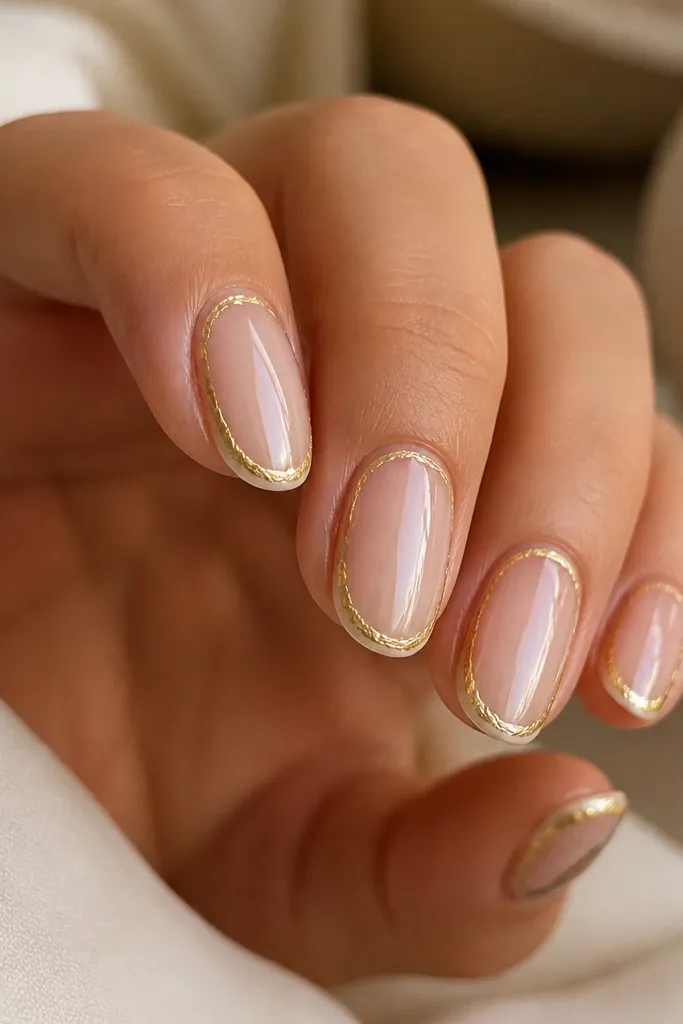
This is the most classy “holiday jewelry” nail set I’ve worn for events where I didn’t want obvious Christmas art. The clear negative center makes your nails look longer and cleaner, and the gold foil frame gives that ornament edge sparkle. Warm gold looks especially good if you wear gold or champagne-toned makeup, but it also works with silver if your skin runs cool. I recommend it when you want elegance that still feels festive without snowflakes or bows. The look stays upscale because you keep the foil confined to the border.
Editor's noteIf you’re using gold gel instead of foil transfer, paint the outline in two thin coats for a smooth, bright line.
Start with a sheer clear base gel (or a nude sheer close to your nail color), cure. Use gold foil transfer or gold gel to create a thin outline along the sides and tip edges, leaving the center open. Press gold foil onto the tacky outline and cure, then remove any loose pieces. Apply glossy top coat over the whole nail, focusing on sealing the foil edges so it doesn’t lift.
Skip thisDon’t make the frame too thick — thick borders look like costume jewelry.