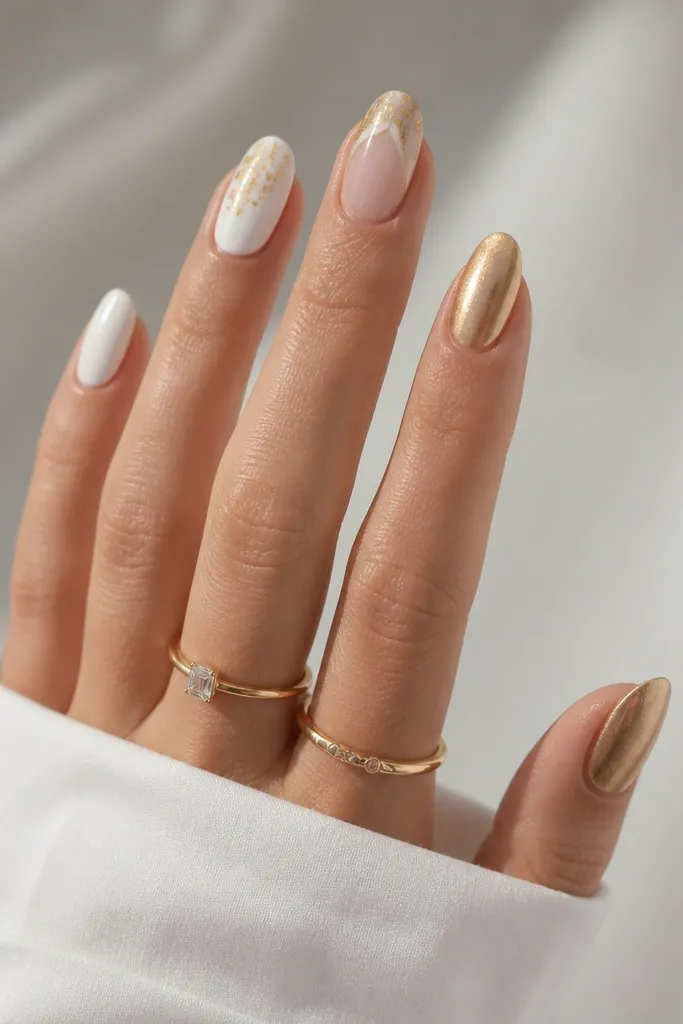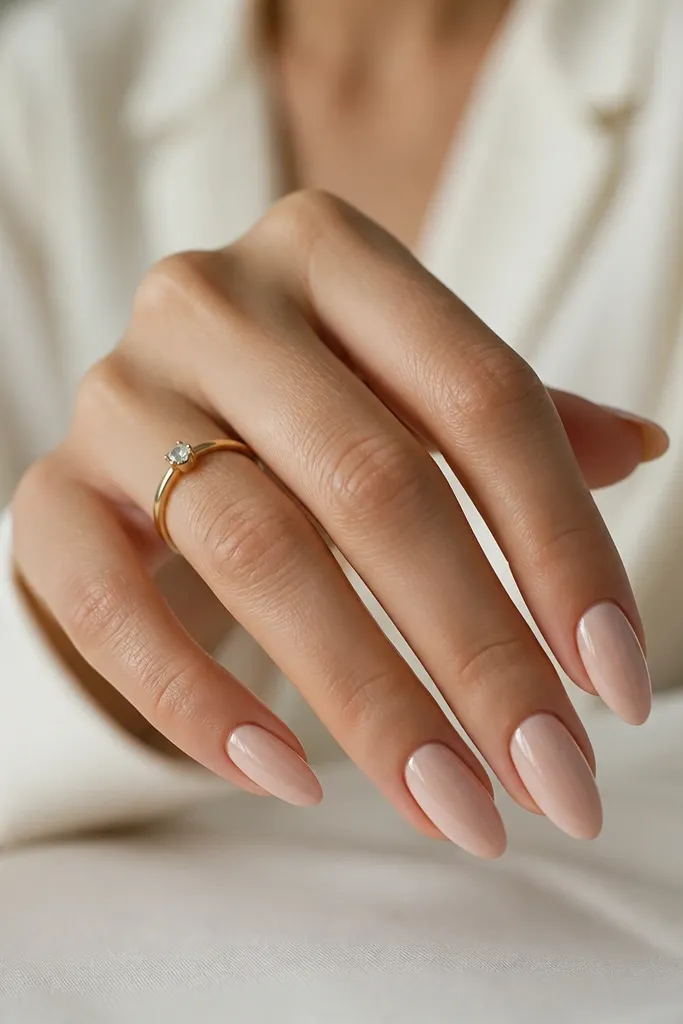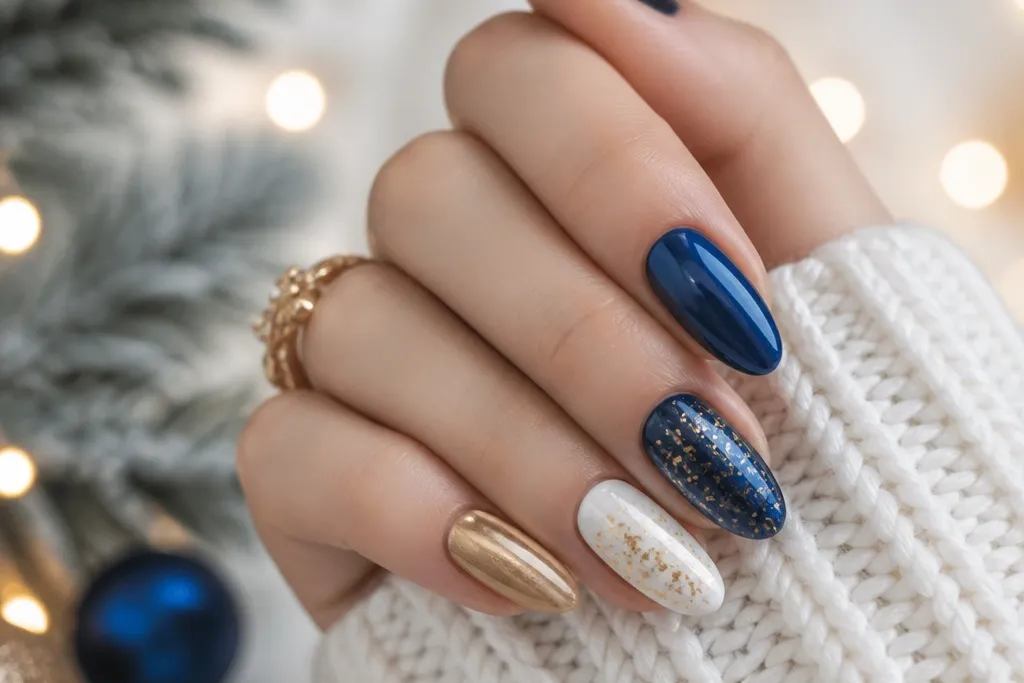
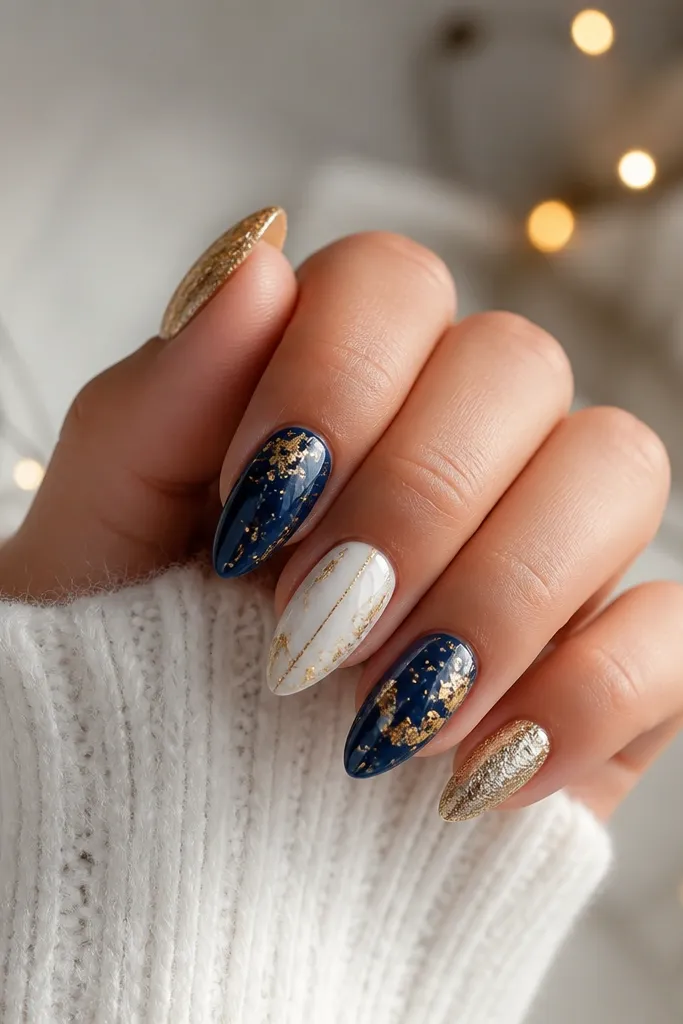
1. Milky White Base with Icy Blue Light Bulbs
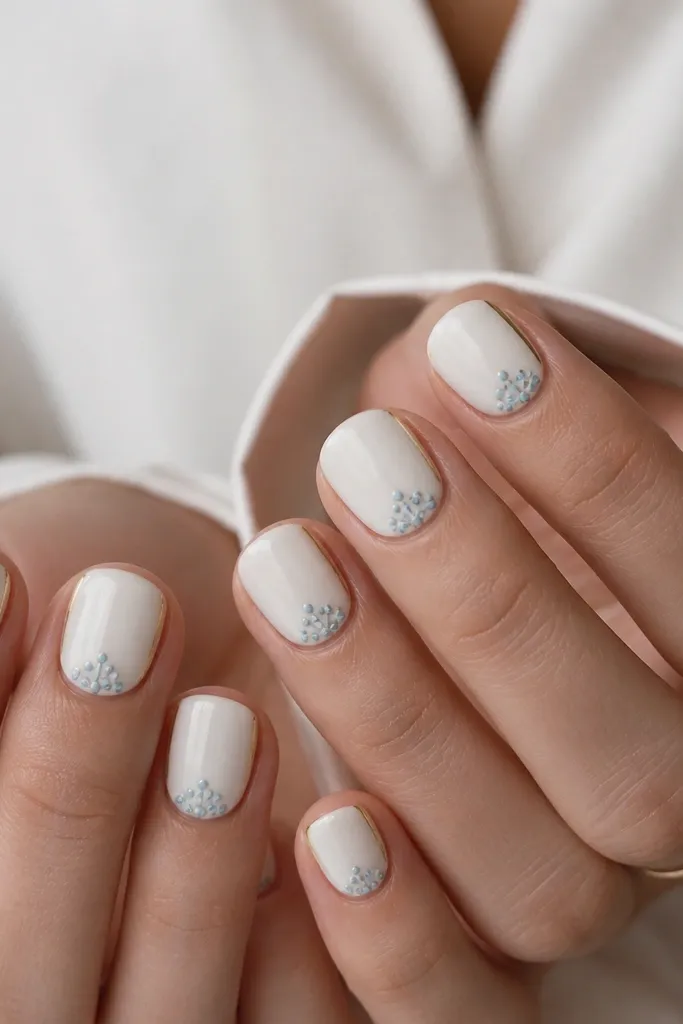
This look is the cleanest way to get the “lights” effect without using actual LEDs. Icy blue dots over a milky white base look bright and cool, and the thin gold side line gives you structure so the dots don’t float. It flatters fair to medium skin tones because the white stays crisp, and it also works on deeper skin because the contrast is still strong. I like it for short-to-medium nails since the dot clusters can stay small and intentional. For soft glam, keep the gold line to about one-third the nail width, not full striping.
Start by painting two thin coats of milky white gel or polish, then cure fully. With a dotting tool, place 3-5 icy blue dots in a small arc near the cuticle, leaving a little space between the dots. Add one thin gold strip along the left or right edge of each nail using striping tape or a liner brush. Finally, top coat twice — first a normal coat, then a second glossy coat after the first is tack-free.
Use a liner brush dampened with a tiny bit of top coat to sharpen the gold edge so it looks like it’s printed, not hand-wobbled.
Avoid big pearl studs for this design — they kill the light-bulb illusion and make the nails feel heavy.
2. Baby Blue Half-Moon with White Light Reflections
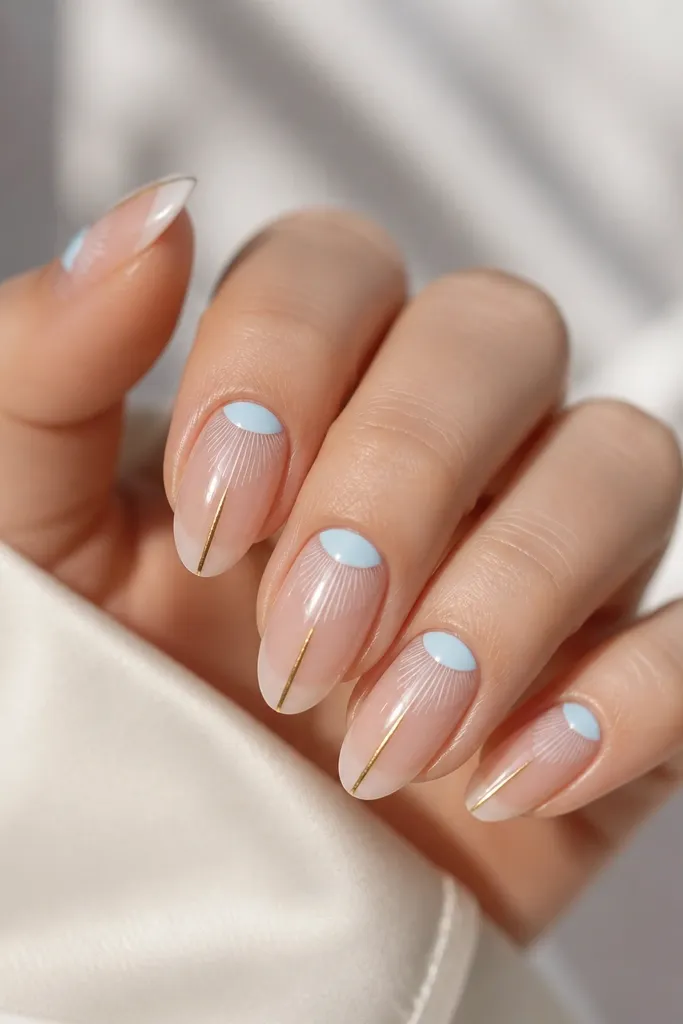
This design looks like a soft glow because the white reflections are thin and directional, not chunky. The baby blue half-moon gives you that cool base near the cuticle, and the gold line adds a “spark” of structure. I’ve worn this at indoor events where flash makes the white strokes pop, and it photographs really clean. It flatters hands with slightly longer fingers because almond shape makes the taper look elegant. If your nails are short, use fewer white strokes and keep the gold line closer to the center.
Paint the full nail in a sheer nude base or pale blue wash, then create a baby blue half-moon right at the cuticle with a small brush. Add 2-3 thin white strokes across the nail — each one should start wider near the center and taper as it heads toward the tip. Draw a single narrow gold line that runs diagonally from mid-nail toward the tip, keeping it under 1mm thick. Top coat well, and cap the free edge so the reflections don’t lift.
Swipe a thin layer of white over the cured base before adding reflections — it helps the white look opaque in one coat.
Skip thick white gel lines; they look like frosting instead of light.
3. White Marble Vein with Blue Tiny Starbursts and Gold Foil
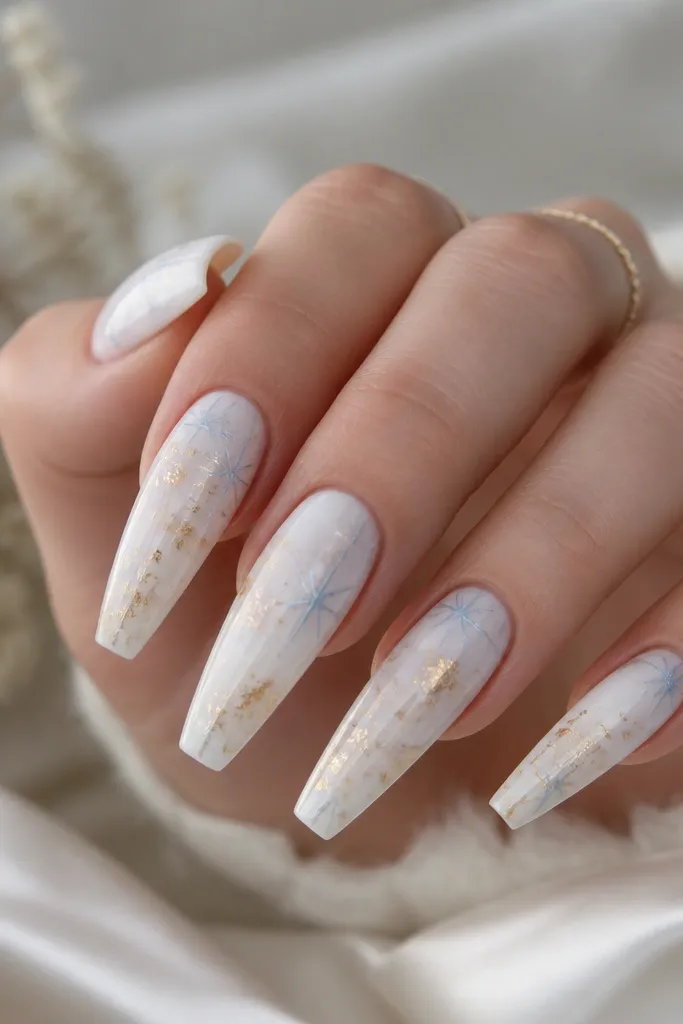
Marble works because the base already has movement, and the tiny starbursts give you the “lights” feeling without needing big shine. I use milky white marble so the blue doesn’t turn gray, then I place the starbursts in small clusters so the design stays soft glam, not cartoon. Gold foil flecks in the middle catch light when you move your hands. This style looks best on medium-long nails because the marble veins give you space to breathe. It flatters warm and neutral skin tones because the gold reads buttery next to the cool blues.
Editor's notePlace foil after the marble cures; if you foil too early, the marble can smear under the tack.
Start with a milky white base and then add thin, irregular gray-blue marble veins using a striper and a little diluted gel. Cure, then add 2-3 tiny icy blue starbursts near the cuticle on each nail using a dot-and-line method (a dot plus four short lines). Press small gold foil flecks onto the center with a foil gel or tacky layer, then cure. Finish with a smoothing top coat so the marble doesn’t feel bumpy.
Skip thisDon’t add starbursts on every corner — that’s how it turns into glitter overload.
4. Sky Blue Gradient Tips with Thin Gold Grid and White Dots
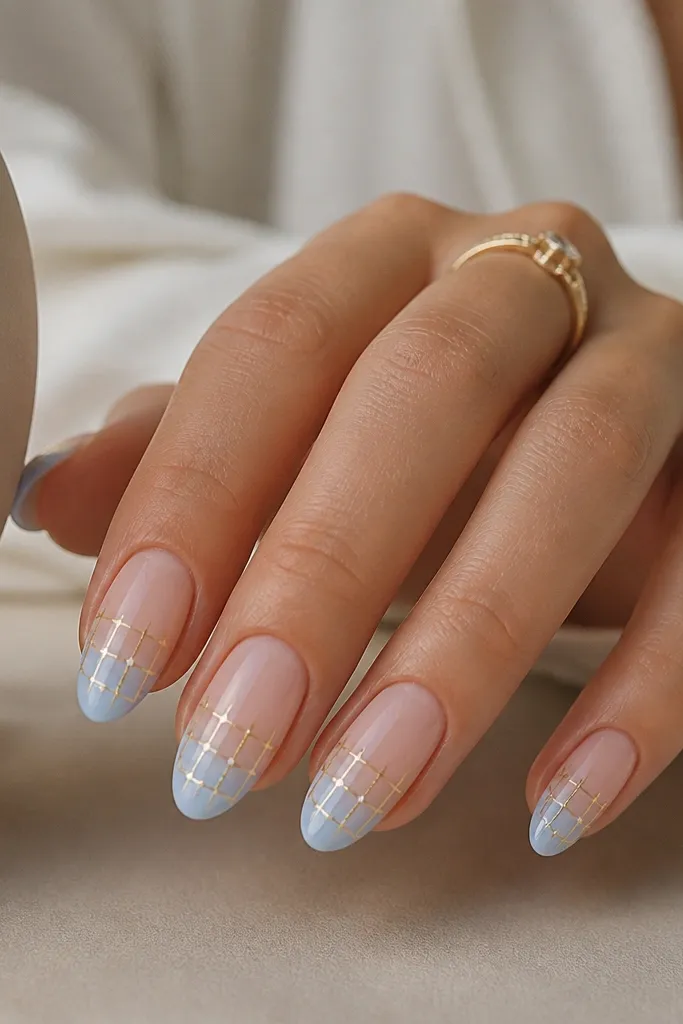
This one is for people who like a structured look that still feels airy. The gradient tips make the blue look light and wearable, while the thin gold grid gives you a neat frame. The white dots at the grid intersections mimic tiny “bulbs” turning on, especially under phone flash. I like this on oval or almond nails because the grid lines look clean across the curve. It also flatters both short and medium nails if you keep the grid smaller and centered.
Paint a nude base, then sponge or airbrush a sky blue gradient starting around the mid-nail and fading into the tip — cure. Use striping tape to map a simple grid in the center, then paint thin gold lines between the tape edges and remove the tape once gel is set. Add white dots directly on the gold line intersections using a dotting tool. Top coat twice for a glassy finish and to seal the grid.
If your grid looks crooked, fix it before curing by wiping the edges with a clean brush dipped in cleanser.
Skip thick gold grid lines; they hide the gradient and make the whole design heavy.
5. Gold Foil Frame with Blue Center and White Light Halo
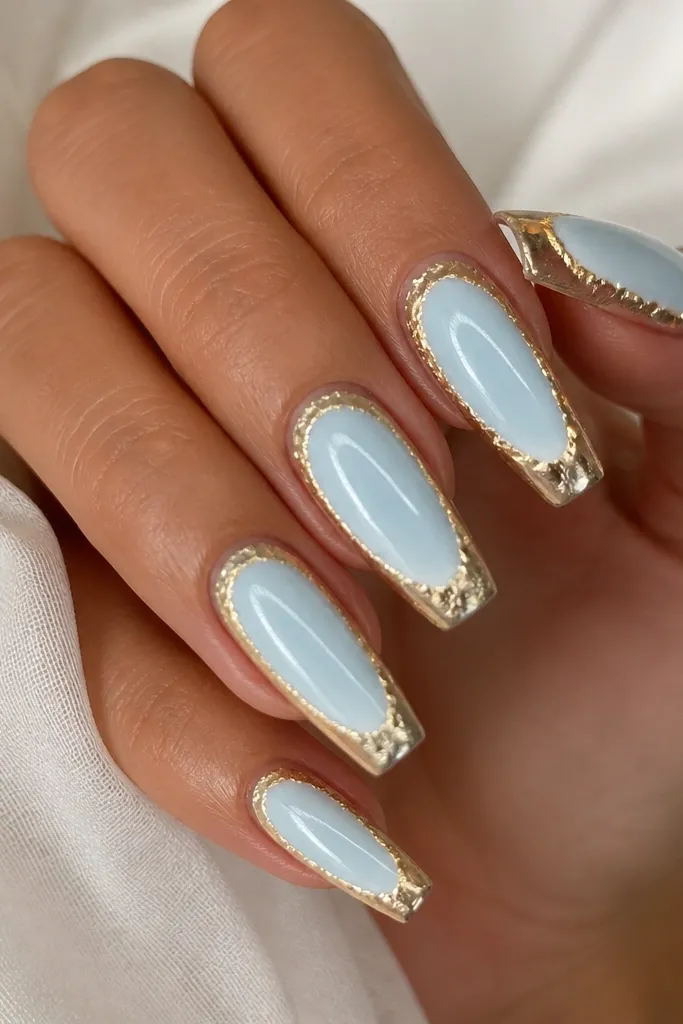
The halo effect reads like lights because the white ring sits behind the color, not on top. I start with a pale blue center panel so it feels soft, then I outline it with a gold foil frame for that luxe glow. The white halo ring adds dimension and makes the blue look brighter, even without heavy glitter. This is flattering on hands that prefer clean, graphic designs. It also works well for medium length because the halo ring needs a bit of space to look round.
Editor's noteMake the halo ring slightly off-center toward the cuticle — it looks more natural than perfectly centered every time.
Paint the nails with a sheer nude base, then create a pale blue center panel using a striping brush and a gentle curved edge. Add gold foil as a frame by pressing foil gel around the edges of the blue panel and curing. Use a fine liner brush to draw a thin white halo ring just behind the center panel, leaving a small gap so it looks like light behind glass. Finish with a thick, glossy top coat to smooth the foil texture.
Skip thisDon’t draw the halo too thick; it should be a hairline ring.
6. White French Tips with Blue Micro Lights and Gold Side Accents
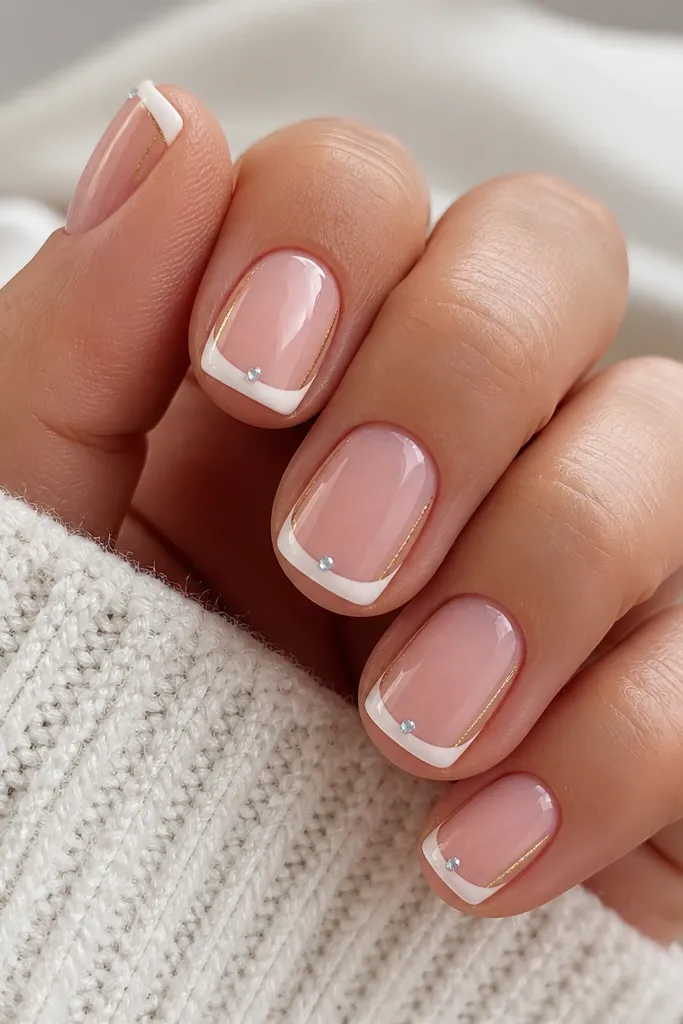
A classic French tip becomes soft glam when you add micro lights. Crisp white tips make the design look polished, and the tiny blue dots inside the smile line add that “twinkling” effect without turning it into a full pattern. Gold side accents keep the nails from looking too plain, and they also make fingers look longer because the gold line hugs the edges. This is my go-to for short nails because it keeps the design contained at the tip. It also looks great on hands with shorter nail beds since the French line defines the shape.
Editor's noteUse thinner white for the French line — thicker white chips faster at the tip edge.
Start with a nude or sheer pink base, then paint clean white French tips with a guide strip or a French stencil. Add 2-4 tiny icy blue dots along the inside of the smile line, keeping them close together near the center. Paint a thin gold line on one side of each nail — left side on half your nails, right side on the others for balance. Seal with a fast-drying top coat that levels smoothly.
Skip thisSkip random dot placement; keep the dots near the smile line so they read as lights.
7. Icy Blue Base with White Lightning Strikes and Gold Corners
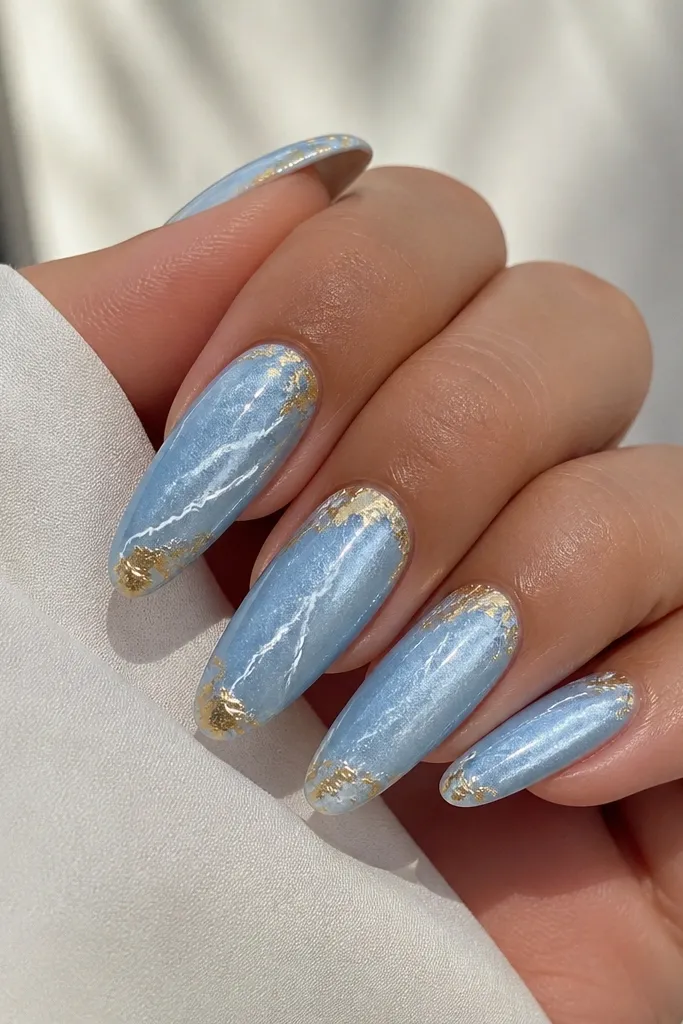
Lightning strikes are a fun way to interpret “lights” as motion. The icy blue base keeps it cool and modern, while the white bolts create high contrast that looks sharp in photos. Gold corners add a framing effect that makes the design feel intentional and not like just scribbles. I like this on long almond nails because the bolts have room to taper naturally. It also looks great on deeper skin tones because the blue pops without needing extra glitter.
Editor's notePractice the bolt shape on a paper nail form — the best bolts look like they belong together, not random.
Apply icy blue gel in two coats, curing fully between coats. Draw one or two thin white lightning bolts diagonally on each nail using a striping brush, keeping the lines narrow and slightly jagged. Add gold foil corners by placing tiny foil pieces in two spots per nail — one near the cuticle corner and one near the tip corner. Top coat slowly, then cap the free edge so the bolt lines stay crisp.
Skip thisDon’t thicken the bolts; thick lightning looks like frosting.
8. Blue and White Diagonal Sash with Gold Pinstripe Lights
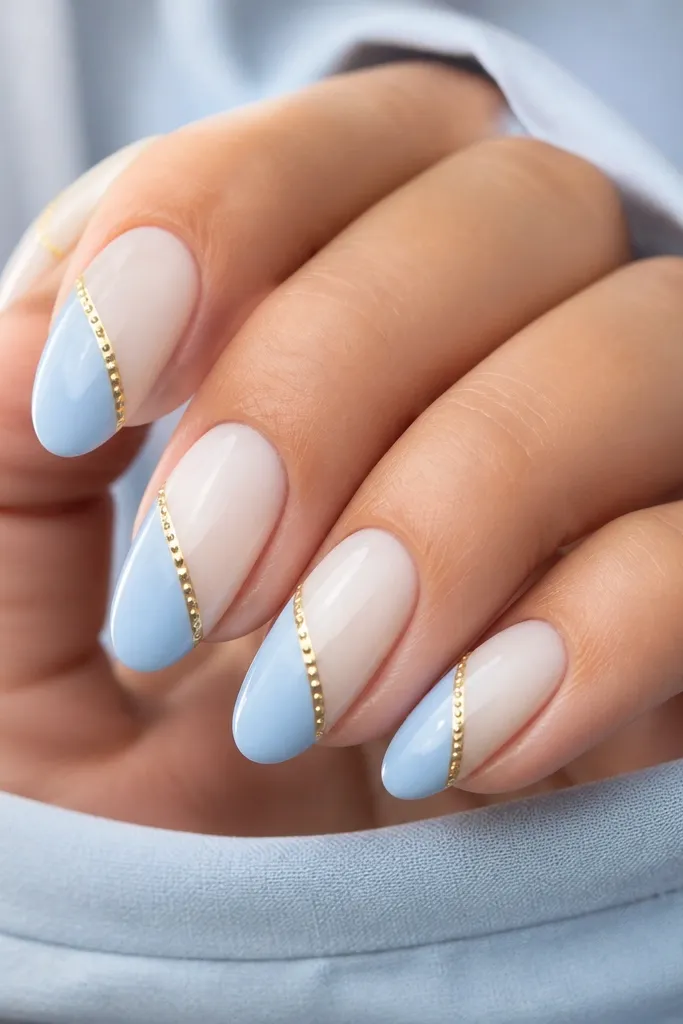
This sash layout is clean, flattering, and it makes your nails look longer because the diagonal line pulls the eye. The pale blue and milky white split is simple but high-impact, and the gold pinstripe acts like the “wire” where the lights sit. Tiny white dot lights on the pinstripe give you that twinkle effect without covering the whole nail. I’ve worn this for gallery openings and it looks chic even under natural light. It flatters hands with uneven nail shapes because the diagonal sash visually balances them.
Start with a nude base, then tape a diagonal line across the nail using striping tape. Paint one side milky white and the other pale blue, cure, then remove tape carefully. Apply a thin gold line right along the seam where the colors meet. Add 4-6 tiny white dots spaced evenly along the gold line, then top coat with a level, glossy finish.
Press the tape down with a silicone tool so the seam stays razor sharp after curing.
Avoid uneven dot spacing; lights look best when the spacing feels intentional.
9. White Base with Blue Ombre Chevrons and Gold Spark Points
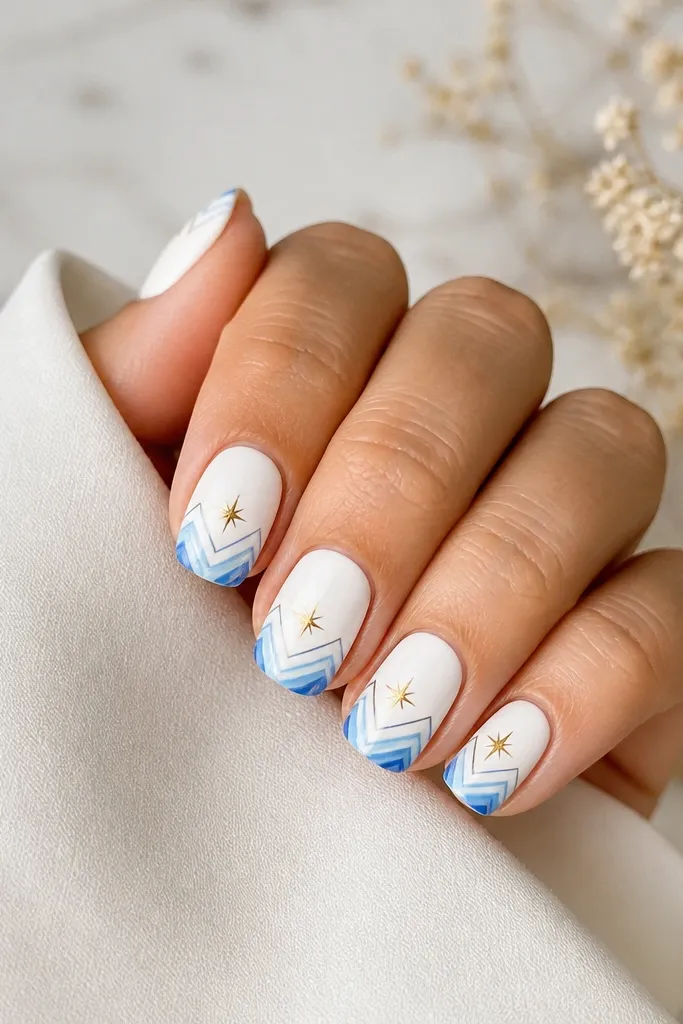
Chevrons create a directional glow, and the ombre blue keeps it soft. I use a white base so the chevrons look bright, then I fade the blue from darker at the center to lighter at the edges. Gold spark points at the chevron tips mimic light hitting crystal — tiny and concentrated. This looks flattering on all nail lengths, but it’s especially good for short nails because chevrons add shape and don’t require a long canvas. It also works for fair and deep skin since the white base handles contrast.
Editor's noteIf your chevron edges look rough, clean them with a brush dipped in cleanser before curing.
Paint two coats of glossy white, cure fully. With a striping brush, draw a centered chevron in light blue and then blend outward using a sponge lightly — cure. Add small gold spark points at the chevron peaks using a fine brush or foil gel dot. Keep the gold limited to the tips so the design stays airy. Finish with top coat and a careful cap on both sides.
Skip thisDon’t make the chevrons too wide; wide chevrons swallow the nail bed on short nails.
10. Blue Stained Glass Squares with White Light Dots and Gold Lines
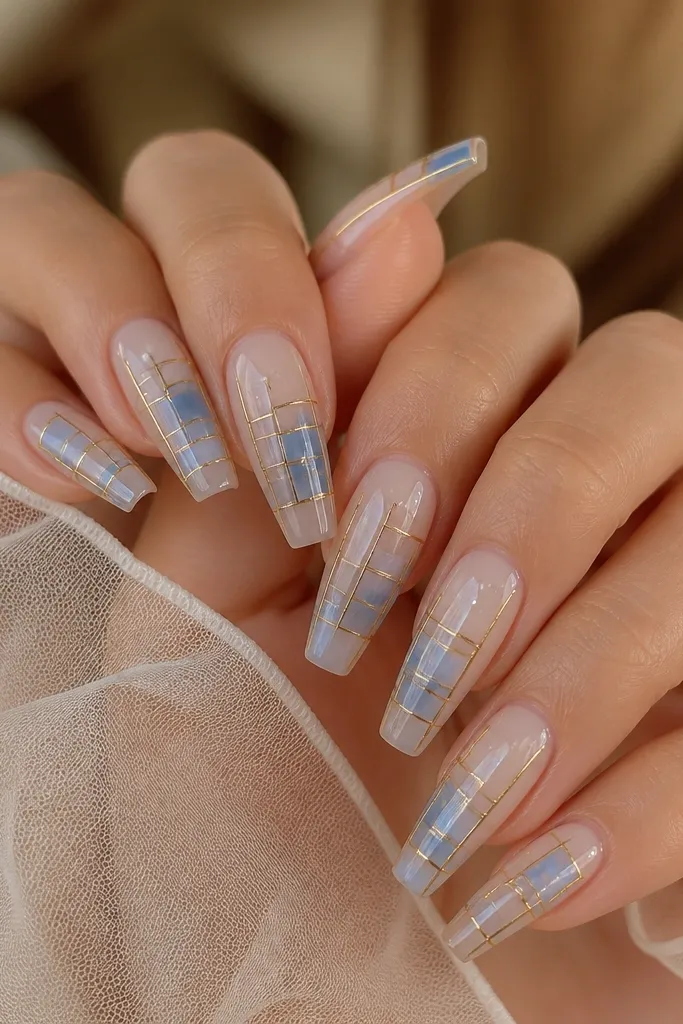
Stained glass nails look like real light bouncing through panels. The key is using translucent-looking blue (not opaque neon) and separating each section with thin gold lines. White dot lights placed inside a couple squares create that “lights are on” feeling without adding chunky decoration. I like this for evenings because the sheer background makes it look airy under warm lighting. It flatters hands with broader nail beds because the squares fill space nicely. If your nails are narrow, make fewer squares per nail so it doesn’t cramp.
Start with a sheer milky nude base. Paint translucent blue squares using a thin brush and a watery gel or diluted polish, cure after each nail or each step. Outline the squares with thin gold lines — striping tape helps if you’re nervous about straight lines. Add 2-4 tiny white dots inside selected squares, then cure. Seal with top coat twice so the stained glass lines stay smooth.
Use a thinner gold consistency than you think — thick gold turns into a heavy outline fast.
Avoid full coverage opaque blue; it removes the light-through effect.
11. White Pearl-Effect Base with Blue Crescent Lights and Gold Edge
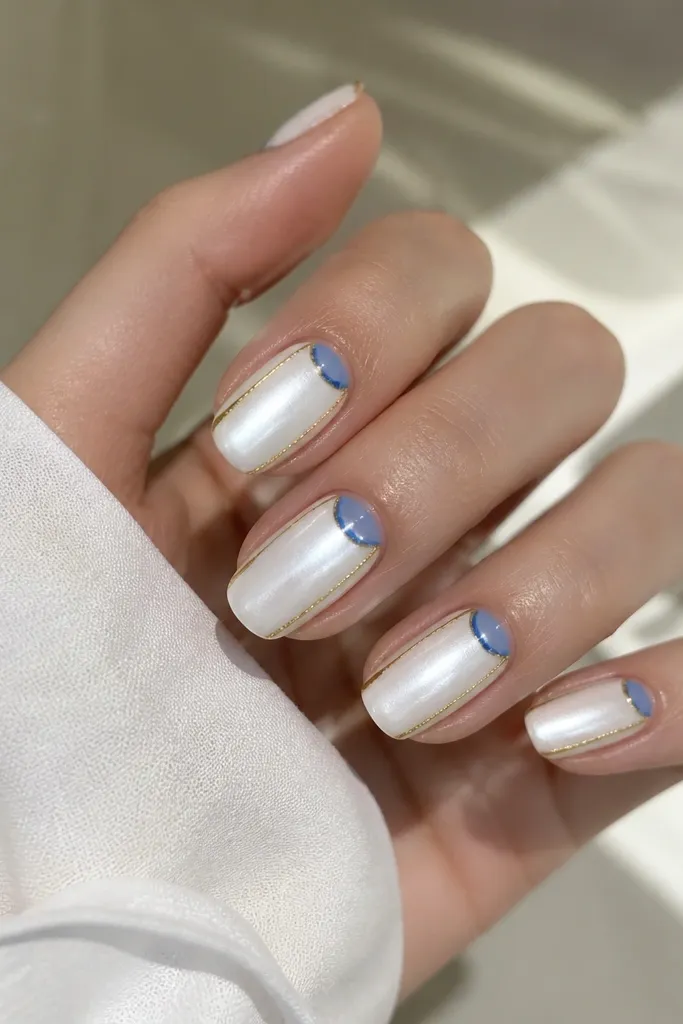
This design is soft glam in the most wearable way because it looks like jewelry, not a costume. The white pearl-effect base gives you glow even before you add lights, and the blue crescent near the cuticle reads like moonlight turning on. A thin gold edge line adds a little structure and makes the pearl look intentional. I like it on short almond and squoval shapes because the crescent sits perfectly at the cuticle curve. It flatters warm undertones especially well since pearl white and gold look buttery together.
Editor's noteIf the pearl base looks streaky, apply thinner coats and cure longer — don’t add more product in one thick layer.
Apply a white pearl gel or polish in two thin coats, curing fully. Use a small brush to paint a blue crescent at the cuticle — keep it thin and curved, not a big blob. Add one thin gold line along the side wall of the nail, staying close to the edge. For lights, add one extra tiny white dot at the top of the blue crescent like a highlight. Finish with a glossy top coat that smooths the pearl texture.
Skip thisSkip chunky gold charms; the crescent already gives you the glow.
12. Blue and White Swirl Half-Moons with Gold Tiny Bulb Cluster
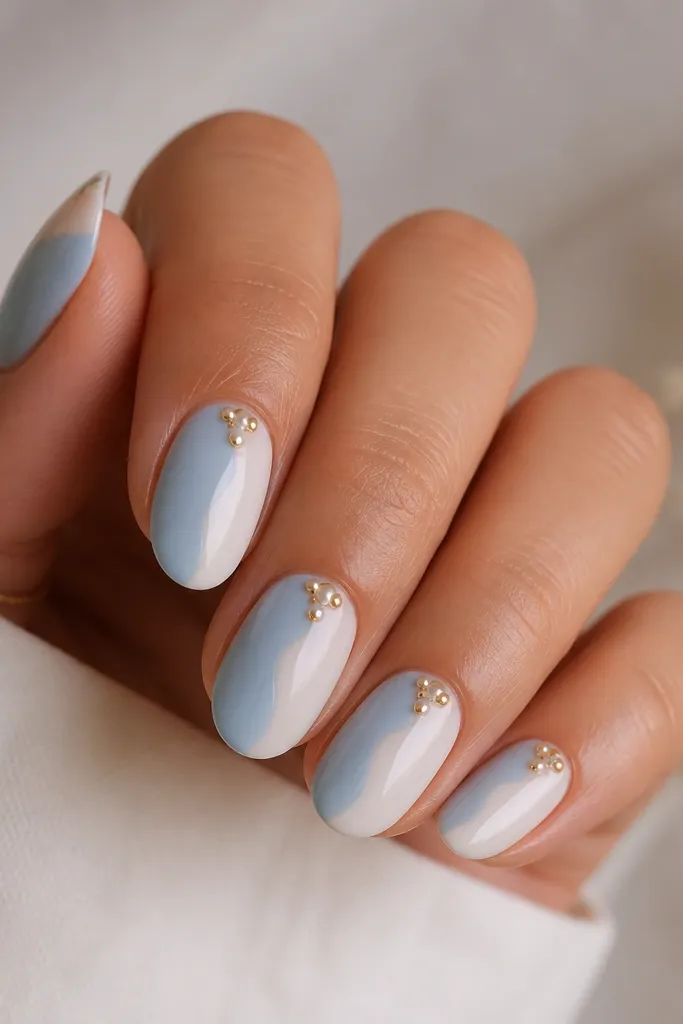
Swirl half-moons look romantic and they still read clean because the split curve is controlled. Pale blue on one side and milky white on the other keep the palette bright, and the gold bulb cluster near the cuticle is a cute “lights” moment. I’ve worn this for date nights because it looks sweet without being childish. It flatters hands with oval nail beds since the half-moon curve matches the natural shape. Keep the gold cluster small — one cluster per nail is enough.
Start with a sheer nude base. Create a half-moon split using striping tape to map the curve, then paint one side pale blue and the other milky white, cure. Remove tape and use a thin brush to blend the swirl edge so it looks like a smooth twist. Add a tiny gold bulb cluster at the cuticle using gold gel dots and one small white dot highlight. Top coat and cap the free edge carefully.
Use a small brush with a flat tip for the swirl edge — it makes the curve look smooth faster than a round brush.
Avoid covering the entire nail in swirls; let most of the nail stay clear so the lights stand out.
13. Blue Glitter Fade with White Light Dashes and Gold Micro Lines
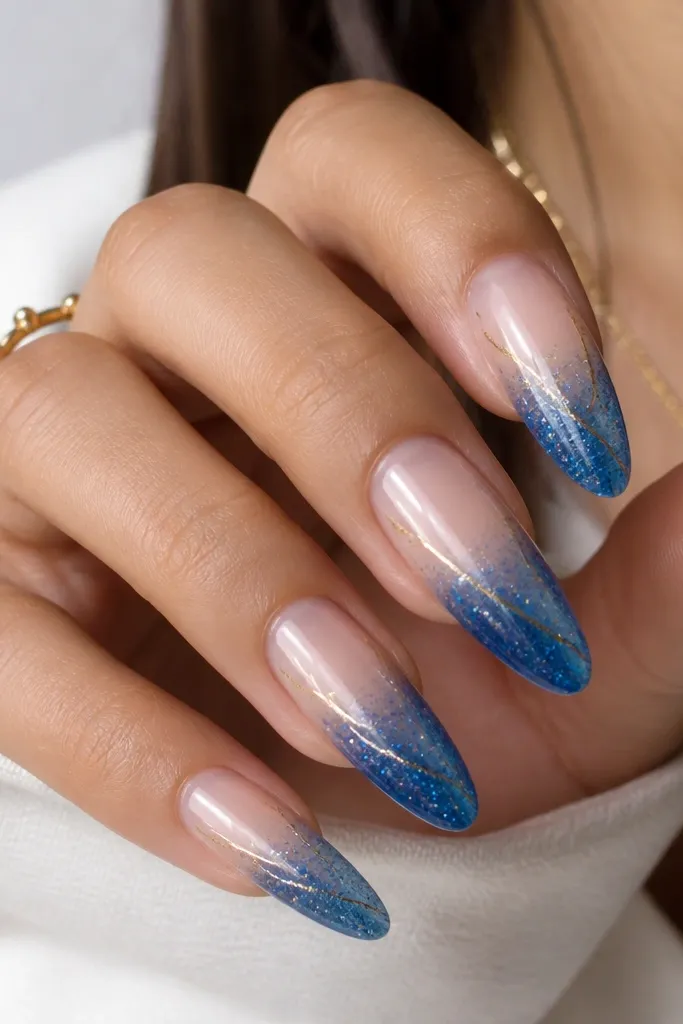
This is the “party lights” version that still feels soft because the glitter is faded, not full coverage. The blue glitter fade creates movement, while the white dashes read like light streaks you’d see in flash photography. Gold micro lines on the sides keep the glitter from looking messy by giving it a clean frame. I like this on longer nails because the dashes need space to taper and look like streaks. It flatters medium skin tones and deeper tones because the glitter catches warm light well.
Editor's noteWipe your liner brush on a paper towel before picking up white gel so the dashes stay thin.
Paint a nude or sheer base, then apply blue glitter gel starting at mid-nail and fading toward the tip — cure. Add 3-4 white light dashes diagonally across the glitter area, keeping them short and tapered with a liner brush. Draw two gold micro lines — one on each side — running from just above the glitter start to the tip. Top coat thoroughly, focusing on leveling over the glitter so it doesn’t feel gritty.
Skip thisDon’t over-layer glitter; if it’s too thick, the white dashes look sunk.
14. White Negative Space Star Map with Blue Nodes and Gold Trim
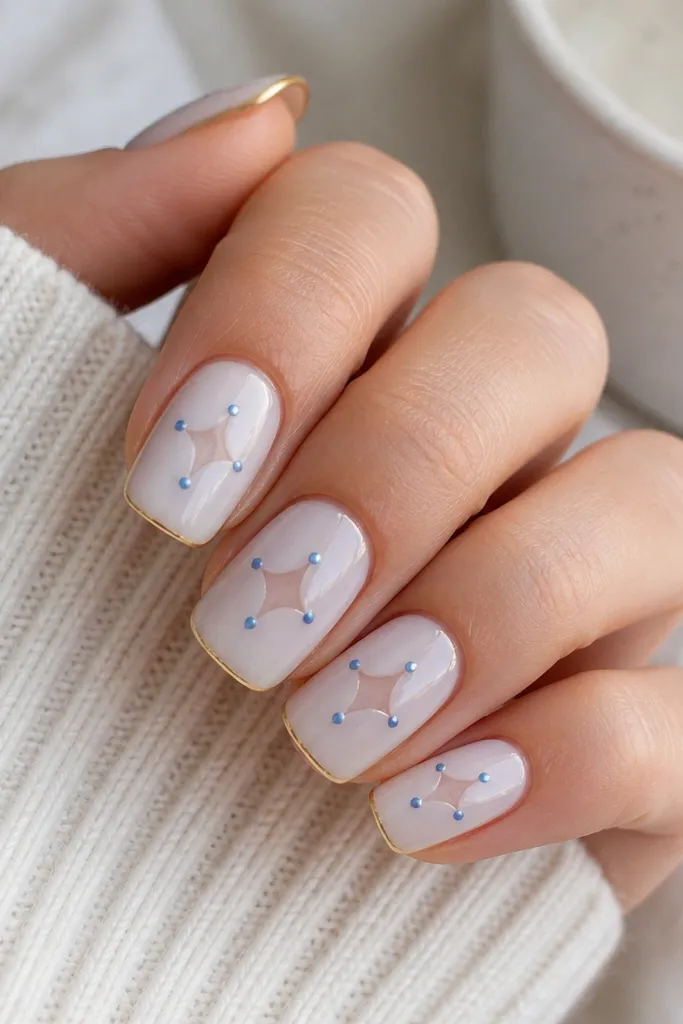
This one looks like a little constellation, and it’s surprisingly flattering because the negative space keeps it airy. Milky white is your clean canvas, blue nodes act like “light points,” and the gold trim makes it feel finished. I like it for people who hate full-coverage glitter because it still looks bright but stays minimal. It flatters short nails because the star map stays centered and doesn’t need length to look intentional. For deeper skin, the negative space makes the design look crisp instead of muddy.
Editor's noteSeal the negative space edges with a super thin top coat using a brush — it prevents lifting later.
Start with a milky white base in two coats and cure. Use a star-shaped stencil or small piece of tape to create negative space in the center — press firmly so edges stay sharp. Paint blue nodes around the negative space with a dotting tool, placing 3-5 points per nail. Outline the outer nail edges with thin gold trim using a liner brush, keeping the line narrow. Top coat carefully, avoiding pooling over the negative space edges.
Skip thisSkip thick gold trim; chunky outlines make the negative space look like a mistake.
15. Powder Pink Cloud Tips with Blue Light Drips and Gold Halo Rings
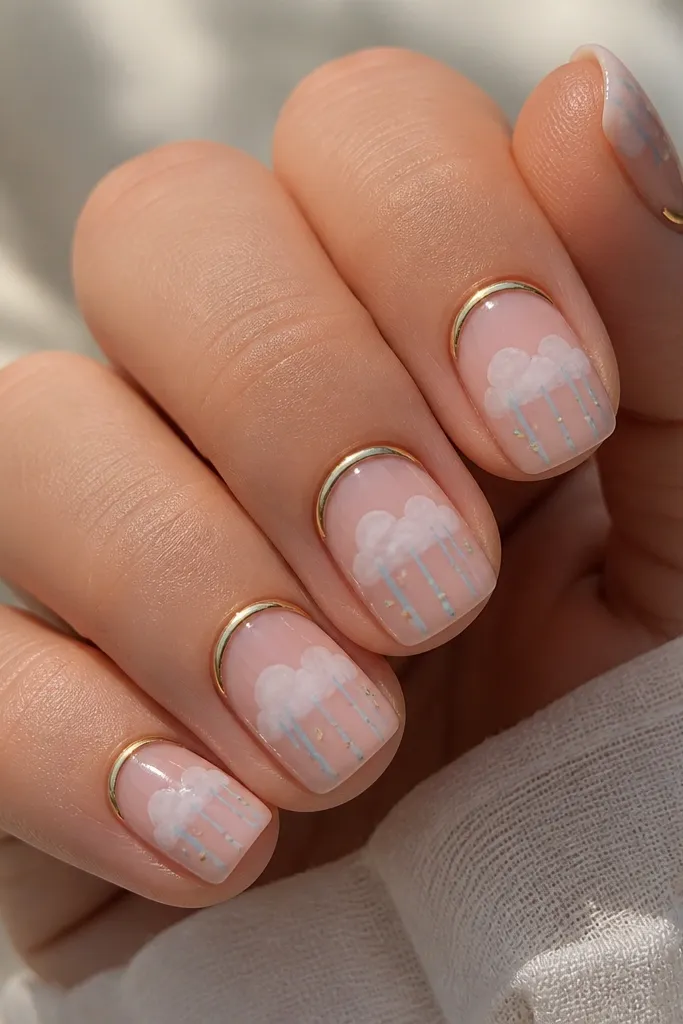
This look is soft glam without feeling flat because the cloud tips create texture while the blue drips add motion. The powder pink base keeps everything romantic, and the blue “light drip” effect reads like tiny LED reflections instead of plain paint. I like it most on short square or squoval nails because the cloud tips give you a smooth edge and the drips stay controlled. The gold halo rings at the cuticle make the nails look intentional, like jewelry, not just nail art. It also photographs well in indoor lighting because the gold catches warm light while the blue looks cool and bright.
Editor's noteIf your blue drip gel looks too opaque, mix it with a drop of clear gel so it reads like light. Cure in two steps — one quick cure for grip, then a full cure — so the drip edges stay crisp.
Start with a powder pink gel polish on all nails and cure it fully. For the cloud tips, sponge a milky white gel onto the tip area in small dabs, then blend the edges with a soft brush so it looks like puffy clouds, not a hard stripe. Add the blue light drips using a striping brush and a translucent icy blue gel, pulling a thin line from the top of each cloud down about 1/3 of the nail; cure in short bursts if your gel is thick. Finish the “halo” by drawing a thin gold ring around the cuticle on each nail, leaving a tiny gap at one side so it doesn’t look like a full band. Place 2-3 tiny gold dots near where each drip ends and cure again. Seal with a top coat that levels smooth so the cloud texture stays slightly raised but not bumpy.
Skip thisSkip a thick top coat over the cloud tips because it flattens the puff effect and makes the blue drips bleed.