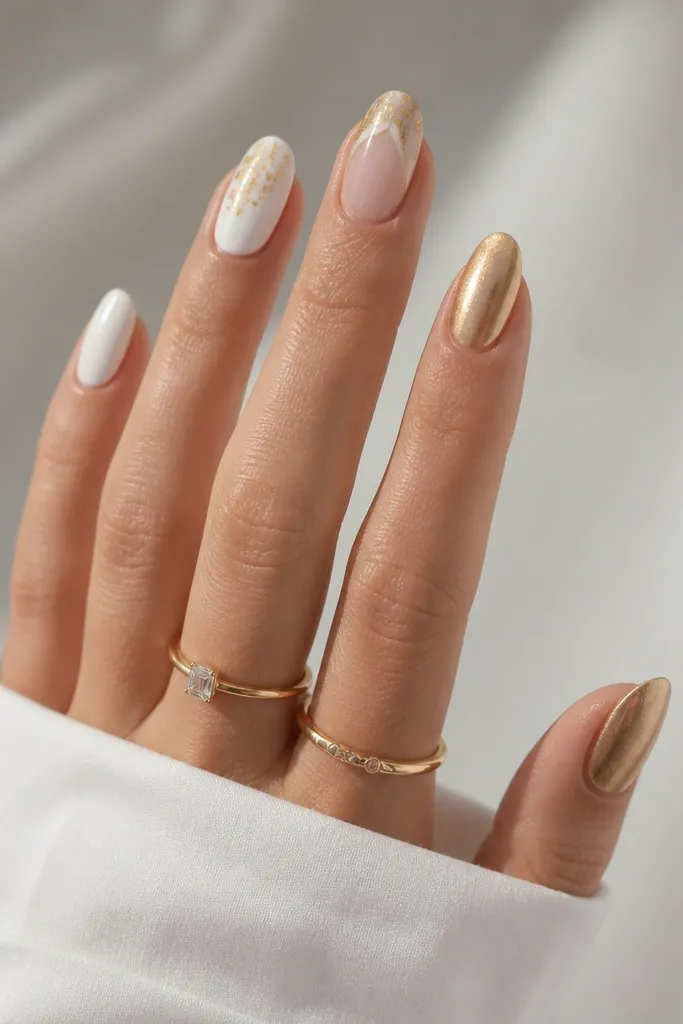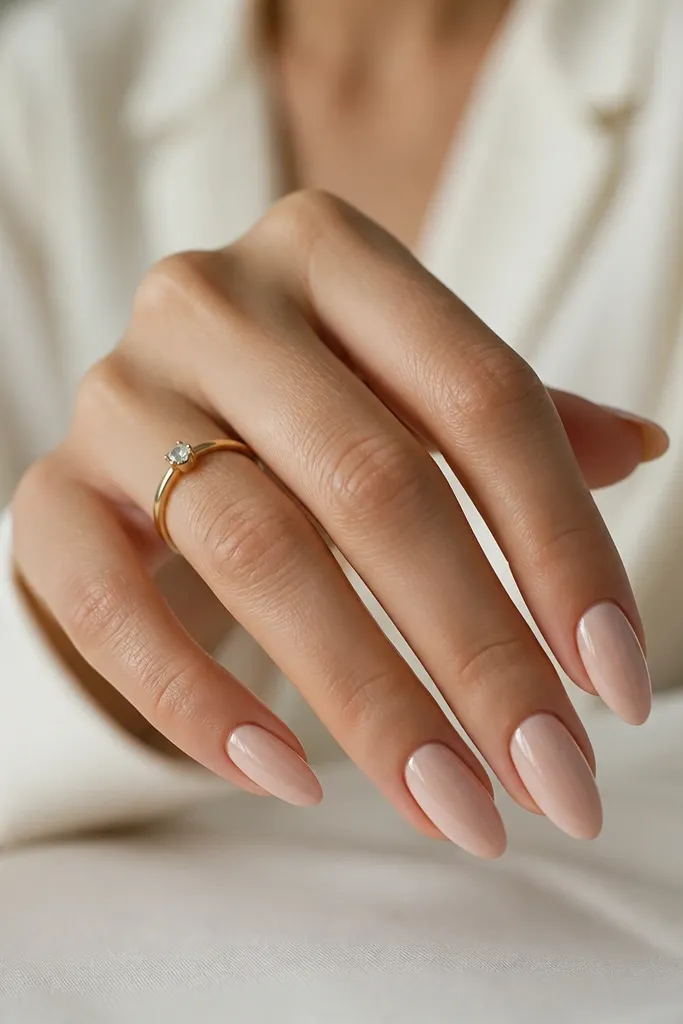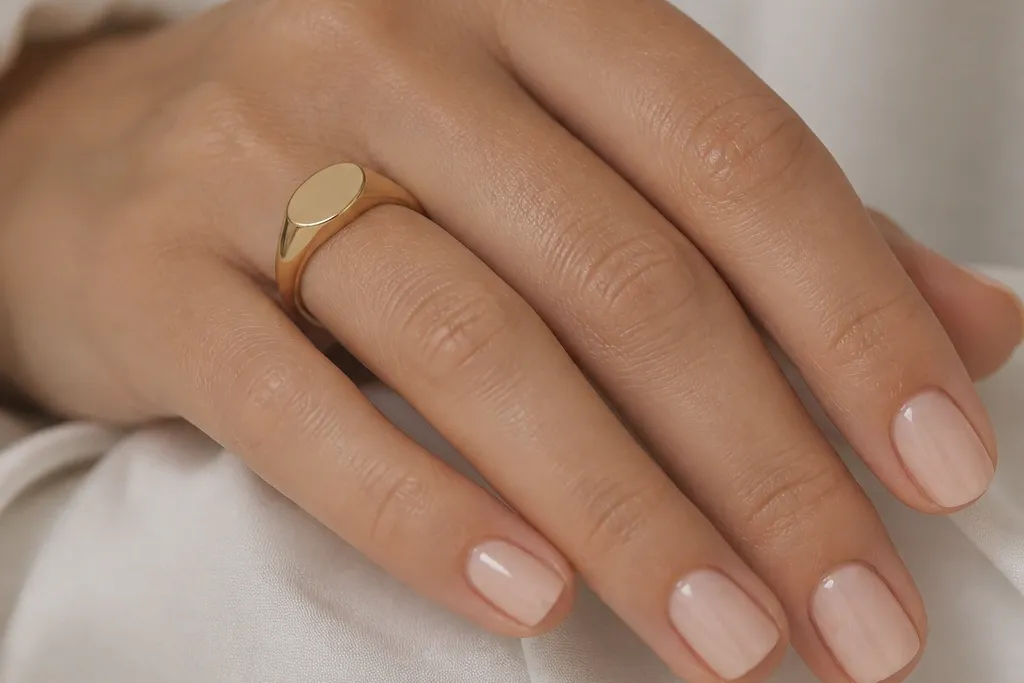

1. Milky Rose Short Almond with Micro French
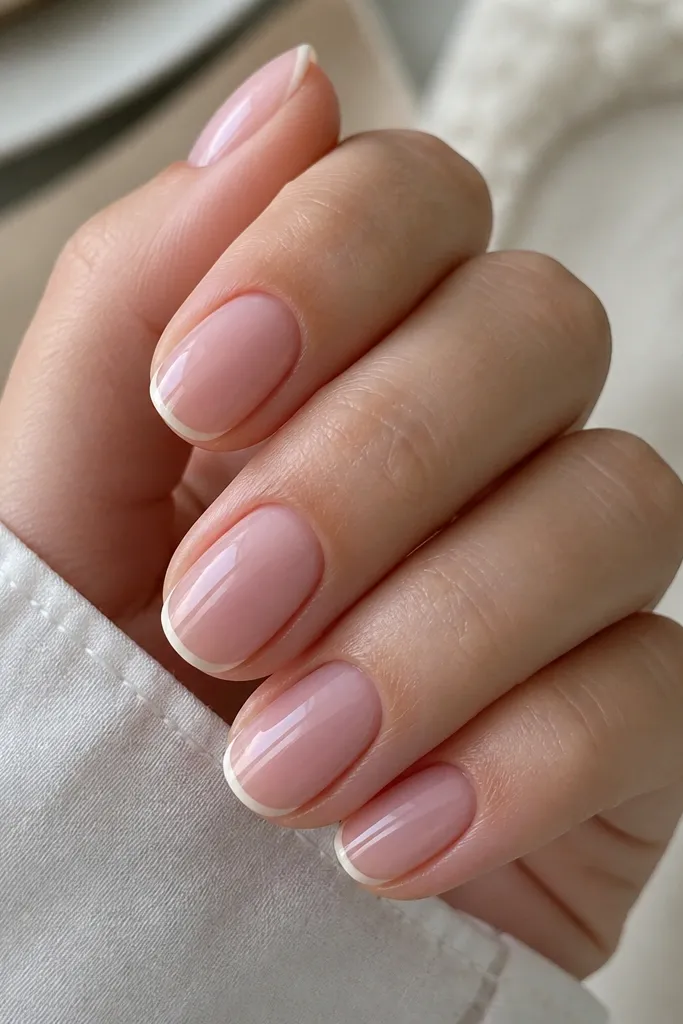
This look is classy because the base and tip are close in value, so your nails read smooth instead of harsh. I use a milky rose gel that covers the nail bed but still lets your natural pink show through, which flatters most skin tones — especially if your nail beds are slightly dry. The micro French keeps the eye on the nail shape, not on chunky decoration. It works for work, weddings, and everyday errands because it doesn’t demand attention, but it still looks like you did something.
Start by prepping and shaping to a soft almond, keeping the free edge to about 1-2 mm. Apply a milky rose base gel in two thin coats, curing each coat fully. With striping gel or a fine brush, draw a French line only at the tip — keep it narrow and centered, then cap the line with a thin clear layer. Finish with a glossy top coat and seal the free edges so the tip line stays crisp.
If your French line gets wobbly, place a small dot of gel at each side of the tip first, then connect them with one smooth stroke.
Avoid thick French tips on short nails — they make the nail look shorter and heavier.
2. Espresso Nude with One Foil Bow Accent
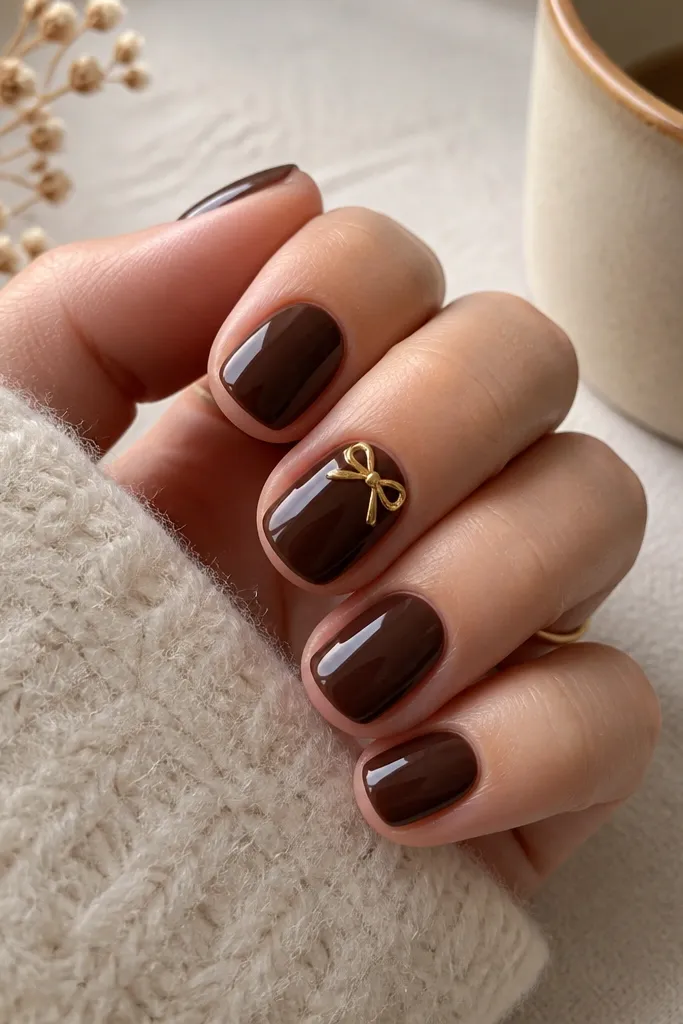
Espresso nude looks elegant because it’s neutral and grounded, not bright. On fair to medium skin, it adds warmth without going too dark; on deeper skin tones, it reads sophisticated and rich instead of ashy. The single foil bow gives you a “special” moment without turning the whole set into a cartoon. I like this for fall through winter, but it also works year-round if you keep the bow small and the base glossy.
Apply a nude espresso gel as your base in two thin coats for full coverage without thickness. Choose one accent nail (I usually pick the ring finger) and place a small gold foil bow using foil glue or a tacky gel layer. Position the bow slightly toward the outer side, then cure so it doesn’t drift. Top coat over the bow carefully, using a thin layer first so the foil doesn’t lift, then add a full glossy top coat and seal the edges.
Editor's noteUse a tiny bow die-cut or cut foil yourself — the smaller the bow, the more expensive it looks.
Skip thisSkip a foil bow on every nail; it looks like craft foil instead of manicure design.
3. Sheer Blush with Tiny Pearl Cluster
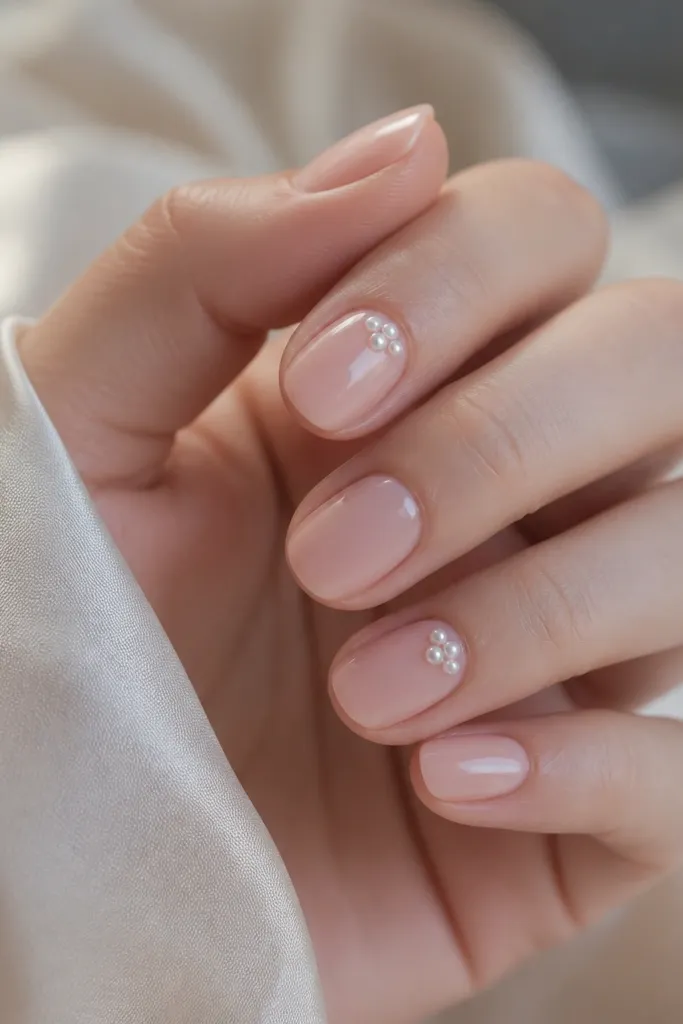
A sheer blush base is the cheat code for classy short nails because it looks like healthy nail color, not heavy paint. The mini pearls near the cuticle make the nail look longer by drawing the eye upward. This is flattering on almost everyone because blush works with cool and warm undertones when it’s sheer. I wear this for bridal events, holiday parties, and dates because it looks delicate and photogenic without needing long nails.
Start with a sheer blush gel and build it in two thin coats so it stays glassy, not opaque. On the accent nails, dab a small amount of clear gel close to the cuticle line (leave a tiny gap so it doesn’t flood the skin). Place three mini pearls in a tight triangle, cure, then add a thin top coat around the pearls without dragging them. Seal the perimeter and file the top lightly once cured so the pearls don’t snag.
If you hate snagging, use flat-back pearls and cap them with gel so they feel smooth to the touch.
Don’t place pearls in the middle of a short nail — it shortens the visual length.
4. Black Tea Gel with Thin Rose-Gold Line
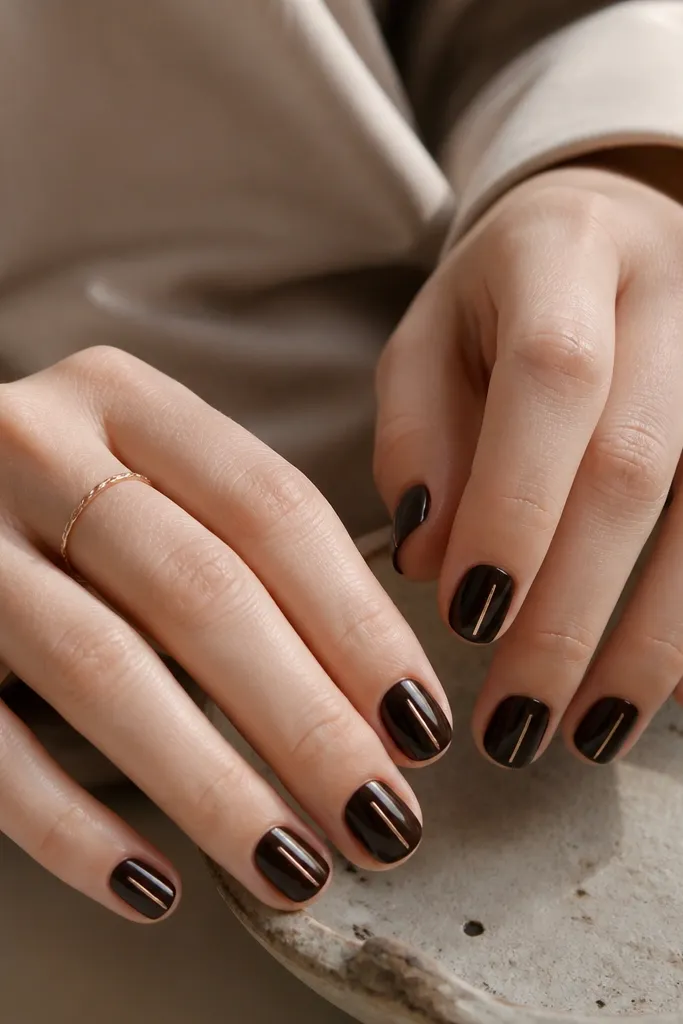
Black tea brown reads classy because it’s dark but not flat black. The slight warmth makes it look flattering on a wide range of skin tones, especially when the top coat is super glossy. A thin rose-gold line creates a length effect on short nails by keeping the accent narrow and vertical. This is my winter go-to when I want something moody but still polished enough for work.
Apply a black-tea brown gel in two thin coats, curing each layer. With a striping brush and rose-gold gel, draw one straight vertical line per nail — keep it centered and about the width of a thin hair. Cure the line, then top coat with a glossy gel, making sure you don’t flood the cuticle. Cap the line by adding a final thin top coat so the rose-gold looks smooth, not textured.
Use a guide dot: place a tiny dot near the cuticle and another near the tip before you draw the line.
Avoid thick lines on short nails — they turn the look chunky fast.
5. Classic Nude with Reverse French Cuticle Detail
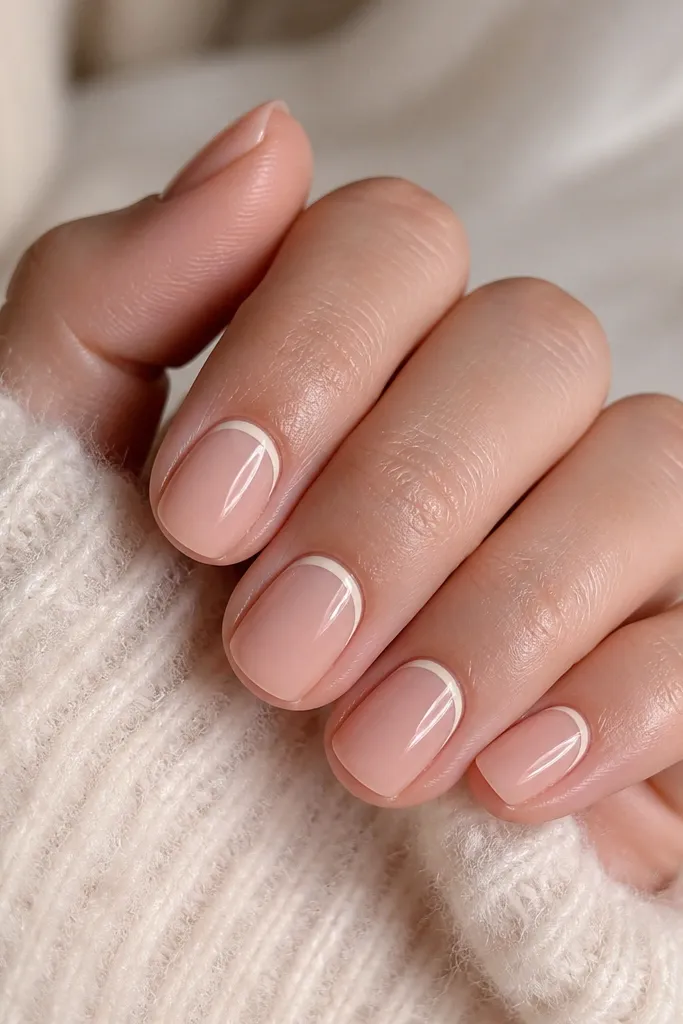
Reverse French looks classy on short nails because it frames the nail bed without adding bulk at the tip. The thin line under the cuticle makes your nails look tidy and slightly longer, which is the whole win. I like classic nude pink for this because it matches your natural nail tone and keeps the design refined. This one works for office weeks, interviews, and events where you want “done” nails without sparkle overload.
File to a soft square, keeping the free edge minimal. Apply your nude base in two thin coats and cure fully. Use a fine detail brush to draw a thin creamy arc under the cuticle, leaving a hairline gap from the skin. Clean the edges with a brush dipped in cleanser, cure, then top coat and seal the free edge.
Do the reverse French after your base is fully cured so the line stays crisp instead of smearing.
Don’t bring the reverse French line too close to the skin — it looks messy and grows out fast.
6. Glazed Peach with Micro Shimmer Fade
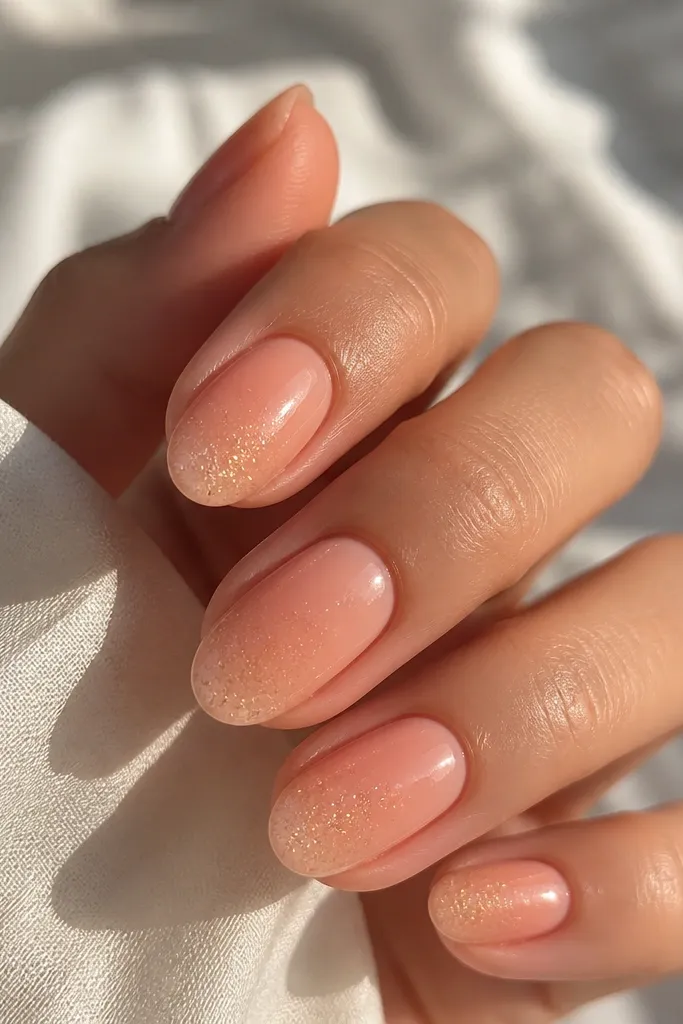
Glazed peach is pretty and classy because it’s warm, wearable, and reflective. The micro shimmer fade keeps the sparkle controlled, so your nails look lit-from-within rather than sparkly dust. This flatters light through deep skin tones because it sits in a flattering peach range — not neon. I wear this in spring and summer when I want something feminine but still polished for daily life.
Start with a peachy nude base gel, then apply a second thin coat for a smooth, even look. Mix micro shimmer into a clear gel or use a pre-made shimmer gel and apply it starting at the center, blending toward the tip with a damp brush. Keep the shimmer lighter near the cuticle so it fades naturally. Cure, then finish with a thick glossy top coat to lock in the shimmer and smooth texture.
Blend with a slightly rounded brush tip, using light pressure so you don’t streak the shimmer.
Avoid chunky glitter gradients — short nails show texture and it starts snagging quickly.
7. Mauve Velvet Matte with Glossy Accent Line
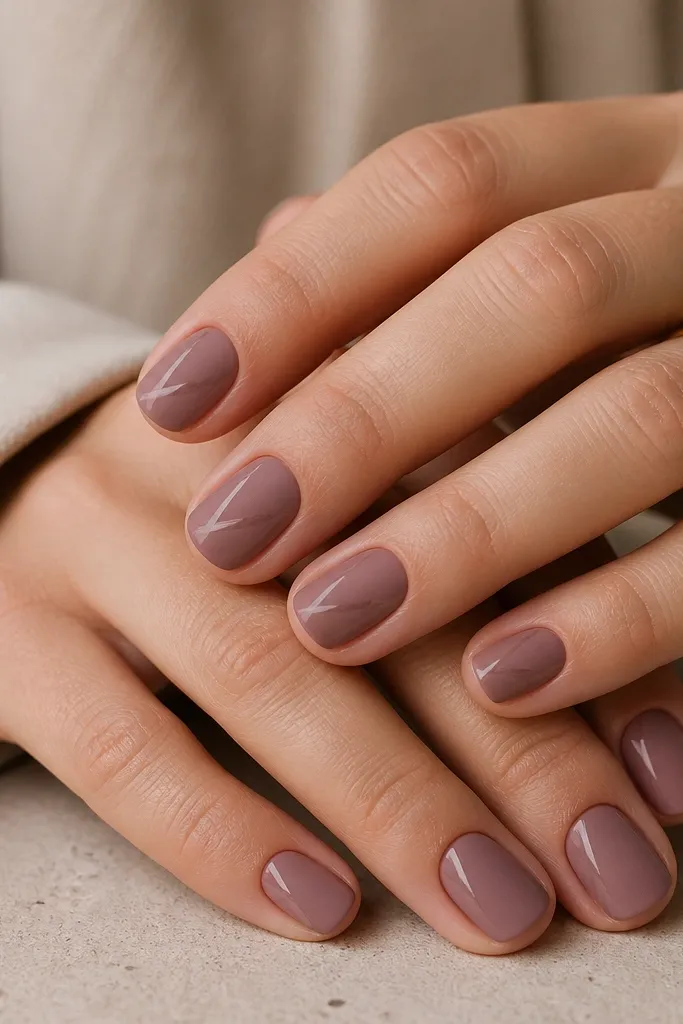
Matte can look classy on short nails when it’s smooth and even. Mauve velvet matte is flattering because it’s soft and sophisticated, not gray and not too pink. The glossy diagonal line gives you contrast, which makes short nails look styled instead of plain. I like this for fall and winter dinners, but it works for everyday if you keep the accent line thin.
Apply a mauve gel base and cure, then add a second thin coat for full color. Once the color is cured, top coat with a matte top coat - two thin layers if you want that velvet look. For the accent, use striping gel to draw one thin diagonal line, then cure. Finish by adding a glossy top coat only over the line area so the matte stays matte and the accent looks wet-gloss.
Editor's noteIf your matte top makes the color look dull, add one extra thin matte coat instead of adding more color gel.
Skip thisDon’t mix matte and thick art everywhere — it looks heavy on short nails.
8. Forest Green with Tiny Gold Dot at the Free Edge
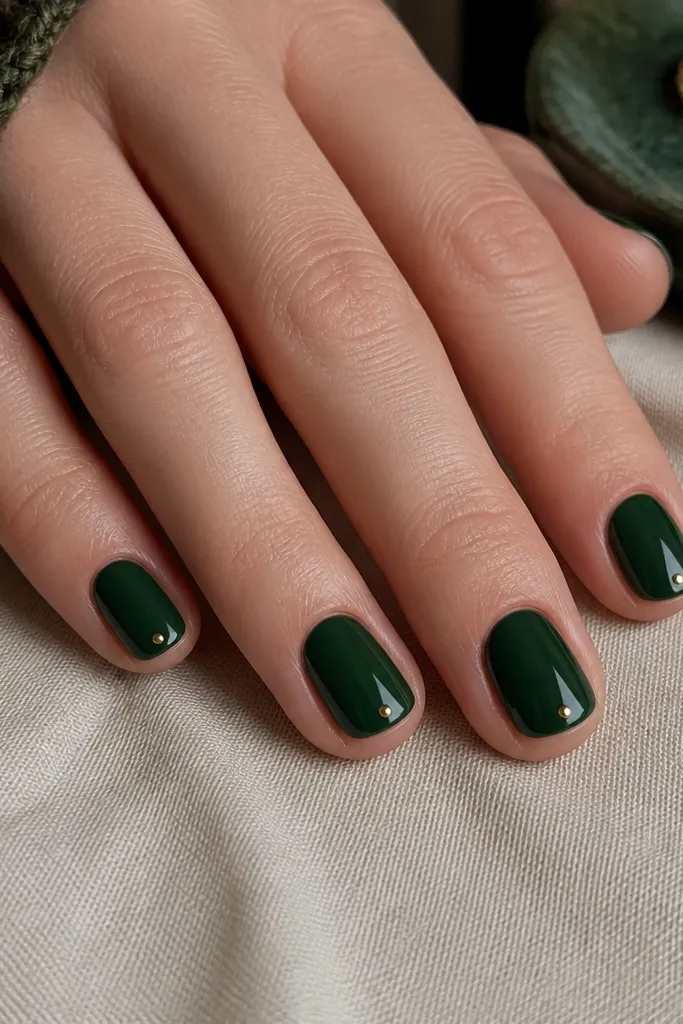
Forest green is classic and seasonal without needing a pattern. The tiny gold dot at the free edge reads like a jewelry detail and makes the manicure feel intentional. This is especially flattering if you like darker colors because the gold gives a warm highlight that keeps the set from looking flat. I wear this in colder months, but it also looks great year-round with gold rings and dark denim.
Paint two thin coats of glossy forest green gel and cure fully. Use a dotting tool with gold chrome gel or gold foil gel to place one dot centered near the tip on each nail. Keep the dot small, roughly the size of a pinhead, and cure. Apply a glossy top coat carefully around the dot, using a light brush stroke so the dot doesn’t smear.
Editor's noteIf you mess up a dot, wipe it before curing — after curing, you’ll have to file it down.
Skip thisSkip big gold blobs — they look like costume jewelry on short nails.
9. Creamy White with Soft Nude Negative Space Half-Moon
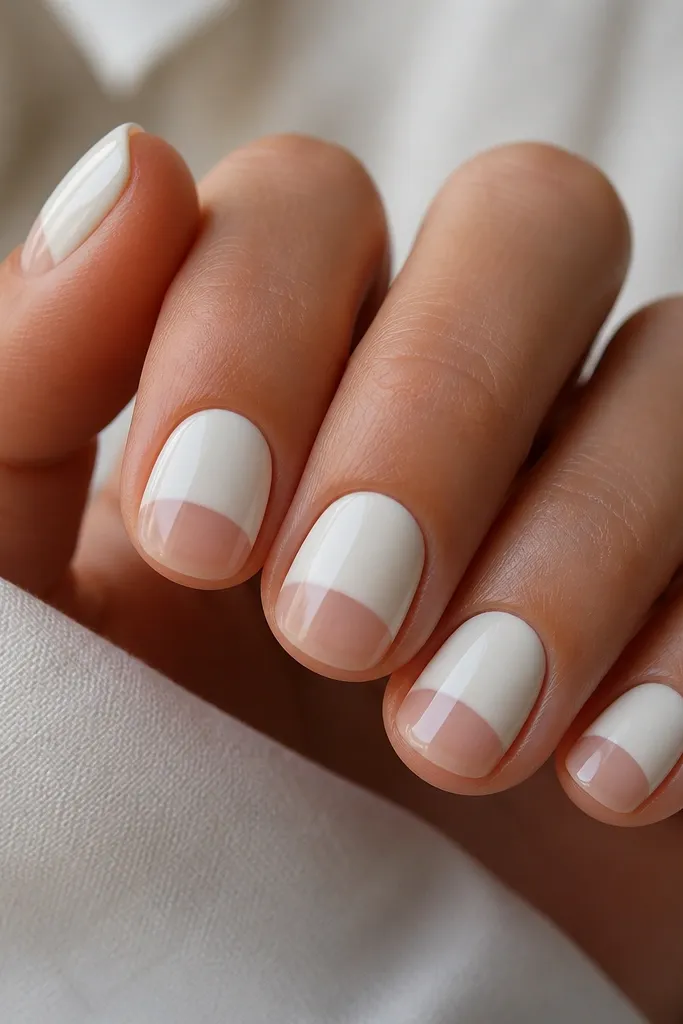
Negative space half-moons look classy because they create a clean graphic line and keep the nail from looking too painted. The creamy white is softer than stark white, which flatters short nails and doesn’t make your hands look washed out. The nude half-moon portion makes the nail bed look longer. This design fits spring through winter because the colors are neutral — and it looks great with both gold and silver jewelry.
Start with a nude base gel that matches your natural nail color as closely as possible. Cure it and then apply creamy white gel only on the top half, leaving the cuticle area nude. Use a half-moon guide sticker or a thin brush to keep the curve smooth — aim for the curve to sit just above the nail’s midpoint. Cure fully, then top coat with glossy gel and seal the free edge.
Use a tacky layer under the white so the boundary stays crisp during application.
Avoid crooked half-moons — angled curves look cheap and make short nails look uneven.
10. Sheer Pink with Thin Silver Side Stripe
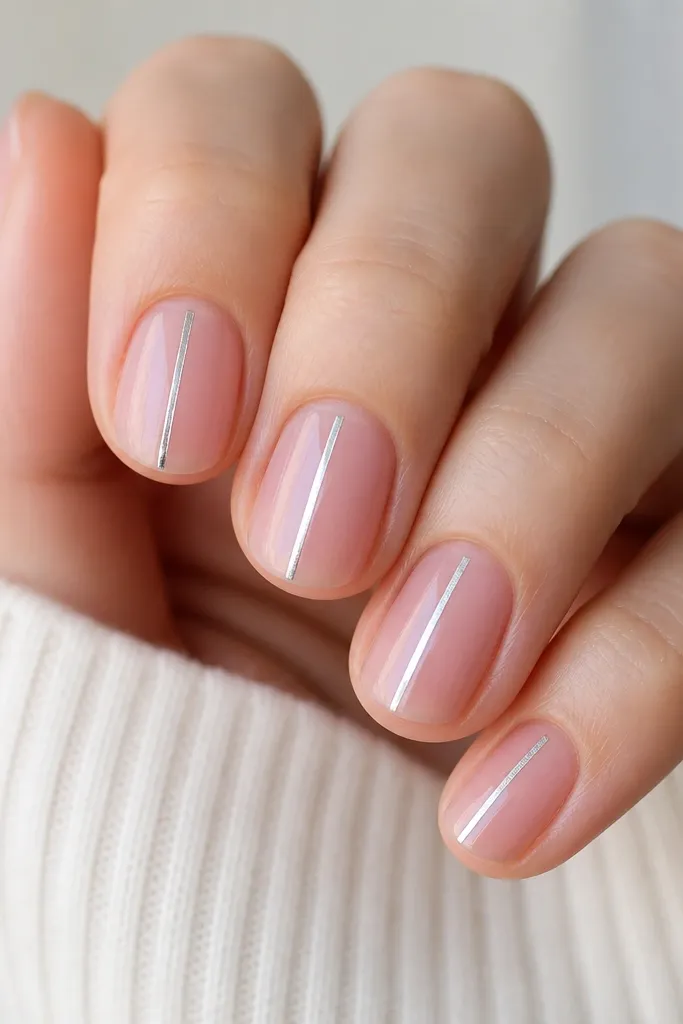
A sheer pink base keeps the manicure light, and the side stripe adds structure. Silver is crisp and clean, which makes short nails look sharper and more put-together. This works best when the stripe is thin — think “jewelry line,” not “tape.” I like this for people who want classy nails but hate heavy art. It looks especially good on cooler undertones and pairs cleanly with silver rings.
Apply sheer pink gel in two thin coats for a natural, even pink. Cure completely. With a fine liner brush, paint a thin silver stripe along one side of the nail, starting a millimeter away from the cuticle and stopping just before the sidewall ends. Cure, then add one glossy top coat, cap the stripe with clear gel so it doesn’t snag.
If your liner brush is too wide, use striping tape to block the stripe edge, then remove it before curing.
Skip thick stripes — they make short nails look crowded.
11. Caramel Swirl Accent on Nude Base
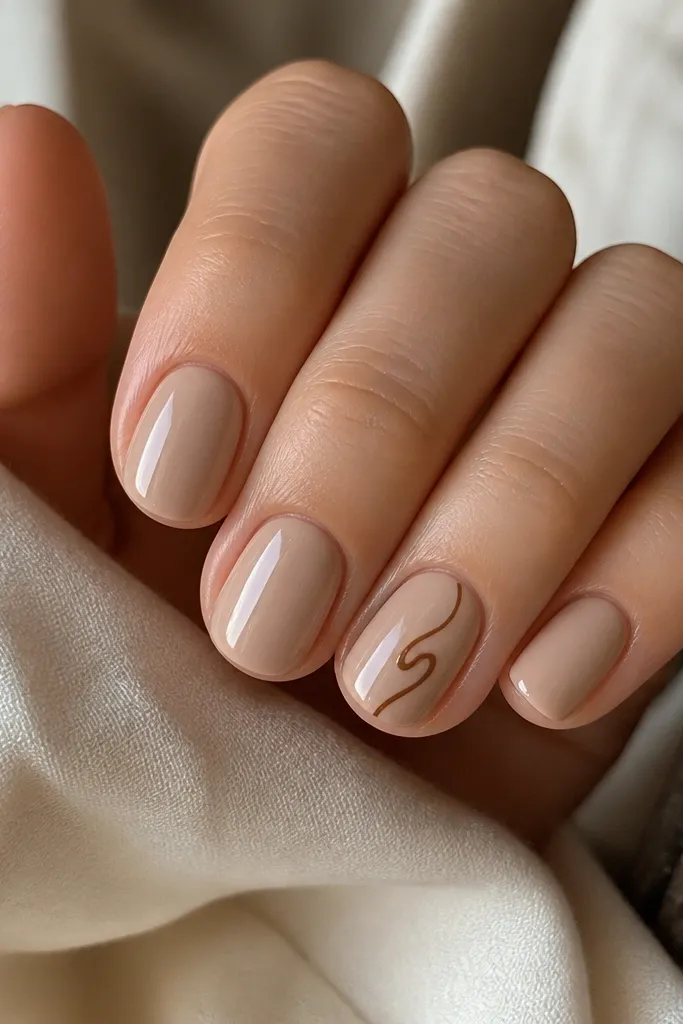
This design is classy because the base is calm and the swirl is airy. A nude beige base makes caramel-brown look warm and expensive, and it flatters hands that look a bit dry because the nude tone hides roughness. The swirl line adds movement without taking over the nail, which is exactly what short nails need. I wear this when I want something cozy for fall, but still clean enough for everyday.
Start with a nude beige gel base in two thin coats and cure. Pick one or two accent nails. Use a fine brush to draw a caramel swirl line — keep it thin and mostly linework, with one slightly thicker loop for contrast. Cure, then top coat over everything, using careful brush pressure so the swirl stays smooth and doesn’t bubble.
Editor's notePractice the swirl on a fake nail first; the trick is one confident curve, not multiple retraced lines.
Skip thisDon’t fill the swirl with solid color blocks — line art looks cleaner on short nails.
12. Burgundy Gloss with One Nude Peek Panel
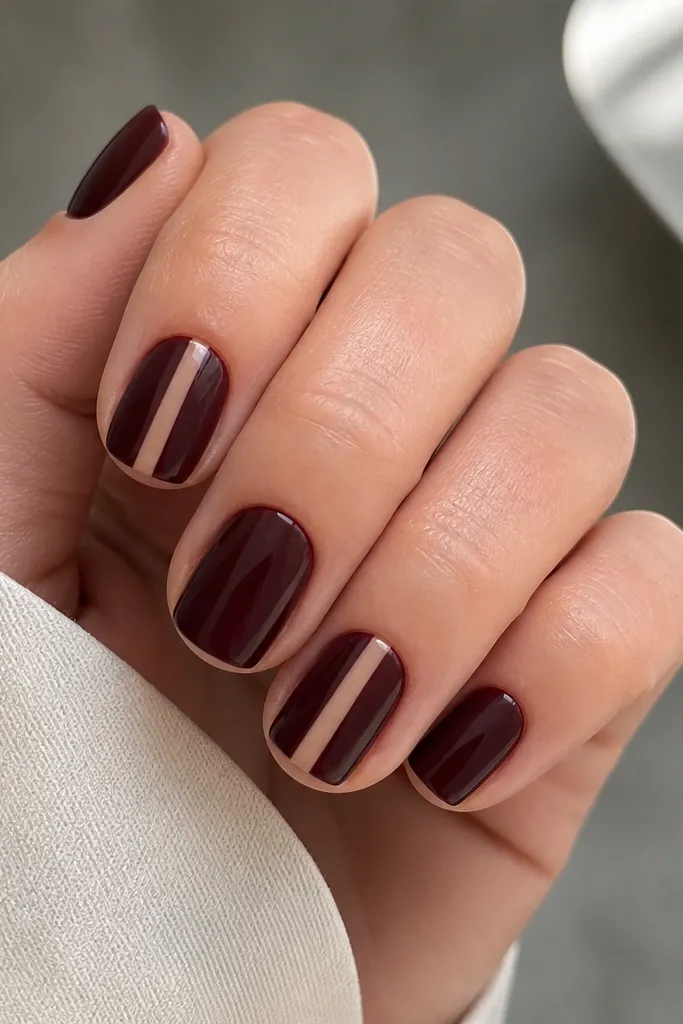
Burgundy is a classy short-nail color because it reads polished even in one shade. The nude peek panel adds a graphic element that makes the nail look longer and more intentional. This is flattering across skin tones because the nude panel breaks up the deep color and prevents it from looking heavy. I like this for autumn through holiday season when you want something dark that still looks neat.
Paint two thin coats of glossy burgundy on all nails and cure. On the accent nail, apply a nude gel panel in a narrow vertical strip — about a third of the nail width — centered. Cure the nude panel first, then paint burgundy around it with a steady brush so the edges stay crisp. Top coat everything in glossy gel and cap the panel edge so it feels smooth.
Use a nail art brush with a slightly pointed tip for the panel edges — rounded brushes blur the line.
Skip wide negative panels — they can make short nails look stumpy.
13. Jewel-Tone Teal with Matte Cuticle Halo
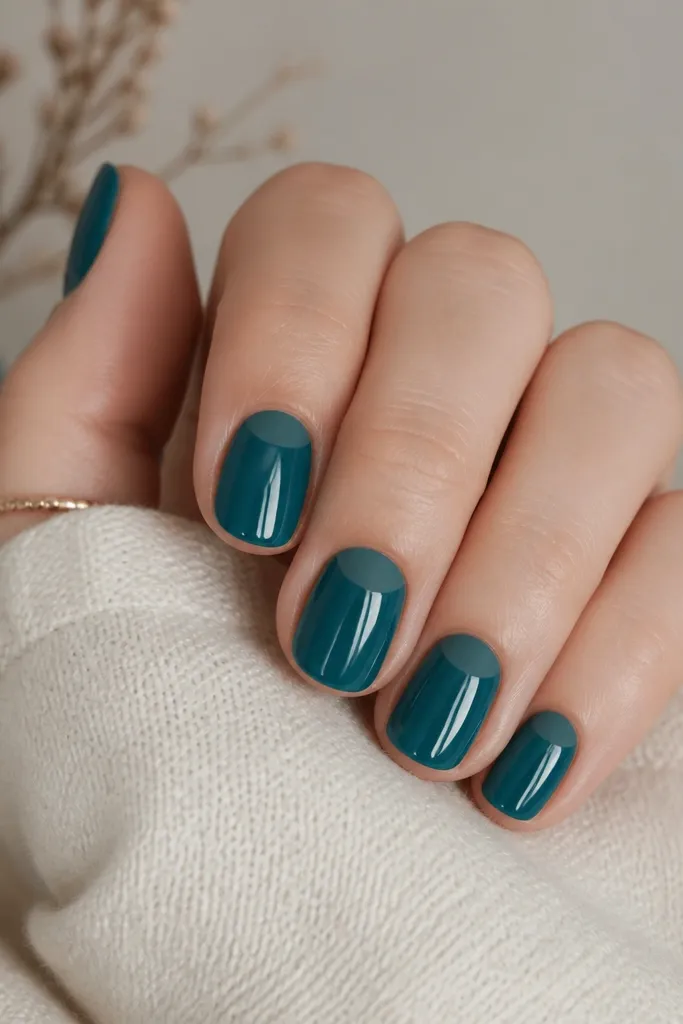
This one looks classy because it mixes finishes in a controlled way. Jewel-tone teal is bold but not loud when you keep the art minimal. The matte halo around the cuticle adds a halo effect that makes your nail bed look neat and slightly lifted. It flatters medium and deeper skin tones beautifully, and it also looks great on fair skin if you choose teal that leans slightly green instead of blue.
Start with a glossy teal base in two thin coats and cure. Then apply matte top coat only around the cuticle area using a small detail brush, forming a thin crescent halo — keep it narrow so it doesn’t look like smudging. Cure and check the edges; clean up with a brush dipped in cleanser before it fully sets. Finish with a glossy top coat over the non-matte areas only, so the cuticle halo stays matte and crisp.
Editor's noteUse painter’s tape or a cuticle guard to block off the gloss area while you paint the matte halo.
Skip thisAvoid smudgy matte near the skin — it makes the set look grown-out or uneven.
14. Champagne Chrome Half-Tip on Nude Blush
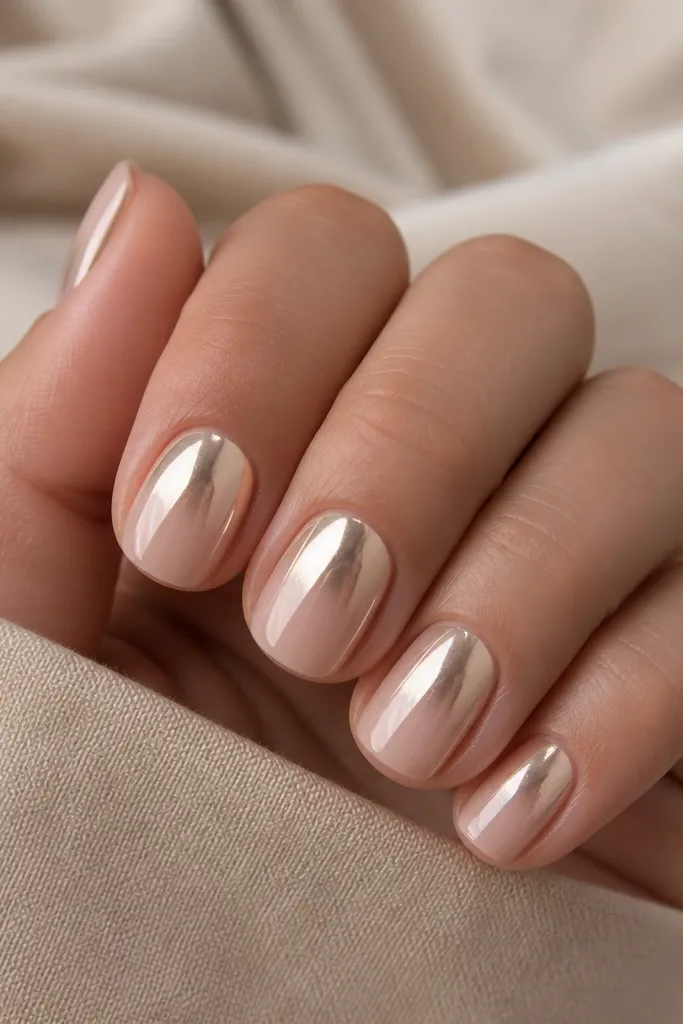
Champagne chrome half-tips look expensive on short nails because they create a strong highlight without covering the whole nail. The nude blush base keeps it wearable and classy, and the chrome adds that “going out” shine. This works for almost any skin tone because champagne is soft and warm, not icy. I use this for holiday parties, birthdays, and nights out when you want maximum impact with minimal nail length.
Apply nude blush gel in two thin coats and cure. For chrome, apply a chrome-friendly base or gel where the half-tip will go — start halfway down the nail. Rub champagne chrome powder or press-on foil into the tacky layer, then buff lightly to remove excess. Seal with a glossy top coat in thin layers so you don’t dull the chrome — I usually do a thin clear cap first, cure, then a second thin cap.
Editor's noteIf your chrome looks patchy, press it firmly in short strokes instead of rubbing in circles.
Skip thisAvoid full chrome coverage on short nails — it can look too heavy and mask the nail shape.
15. Soft Black Micro-Checklist on Sheer Nude
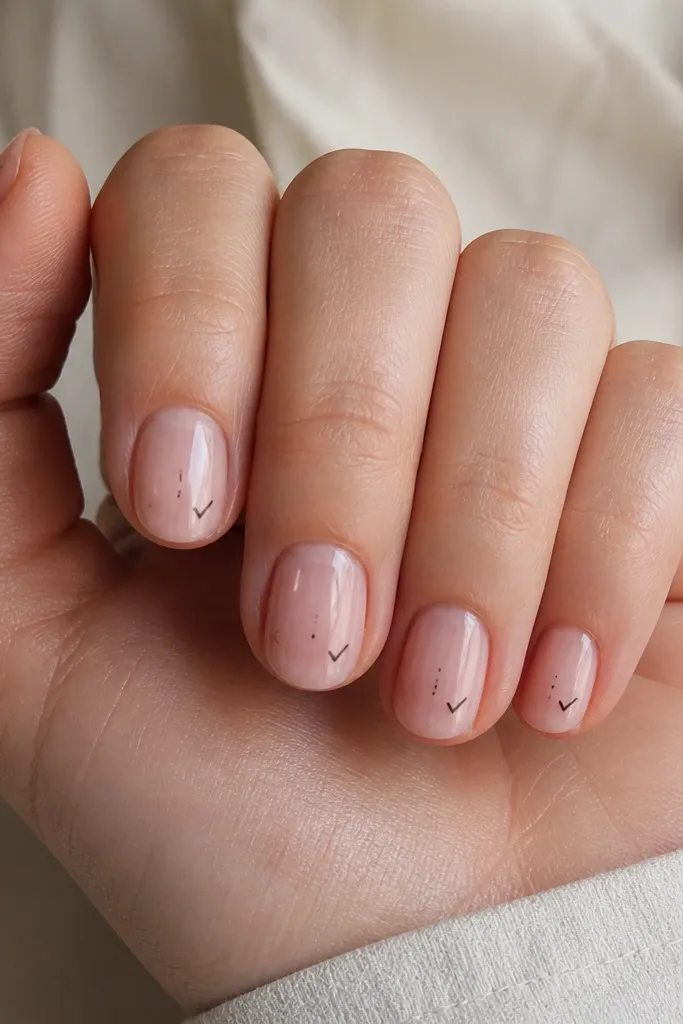
This is classy because it’s graphic but tiny. A sheer nude base keeps your nails looking clean, and the soft black micro marks add personality without turning into a pattern wall. On short nails, micro details work better than big icons because they don’t overwhelm the nail bed. I wear this when I want something modern and slightly artsy but still office-friendly.
Apply a sheer nude gel base in two thin coats, curing each. With a fine liner brush and soft black gel (not jet black if you want it gentler), place micro elements near the tip: a tiny dot, then a short line, then a small check mark. Keep each symbol under 1 mm so they stay delicate. Cure and top coat with glossy gel, using a thin cap layer so the symbols stay crisp.
Editor's noteIf your symbols look thick, thin the gel with a drop of clear and try again — liner gel thickness matters a lot.
Skip thisDon’t add multiple big symbols on every nail — it reads cluttered on short length.