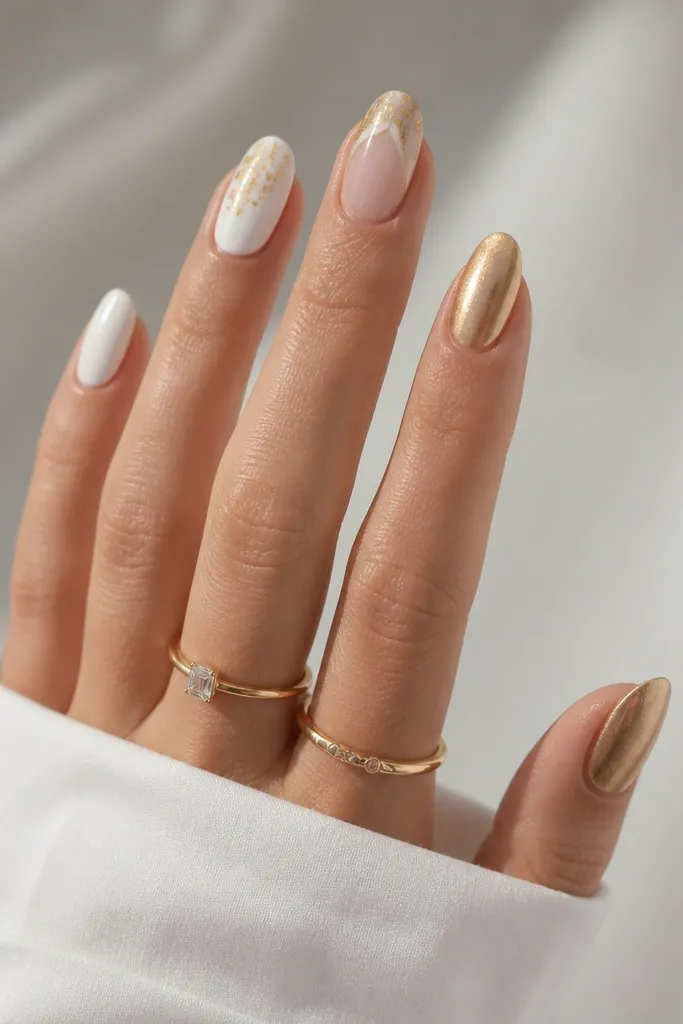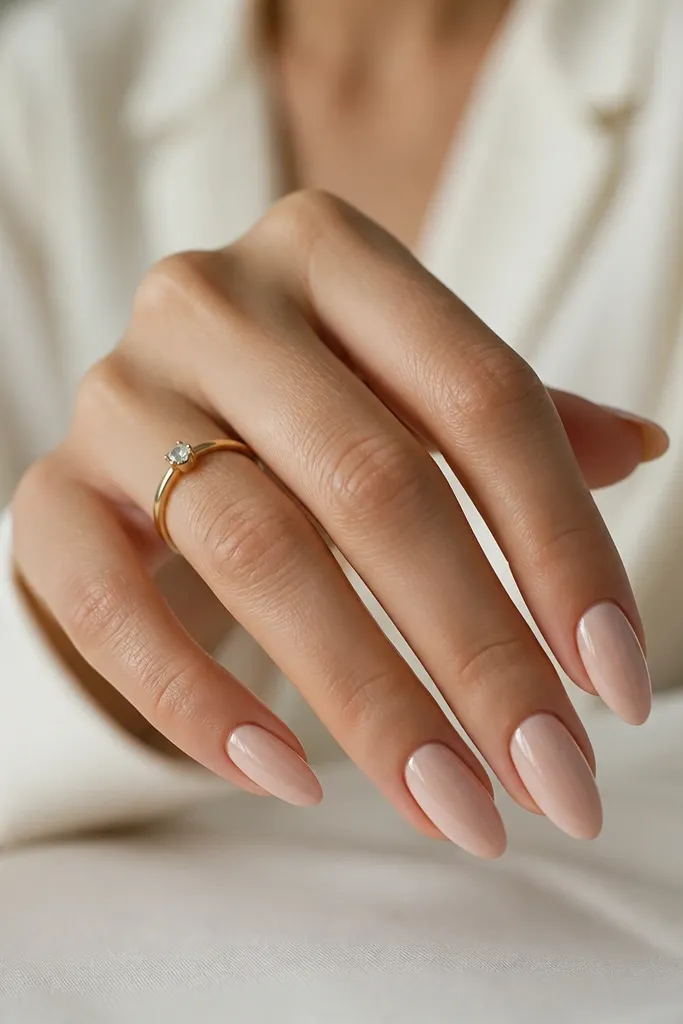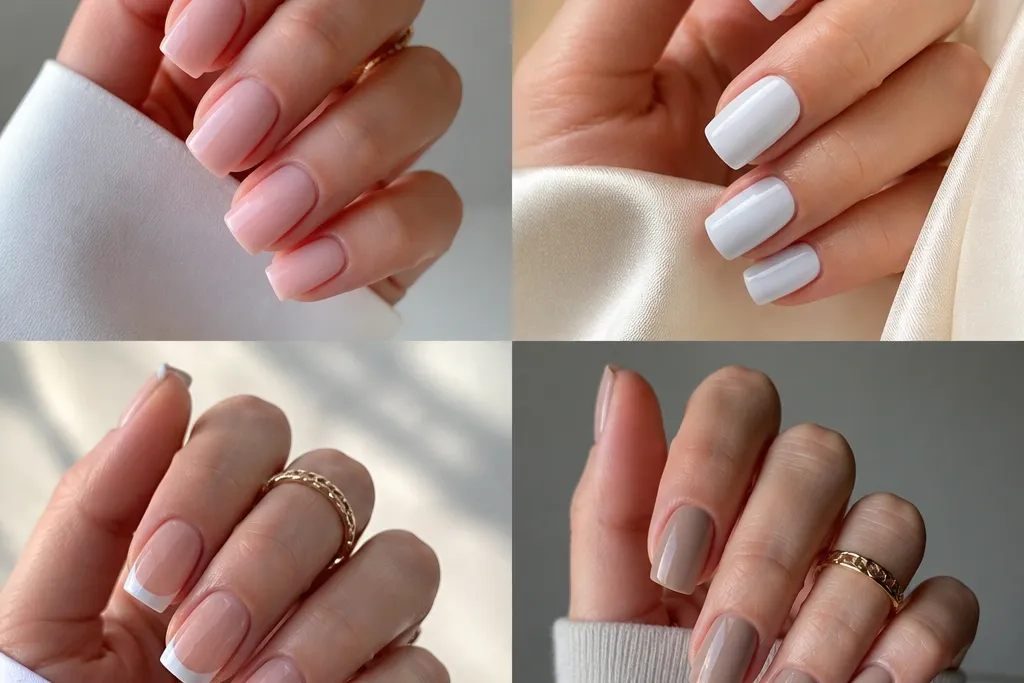
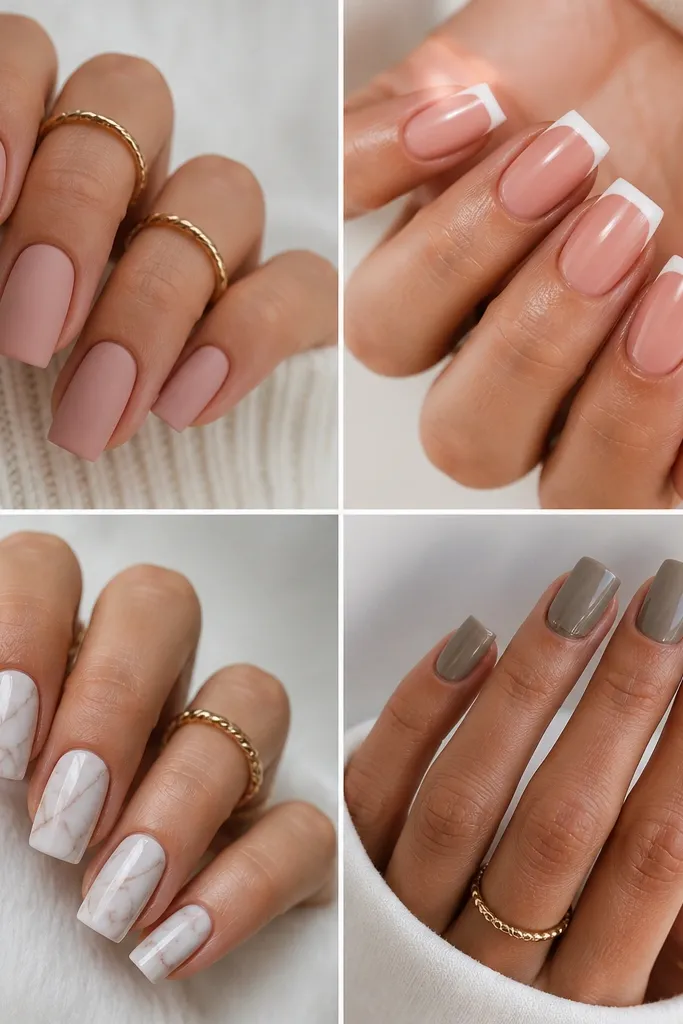
1. Barely-There Milky Nude Square
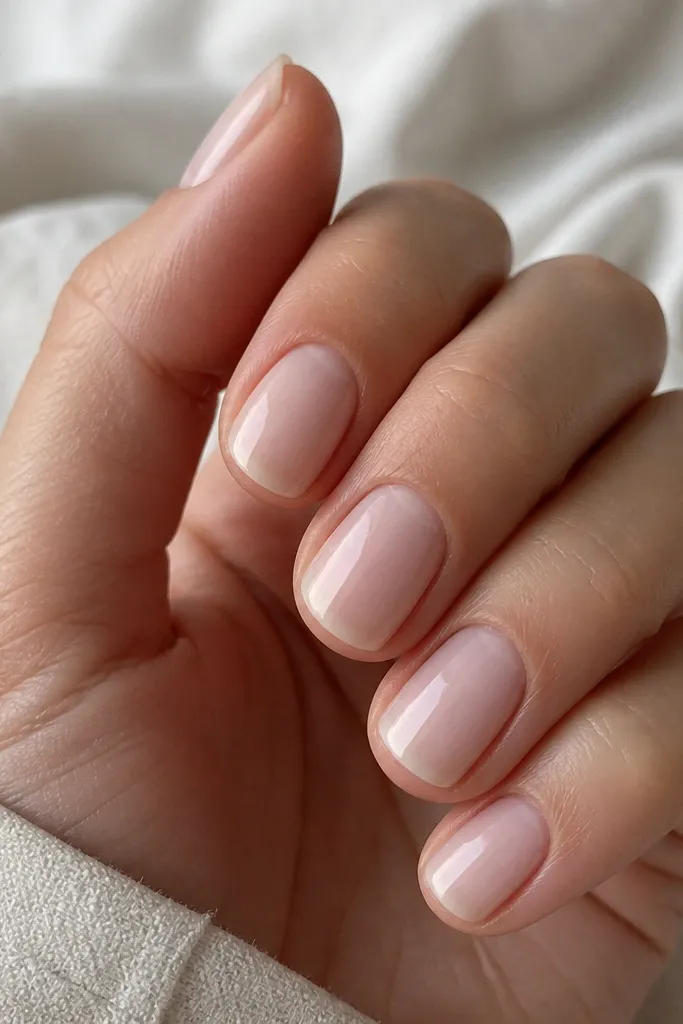
This is the “my nails look naturally polished” set. The milky nude is semi-sheer with a creamy white cast, so it brightens your hands without turning the nails into a bold block of color. On my skin tone, it flatters best when the polish is applied in two thin coats so the nail still shows through at the tip. It also looks great on short square nails because the flat top reflects light and makes the shape look intentional. Wear it to work, weddings, or anytime you want classy without thinking too hard.
Start by pushing back cuticles and buffing the shine off the nail plate with a gentle 180-grit block. Apply a thin base coat, then two coats of milky nude, letting each coat level out before curing or drying. Keep the polish slightly thinner at the sidewalls so you don’t get messy ridges — I leave a tiny “breathing gap” from the edge. Finish with a glossy top coat that’s just a bit thicker over the center and the free edge. If you want extra crispness, clean the sides with a small brush dipped in acetone right after the last coat.
If your milky nude looks streaky, do three thinner coats instead of two thick ones.
Skipping cuticle cleanup makes the set look cloudy instead of classy.
2. Micro French in Soft Taupe
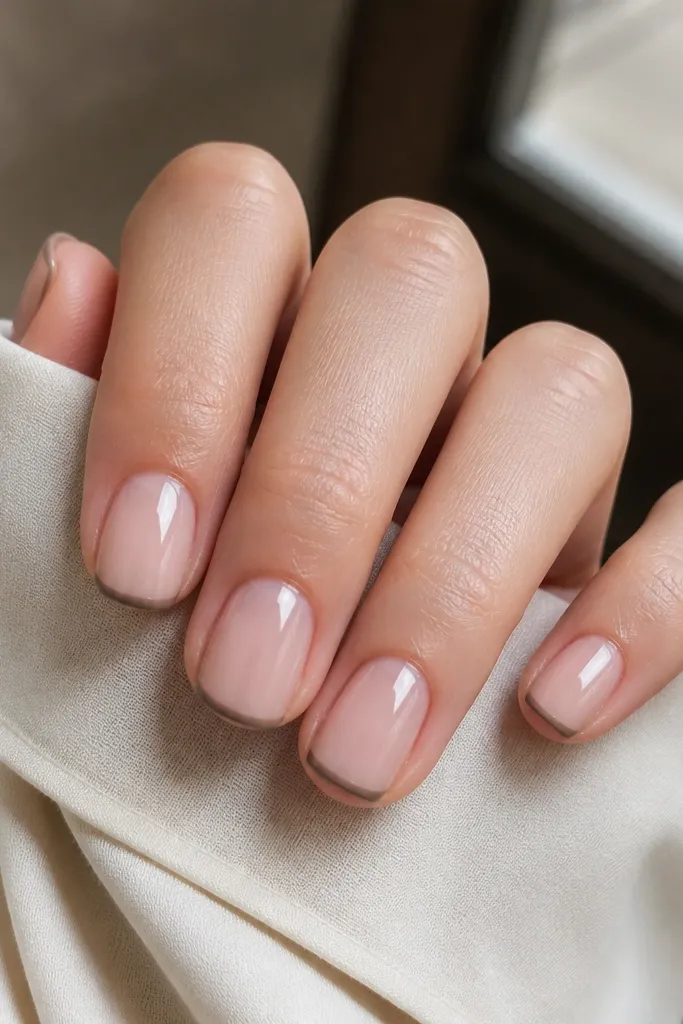
Paint the nails in a sheer nude base — I use one coat of nude builder gel or sheer polish, then let it dry fully. Place French guide stickers or use a steady hand with a striping brush; keep the taupe line about 1 mm from the tip edge. Apply the taupe in one clean swipe per side, then fill the middle with a second pass if needed. Let it dry completely and seal with a glossy top coat that covers the tip edge to lock the line in. Remove any tiny smudges around the corners with a cotton swab lightly dampened with acetone.
Micro French is elegant because the design is controlled and doesn’t take over the nail bed. Using soft taupe instead of white makes it feel modern and less harsh, especially if white tends to wash you out. The flat square tip gives you room to keep the French line straight and narrow. I find it flattering on medium to deep skin tones because taupe sits between warm and neutral and doesn’t look gray-green. This is also a great option for first-time nail art since the line is so thin.
Skip thisThick French lines make short square nails look stubby.
Editor's noteUse a striping brush that’s slightly stiff; it makes the line stay crisp on square tips.
3. Creamy White 'Hospital Corners' Square
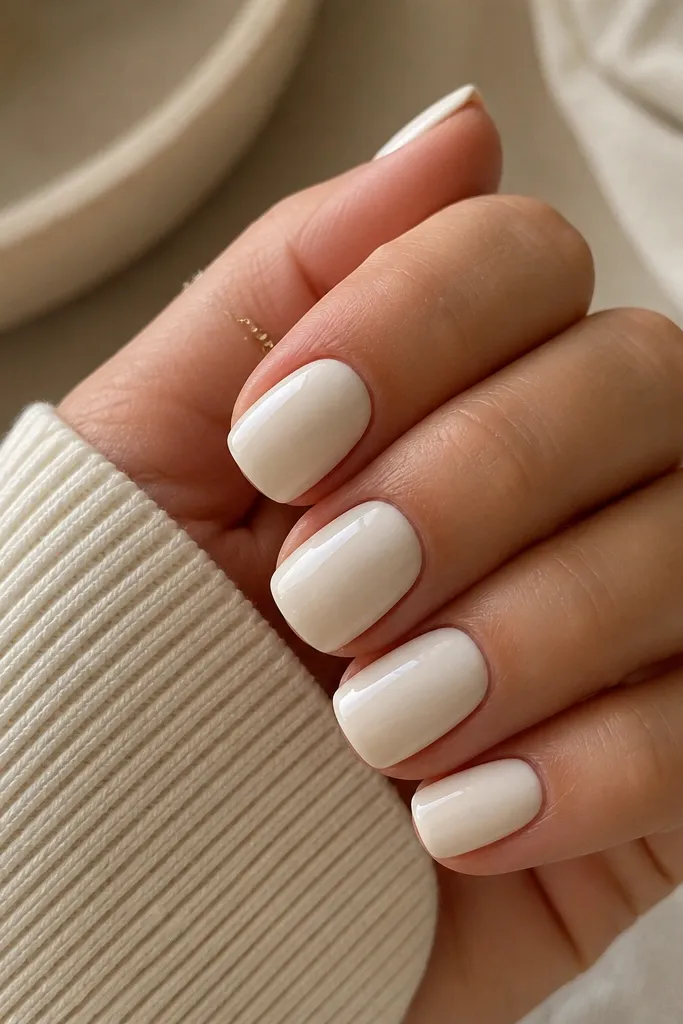
Shape first: file your nails straight across, then soften corners with 180-grit in tiny arcs. Apply a base coat, then two coats of creamy white polish, keeping each coat thin so it doesn’t pool at the center. Use a nail art brush to tighten the cuticle edge before the polish fully sets. Cure or dry fully, then apply a glossy top coat with extra attention on the free edge. If you see any visible streaks, add a third ultra-thin coat just at the center and seal again.
This is the cleanest-looking white option when you want classy, not stark. Creamy white hides streaks better than pure bright white and looks smoother on short square nails. The rounded corners are what keep it from looking sharp or harsh, and the glossy finish makes the nails look freshly polished. On fair skin, it brightens the hands; on deeper skin tones, it looks crisp and polished without needing extra decoration. I wear this when I want my nails to look neat in photos.
Skip thisPure bright white on rough corners looks chippy fast.
Editor's noteIf your white is too opaque, mix in a drop of milky white top coat to keep it creamy.
4. Clear Gloss with Nude Underlayer
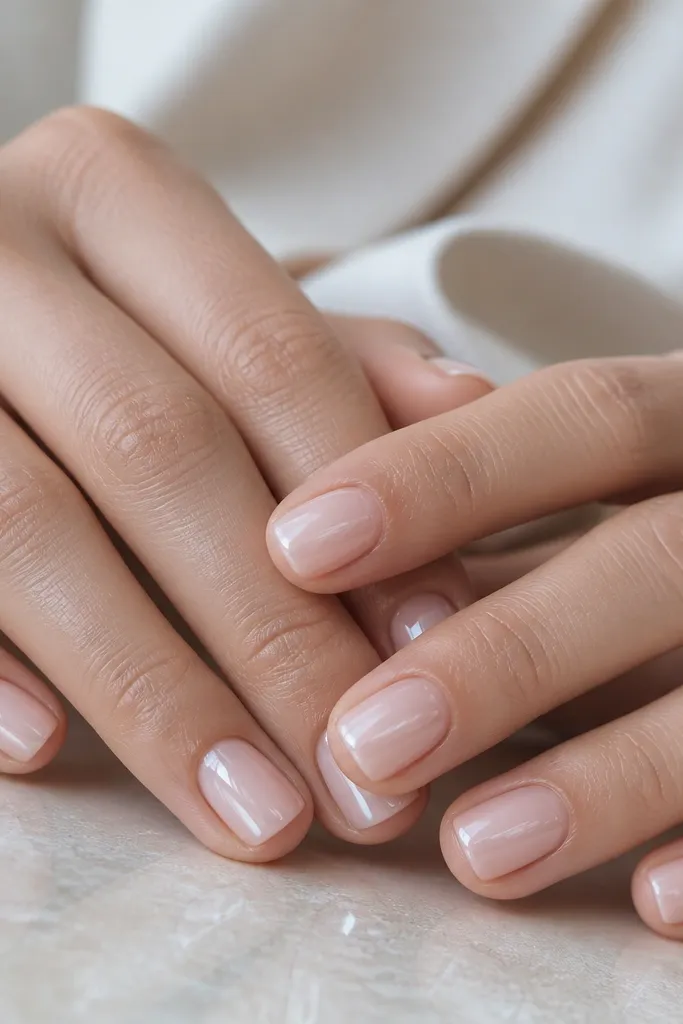
Start with a nude base that matches your skin tone — choose a sheer pink nude if you run cool, or a peach nude if you run warm. Paint one thin coat, let it dry, then apply a clear gel polish or clear polish over the entire nail. The clear coat should be slightly thicker at the center so the nail looks smooth from side angles. Cure or dry, then top with a high-shine clear top coat. Finally, cap the free edge by brushing clear polish across the tip — that’s what helps it last without peeling.
This set is for the “I want length but not color” crowd. The nude underlayer gives your nails warmth, while the clear gloss makes the surface look like glass. On small-space nails, the clear top visually smooths the shape and makes the flat square tip look crisp. I like it on all skin tones because the nude base can be chosen to match your undertone — pinky nude for cool, peachy nude for warm. It’s also one of the easiest ways to make your nails look salon-fresh between full color changes.
Skip thisSkipping the nude underlayer makes clear polish look patchy.
Editor's noteCap the tip every time; clear sets lift first at the edge.
5. Rose Quartz Half-Moon Accent
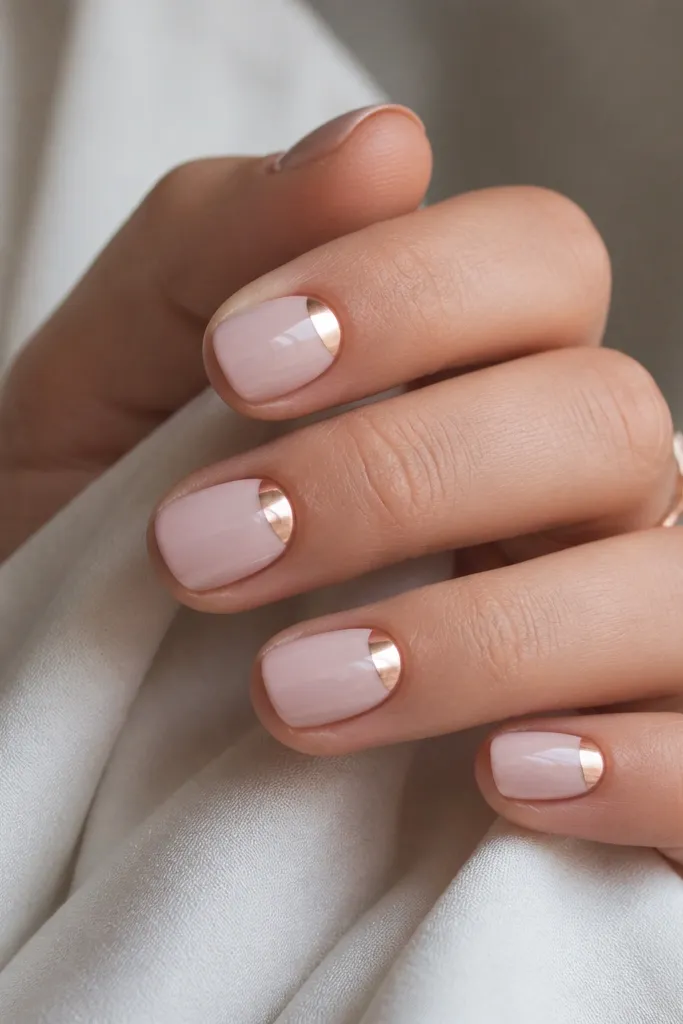
Apply a blush-pink base in two thin coats, stopping about a hair’s width from the sidewalls. Then use a half-moon nail stencil or freehand with a dotting tool to place a small rose-gold half-moon right at the cuticle line. Keep it narrow so it doesn’t crowd the nail bed — think 2 mm tall at most. Seal with a glossy top coat that fully covers the metal edge. For extra polish, add one accent nail by making the half-moon slightly larger on the ring finger.
Half-moons at the cuticle are classy because they’re small and symmetrical. The rose quartz effect comes from a blush base paired with a metallic rose-gold half-moon that catches light. On short square nails, the half-moon pulls the eye toward the base of the nail, which makes fingers look neat and balanced. This works especially well if you like warm tones but don’t want glitter everywhere. The glossy top coat keeps the metal looking smooth, not gritty.
Skip thisOver-sizing the half-moon makes short nails look top-heavy.
Editor's noteIf your half-moon looks uneven, stamp it once, then clean the edges with a thin brush and acetone.
6. Chocolate Mocha Solid with One Nude Stripe
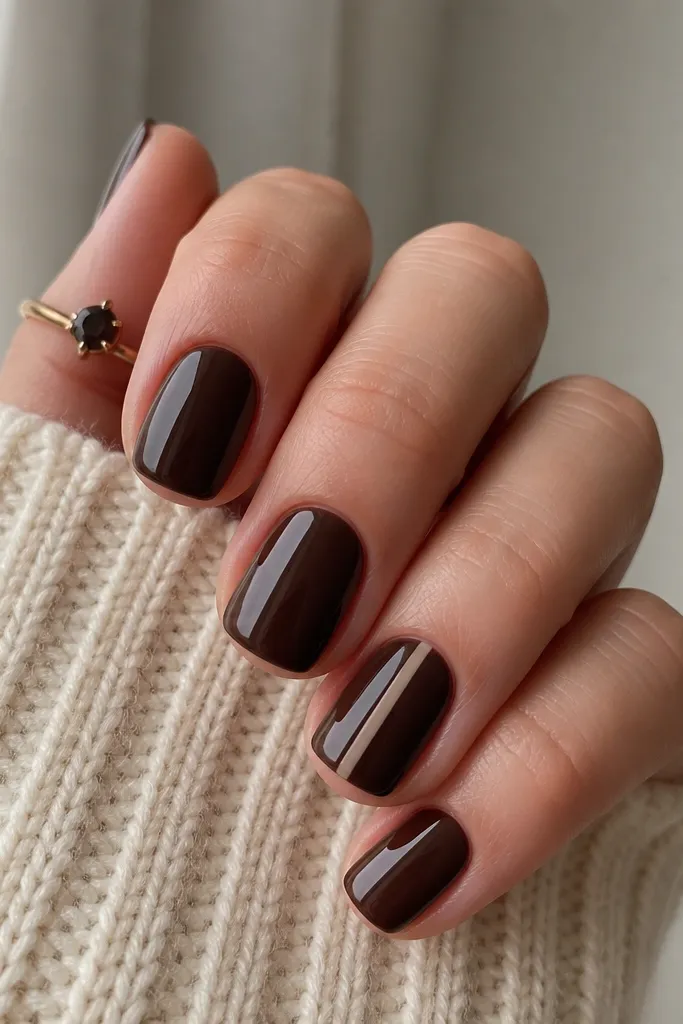
Deep mocha reads expensive because it’s neutral and grounded. The trick is keeping the solid color clean and adding only one tiny detail so it stays elegant on a small nail surface. The nude stripe on one accent nail adds a vertical line that visually lengthens without adding bulk. I like this on medium to deep skin tones because the brown looks warm against the skin. It also works for fall and winter, but I’ve worn it year-round because it feels “put together” even when I’m busy.
Paint all nails in two thin coats of chocolate mocha and cure/dry fully. On the ring finger only, place a thin nude stripe using a striping brush; keep it centered and about 1/2 the width of your French line. Let the stripe dry, then apply top coat over everything. Make sure the stripe is sealed at the edges so it doesn’t catch. If you want extra neatness, pull a tiny amount of nude stripe down toward the cuticle but stop short of the skin by about 1 mm.
Use a striping brush with fewer bristles; it keeps the stripe skinny and sharp.
Putting stripes on every nail turns this from classy to busy.
7. Soft Sage Gloss with One Tiny Pearl Dot
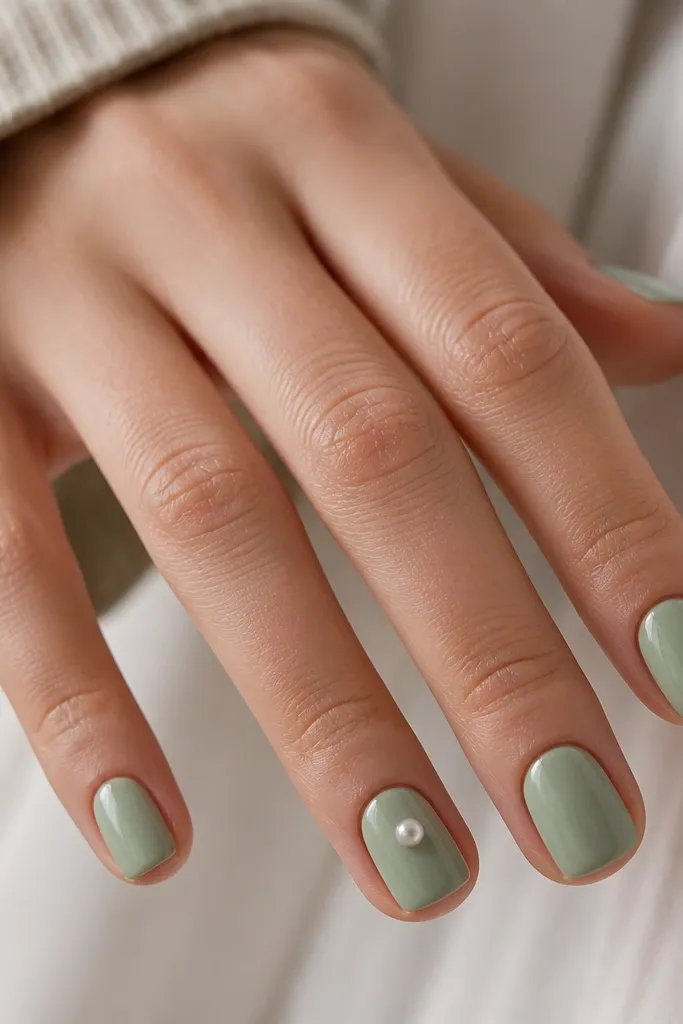
Soft sage is a calm color that still looks fresh, especially in glossy. The single pearl dot is the whole point — it adds a light-catching detail without turning the set into a costume. On cool or neutral undertones, sage makes your hands look brighter; on warm undertones, it still works if the sage leans slightly gray. For short square nails, a tiny dot stays proportional and doesn’t crowd the tip. This is a great “date night but still minimal” set.
Apply sage polish in two thin coats, keeping the color even across the flat tip. On the ring finger only, place one tiny pearl (3 mm or smaller) using nail glue or gel tack — set it near the center of the nail, slightly above halfway. Press gently for a few seconds so it bonds cleanly. Seal with a glossy top coat; if you’re using gel top coat, apply carefully around the pearl so it doesn’t lift. Finish by capping the tip to protect both the polish and the embellishment.
Choose pearls that are smooth and round; rough pearls make the top coat look bumpy.
Using large pearls on short nails makes the accent feel heavy.
8. Black Micro-Grid on Nude Base
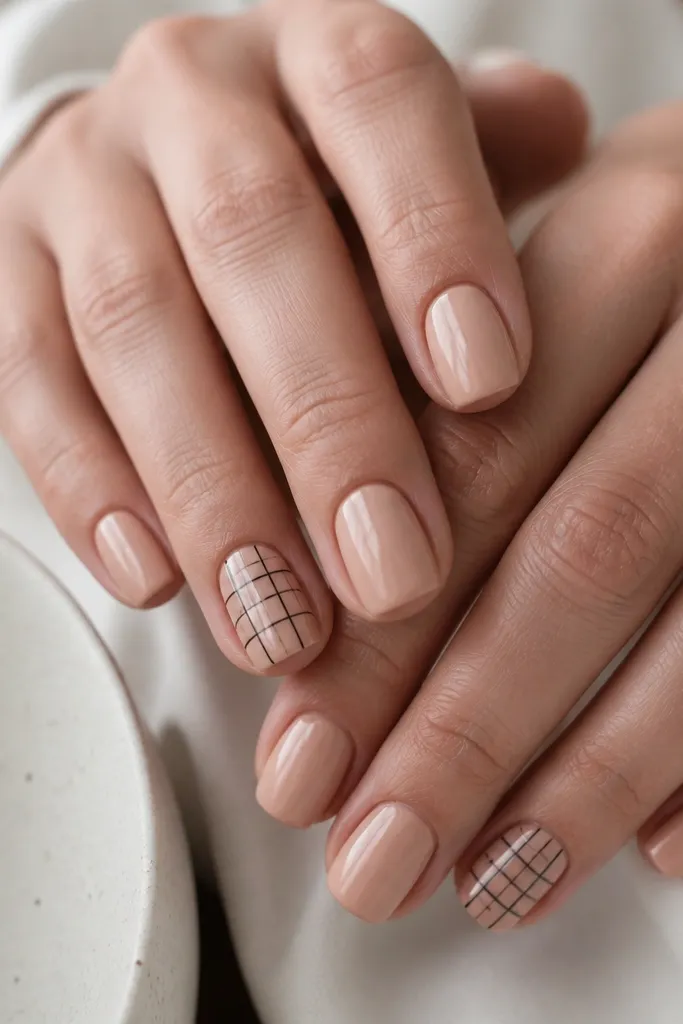
Start with a nude base that matches your undertone; I do two coats for full coverage. On index and middle fingers, use a fine liner brush to draw vertical lines spaced about 2 mm apart. Then add horizontal lines crossing them to form tiny squares, staying light so the pattern doesn’t look thick. Seal with a glossy top coat in one careful layer, then a second thin layer if the grid feels raised. Clean up any line edges with a cotton swab dipped in acetone after the top coat is just tacky.
A micro-grid looks modern and classy when the scale stays small. The nude base keeps it wearable, while the black grid reads sharp and architectural on a square shape. I recommend doing the grid on two nails max because small-space nails need breathing room. The contrast is flattering on almost every skin tone since nude warms the hand and black adds clean definition. It’s also a nice option if you want something different from French tips but still controlled.
Skip thisThick grid lines make short nails look like they’re wearing nail stickers.
Editor's noteDo the grid with gel liner if you struggle with straight lines; it’s easier to correct before curing.
9. Pearl-Edge French Outline
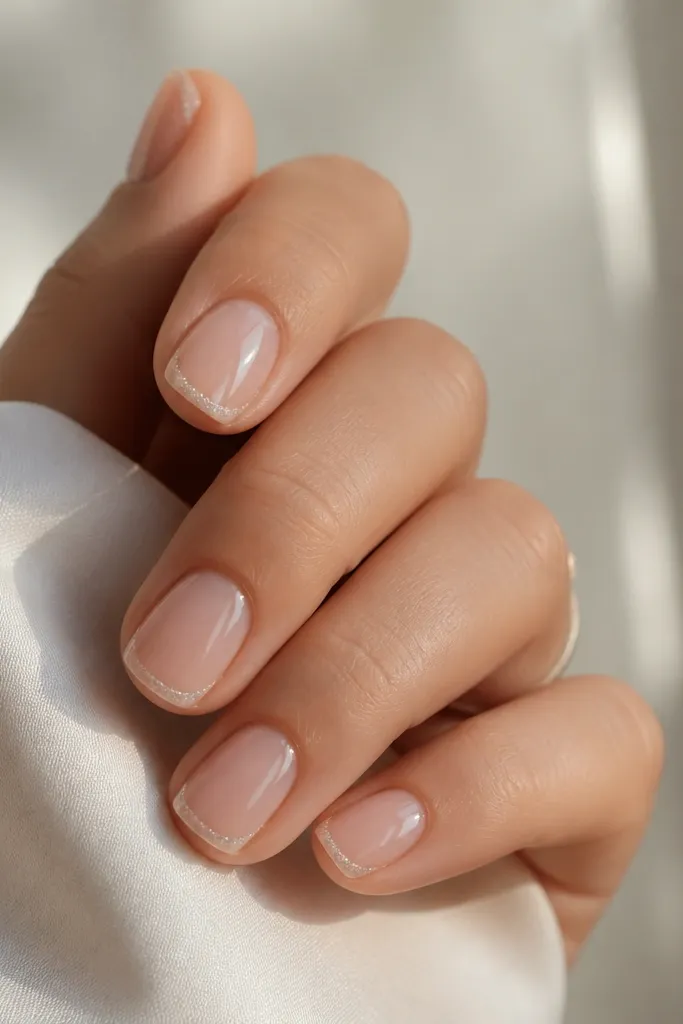
Outline French is elegant because it frames the nail tip without filling it all in. A pearly shimmer line looks classy because it gives dimension while staying light enough for short square nails. The nude base keeps everything clean, and the shimmer catches light as you move your hands. This works well for bridal events, dinners, and anything where you want “pretty nails” but not heavy glitter. I’ve also found it photographs better than full glitter because the nude gives the camera something smooth to focus on.
Apply a sheer nude base in two light coats, then let it set fully. Use a striping brush or French guide sticker to place a thin pearly line right at the tip edge, not across the whole tip. Keep the shimmer line about 0.5-1 mm thick so it reads as an outline. Add a glossy top coat and cap the free edge so the shimmer doesn’t flake. If you want a tiny twist, add a second shimmer dot at the cuticle on the ring finger.
Use shimmer polish with fine particles; chunky shimmer looks messy on a thin line.
Filling the entire tip with shimmer makes it look too heavy for small nails.
10. Champagne Chrome Accent on One Nail
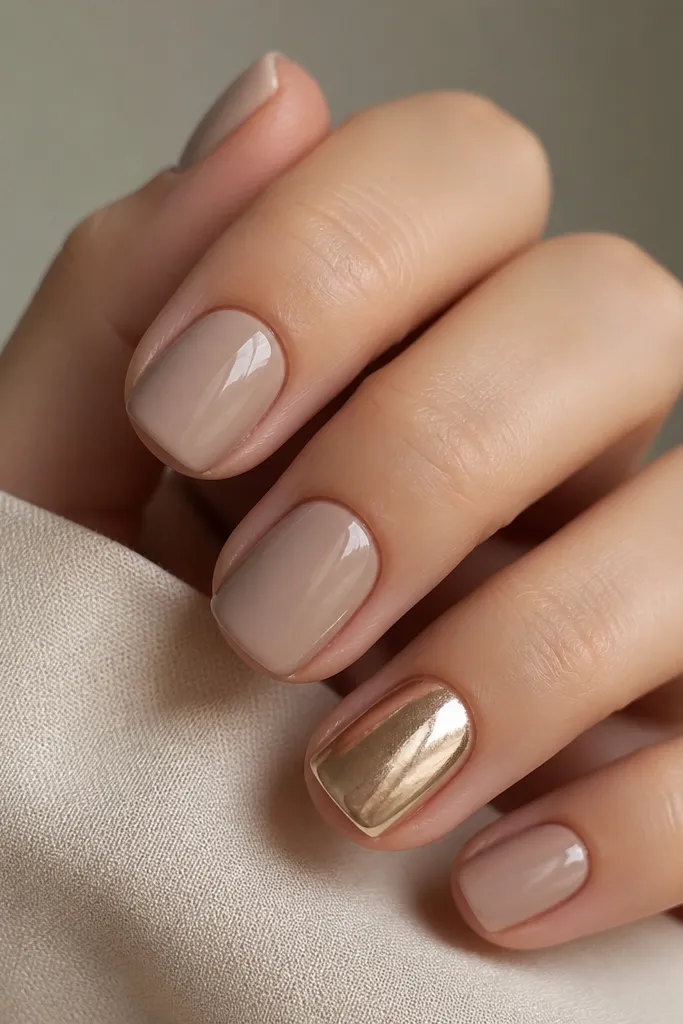
Paint all nails in a beige nude polish or gel in two thin coats. On the ring finger, apply a chrome base or sticky gel layer, then rub champagne chrome powder in small circular motions until it turns reflective. Brush off excess carefully, then seal with a chrome-safe top coat (or a thin gel top) so you don’t dull the mirror effect. Cure fully, then apply normal glossy top coat to the rest of the nails. Finish by wiping the tacky layer if your system has one.
Chrome works when it’s controlled. Doing it on one nail keeps the set classy, and champagne chrome is softer than silver so it doesn’t overpower short square nails. The beige nude base makes the chrome look intentional instead of random. I love this combo for warm undertones and for people who want a “special” nail without big gems. The mirror finish also makes your nails look smoother than matte sets, which helps if your natural nail texture isn’t perfect.
Skip thisUsing chrome on every nail makes short square sets look busy.
Editor's noteIf the chrome looks patchy, add one more light coat of chrome base before powdering.
11. Dusty Pink 'Negative Space' Corner
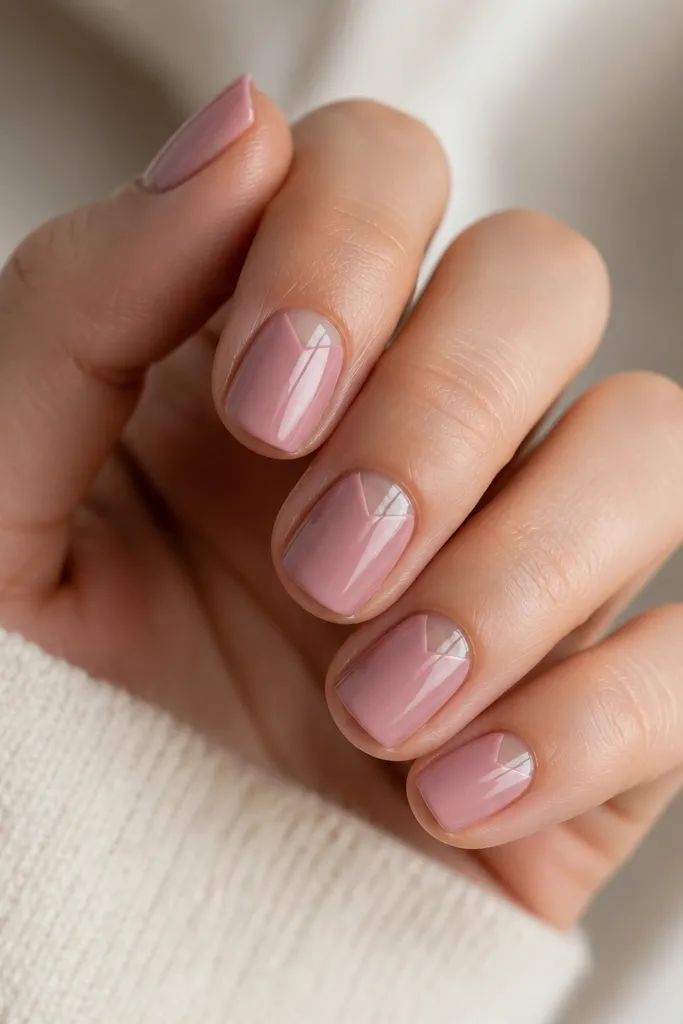
Start with a dusty pink base in two thin coats. On each nail, place a small clear triangle at the upper corner near the cuticle using a nail art tape or a pre-cut stencil. Paint over the rest with pink, then remove the tape while the polish is still slightly flexible so you get crisp edges. Seal with glossy top coat, making sure you don’t flood the negative space. If you’re doing this with gel, cure the base first, then cure after you remove tape and top coat.
Negative space corner designs look clean because they’re geometric and small. A dusty pink base feels feminine without being loud, and the clear corner keeps the design airy for short square nails. I like this on hands that have visible veins or dryness because the clear area makes the nail look fresher. It’s also flattering on a range of skin tones because dusty pink sits in a neutral lane. The best part is how tidy it looks even when your nails grow out a bit — the clear corner still looks intentional.
Skip thisLeaving negative space too large makes the nail look unfinished.
Editor's noteUse thin striping tape for the corner; thick tape leaves chunky borders.
12. Matte Oat Milk with Glossy Center Dot
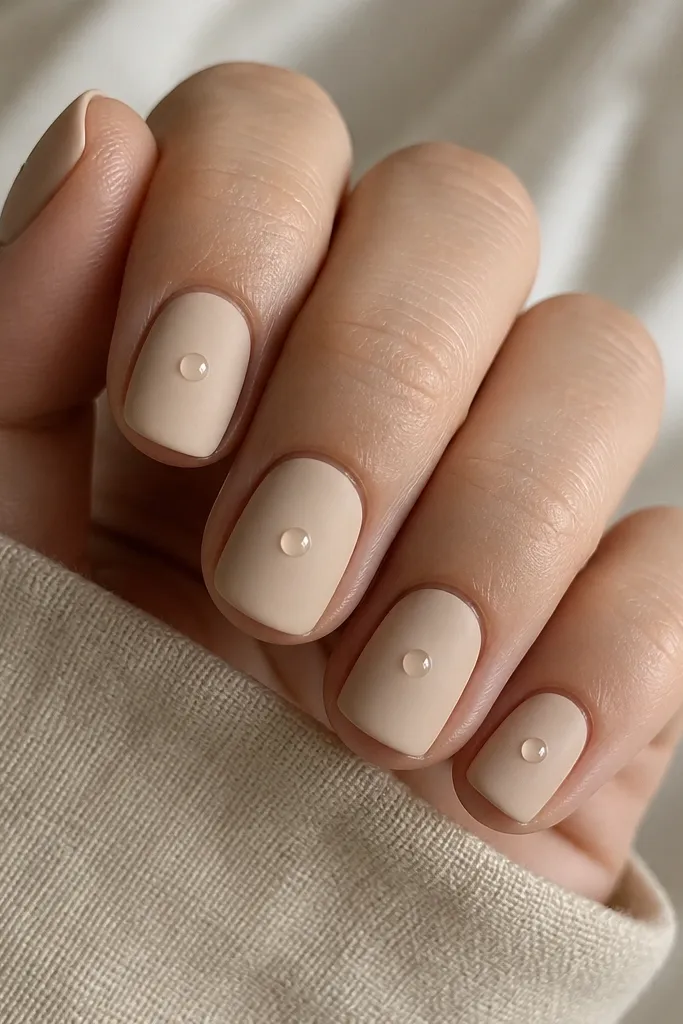
This is the kind of nail look that makes people ask what you did, and you can tell them it’s just finish contrast. Matte oat milk is soft and flattering, and the tiny glossy center dot adds a clean focal point that stays classy. On short square nails, the dot keeps the surface interesting without taking up extra space. I’ve worn it in neutral outfits and it still looks intentional. It also hides minor nail ridges better than glossy-only sets.
Apply oat milk nude in two thin coats and cure/dry fully. Top coat with a matte top coat across all nails. Then, using a dotting tool, place a tiny drop of clear gel or glossy top coat right at the center of each nail and cure it separately if your system needs it. Keep the dot small — about the size of a grain of rice. Finish with no additional top coat over the dot so it stays shiny and raised.
Practice the dot size on a spare nail tip; too big and it looks like a blob.
Matte top coat over a wet dot smears the shine.
13. Emerald Tiny Stud Line on Nude
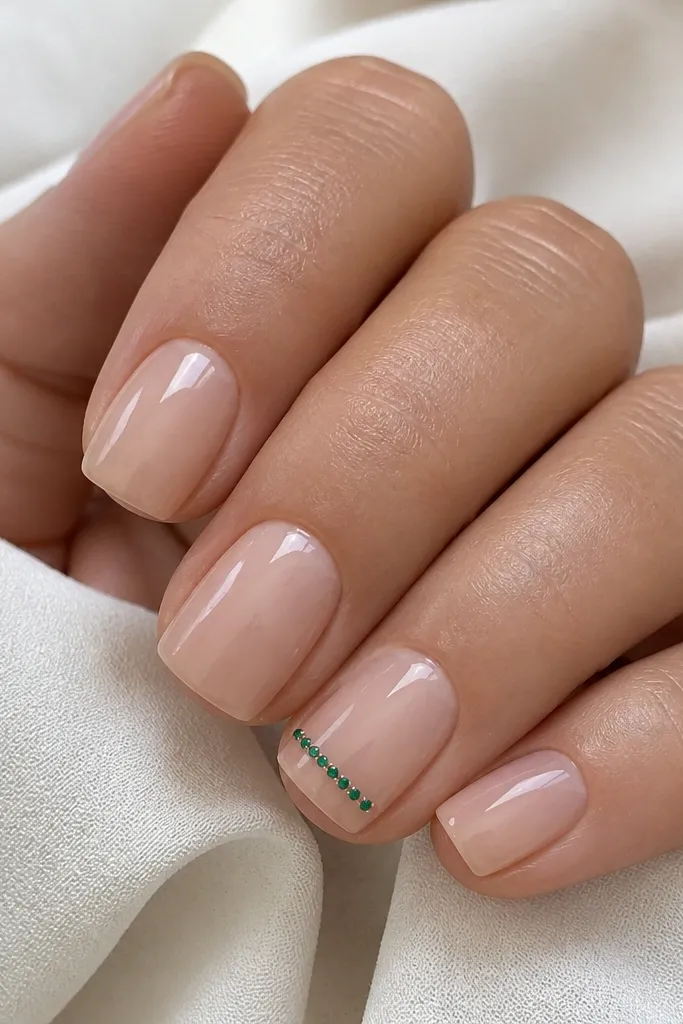
Emerald looks rich without being heavy when you keep the sparkle tiny. A single stud line at the tip gives you that “jewelry nail” feeling, but it stays elegant because the studs are small and spaced evenly. The nude base keeps the studs from overwhelming short square nails. I like emerald most on people with warm or neutral undertones because it pops without turning harsh. This is great for holiday parties or a night out when you want one clear statement.
Paint all nails with a sheer nude base in two coats, letting it dry fully. Choose one accent nail and place tiny emerald studs in a straight row across the tip — start about 1 mm from the side edge and keep the spacing even. Use nail glue for regular studs or gel tack if you’re using gel; press each stud down gently so it sits flat. Seal with a glossy top coat, brushing over the studs slowly to avoid pushing them out of line. Cap the free edge with extra top coat so the studs don’t snag.
Use a tweezer with a flat tip to line up studs — round tips roll them.
Random stud placement makes short nails look cluttered.
14. Deep Navy with Single White Corner Tip
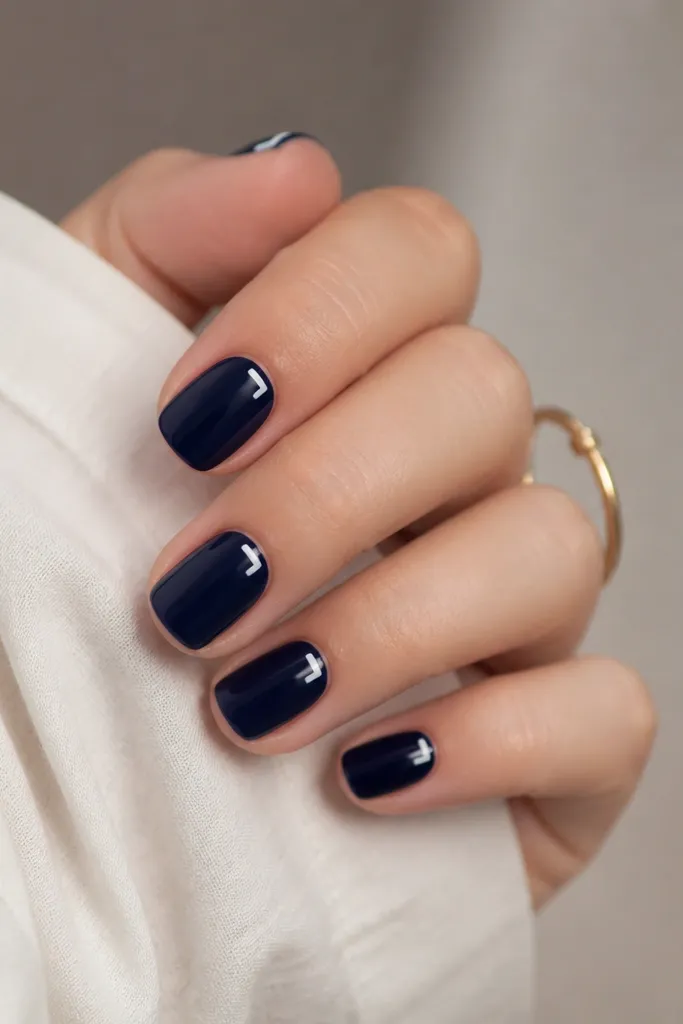
Apply deep navy polish in two thin coats and cure/dry fully. Use striping tape or a thin brush to place a small white corner at the upper tip edge — aim for a triangle or diagonal wedge about 2-3 mm wide. Keep the accent only on the tip corner so the nail stays balanced. Seal with a glossy top coat, and make sure the edges of the white accent are fully covered. Clean up the sides with a small brush so the navy doesn’t creep over the cuticle.
Deep navy is classy because it looks crisp and clean, especially in glossy. The little white corner accent adds a “French-inspired” look without the full tip line, so it works perfectly on small-space square nails. I’ve done this for clients who want something darker but still bright enough for daytime. It flatters cool undertones and it also looks sharp on warm skin because navy adds contrast. The tiny mark makes the set feel designed, not random.
Skip thisBig white tips on short nails make them look like square stickers.
Editor's noteIf your white looks chalky, use a gel white polish for the accent — it stays smooth.
15. Satin Almond Square with Warm Caramel Ombré Fade
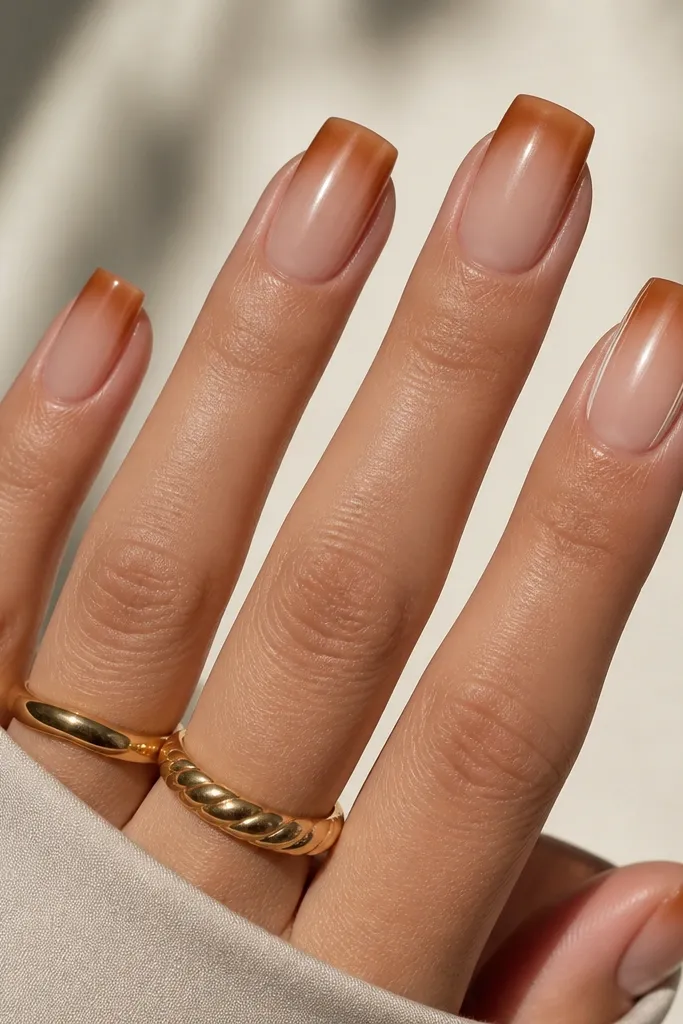
File your nails into a short square shape, then buff only the shine off the top layer so the sheer base grips. Paint a sheer pink-beige base (two thin coats) and cure fully. For the fade, sponge warm caramel polish starting about 2-3 mm from the tip line and blend upward with light taps, then cure. On the ring finger, use a fine liner brush to draw two ultra-thin white lines down each sidewall, stopping before the cuticle, then cure. Finish with a satin top coat on the nude area and a glossy top coat only over the caramel fade so the contrast looks intentional.
This look is clean because the cuticle stays sheer and uncluttered, and the ombré fade grows softer as it moves toward the nail bed. I like it because caramel reads classy in real life, not orange-candy, especially when you keep the fade tight and the edges neat. The satin finish on the nude part makes the color feel expensive, then the glossy caramel tip catches light when you move your hands. It also works great for short square nails because the fade pulls the eye upward without adding bulk.
Skip thisSkipping full cure between the sheer base and the ombré makes the blend smear and turn chalky near the cuticle.
Editor's noteTo keep the fade from looking muddy, use a makeup sponge that is slightly dry (blot it on a paper towel) and build the caramel in two passes instead of one heavy coat.