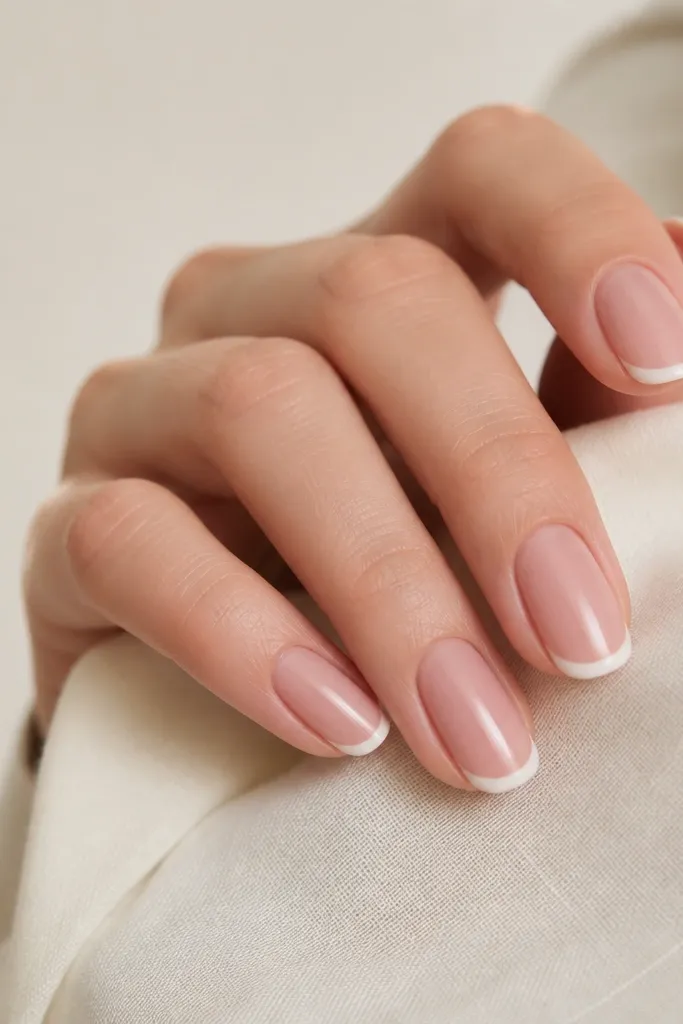
1. Milky White French with Leaf-Gold Foil Tips
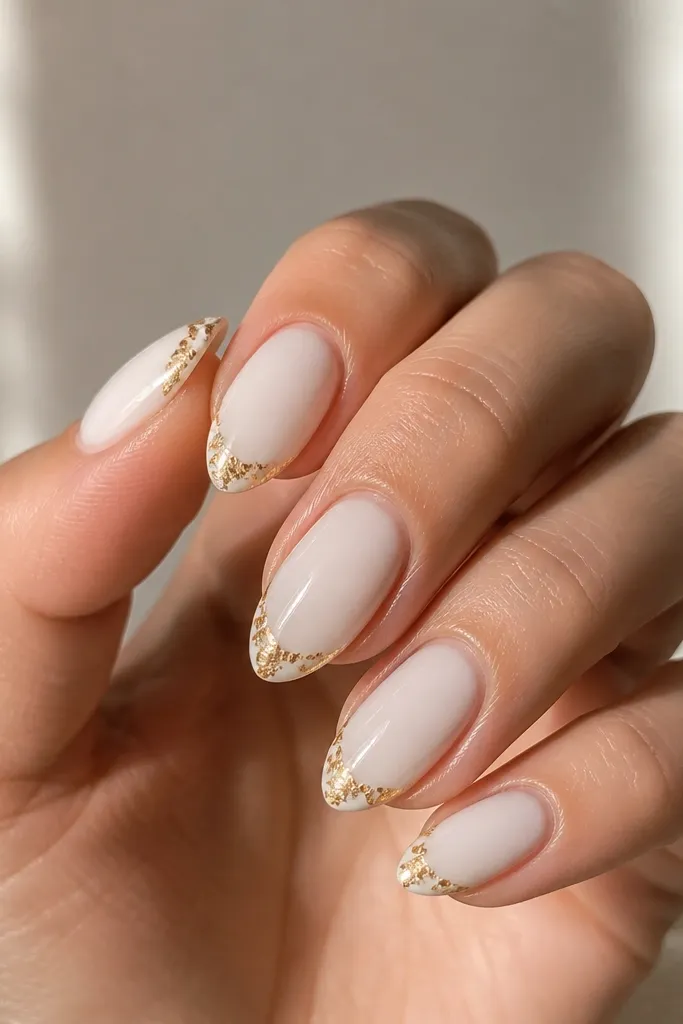
This is my go-to when I want “clean but not boring.” The milky white gives a soft, winter-friendly base that still looks fresh in summer, and the leaf-gold foil adds sparkle without needing heavy coverage. I like it on short almond or soft squoval because the foil stays on the tip where it doesn’t snag. It flatters hands with slimmer nail beds because the French line visually lengthens, and it also works on deeper skin tones because the white pops in a flattering way. The styling principle is contrast with restraint — keep the white as the field and let gold be the highlight at the tip.
Start by painting two thin coats of milky white, curing each coat fully. Use a French guide strip to place the tip line — aim for a tip width of about 1.5 to 2 mm on short nails. Press leaf-gold foil onto the wet tacky layer along the tip edge, then gently pat to blend the foil so it doesn’t look pasted in one block. Seal with a high-gloss topcoat in two passes: first a thin layer over the whole nail, then a thicker layer focusing on the tip so the foil edges feel smooth.
If your foil lifts after a day, rough up the foil lightly with a soft buffer before topcoat — it grips better.
Avoid a thick French line; it looks bulky and makes the grow-out line obvious.
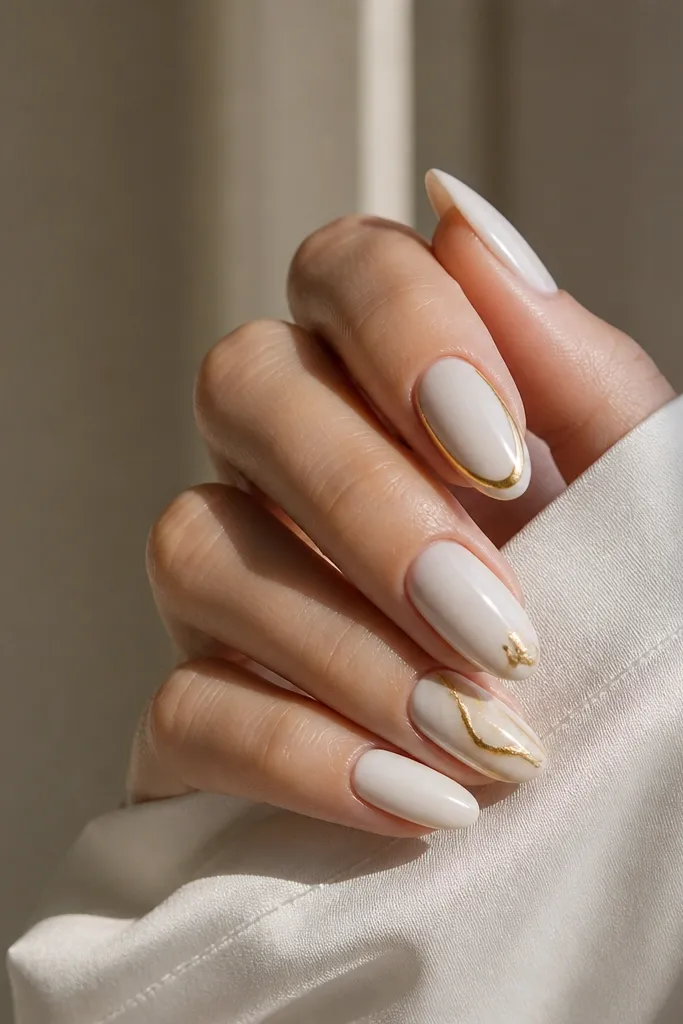
2. White Marble Vein with Brushed Gold Outline
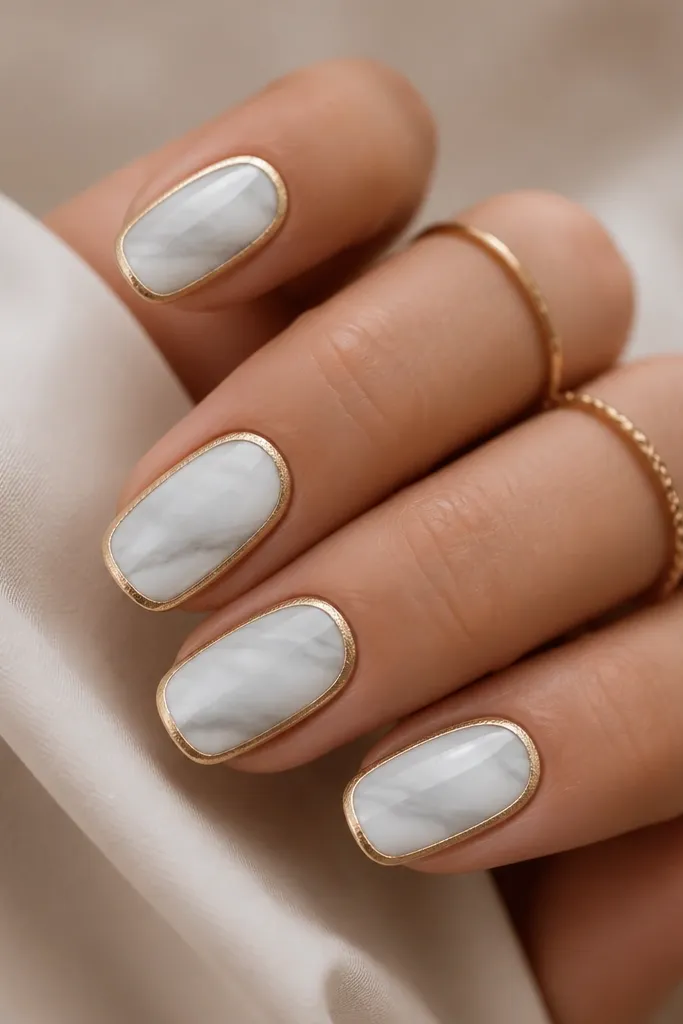
Marble nails look seasonal because the pattern reads soft and organic instead of themed. The white marble base keeps it bright, and the brushed gold outline turns it into something you’d wear with a gold watch. I like this design for medium squoval because the outline frames the nail shape cleanly. It flatters hands with slightly wider nail beds because the thin border makes the nail look more defined. The principle here is “frame the look” — the gold sits like a border so the marble stays the star.
Paint two coats of white base gel, then add a marble effect with a thin brush and a marbling tool using a white-and-gray gel mix. Drag a few swirls from near the center toward the sides, then stop so it doesn’t pool at the tip. Once the marble is cured, use a fine detail brush to paint a gold outline following the cuticle curve and the sidewalls, staying about 0.5 mm away from the edges. Finish with a glossy topcoat that fully seals the perimeter so the outline doesn’t catch on skin or fabric.
Keep the marble lines sparse; three to five veins per nail looks more expensive than a full “water drop” pattern.
Skip gold on top of thick marble gel — it can crack or peel because the surface is too uneven.
3. Half-Moon Cuticle Glow in White and Gold
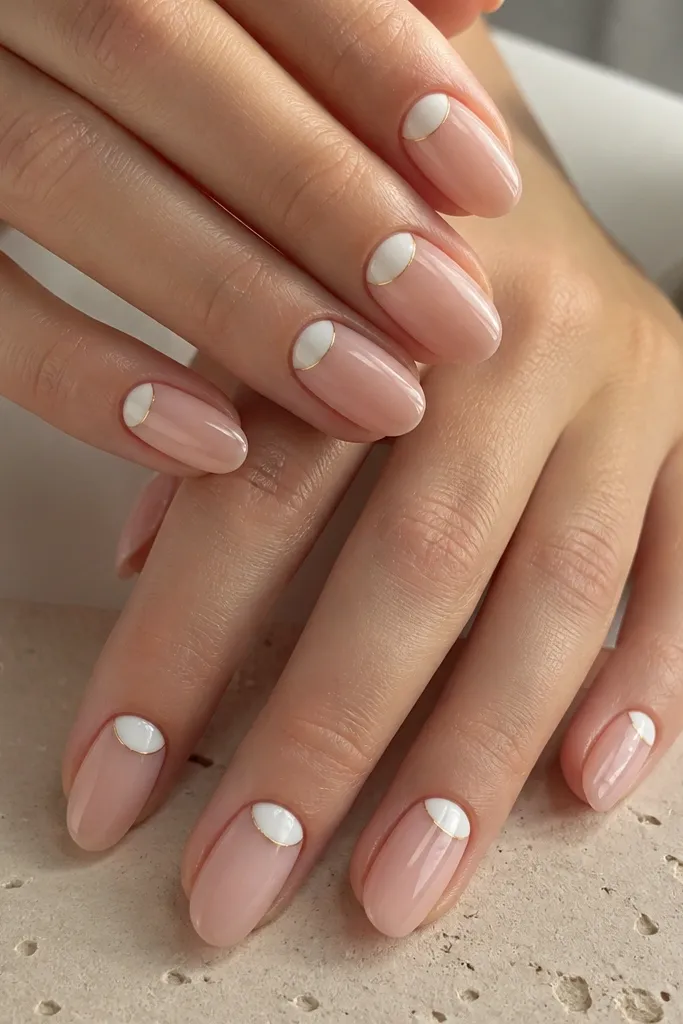
This one makes your hands look polished fast, especially if you hate heavy nail art. The half-moon cuticle shape grows out gracefully because the design sits right where your nail naturally changes. The white half-moon brightens the area around the cuticle, and the thin gold rim gives that jewelry-like glow without covering the whole nail. I like it on short squoval and almond because the proportions stay balanced. It suits most skin tones — the sheer base matches your hand while the white and gold add contrast. The principle is using negative space so the gold reads clean and the nails don’t feel heavy.
Start with a sheer pink-nude base gel, curing it well. Paint the half-moon using a small liner brush and true opaque white — aim for a shape that’s about 2/3 the width of the nail and sits 0.5 to 1 mm below the cuticle line. Add a micro-thin gold rim around the white half-moon using a foil-gel or metallic gel pen. Seal with a glassy topcoat, and run the brush along the free edge to lock the rim down.
If your cuticles are dry, push them back gently after a warm shower so the half-moon looks crisp.
Don’t make the half-moon too big; oversized cuticles can look like a sticker when nails grow.
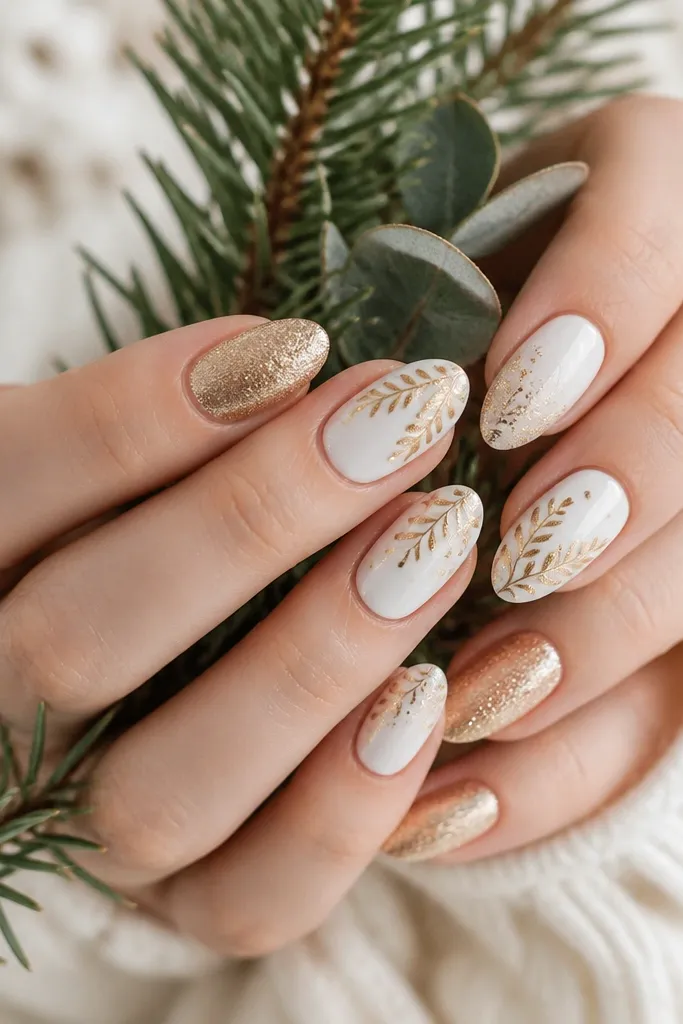
4. Gold Foil Confetti on Snow-White Base
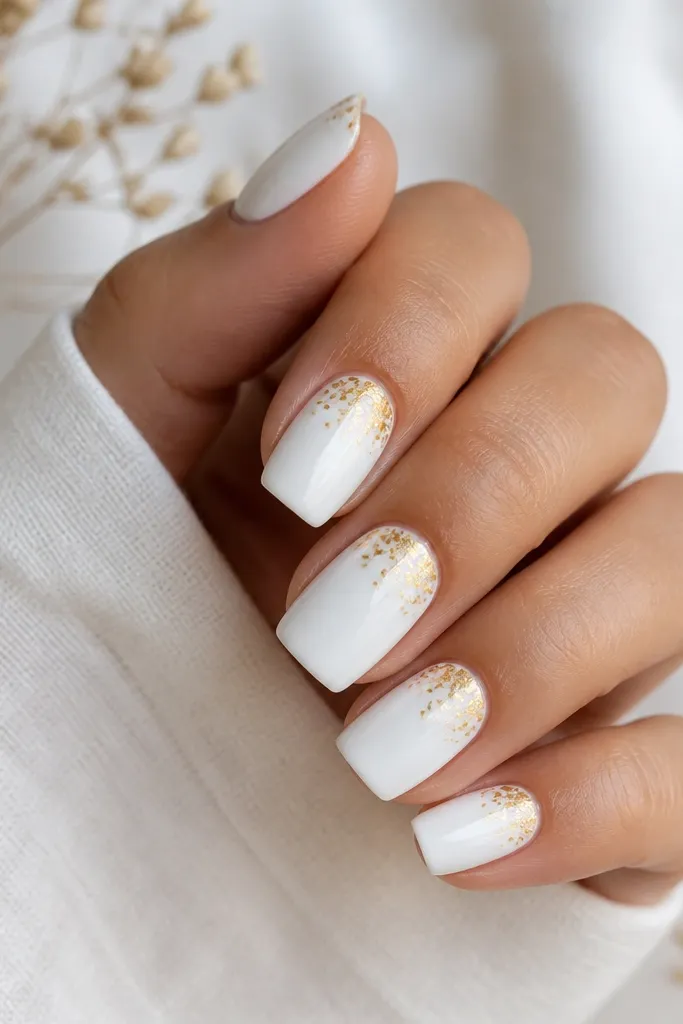
Confetti foil is the quickest way to get “party nails” without covering your whole nail in gold. Snow-white makes the foil look crisp and bright, and the scattered pieces create movement so your nails don’t look flat. I wear this when I want something seasonal evergreen but still fun for weekends. It looks best on medium-short nails because the foil stays in the upper half and doesn’t snag. This design flatters all skin tones because the white background is the contrast anchor. Principle: scatter gold in small clusters so it looks like light, not paint.
Apply two coats of snow-white polish or gel, curing fully between coats. Add a tacky layer only on areas you want foil — I keep it to the top third so the nails stay airy. Press tiny foil bits onto the tacky spots, then rotate the foil placement so pieces vary in size. Finish with a thick topcoat only where the foil sits so the surface feels smooth, then cap the free edge with topcoat for longer wear.
Use tweezers and a dry dotting tool; it’s easier to place tiny pieces without smearing the white.
Avoid covering the entire nail in foil; it turns into a block and looks cheaper over time.
5. Micro-Gold Stripes on White Negative Space
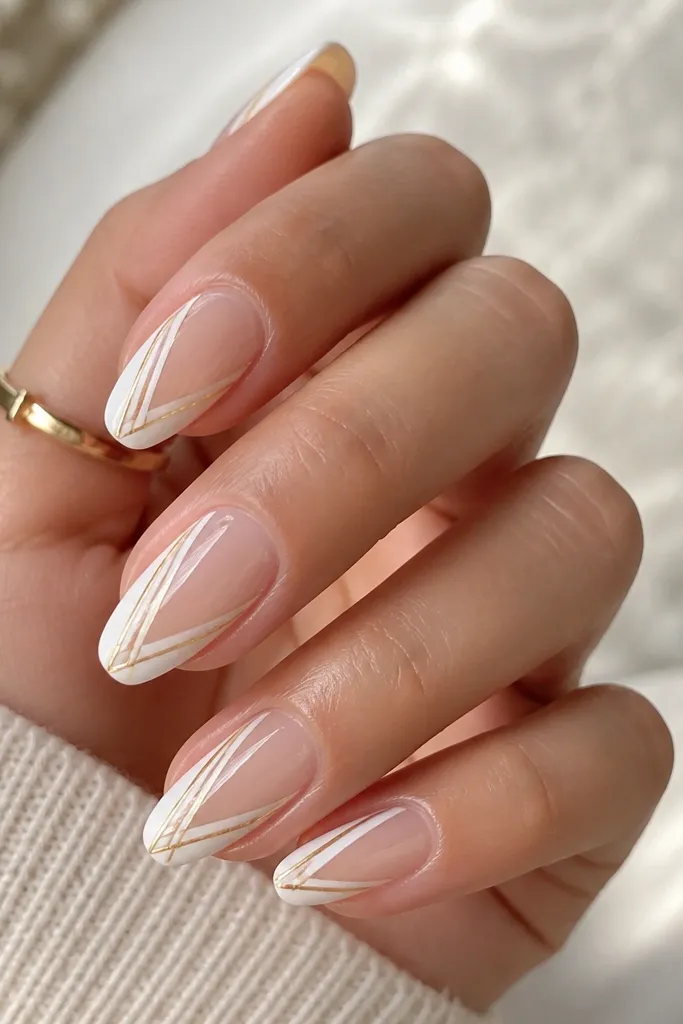
This design is for when you want something modern and clean, not sparkly. The negative space keeps it light, and the white panel gives you that bright evergreen feel. Micro gold stripes look like jewelry accents and catch light when your hand moves. I like it on short almond or squoval because thin lines stay crisp at smaller lengths. It flatters hands with shorter nail beds because the diagonal white panel creates a lengthening optical line. Principle: keep the gold to thin line work and let the white shape do the heavy lifting.
Start with a glossy nude base and cure it. Use striping tape or a thin liner brush to create a diagonal white negative space panel — keep it narrow, about 2-3 mm at the center. Paint opaque white inside the panel, cure, then remove tape if you used it. Draw two to three micro gold stripes on top of the white panel using a gold gel striping tool, spacing them evenly. Topcoat lightly first, then add a second topcoat layer to seal the tape edges.
If your stripes look wobbly, rest your hand on a desk and move your brush with your wrist, not your fingers.
Don’t use chunky gold glitter for stripes; it creates texture that snags and dents quickly.
6. White Ombré Tips into Brushed Gold
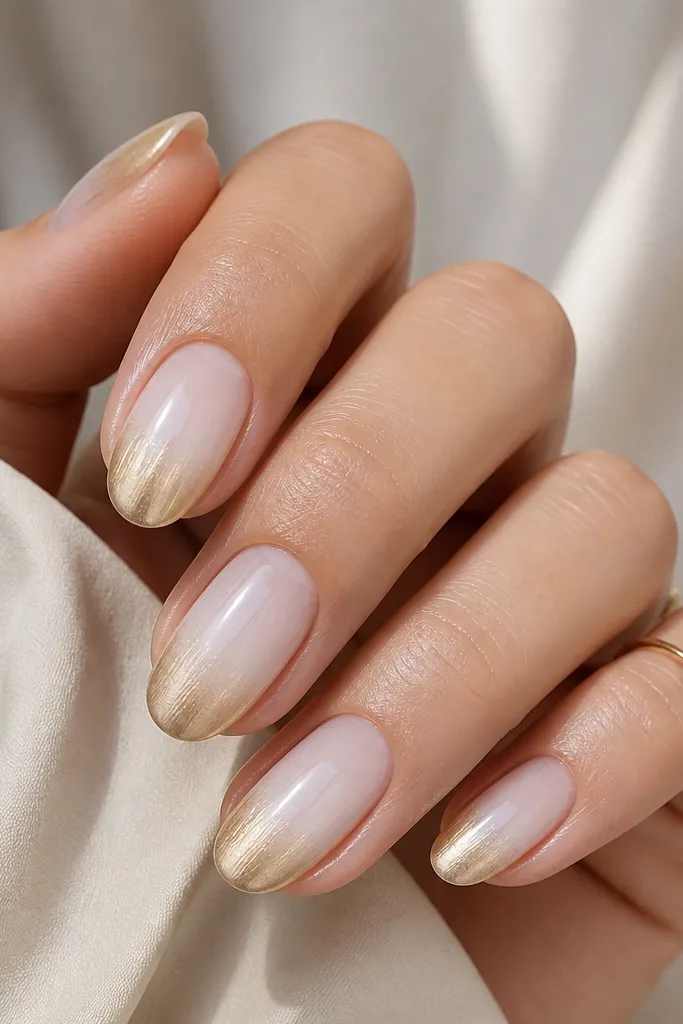
This one looks expensive because the gradient feels smooth and intentional. The ombré starts with a wearable nude-to-white fade, and then the brushed gold takes over at the extreme tip where light hits first. I wear it for fall events because it reads warm without turning into full-on holiday glitter. It flatters hands with slightly longer nail beds since the gradient can extend visually. It also works on different skin tones because nude base tones the transition. Principle: put the gold only at the highest light point — the tip edge.
Apply a nude base gel and cure. Sponge on the white ombré at the tips using a makeup sponge — keep the white height around 1/3 of the nail length. Clean up the sides with a brush dipped in gel cleanser so the ombré doesn’t get messy. For the gold, use a gold chrome powder or brushed metallic gel on just the very tip and blend downward into the white with a soft brush. Cure, then seal with a high-gloss topcoat that smooths the powder texture.
Dust off excess chrome powder before topcoat; trapped loose particles dull the shine.
Avoid a harsh line between white and gold; it makes it look like two separate stickers.
7. Classic White Base with Gold Studded Cuticle Dots
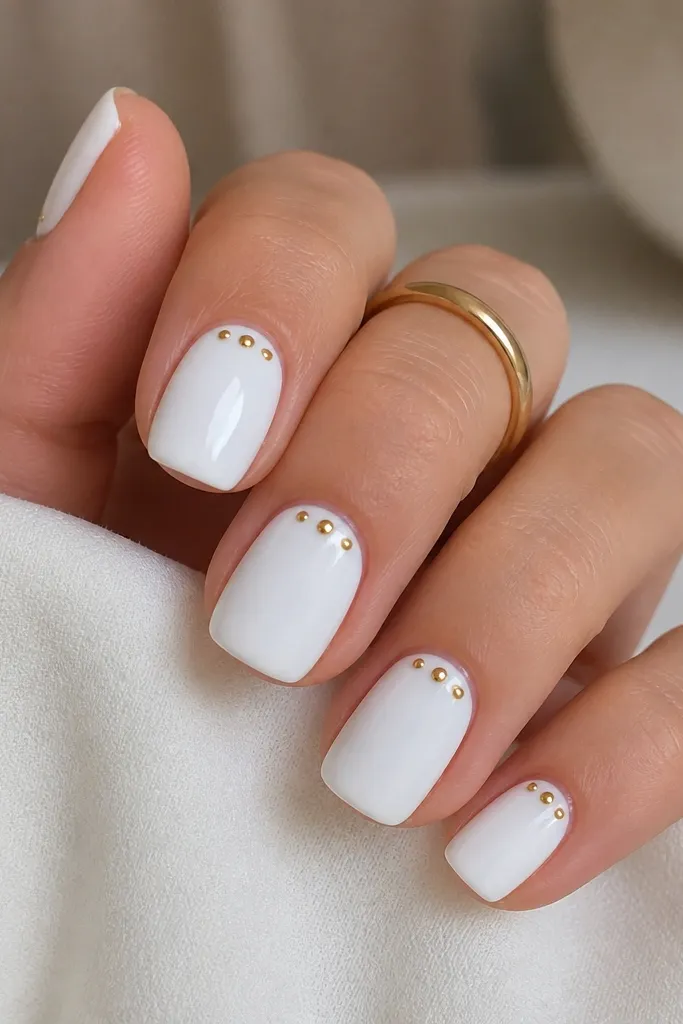
If you want something seasonal evergreen that still feels glam, this is it. The full white base stays bright in winter and crisp in spring, and the tiny gold studs add sparkle without needing foil coverage. I love it for everyday because studs are small — they don’t catch as badly as big gems. It flatters any skin tone, and it makes hands look neat because the white base hides small imperfections. Principle: keep the rhinestone placement tight and symmetrical so the look reads intentional.
Start with two coats of opaque white, cured fully. Use a dotting tool to place one tiny drop of clear gel or rhinestone glue near the cuticle, slightly off-center so it looks like a jewelry accent. Add one or two small gold studs per nail, then press lightly and cure. Leave about 1 mm of space from the sidewalls so the studs don’t lift at the edges. Finish with topcoat, using a thicker layer over the studs to lock them down and smooth the surface.
Editor's noteChoose studs that are flat-bottomed; they sit better under topcoat and last longer.
Skip thisDon’t place studs too close to the free edge; they pop off faster.
8. White Pearl Shell with Gold Center Line
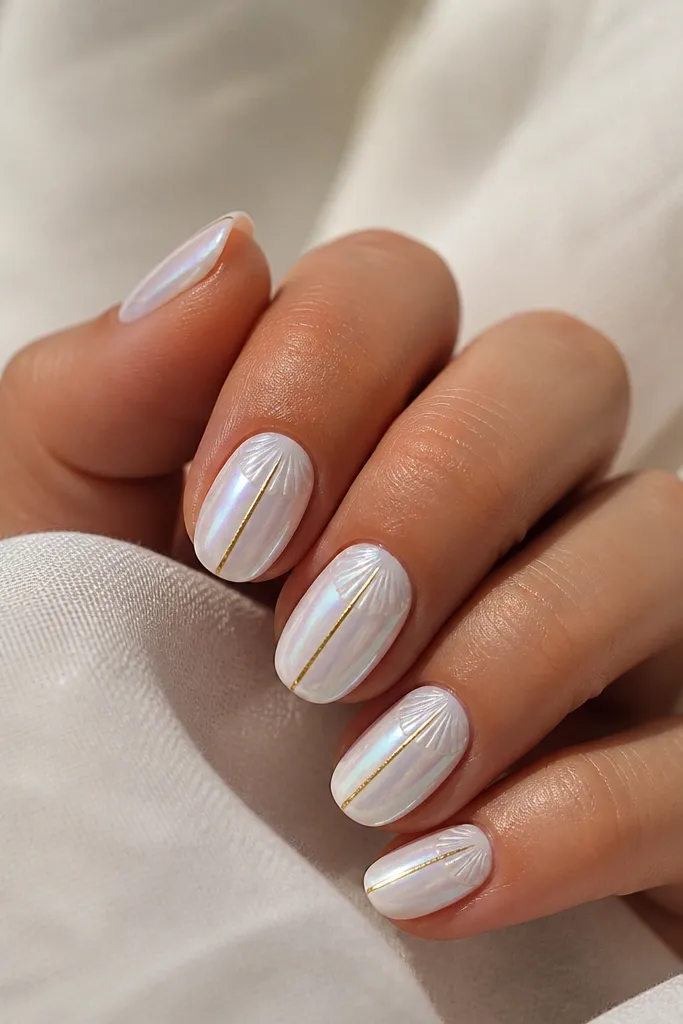
Pearl shell nails look seasonal because they mimic light on seashells, but the white and gold keep it classy. The center gold line makes the nail look longer, and the pearl base gives a gentle glow that doesn’t scream “holiday.” I wear this when I want something bridal-adjacent without going full wedding nails. It flatters oval and almond shapes best, especially if your nail beds are a bit wide — the line narrows the look. The principle is vertical structure — one clean gold line plus a soft shimmer base.
Apply two coats of pearly white gel, curing each coat. Create the shell arc by painting a thin curved line in slightly thicker pearl gel on the top third, then feather it out with a clean brush so it looks like a natural shell ridge. Cure. Paint a thin vertical gold line down the center, keeping it straight by using a nail guide mark on the nail tip. Topcoat with a glossy finish, and make sure you cover the edges of the pearl arc so it doesn’t catch.
If the pearl looks too silvery, add a warm white base layer first so the pearl shifts gold-leaning tones.
Avoid painting the gold line too thick; chunky lines make nails look shorter.
9. Gold Leaf Cut-Out on Bright White Base
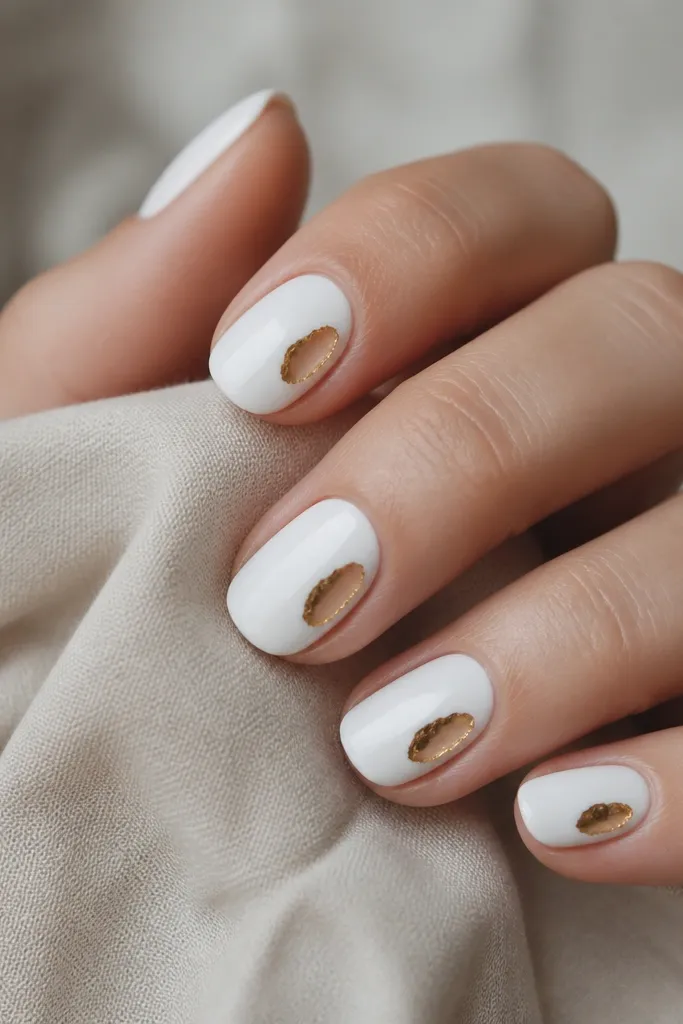
This design looks like custom jewelry because the gold leaf sits inside a “window” instead of covering everything. The bright white base keeps the look crisp and evergreen, while the cut-out placement makes it feel modern. I like it on short almond because the window area stays neat and doesn’t take over the whole nail. It flatters hands with fair to medium skin tones because the white reads bright, and it also works on deeper skin tones because the contrast stays strong. Principle: limit gold leaf to one framed area so it looks deliberate.
Paint two coats of bright opaque white and cure. Decide the window position — I place it slightly off-center toward the sidewall, about 3 mm wide. Use a small striping tape piece to mask the window edges, then press gold leaf into the exposed area on a tacky layer. Remove the tape carefully while the gel is still tacky so you keep sharp edges. Seal with topcoat, focusing on smoothing the window edges so they don’t lift.
Editor's notePress gold leaf with a silicone tool, not your fingers — it prevents fingerprints in the foil.
Skip thisDon’t make the window too close to the cuticle; it can lift where the skin moves.
10. Classic White Polka Dots with Gold Dots Accent
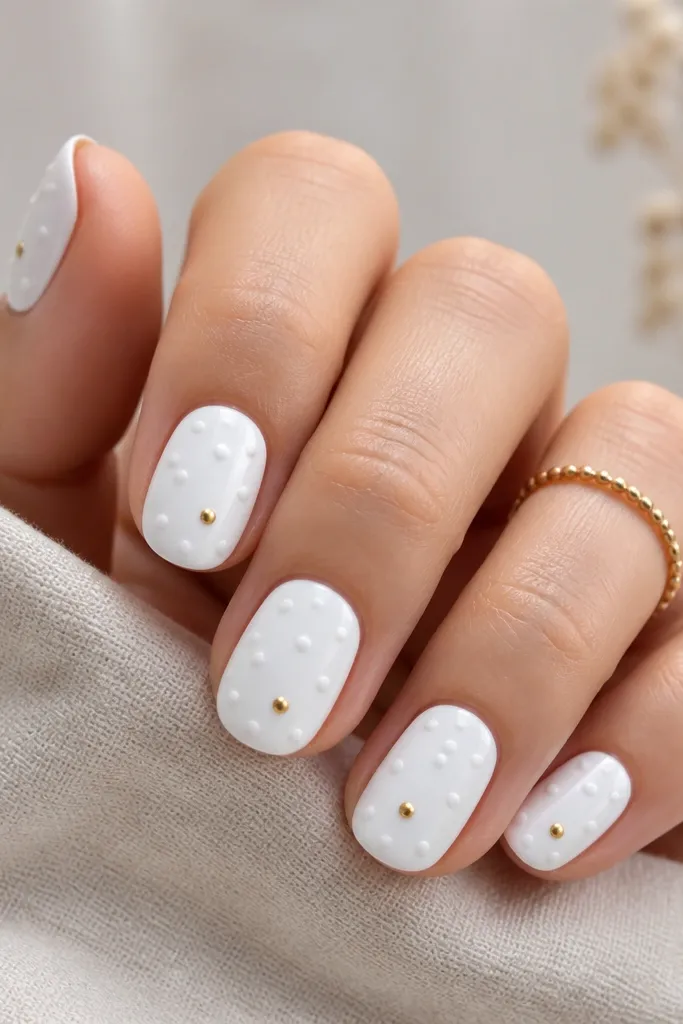
Polka dots are one of the few nail patterns that never feel seasonal in a bad way — they read playful, not themed. The white base keeps it clean, and the raised dot texture catches light differently than flat polish. Gold dots add a tiny sparkle that looks good in daylight and under indoor lighting. I like this on short squoval because the dot spacing looks neat at smaller sizes. It flatters hands that need a little visual interest without heavy lines. Principle: use dot spacing as your design — consistent circles make it look high-end.
Start with a glossy white base, curing fully. Use a dotting tool to create polka dots in a slightly thicker white gel or 3D gel for a raised effect; keep dot size around the same diameter across nails. For gold accents, swap the gel to gold metallic gel and place one gold dot near the center of each nail or on every other nail. Cure each nail, then topcoat carefully — if you use a super thick topcoat, the raised dots can flatten, so apply one thin glossy coat first and cure, then decide if you need a second coat.
Editor's noteUse the same dotting tool tip for all nails, then clean it with gel cleanser between colors.
Skip thisAvoid uneven dot sizes; mismatched circles make it look DIY in a bad way.
11. White and Gold Diagonal French with Sharp Angle
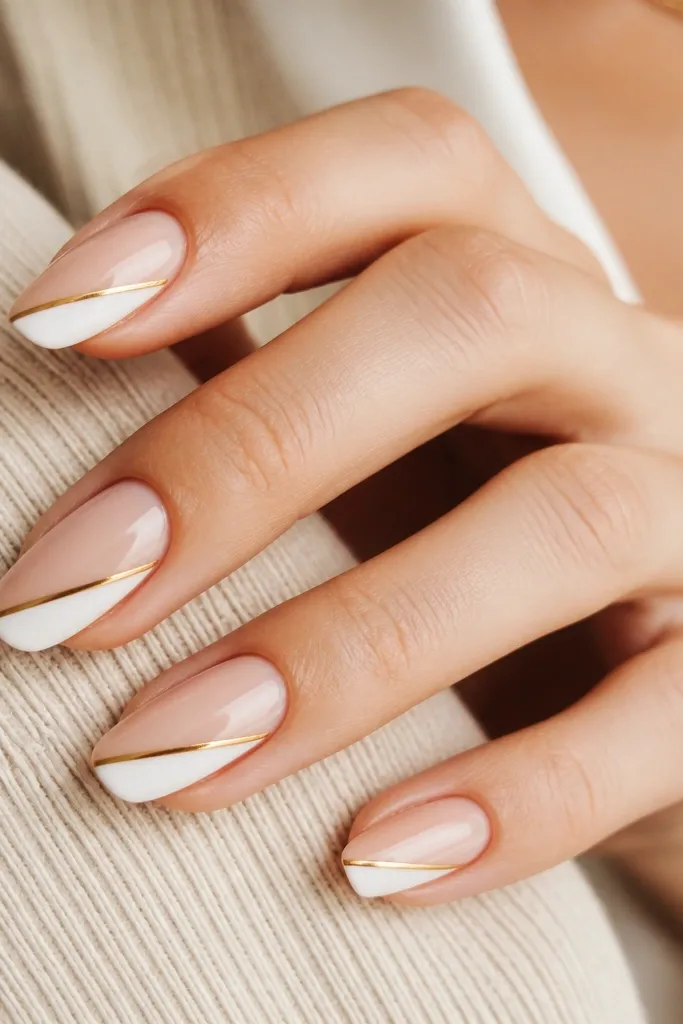
Diagonal French looks modern and reads evergreen because it’s still “French,” just with a sharper fashion twist. The white diagonal panel keeps it bright and clean, while the thin gold line adds a crisp jewelry edge. I like this on medium squoval because the angle has room to look intentional. It flatters hands with longer fingers because it draws the eye diagonally, but it still looks good on shorter nails if you keep the angle narrow. Principle: keep the gold line thin and aligned — the precision is what makes it look salon-done.
Apply a nude base and cure. Place a striping tape guide for the diagonal tip — aim for a line that hits the sidewall about 2 mm from the tip edge. Paint opaque white within the tape area, cure, then remove the tape to reveal a sharp edge. Next, use a fine liner brush to trace a thin gold line along the diagonal boundary where the white meets the nude. Seal with topcoat, and cap the free edge so the diagonal edge doesn’t lift.
Editor's noteIf you’re nervous about straight lines, do the white first with tape, then freehand the gold — it’s easier to correct small gold wobbles with a cleanup brush.
Skip thisAvoid thick gold; it turns the manicure into a stripe instead of a highlight.
12. White Base with Gold Foil Half-Bow at the Tip
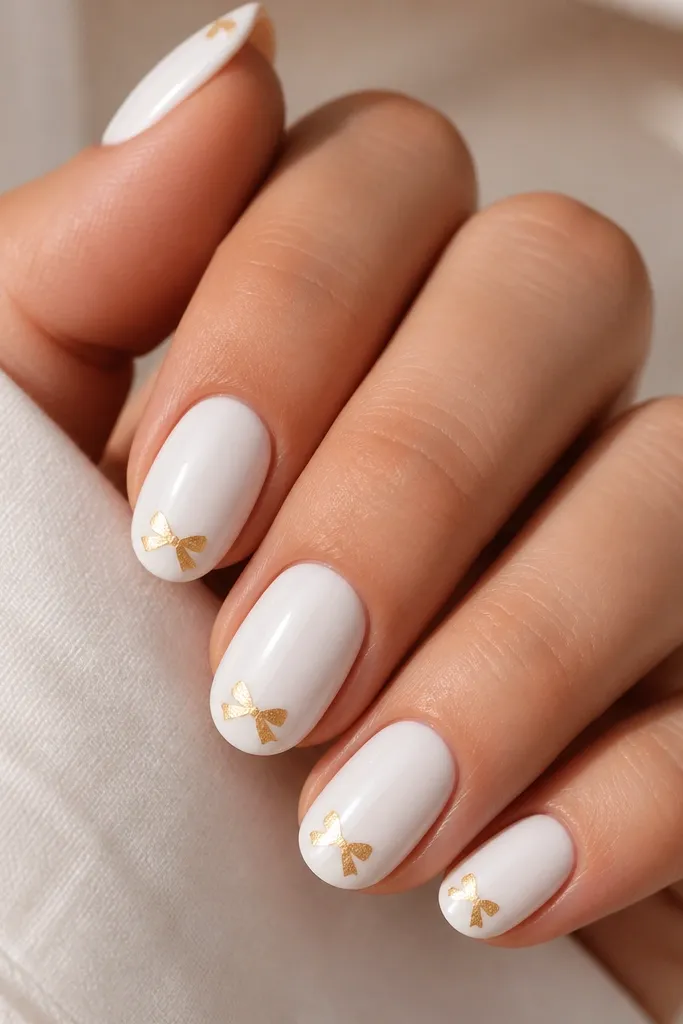
This design is girly without looking childish. The white base stays clean, and the gold half-bow at the tip gives you a focal point that looks cute under coats and sweaters. I like it on short almond because the bow stays compact and doesn’t overpower the nail. It flatters hands with smaller nail beds because the focal point sits in the center and doesn’t require a wide canvas. The principle is one focal element — keep everything else plain so the bow reads intentional.
Start with two coats of glossy white, curing fully. Add a tacky layer only at the tip center where the bow will sit. Press small pieces of gold foil to form a curved shape, then use a fine brush to nudge the foil edges into a half-bow outline — think two arcs with a small center gap. Cure and seal with topcoat in two thin layers so the foil gets fully locked without flooding the bow shape. Keep the bow centered and leave a little white space around it so it looks crisp.
Editor's noteUse small foil pieces; big chunks make the bow blob-like instead of ribbon-like.
Skip thisAvoid adding extra gems around the bow; the half-bow is already the statement.
13. Gold Chrome Marble with White Veins
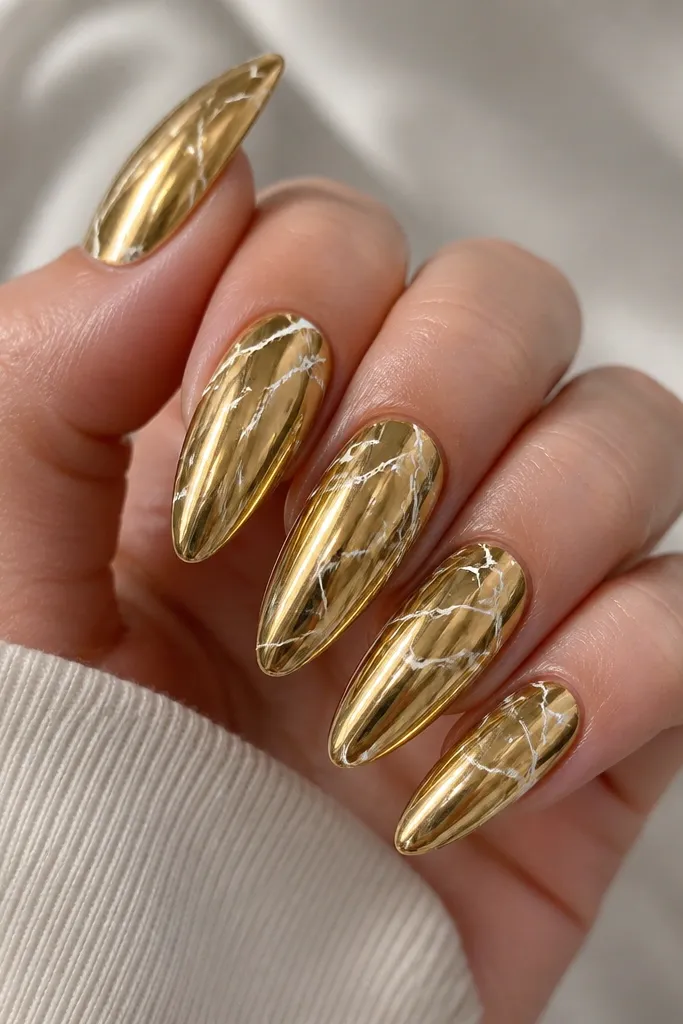
If you want a bolder evergreen look, this is the one I reach for. The gold chrome base gives that glassy shine, and the white veining keeps it from looking like plain gold. I like it on medium-long almond when I’m going to an event, because the reflections look stunning under flash photos. It flatters warm undertones especially well, but even cooler undertones look good because the white veins cool the gold down. Principle: contrast through line work — let the gold be smooth, then draw white veins like marble cracks.
Apply a gold chrome gel base and cure, then rub chrome powder over it if your system requires it. Seal with a thin clear layer so the chrome is protected, then draw white veins using a thin liner brush with opaque white gel. Keep the vein lines narrow and varied — don’t draw the same pattern across all nails. Cure again, then topcoat with a non-wipe topcoat that won’t dull the chrome too much. If you want maximum shine, use a glossy topcoat meant for chrome — it keeps the reflective finish cleaner.
Editor's noteUse a liner brush with a fine tip and wipe it on a lint-free pad between nails so the veins stay crisp.
Skip thisAvoid matte topcoat; it kills the chrome reflections that make this design pop.
14. Snow-White Base with Gold Foil Edge Fade
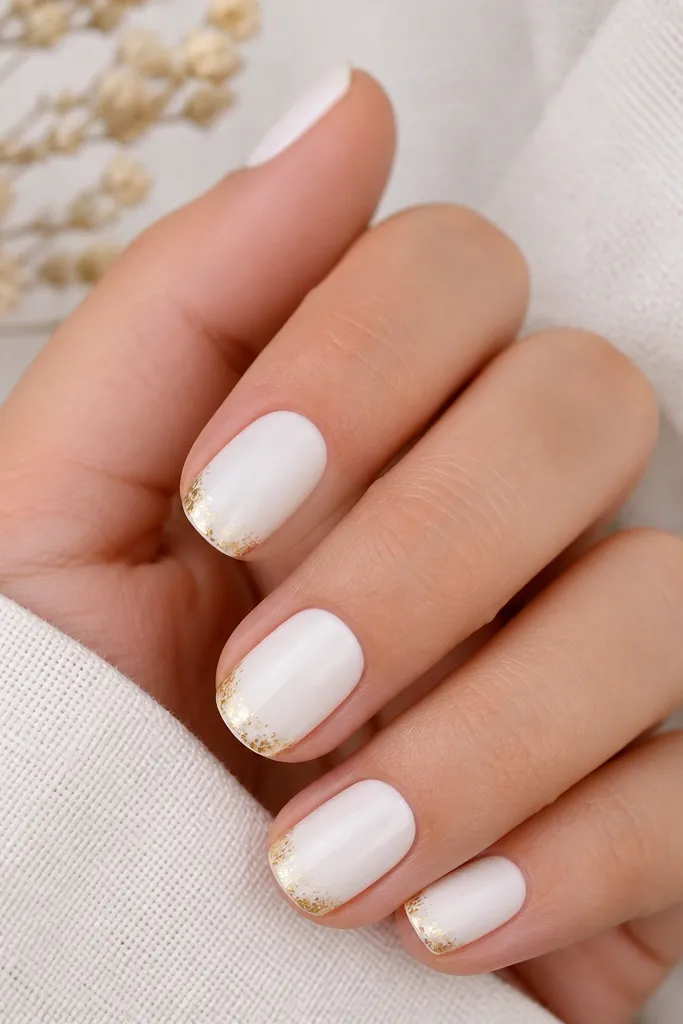
This is a subtle gold design that still looks luxe. The snow-white base reads clean and seasonal all year, and the gold foil edge fade adds a warm glow exactly where the light hits when your hand moves. I like it for workdays because it looks neat from a distance, but it still has detail up close. It flatters shorter nail lengths because the gold stays at the edge and doesn’t visually shrink the nail. Principle: keep gold in a gradient so it looks intentional and soft, not harsh.
Paint two coats of snow-white and cure. Add a tacky layer only along the free edge — about 1 mm up from the tip — then press gold foil pieces along the corners first. Use a silicone tool to gently blend the foil inward so the center stays mostly white. If the foil is too strong, scrape a little off with the edge of a tool before curing. Seal with a glossy topcoat, making sure you cap the free edge to prevent foil lift.
Press foil with a tapping motion; dragging can smear the foil and ruin the fade.
Avoid a straight gold line; the whole point is the soft fade.
15. White Floral Micro-Outline with Tiny Gold Centers
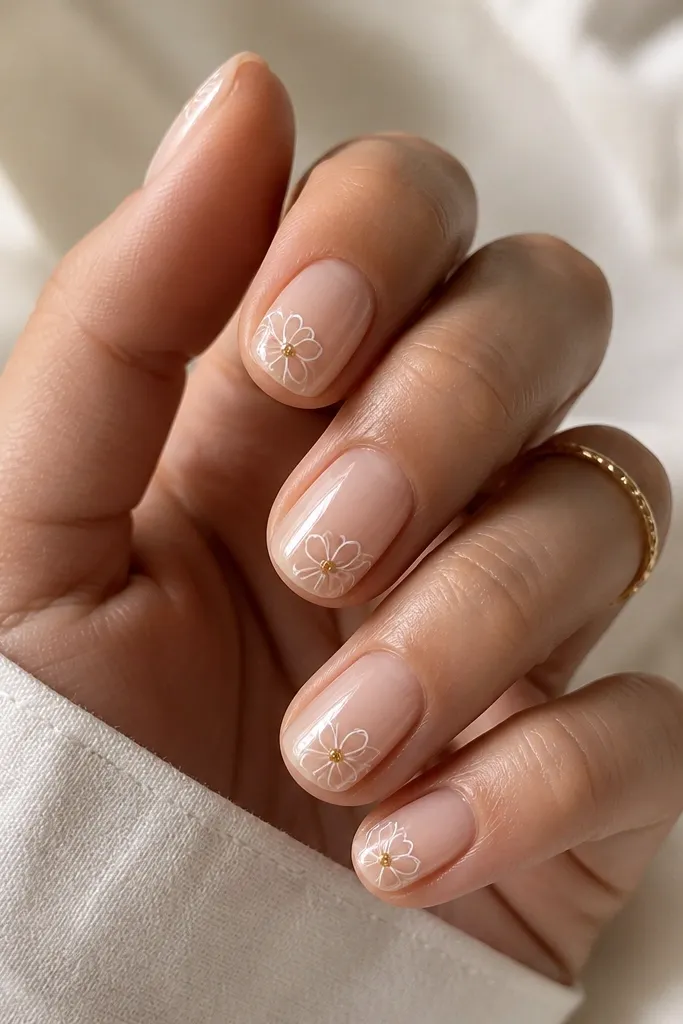
Micro florals look seasonal because the flowers are tiny and clean, not big and cartoonish. Keeping the flowers as white outlines keeps the overall look light, and the tiny gold centers add a warm focal point. I wear this when I want something romantic but still wearable with casual outfits. It flatters narrow nail beds because the negative space makes the nail look longer and more airy. The principle is line art — thin outlines and one gold dot per flower so it stays crisp.
Start with a sheer nude base and cure. Use a thin liner brush to draw one small flower near the tip on each nail, leaving about 2-3 mm of negative space around it. Outline the petals with opaque white gel, then add a tiny gold dot in the center using a gold gel pen or dotting tool. Cure each nail carefully so the lines don’t spread. Topcoat with a glossy finish, applying a little extra around the lines so they don’t catch on clothing.
If your flowers look messy, practice on a paper swatch first — the petal shapes get easier fast.
Avoid thick white lines; bulky outlines look heavy on nude bases.