1. Blue-White French with 14k Micro Line
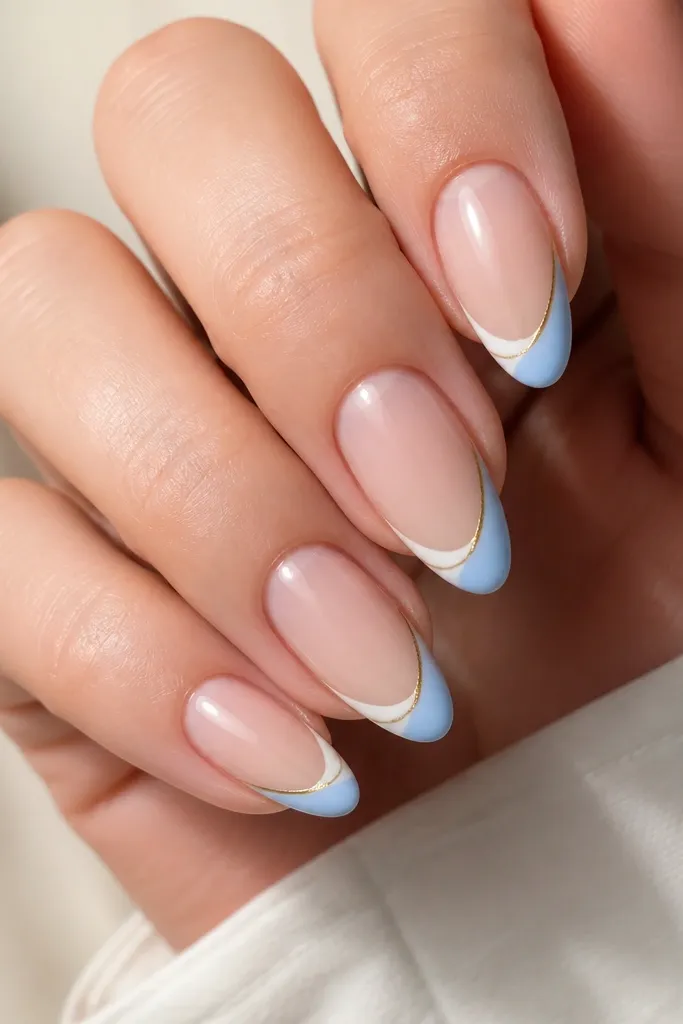
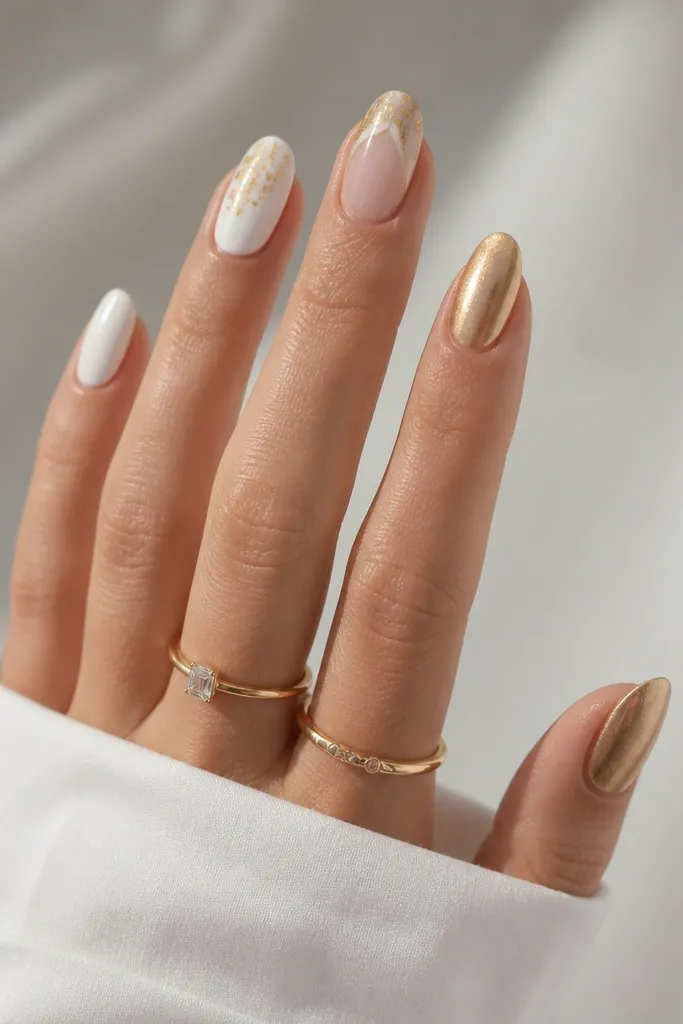
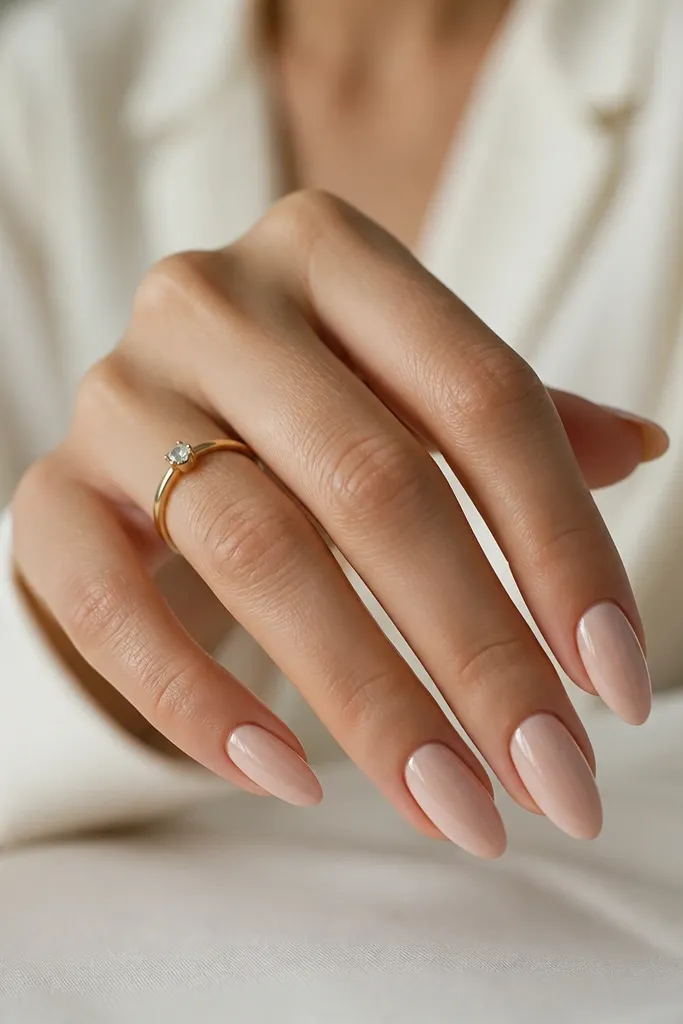
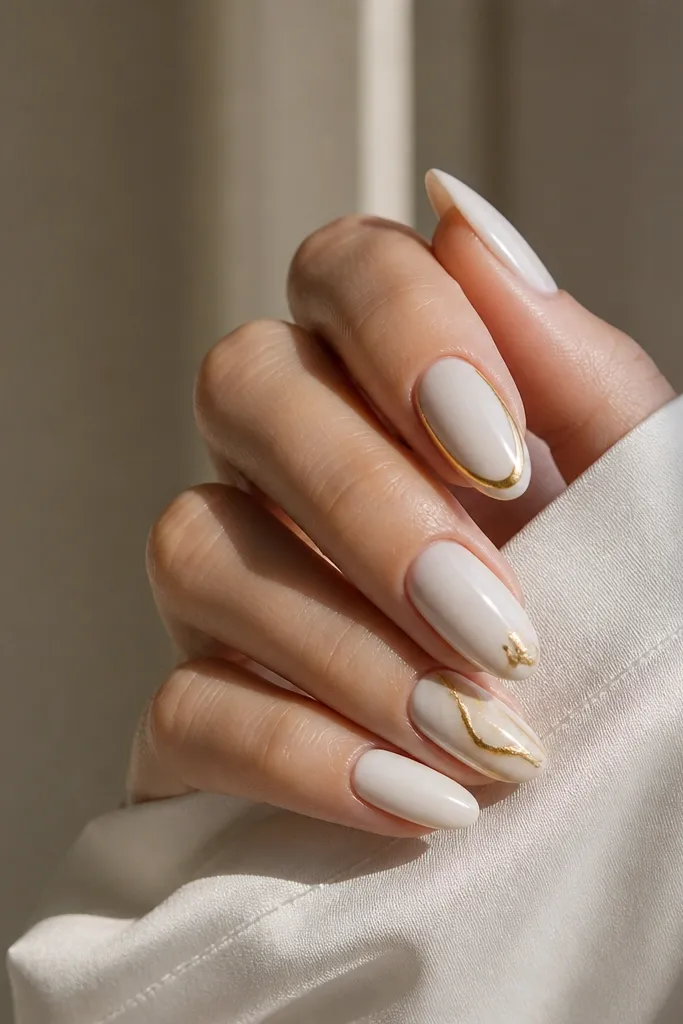
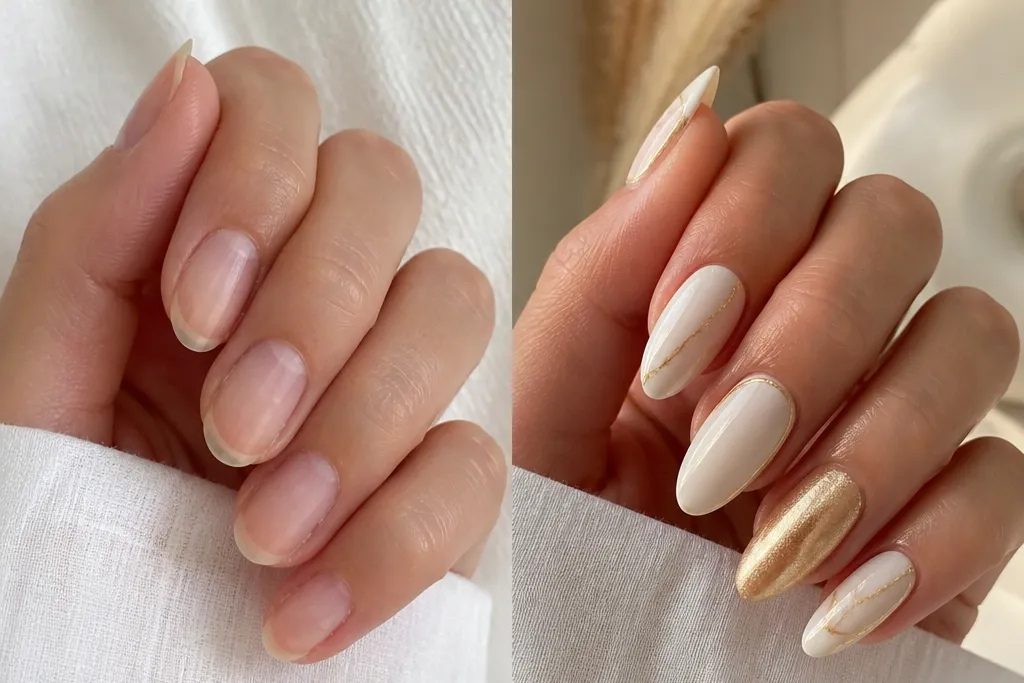
This design makes your nails look freshly shaped because the blue-white french creates a clean boundary at the tip. The sheer nude base keeps everything from looking flat, and the micro gold line adds a sharp “jewelry” edge without turning the set chunky. I like it on medium almond and longer almond because the thin stripe follows the curve and looks intentional. On cool undertones, the blue-white reads crisp instead of gray; on warm undertones, the gold keeps the overall look warm and flattering. It’s also the easiest white-and-gold set to wear to work because the gold stays minimal.
Start by prepping and buffing lightly, then apply a sheer nude base gel and cure fully. Paint the french tips using a blue-white gel — keep the white border about 1 mm away from the sidewalls so it doesn’t flood the cuticle. Cure, then place a striping gel gold line about 0.5 mm inside the french edge, following the almond curve. Finish with a glossy top coat and seal the free edge with a thin swipe. If you want extra polish, add one tiny gold dot on the ring finger corner while the top coat is still tacky, then cure again.
Use a striping brush with a short bristle length so the gold line stays straight on the curve.
Don’t use runny white gel — it bleeds into the sidewalls and ruins the french boundary.
2. Half-Moon Gold Cuticle Frame on Blue-White
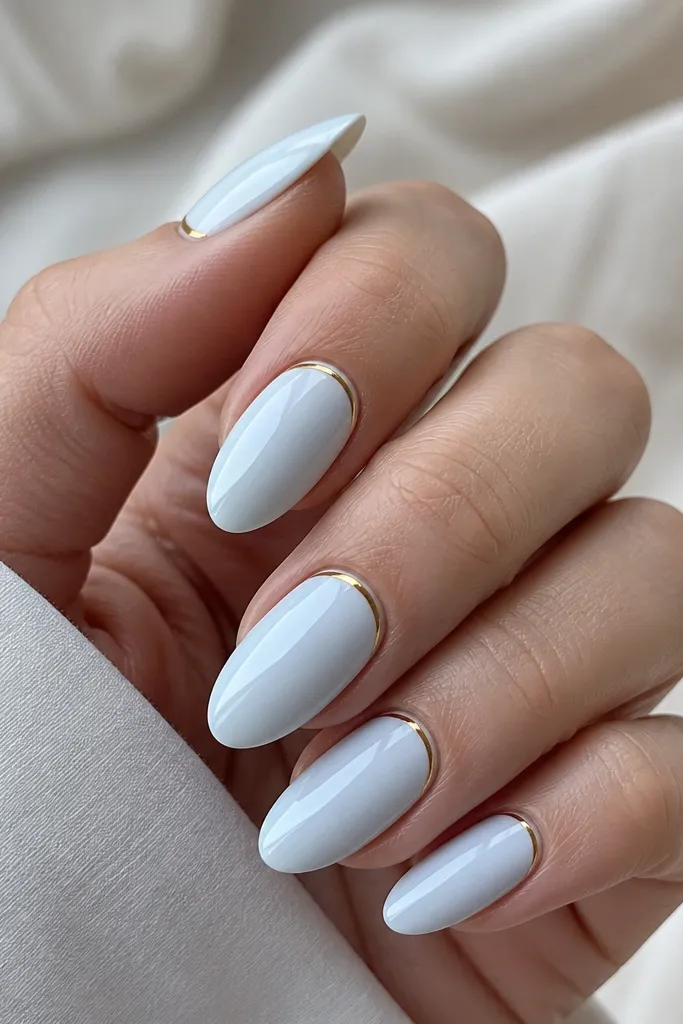
A gold half-moon makes the nail look longer because your eye lands at the cuticle and then travels down the almond taper. The blue-white base gives that bright, cool-clean vibe, while the gold frame adds warmth and definition right where nails naturally show texture. This works great on short-to-medium almond because you don’t need a lot of free edge for the design to read. I’ve worn it on my own nails when they were uneven at the tips, and it still looked balanced because the frame anchors the shape. It also photographs well because the gold edge catches light even in indoor lighting.
Apply a smooth blue-white base gel in two thin coats so it stays opaque without pooling. Cure each coat fully, then use a small detail brush to paint a gold half-moon along the cuticle — start at one sidewall, follow the curve, and stop before it touches the sidewall edges. If you’re using gold foil glue, place a thin line first, then press a small piece of gold foil to fill the half-moon evenly. Seal with a high-gloss top coat, then cure and wipe the inhibition layer if your top coat requires it. Finish by cleaning around the cuticle with a lint-free wipe and acetone on a micro brush so the frame stays crisp.
Keep the half-moon about 1-2 mm tall so it frames your cuticle without covering it.
Don’t overfill the gold — thick gold at the cuticle makes the nail look bulky.
3. Diagonal Blue-White Sweep with Gold Foil Chunk
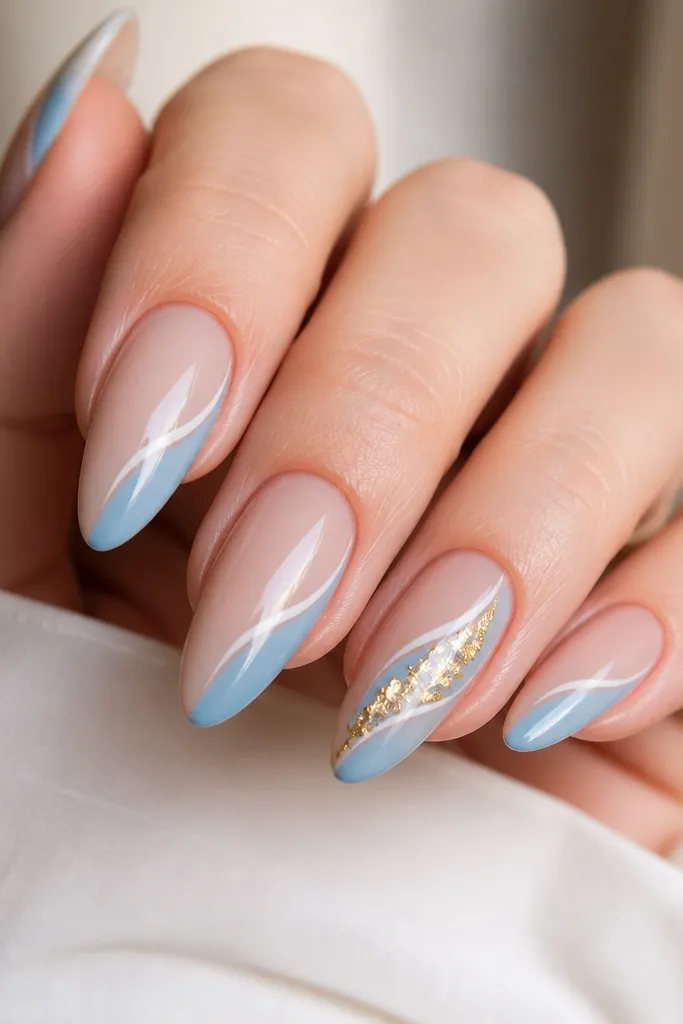
Diagonal accents make hands look slimmer because the line pulls the eye across the nail instead of straight down. This design uses a nude base to keep it light, then a blue-white sweep for that clean, modern look. The gold foil chunk on the diagonal is the fun part — it adds texture and light without needing a full gold nail. I like this on medium almond because the diagonal has enough space to curve with the nail without looking like tape. On fair skin, the contrast is bright; on deeper skin tones, the blue-white still pops, and the foil keeps it from looking icy.
Editor's noteCut your foil into uneven slivers first — it makes the chunk look intentional instead of random.
Start with a nude sheer base gel and cure. Paint a diagonal blue-white sweep using a striping brush — aim for a band width of about 3-4 mm in the middle, thinning toward the tip. Cure, then add a small amount of gold foil adhesive right along the diagonal where you want the “chunk” effect. Press irregular gold foil pieces onto the tacky adhesive, then gently press with a silicone tool to flatten high edges. Seal with glossy top coat in two passes, letting the first coat level out before curing again.
Skip thisDon’t drag the brush through foil glue after it grabs — it smears the gold into dull patches.
4. All-Blue-White Almond with Gold Chrome Tips
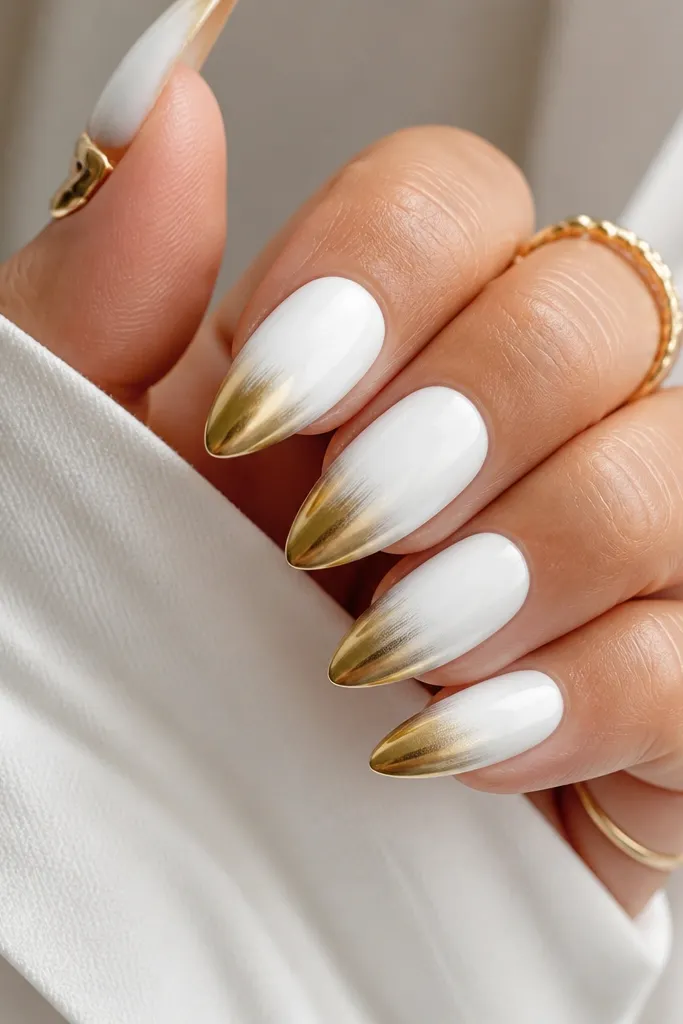
If you want maximum “after” photos, this is it. Full blue-white gives the clean canvas, and gold chrome at the tip adds a reflective finish that looks expensive even in daylight. The gradient feel happens because you blend chrome slightly upward, so it looks like the tip is lit from within. This flatters most skin tones because the white is bright and the gold is warm, and the chrome reflects your hand’s movement. I’ve worn this for events where I knew I’d be taking lots of pictures, and it still looks sharp after hours because the chrome catches light instead of showing minor edge wear.
Editor's noteUse a chrome top coat that says “chrome safe” on the label so the metallic finish stays mirror-like.
Build your blue-white base in two thin coats until it’s fully opaque, then cure thoroughly. Use a sponge or a small chrome applicator to press gold chrome powder onto the outer third of the nail — keep it concentrated near the tip and lightly feather upward. For a smooth blend, wipe off excess powder with a dry brush after the first press, then press again only where you want more density. Seal with a glossy chrome-friendly top coat; don’t use matte top coat here. Cure, then gently buff the surface only if your top coat creates texture.
Skip thisDon’t apply chrome over a matte or overly thick top coat — it dulls the shine.
5. Blue-White Marble Vein with Thin Gold Lines
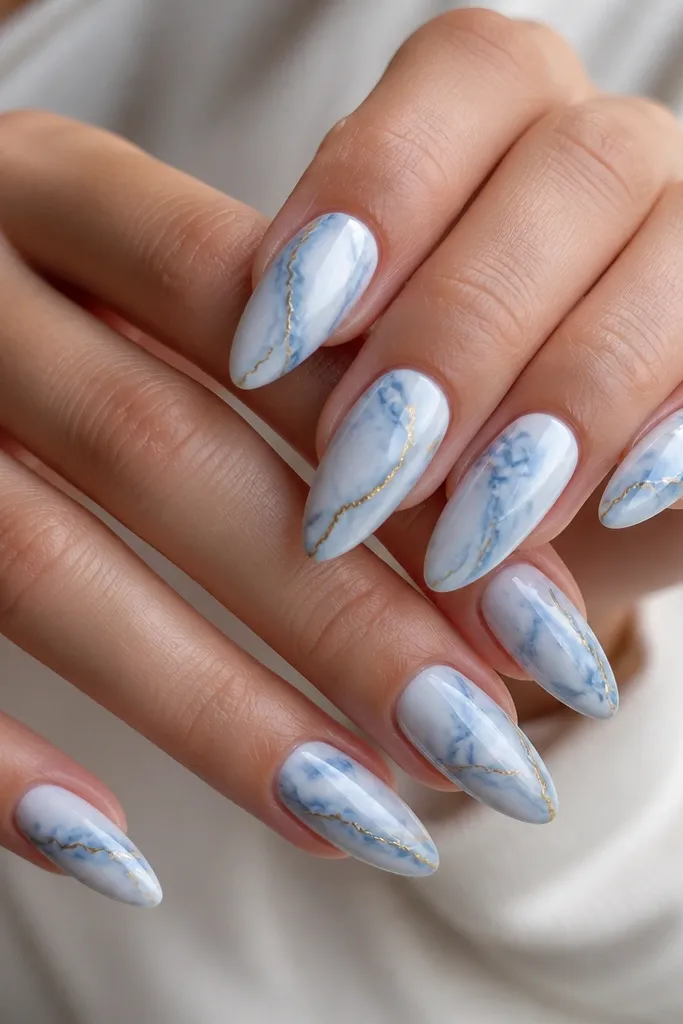
Marble works because it looks detailed even when you keep the colors controlled. Here, you’re using blue-white as the base, then adding soft blue-gray veins so it doesn’t look like plain white paint. The thin gold lines act like “highlights” on select veins, which makes the design feel jewelry-like instead of busy. This looks best on medium-long almond because the veining has room to twist without turning into blobs. I’ve done this on hands with short nail beds and it still works because the marble movement pulls the eye down the length.
Editor's noteDo the veins in one direction per nail so the marble looks like it has flow, not random scribbles.
Start with an opaque blue-white base gel, cured. Use a marbling tool or a fine brush to add blue-gray vein lines — keep them thin (about the width of a strand of hair) and vary pressure so the veins look natural. Swirl lightly so the edges soften, then cure. With a striping gel gold, trace one or two veins per nail — don’t outline everything. Seal with glossy top coat and cap the free edge with the same top coat so the marble doesn’t lift at the tip.
Skip thisDon’t thicken the veins — chunky marble on white looks like icing, not stone.
6. Blue-White Ombre Base into Gold Foil Edge
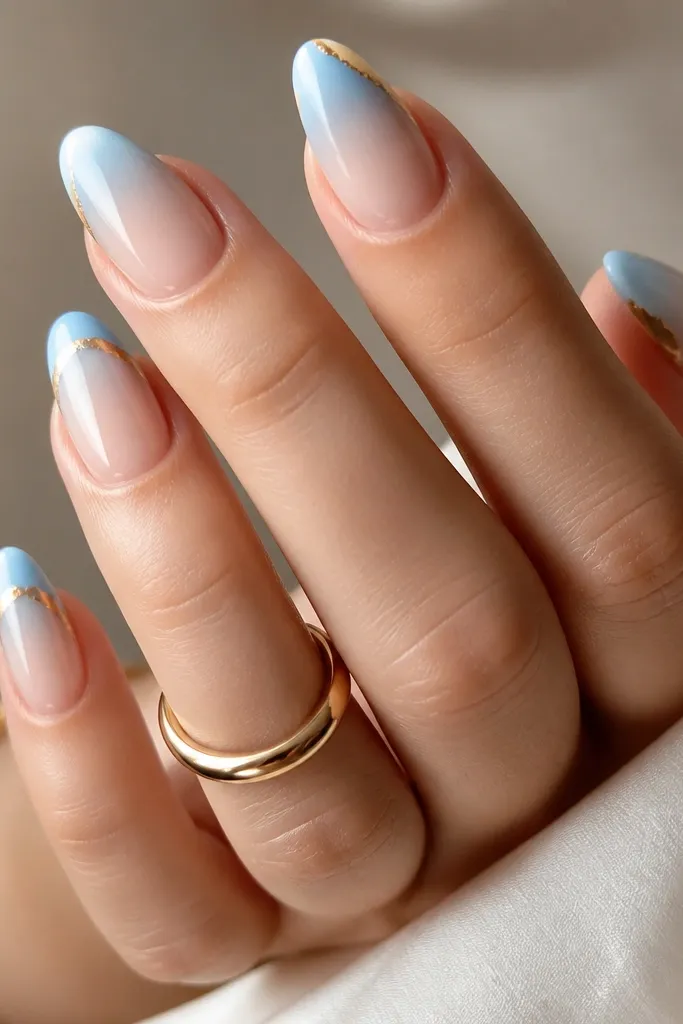
This is the “grown-up” white-and-gold look that still feels special. The ombre softens the transition from cuticle to tip, so it flatters nail beds that look short, and it keeps the set from looking stark. The gold foil edge at the tip adds that clean finishing line, like a designer cuff. I love this on warm skin tones because the gold edge warms the white ombre instead of making it look icy. It also plays nicely with everyday outfits — you get sparkle without the full gold commitment.
Editor's noteKeep the ombre fade gentle — the best version looks like your nail naturally gets brighter at the tip.
Apply a sheer nude base and cure. Sponge on a blue-white ombre using a makeup sponge: start with the lightest amount near the cuticle and build toward the tip, then cure. Add a thin line of gold foil adhesive along the outer edge at the tip, then press gold foil in small pieces to wrap the border. Use a silicone tool to press and flatten so it doesn’t snag. Finish with glossy top coat, making sure you cap the foil edge so it doesn’t lift.
Skip thisDon’t paint the foil adhesive too wide — wide adhesive makes foil look like a sticker.
7. White Micro Studs with Gold Frame Corners
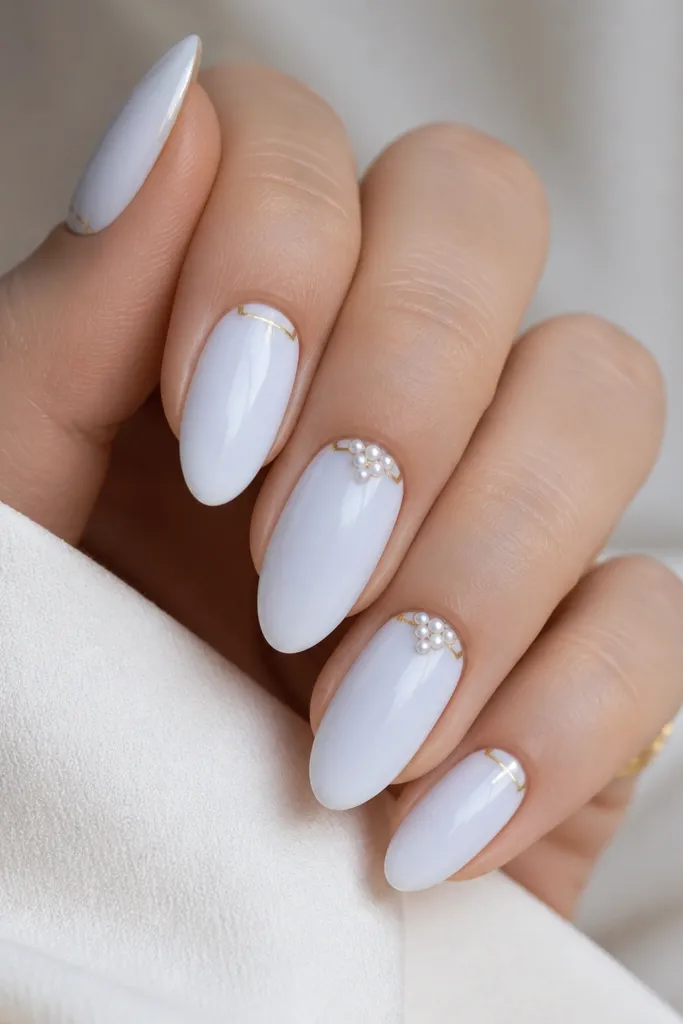
Micro studs give you that “texture you can feel” look without heavy rhinestones. When the nail is solid blue-white, tiny studs look crisp and intentional, not cluttered. The gold frame corners — those little L shapes near the sidewalls — add structure and make the nail look more symmetrical. This set flatters hands with wider nails because the gold corners visually balance the width. It’s also a great choice for bridal events because it reads clean up close and sparkly from a distance.
Editor's notePlace studs with tweezers or a wax pen, not your brush — you get cleaner placement near the cuticle.
Paint two thin coats of opaque blue-white gel and cure. Use a dotting tool to place micro studs at the cuticle — keep the cluster to 3-5 studs so it stays neat. For the gold corners, use striping gel to paint an L shape near each sidewall, about 2 mm long — leave a gap from the cuticle so it doesn’t look like a thick border. Cure, then apply top coat carefully around the studs so they stay set. Cap the free edge with top coat last so the set doesn’t catch on hair or fabric.
Skip thisDon’t bury studs under thick gel — it dulls the shine and can lift at the edges.
8. Blue-White Negative Space Nail with Gold Cross
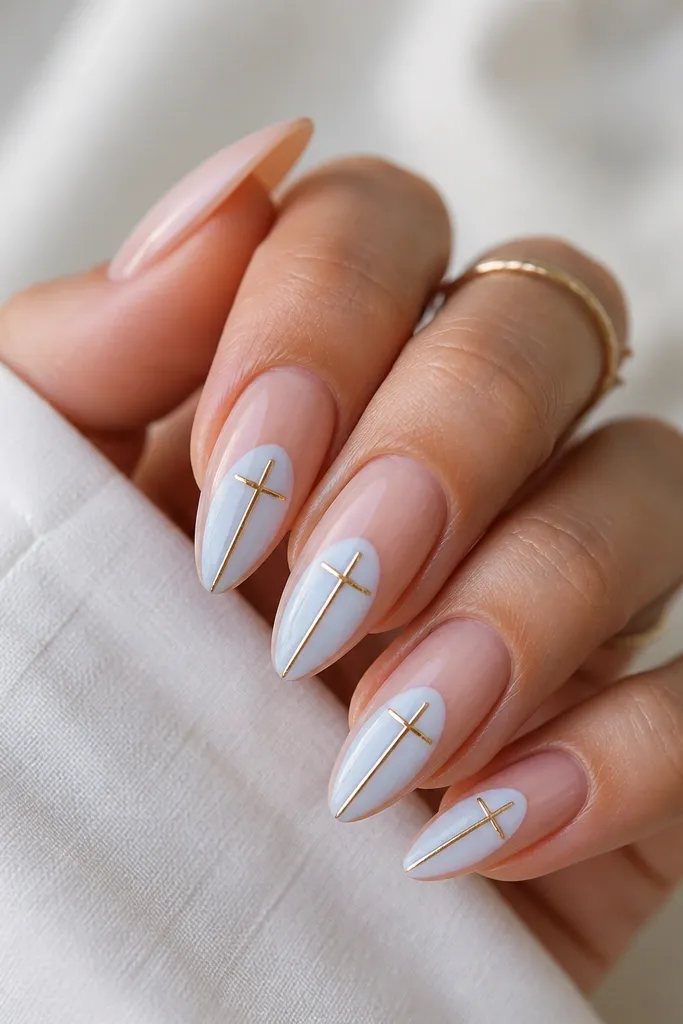
Negative space keeps white-and-gold from looking too “full coverage” and bulky. The nude base lets your natural nail line show through, which makes the almond shape look longer and cleaner. The blue-white shape gives the contrast, and the gold cross adds a graphic, modern vibe that still looks elegant. I like this for hands that have a little nail ridging because the nude base hides unevenness better than full white. It’s also a strong choice if you want something trendy but not loud.
Start with a nude base gel and cure. Paint a blue-white shape in the center — I like a vertical rectangle that starts just below the cuticle and tapers slightly toward the tip. Cure, then use striping gel gold to draw a thin cross over the blue-white: the vertical line should follow the nail center, and the horizontal line sits around the midpoint. Cure again, then apply glossy top coat carefully, avoiding flooding the negative space edges. Clean up the sidewalls with a small brush dipped in remover so the lines stay sharp.
Use a nail vinyl or a tiny piece of tape as a guide for the vertical line so the cross looks centered.
Don’t let blue-white touch the sidewalls — it makes the negative space feel cramped.
9. Blue-White Galaxy Dots with Gold Crescent
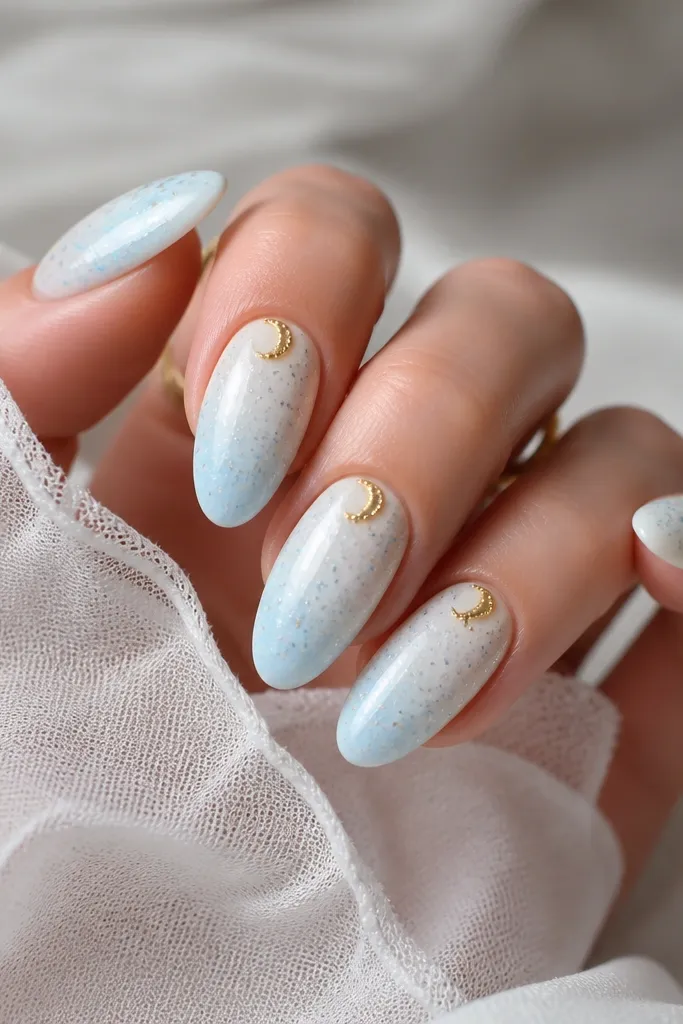
This design mixes “clean white” with soft sparkle, so it doesn’t look like your nails are trying too hard. The blue-white base stays bright and makes the tiny dots pop. A gold crescent at the cuticle anchors the chaos so it still feels polished. This is flattering on fair to medium skin tones because the lighter dot colors look airy, not heavy. I’ve worn it to parties where I wanted something different from plain french tips, and it still matched gold jewelry easily.
Editor's noteUse silver chrome dust for the dots instead of glitter polish — it looks finer and cleaner.
Apply two coats of opaque blue-white gel and cure. Using a fine dotting tool, place small light blue and silver dots — vary size from pinhead to slightly larger so it looks like depth. Add a tiny gold crescent at the cuticle by painting a thin curved line, then fill it lightly so it’s opaque. Cure, then apply glossy top coat in one controlled layer. Cap the free edge so the dots don’t catch and snag.
Skip thisDon’t overdo the dots — too many makes it look like cheap confetti.
10. Blue-White Cat-Eye Accent with Gold Outline
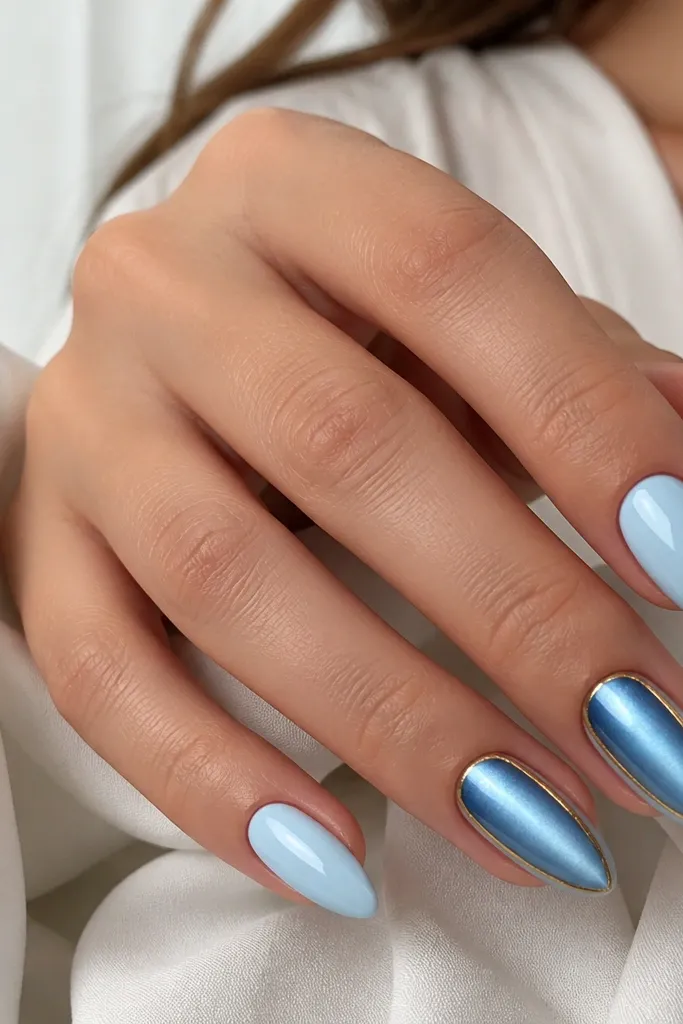
Cat-eye gel gives you movement, and the gold outline makes it look intentional. The blue-white base is smooth and bright, so the magnetic line looks crisp instead of muddy. Gold outline adds a fine border that frames the cat-eye stripe and keeps it from looking like a random streak. This is a great option if you like white-and-gold but want something with depth. It flatters hands with shorter nail beds because the cat-eye line pulls the eye down the center.
Editor's noteHold the magnet steady for the full cure time so the cat-eye line doesn’t blur.
Paint all nails with opaque blue-white gel in two thin coats, cure fully. On the accent nails, apply a cat-eye gel in the center band, then cure with a magnet held at an angle for the line effect. Once cured, use striping gel gold to trace around the cat-eye band edges — keep it thin and even. Apply glossy top coat over the whole nail and cap the free edge. Clean around the outline with a small brush so the gold border stays crisp.
Skip thisDon’t use a thick magnet gel layer — it makes the cat-eye line wider than you want.
11. Blue-White Pearl Coat with Gold Side Bar
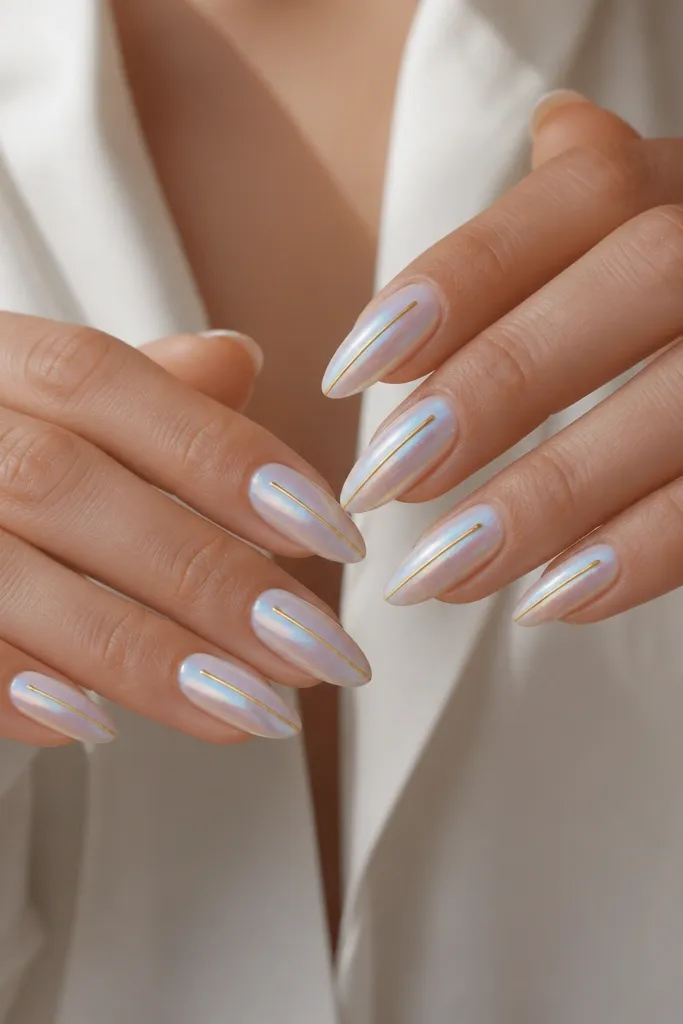
Pearl polish changes everything about white — it stops looking flat and starts looking lit from within. The gold side bar then gives a clean, vertical “column” effect that makes the almond shape look longer and more narrow. I like this on hands that show dry cuticles because the pearly finish makes the nail look soft and smooth overall. On deeper skin tones, the pearl shift looks gorgeous without needing extra gemstones. It’s also a wearable set for everyday because the gold is thin and the sparkle is subtle.
Editor's noteIf your pearl looks streaky, apply it in two thinner coats instead of one heavy coat.
Apply a sheer base, cure, then sponge or brush on a pearl blue-white gel until it looks evenly coated. Cure. For the gold side bar, use a striping gel gold and paint a straight vertical line in the center-left or center-right position depending on your nail — I keep it about 1.5-2 mm away from the sidewall. Cure again, then apply glossy top coat, making sure the side bar edge is sealed. Finish by wiping any stray gold gel from the cuticle area with a micro brush.
Skip thisDon’t place the gold bar too close to the sidewall — it makes the nail look uneven on the curve.
12. Blue-White Full Cover with Gold Leaf Placement
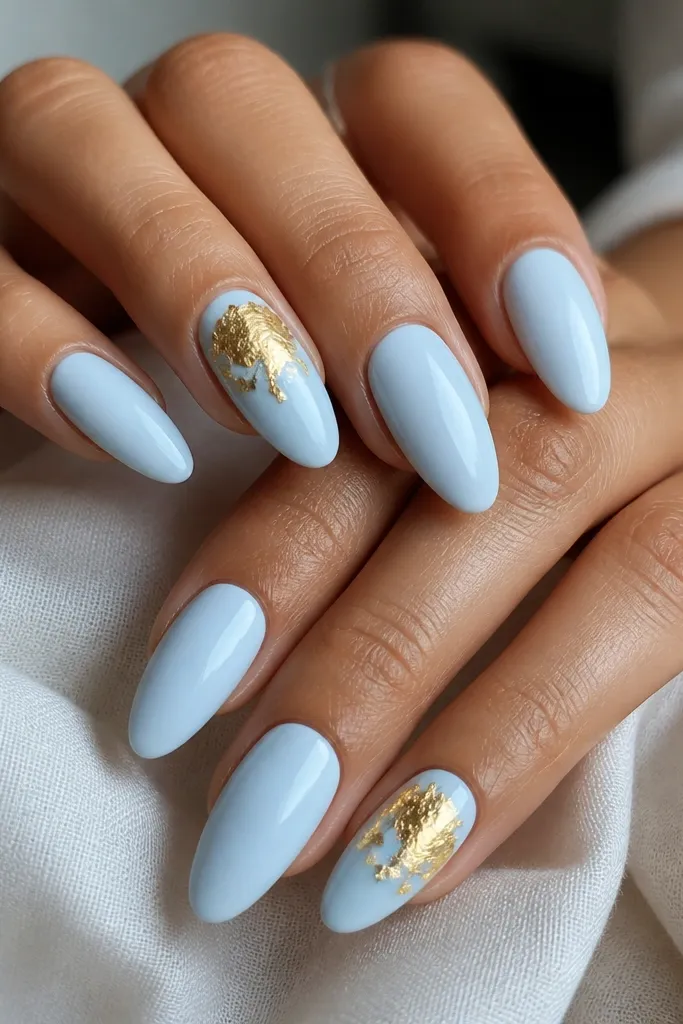
Gold leaf has a softer, organic look compared to chrome, and it makes full white feel more interesting. The blue-white full cover keeps the set clean, while the gold leaf placement adds dimension only where you want attention. This flatters hands that like statement nails but still want a white-and-gold theme that looks classy. I’ve done this for birthdays and photos, and the gold leaf catches light without looking like thick foil blobs. It also works well on medium almond because the top third is the sweet spot for leaf placement.
Start with fully opaque blue-white gel in two coats, cure each coat. Apply a thin layer of gold leaf adhesive only on the top third of the accent nails, leaving the rest plain. Press gold leaf pieces onto the adhesive, then gently pat with a silicone tool so it follows the nail curve. Seal with a glossy top coat in two layers so the leaf edges don’t snag. Cap the free edge carefully so the top layer doesn’t thin out near the tip.
Use small leaf pieces instead of big sheets — they conform better to the almond curve.
Don’t seal leaf too soon if your adhesive is still tacky in a way that smears — it turns leaf dull.
13. Blue-White French Tip with Gold Drip Line
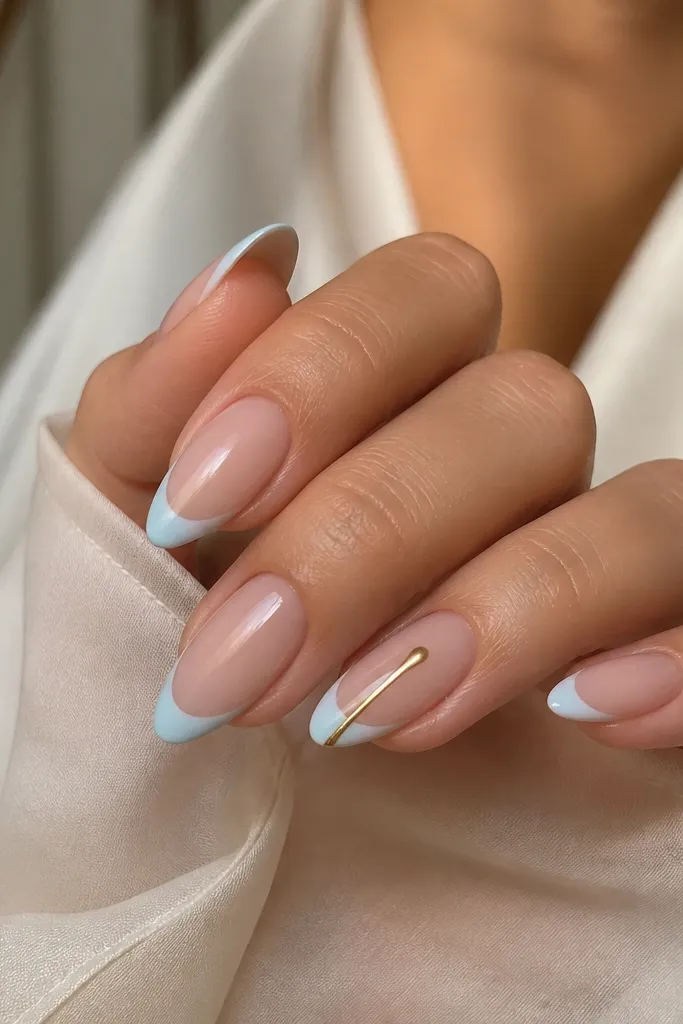
A drip line sounds messy, but when it’s thin and controlled it looks like high-end nail art. The blue-white french keeps the set structured, and the gold drip adds a playful “spark” moment. This design is flattering because the french tip visually lengthens, and the drip pulls the eye down the nail instead of making it look wide. I like it on medium-long almond for the extra space the drip needs. It also pairs well with gold rings since the drip sits right where your jewelry catches light.
Editor's notePractice the drip on one nail first — the right drip is a controlled taper, not a thick blob.
Paint nude base gel, cure. Apply blue-white french tips in an even arc, cure. On the accent nail, draw a thin gold line right at the inner edge of the french, then use the tip of the brush to let a small amount of gold gel fall downward into a taper. Cure, then apply glossy top coat carefully so the drip stays glossy and doesn’t flatten. For non-accent nails, keep them plain french or add a tiny gold dot at the corner if you want matching without drip.
Skip thisDon’t use watery gold polish — it spreads and turns into a streak.
14. Blue-White Outline French with Gold Corner Gems
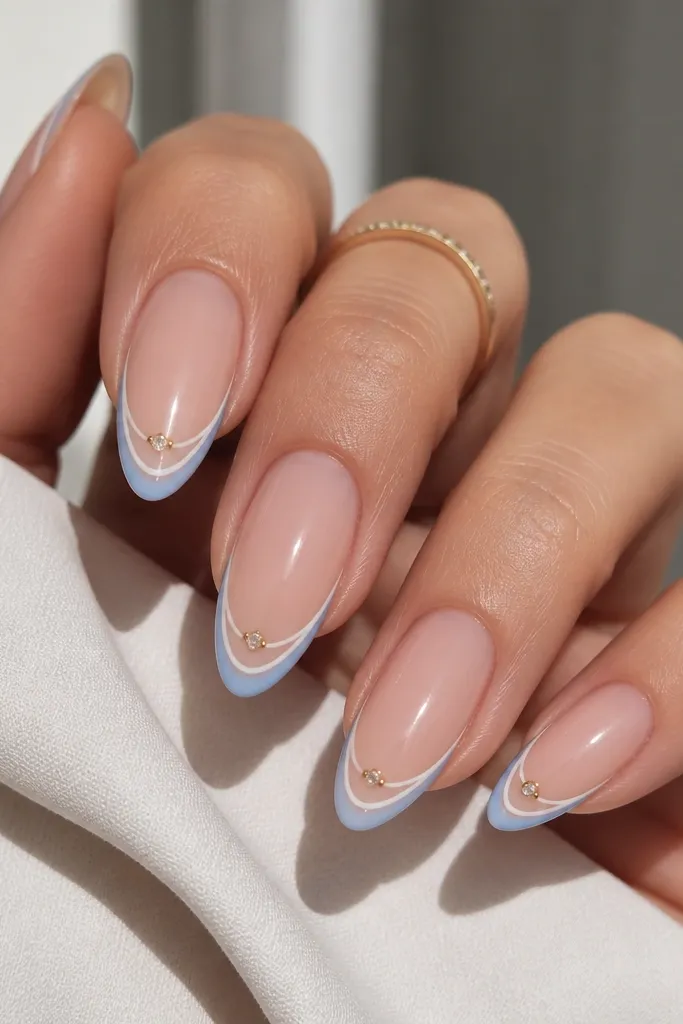
Outline french is clean and modern because the white sits in the border instead of filling the entire tip. That keeps the nail looking light, and it makes the almond shape look sharper. The gold corner gems add just enough sparkle without covering the whole nail, so it stays elegant for events. This is a great choice if you hate full white because you feel it looks too bold, but you still want the “white and gold” vibe. I’ve worn this with both silver and gold jewelry; the gold settings tie everything together. It also photographs well because the corners catch light when your hand moves.
Editor's noteUse a liner brush and keep your outline line slightly thicker at the corners — it makes the tip look more balanced.
Start with a nude sheer base and cure. Use a thin brush to paint a blue-white outline french — trace the tip shape, keeping the line about 1-1.5 mm thick. Cure, then place tiny gold-toned gem settings at each outer corner of the outline on two nails. If you’re using loose stones, apply a small dot of gel adhesive at the corner, place the stone, then cure. Finish with a glossy top coat, but keep it thin around the stones so they don’t look dull. Cap the free edge with top coat to protect the outline line.
Skip thisDon’t flood the outline with gel — it turns outline french into a filled french.
15. Blue-White Solid Nails with Gold Half-Chain Across Tip
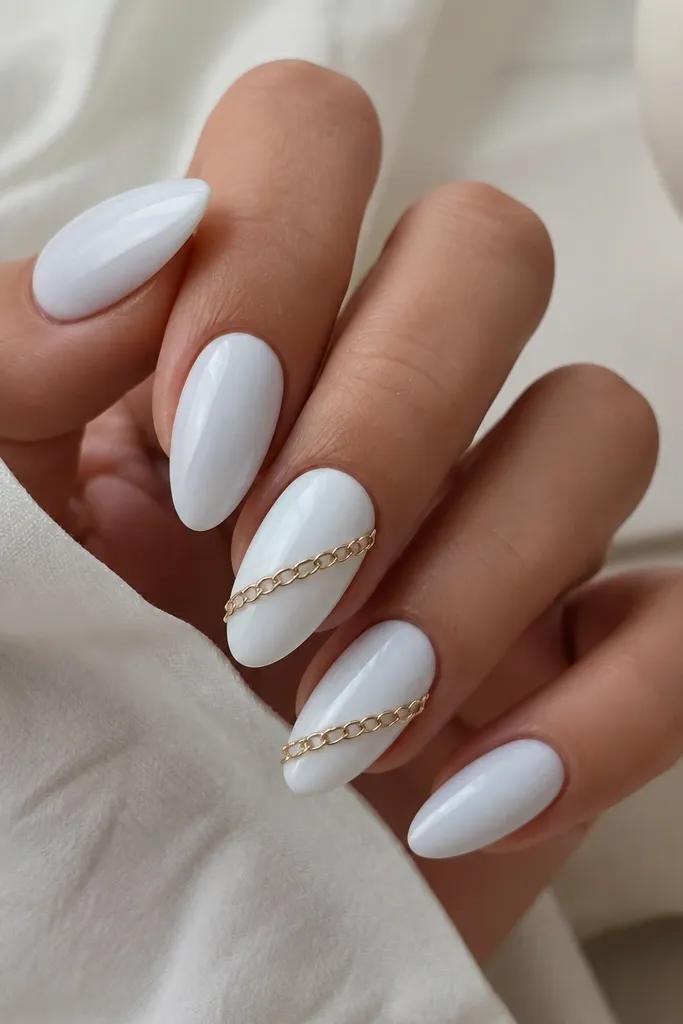
A chain detail looks like you added jewelry to your nails, and the blue-white base makes it stand out without clashing. The chain across the tip is flattering because it follows the almond curve and draws attention to the free edge, where the shape is strongest. I like this for nights out because it catches street lighting and looks expensive in motion. It’s also forgiving if you have slight unevenness near the tip — the chain sits over the area and visually smooths it. On fair skin, the gold pops hard; on deeper skin tones, the chain still reads clear because the blue-white background stays bright.
Apply two coats of opaque blue-white gel and cure. On accent nails, map the chain placement with a pencil dot guide: start near one sidewall at the upper tip and angle toward the opposite side about 3-4 mm from the tip edge. Apply a thin line of chain adhesive gel where the links will sit, press the gold chain in place, and remove excess adhesive around the links. Cure, then apply a glossy top coat that fully covers the chain links so they feel smooth when you run your thumb over them. Seal the free edge last so the chain doesn’t lift at the tip.
Choose a chain with small links — big links can snag and look bulky on almond nails.
Don’t skip sealing over the chain — unsealed links catch on hair and lift quickly.