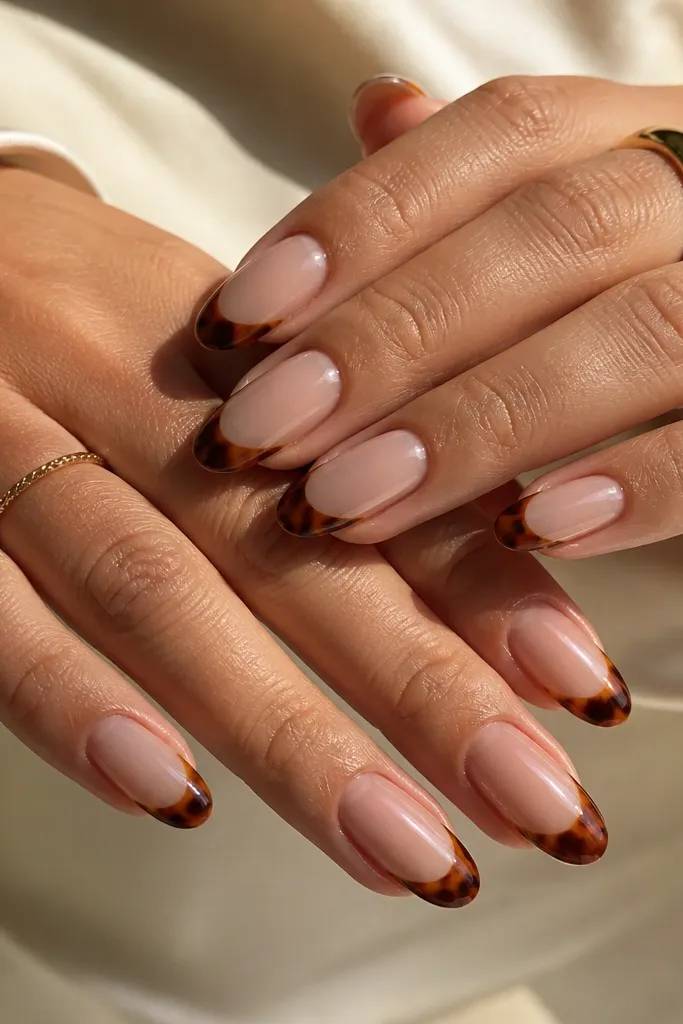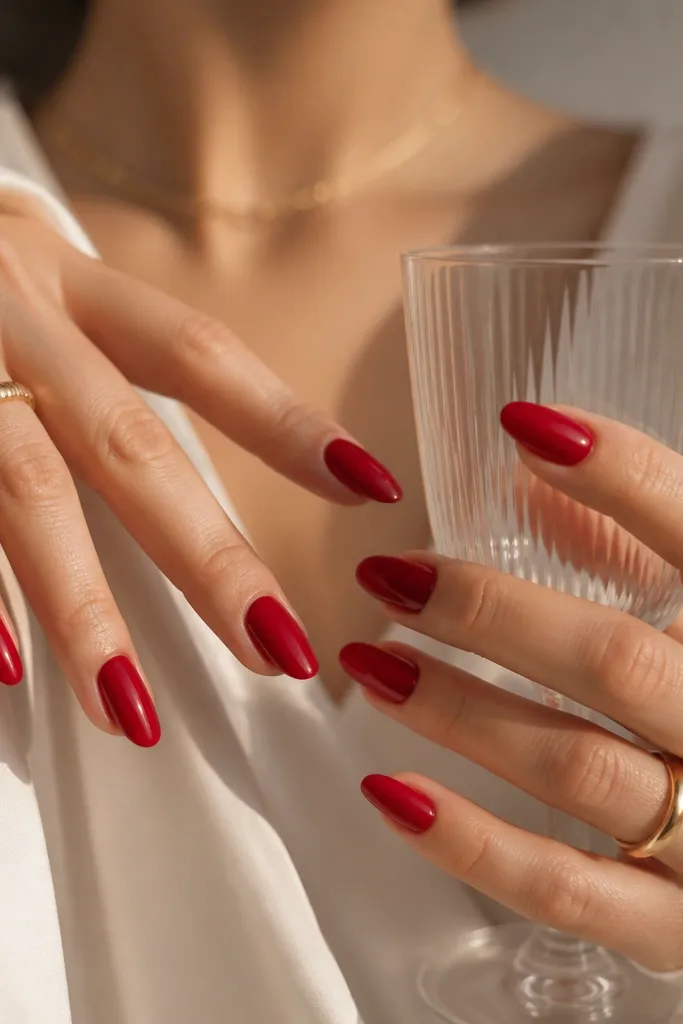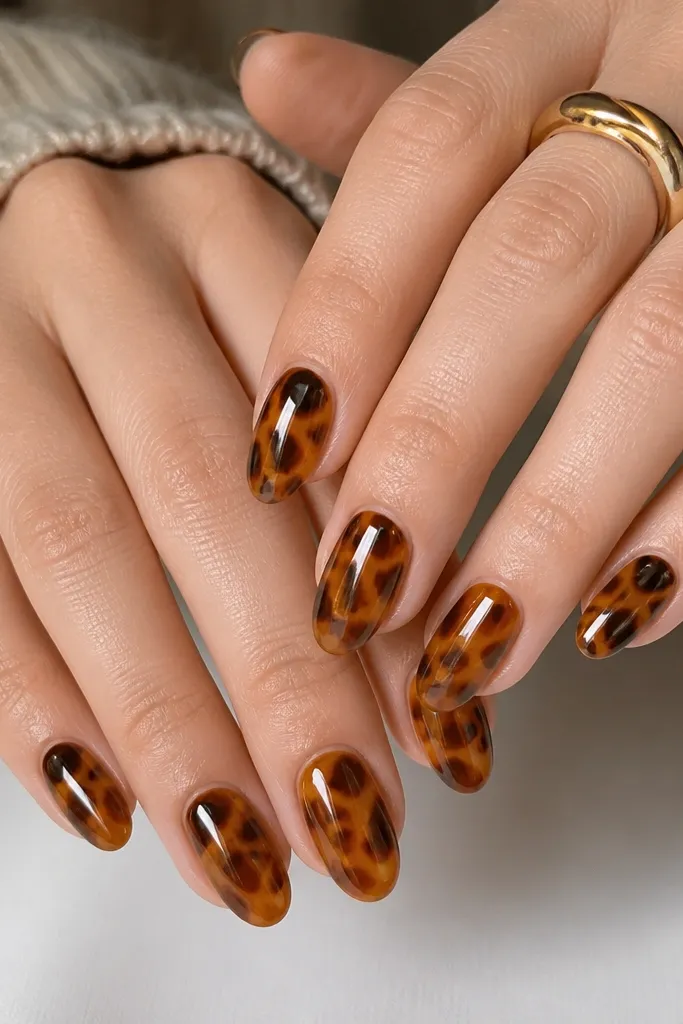
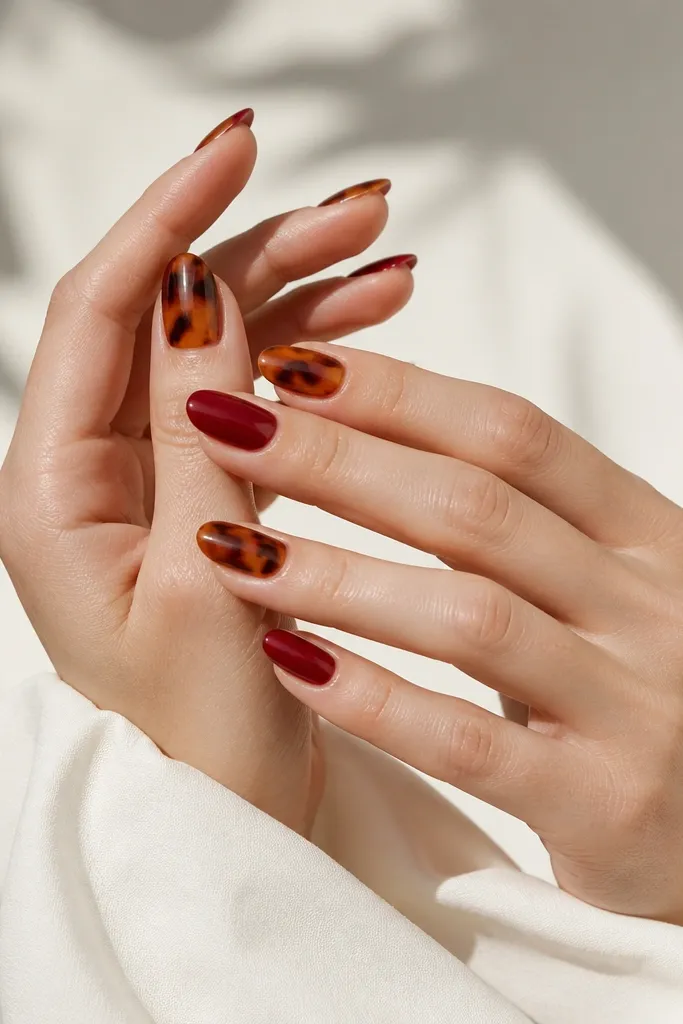
1. Oxblood Base with Amber Tortoise Veins
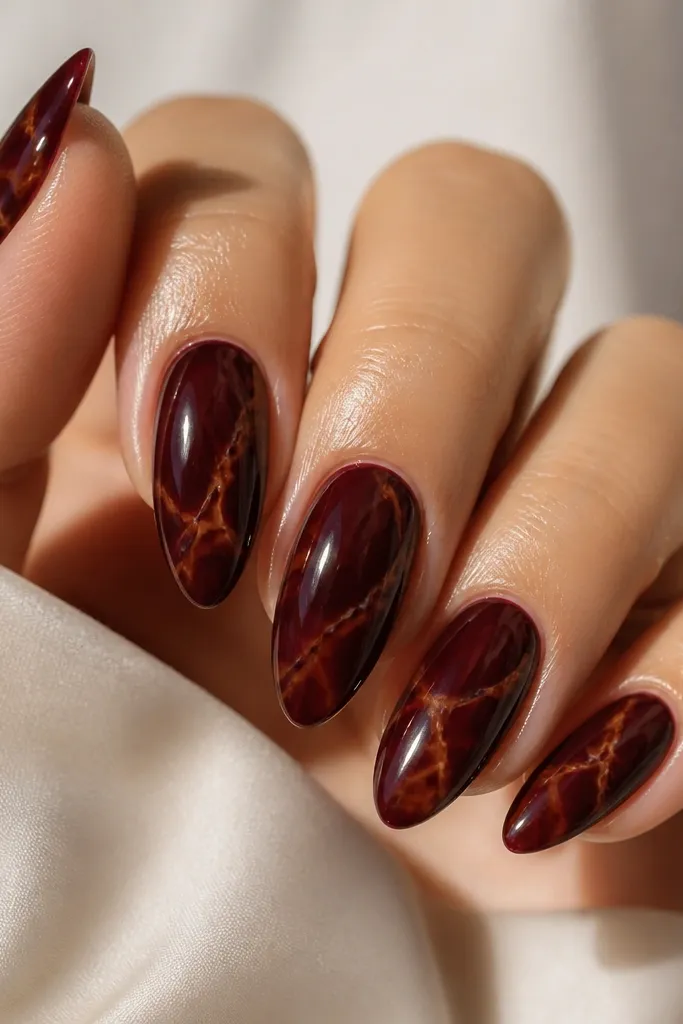
Start by painting two thin coats of oxblood on clean, dry nails, then cap the free edge so chips don’t start there. Use a makeup sponge or a fine detail brush to dab tiny dots of caramel and amber where you want the tortoise to “flow,” then drag them into thin diagonal veins. Add one darker brown streak between the amber lines for depth, keeping everything narrow so it doesn’t smear. Finish with a glossy top coat in two layers, letting the first layer set for 30-60 seconds so the marbling stays crisp.
This look uses oxblood as the solid anchor because it has that brown-red warmth that makes tortoise shell look natural, not pasted on. The tortoise portion is kept as “veins” — thin amber and caramel strands — so you get movement without losing the red punch. It flatters medium to deep skin tones especially well because the contrast stays crisp rather than turning muddy. For work days, it reads classy; for nights out, the amber catches highlights and makes your nails look styled even when you’re wearing simple jewelry.
Skip thisDon’t flood the nail with thick tortoise blobs; it turns into a cloudy patch instead of a shell pattern.
Editor's noteAfter you do the shell veins, seal the pattern edges with a super-thin top coat before your full coat — it prevents the marbling from lifting.
2. Classic Tortoise Shell with Red Half-Moons
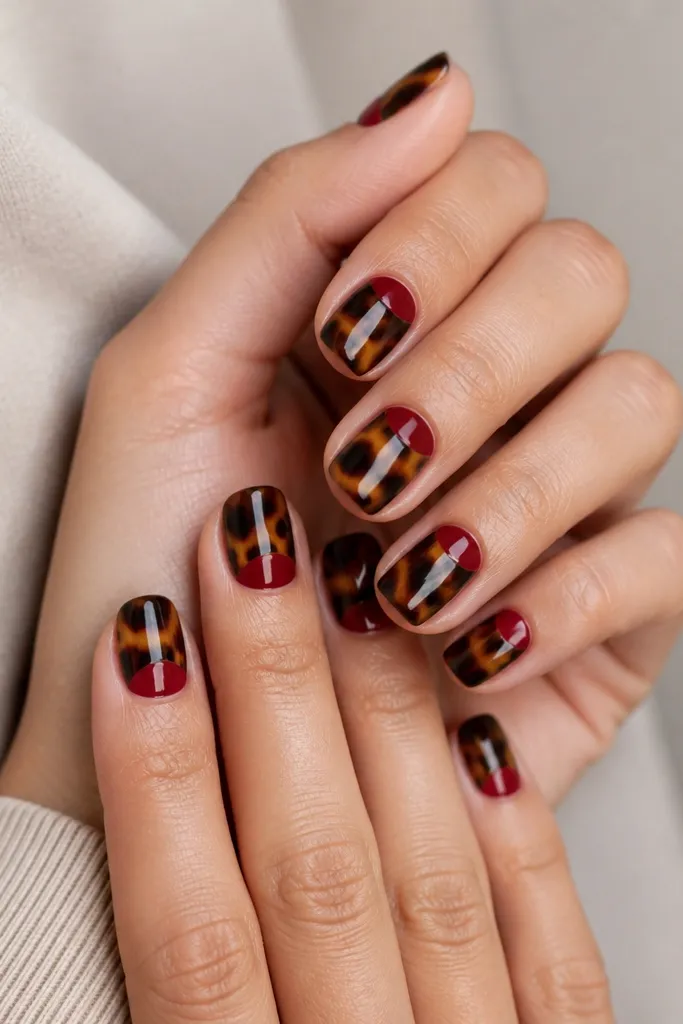
Start by applying a sheer nude base under a glossy top coat if your nails are stained, then build your tortoise shell in the center area. For shell, sponge on a light caramel base, then add small dark-brown patches and swirl them with a toothpick just enough to blend edges. Wipe the cuticle area with a brush dipped in acetone so the shell stays neat. Then paint a curved wine-red half-moon at the cuticle using a thin liner brush and finish with two coats of glossy top coat.
This design works because it frames the tortoise with a red “halo” at the cuticle. The half-moon shape makes your nail bed look longer and cleaner, which is perfect if your nails grow out uneven or you hate visible regrowth lines. I like wine-red here because it sits slightly muted against the shell tones, so it looks intentional instead of loud. It looks especially flattering on shorter lengths and hands with cooler undertones because the red brings warmth right where the eye focuses.
Skip thisDon’t let the red half-moon touch the shell in a messy way; you want a clean boundary so the design reads clearly.
Editor's noteUse tape or a cuticle guard for the half-moon edge if you’re picky about symmetry — even a little guide makes it look salon-neat.
3. Red French Tips Over Tortoise Base
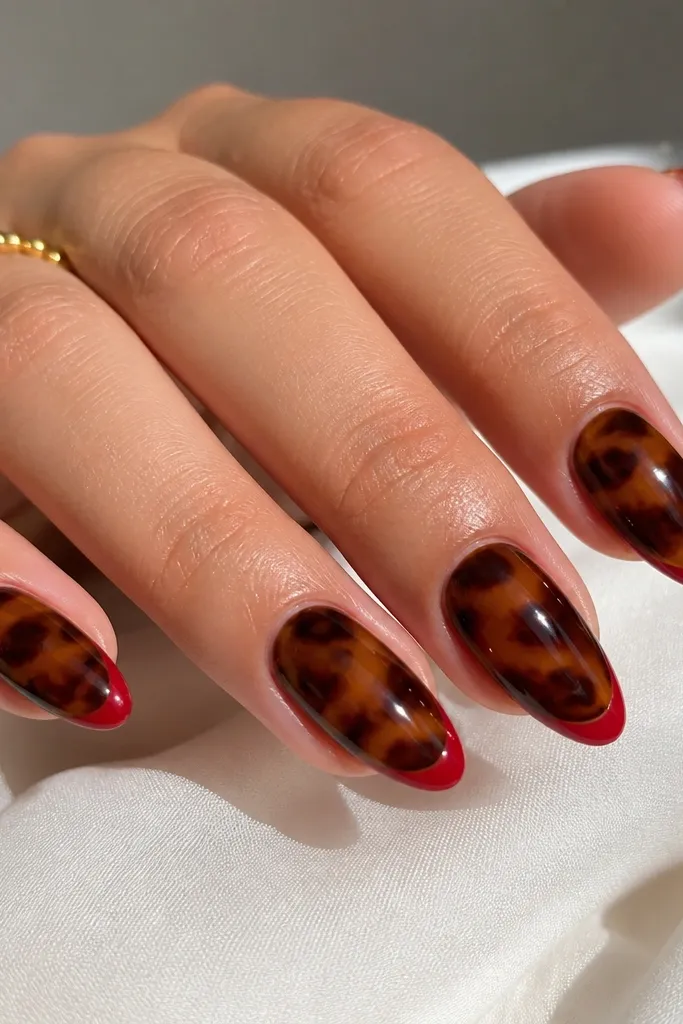
This is the combo I reach for when I want “trendy but wearable.” The tortoise base brings the depth, while the red French tip gives a clean, graphic edge. Because French tips visually lengthen the nail, this one flatters short-to-medium nails and hands that look better with structured shapes than lots of tiny details. The contrast also looks great on both fair and deep skin tones — the shell creates warmth, and the red keeps the set from looking too beige.
Begin with a tortoise shell base: sponge a caramel layer, then dab dark brown patches and blend the edges with a clean brush. Leave a little negative space near where the tip will start so your smile line doesn’t get buried. Once the base is set, paint a red French tip with a thin brush, keeping the tip width around 1.5 to 2 mm for an almond shape. Clean the edges, then seal everything with two glossy top coats.
Angle your smile line slightly upward at the sidewalls; it makes the nail look lifted instead of flat.
Don’t paint the French tip too thick; chunky tips cover the shell and make the set look heavy.
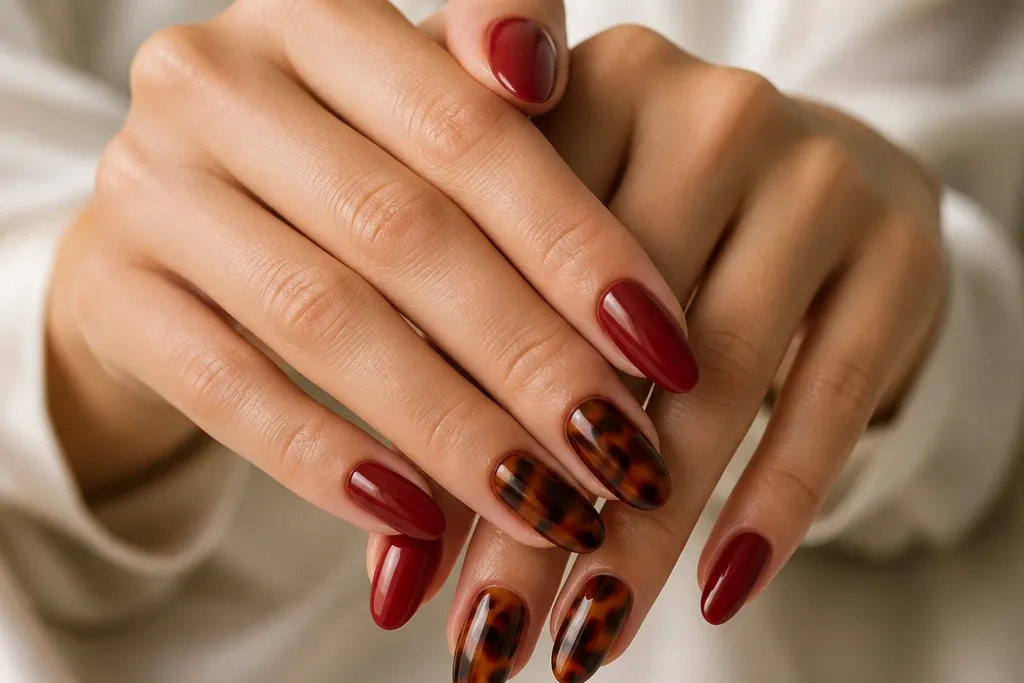
4. Tortoise Shell Skittle with Oxblood Accent Nail
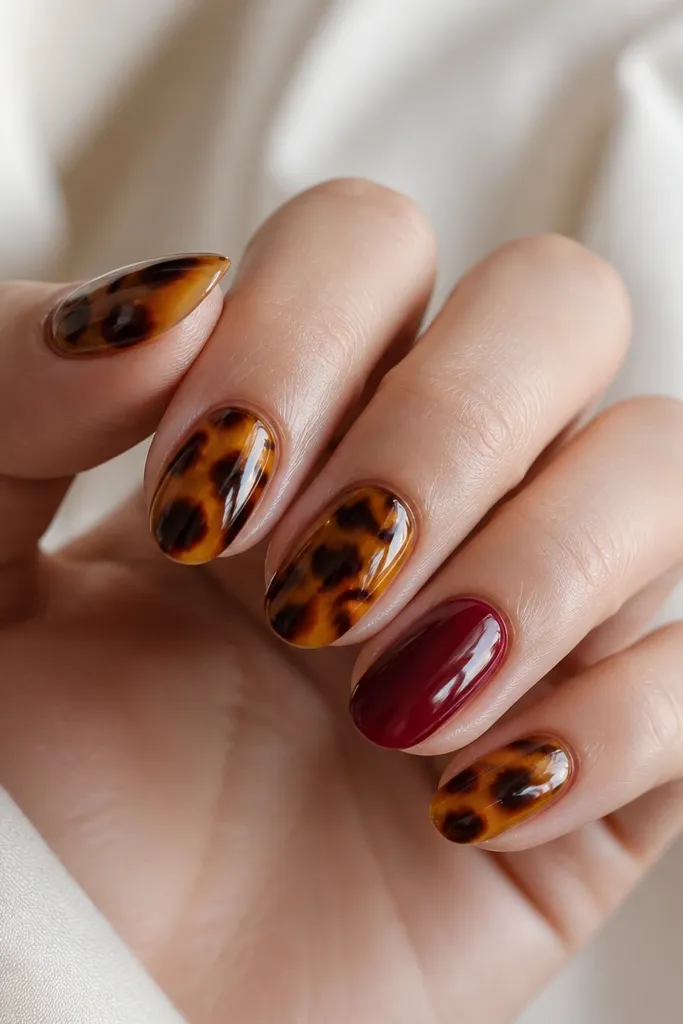
Skittle sets look best when the accent nail has a totally different texture or coverage. Here, four nails get tortoise shell, and one nail stays solid oxblood so your eye has a resting point. I like this on days when you want something striking but you don’t want to spend time on tiny details across every nail. It flatters hands with varying nail lengths because the solid accent nail hides shape differences better than a fully patterned set. It also pairs well with gold rings because the caramel in the shell looks like warm metal.
Start by painting tortoise shell on four nails: caramel base, then small dark-brown irregular patches, swirled lightly with a toothpick. Keep the pattern concentrated in the middle so it doesn’t get too busy near the cuticle. On the fifth nail, paint two thin coats of oxblood and cap the edges for durability. After curing, apply one layer of glossy top coat to all nails, then a second layer only where the shell looks slightly matte or textured.
If you want extra “luxury” without extra work, add a single thin gold foil line on the accent nail — one line near the center is enough.
Don’t put tortoise shell on every nail if your pattern work isn’t super steady; it can start to look messy instead of intentional.
5. Red Crackle Lines on Tortoise Background
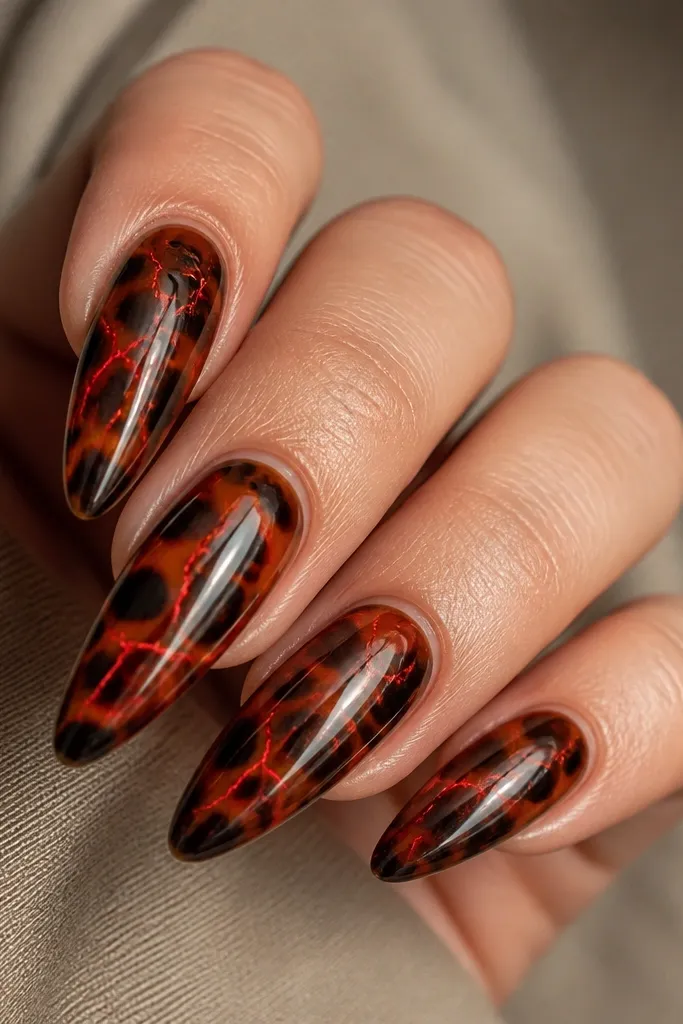
Crackle lines give you that “fractured glass” look without covering the whole nail in heavy color. The tortoise background stays warm and organic, while the red crackle reads sharp and modern. This one is great if you want a trendy nail that still looks wearable because the red lines stay controlled and don’t overpower the shell. It flatters longer nail beds and hands with slim fingers because the vertical lines create a lengthening effect. I’ve worn this with both casual denim and dressy black outfits, and it always looks like I tried.
Paint a tortoise shell base first using caramel and dark brown patches, then blend edges so you don’t get hard blocks. Let it dry fully. Apply red crackle effect gel or a thin red crackle polish using a liner brush, placing lines vertically down the nail with a couple diagonals for movement. Keep lines thin — around the width of a hair — and leave some shell showing between them. Seal with a glossy top coat in two thin layers so the crackle texture stays crisp.
If your red lines smear, do them in two passes: place the line lightly first, then reinforce once the first pass is set.
Don’t overlap crackle lines too close together; it turns into a red smear and kills the glassy effect.
6. Wine Red Tortoise Ombre to Caramel Edge
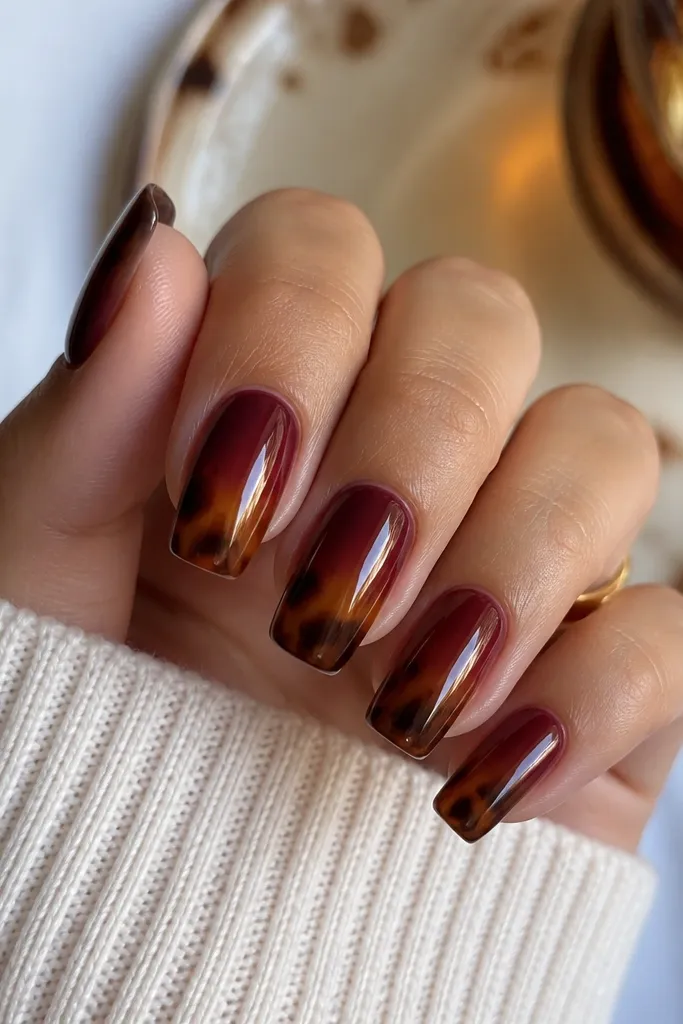
This is for the days you want “soft drama.” The wine-red near the cuticle looks smooth and clean, then the tortoise tones bloom toward the tip where the nail naturally draws light. Ombre flatters most nail shapes because it smooths out any uneven nail surface, and it works well if your cuticles grow in a little irregular. The caramel edge also looks great with warm skin tones and gold jewelry. It’s a little less graphic than French tips, so it feels more wearable for everyday.
Start with a wine-red base on the cuticle area, keeping it only about a third of the nail length. Sponge a caramel shade where you want the fade, then dab dark-brown tortoise patches into the caramel so they blend outward. Use a clean brush to pull the edges together so there’s no harsh line. Finish by reinforcing the free edge with an extra thin caramel layer so the tip looks bright and dimensional. Seal with glossy top coat and cap the tip edges for longevity.
Use a denser sponge and press lightly — heavy pressure makes ombre look streaky instead of blended.
Don’t skip blending; a hard line between wine and caramel instantly makes it look like two separate manis.
7. Tortoise Shell Accent Tips on a Red Base
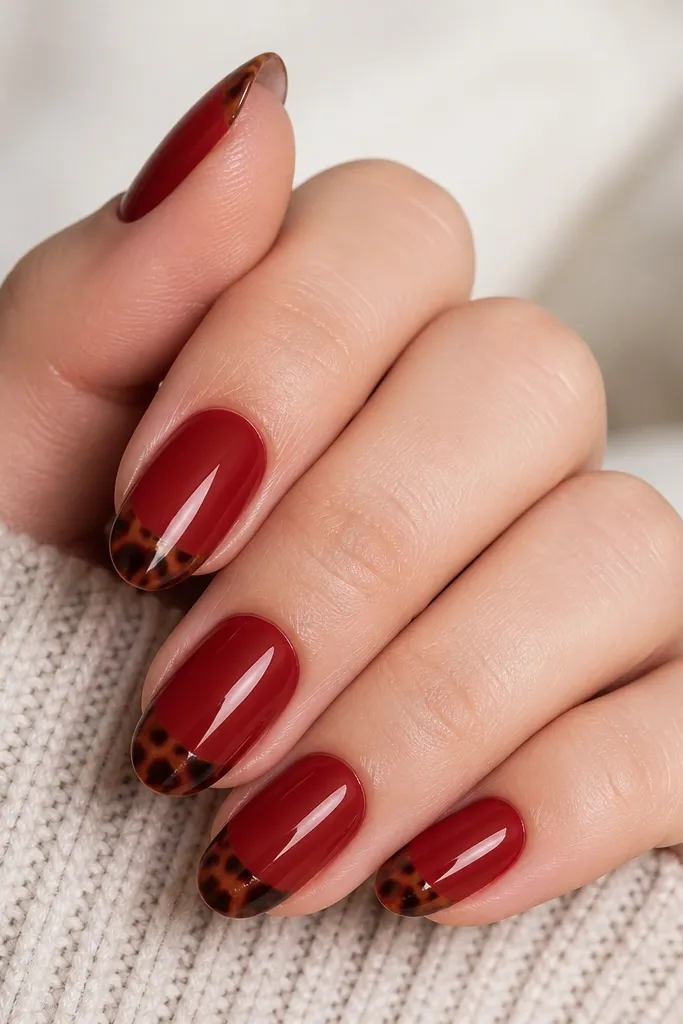
This style is clean and fast once you get the placement right. A solid red base makes your nails look polished even if the shell tip pattern is smaller or slightly imperfect. The tortoise cap at the tip adds that trendy look without turning the whole nail into a busy print. It flatters shorter nails because the curved shell cap mimics the natural shape of the free edge. If you work with your hands and want something durable, this one hides wear well because the base color matches the shell warmth.
Paint two thin coats of brick red across the whole nail, then let it cure fully. For the shell tip cap, sponge caramel on the last 1/3 of the nail, then dab dark-brown patches and swirl edges with a toothpick. Keep the shell inside the tip arc so it doesn’t spill down the sides. Add a tiny amount of amber at the center of the tip to make it look layered. Finish with glossy top coat, focusing on the tip edge where chips start.
Make your shell cap slightly narrower than you think; it looks sharper and feels more “intentional.”
Don’t put the shell too high up the nail; it shortens the look and makes short nails look crowded.
8. Red Swirl Over Tortoise with Glossy Gel Depth
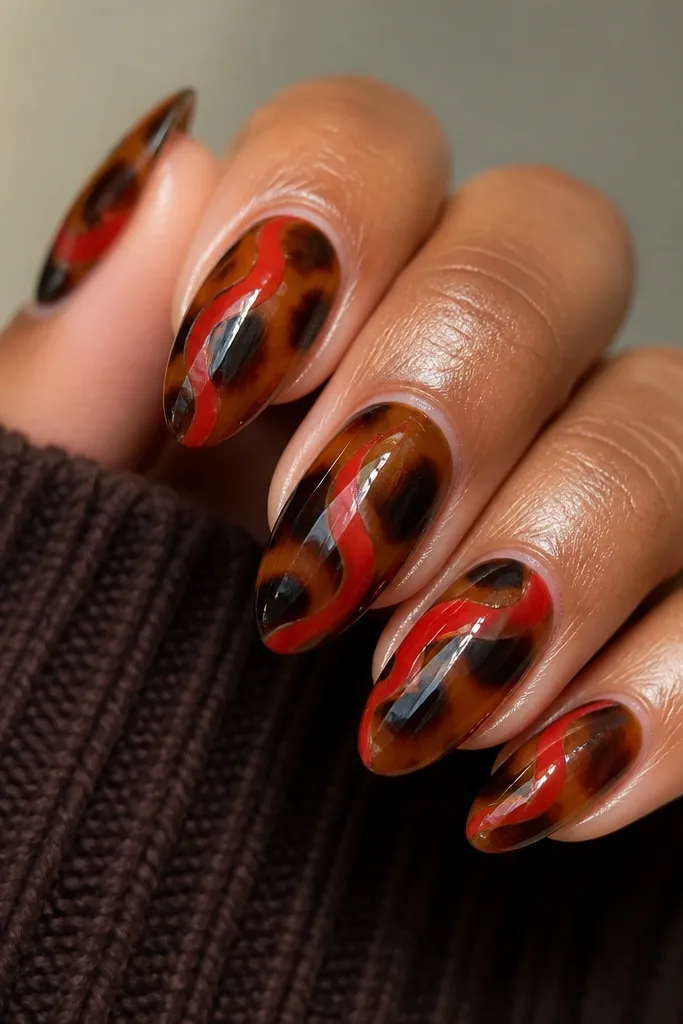
Build your tortoise base first with caramel and dark brown patches, then blend gently so the shell has soft transitions. Cure it fully. Apply a thick red gel line for the swirl — start near the cuticle but keep a small gap so it doesn’t flood the cuticle area. Drag the swirl outward with a silicone tool or a clean liner brush, then add a second thin red line inside it for contrast. Seal with a glossy top coat and do an extra thin top coat around the swirl edges so it stays smooth.
Swirls look custom because your eye can follow a motion path across the nail. With tortoise as the base, the red swirl looks like it was painted on top of a translucent shell sheet. I like this on medium lengths because the swirl has room to curve without wrapping too tightly. It flatters hands with wider nail beds because the swirl lines visually narrow the center. The glossy depth makes it pop under daylight and flash photos, which is why I keep coming back to this one for events.
Skip thisDon’t let the swirl get too close to the sidewalls; it can catch on hair and clothes and feel rough.
Editor's noteIf your swirl looks wobbly, draw the curve with a dot-and-dash method: place 3-4 dots along the path, then connect them.
9. Tortoise Shell Half-and-Half with Oxblood Outline
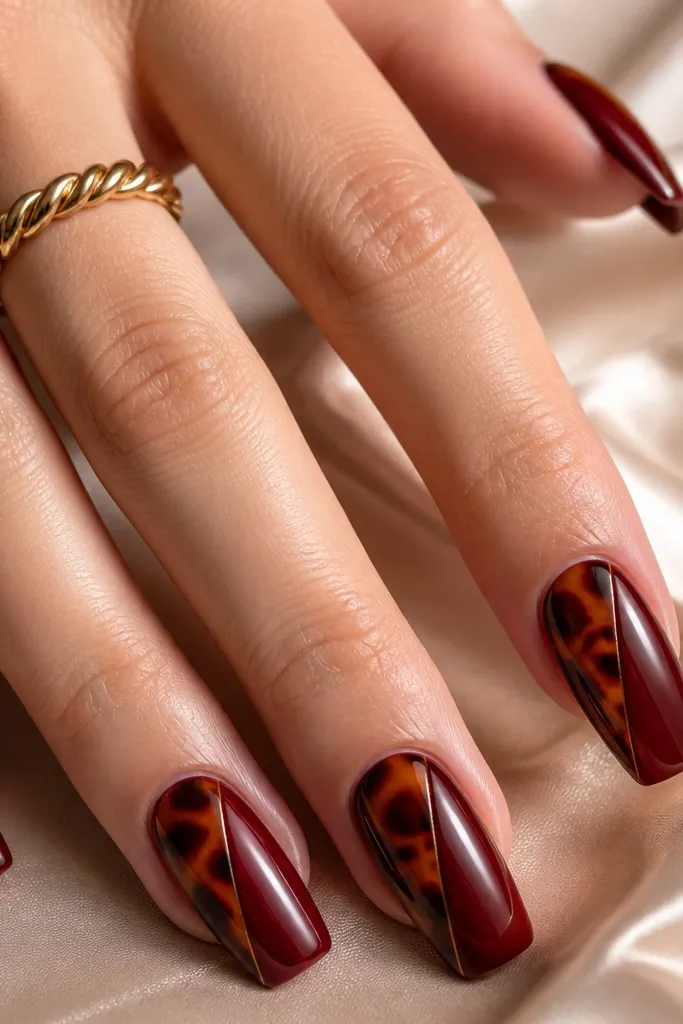
This is a graphic version of tortoise that still feels wearable because the red side is clean and solid. The diagonal split makes the nail look longer and adds structure, which is great if you like bold looks but don’t want glitter or tiny details. The thin outline keeps both colors from bleeding together, so it reads crisp. It flatters most nail shapes, but I love it on long squoval because the diagonal line looks smooth. The contrast also works well for cooler undertones since oxblood has that deep, grounding warmth.
Paint the tortoise shell on one half of the nail using a sponge: caramel base, then dark brown patches blended lightly. On the other half, paint two coats of oxblood, keeping the edges straight. Cure each side fully if you’re using gel, or wait until polish is dry-dry before continuing. Use a thin liner brush to trace a crisp outline along the split line, then fill any tiny gaps. Finish with glossy top coat in two layers, paying attention to smoothing the split edge.
Use a striping tape guide for the diagonal split so the line stays even across every nail.
Don’t rush the split edge; if you smear while the polish is wet, you lose the clean graphic look.
10. Deep Red Gloss with Tortoise Micro-Confetti
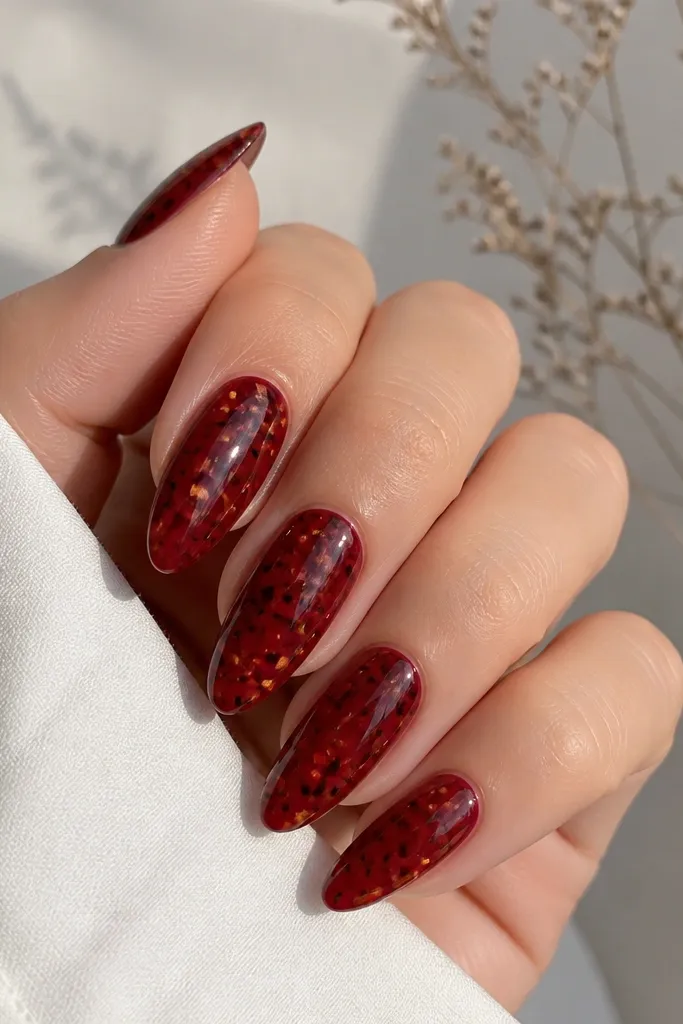
Micro-confetti is the most forgiving tortoise style I’ve done. Instead of a full marbled pattern, you scatter tiny amber and dark-brown bits over a deep red base, so small imperfections look like part of the design. It’s great for beginners because you don’t have to nail exact swirls. It flatters hands that need something sleek because the base color stays dominant and the shell bits act like highlights. This also looks good in photos because the tiny pieces catch light without needing a complex layout.
Start with a deep red base, like wine or oxblood, and paint two thin coats for a glassy look. After it’s set, add tortoise micro-confetti: use a small dotting tool to place tiny pieces of amber and dark brown, then tap them into a light cluster near the center. Keep the scatter uneven — more density in the middle, less near the cuticle. Add one or two slightly larger pieces near the free edge so the design has a focal point. Seal with glossy top coat and apply a slightly thicker second coat if you feel any texture from the bits.
If the confetti feels raised, press it gently with the flat side of a silicone tool before top coat.
Don’t cover everything with a heavy shell layer; micro-confetti should stay light so the red glow remains the star.