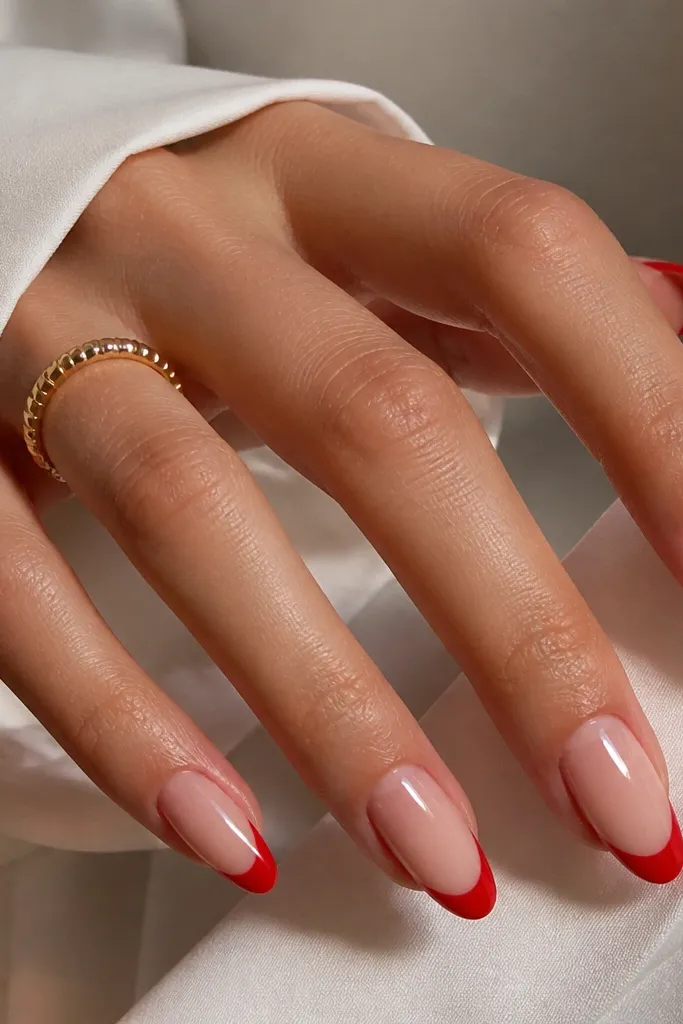
1. Classic cherry red micro French on almond
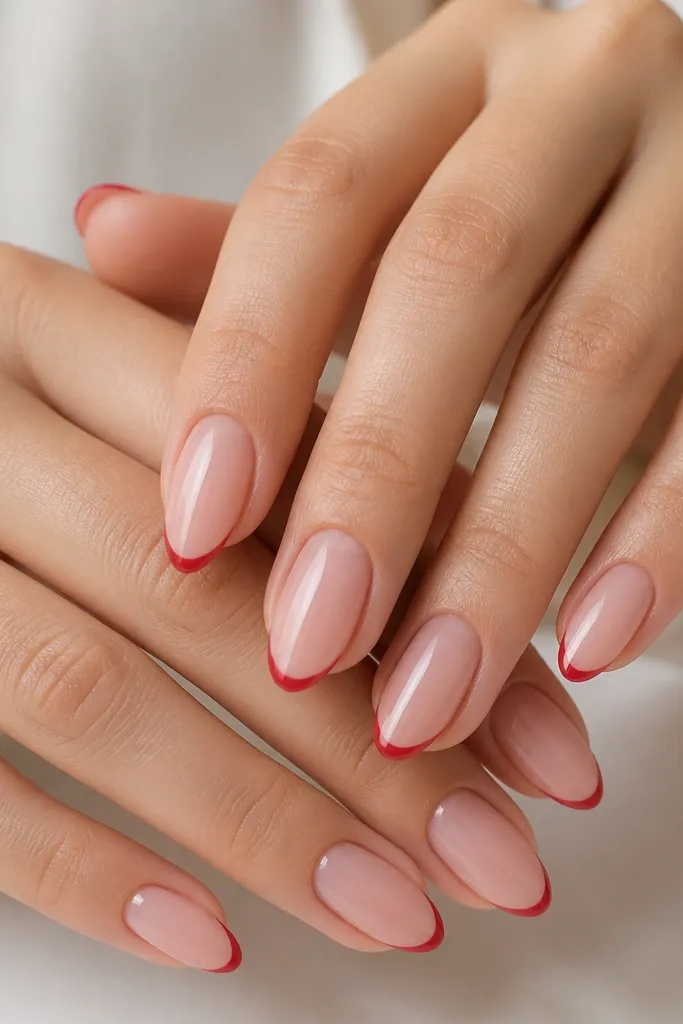
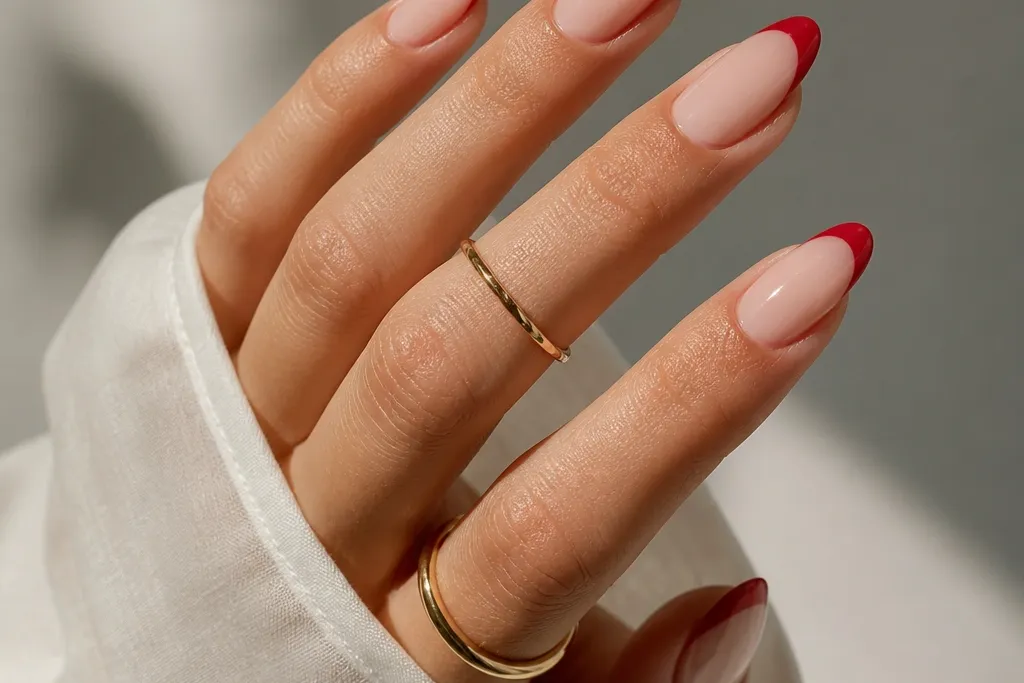
This look is the one I reach for when I want red French tip nails almond to look clean even in harsh lighting. The nude pink base should be sheer and milky, so the red tip has contrast without looking heavy. Keep the red glossy and cherry-toned, not dark-burgundy, because burgundy can read too thick on almond tips. It flatters most skin tones, especially light to medium because the nude base brightens the hand. It also flatters shorter nail beds when you keep the tip micro-thin and let the almond shape do the length work.
Start by applying a sheer nude base and curing it fully if you’re using gel. Use a striping brush and paint a French line that’s about 1.5-2 mm wide at the center, then mirror that curve on both sides. I paint the corners last: place the brush at the sidewall, then pull inward to meet the center line. Fill the tip area only after the smile line is crisp, so you don’t widen the curve by accident. Finish with two coats of glossy top coat, focusing on the tip edge so it doesn’t chip.
If your line gets shaky, make the first pass thinner than you think — you can always build coverage in a second layer.
Avoid using a thick red polish that pools at the curve; it makes the almond tip look bulky and cheap.
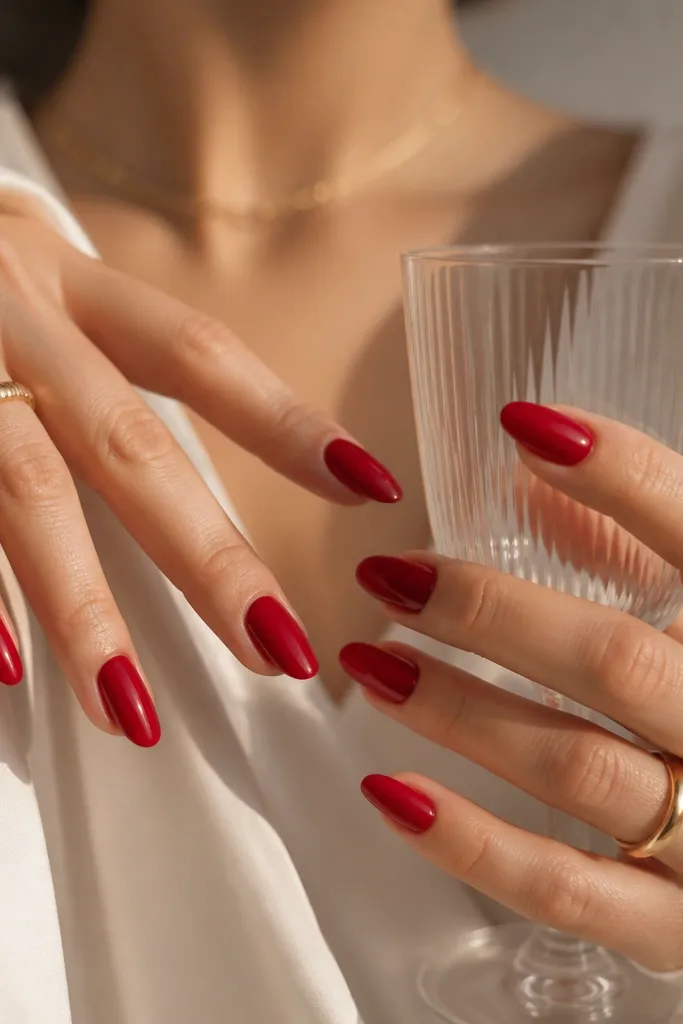
2. Velvet matte brick red French with nude base
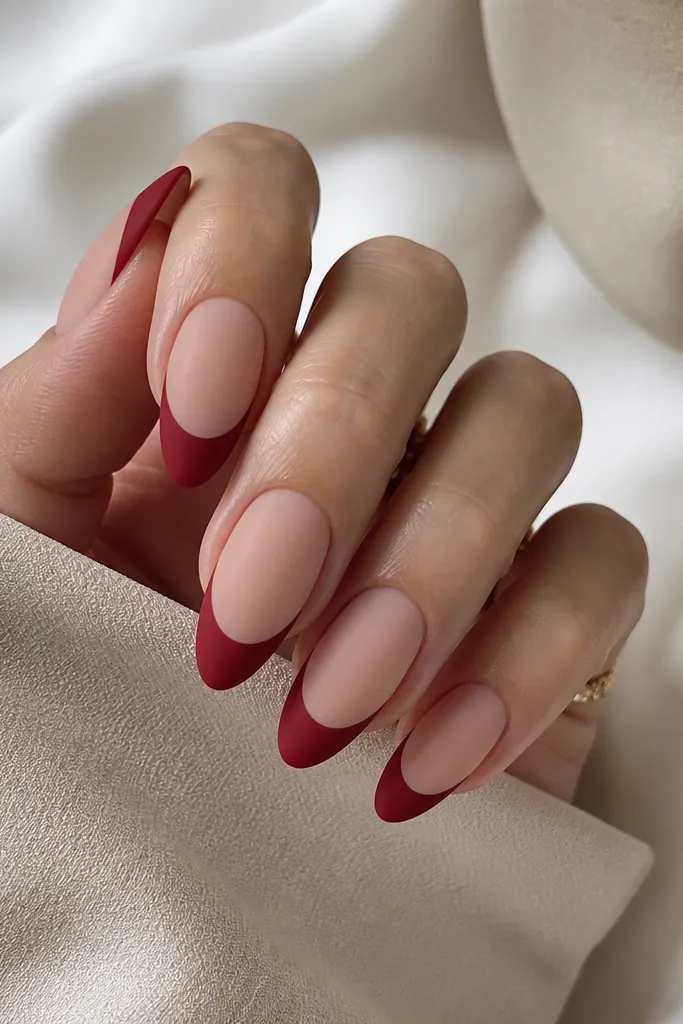
Matte brick red makes red french tip nails almond feel more grown-up and hides tiny imperfections on the nail surface. I like a nude base that’s a little warmer, like beige-pink, so the brick red doesn’t fight cool undertones in your skin. The smile line can be slightly wider here, around 2.5 mm, because matte covers unevenness better than glossy. This one flatters medium to deep skin tones beautifully because the brick red has warmth that looks intentional. It also looks great for fall and winter outfits, especially with knitwear and gold jewelry.
Editor's noteFor the smoothest matte look, buff the nail lightly before base coat so the matte doesn’t cling to ridges.
Apply a nude beige-pink base and cure it until it’s fully smooth. Paint the French smile line with a matte-finish red gel or regular gel cured then top-coated with matte top coat only on the red tip. Keep the tip width around 2-2.5 mm at the center and taper it down at both corners so it follows the almond shape. After filling, cure again, then seal the entire nail with a glossy top coat only on the nude area if you want contrast, or use full matte if you prefer everything match. Clean up the edges with a flat brush and acetone on a lint-free wipe.
Skip thisSkip matte top coat over glittery or chrome red unless you test first; it can turn patchy.
3. Glossy deep wine red French with negative space
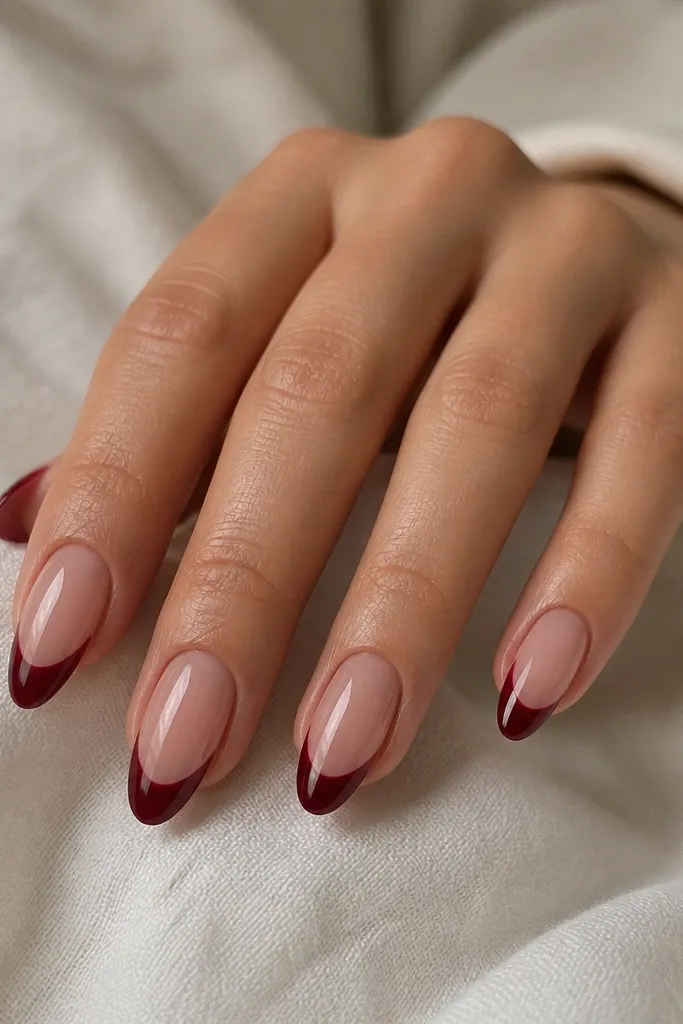
This design looks modern because it breaks up the red block with a tiny crescent of bare nail. The deep wine red is flattering on almost everyone, but I especially love it on fair skin because it adds depth without turning harsh. Use a sheer nude base so your nails still look airy between the negative space. The almond shape makes the negative crescent look like a highlight rather than a mistake. It works well for formal events because the glossy finish catches light along the curve.
Start with a sheer nude base and cure. Paint your French tip outline first using wine red, keeping the smile line thin and crisp. Before you fill the tip completely, leave a narrow gap at the center crescent — I use the tip of a dotting tool to press a small channel while the red is still tacky. Then fill both sides up to the gap edges and cure. Finish with a glossy top coat and wipe the nail edges so the negative space stays clean.
If the crescent bleeds, use a thin brush dipped in acetone to sharpen just the gap edge before curing.
Don’t make the negative space too wide; it can turn into a half-finished look.
4. Red chrome French tip with holographic dust edge
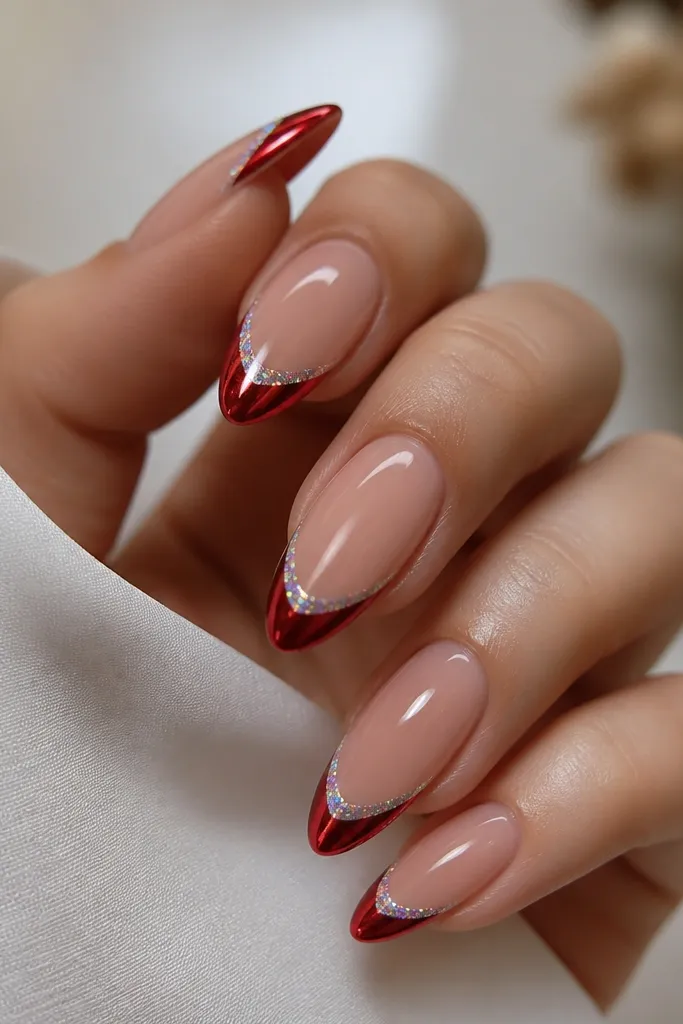
Chrome changes how red french tip nails almond look because it makes the tip line look thinner and brighter. I pair red chrome with a nude base so the chrome doesn’t overwhelm your hands. The holographic dust edge adds a soft sparkle without turning the tips into full glitter. This set looks best on medium to deep skin tones, where the chrome reflects light in a way that feels expensive. It also photographs really well because the almond curve throws highlights onto the camera.
Base coat with a nude pink that’s slightly opaque, then cure. Apply a thin layer of red chrome gel or use chrome powder over a tacky base, focusing only on the French tip area. Use a small sponge applicator so the chrome stays inside the smile line and doesn’t cover the nude base. For the holographic dust, tap a tiny amount only along the outer edge of the tip while the last layer is still tacky, then cure. Seal with a glossy top coat to smooth the surface and lock the dust in place.
Press the chrome powder in with a firm, flat sponge — it makes the finish smoother than rubbing.
Avoid thick chrome layers; they create bumps that show at the almond tip.
5. Candy apple red French with micro stars
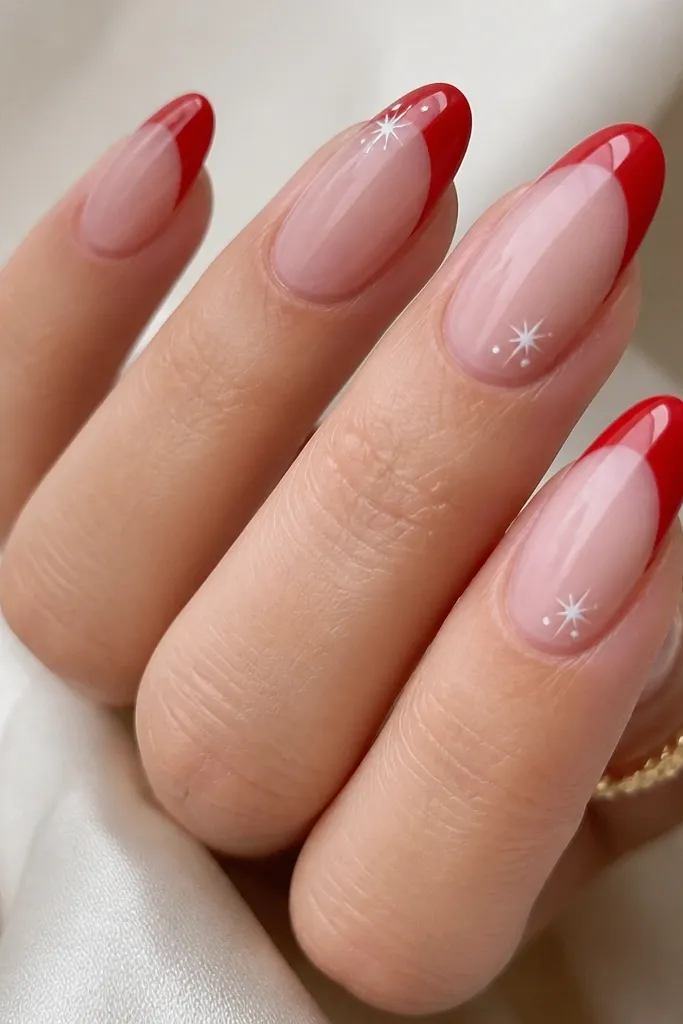
This is the fun version of red french tip nails almond that still looks neat. Candy apple red is brighter than cherry, and it makes the white details pop. I like micro stars placed close to the smile line because they look like they’re “floating” over the curve. This flatters short-to-medium nail lengths because the stars add interest without needing extra width. It also looks great for birthdays, concerts, or any day you want red to feel playful instead of strict.
Apply a sheer pink base and cure. Paint glossy candy apple French tips with a 2 mm width and cure. On selected nails, place 2-4 tiny white stars right above the smile line — I use a dotting tool and let the star points be imperfect for a handmade look. Cure again carefully, then add one thin top coat layer over the whole nail. If the stars feel raised, do a second top coat only after the first has leveled, so you don’t blur the details.
Use a star stamp or a micro nail art brush, but keep stars under 1 mm so they stay crisp.
Skip oversized stars; they make the almond tip look crowded.
6. Red French with black outline smile
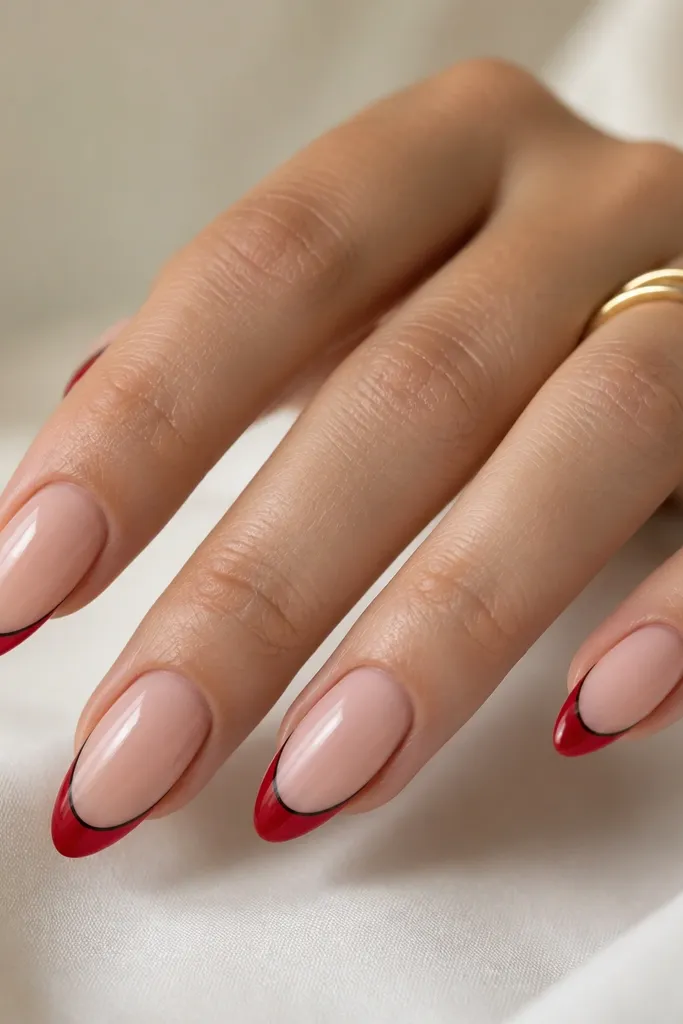
A black outline makes red french tip nails almond look graphic and sharp, like a manicure with eyeliner. The nude base keeps it wearable, while the outline adds contrast that makes the almond shape look extra clean. I recommend a true black gel liner and glossy red so the outline stays crisp. This style flatters anyone who likes a bold look but still wants a tidy nail shape. It also works for fair, medium, and deep skin tones because the contrast is on the nail, not dependent on skin undertones.
Start with a nude sheer base and cure. Paint the red French tips first, staying within a 2 mm width at the center. Cure, then use a fine liner brush to draw a thin black line along the smile curve — keep it about the width of a fine hair, not a thick border. Let it set for a moment, cure again, then apply glossy top coat to seal the outline without smearing. Clean the sidewalls with a cotton swab dipped in acetone after curing.
Trace the smile with the liner brush lightly, then go back once for thickness — two passes look cleaner than trying to press hard.
Don’t outline the whole tip; the magic is only at the smile edge.
7. Half-moon red French blend at the cuticle edge
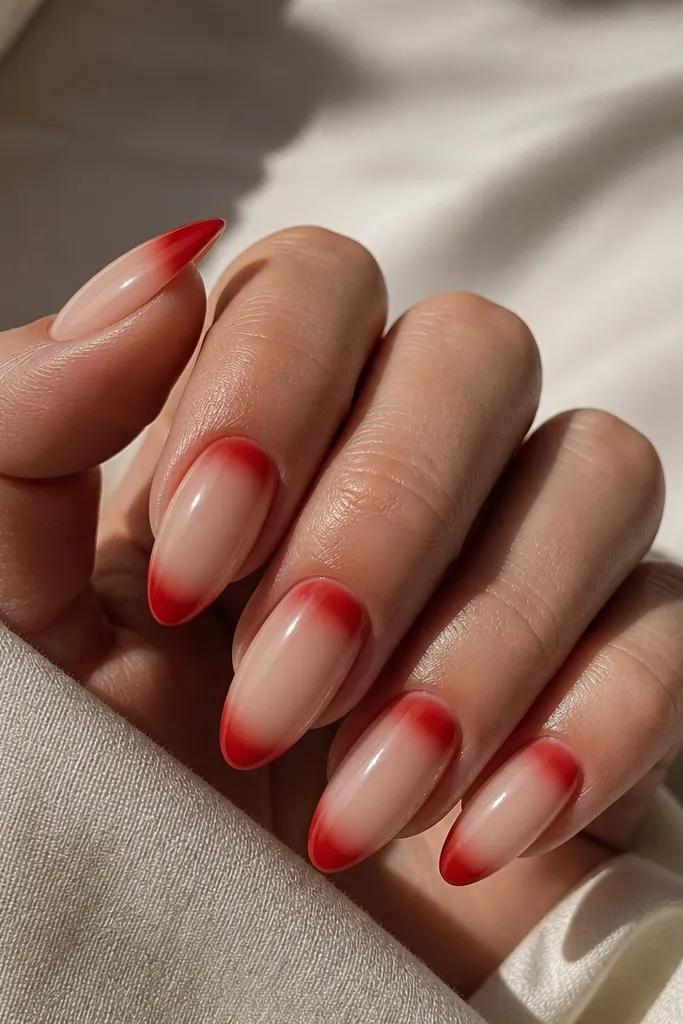
This design plays with placement, and it makes red french tip nails almond feel more artistic without looking messy. The red sits at the tip, then echoes as a subtle half-moon near the cuticle, so your eyes travel along the nail. I like a nude base that’s creamy and covers well, because the blend needs a smooth surface. This flatters hands that need a little elongation because it pulls the eye down the center. It’s also great for weddings or formal events if you keep the red sheer and the half-moon small.
Base coat with a creamy nude and cure. Paint a classic French tip in red at about 2 mm wide, cure, then use a sponge to softly blend a translucent red half-moon near the cuticle — keep it small, roughly 1/3 of the nail width. Add the red blend only on the center area, then feather it outward with the sponge so there’s no harsh edge. Cure, then top coat. If you want more definition, do a second sponge pass with less product so the half-moon stays subtle.
Use a separate sponge for the tip and cuticle blend so red doesn’t smear into the nude.
Avoid a full opaque red half-moon; it turns into a different manicure instead of a soft echo.
8. Red French tip with tiny gold foil flecks
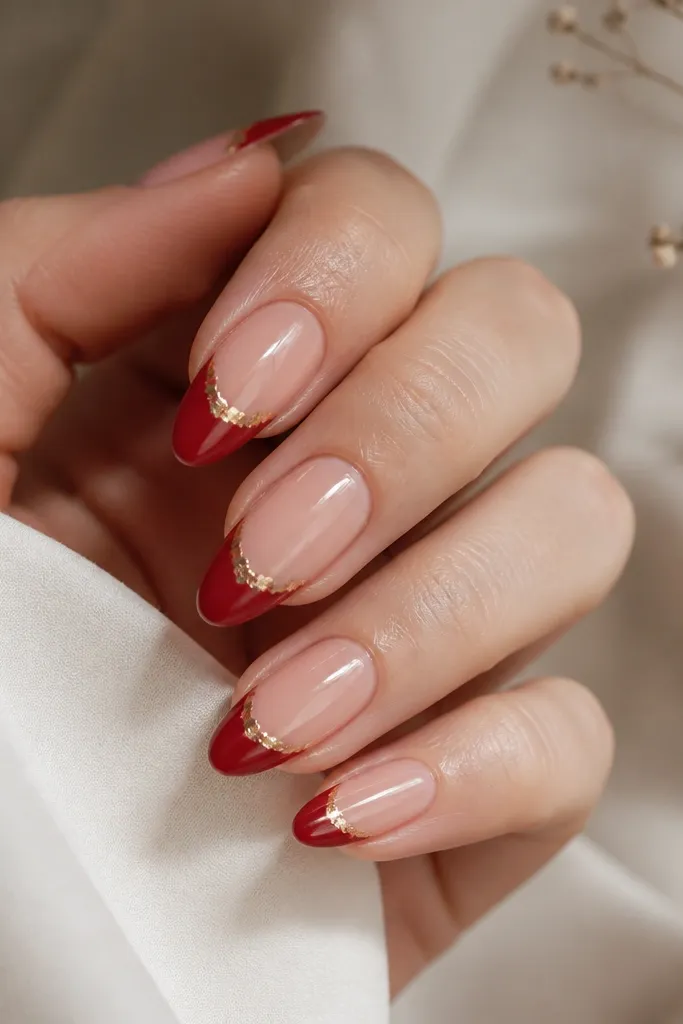
Gold foil flecks make red french tip nails almond look elevated without turning into heavy nail art. I like using foil that looks like torn paper, because the irregular edges catch light more than chunky flakes. This set looks especially good on warmer skin tones and with gold rings, but it works on cool undertones too when the nude base is pinky. The foil should stay near the smile line so the almond shape still looks clean. It’s also a lifesaver if you want to hide slight unevenness in your French line — foil distracts the eye.
Editor's notePress the foil with a dry cotton swab for 2-3 seconds; it flattens the fleck without smearing it.
Apply a nude pink base and cure. Paint glossy red French tips at 2 mm width and cure again. Use a small piece of gold foil with tweezers and press only lightly at the smile line — you want flecks, not full coverage. Add a tiny amount of foil adhesive or tack gel where you place each fleck, then cure. Seal with glossy top coat in two thin layers, letting the first level before the second so foil edges don’t lift.
Skip thisDon’t scatter foil down the sides; it makes the tip look wider than your almond shape.
9. Matte nude + glossy red French for contrast
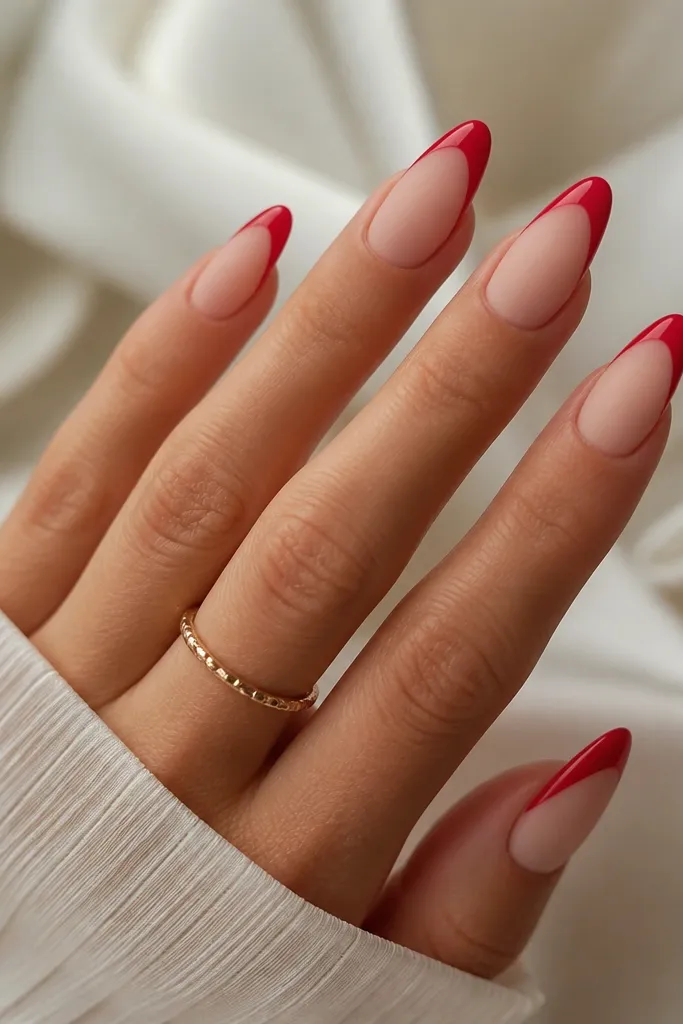
The contrast combo is what makes this one feel modern: matte nude calms the hand, then glossy red at the tip pops. For red french tip nails almond, the thin crisp smile line is key because matte base can make edges look softer. I like a matte nude that’s slightly opaque so it doesn’t look patchy under indoor lights. This flatters almost everyone because the matte base reduces shine and makes the red look intentional. It’s also great if you hate the look of shiny nude polish but still want a standout tip.
Start with a nude base coat and cure until smooth. Paint the red French tips with a glossy gel polish, keeping the tip width around 1.5-2 mm and following the almond curve. Cure, then apply matte top coat only to the nude area, avoiding the red tips. If your matte top coat can’t be controlled perfectly, use a small brush to mask the red before applying matte. Finish by sealing the red tips with glossy top coat so they stay mirror-smooth.
Brush matte top coat on the nude in thin strokes; heavy matte layers look dusty at the apex.
Avoid getting matte top coat onto the red; it kills the crisp contrast.
10. Ombre red to nude French fade on almond
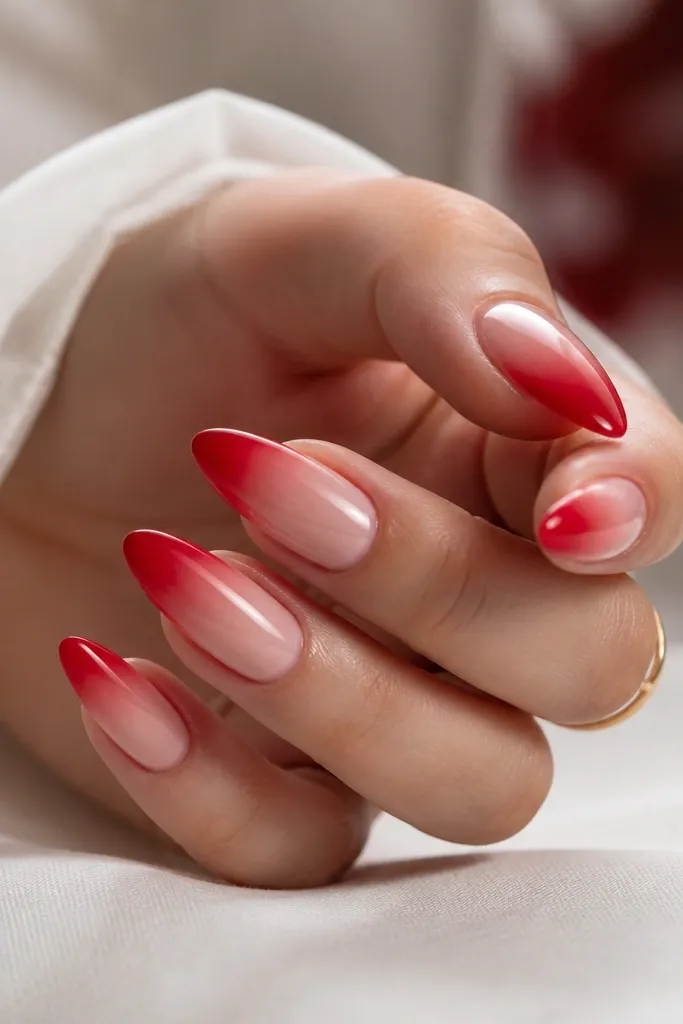
An ombre fade keeps red french tip nails almond looking soft and expensive, especially when you don’t want a perfectly straight smile line. The red is still the star, but the gradient makes the almond shape feel longer and less blunt. I like using a medium cherry red instead of a very dark wine so the fade stays bright. This flatters hands with ridges because the gradient visually smooths the transition. It also works for everyday because it’s less “sharp” than classic French.
Apply a nude base and cure. Paint a thin red band at the very tip area, then use a makeup sponge to dab and fade the red upward toward the smile curve. Keep the sponge moves light and centered so you don’t over-blend and erase the almond outline. Cure, then repeat once if you want a stronger tip. Seal with glossy top coat so the fade looks like a smooth airbrushed gradient.
Fade in layers, not in one heavy sponge pass — the second layer gives better control.
Don’t let the sponge drag across the nail; it can lift base coat and create patchy edges.
11. Red French with clear negative sides
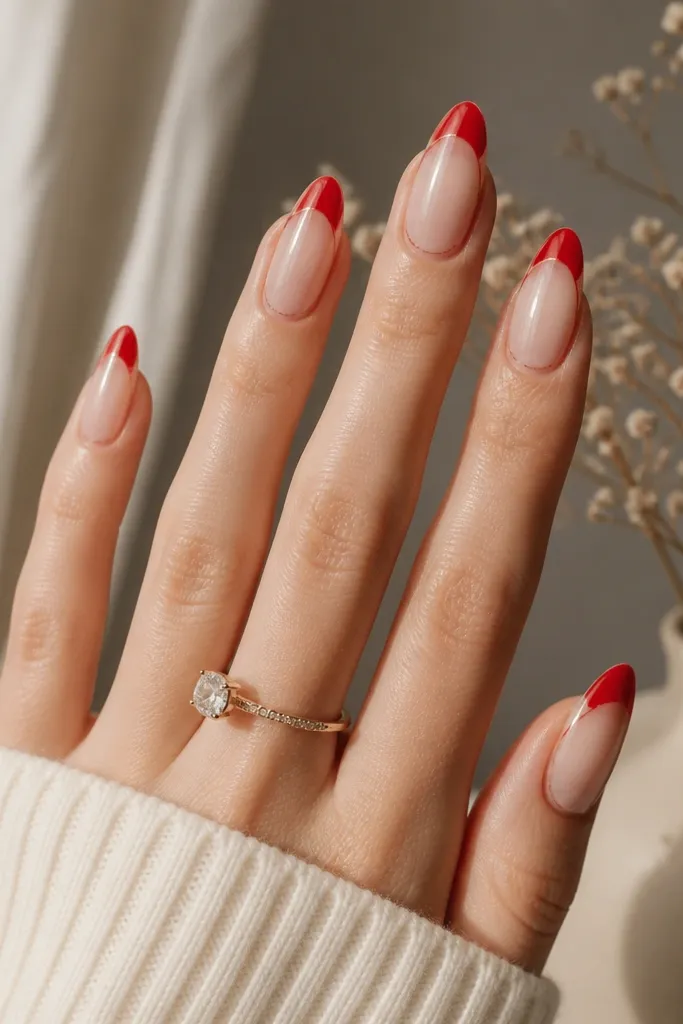
Clear negative sides make red french tip nails almond look sleek and narrow, like the nail is stretched. I use this when my nail bed is slightly wide because the clear sides visually slim the shape. The base should be sheer nude only in the center so the sides stay transparent. Glossy red at the tip gives the structure, while the clear sides keep it from looking heavy. This set looks great on medium to deep skin tones because the contrast reads clean and modern, not washed out.
Editor's noteUse a small flat brush and wipe it on a lint-free pad between nails so you don’t smear red into the clear zones.
Start with a sheer nude base in the center of the nail, leaving a small gap on both sidewalls. Cure. Paint red French tips only over the center area and taper the red so it stops before the clear side gaps — you should see clear nail on both sides of the tip. Fill the center tip fully, cure, then apply top coat carefully so it doesn’t flood into the side gaps. If you’re using gel, cap the free edge with a tiny amount of red so it doesn’t chip at the border.
Skip thisAvoid thick red at the side edges; it makes the nail look wider and less “snatched.”
12. Red French tip with tiny pearl dots
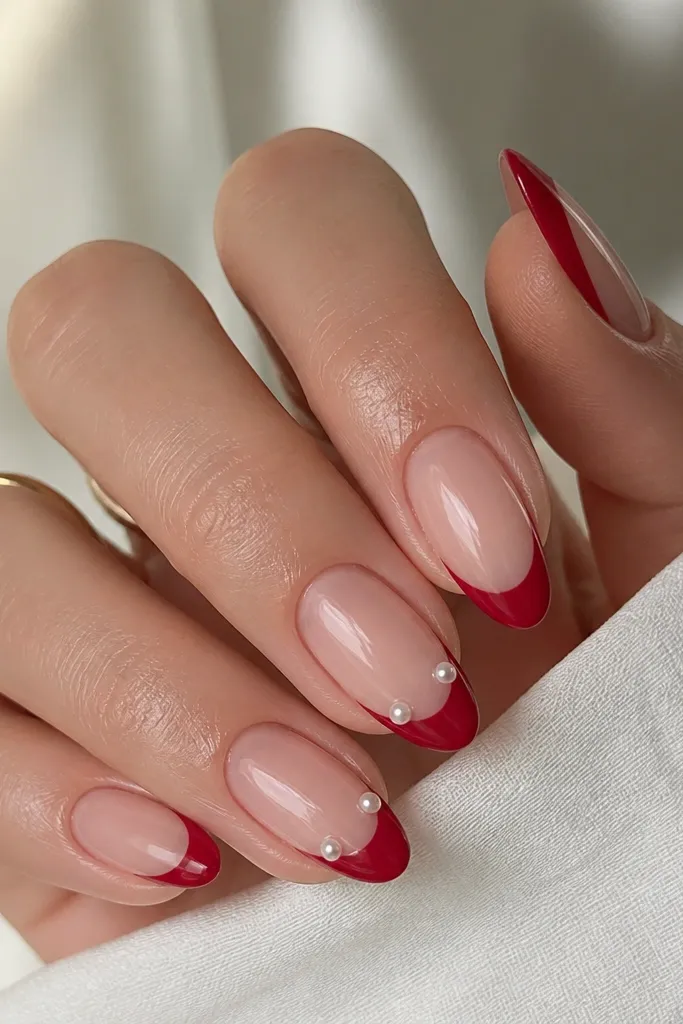
Pearl dots add a soft, romantic touch to red french tip nails almond without turning them into bridal-only nails. I use tiny pearls about the size of a pinhead, because big pearls wreck the clean almond look. The nude base should be sheer and milky so the pearls look bright. This style flatters fair to medium skin tones because the white pearls give a crisp highlight along the curve. It also works for dinner dates and holidays when you want a little texture but still want the manicure to look tidy.
Base coat with a sheer milky nude and cure. Paint the glossy red French tips at 2 mm width and cure. Add a micro dot of gel adhesive on the smile line where you want the pearl, then place one pearl dot per side using tweezers. Cure under the lamp until the pearl is secure, then seal with top coat. Use a thin brush to cover the edges around each pearl so it doesn’t snag on sweaters or hair.
If you’re doing this at home, use pearl dots in a flat-bottom style — they sit better on curved almond tips.
Skip large pearls; they lift and catch on fabric.
13. High-tip red French with slim nude gap
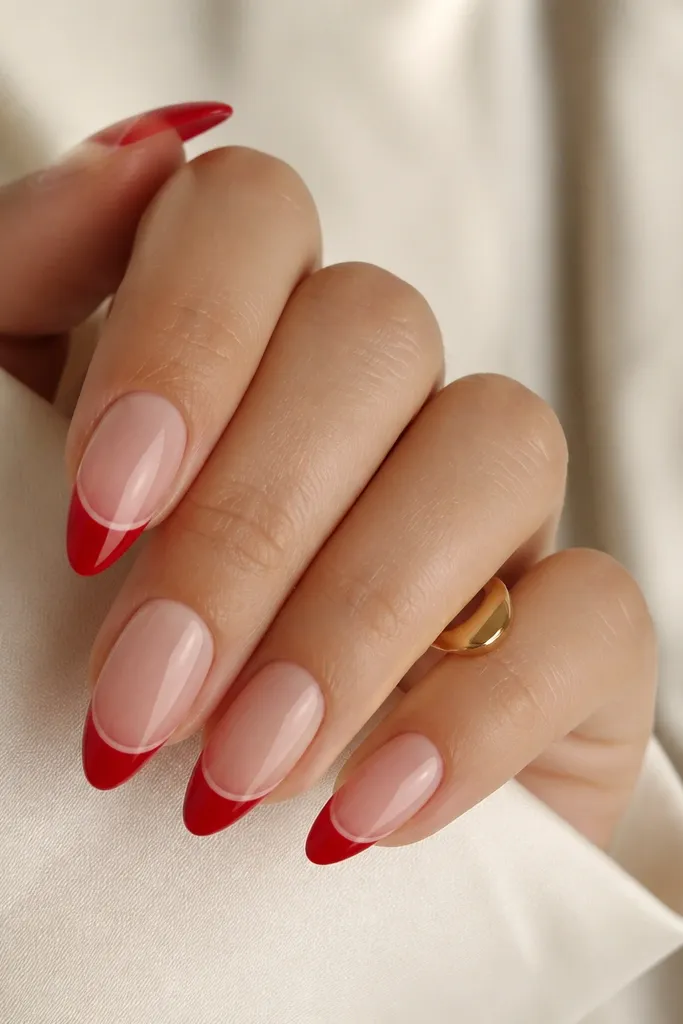
High-tip placement is how you make red french tip nails almond look extra long. The slim nude gap under the smile line adds structure and keeps the red from swallowing the nail bed. I like this on shorter nails because it visually pushes the red up and out, making your nail look longer even when your base length is limited. It flatters hands with shorter fingers because the high tip draws attention to the upper half. Use a bright glossy red so the gap stays crisp and doesn’t look muddy.
Editor's noteUse a guide strip of tape for the nude gap if you’re new; remove the tape before curing so you don’t pull gel.
Start with a nude base and cure. Mark the smile line higher than you usually would — about 1-2 mm higher than classic French, then paint a thin nude gap by carefully tracing and leaving it bare. Fill the red only above the gap so you get that clean separation. Cure and inspect from the side to make sure the red edge is smooth at the apex. Finish with glossy top coat and cap the tip edge so the high placement doesn’t chip at the free edge.
Skip thisDon’t make the gap wide; a wide nude line can make the manicure look unfinished.
14. Red French tip with silver micro glitter border
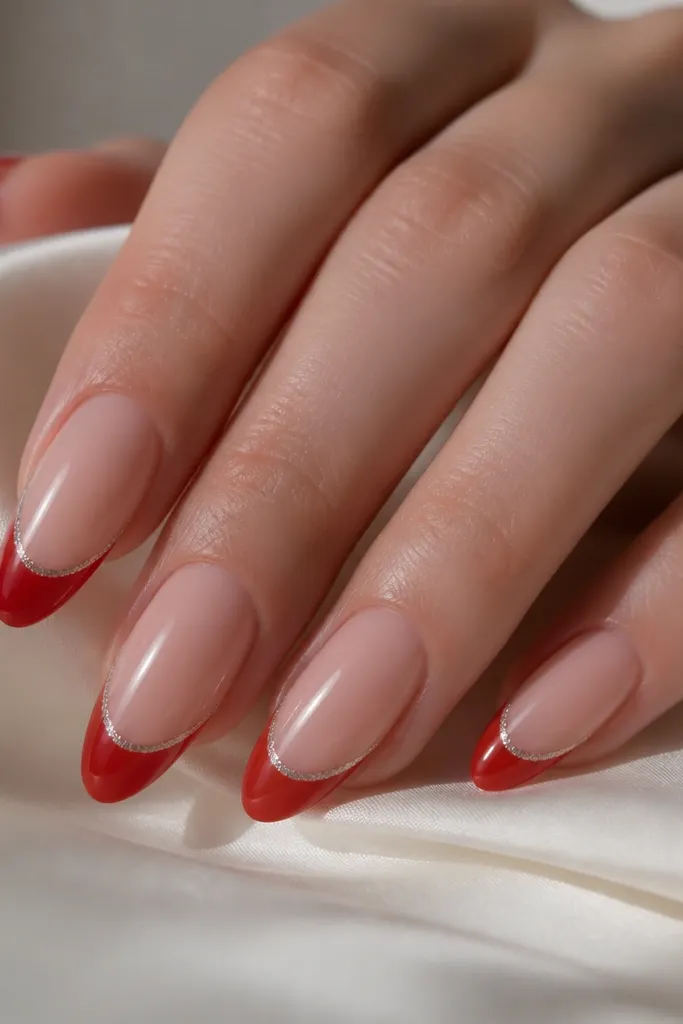
This is the “party clean” version of red french tip nails almond. The silver micro glitter border adds dimension exactly where your eye lands — on the smile line. I keep the glitter super thin so the almond curve still looks sharp and not chunky. This flatters most skin tones, and it looks especially good when you wear silver rings because the sparkle matches the metal. It also hides tiny brush streaks in the red because the glitter line draws focus.
Editor's noteUse micro glitter, not chunky — chunky glitter makes the smile line look uneven on almond.
Apply a nude base and cure. Paint glossy red French tips at 2 mm width and cure. With a fine liner brush, paint a thin tacky line right on the smile curve and dust silver micro glitter over it, then tap off the excess. Cure again so the glitter locks in. Seal with glossy top coat, but keep the first top coat thin so the glitter line stays bright rather than muted.
Skip thisAvoid overloading glitter; it can turn the border into a thick stripe.
15. Two-tone red French with dark-to-light fade
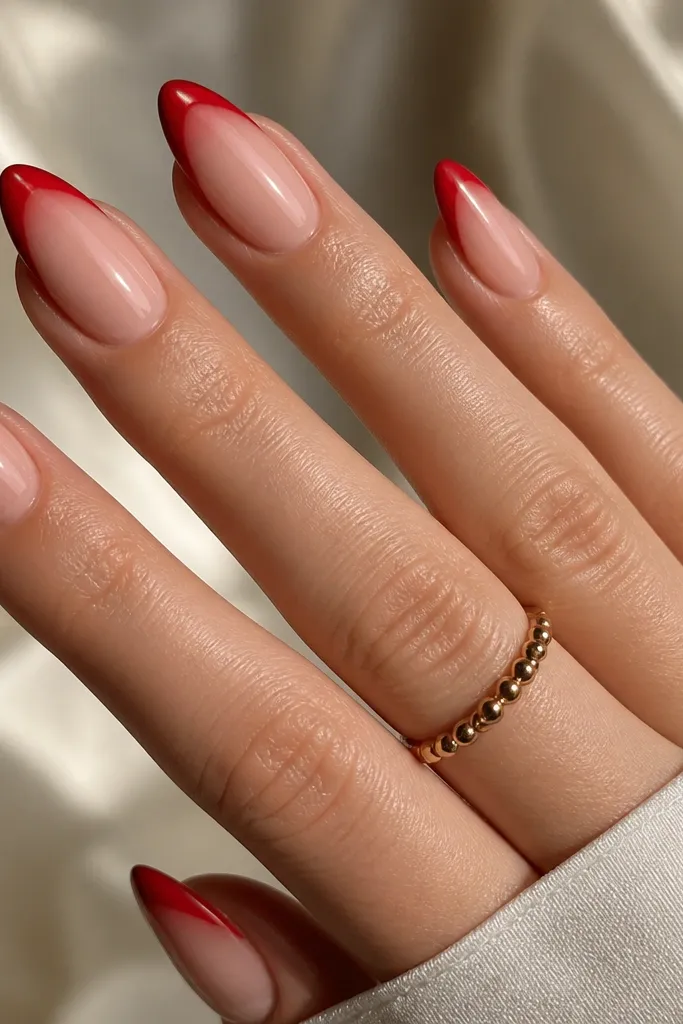
Two-tone red makes red french tip nails almond look custom, like you spent longer than you did. The dark corners frame the almond shape and the lighter center keeps it bright. I like using a deep ruby at the outer edges and a cherry red at the center because it stays flattering across skin tones. This design works best on medium to long almond nails since there’s room for the gradient to show. It also looks great for photos because the corners catch light differently than the center.
Editor's noteBlend with a nearly dry brush — wet blending smears and can pull the nude base into the red.
Start with a nude base and cure. Paint the French tip area lightly in the lighter cherry red first, staying within a 2 mm width. Then add the darker ruby at the outer corners — I place it only on the side thirds of the tip. Use a small sponge or a clean brush to blend the boundary line so it looks like a fade, not two blocks. Cure and apply glossy top coat, making sure the blending area is smooth at the apex.
Skip thisAvoid harsh separation between colors; it reads like an accident on almond.