1. Burgundy glass gloss almond
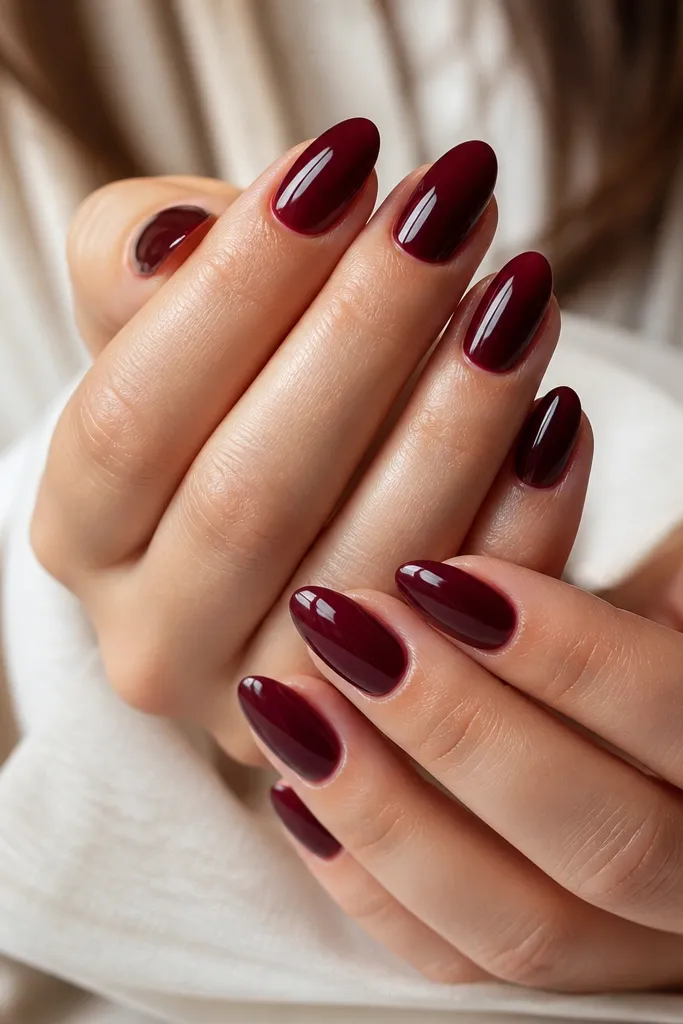
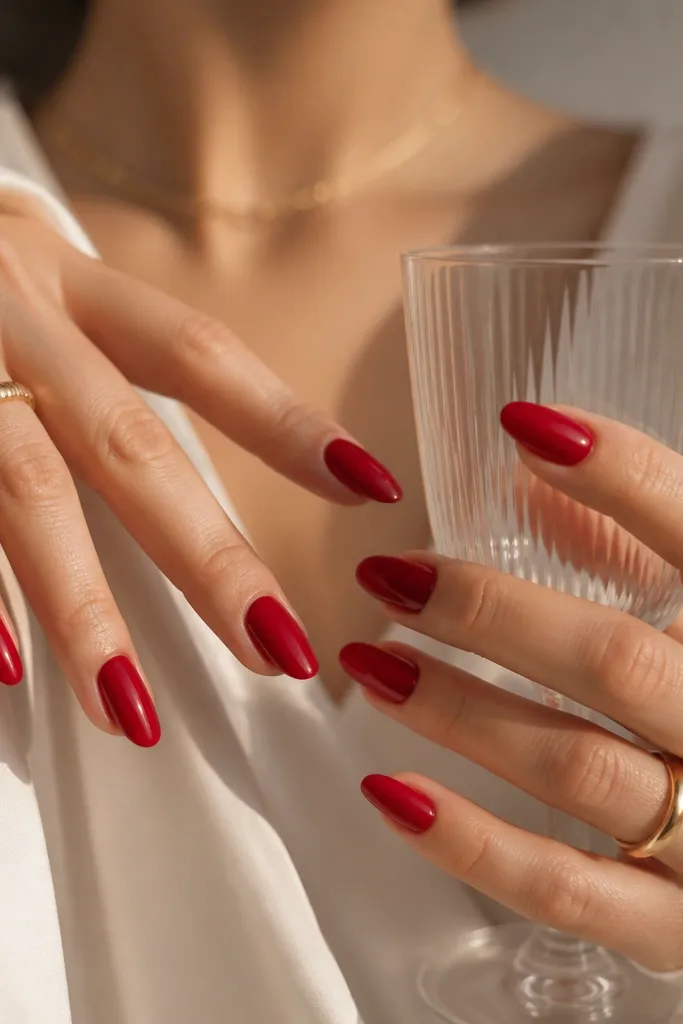
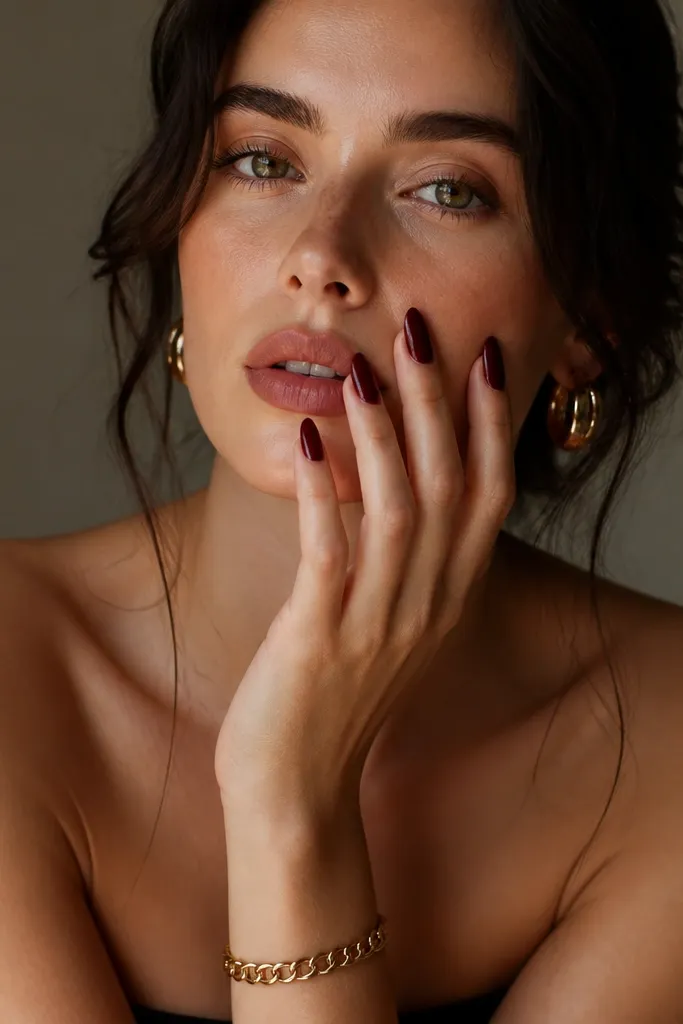
This look is pure dark red done right: a cool burgundy with a wet, glass-gloss topcoat. The cool undertone keeps the color looking crisp on fair to light-medium skin, and it gives medium-to-olive skin a more “jewelry” effect instead of looking flat. Almond nails make the shine look like it’s flowing down the nail, so the color appears richer than the bottle shade. I like this for work weeks because it reads polished even when the manicure grows out a little. It also flatters hands with shorter nail beds because the almond taper visually stretches the finger.
Editor's noteIf your burgundy looks patchy, add a third super-thin coat only on the center and cure it hard — it fixes depth without thickening the nail.
Start by pushing back cuticles and lightly buffing the nail surface with a 180 grit block so gel holds. Apply a thin base coat, then cure. Paint two medium coats of the cool burgundy, curing each coat fully, and keep the second coat slightly thicker at the center for depth. Finally, seal with a high-gloss gel topcoat and cap the free edge — I run the brush across the tip once to stop edge lift. Wipe the tacky layer if your topcoat needs it, and finish by cleaning around the cuticle line with a fine brush dipped in gel cleanser.
Skip thisDon’t use a streaky red and hope topcoat fixes it — you’ll see banding under gloss.
2. Warm wine sheer base almond
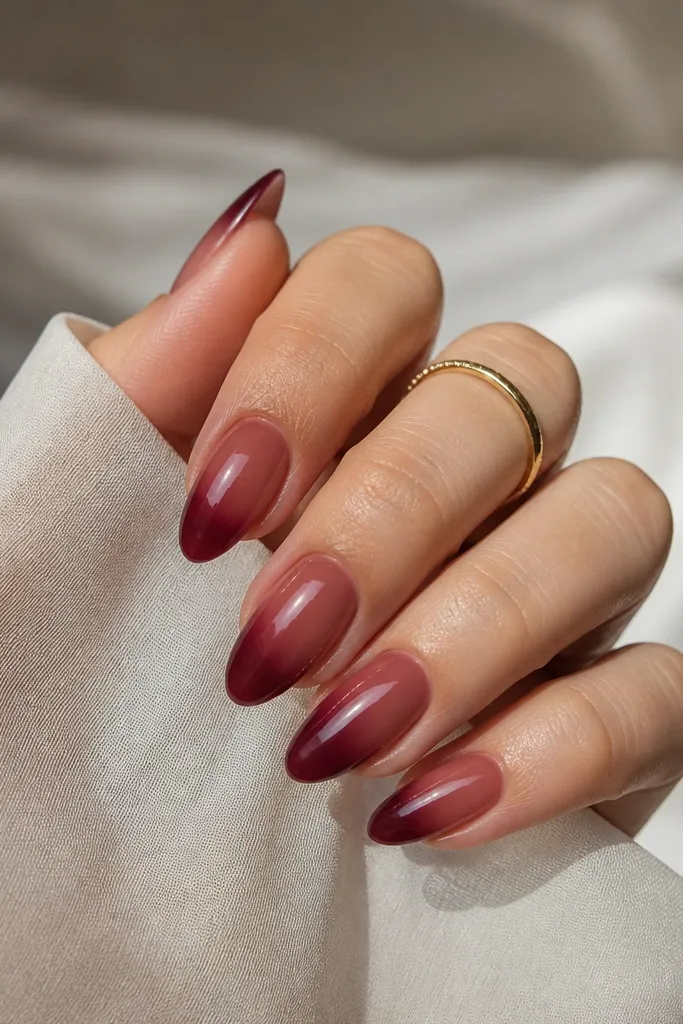
This one is for when you want dark red but still want your nails to look light and wearable. The warm wine undertone flatters olive, tan, and medium skin because it reads warm and smooth, not harsh. A sheer base keeps the nail bed looking natural, while the deeper tip gives you that almond “elongation” effect. I’ve worn this to weddings and dinners where I wanted something bold without heavy coverage. It also looks great with short-to-medium almond lengths because the translucency keeps the set from feeling too heavy.
Editor's noteUse a sheer base if your nails stain easily — it keeps the dark tone from grabbing onto ridges.
Start with a nude-pink sheer base builder (or a sheer red base) and cure it. Then apply a warm wine gel in a thin layer, focusing the color more toward the middle and tip, leaving the cuticle area slightly lighter. Cure, then add a second thin coat only where you want more depth, especially near the sidewalls. Finish with a glossy topcoat and cap the tip. For extra clean edges, use a liner brush to pull the color slightly inward from the sidewalls so it doesn’t flood the skin.
Skip thisDon’t paint the cuticle area fully opaque — sheer around the base is what makes this look expensive.
3. Crushed velvet dark red almond
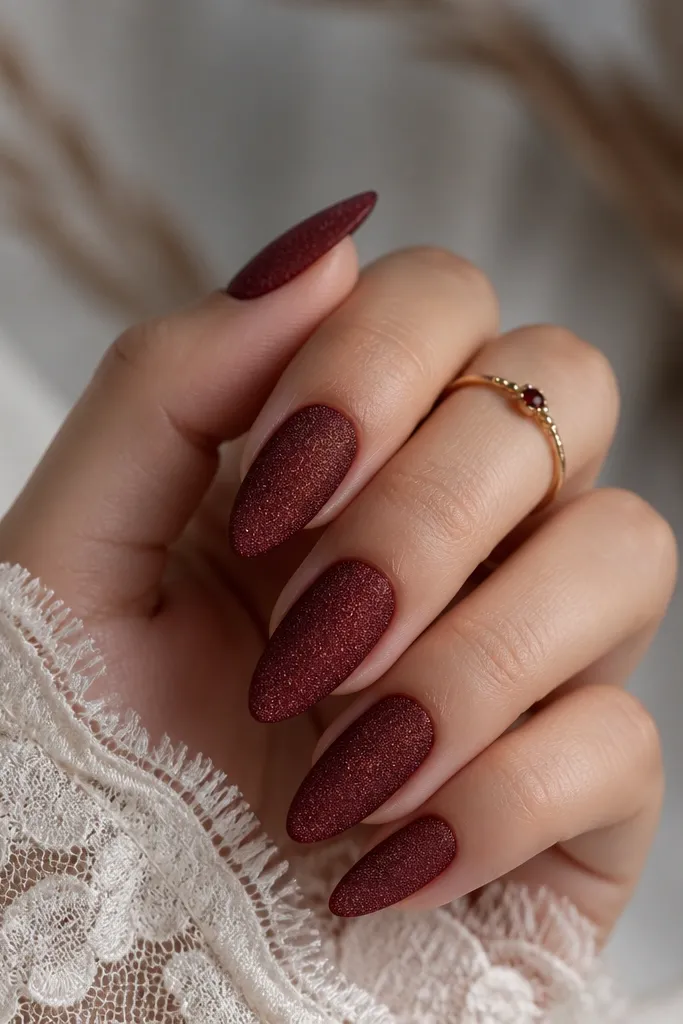
Crushed velvet dark red is the mood when you want depth without gloss. The texture absorbs light, so the red looks richer and more “fabric-like” instead of shiny. This is flattering on all skin tones, but it’s especially good if you have dry cuticles or slightly uneven nail texture because velvet finishes hide minor imperfections. On almond nails, the taper makes the velvety effect look even across the nail. I reach for this when I’m wearing darker outfits and want the manicure to match the vibe.
Start with a dark red gel base and cure it fully. Apply velvet powder in a light layer — I press it gently with the applicator so it doesn’t clump, then tap off excess. Cure or set it according to your powder system instructions. Seal with a velvet-friendly topcoat if your kit allows it; otherwise, keep it unsealed so the texture stays true. Finish by cleaning the edges with a dry brush so the powder doesn’t smear around the sidewalls.
If the velvet looks patchy, don’t add more powder right away — buff the surface lightly after curing and re-apply a thinner layer.
Don’t use a heavy glossy topcoat over velvet — it turns the texture into something flat.
4. Dark red French tip with nude base almond
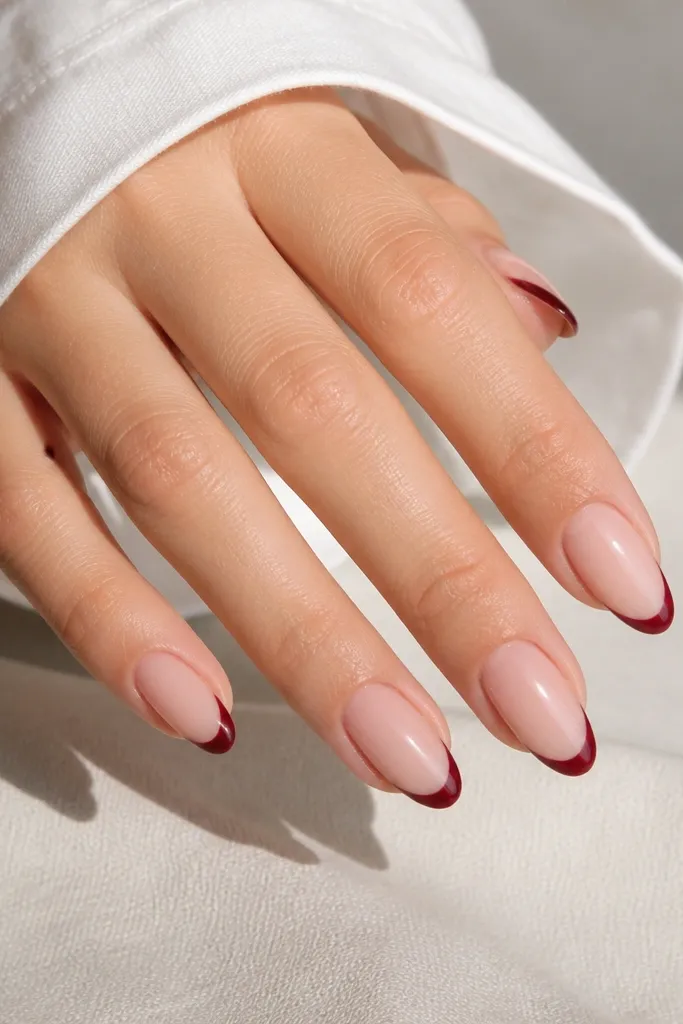
A dark red French tip makes almond nails look sharper and more intentional. The nude base keeps the set light, so the dark red reads like a design detail instead of a full-color commitment. It’s flattering on short nail beds because the nude base extends the visual length, while the French edge defines the tip. I like this for people who get bored by solid color — it still feels classic, but the dark red gives it edge. This also looks great with gold jewelry because the red line looks like a polished frame.
Editor's noteMake your French line slightly thicker at the center of the almond — it balances the taper and looks more natural.
Start by building a nude-pink base (sheer to medium coverage) and cure. Then map the French line by placing the brush at the center of the tip and pulling left and right — keep the line thin. Use a dark red gel and paint the French evenly, aiming for a tip width around 2-3 mm on medium almond. Cure, then refine the edges with a small flat brush dipped in gel cleanser. Finish with a glossy topcoat and cap the tip so the French edge stays crisp as it grows out.
Skip thisDon’t let the French touch the sidewalls — a tiny gap makes it look salon-clean, not messy.
5. Oxblood micro-flake almond
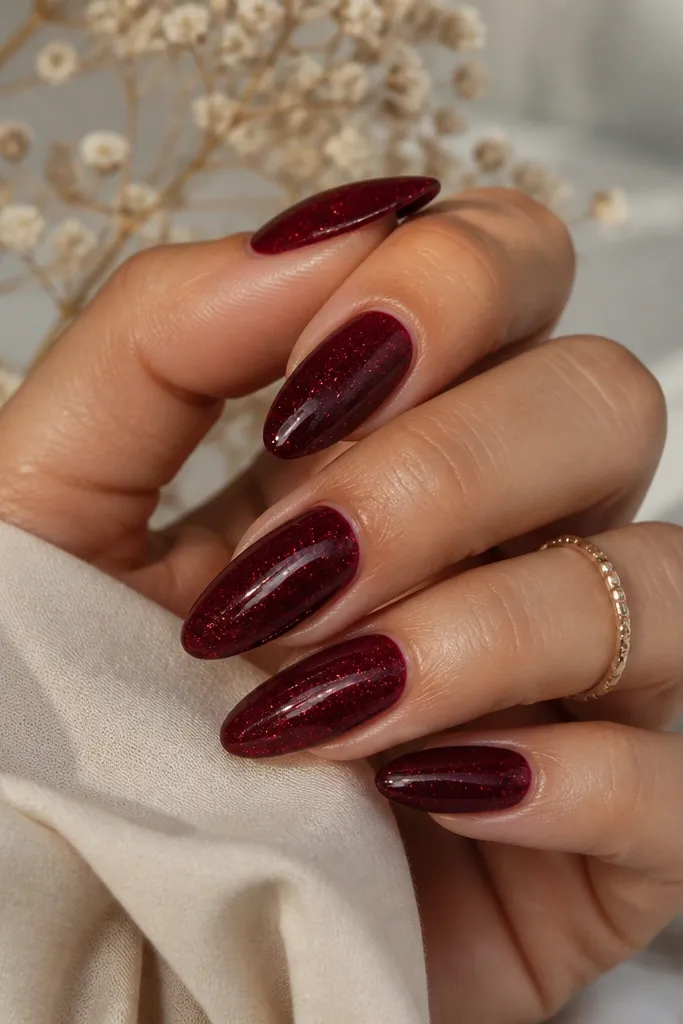
Oxblood with micro-flakes gives you “night out” sparkle without turning into chunky glitter. The undertone is deeper and slightly brown-red, which looks incredible on medium and deep skin tones because it reads warm and rich. Almond nails help the micro-flakes distribute evenly across the tapered surface, so the shimmer looks intentional. I’ve found this look works for both holiday parties and date nights because it looks expensive even in low light. It also hides tiny imperfections better than pure gloss because the shimmer breaks up the surface reflection.
Editor's noteUse less flakes than you think — micro-flake coverage looks best when it’s airy, not opaque.
Start with a solid oxblood base gel and cure. Apply a thin layer of clear gel or topcoat only where you want shimmer, then sprinkle ultra-fine red micro-flakes over it. Tap off excess and cure. For a controlled look, keep flakes heavier in the center and lighter near the cuticle — it flatters the almond shape. Finish with a thin glossy topcoat to smooth the texture and make the flakes look like they’re under glass.
Skip thisDon’t use chunky glitter with dark red — it turns the set into a rough texture fast.
6. Dark red chrome strip almond
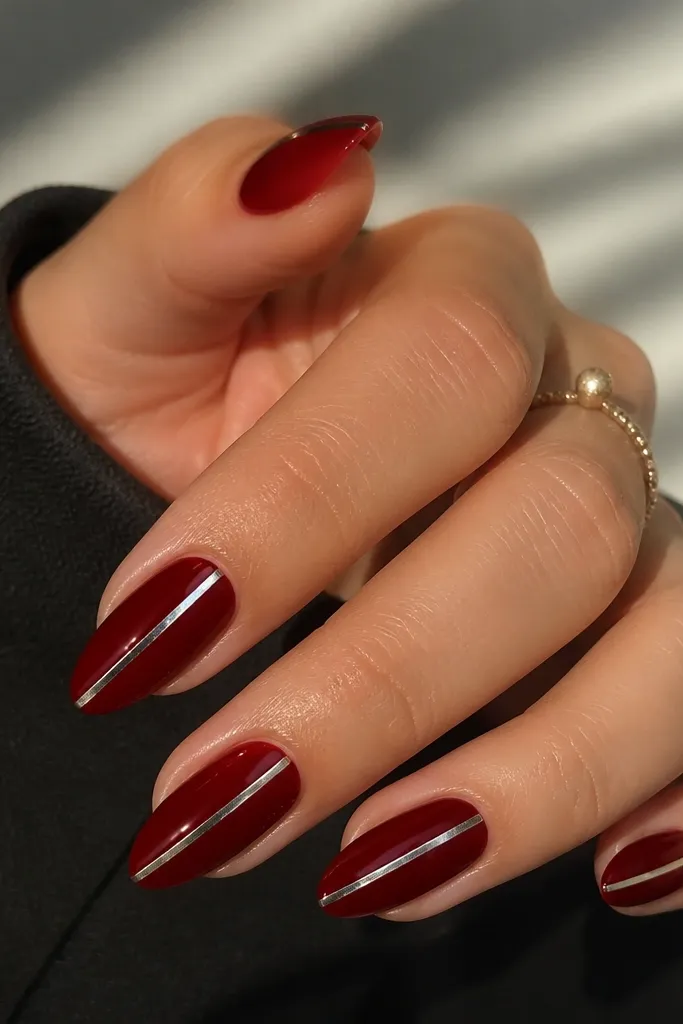
A vertical chrome strip is my favorite way to make dark red look more expensive without adding a full design. The chrome reflects like jewelry, and on almond nails it visually lengthens the nail bed. This is especially flattering if your nail beds are shorter because the line draws the eye upward. I like silver chrome most, but you can swap to deep burgundy-tinted chrome if you want it softer. It also works well for formal events because the design stays clean and symmetrical.
Start with a solid dark red base gel and cure. Apply a thin strip of chrome transfer foil adhesive or a strip of clear gel in a straight line from about 1 mm below the cuticle to just shy of the tip. Keep the strip width around 1 mm for a sleek look. Cure if your system needs it, then press the chrome foil onto the tacky line and rub gently for full transfer. Seal with a glossy topcoat, making sure you don’t flood over the strip so the line stays crisp.
Use a striping brush to paint the adhesive — freehand chrome lines look wobbly on almond tips.
Don’t make the strip too thick — it turns from “jewelry line” into “sticker stripe.”
7. Dark red ombre to blackened tip almond
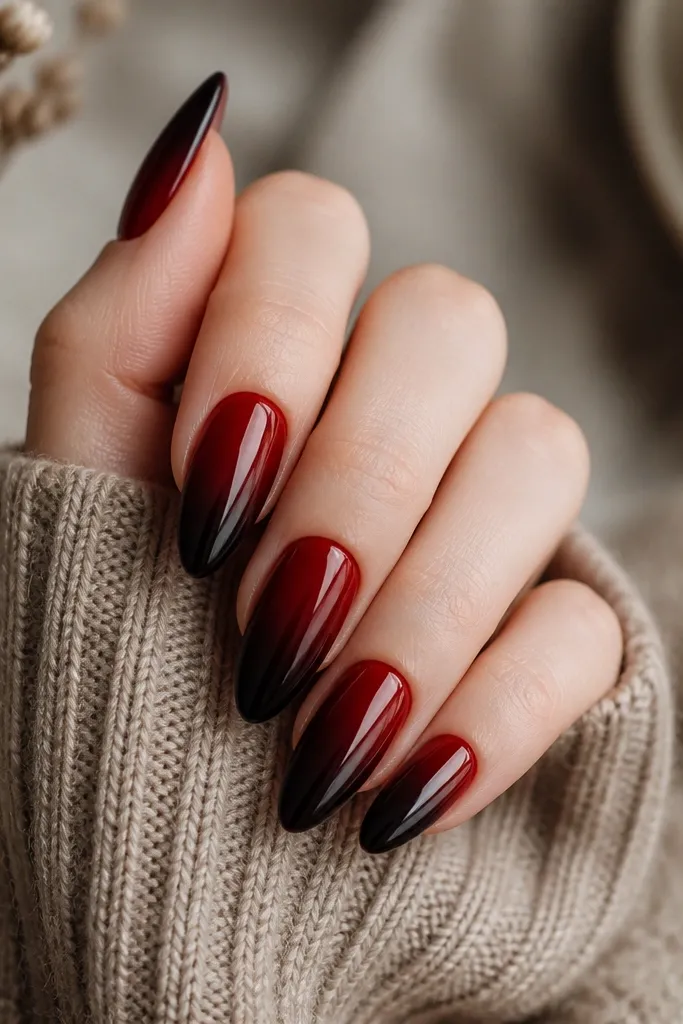
This ombre turns dark red into something moodier. The gradient looks seamless on almond because the taper gives the blend a natural direction from wider base to narrow tip. I love it on medium to deep skin tones because the dark-to-blackened end looks extra dramatic without needing glitter. It also works on fair skin if you keep the blackened tip subtle — think “smoked burgundy,” not ink black. This is my go-to for winter because it matches dark sweaters and looks good in photos.
Editor's noteBlend on the nail with light pressure — heavy dabbing creates texture and a dusty edge.
Start with a dark red base gel and cure. On a makeup sponge or ombre brush, dab a deeper burgundy/near-black shade at the tip area only, then blend upward about halfway. Clean up the lower edge with a small brush dipped in gel cleanser so the ombre stays controlled. Cure, then repeat a second blend pass if you want more depth at the tip. Finish with a glossy topcoat — gloss makes the gradient look like it’s melted together.
Skip thisDon’t leave a visible line between red and black — that defeats the ombre effect.
8. Sheer dark red aura almond
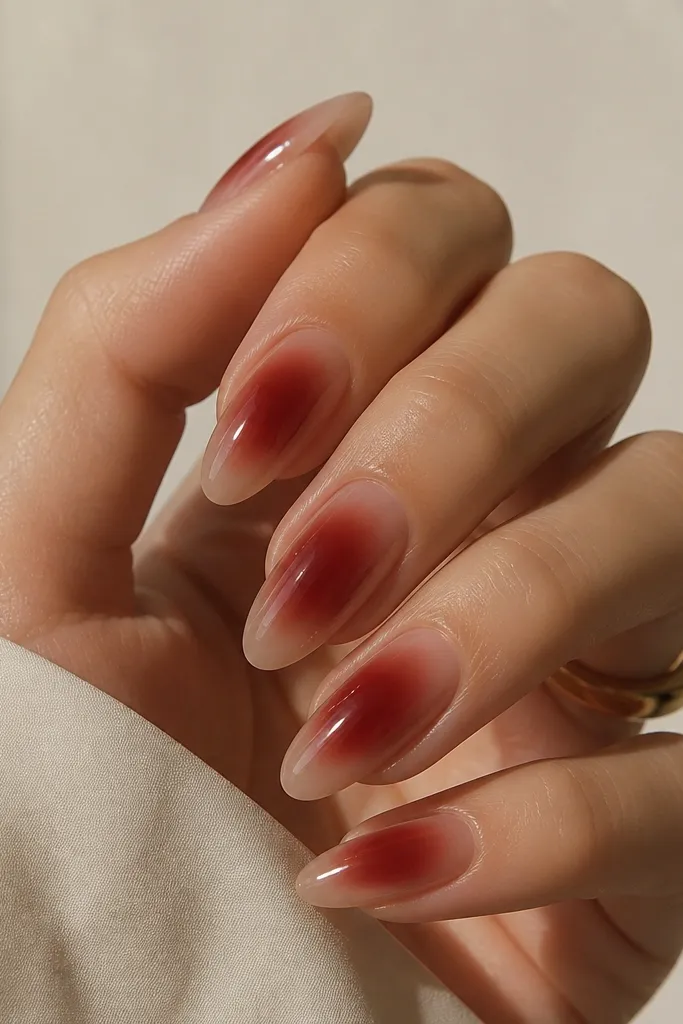
Aura nails in dark red give you a glow effect without using neon or glitter. The sheer base makes it look modern, and the aura concentrated in the center makes almond nails look longer and more sculpted. I’ve worn this with both casual outfits and dressy looks because it’s bold but not loud. It flatters hands with lots of natural nail show because the design fills the center while the edges stay clean. If you want something different from solid color but still want it wearable, this is the one.
Editor's noteFor a cleaner aura, wipe excess gel off your sponge first — you want smoke, not paint blob.
Start with a sheer nude-pink or sheer rose base and cure. Apply a thin layer of dark red gel in the center, then use an airbrush effect sponge or a small makeup sponge to blur outward in a soft circle. Keep the aura radius about 3-4 mm wide on each nail for a consistent look. Clean the outer edges so the red stays concentrated, then cure. Finish with two coats of glossy topcoat to smooth the aura and make the center look glassy.
Skip thisDon’t paint the aura all the way to the sidewalls — the almond shape needs breathing room.
9. Dark red nail art bow accent almond
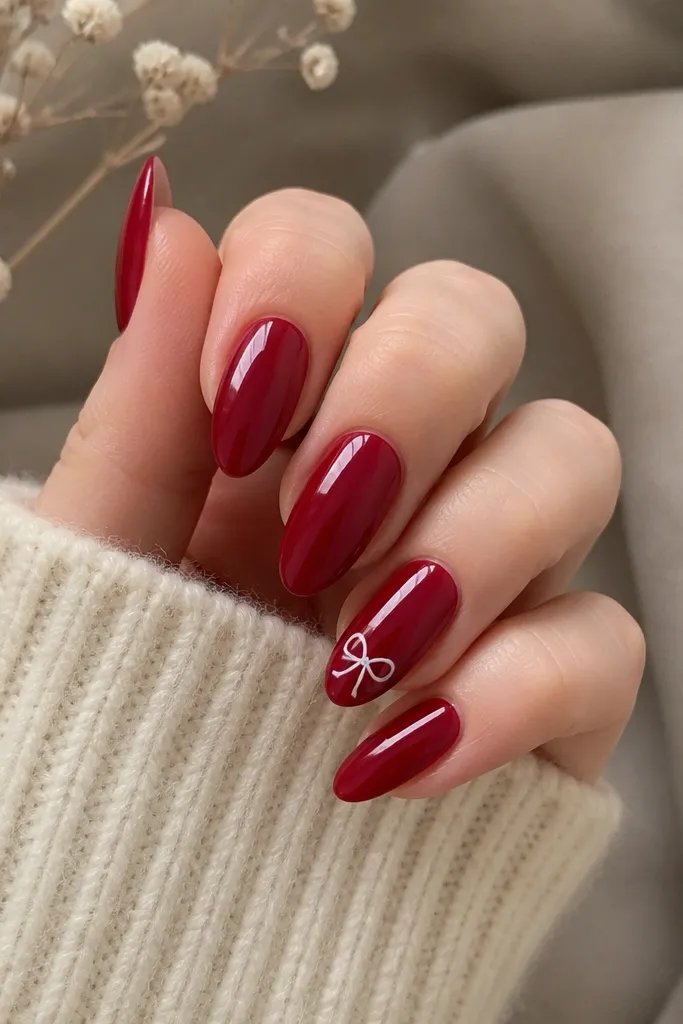
A tiny bow accent keeps dark red feeling sweet instead of severe. I like doing this on one or two nails only, because too many accents turns it into costume territory. The bow works best in crisp white or creamy off-white, which pops against dark red and looks clean in indoor lighting. This is a great choice for birthdays, Valentine season, or when you want something playful but still sophisticated. Almond nails make the bow placement look intentional because the tip is a natural “canvas” area.
Paint all nails in solid dark red and cure, then apply glossy topcoat. On the accent nail, use a fine liner brush to draw a small V-shape for the bow center near the upper third of the nail. Then add two curved loops on each side and draw a tiny knot in the middle. Cure under an LED lamp, then seal with a thin glossy topcoat so the lines stay smooth. Keep the bow size small — about 3-4 mm wide — so it doesn’t overwhelm the almond tip.
Use gel liner pens if you hate brush control — the line stays sharp on almond tips.
Don’t put the bow too close to the cuticle — it makes the nail look shorter.
10. Dark red matte with glossy cuticle half-moon almond
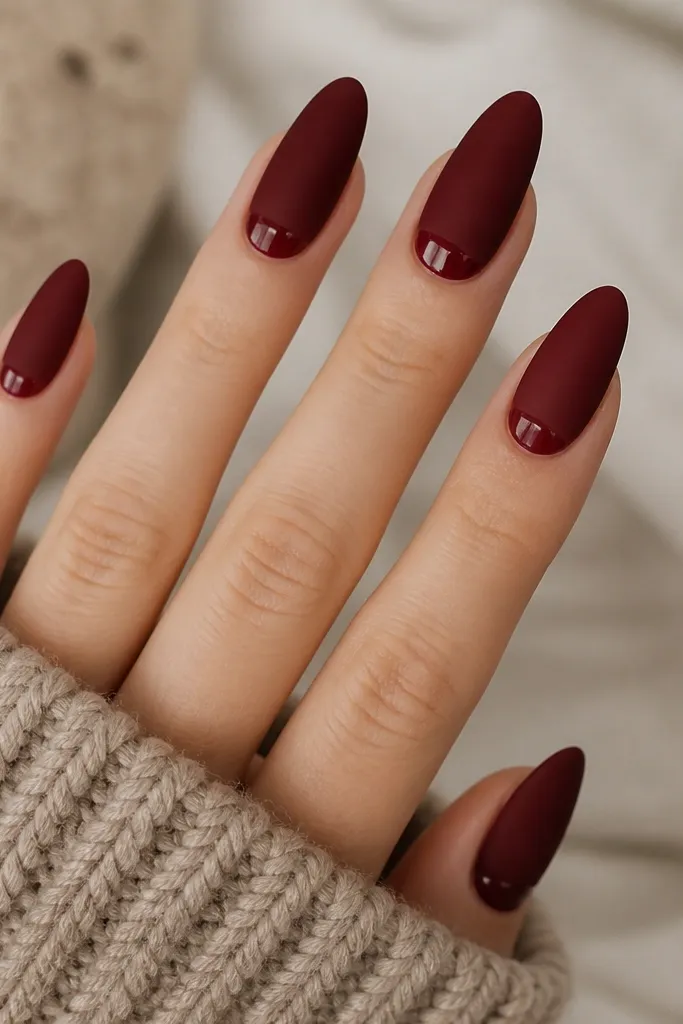
This set mixes textures in a way that looks intentional, not accidental. Matte dark red hides small surface imperfections, while the glossy half-moon at the cuticle catches light like a frame. Almond nails look extra sleek with this because the cuticle crescent emphasizes the curve and makes the nail bed look sculpted. It flatters hands with dry skin around the nails because the matte finish looks smooth and even. I wear this for nights out when I want the color to look rich without mirror shine everywhere.
Editor's noteMake the half-moon slightly wider at the sides on almond — it balances the taper.
Start with a solid dark red gel base and cure. Apply matte topcoat to the whole nail and cure. Then, using a thin striping brush, paint a small crescent of glossy gel topcoat at the cuticle area, leaving the rest matte. Cure again and wipe if needed. Finish by checking the edge — the crescent should be crisp and clean, not messy around the skin line.
Skip thisDon’t skip a solid base coat — matte shows thin spots and ridges more than gloss.
11. Dark red satin sheen almond
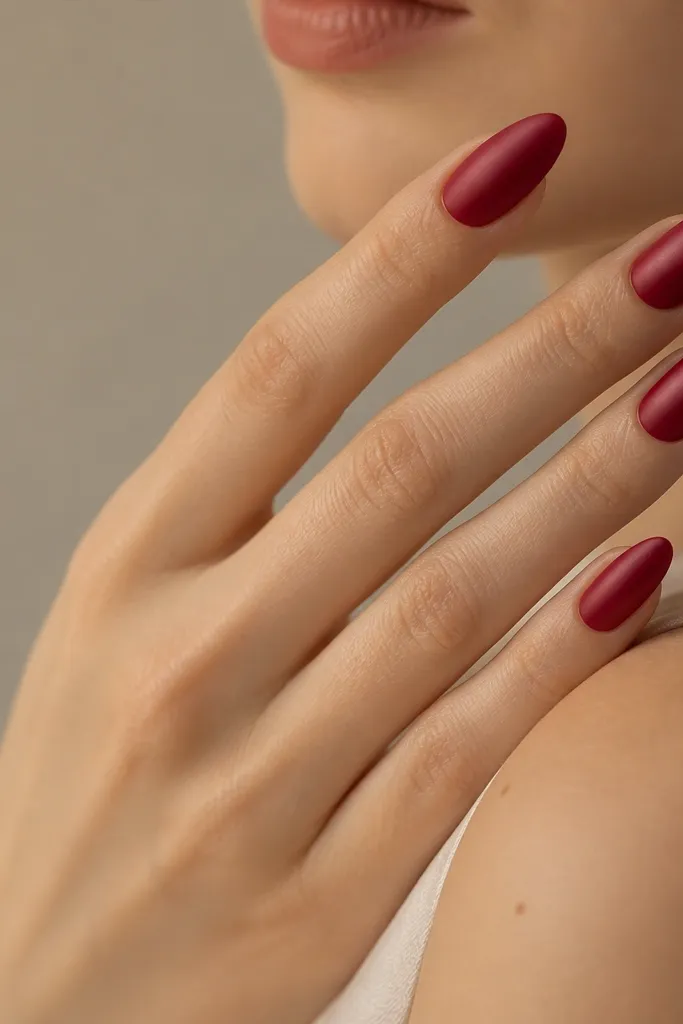
Satin sheen is the in-between finish that makes dark red look expensive without being flashy. It has a soft glow that flatters most skin tones because it doesn’t reflect as sharply as mirror gloss. On almond nails, satin makes the taper look smoother and more sculpted, especially if you’re growing your natural nails out. I like this for everyday because it looks polished even when you’re not wearing jewelry. It also photographs nicely — the color stays deep and the surface looks even.
Editor's noteTest satin topcoat on one nail first — some brands pull more brown or more purple depending on the gel base.
Paint your nails with a dark red gel in two coats and cure each. Instead of a standard glossy topcoat, use a satin topcoat or a matte topcoat mixed with a satin additive if your brand allows it. Apply one even layer over the whole nail, then cap the tip. Cure fully and let it cool before touching. If your satin topcoat looks too flat, add a second satin layer only to the center to keep it from looking dry.
Skip thisDon’t use satin over a streaky red base — satin shows uneven coverage fast.
12. Dark red half-moon negative space almond
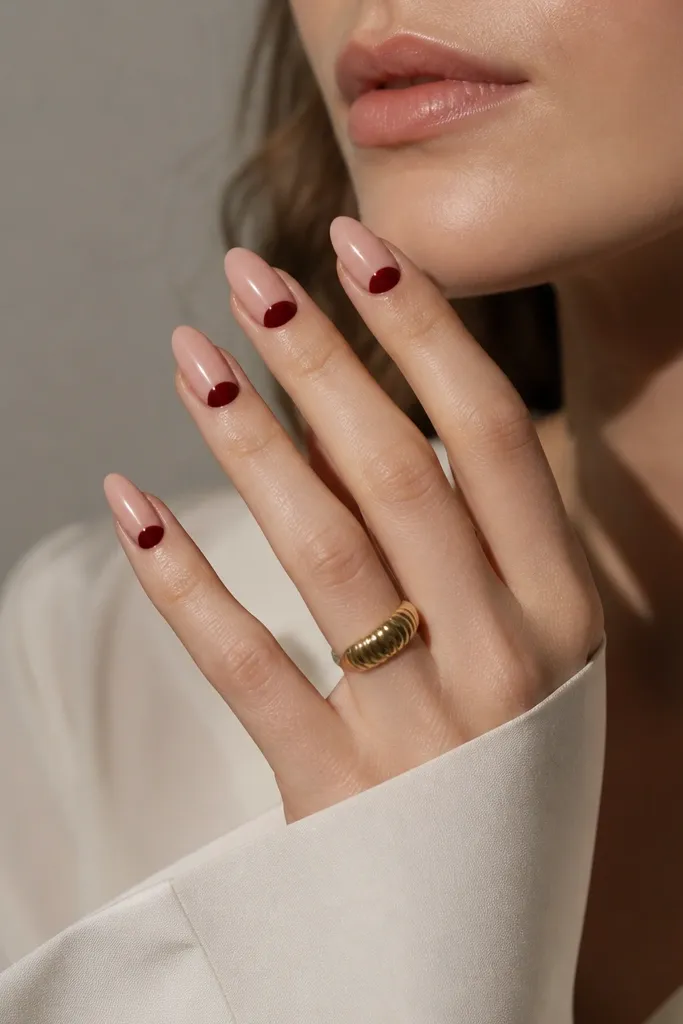
Negative space half-moons make dark red look clean and graphic. The nude base keeps the set light, and the half-moon shape emphasizes the natural cuticle curve. This flatters hands with longer fingers because it keeps the look airy, but it also works on shorter fingers by visually widening the nail bed with the nude area. I like this when I’m not in the mood for full coverage but still want a dark red statement. Almond nails make the half-moon feel intentional because the tip taper is already sleek.
Editor's noteChoose a nude base that matches your skin tone — the half-moon looks sharper when the nude blends.
Start with a nude builder gel or sheer nude base and cure. Use a small half-moon stencil or cut your own thin foil stencil to mask the cuticle area, leaving the half-moon open. Paint the exposed cuticle half-moon area with dark red gel and cure. Remove the stencil carefully, then apply glossy topcoat over the whole nail. If you don’t use stencils, place the brush at the cuticle center and drag outward in a gentle arc, then clean edges with a thin brush and gel cleanser.
Skip thisDon’t make the half-moon too high — keep it tight to the cuticle so it looks crisp.
13. Dark red gold leaf almond
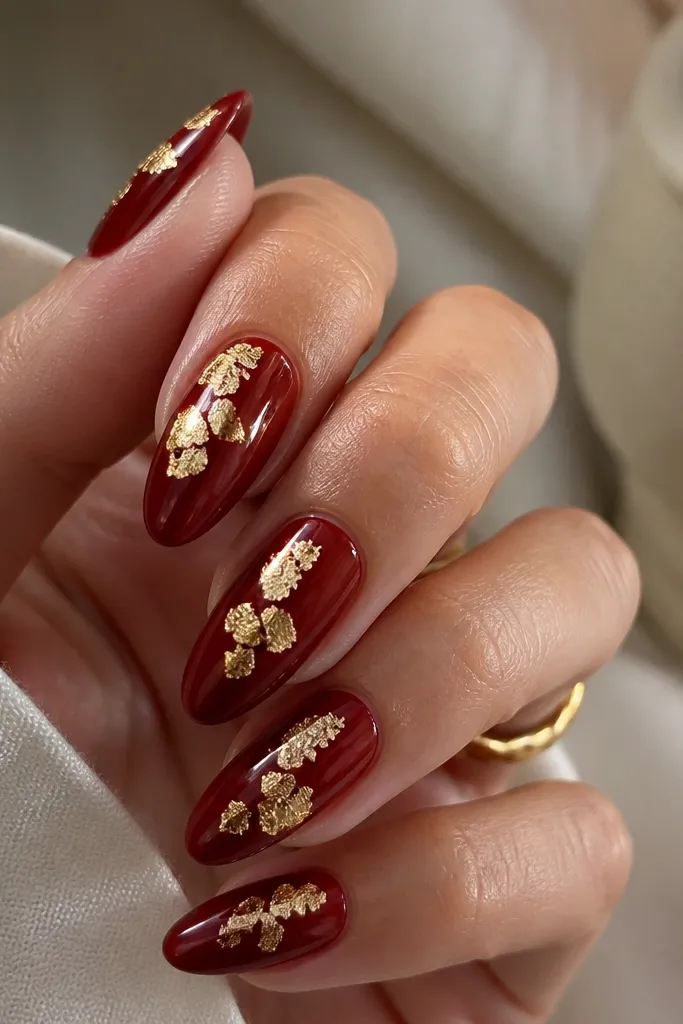
Gold leaf on dark red looks like candlelight in manicure form. The dark background makes the gold pieces look brighter, and the irregular edges keep it from looking like a sticker. I’ve found this works best when the gold is placed on only one or two nails per hand, especially if you’re doing a full set of almonds. It flatters medium to deep skin because the warm gold balances the red undertone. For fair skin, it still works, but I’d keep the gold pieces smaller so the nail doesn’t feel too heavy.
Editor's notePlace gold leaf slightly off-center on the nail — it looks more organic on almond tips.
Apply a solid dark red gel base to all nails and cure. On accent nails, brush on a thin layer of tacky gel where you want gold leaf — keep it in an uneven patch so the placement feels natural. Press gold leaf pieces onto the tacky areas, then tap off excess. Seal with a glossy topcoat in two thin layers so the leaf doesn’t lift at the edges. If you see sharp leaf edges, gently buff the surface lightly after curing and before the second topcoat.
Skip thisDon’t cover the whole nail in leaf — it turns into a textured mess instead of a luxe accent.
14. Dark red marble with fine white veins almond
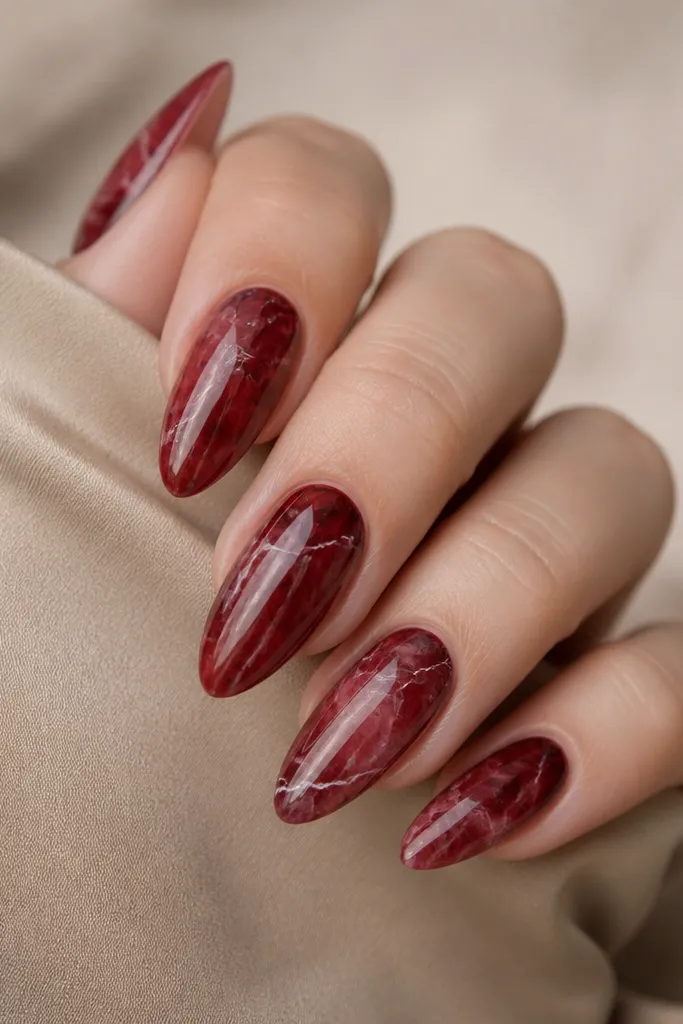
Marble veins in fine white make dark red look like high-end stone instead of paint. The key is keeping the veins thin and letting the dark red dominate, so the set stays sophisticated. Almond nails are perfect for marble because the tapered shape gives the veins a natural direction from base to tip. This is flattering on all skin tones because the contrast is crisp and clean. I wear this for events when I want something that looks hand-crafted but still matches everything in my closet.
Start with a dark red base gel and cure. On a palette, mix a small amount of white gel with a drop of clear gel to thin it for fine lines. Use a detail brush to draw thin vein lines — start near the center and branch lightly toward the sides. Add a few tiny dots or short offshoots so it looks like stone, not lines. Cure, then apply glossy topcoat in two layers to smooth the marble texture and deepen the dark color.
Use clear gel to thin your white — thick white makes marble look like cracks, not stone.
Don’t overwork the veins — too many lines makes it look messy on almond.
15. Smoked Cabernet Almond with Blackened Gradient Cuticle Glow
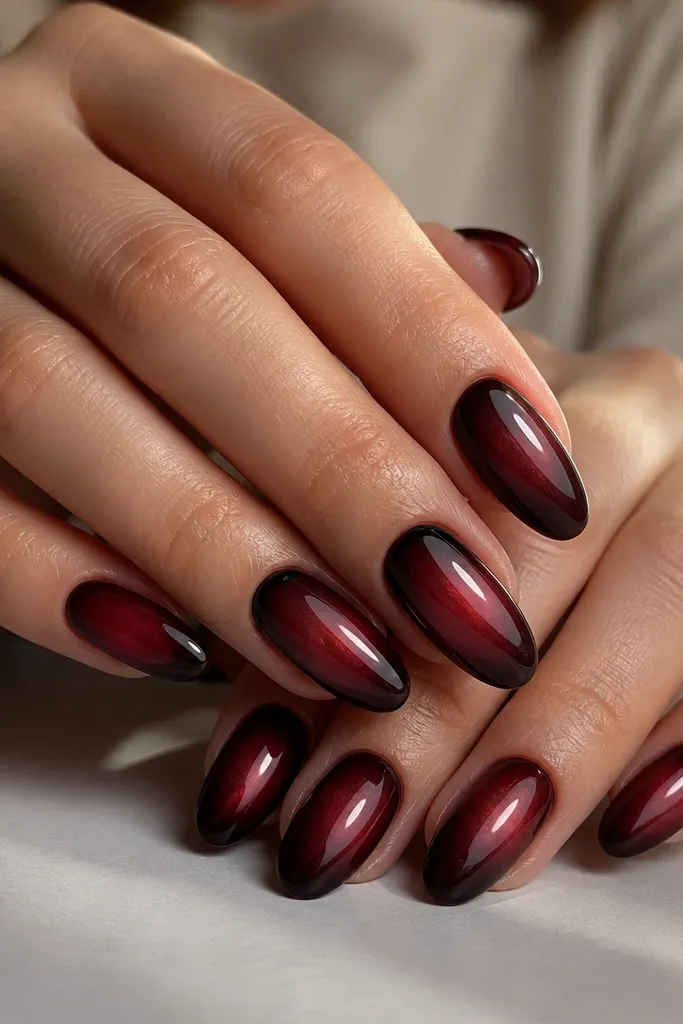
This set looks expensive because it plays with contrast in the exact spot your eye already lands — the cuticle. The smoked gradient makes dark red feel less flat, like it has depth instead of paint-on color. I’ve worn a similar “cabernet haze” when I didn’t want full black nails but still wanted the moodier look. The subtle cuticle glow keeps it sophisticated instead of goth-heavy, and the almond shape makes the fade feel controlled rather than messy.
Editor's noteDo the gradient on two nails at a time so you can blend while the color is still workable, then cure fully before you touch the next nails. If you don’t have an airbrush, a torn makeup sponge dabbed lightly gives the same smoky edges.
Start by applying a sheer dark-red base (not opaque) so the gradient has something to blend into. Use an airbrush or makeup sponge to dust a near-black red-brown at the cuticle corners, then blend toward the middle where the red stays lighter. With a thin brush, pull a soft red halo around the cuticle center — think a shallow crescent, not a thick ring. Finish with a glossy top coat and cap the free edge so the fade stays crisp after wear. If you want the accent nail, paint a single thin black arc along the cuticle line on one nail and keep it off-center.
Skip thisDon’t start with a fully opaque dark red — the gradient won’t look smoky, it will look like patchy repainting.