
1. Classic glossy cherry red almonds
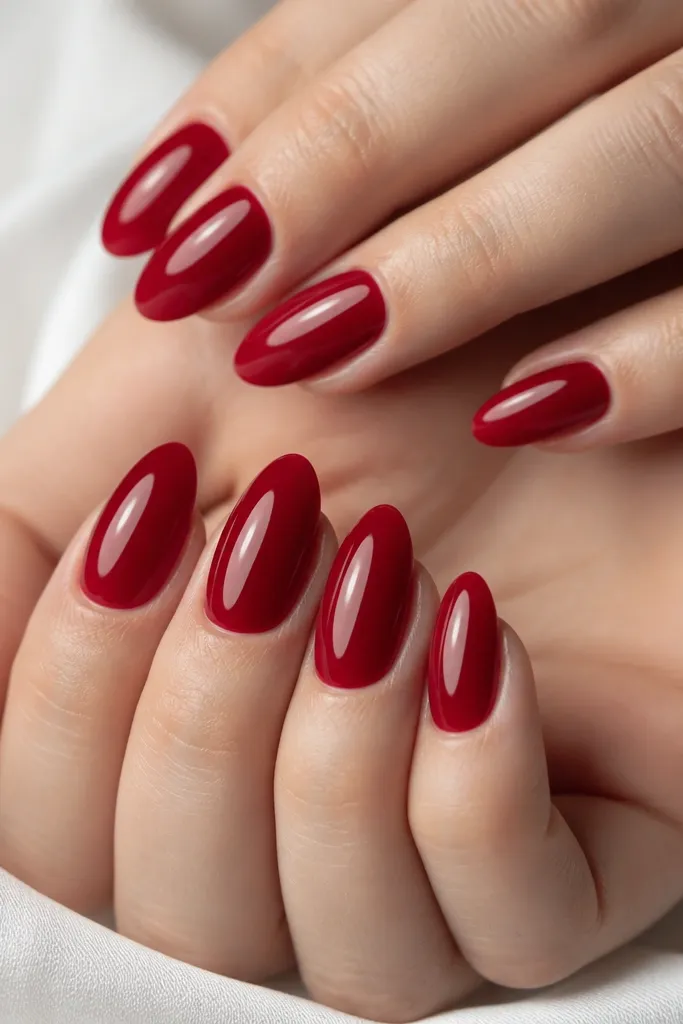
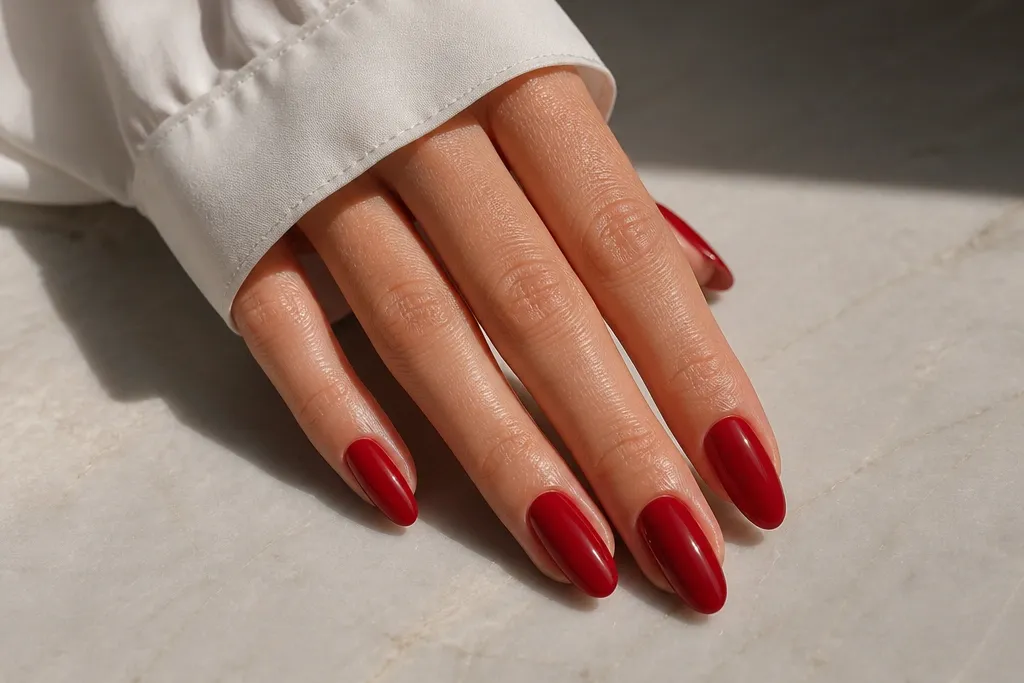
This is the “I did my nails on purpose” set. The shade is cherry red — slightly blue-leaning — so it reads feminine and polished instead of orange-red. The glossy finish makes the almond taper look crisp, and the single-color layout keeps attention on the shape. It flatters most skin tones, but it’s especially flattering on fair to light-medium because the red pops without needing extra contrast. For workdays, dinners, and events where you want neat hands in photos, this is the safest chic red almond nail choice.
Start by pushing back cuticles gently and buffing the nail surface just enough for grip. Apply a thin base coat, then build color in two coats of cherry red gel or lacquer, letting each coat level out before curing or drying. When filing, taper the sides inward toward the apex so the tip is narrower than the widest point near mid-nail. Finish with a glossy topcoat in a thin layer, then cap the free edge so chips don’t start at the tip. Clean the edges with a small brush dipped in acetone after the final cure so the cuticle line looks sharp.
Editor's noteIf your red looks streaky, stir the polish instead of shaking, and apply thinner coats — thick layers trap texture.
Skip thisAvoid a rounded almond tip; it turns the whole set into “short coffin” instead of chic almond.
2. Creamy nude French tip with red base
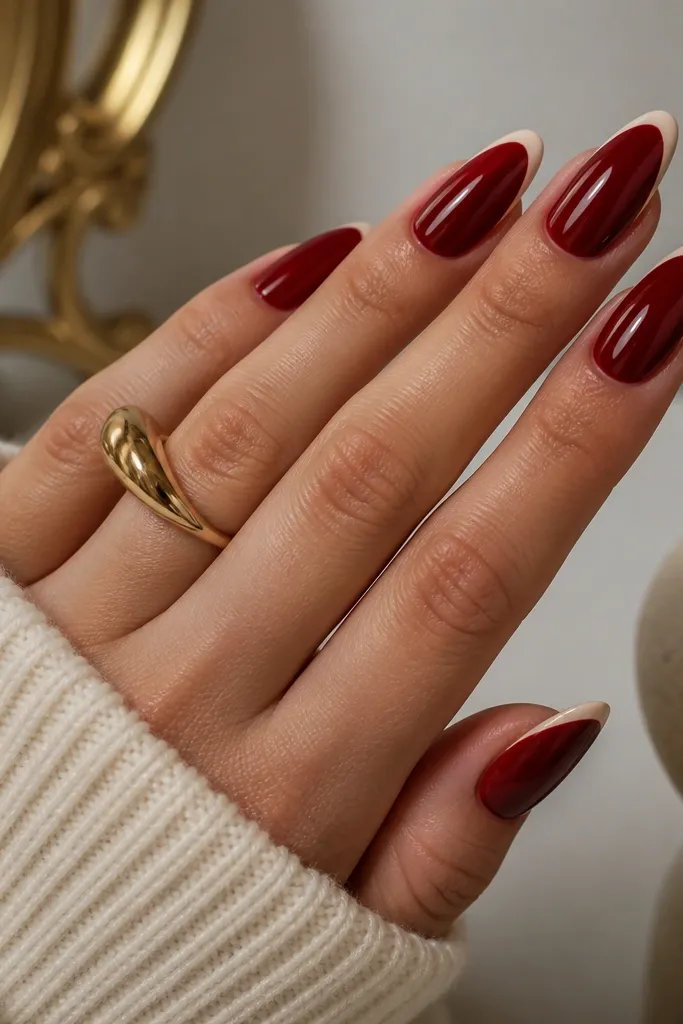
This design feels feminine because the nude tip softens the red instead of overpowering it. The base is a true red (not too dark), and the French tip is a creamy nude that matches your skin’s undertone — pinky nude for cool skin, beige nude for warm skin. The almond shape makes the French line look longer and more delicate, especially when the tip is thin. I like it on medium to deep skin tones because the nude tip creates contrast without turning the nails harsh. It’s also great if you’re growing your natural nails out and want a clean look that doesn’t show uneven regrowth as quickly.
Start with two coats of red, keeping the color slightly lower than the final tip shape so you can file without dragging red onto the tip. Use a French guide strip or a thin strip of tape to mark a curved line across the nail — place it so the tip takes up about 15-20% of the nail length. Paint the creamy nude tip in one smooth pass per side, then remove the guide while the polish is still tacky for a crisp edge. After it dries or cures, seal everything with a glossy topcoat and cap the free edge. If you see any red bleeding into the nude line, clean it with a flat brush and acetone before the final topcoat.
Choose nude that matches your cuticle area — the closer the match, the more “expensive” the French looks.
Don’t make the French tip too thick; thick tips on almond can look like an awkward helmet.
3. Red velvet matte with a micro-glitter cuticle ring
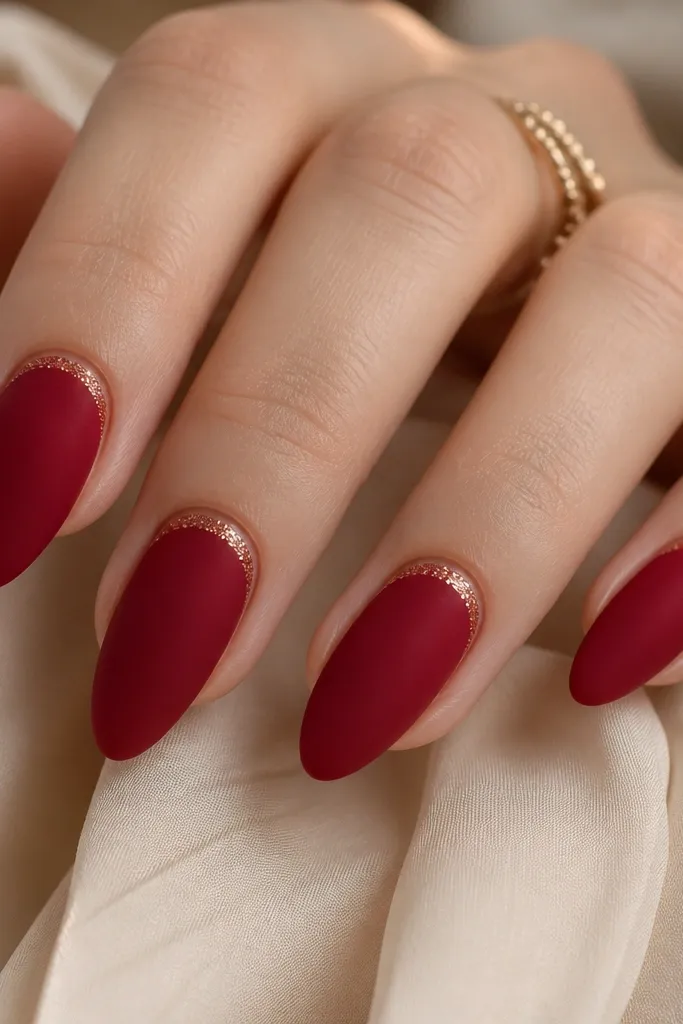
Matte red reads feminine and soft, and the cuticle ring adds just enough sparkle without turning it into a party set. I use a velvet matte finish red — it looks like it has tiny fibers, not just flat matte. The micro-glitter ring is tiny and controlled, placed in a crescent that follows the cuticle curve. This is flattering on hands with slightly dry cuticles because the matte finish hides minor texture, while the glitter draws the eye to the nail base. It’s perfect for date nights and evenings, and it looks gorgeous in low light.
Apply a base coat, then two coats of red gel, keeping the surface smooth. Cure fully, then switch to a matte topcoat — one layer, not two, because heavy matte can look chalky. For the cuticle ring, use a fine detail brush to paint a thin line of clear gel around the cuticle edge, leaving a hairline gap from the skin. Sprinkle micro-glitter over the gel ring, tap off excess, then cure. Finish with a tiny amount of matte topcoat everywhere except the glitter — I leave glitter glossy so it catches light.
Editor's noteIf the matte looks uneven, buff the surface lightly before matte topcoat and wipe with cleanser so dust doesn’t show.
Skip thisDon’t bring glitter down onto the cuticle skin; it lifts and looks messy fast.
4. Half-moon red cuticle with sheer blush
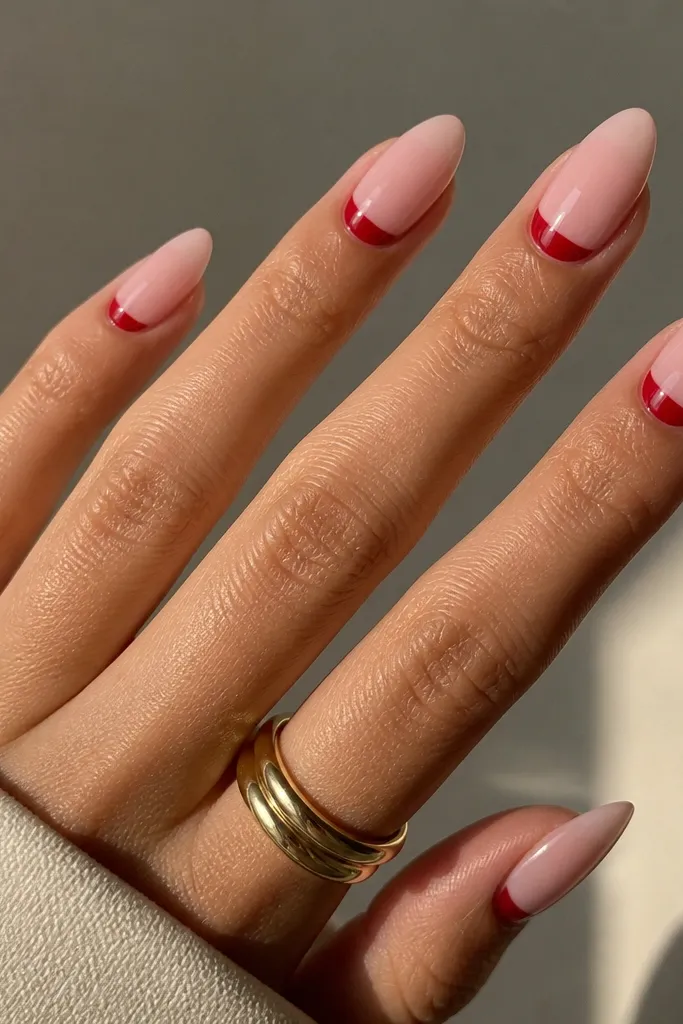
This is the most “feminine” red layout because it keeps negative space where your eye expects it. The base is a sheer blush that looks like your nail but prettier, and the half-moon is a solid red crescent that frames the cuticle. Almond shape makes the crescent look elongated and refined instead of wide. It flatters fair to deep skin tones because the blush layer adapts to your natural color, and the red stays the only strong pigment. I wear this when I want nails that look clean even if they grow out a little.
Start with a sheer blush gel or pink tint — apply it thin and build to opacity only where needed. Use a half-moon stencil or cut a small curved piece of tape to mask the cuticle area, then paint the red crescent with a small flat brush. Keep the red edge sharp and stop the crescent just before it touches the sidewalls so it doesn’t flood. Remove the stencil while the red is still tacky to prevent tearing. Seal with a glossy topcoat, then run a thin brush along the free edge for durability.
Editor's noteFor a cleaner half-moon, use a stencil that matches your nail curve — one-size stencils never fit almond sides.
Skip thisSkip thick blush layers; thick sheer bases look bumpy and the red half-moon gets distorted.
5. Red ombre into sheer nude
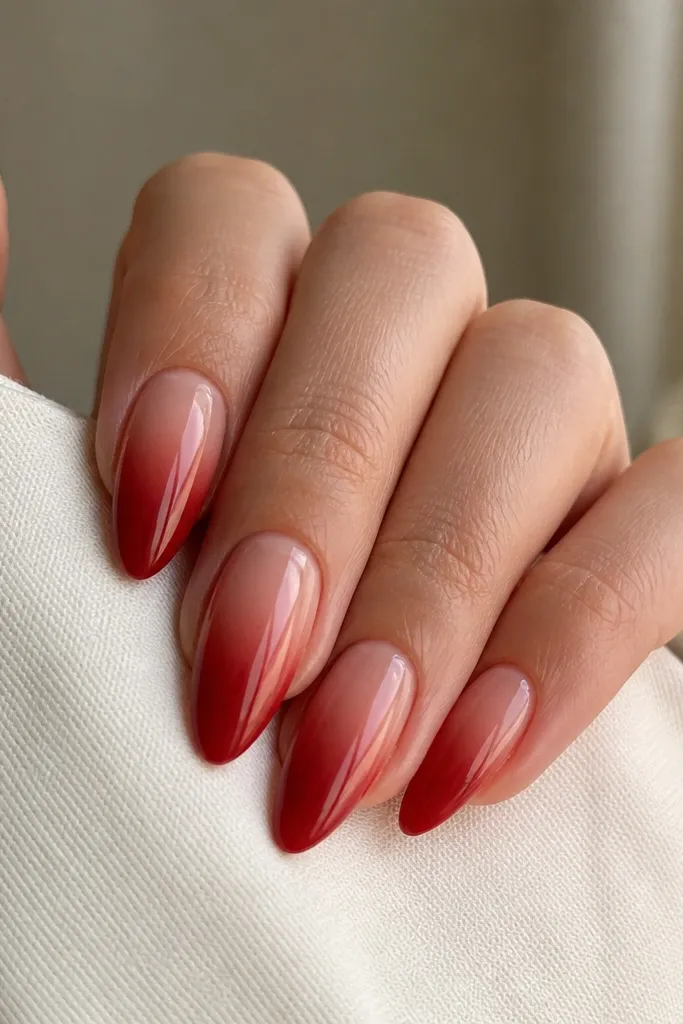
Ombre makes red look softer and more feminine because the color fades instead of stopping abruptly. The best version for almond is deep red at the tip that melts into a sheer nude — you still get drama, but it doesn’t look heavy. I prefer a slightly translucent nude base so the gradient looks like it’s growing out naturally. This works on all skin tones and looks especially good on shorter almonds because it creates a long vertical line. It’s also forgiving if you’re still learning to place nail art symmetrically.
Start with a sheer nude base coat and cure. Sponge on deep red near the tip using a makeup sponge cut into a small wedge — dab, don’t swipe. Build the red in layers, keeping the darkest area to the outer third of the tip and blending upward with lighter dabs. Wipe the sponge between nails so the gradient stays clean. After it’s dry, seal with a rubber base or strong builder gel, then topcoat glossy for a smooth finish that hides tiny sponge texture.
Use a fresh wedge of sponge for each nail set so the gradient doesn’t get muddy.
Don’t overblend; too much blending turns the tip into a dusty pink instead of a sharp red gradient.
6. Thin black micro-lines on red glossy almonds
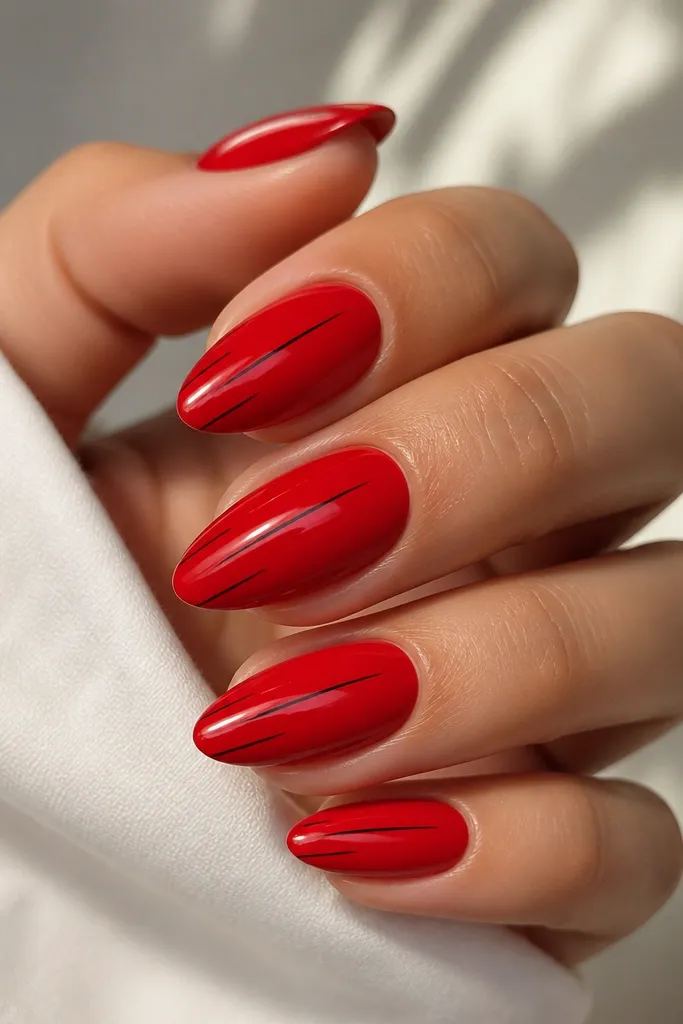
Black micro-lines make red look chic because they add structure without adding bulk. The trick is scale: the lines should be thinner than a hair and placed close to the centerline, not sprawling across the nail. I use a glossy red base so the black looks like crisp ink, and the almond shape makes the vertical lines elongate the finger. This set looks great on medium to deep skin because the contrast is clean, and it also flatters fair skin because the black outlines prevent red from looking flat. It’s my go-to for people who love nail art but hate chunky decals.
Paint two coats of glossy cherry or classic red and cure fully. Use a stripping brush (about 0.5-1mm tip) loaded lightly with black gel or polish. Draw one thin line from about 1-2mm below the cuticle to near the tip, then add a second line offset slightly to create a subtle “rail” effect. If you want variation, do the strongest line on two nails and keep the rest to one line. Cure, then seal with a clear glossy topcoat in a thin layer so the lines stay crisp.
If your line looks thick, clean the brush on paper towel first, then reload with less product.
Skip big nail art stickers; they make red look dated and the lines lose that sharp, pen-like finish.
7. Red chrome with a clear negative-space swirl
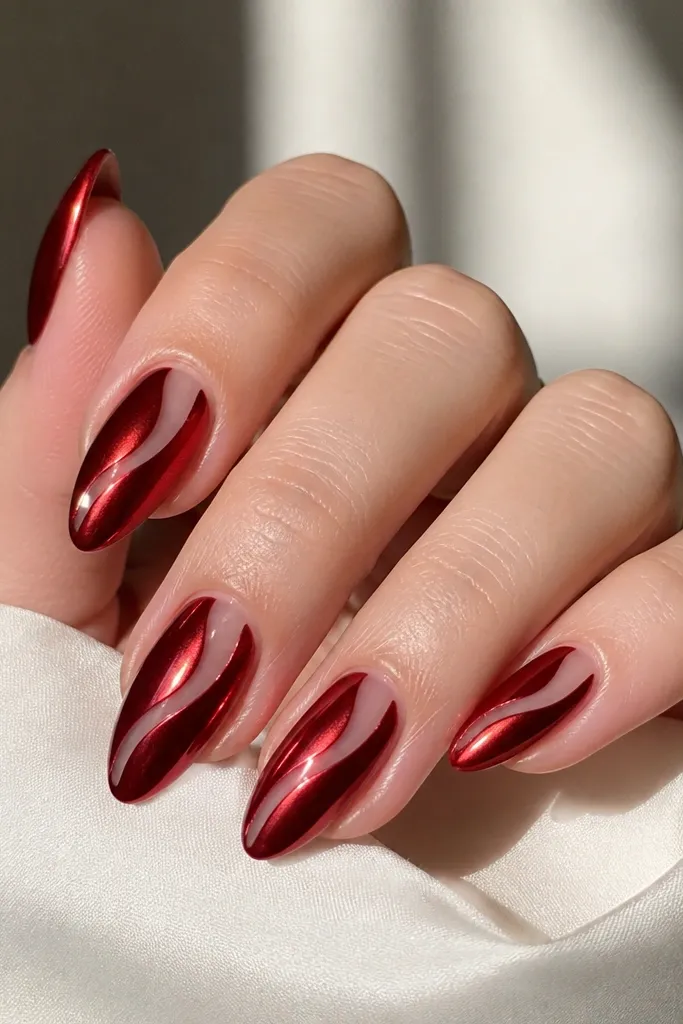
Chrome red looks feminine when you control the reflection. The negative-space swirl keeps it airy and modern, so it doesn’t look like a full heavy foil coat. I like a mirror red chrome over a deep red base because it gives dimensional shine rather than a flat candy red. The swirl is placed slightly off-center to guide the eye along the almond shape. This looks amazing on hands where you want “wow” in daylight but still want it to feel clean. It also photographs beautifully because the clear swirl catches the light differently than the chrome.
Start with a deep red gel base and cure. Apply a thin layer of chrome adhesive or base for chrome, then use red chrome powder and buff until it turns mirror-smooth. For the clear swirl, mask the swirl area with liquid latex or a peel-off barrier before you apply chrome, then remove it after the chrome step so the design stays transparent. If you don’t have a barrier product, paint a clear gel swirl on top of the cured red, cure it, then chrome around it carefully with tape to protect edges. Finish with a glossy topcoat that won’t dull chrome — use a chrome-safe topcoat if you have it.
Practice the swirl on one nail first — you want one continuous curve, not a stop-start shape.
Don’t cover chrome with a thick, regular matte topcoat — it kills the mirror look.
8. Red French tip with tiny white daisies
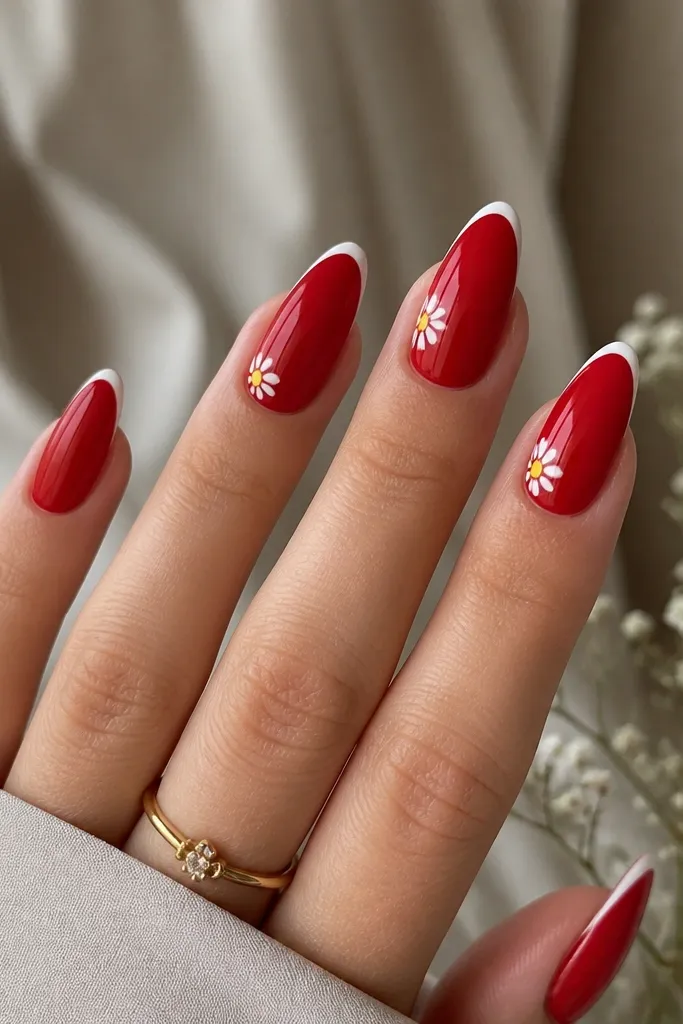
This one reads feminine because the daisy details are small, spaced, and placed at the tip where they look like spring jewelry. The base is glossy red, the French tip is thin and white, and the flowers are white with a tiny yellow center so they don’t look like cartoon stickers. Almond shape keeps the flowers from spreading wide — they stay delicate. It flatters anyone because the white brings brightness around the fingertips, especially on medium skin tones where pure red can look heavy. Wear it for brunch, birthdays, or any day you want “cute but still grown.”
Paint a glossy red base with two coats and cure. Use a French guide strip to create thin white tips taking up about 15% of the nail length. On accent nails (I usually do two), paint tiny daisy petals using a dotting tool: five small dots around a center. Add a micro yellow dot in the middle, then outline each petal lightly with a thin white gel if you want extra crispness. Seal everything with a glossy topcoat, and avoid flooding the flower edges so the petals keep their definition.
Use a detail dotting tool tip size that makes the flower about 2-3mm wide — bigger daisies look childish on almond.
Skip black outlines on the flowers; they make the set look harsh instead of soft.
9. Red marble tips with nude base
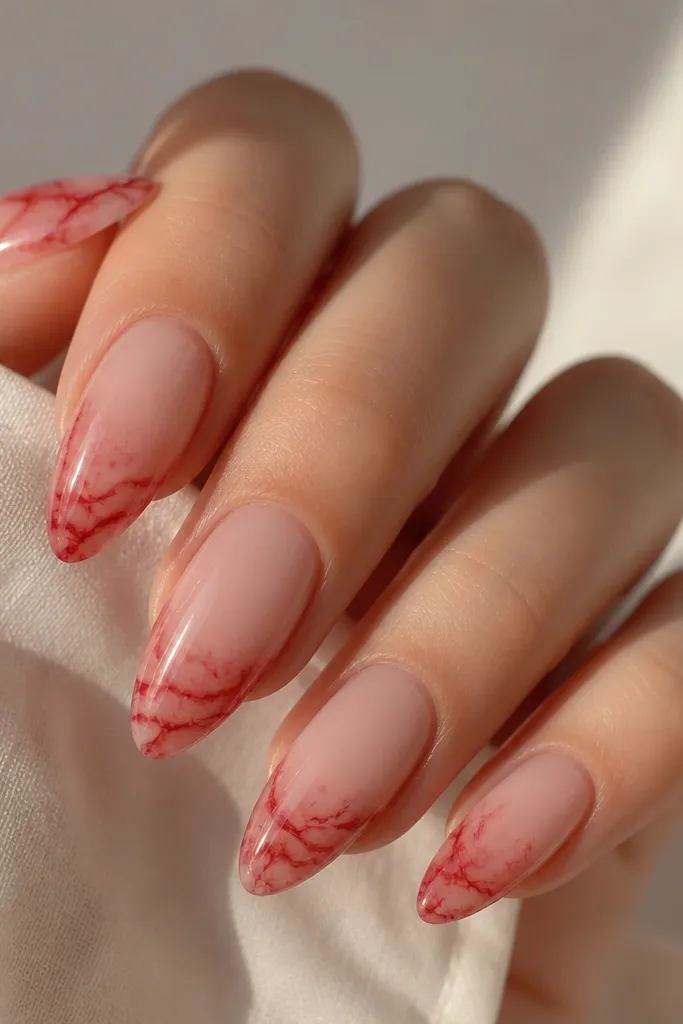
Marble looks chic because it has movement, and keeping it only on the tip keeps the manicure clean. The nude base smooths everything out, so the red veining reads elegant instead of chaotic. I use a translucent nude that matches my natural nail tone, then marble with red gel plus a tiny bit of white for smoky contrast. This is flattering on short to medium almond nails because the marble stays contained and the nude base creates length. It also works for formal events because it still looks “polished” when you’re not wearing lots of jewelry.
Start with a nude base coat and cure, then apply a second thin nude layer so the finish is even. For the marble tip, sponge or paint a light red wash on the tip area first, then drag thin red and white lines through it with a fine brush. Use a toothpick or the tip of a dotting tool to swirl the lines slightly so they look blended, not stamped. Keep the pattern mostly within the last third of the nail. Seal with a glossy topcoat in two thin layers if needed so the veining stays smooth.
Editor's noteMarble looks best when the lines are uneven — aim for some thick veins and some wispy ones.
Skip thisDon’t cover the whole nail in marble; full coverage turns red marble into a busy print.
10. Red rhinestone half-border on one accent nail
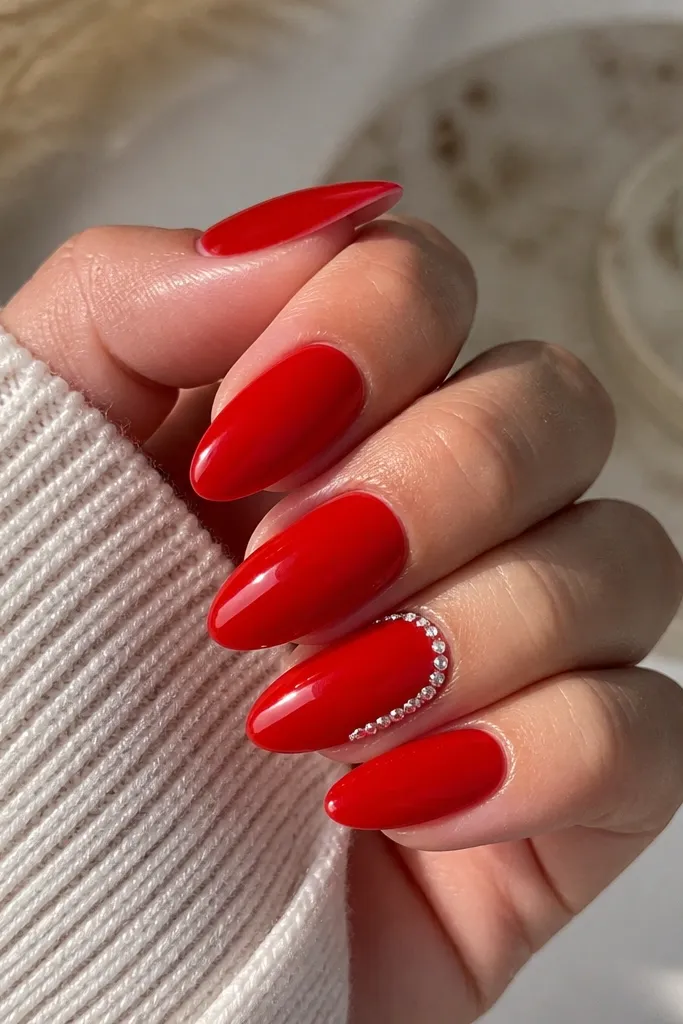
This is the most “feminine sparkle” version of red without turning your hands into a disco ball. The base stays solid red, and the rhinestones only sit on one accent nail — usually along the side of the cuticle curve so it looks like jewelry. I use tiny flat-back clear stones so they sit flush and don’t catch on fabric. Almond shape makes the border line look like a bracelet cuff. It’s flattering across skin tones because clear stones reflect your skin’s light and the red gives warmth. This is the set I wear for weddings, holiday dinners, and nights out when you want compliments.
Apply two coats of glossy red gel and cure. Pick one accent nail and plan the stone placement: I place stones along the inner side of the cuticle curve, from about 2mm from the corner to near the mid-nail. Use a dot of clear gel or rhinestone glue on each stone spot, then press stones down with a silicone tool. Leave tiny gaps so the border looks intentional, not crowded. Cure, then apply topcoat carefully around the stones — I keep it thin so the stones stay shiny and don’t get cloudy.
If you snag your nails easily, skip the free-edge topcoat on the accent nail and seal only around stone edges.
Avoid big chunky stones; they lift at the edges and make the manicure look sloppy.