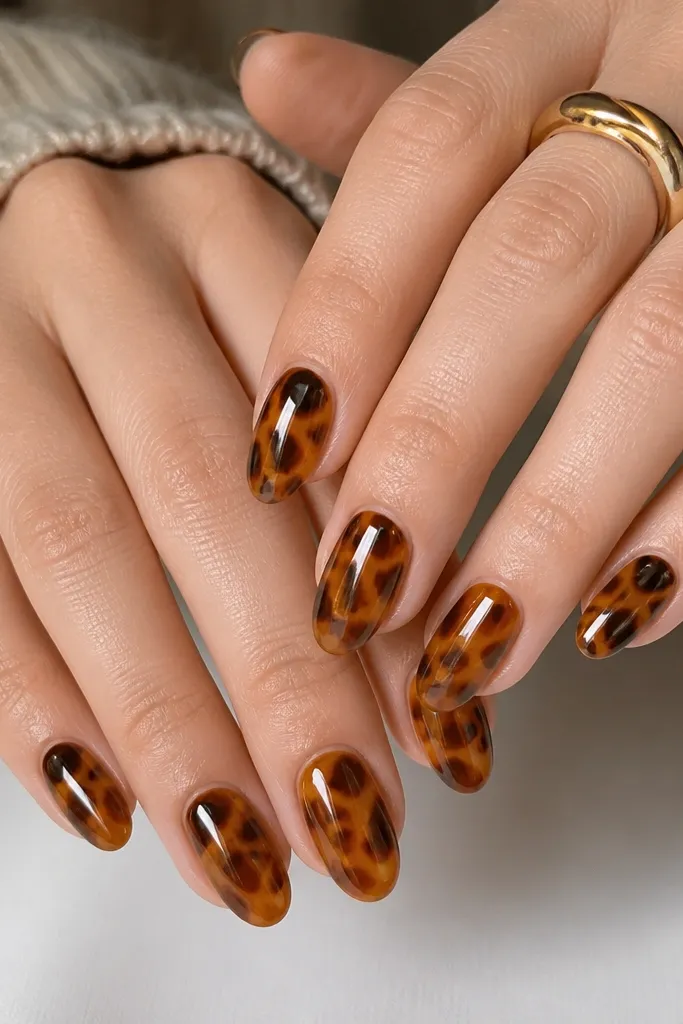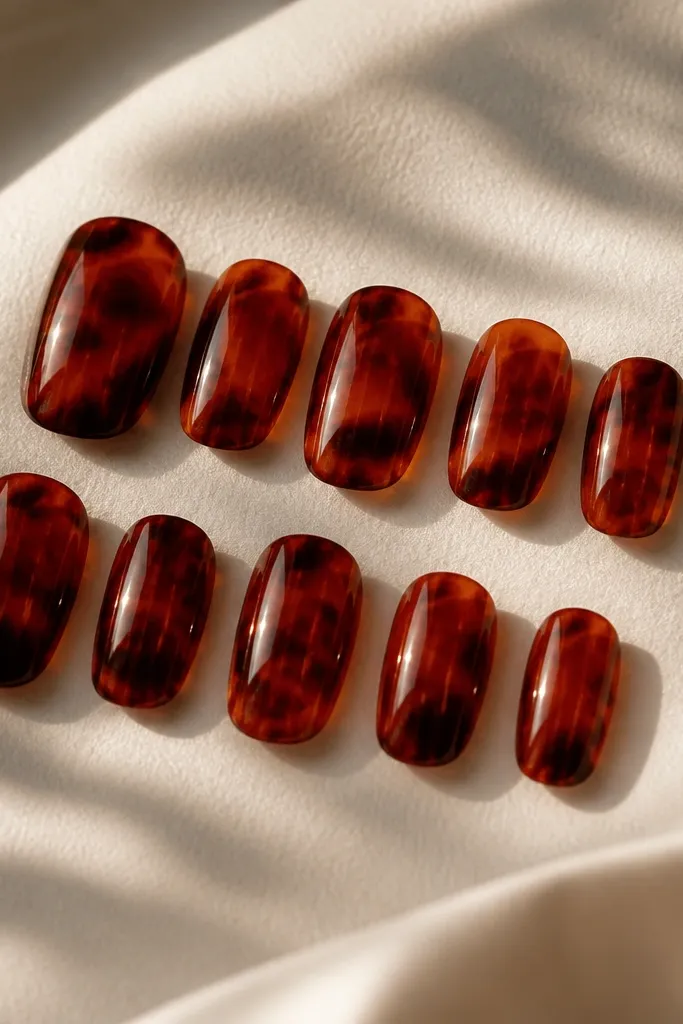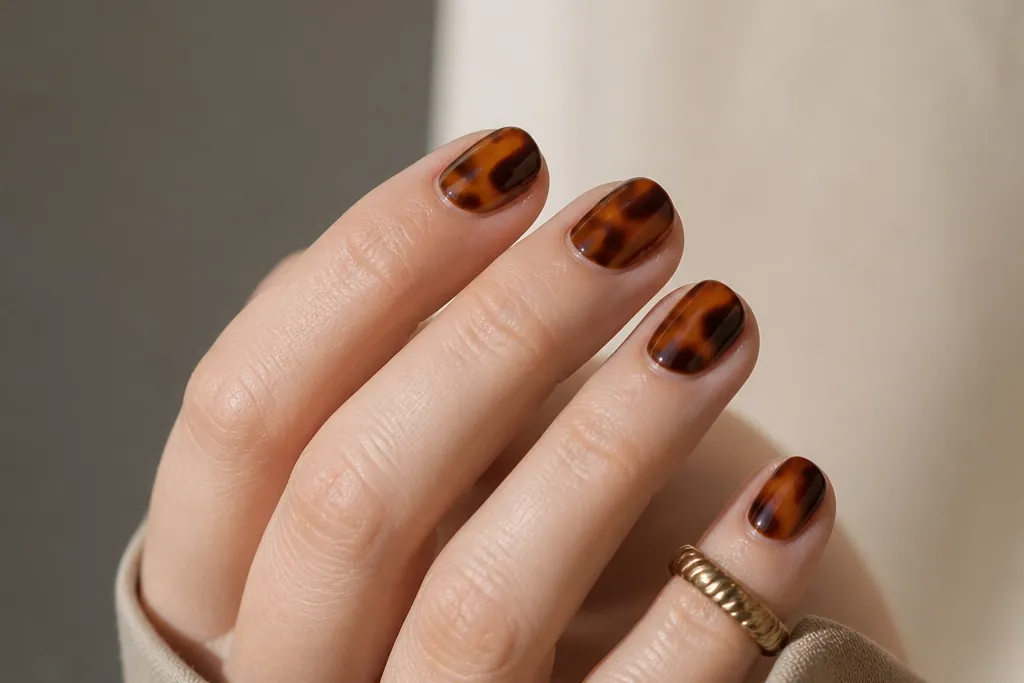
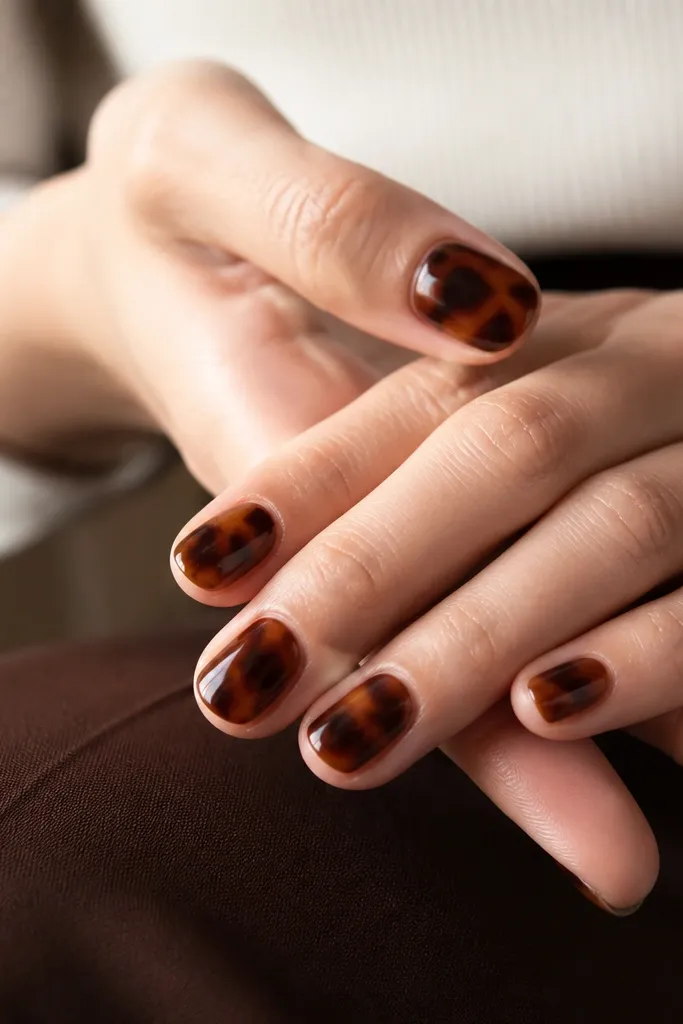
1. Milky Nude Tortoise With Center Dark Veins
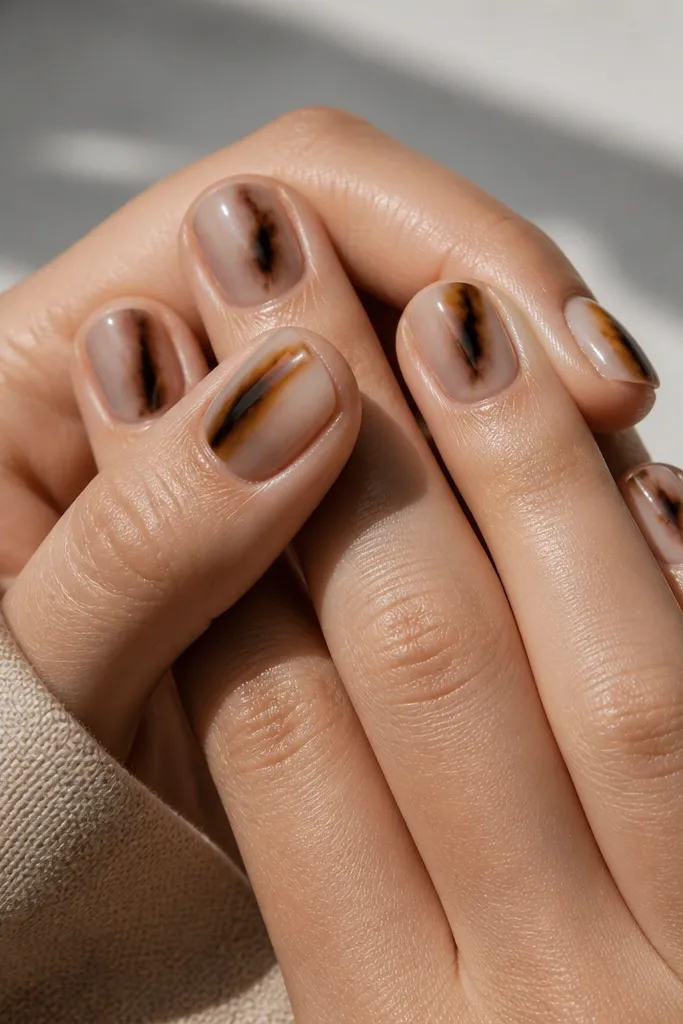
This is the tortoise design I reach for when I want short nails to look “done” without looking busy. The milky nude base makes your skin tone look smoother, and the center dark veins pull the eye inward so your nail bed looks longer. I’ve worn this on medium skin tones and fair skin — the caramel highlights keep it warm instead of gray. It’s also a great choice for work because the pattern reads like natural amber, not loud art.
Start by painting a milky nude base in two thin coats, letting each cure fully. Then use a striping brush to drag a few thin lines of dark brown through the center — don’t bring them all the way to the sidewalls. Add small caramel gaps between the lines so you get marbling, not stripes. Finish by sealing with a thick, glossy top coat that covers the pattern edges cleanly.
Editor's noteIf your tortoise looks flat, add one more thin top coat layer only over the center veins to deepen the look.
Skip thisAvoid letting the dark veins reach the side edges — that’s what makes short tortoise look wider and cheaper.
2. Champagne Tortoise Half-Moon Cuticle Glow
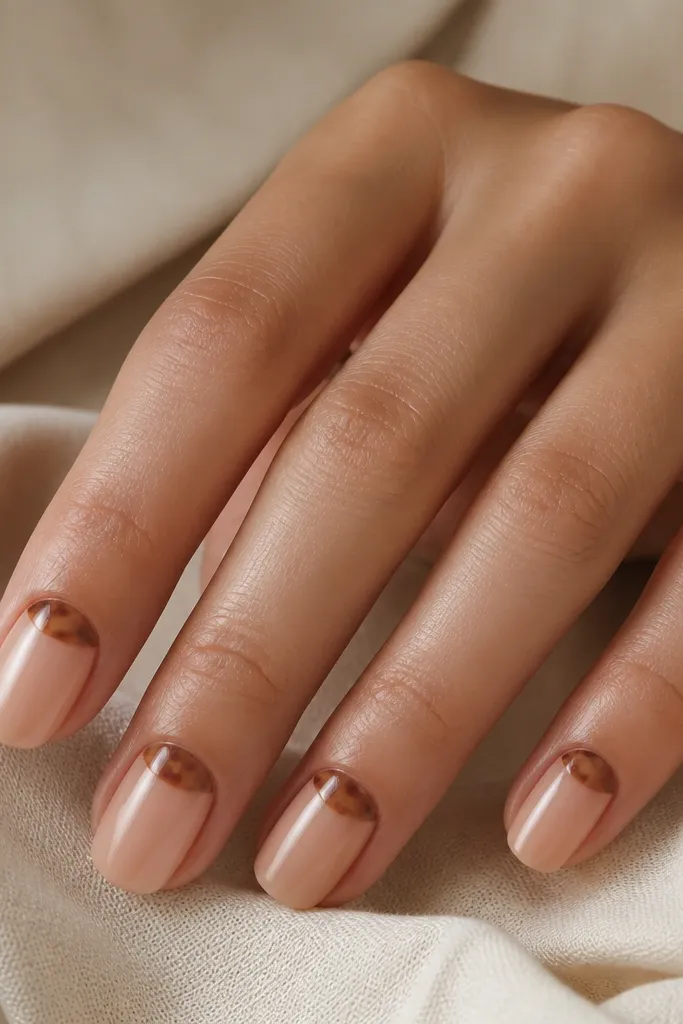
This design makes short nails look intentional because the tortoise is concentrated right where your eye lands — the cuticle area. The champagne base adds warmth, and the half-moon marbling gives that “glow” effect without covering the whole nail. On deeper skin tones, it looks especially luxe because the translucent base catches light and doesn’t overpower. It’s also perfect if you hate full-coverage patterns because you still get the tortoise vibe with less visual weight.
Paint a sheer champagne base in two coats so the nail shows through. Use a small detail brush to create a half-moon of marbling at the cuticle, keeping it about 1/3 of the nail width. Mix light caramel and cocoa-brown dots, then drag them slightly to form tiny cells. Clean up the edges with a brush dipped in alcohol, then seal with a glossy top coat.
Editor's noteAsk your nail tech to keep the half-moon edge crisp — a slightly sharp curve looks more expensive than a blurry one.
Skip thisSkip thick marbling at the cuticle — bulk there makes the nail snag and lifts faster.
3. Reverse French Tortoise Tips
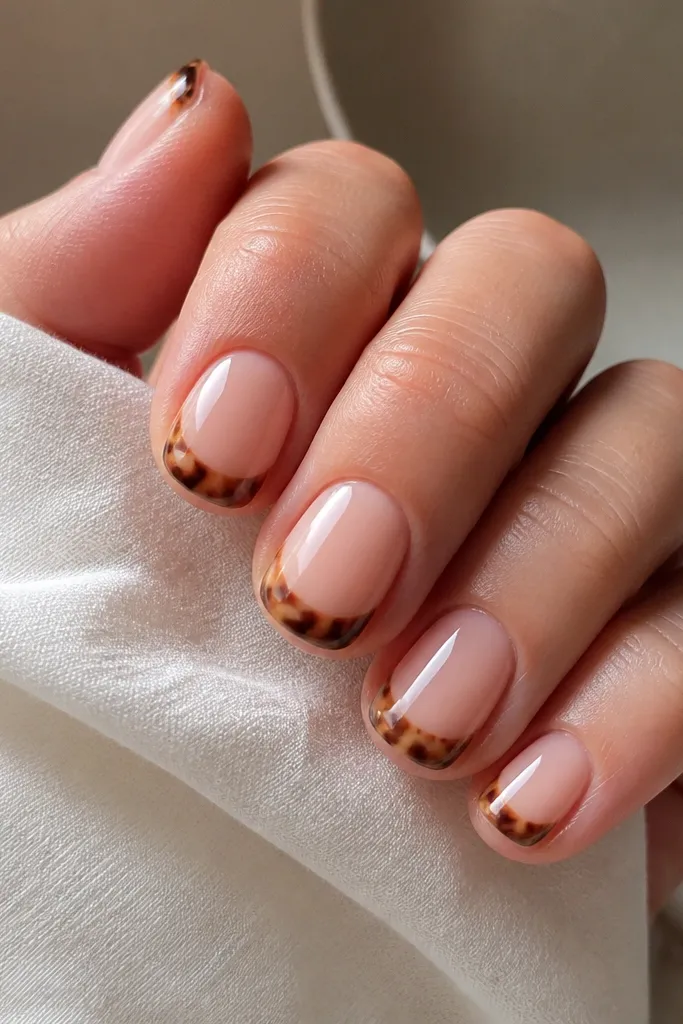
Reverse French tips give you the tortoise look without covering the entire nail bed, which is exactly what keeps it chic on short length. The curved band near the free edge makes your nails look neatly finished, and the nude base keeps the design airy. This works well if your nail beds are shorter because the band frames the tip and adds structure. I like it for events because it looks like nail art, but it still reads wearable.
Start with a nude sheer base and cure. Then map a thin curved band about 1-2 mm above the free edge using a striping brush. Fill that band with tortoise marbling: add honey caramel patches, then tap in cocoa-brown for the darker cells, and blend lightly with the brush tip. Cap the whole nail with glossy top coat, making sure the band edges are sealed so they don’t catch.
Editor's noteUse a nail art tape strip as a guide for the curve, then remove it before curing so the band stays clean.
Skip thisDon’t make the tortoise band too thick — thick bands on short nails look like a heavy sticker.
4. Tortoise With Thin Black Outline Accent
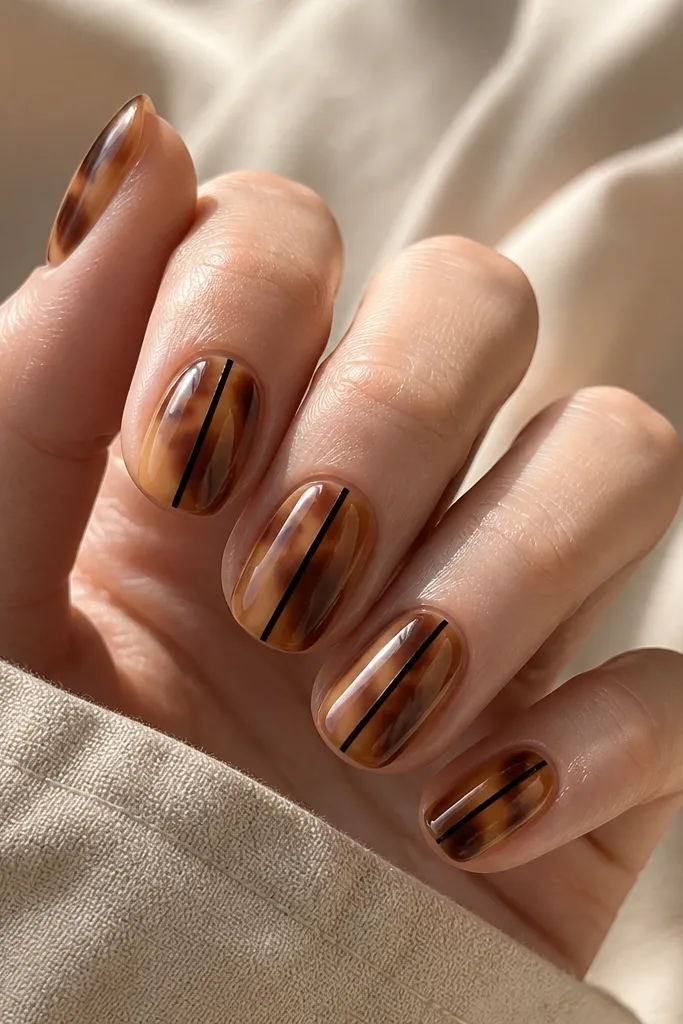
This one is for when you want tortoise to look graphic but still sophisticated. The thin black line acts like framing, so your eye reads the marbling as intentional rather than random. It’s flattering on most skin tones because black adds contrast without needing bright colors. On short nails, the vertical line creates a length illusion, which is why this design works even when you keep your nails short.
Apply a warm beige tortoise base by painting a sheer beige first, then adding small caramel and umber cells with a sponge or dotting tool. Once cured, draw a single thin vertical black line in the center using a fine liner brush. Keep the line straight and stop it about 0.5 mm from the cuticle and tip so it doesn’t look harsh. Finish with a glossy top coat that smooths the line so it looks like part of the gel.
If your black line looks wobbly, don’t redraw — wipe it off quickly with a brush dipped in cleaner and retry once.
Avoid thick black borders — they make short tortoise look like nail stickers from a drugstore.
5. Coffee-Toffee Tortoise All Over With Sheer Pink Fade
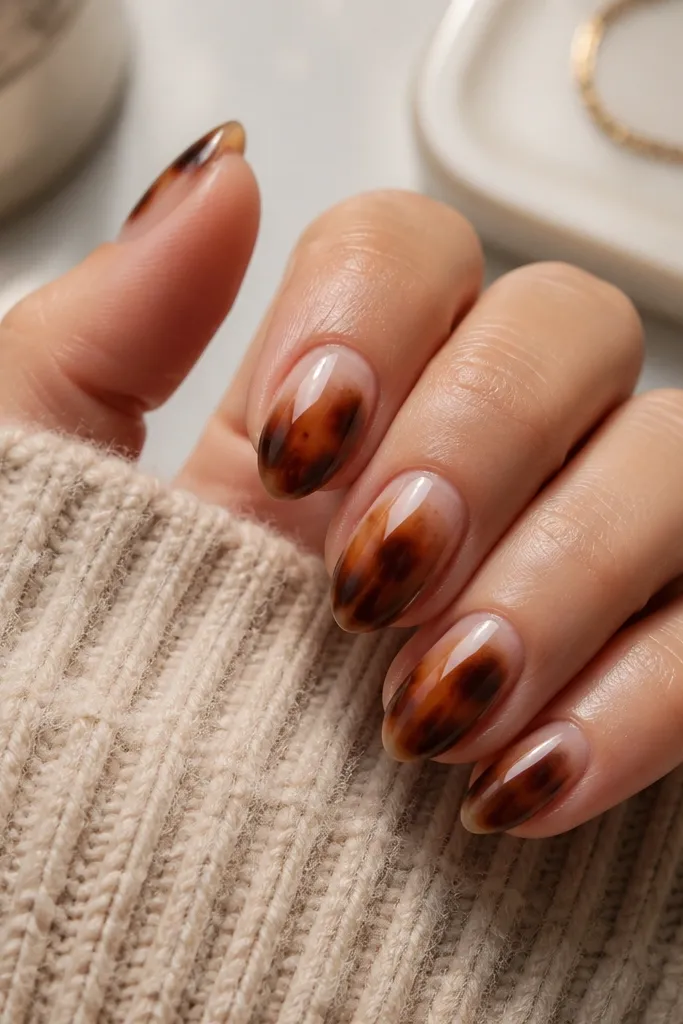
This is the most “wear it with anything” tortoise set I’ve done. The sheer pink fade keeps the design light at the cuticle so it doesn’t feel heavy, while the darker coffee tones build toward the tip. Almond helps too — it gives the tortoise a natural direction, so the marbling looks like it’s flowing. I’ve worn this with gold jewelry and it pairs perfectly because the toffee tones echo warm metal.
Start with a sheer pink base that you apply slightly thicker near the cuticle, then blend it thinner toward the tip. Add tortoise patches using a sponge: dab toffee-gold first, then layer coffee-brown irregular shapes in the center and toward the free edge. Use a thin brush to soften edges so you get marbling rather than blotches. Seal with a glossy top coat, and cap the free edge so the pattern stays smooth.
If your sponge pattern looks too speckled, wipe the sponge on a paper towel once before dabbing.
Skip fully opaque bases — opaque tortoise on short nails can look like a mask.
6. Tortoise Micro-Freckles Over Clear Nude
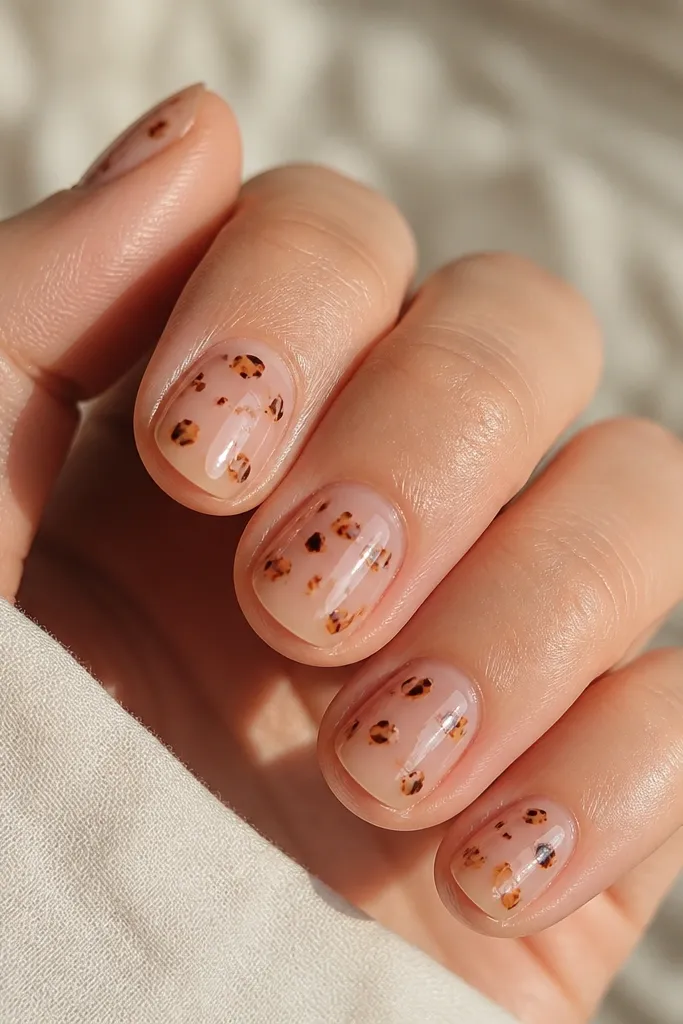
Micro-freckles are the tortoise version of a subtle outfit — it looks chic without demanding attention. A clear nude base makes the nails look fresh, and the tiny pattern keeps your short length from feeling crowded. This is my go-to when I’m between nail shapes or my nails are a little uneven. It also works on fingers with narrower nail beds because the spacing stays airy.
Paint a clear nude base in two thin coats so it looks smooth. Use a dotting tool or the tip of a bobby pin to place tiny caramel dots, then add smaller dark brown dots in between. Drag each dot a hair-width with a fine brush so the dots become tiny cells. Finish with glossy top coat, but don’t overbuild thickness — you want the freckles to sit under the shine.
Use two dot sizes: one for caramel, one for dark brown. That contrast makes the tortoise read instantly.
Don’t cluster freckles at the tips — it makes short nails look like they’re wearing a heavy blot.
7. Golden Tortoise With Copper Leaf Accent
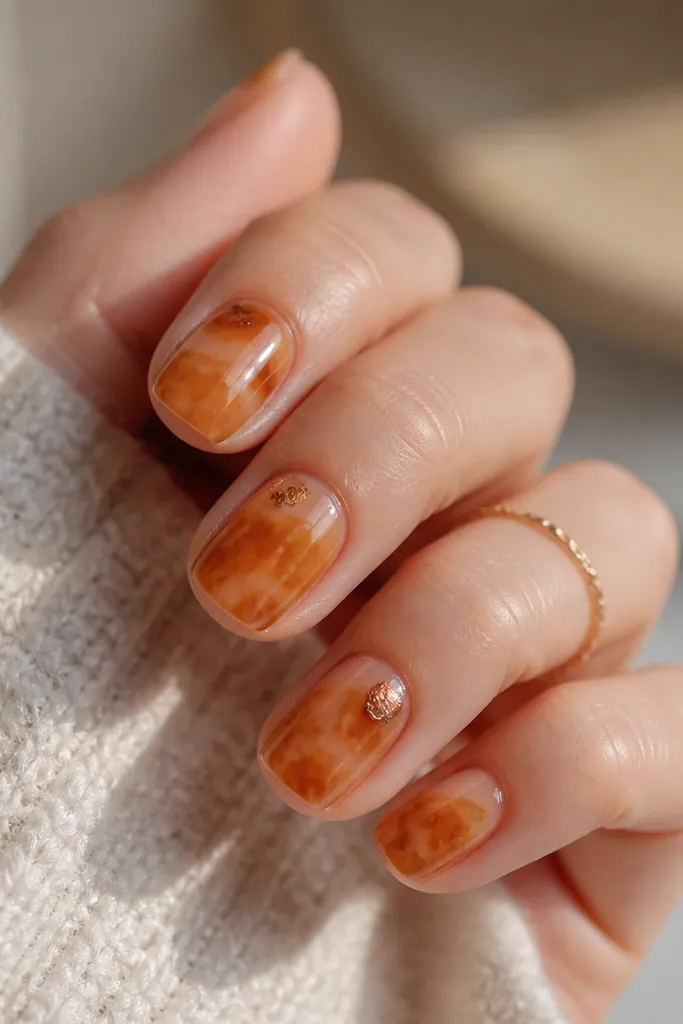
Copper leaf makes tortoise look like it belongs in evening light. The golden honey marbling is warm and bright, and it looks extra flattering with medium to deep skin tones because it reflects heat and doesn’t turn dull. I keep the leaf small and placed near the cuticle so it reads like a design detail, not glitter. This set is perfect for date night, holidays, or any time you want “pretty but grown-up.”
Start with a sheer nude base and cure. Build the golden tortoise by adding honey caramel and thin umber streaks with a fine brush, then soften the transitions with a translucent top coat. Add copper leaf flakes using a tiny amount of tacky gel near the cuticle on select nails only. Seal everything with one or two glossy top coats, pressing gently around the leaf so it doesn’t snag.
Editor's noteCut copper leaf into smaller pieces with clean scissors — tiny flakes look more expensive on short nails.
Skip thisAvoid covering every nail in leaf — it turns the set into festival glitter instead of chic tortoise.
8. Tortoise Gradient From Cuticle to Tip
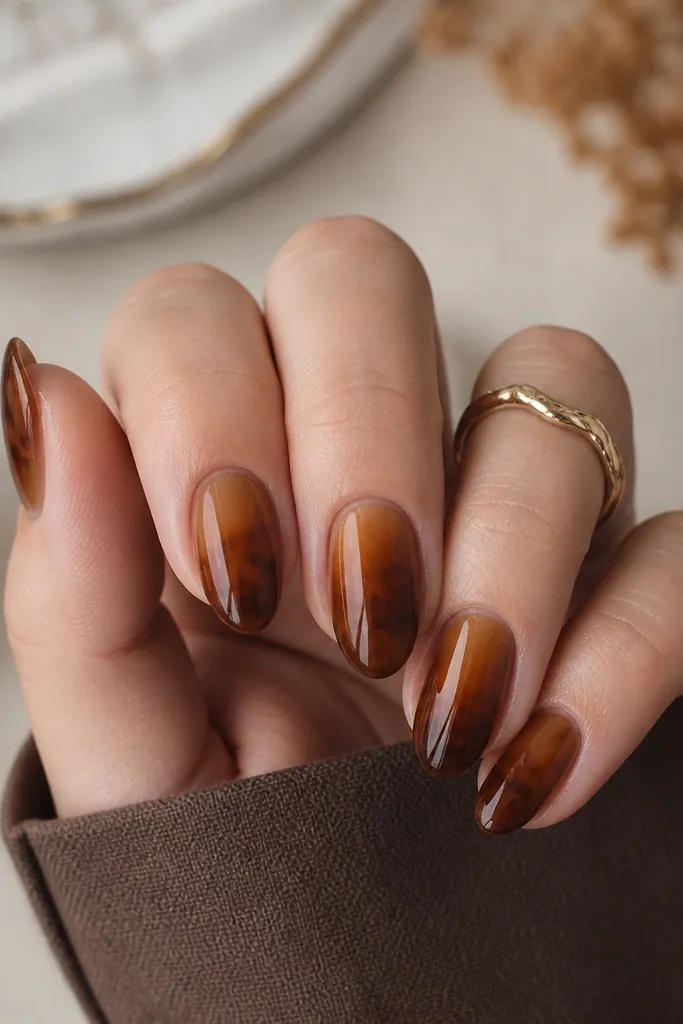
A gradient tortoise is the fastest way to make short nails look longer because the darkest tone sits at the tip and pulls the eye downward. The lighter caramel near the cuticle keeps it soft and flattering, which matters on short length where harsh contrast can look heavy. This looks amazing on fair skin because the caramel glow adds warmth without going orange. I also love it for people who want tortoise but hate random patterns.
Apply a sheer nude base and cure. Sponge or brush on a light caramel tortoise layer near the cuticle, then add espresso-brown marbling closer to the free edge. Blend between them with a translucent top coat — don’t keep adding opaque paint, or the gradient turns chalky. Finish with glossy top coat, then gently buff the surface only if you need to remove texture.
Editor's noteBlend with top coat while it’s still slightly tacky — you get smoother transitions than with fully cured gel.
Skip thisSkip hard lines between caramel and espresso — that’s what makes it look like two separate stickers.
9. Tortoise Side Swipe On Short Squoval
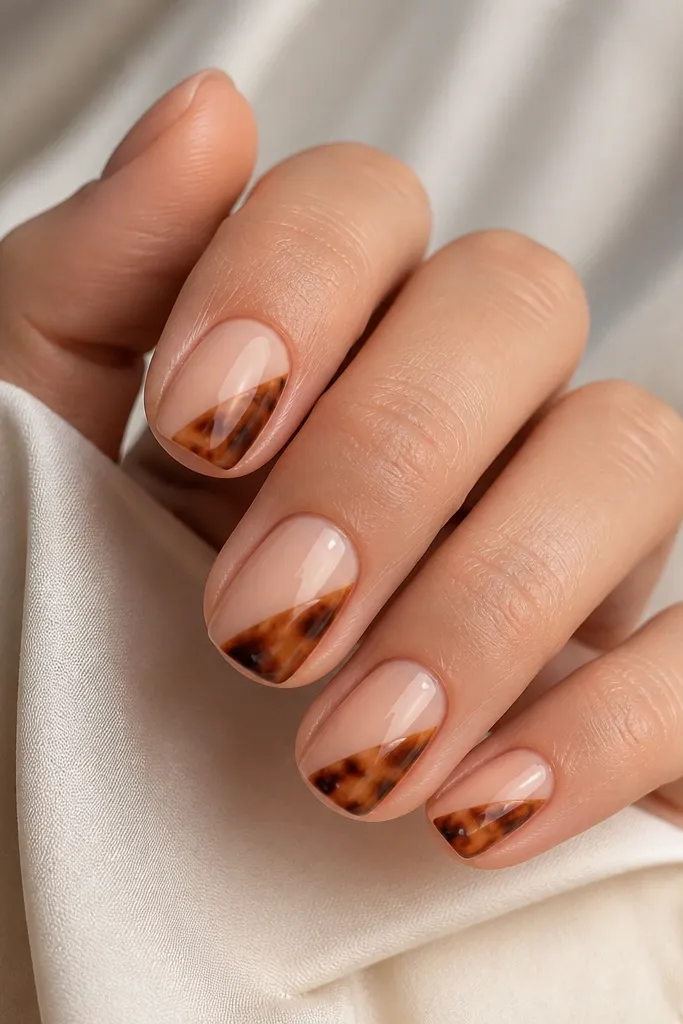
Side-swipe tortoise is my pick for making nails look slimmer. By placing the pattern off-center, you create negative space on the opposite side, which is where the “chic” look comes from. It’s especially flattering if you have wider nail beds or you feel your nails look thick. The diagonal angle also makes your hands look more dynamic without needing long length.
Paint a nude base and cure. Then place a diagonal guide line with a striping brush from the outer side around halfway up to the tip corner. Fill that diagonal area with tortoise marbling: caramel first, then add dark brown patches and drag the edges slightly. Seal with glossy top coat, and cap the diagonal edge so it doesn’t lift.
Editor's noteKeep the swipe width about 1/3 of the nail — wider looks busy on short nails.
Skip thisDon’t center the swipe — centered tortoise on short squoval can look bulky.
10. Matte Tortoise With Glossy Center Dot
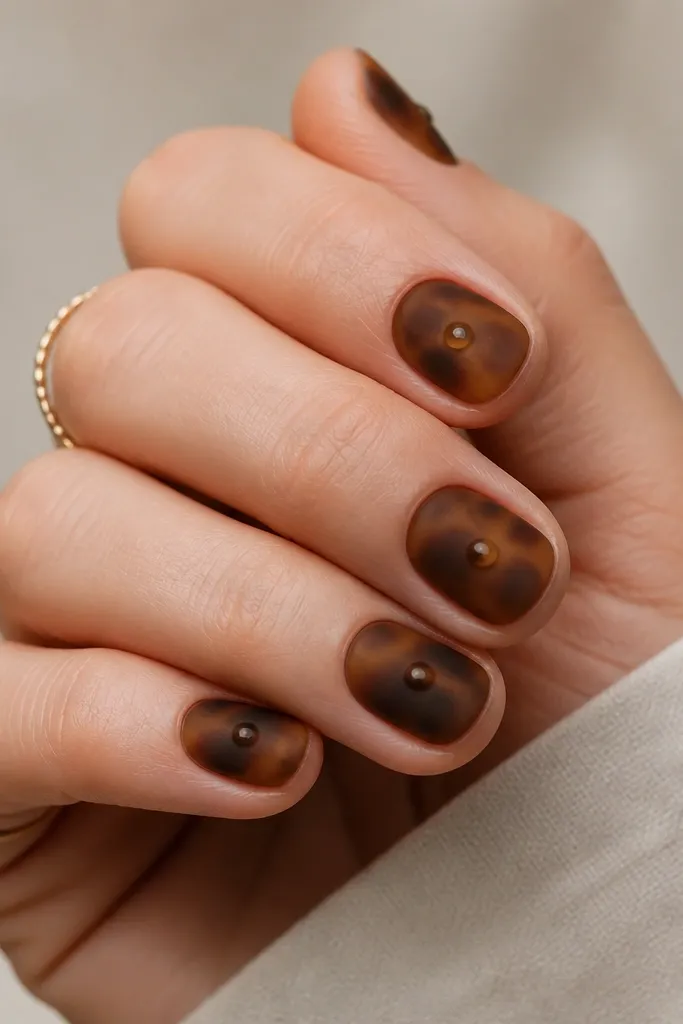
This is the contrast trick that makes tortoise feel modern. Matte tortoise looks soft and expensive, but it can lose “depth” if it’s all one finish. The glossy center dot gives a highlight that makes the marbling feel dimensional, even on short nails. I like it on fair to medium skin tones because the matte finish keeps everything calm, and the glossy dot adds a focal point. It also works for people who hate high-shine nails.
Start with your tortoise design on a sheer nude base and cure it glossy first. Then apply a matte top coat over the whole nail and cure. Take a small amount of clear gel and place a tiny dot in the center of each nail — keep it smaller than a rice grain. Cure again, then check the dot is smooth and domed by running a finger over it lightly.
Editor's noteUse a toothpick for the dot if your brush keeps flooding — you want pinpoint control.
Skip thisDon’t put the glossy dot near the cuticle — it can look like a mistake on short nails.
11. Tortoise With Micro French Tip Line
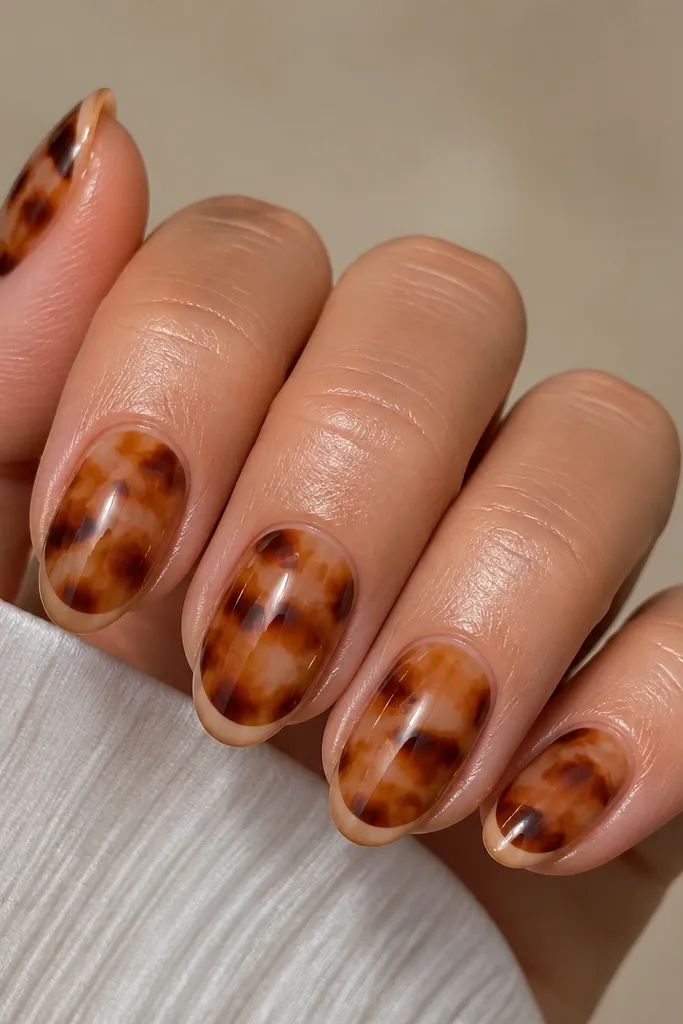
Micro French lines make short nails look neatly finished, and they keep tortoise from feeling chaotic. The tortoise fills the nail, while the thin nude line at the tip adds structure and prevents the pattern from spilling visually into the free edge. This looks great on almond because the tip line follows the natural taper. I’ve worn this with both silver and gold jewelry; the warm tortoise tones make metals look intentional either way.
Build your tortoise marbling over a sheer warm beige base and cure. Use a fine liner brush to paint a thin nude line right at the very tip edge, leaving a tiny gap from the sidewalls. Clean it up with a cotton swab dipped in cleaner so it stays crisp. Seal the whole nail with glossy top coat, then check that the top coat doesn’t blur the line.
Editor's noteIf your tip line looks wobbly, rest your hand on a table and pull the brush in one steady stroke.
Skip thisAvoid a thick French band — it competes with tortoise on short length.
12. Tortoise Aura Around the Cuticle
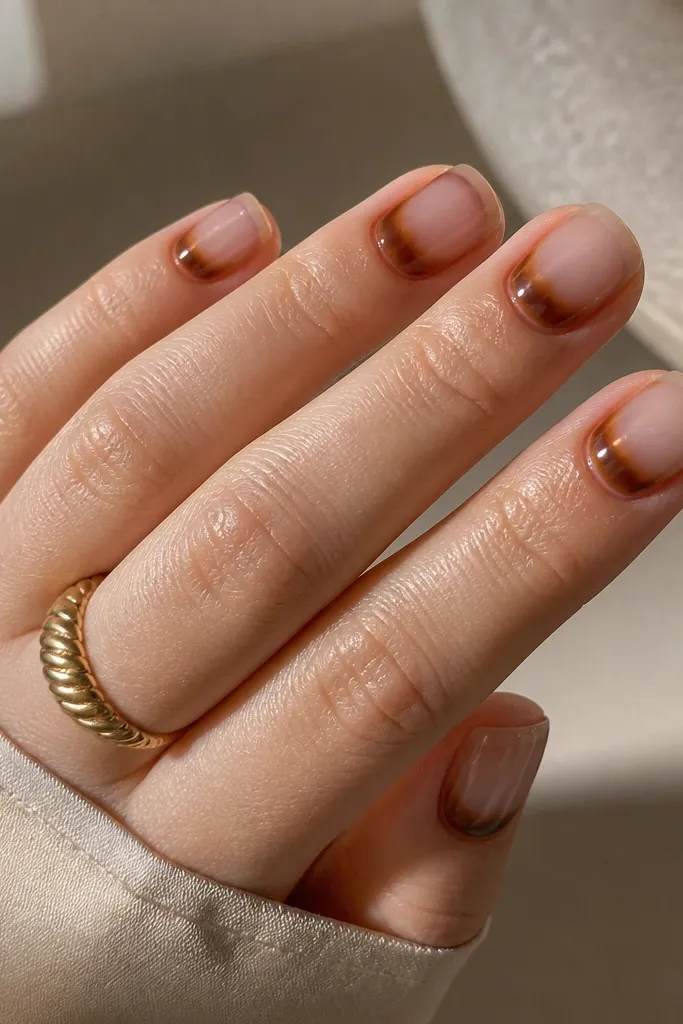
Aura placement is a gentle way to do tortoise when you want a “glow” without full coverage. The ring around the cuticle makes your nails look like they have a soft halo, which is flattering on both short and slightly wide nail beds. I like this for everyday because it grows out nicely — the aura is near the base, so regrowth still looks intentional. The sheer negative space keeps the set from looking heavy.
Start with a sheer nude base and cure. Sponge a light caramel haze around the cuticle in a ring, then add a darker brown haze only at the center of the ring so it fades out. Use a small brush to pull the edges outward so the aura looks soft, not stamped. Finish with glossy top coat, focusing on sealing the cuticle area so the sponge texture smooths out.
Do two light sponge passes instead of one heavy one — you get better fade control on short nails.
Skip opaque coverage through the center — that’s what turns aura into a blob.
13. Tortoise Checker Edge On One Side
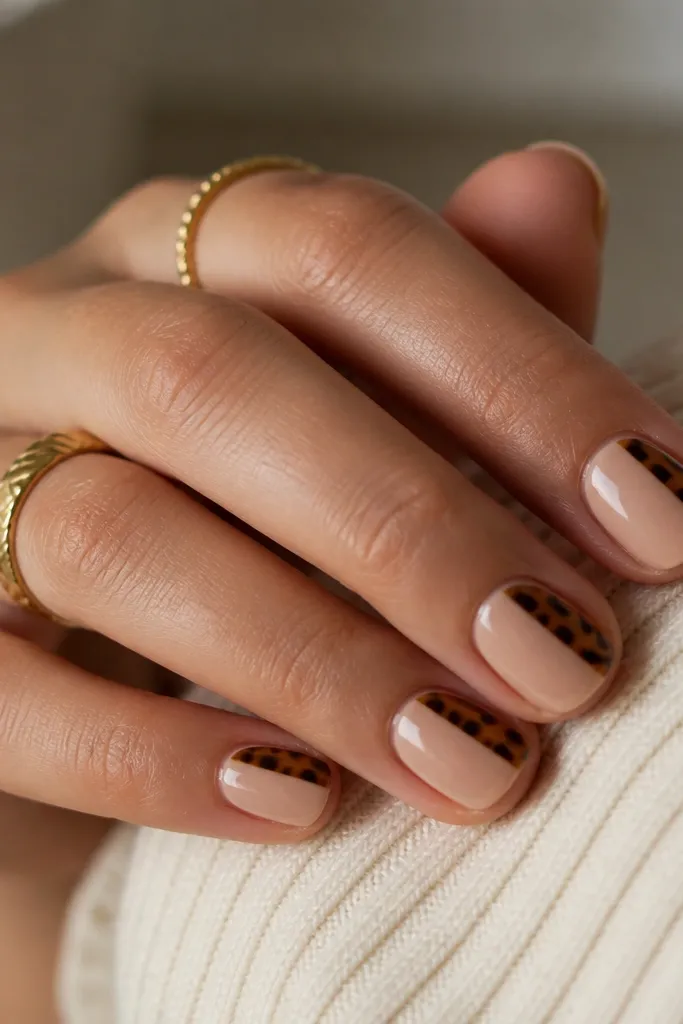
A single-side checker edge is subtle, but it changes the whole vibe. The pattern sits where your eye expects detail, and the plain nude area keeps it sophisticated. This works especially well if your nails grow with slight asymmetry because you’re not trying to make the whole nail match perfectly. I’ve done it with both medium and fair skin tones and it always reads warm and clean because the base stays sheer.
Paint a warm nude base and cure. Then create a vertical strip on one side using a dotting tool: place small caramel cells, add dark brown cells between them, and connect them with tiny softened edges using a toothpick. Keep the strip width to about 1-2 mm on short nails. Seal with glossy top coat, and cap the strip edges so they don’t catch on clothing.
Editor's noteUse a toothpick to blend only the corners of cells — blending too much turns it into random smears.
Skip thisDon’t add checker pattern to the whole nail — it looks like a print overkill on short length.
14. Tortoise Marble With Clear Negative Cuticle Frame
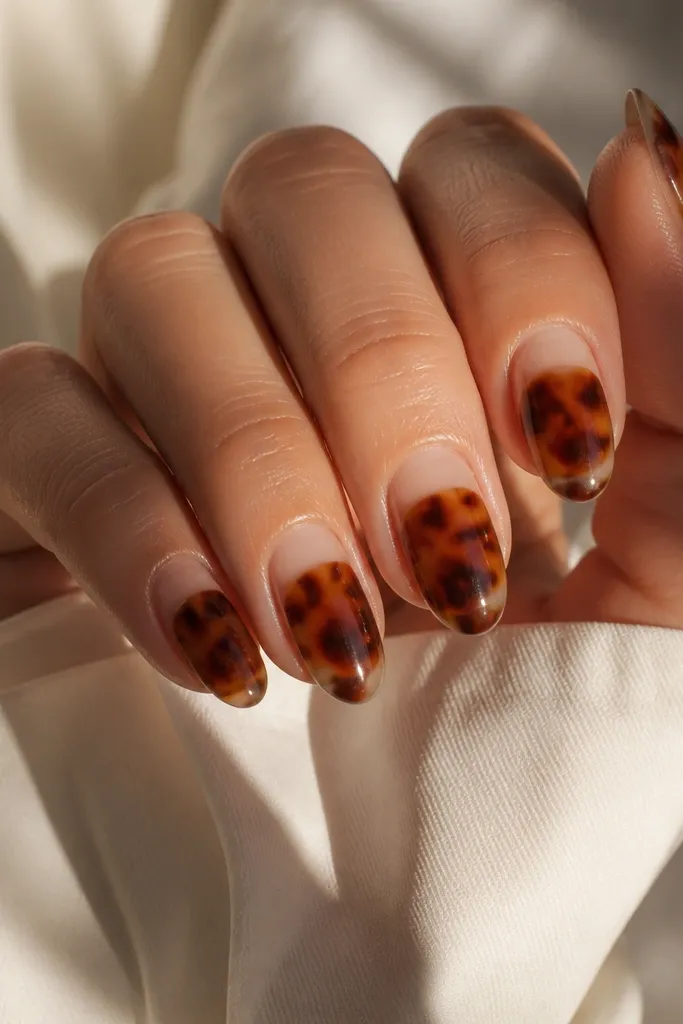
Clear negative cuticle frames are the trick to making tortoise look tailored. The transparency keeps the design light, and the tortoise marble in the center gives it the classic aged-amber look. This is flattering on hands where the cuticle area gets dry or uneven because the frame makes it look intentional. I also like it for photos because the negative space catches light and makes the marbling pop.
Start by prepping and applying a sheer nude base that stops short of the cuticle, leaving a small clear window. Add tortoise marble across the center: brush in caramel streaks, tap in dark brown cells, and then soften with a translucent layer. Keep the darkest tones toward the middle and slightly toward the tip. Finish with glossy top coat over the marbling only, leaving the clear window truly clear so it stays crisp.
Use a small gel brush to clean the cuticle window edges before curing — that crisp border is the whole look.
Avoid flooding top coat into the clear window — it turns the frame cloudy.
15. Tortoise With Rose Quartz Pink Highlights
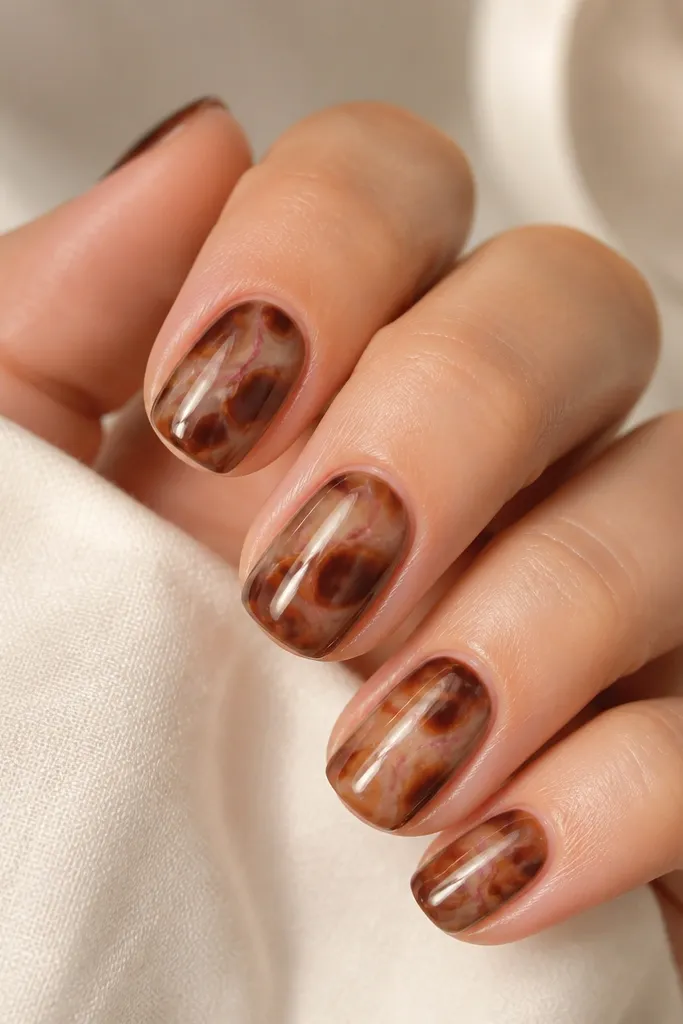
Adding rose quartz highlights makes tortoise look romantic without turning it into full pink nail art. The pink streaks sit on top of the warm base tones, so they read like natural inclusions, not neon accents. This is flattering on fair to medium skin because the pink adds a soft glow near the nail bed. I also like it for spring and summer because it looks warmer than plain nude.
Apply a warm beige sheer base and cure. Paint tortoise marbling with caramel and espresso in thin strokes so the pattern is scaled for short nails. On select nails, drag a few ultra-thin rose quartz pink streaks through the marbling, keeping them subtle and irregular. Seal with glossy top coat, then check that the pink streaks are smooth and not raised.
Editor's noteUse a sheer pink gel for the highlights — opaque pink looks like paint over tortoise.
Skip thisAvoid heavy pink coverage — too much pink makes the set look like a themed manicure instead of chic tortoise.