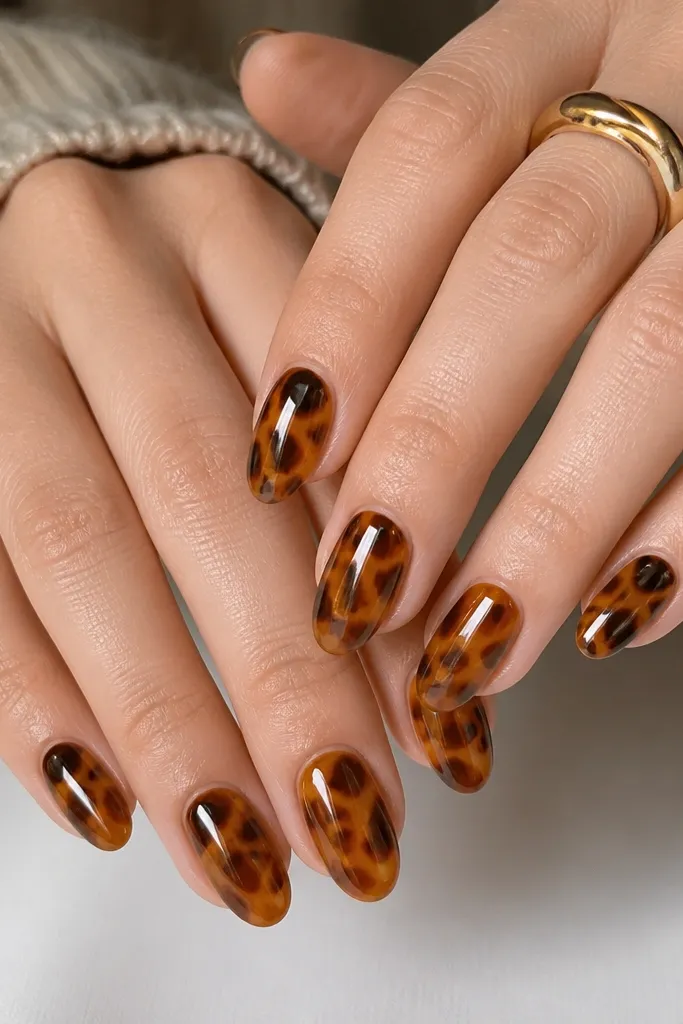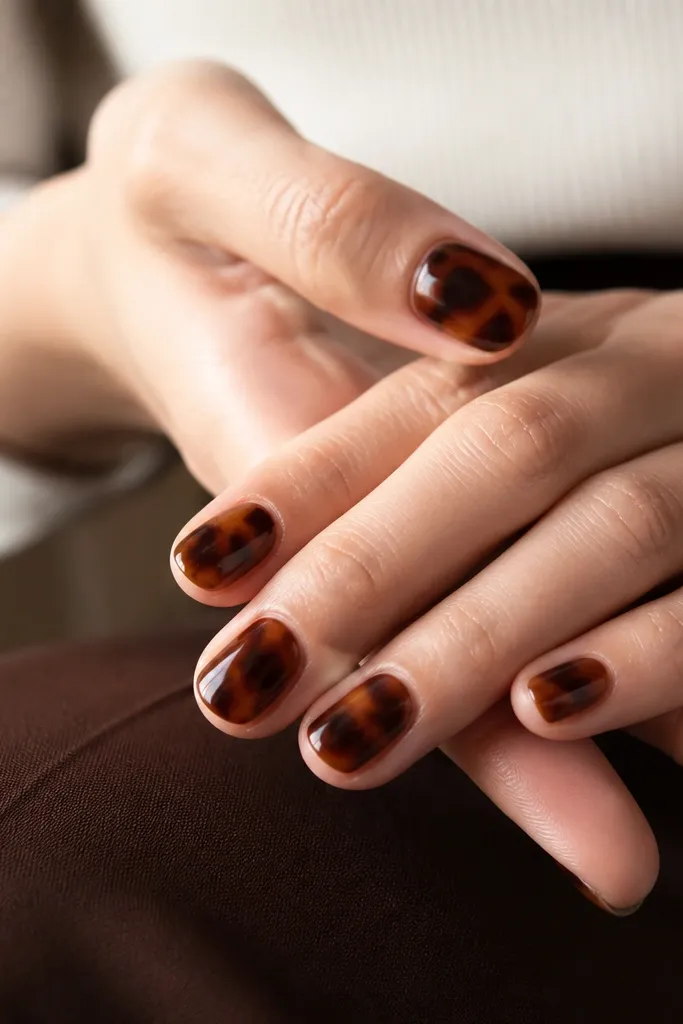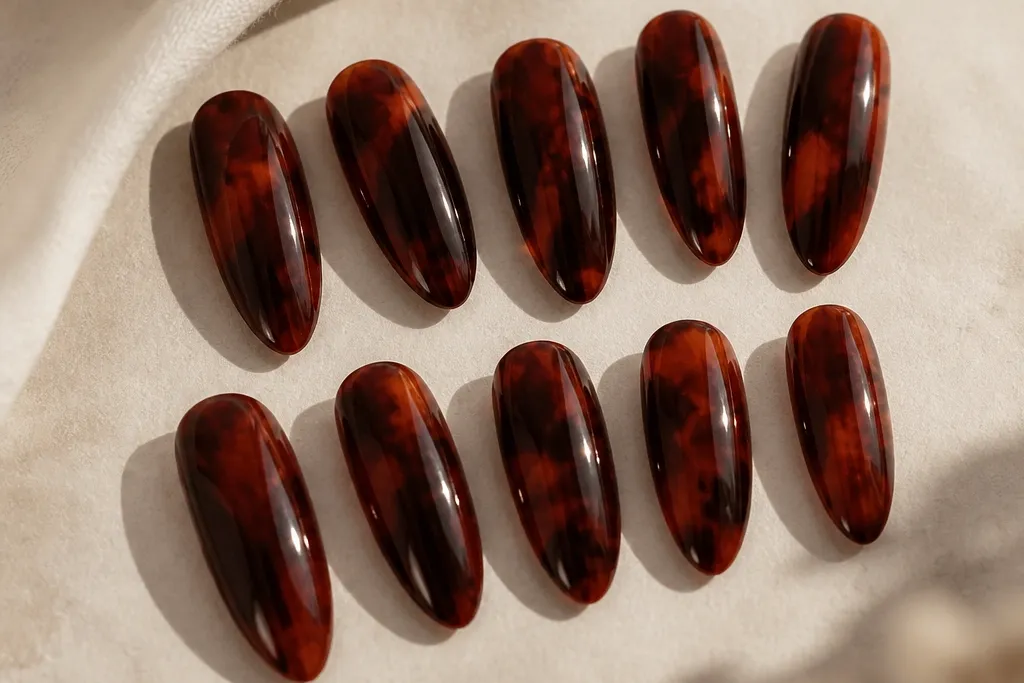
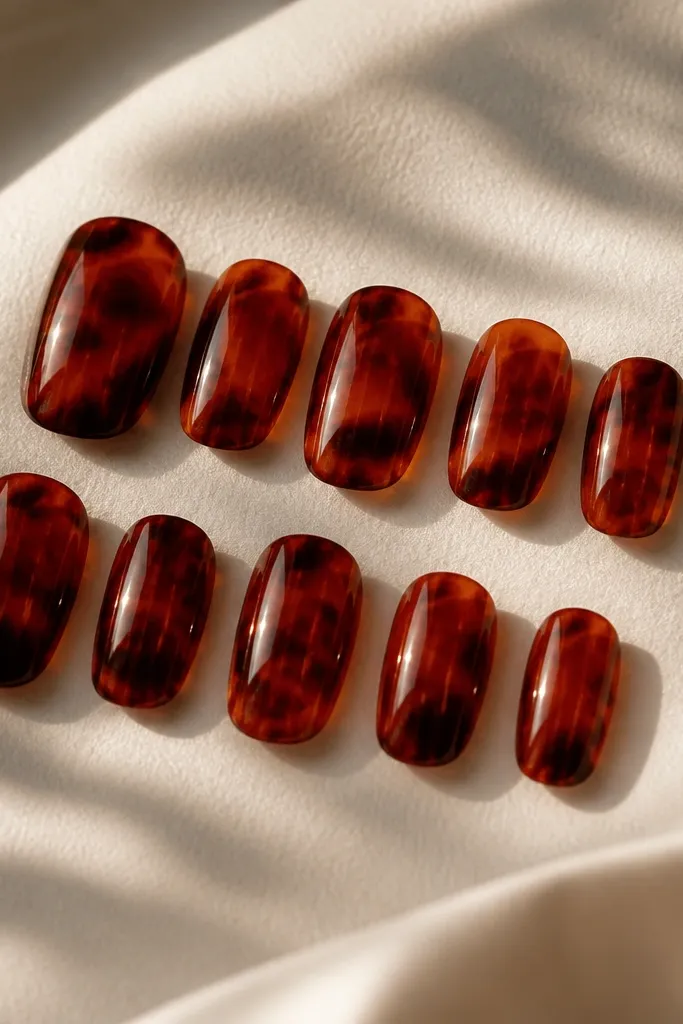
1. Free-Edge Brick Tortoise with Micro Black Veins
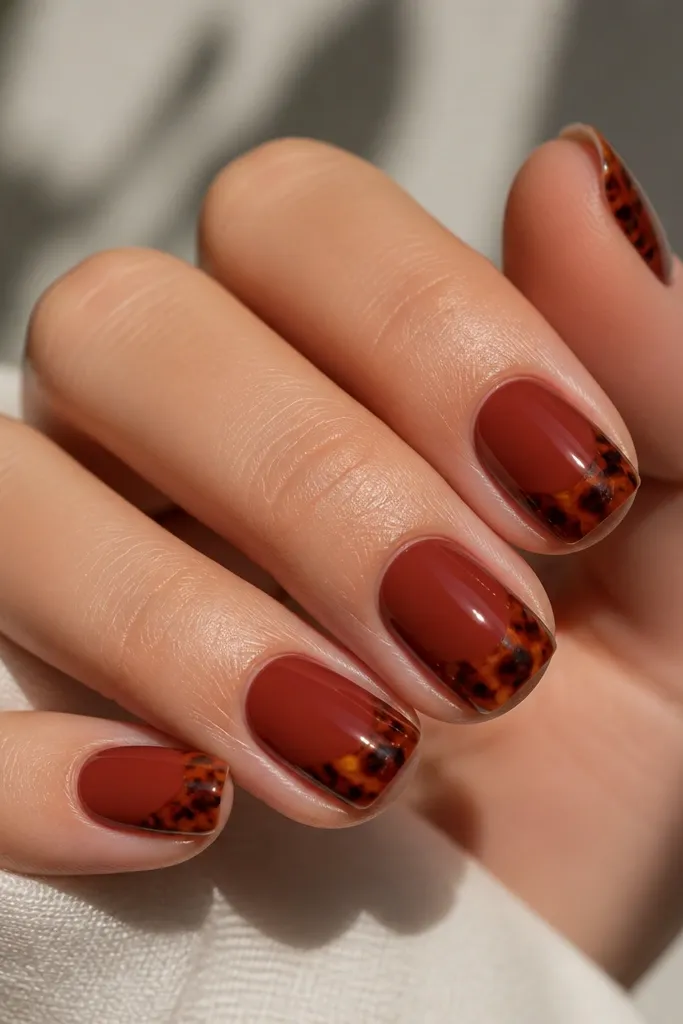
Start by painting a brick-red jelly base and curing or drying fully. Then paint 2-3 small tortoise islands at the very tip of the nail, staying away from the sidewalls by about half a millimeter. Use a dotting tool or the tip of a striping brush to drag tiny black-brown lines from each island, keeping them thin and slightly curved. Finish by sealing with a glossy top coat in two passes — one thin pass to lock the pattern, and a second slightly thicker pass on the free edge.
This one is for when you want tortoise to look bold but still neat on shorter nails. The base is a brick-red that reads warm against fair and medium skin tones, and the shell only starts at the free edge so the nail bed looks longer. I use darker maroon islands and then add micro black veins with a detail brush — the thin lines make it look like real shell, not a blob. It flatters hands with shorter nail beds and also looks great on olive skin because the red stays warm instead of turning pink.
Skip thisAvoid letting the tortoise islands reach the cuticle — it makes short nails look even shorter.
Editor's noteIf your lines look shaky, rest your hand on a table and do the veins in one direction only so they look intentional.
2. Center Shell Fade in Wine-Red with Caramel Highlights
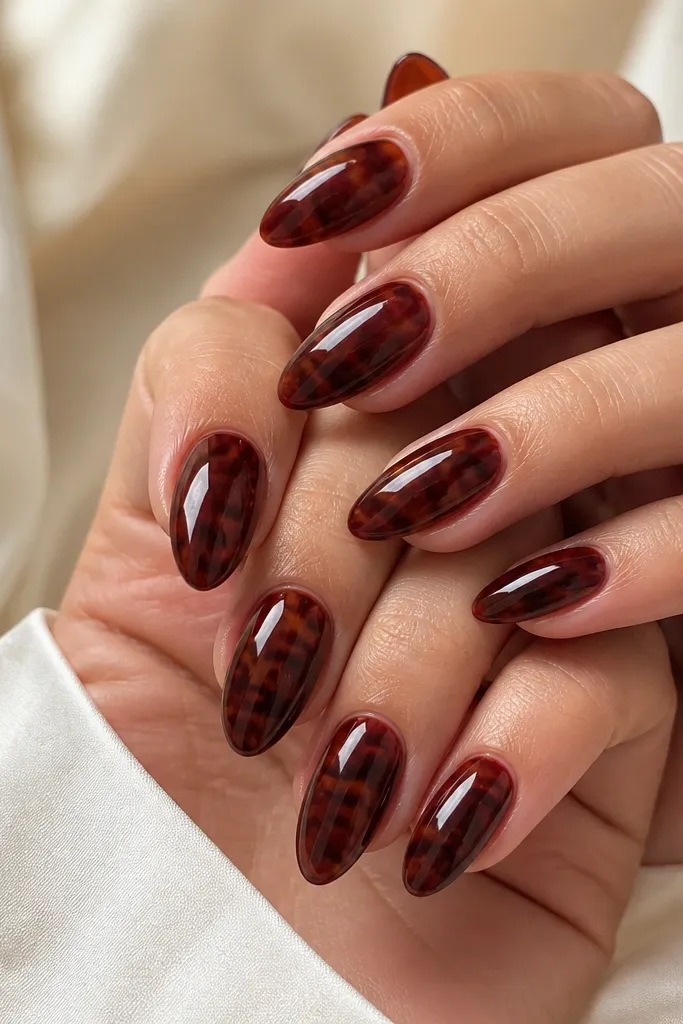
This design is flattering when you want the tortoise to feel airy instead of heavy. The wine-red base gives that “old-world” warmth, and the caramel highlights add a sun-kissed glow that looks good on both cool and warm undertones. The center placement elongates the nail visually because your eye tracks through the middle where the contrast is strongest. I’ve worn this to dinners and it reads polished even with minimal jewelry because the highlights catch the light.
Apply a wine-red creme base and cure it completely. Next, use a thin brush to paint darker maroon shell islands in the center third of the nail, leaving a clean red margin near the cuticle and sidewalls. Add small caramel wisps between the islands — keep them like thin smoke trails, not thick stripes. Finally, blend the edges by lightly tapping with a clean sponge around the border of the pattern, then seal with a glossy top coat.
Use a sponge for blending only at the edges — keep the center crisp so the pattern doesn’t smear.
Don’t add caramel all over the nail; it turns the tortoise into a patchwork of highlights.
3. Black-Brown Rim Tortoise on Glossy Ruby
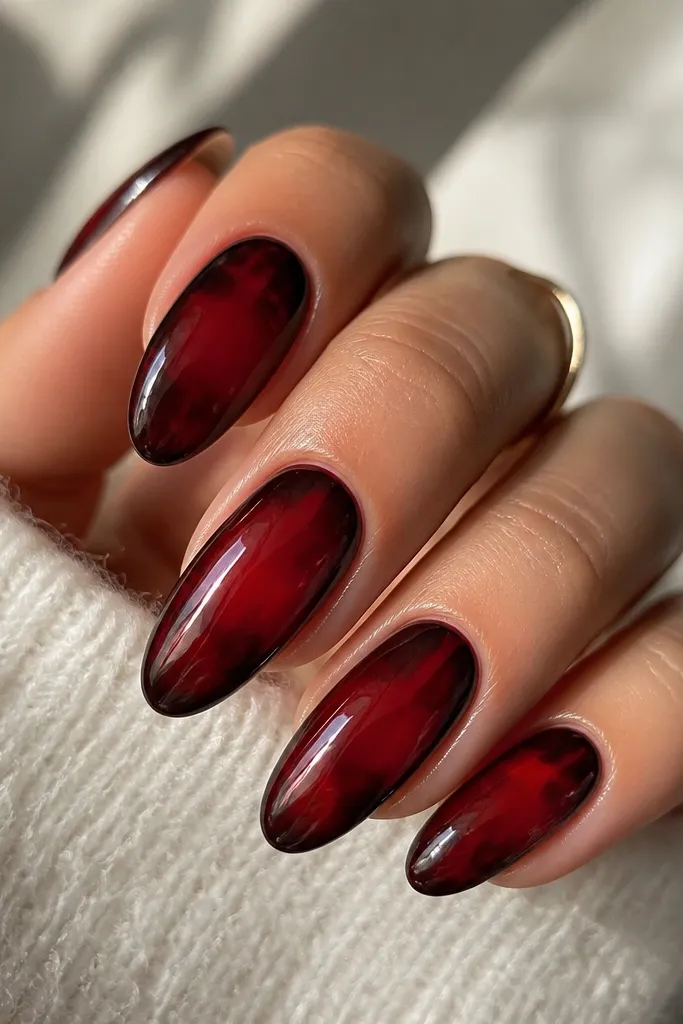
This is my go-to when I want tortoise to look structured instead of organic. A glossy ruby base keeps the color saturated, and the black-brown rim creates a frame that makes nails look sharper and more defined. It’s especially flattering on long oval nails because the rim follows the nail’s natural shape. On darker skin tones, the black-brown framing makes the red look crisp; on fair skin, it prevents the red from looking too bright or candy-like.
Paint a glossy ruby-red base and cure it so it’s fully smooth. Then outline the sidewalls and free edge with a very thin black-brown line, staying just inside the edge of the nail. Fill the framed area with maroon tortoise islands, leaving a small center window of ruby so the design breathes. Top coat twice, with extra attention to the rim area so the edges feel perfectly smooth.
If your rim looks thick, wipe the brush on a lint-free wipe and re-trace the line thinner — the second pass is where it gets clean.
Skip matte for this one; matte makes the rim look chalky and less dimensional.
4. Tortoise Confetti on Sheer Red Jelly
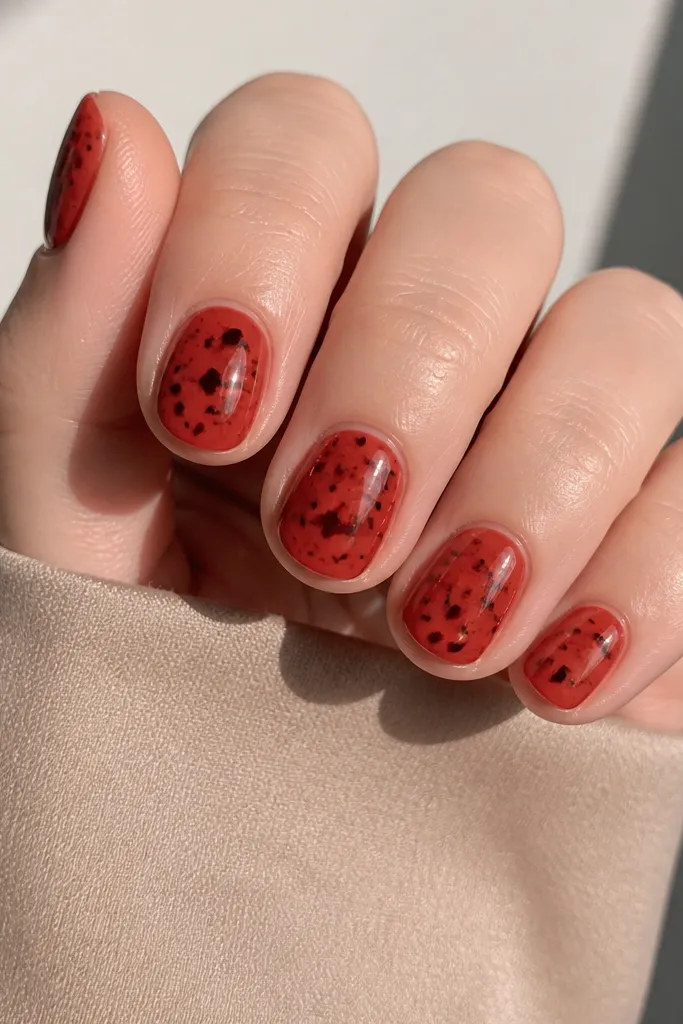
If you want tortoise that looks cute instead of intense, this is it. The sheer red jelly base keeps everything light, and the confetti-style tortoise pieces stay small so the nail still looks neat. I like this for everyday wear because it doesn’t scream “pattern” — it just adds detail. It flatters small nails and works across skin tones because the negative space prevents the red from overwhelming your hand.
Start with a sheer red jelly and cure it in a thin layer so it doesn’t pool. Then use a dotting tool to place tiny maroon-brown tortoise fragments across the nail, leaving about half the nail showing red jelly. Add a few micro black dots between fragments for contrast, then use a fine brush to soften the edges of the biggest fragments with a tap. Finish with one careful thick top coat to smooth everything out without flooding the negative space.
Keep the fragments under 1 mm — if they grow, it stops reading as confetti and starts reading as clutter.
Don’t paint a full tortoise block on sheer base; it kills the airy look.
5. Red Tortoise French Tips with Thin Brown Outline
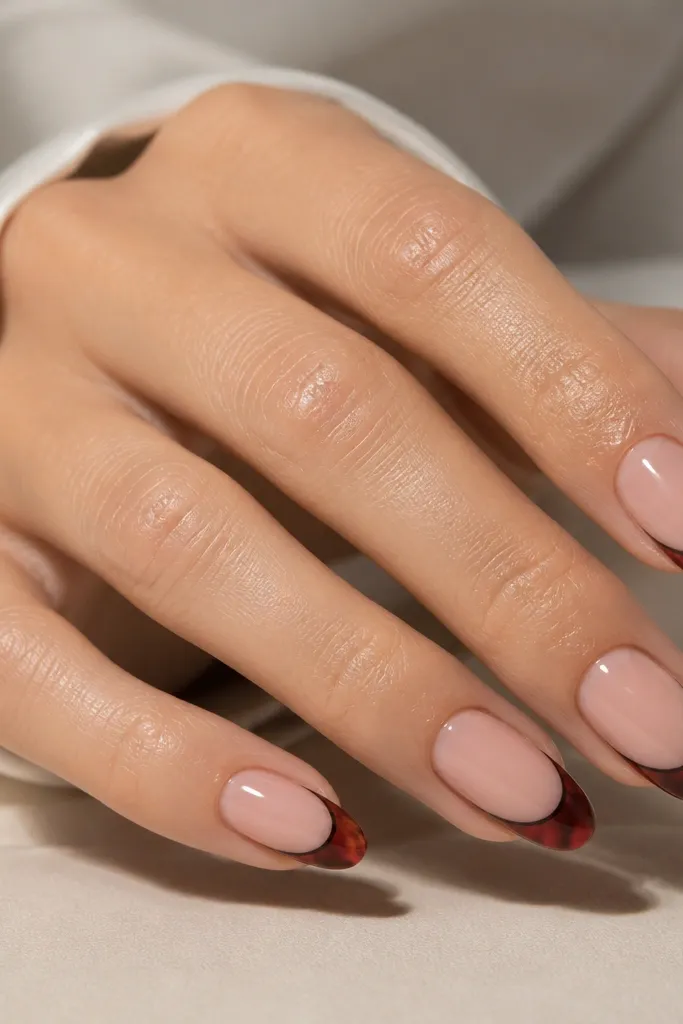
This one looks expensive because it keeps the classic French structure but swaps in tortoise texture. The nude-pink base makes your red tips look intentional, and the thin brown outline gives the tip a crisp border that your eye reads instantly. It’s great for occasions like weddings or holiday parties where you want something fresh but still “clean.” On hands with warmer undertones, the red looks harmonious; on cooler undertones, the brown outline keeps the palette grounded.
Apply a nude-pink base and cure it, then mark your smile line lightly with a guide sticker or by eye. Paint the French tip area with red (brick or ruby), then add maroon tortoise islands inside the tip, keeping them confined to the tip zone. Use a thin striping brush to trace a brown outline just along the smile line so the edges look sharp. Seal with top coat, and run the brush along the tip edge to lock the outline.
If your smile line is uneven, fix it with the outline — the brown line hides small dips better than red polish does.
Don’t put tortoise islands all the way to the sidewalls; it blurs the French shape.
6. Glossy Maroon Shell Waves on True Red
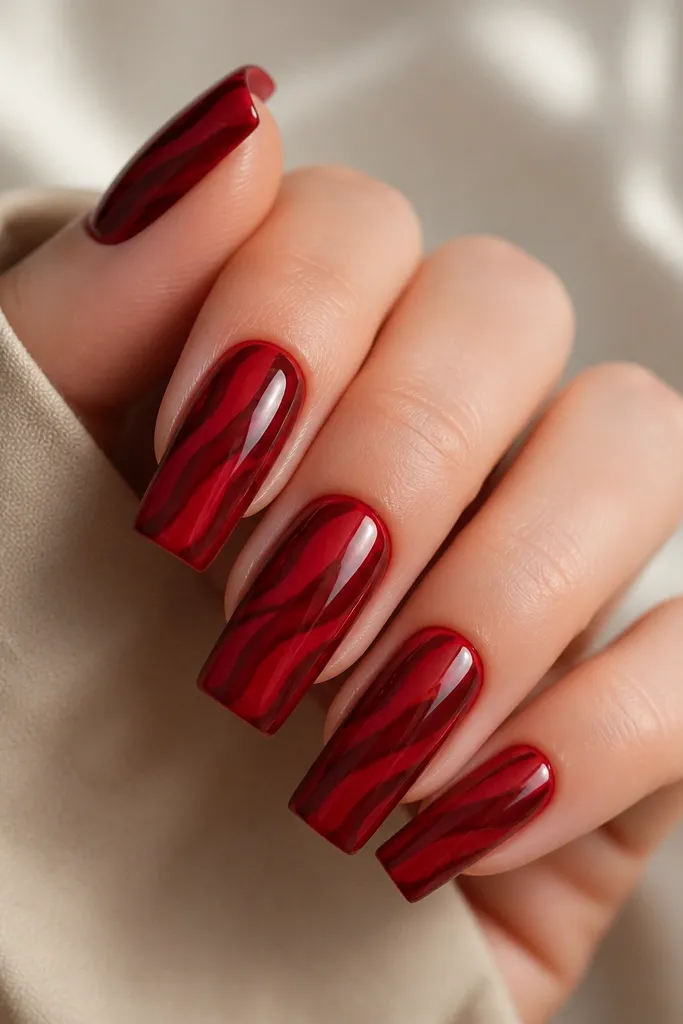
This design moves your tortoise pattern like fabric — waves instead of patches. A true red base gives a clean, classic tone that doesn’t shift orange under indoor light, and the maroon wave bands add depth. I like it on long square nails because the straight edges give the waves a sharper path, and it looks bold without needing heavy glitter. It also flatters hands with longer fingers because the wave direction emphasizes length.
Paint a true red base in two thin coats so it stays even and glossy. Then, starting near the cuticle, paint maroon shell waves with a fine brush — think of 2-3 sweeping bands rather than scattered islands. Add small black-brown shading between bands to create a “shadowed shell” look. Finally, top coat in two layers, and check the surface under a lamp — you want it smooth, not textured.
Use a striping brush for the waves; a flat brush makes the edges too thick.
Don’t crowd the waves close together — leave some true red showing so it reads as wave movement.
7. Tortoise Ombre at the Cuticle in Red and Cocoa Brown
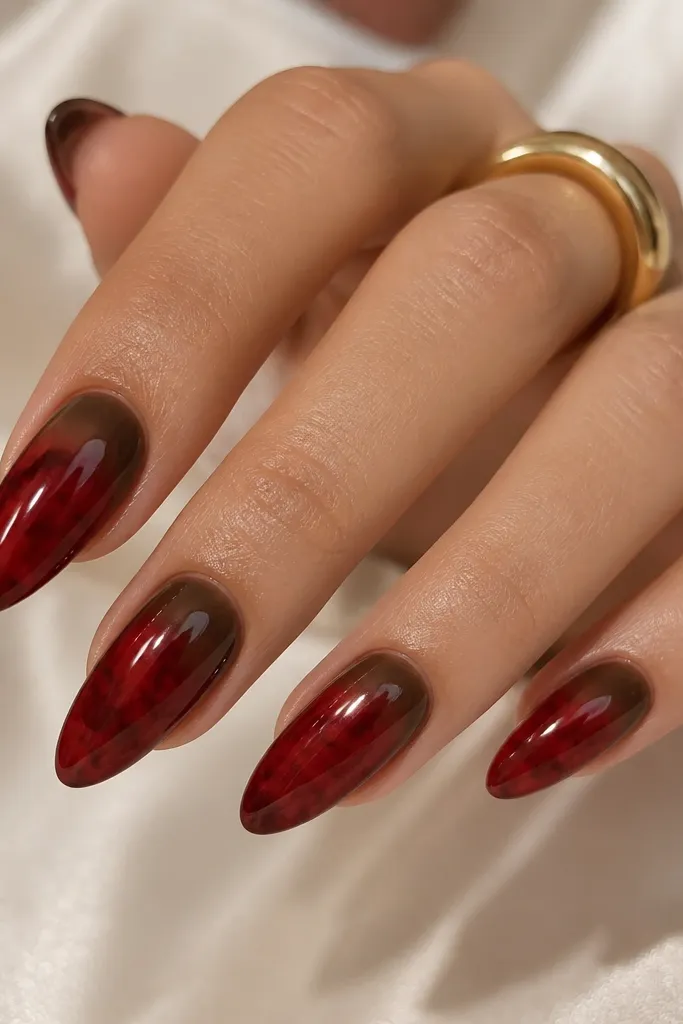
This is tortoise that looks smooth and modern, not patchy. The cocoa-brown ombre at the cuticle creates a shadow effect, and the red stays rich because it’s the main color. It flatters medium to long almond nails beautifully and makes cuticles look cleaner because the gradient hides tiny color lines. On hands with dry cuticles, the smoky fade also looks forgiving, but you still need to prep well so it doesn’t lift.
Start with a deep red base and cure it. Then sponge a cocoa-brown shade at the cuticle area only — press lightly, then stop before you reach the sidewalls. While the sponge area is still set, paint maroon tortoise islands just below the ombre, using a thin brush and keeping islands irregular. Blend the bottom edges of the islands by tapping lightly with a clean sponge corner, then seal with a glossy top coat.
Do the ombre first, then place your islands — it’s easier to match your shell contrast to the cocoa shadow.
Skip heavy sponge pressure; it makes the cuticle area look muddy.
8. Red Tortoise Checkerboard Accent with One Bold Nail
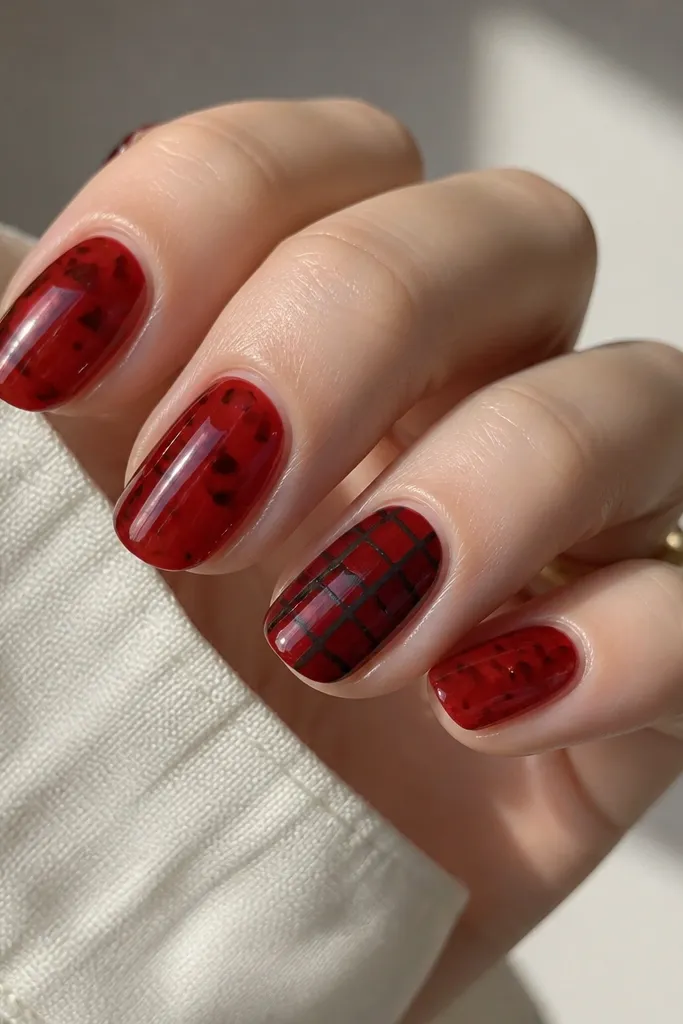
This is how you make tortoise look intentional without covering every nail in heavy pattern. The sheer red jelly keeps the set light, and the checkerboard accent gives you that fashion-girl geometry. I like doing it on the ring finger because it matches how people naturally look at your hand when you gesture. This palette works across skin tones because the red is sheer and the darker browns are controlled — you get contrast without bulk.
Paint all nails except the ring finger with a sheer red jelly, curing in thin layers. On the remaining nails, place tiny maroon-brown tortoise fragments spaced out so you still see the jelly underneath. For the ring finger, sketch a simple grid with a thin black-brown line, then fill alternating squares with maroon and darker brown tortoise islands. Keep square edges crisp by letting each color dry or cure fully before the next fill, then top coat all nails with a glossy finish.
Use a nail stencil or even a strip of tape to guide your grid lines — straight geometry makes checkerboard look clean.
Don’t freestyle the grid; crooked squares make the accent look accidental.
9. Sculpted Tortoise Marble in Dark Red, Cinnamon, and Black
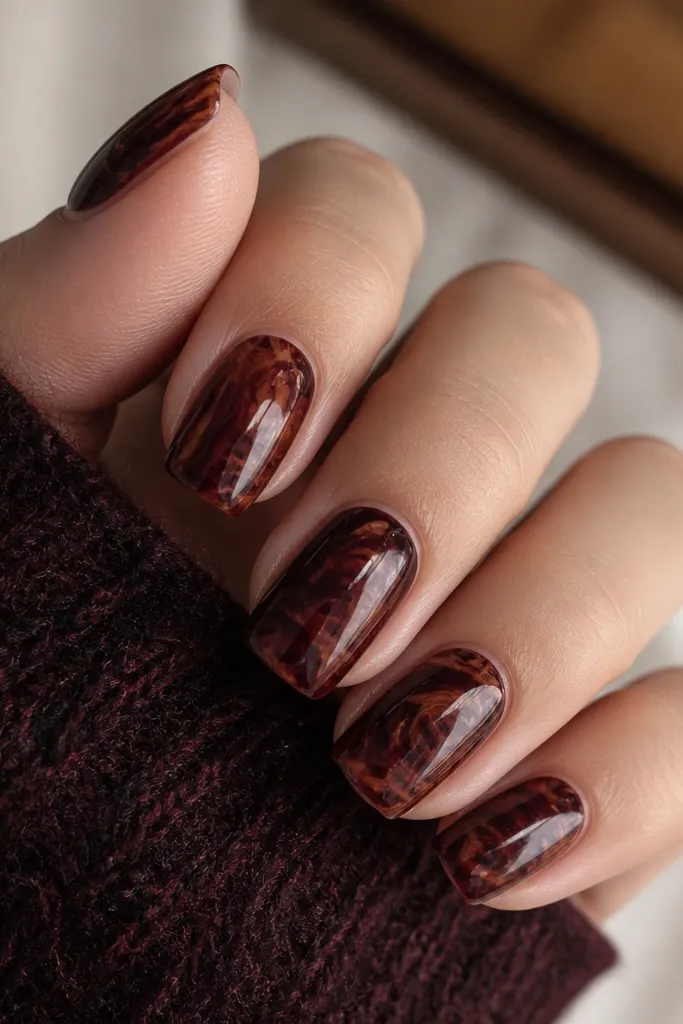
This one looks like tortoise shell that got hand-carved. A dark red base holds the color, while cinnamon-brown swirls create that warm, aged look. The black-brown veins add definition, and the feathered edges make it feel dimensional instead of flat. It’s flattering on medium squoval nails because the shape gives enough real estate for marble movement without making it messy. I’ve worn this with gold rings and it looks extra sharp because the warm browns match metal tones.
Start with a dark red base and cure it until smooth. Then paint a few larger cinnamon-brown marble swirls across the nail, leaving gaps of dark red between them. Use a fine brush to pull black-brown veins through the swirls, keeping them thin and slightly curved. Add a tiny second layer of cinnamon to thicken the most important swirl areas, then seal with a glossy top coat in two layers so the surface stays even.
Work in small sections — do one nail pattern at a time so the edges don’t dry and start to drag.
Avoid laying thick marble swirls; heavy paint makes the surface catch on fabric.
10. Tortoise Galaxy Fade with Red Smoke and Brown Shell Spots
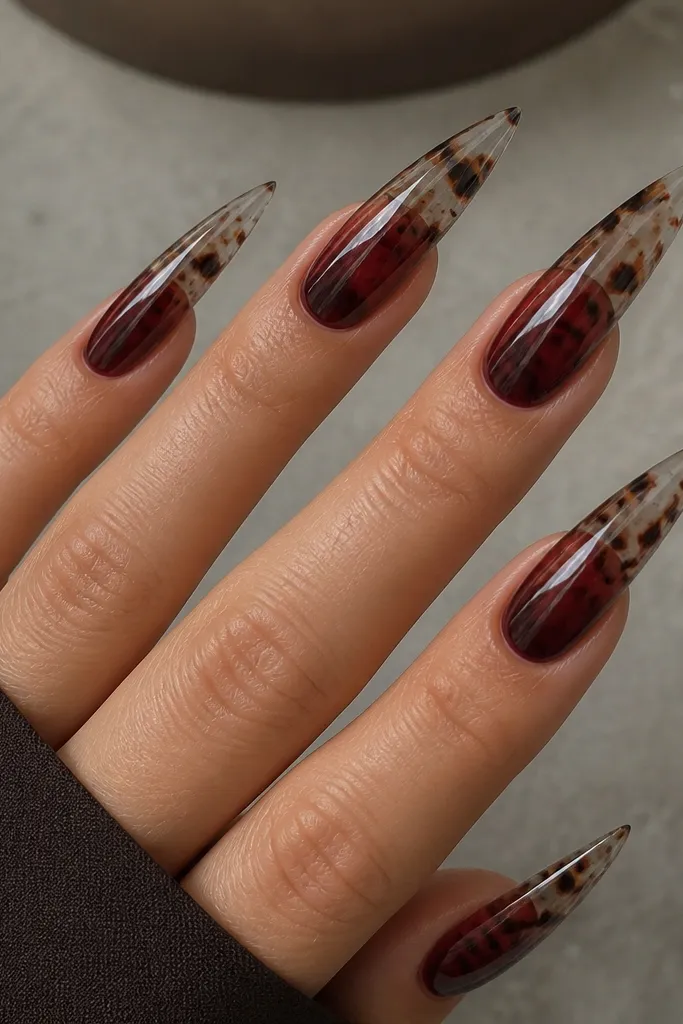
This is the boldest look on the list, but it still reads tortoise, not space glitter. The red smoke fade makes the shell feel like it’s drifting, and the brown spots keep the pattern grounded. Stiletto shape is where this shines because the gradient has room to stretch and the shell spots look like they’re floating within the nail. It flatters dramatic outfits and also looks good on hands with longer nail plates because the fade doesn’t feel cramped.
Apply a sheer base or clear builder gel, then sponge or airbrush a red smoke gradient where the red is strongest in the middle and lighter toward the tip. Add brown shell spots with a dotting tool, then connect a few spots with tiny maroon wisps using a detail brush. Finish the “tortoise” feel with light black-brown speckling — use a brush flick close to the nail, not a heavy sprinkle. Seal with a glossy top coat, and wipe the sides carefully so the speckling doesn’t smear onto skin.
Do the speckling last and keep it light; it should look like dust, not dots you can count.
Don’t over-darken the tip — if the gradient stays heavy all the way down, it looks like a solid red nail.