1. Velvet Crème Wine Almonds
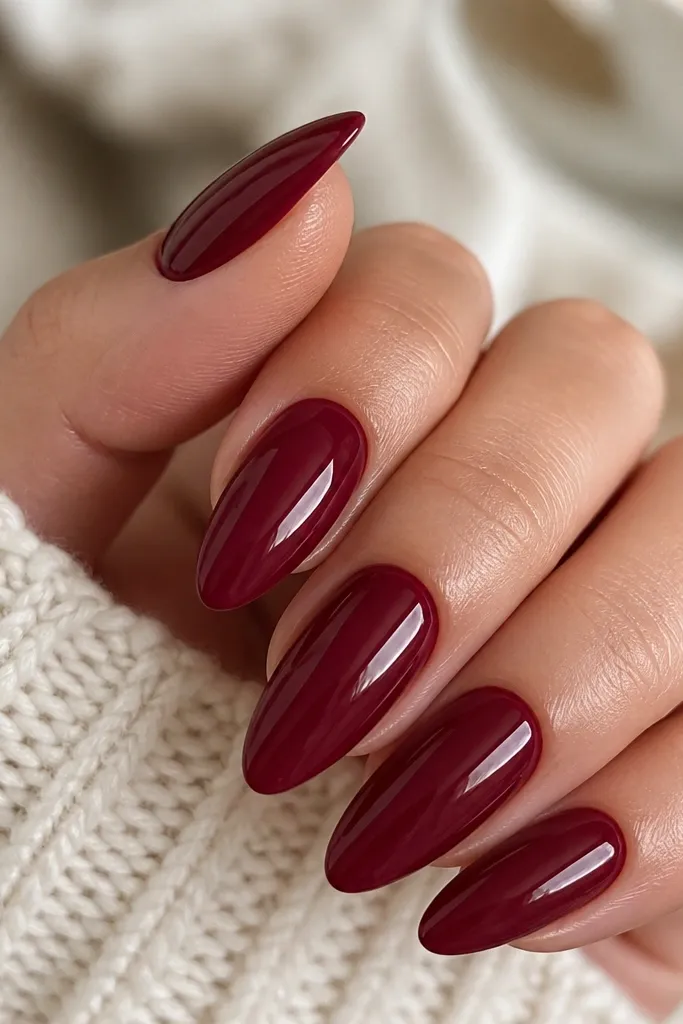
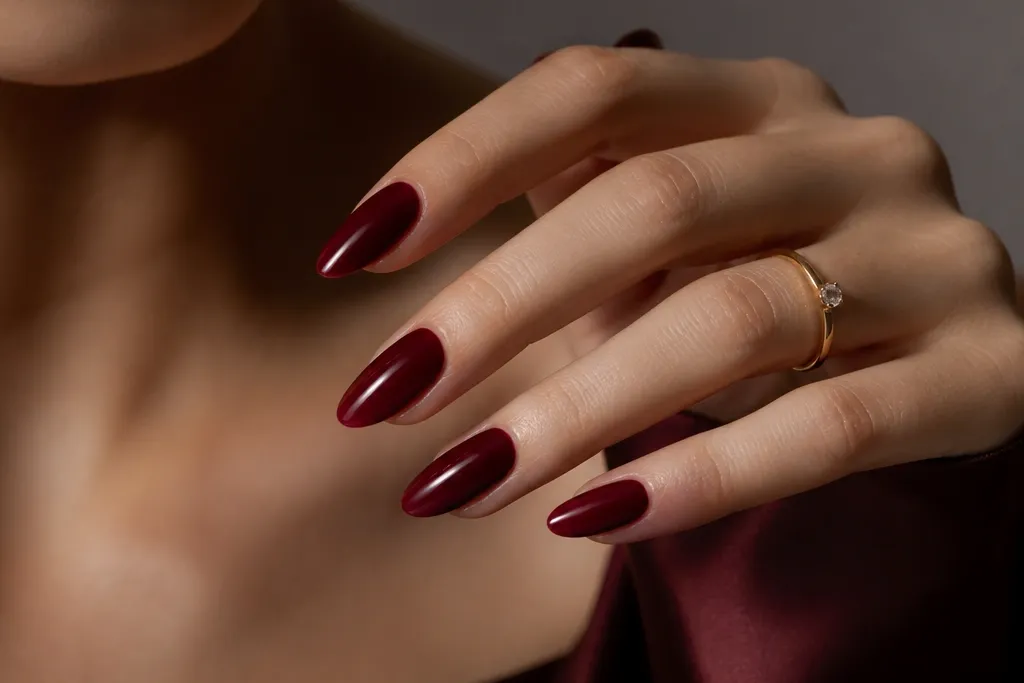
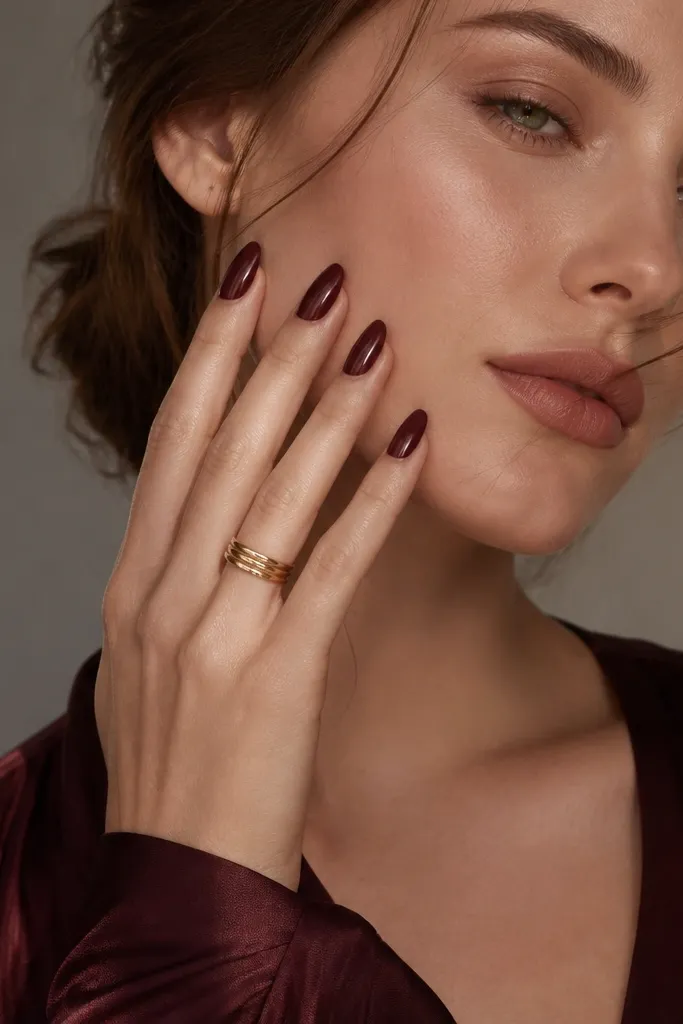
This is the “one bottle, perfect hands” option. Use a deep wine red crème that looks slightly purple in indoor light, not an orange-leaning red. The almond shape makes the color look longer and more refined because the sides taper smoothly toward the tip. It flatters light, medium, and deep skin tones because the undertone is dark enough to read rich without turning muddy. For workdays and events where you want elegance without sparkle, this is the design I reach for most.
Start by pushing back cuticles gently and buffing the shine off your nail plate. Apply a thin base coat, then do two coats of wine red crème, keeping each coat centered so you don’t flood the cuticle. Cure between coats if you’re using gel, and keep the last coat slightly thicker toward the tip for that glassy depth. Finish with a high-gloss top coat and cap the free edge. Finally, clean up the sidewalls with a small brush dipped in acetone so the red stays crisp.
If your wine red looks flat, add a glossy top coat with a thicker brush — it smooths the surface and makes the color look richer.
Skip sheer, patchy first coats because they make wine red look like staining instead of a deliberate manicure.
2. Smoked Wine Gradient (Dark-to-Soft)
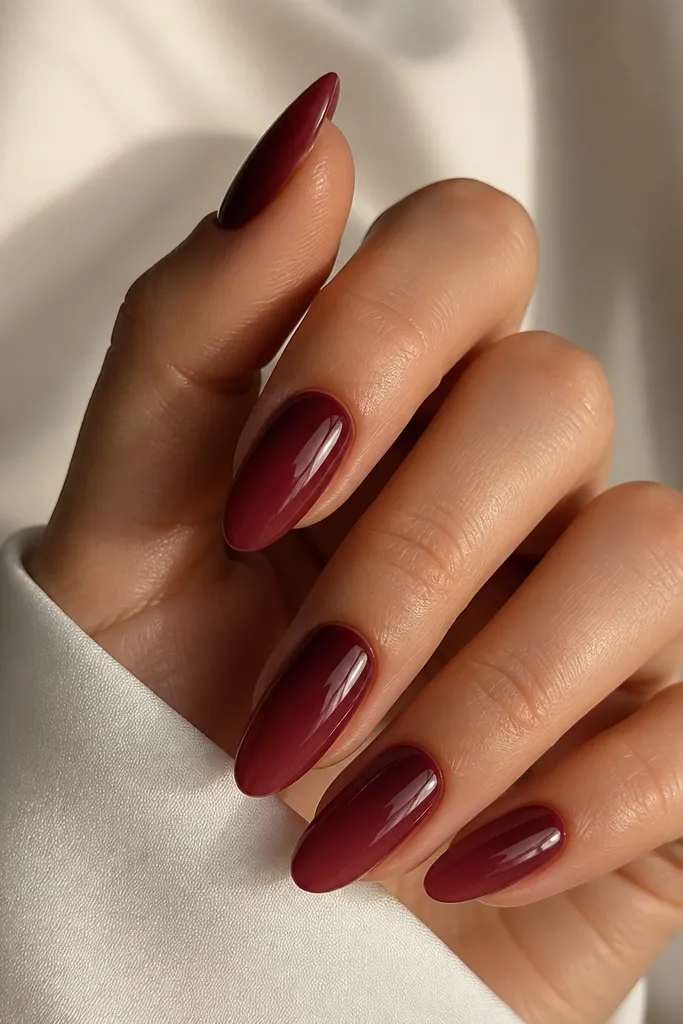
A smoked gradient turns wine red into something dimensional instead of flat. You want the darkest shade at the cuticle and a slightly lighter wine toward the tip, so your nails look like they have depth when you move. Almond shape helps because the taper gives the gradient room to blend naturally. This looks especially good on hands with shorter nails because the lighter tip visually extends the nail. It also works on fair skin when you choose a gradient that stays cool-toned, not pink.
Start with a base coat, then apply a full coat of your lighter wine red as the foundation. Take a makeup sponge (cut into a small wedge) and dab a darker burgundy at the cuticle area, blending upward in tiny taps. Keep the blend zone narrow — about 20-30% of the nail near the base — so it doesn’t look like a fade. Clean the cuticle edge with a fine brush and acetone, then seal with a glossy top coat. If you want extra smoothness, do one thin top coat, cure, then do a second thin top coat.
Practice the blend on one nail first; tap off the sponge on a paper towel so you control how much pigment transfers.
Don’t drag the sponge — you’ll get speckling and a muddy transition.
3. Wine Cuticle Halo Line
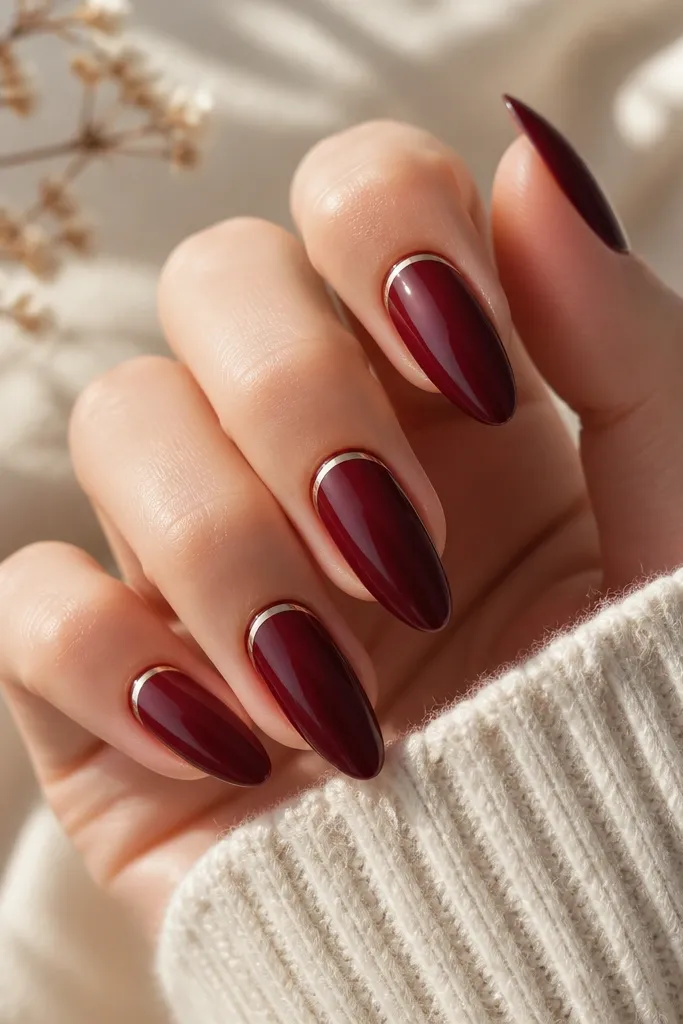
This design is all about the highlight at the base. Paint the nails in a solid wine red, then add a thin curved line just inside the cuticle line using rose-gold foil gel or a metallic striping polish. The halo makes the nail look cleaner and more lifted, which is why it flatters hands with slightly dry cuticles — the line draws the eye upward. It also looks gorgeous with gold jewelry because the undertone stays warm without turning the wine red orange. If you want “luxury” without chunky art, this is the one.
Start with two coats of wine red crème and cure fully so the surface is smooth. Use a striping brush to draw a thin arc that follows your natural cuticle curve, leaving a tiny gap from the skin. If you’re using foil gel, apply it where the line will go, then press a small piece of rose-gold foil and cure. For polish striping, let the wine base cure, then paint the metallic line in one steady pass. Seal with a glossy top coat, and cap the line by brushing top coat over it lightly.
Use a magnifying lamp if you have one — the line is thin enough that small placement errors show up in photos.
Avoid thick metallic lines; they turn the look from polished to “sticker” fast.
4. Burgundy Foil Tips
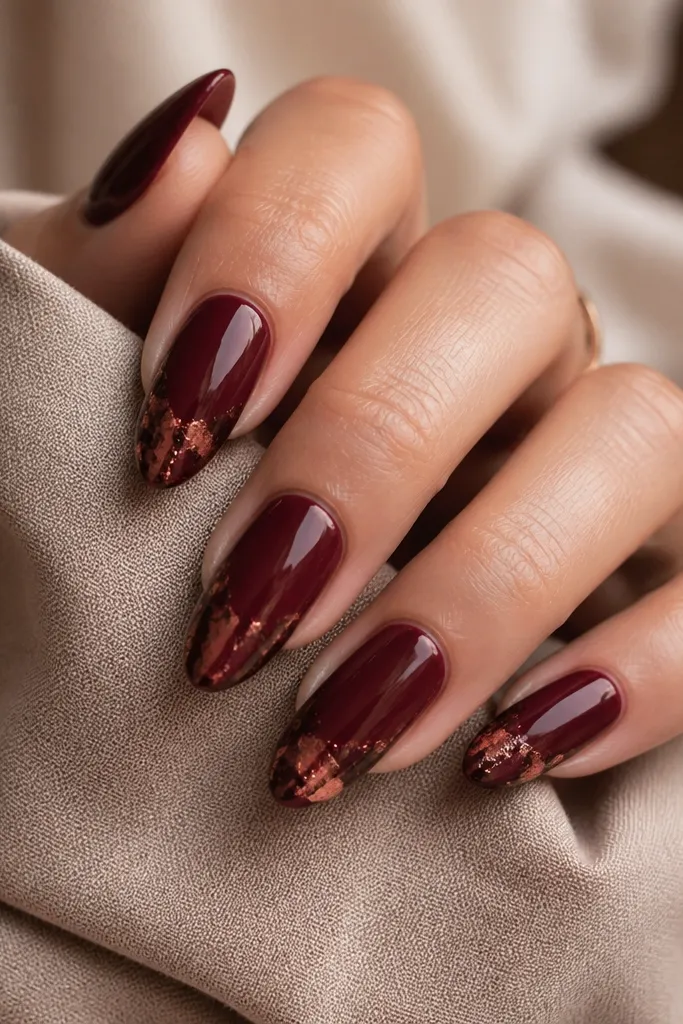
Foil tips make wine red feel expensive because the texture catches light right at the part that moves. You get that “my nails look like jewelry” effect without needing full coverage chrome. Choose foil that reads burgundy with a copper edge so it doesn’t clash with the wine base. Almond shape makes the foil look intentional because the taper gives the foil a natural gradient. This works well for evening events, holiday parties, and any time you want your hands to look dressed up.
Apply a full wine red base in two coats and cure completely. Tear or cut foil into small tip-sized pieces so you can place them without overlapping too much. Add a thin layer of foil adhesive or foil gel to the last 20-25% of the nail, then press the foil onto the tacky area and burnish gently with a cotton swab. Trim overhang at the tip with a fine file, then seal with a glossy top coat in two layers to smooth the foil texture. Keep your placement slightly uneven so it looks like real foil — not a perfect sticker.
If your foil lifts at the corners, press it longer with a flat tool and seal quickly with top coat.
Don’t put foil all the way to the mid-nail; it can look heavy and cheap on almond.
5. Matte Wine with Glossy Micro-French
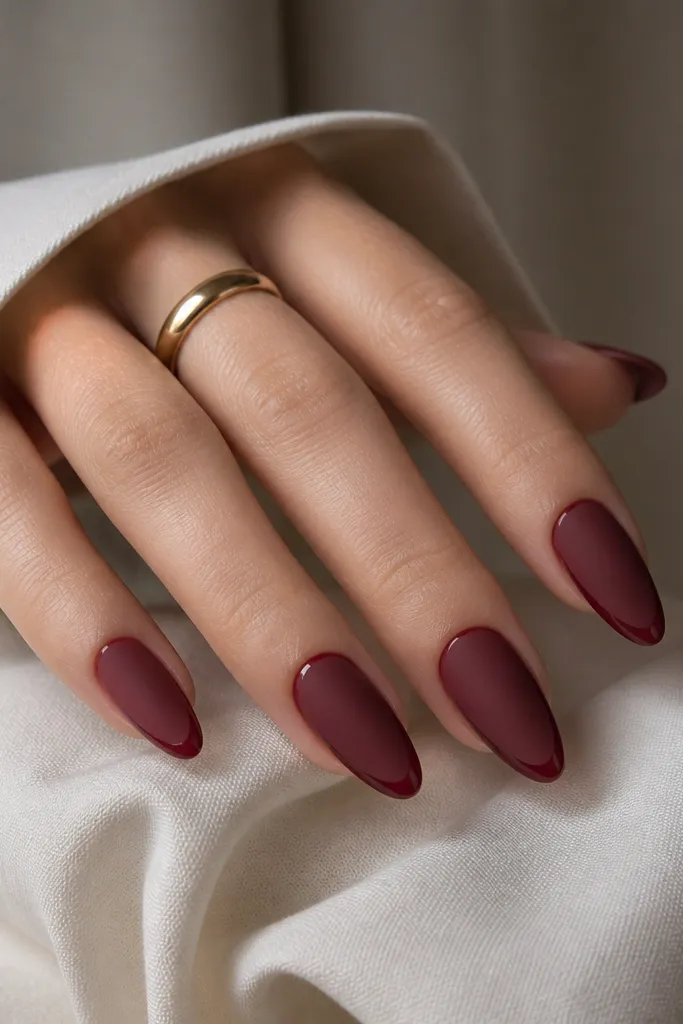
The combo of matte base and glossy micro-French is the easiest way to make wine red look designer. Matte hides small imperfections in your nail texture, while the glossy line adds a clean, sharp frame. Use the same wine shade for the French line so it looks cohesive instead of like a different color. Almond nails make the micro-French look longer and more narrow, which is flattering for hands that need a little visual slimming. I wear this to dinners and date nights because it looks soft up close and polished from across the table.
Editor's noteMake the French line slightly higher on the sidewalls than the center so it looks even on almond tips.
Start with your wine red crème and cure it fully, then apply a matte top coat on the whole nail. Once it’s dry/cured, use a striping brush to paint a thin glossy line at the tip — about 1 mm wide — leaving the matte surface around it. If your base is gel, use glossy gel polish for the line and cure. Seal with a matte top coat everywhere except the French line, then do a final glossy top coat only on the micro-French so it stays slick. Clean the edges with a detail brush so the line stays crisp.
Skip thisSkip thick French lines; they ruin the delicate contrast and can make the nails look short.
6. Wine Red Chrome Dust
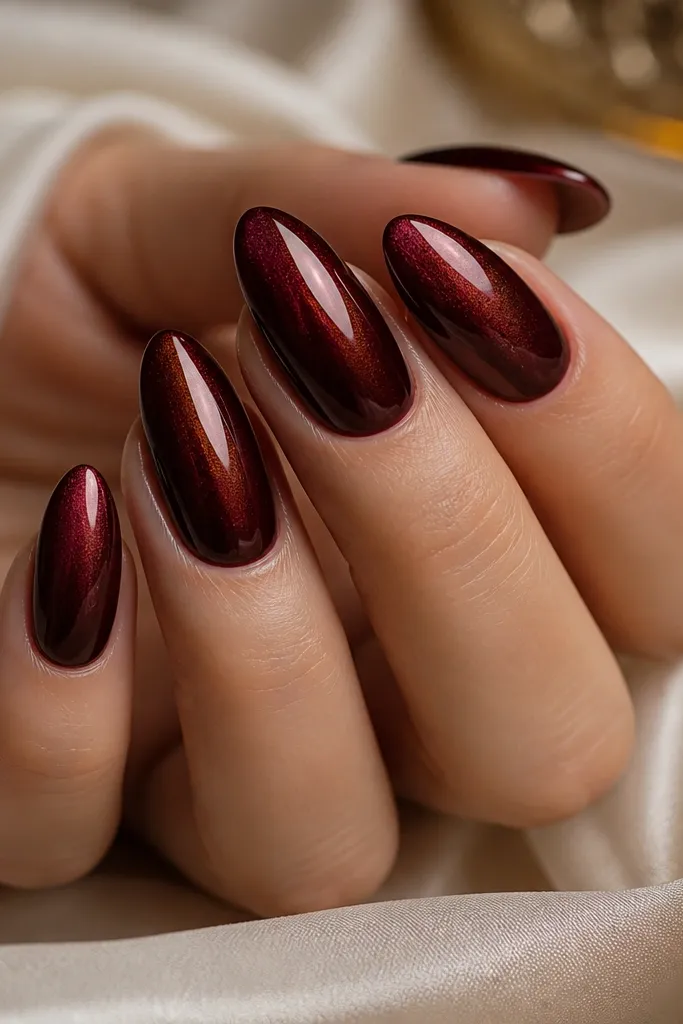
Chrome dust turns wine red into that “smoked glass” look. Instead of a full mirror, you get a softer metallic haze that flatters every skin tone because the color stays dark and controlled. Almond shape helps the reflections stretch down the nail, which makes fingers look longer. This is the manicure I use when I want something bold but still classy. It also photographs well because the chrome catches light without turning into bright red.
Editor's noteUse a light hand with the buffing — too much pressure wipes the “dust” look into a flat sheen.
Start with two coats of wine red base gel or polish and cure. Apply a thin layer of chrome base (or gel chrome medium) and work one nail at a time so it stays tacky. Sprinkle or rub wine-toned chrome powder/dust onto the nail, then buff gently with a soft applicator to remove excess for a smoky effect. Cure, then seal with a non-wipe top coat that won’t dull the chrome. If you want the effect stronger, add a second light layer of chrome dust only at the center line of the nail.
Skip thisDon’t use a bright pink chrome; it will make your wine red look cheap and inconsistent.
7. Ombre Wine & Cocoa Brown
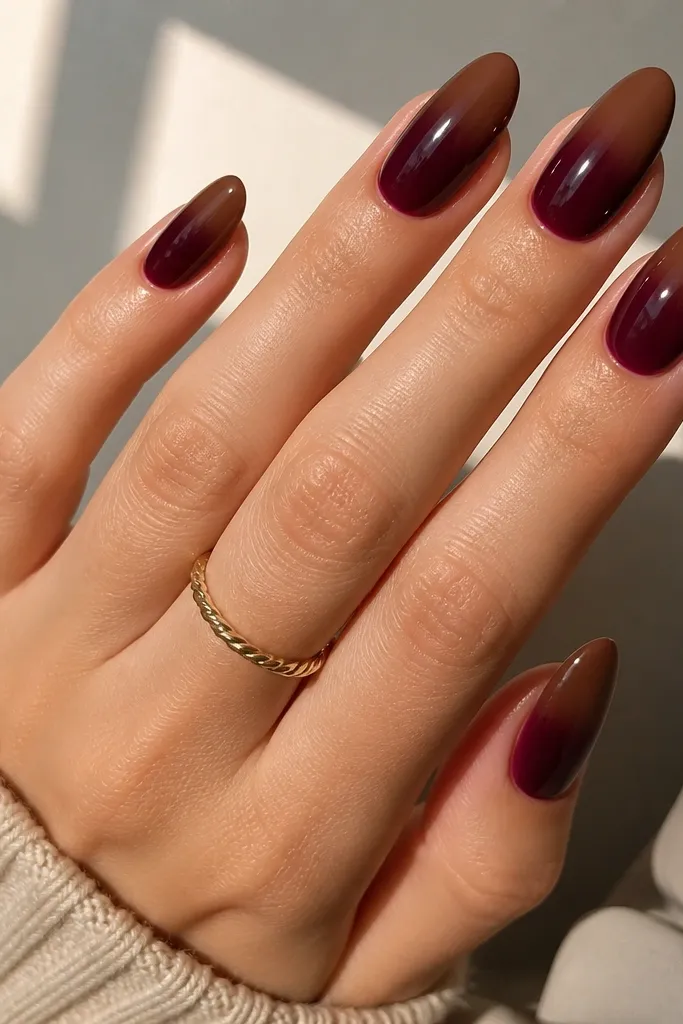
This is the “cozy luxury” wine red design. The cocoa-brown transition adds warmth and makes the burgundy look richer, not just darker. Almond shape makes the ombre feel smoother because the nail narrows toward the tip, so the color blend looks natural. It flatters medium to deep skin tones beautifully, but it also looks great on fair skin if you keep the wine base cool (slightly purple). This is a great choice for fall events, winter parties, and anyone who wants wine red without going full sparkle.
Editor's notePick a cocoa brown that looks like melted chocolate, not red-brown — it keeps the wine undertone intact.
Apply a base coat, then paint the nails with a cool wine red as your first layer. Use a sponge to blend cocoa brown starting around the middle of the nail and working toward the tip, keeping the darkest brown in the last 30%. Blend until there’s no hard edge, then clean around the cuticle with a brush and acetone. Cure, then add two coats of glossy top coat to lock in the gradient. Finish by lightly buffing the surface so the ombre looks smooth and not textured.
Skip thisAvoid mixing a warm orange-brown; it can turn the whole set into a rusty color.
8. Wine Red Marble Vein Accent
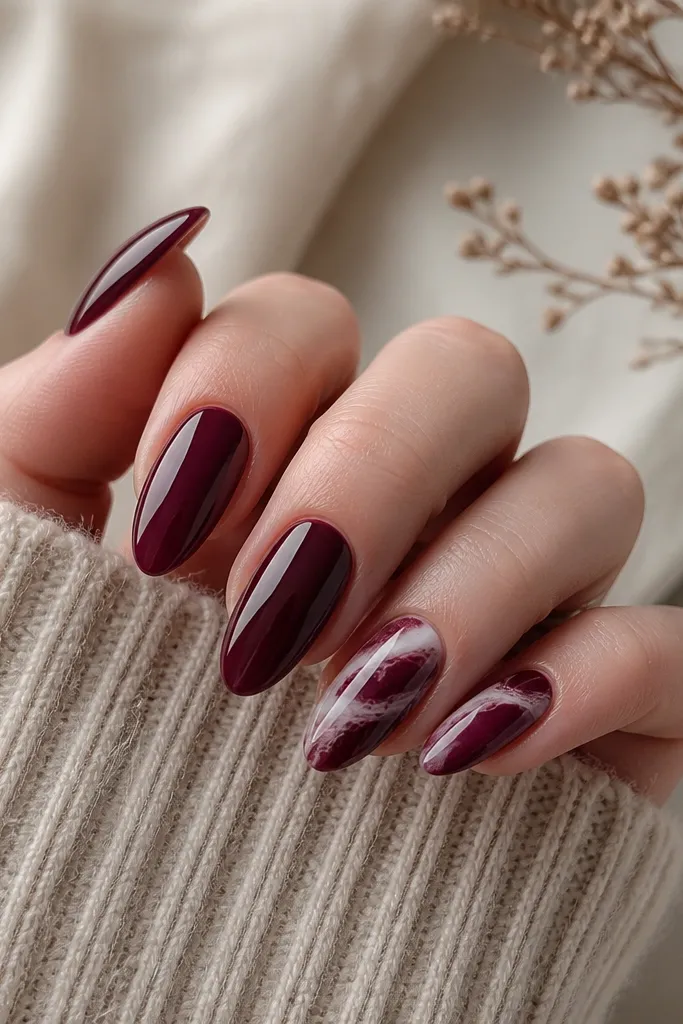
Marble accents make wine red feel custom without covering every nail in art. Use a deep wine base and add thin, vein-like lines in off-white and a slightly darker burgundy to mimic stone. Almond shape works because the veins can follow the nail’s natural length, which makes fingers look elegant instead of messy. This is a great pick for people who want detail but still want the set to look wearable. It also pairs well with both silver and gold jewelry because the veins sit between cool and warm.
Paint all nails with two coats of wine red and cure. On your accent nail(s), use a fine detail brush to draw random thin veins with off-white gel polish, then add a few darker burgundy lines next to them. Drag a clean brush through the lines lightly so the veins look slightly softened, not sticker-sharp. If you want more realism, add one or two tiny “cracks” that break and restart. Cure fully, then seal with glossy top coat in two layers to protect the raised lines from snagging.
Keep the veins thin — a 0.5 mm line looks like stone; thick lines look like nail art decals.
Don’t draw marble across the whole nail in heavy strokes; it turns into blotchy swirls.
9. Half-Moon Wine with Nude Negative Space
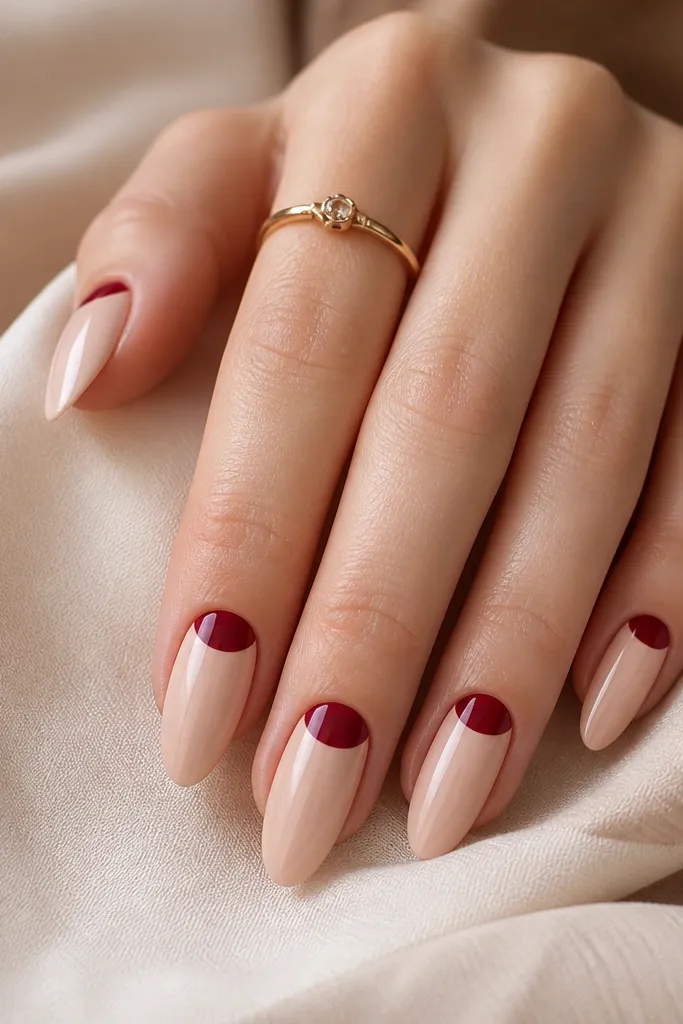
Negative space at the cuticle is a cheat code for clean, expensive-looking nails. This design uses a nude base (a sheer pink-beige that matches your skin tone) and paints only the half-moon area in wine red. Almond shape makes the half-moon look longer because the cuticle curve is framed by the taper. It looks flattering on hands with shorter nail beds because the nude area helps the nail look bigger and less crowded. If you want wine red but hate when dark polish makes your nails look smaller, this one fixes that.
Start by applying a nude base that matches your skin tone — two thin coats for opacity without looking chalky. Use a half-moon stencil or freehand with a detail brush to paint the cuticle curve in wine red, leaving the center negative space nude. Clean the edges with a small brush dipped in acetone so the half-moon line stays sharp. Cure and then apply glossy top coat over the whole nail, including the wine half-moon. If you see any unevenness at the cuticle edge, do a light top coat and cure again to smooth it.
Choose a nude that’s slightly warmer than your skin if you wear gold jewelry — it keeps the set cohesive.
Avoid nude bases that are too gray; they make the wine red look bruised.
10. Wine Red Velvet French Ombre
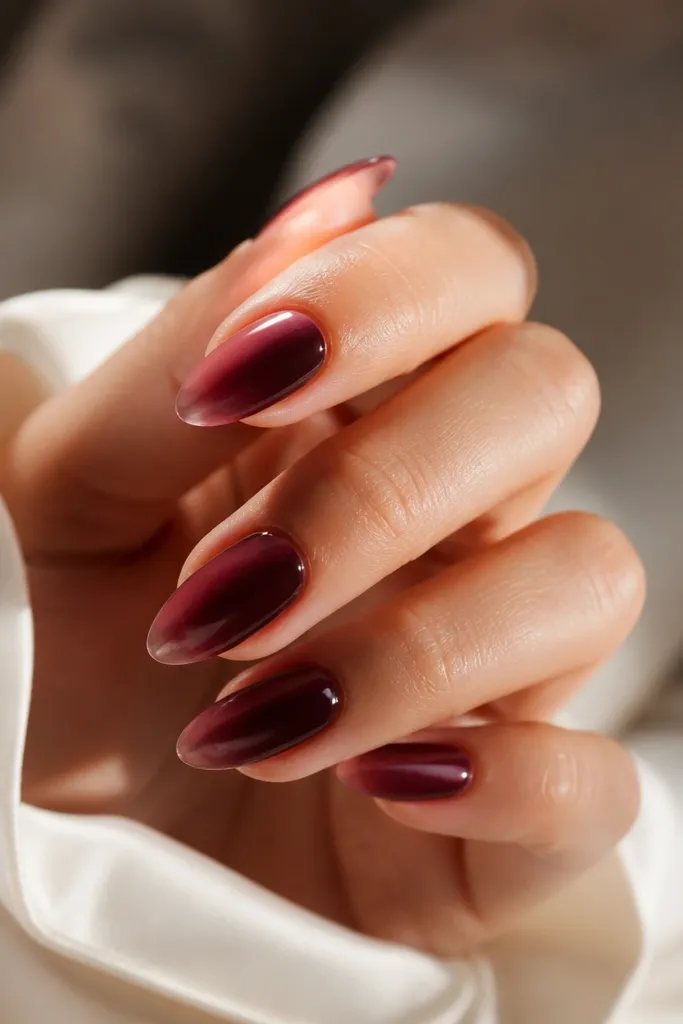
This design is a French tip that behaves like an ombre, so it looks softer than a hard line. You paint a lighter wine near the tip and blend into a deeper wine toward the base, keeping the transition smooth and controlled. The almond shape helps because the tip narrows, making the French area look precise even when the blend is gentle. It flatters most skin tones because the lighter tip adds brightness and length. I recommend it when you want wine red to look “special” but still appropriate for photos, work, and holiday dinners.
Editor's noteUse a lighter wine shade with a hint of purple — it makes the gradient look velvet, not pink.
Apply a base coat, then paint the entire nail with your deeper wine red as the foundation. Add a second shade of lighter wine and place it only on the top third of the nail. Use a sponge or a soft blending brush to fade the lighter shade into the deeper wine, keeping the blend at least 2 mm above the cuticle line. Clean the sidewalls and check symmetry under a bright light. Seal with two coats of glossy top coat so the blend looks smooth and reflective.
Skip thisDon’t make the French area too wide; on almond it can swallow the nail and look blunt.