
1. Classic Cherry Gloss with Micro-Gloss Edge
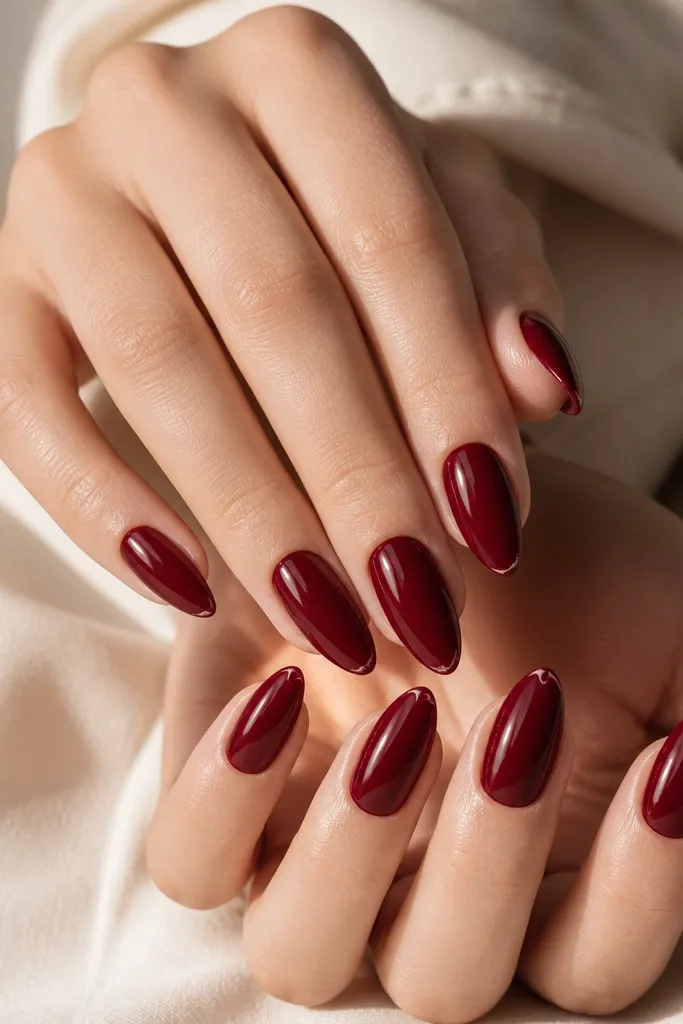
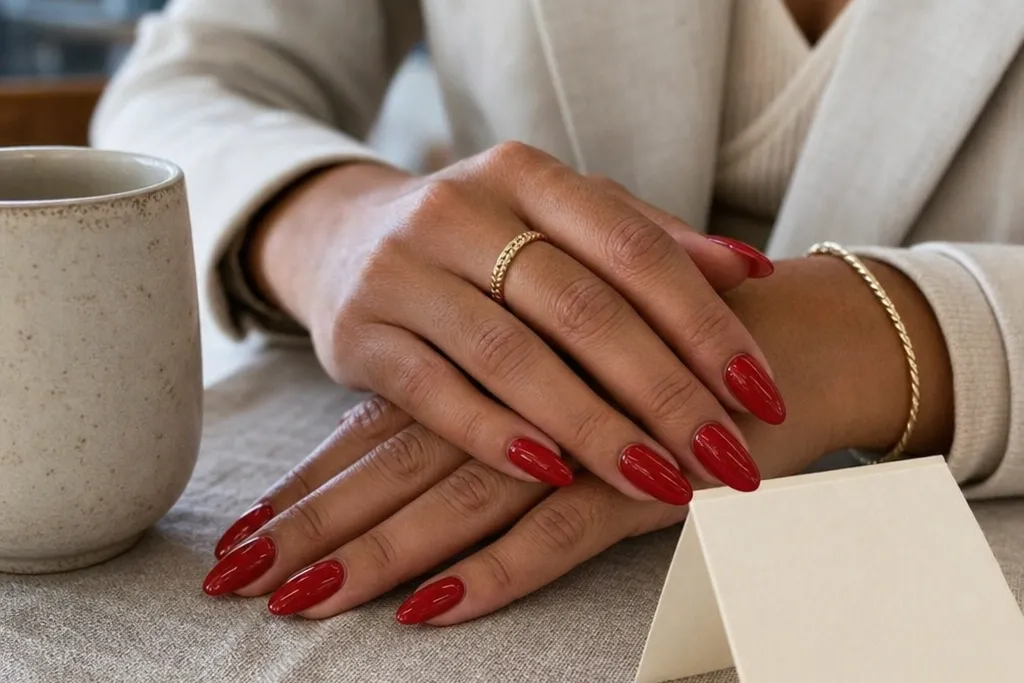
This design is for when you want red almond nails designs that look expensive without extra art. The cherry red is a blue-leaning red, so it gives that clean, jewel effect on both fair and medium skin. The almond shape makes the nail bed look longer, and the high shine reflects light along the edges. I love it for office days because the color stays bold but the micro-highlight keeps it from looking flat.
Editor's noteIf your red looks streaky, do thinner coats instead of thicker ones — almond nails show streaks fast.
Start with a thin base coat and cure it fully. Paint two coats of cherry red gel, keeping the first coat slightly translucent at the cuticle and the second more opaque, then cap the free edge. Before your final top coat, add a tiny brush of clear gel along the free edge only — think 1 mm wide, centered — and cure. Finish with a regular high-shine top coat over everything so the highlight blends into the gloss.
Skip thisDon’t flood the cuticle area; sloppy edges make the cherry look smoky and cheap.
2. Red French Tips with Nude Center (Reverse French Almond)
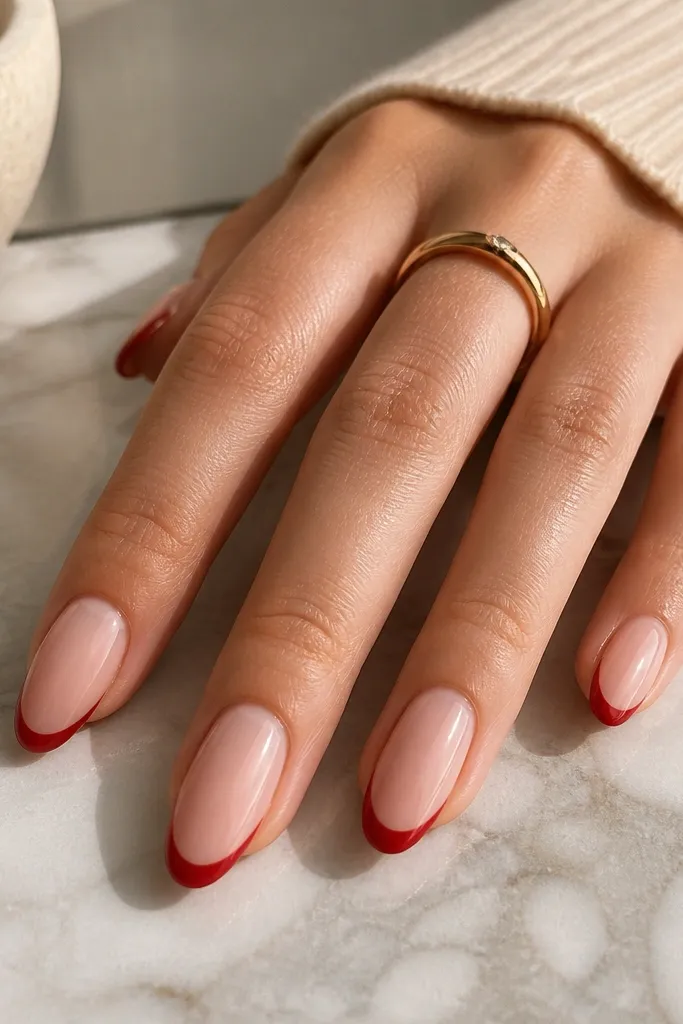
Reverse French is my go-to when you want red but you don’t want the whole nail to feel heavy. The nude center makes your nail bed look longer, and the red tip reads sharp because the almond has a natural taper. This works great on short-to-medium lengths because it visually stretches the finger. On warm skin, choose a nude base with a peachy tone; on cool skin, pick a nude base that leans pink.
Editor's noteUse a nail guide strip or a French stencil for your first try — it keeps the curve even across all ten nails.
Start by applying a sheer nude builder or base gel and cure. Then paint the red French tip using a liner brush: place the first red stroke at the center of the tip, then pull it to the left and right, keeping the red about 2 mm from the sidewalls. Clean up around the edges with a small brush dipped in isopropyl alcohol. Finally, seal with a glossy top coat and cap the tip.
Skip thisDon’t let the red touch the sidewalls; it makes the almond look wider than it is.
3. Velvet Matte Red with a Single Satin Line
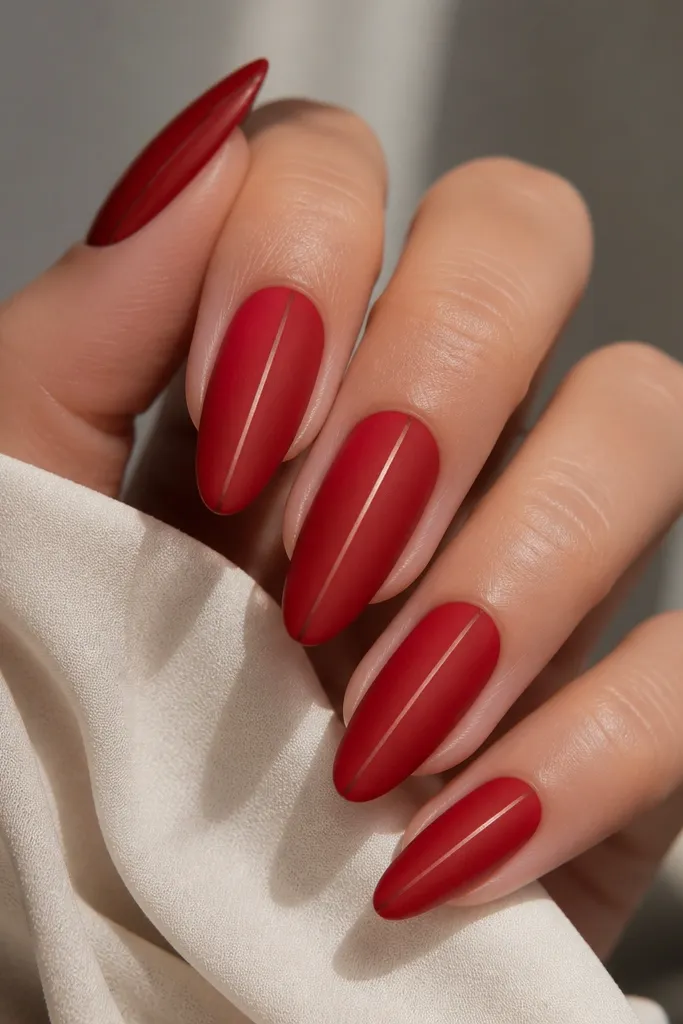
This is the design I reach for when glossy red feels too loud. Matte velvet red hides minor surface texture, so it looks smooth even if your nails aren’t perfectly even. The single satin line adds dimension without turning into full nail art. It flatters hands with longer nail beds because the vertical line lengthens even more, and it looks gorgeous on both fair and deeper skin tones.
Editor's noteKeep the line thin — about the width of a gel brush hair — or it will look like a crack.
Paint two coats of red matte gel (or regular red gel plus matte top coat) and cure. Use a fine striping brush to paint one thin line in clear gel mixed with a pearl top coat or metallic nude — keep it centered. Cure the line separately if your product needs it, then seal with a matte top coat only over the rest of the nail so the line keeps its sheen. If the line dulls, go back with glossy top coat just on that line and cure again.
Skip thisDon’t matte the entire nail twice; too much matte can look chalky and uneven.
4. Red Marble Vein Over Clear Blush Base
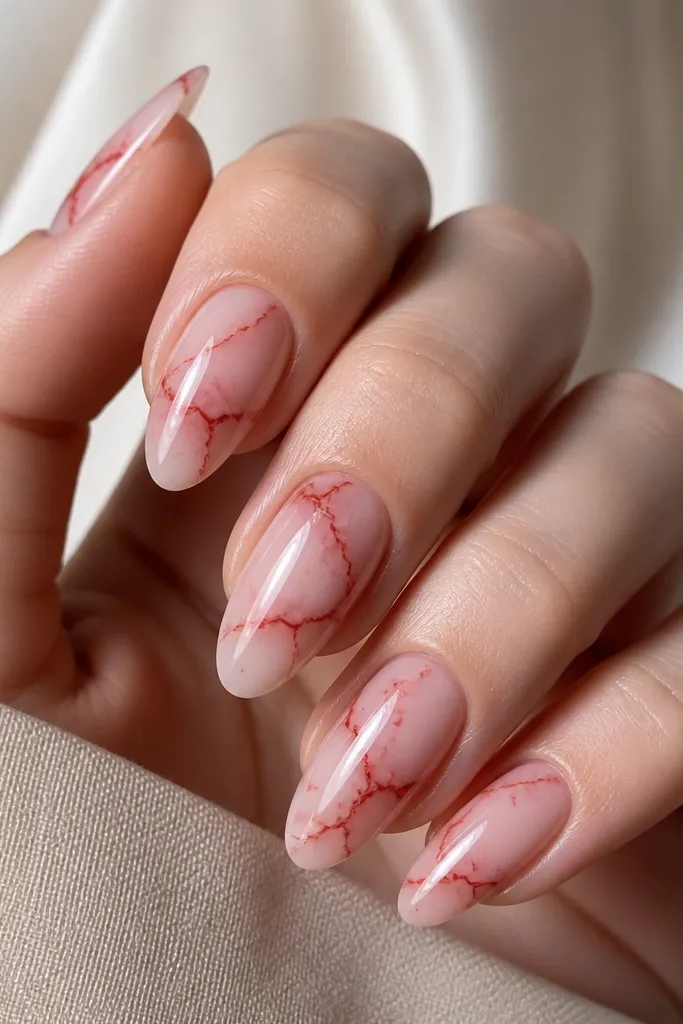
Marble nails look harder than they are, and this one is actually forgiving. The clear blush base keeps it airy, so the red veins don’t overpower your hand. Almond shape makes the veins feel like they “flow” down the nail, which is what makes it look like real stone. This looks flattering on short-to-medium almond lengths and on skin tones that like soft contrasts.
Start with a sheer blush builder gel and cure, then apply a thin clear top coat layer for slip. Add a few drops of diluted red gel (or red nail polish mixed with a clear gel) on a palette. Using a thin liner brush, drag thin red threads from the center toward the corners, then add 2-3 smaller branches. Cure, then seal with two full top coat layers so the marble looks glassy and not textured.
Wipe your brush on a lint-free wipe before you pull veins — it keeps the lines crisp.
Don’t flood veins across the whole nail; marble looks best with breathing space.
5. Glazed Red with Gold Foil Flecks
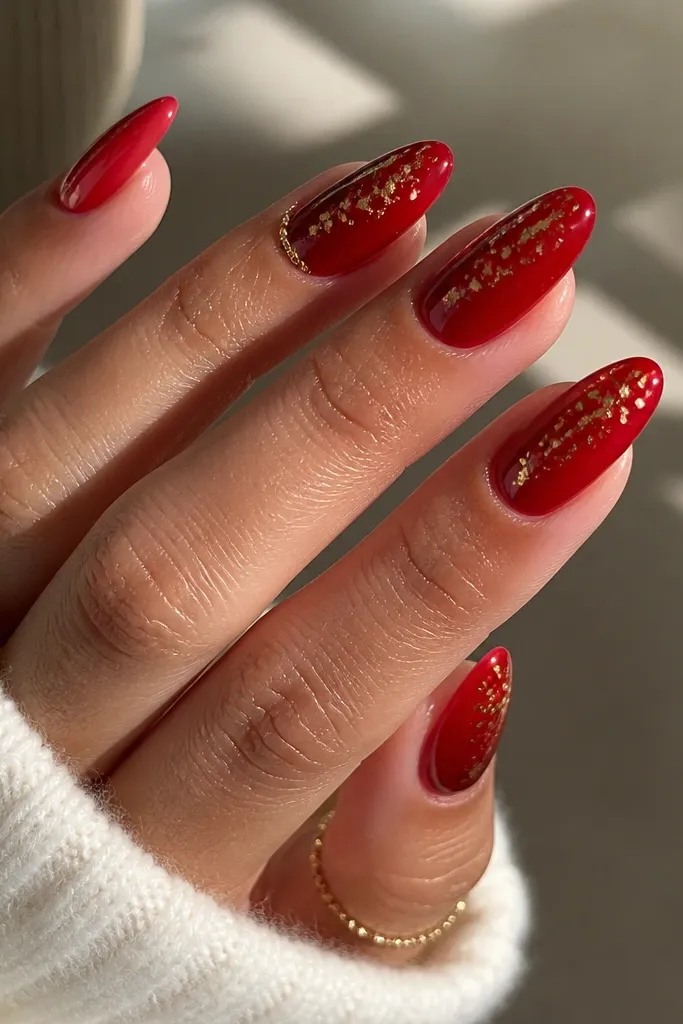
Glazed red is my favorite “night out” version because it looks like you poured shine on top. The gold foil flecks catch light as you move, and they don’t need to be perfectly placed to look intentional. Almond makes the foil look more concentrated toward the tip, which is flattering for hands that want a little lift. This works on fair, medium, and deep skin because the gold adds warmth and the red stays the anchor color.
Editor's noteIf your foil looks too sparse, add one extra fleck near the center — one dot changes the whole balance.
Apply two coats of glossy red gel and cure. Tap small pieces of gold foil into a thin tack layer on the upper half of the nail — leave the lower half mostly clean. Press lightly with a silicone tool, then cure. Finish with a top coat that you apply a little thicker over the foil to smooth it down.
Skip thisDon’t rub foil aggressively; it turns into smears and looks messy on almond.
6. Red Ombre Almond with Soft Nude Fade
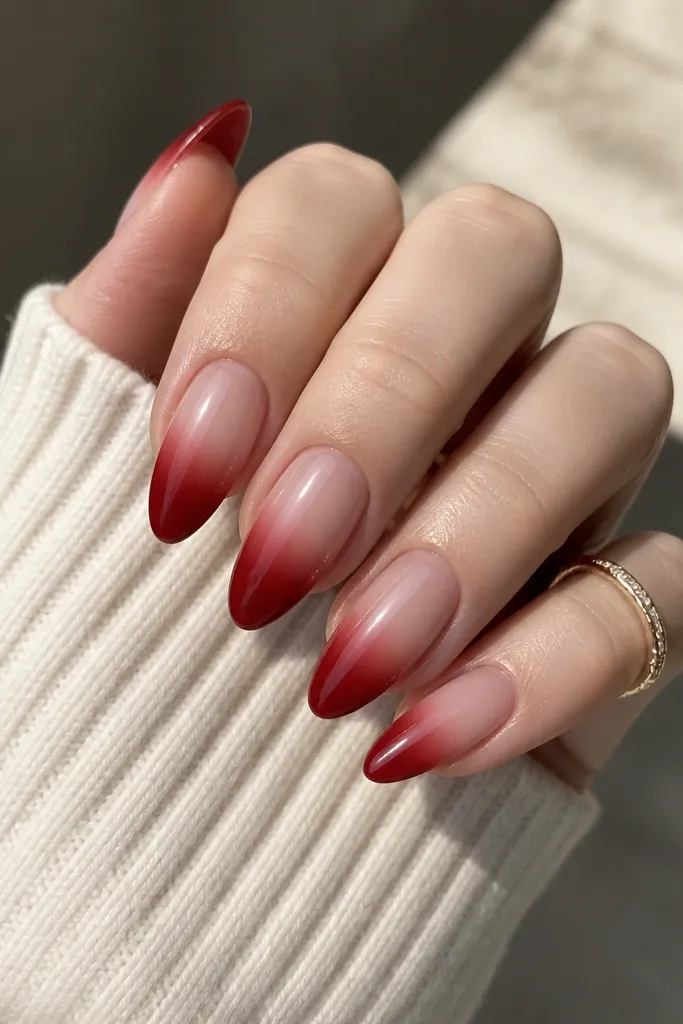
An ombre fade makes red look wearable even if you’re trying it for the first time. The nude base keeps the cuticle area soft, and the deeper red at the tip adds drama where almond already tapers. I like this on medium length because it looks like a natural design, not a sticker job. It flatters hands with short nail beds because the nude space makes the finger look longer.
Start with a nude base gel and cure. Sponge deep red gel onto the tip area using a makeup sponge, then blend upward by dabbing lightly — stop around the lower third of the nail. Clean the edges with a brush dipped in alcohol. Seal with a glossy top coat, then do a second top coat for extra smoothness over the sponge texture.
Use the smallest amount of red on the sponge and build slowly; ombre looks clean when the fade is controlled.
Don’t skip cleanup around the sides; sponge ombre shows every smudge on almond.
7. Matte Red Hearts on Clear Glossy Base
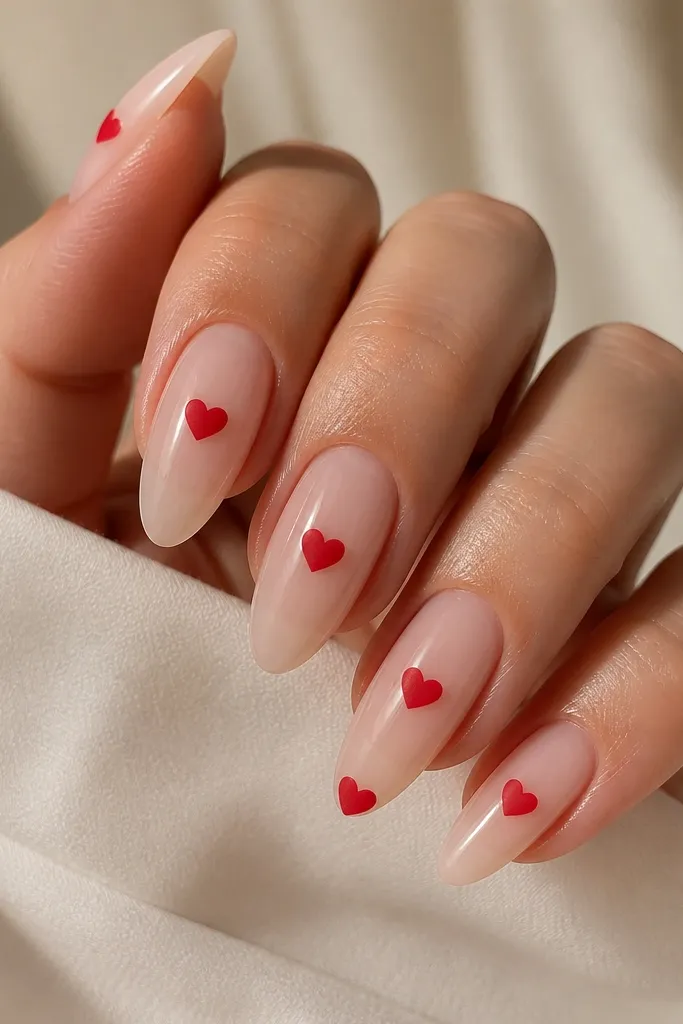
This is cute without getting childish because the base is clear and glossy, and the hearts are matte red. The contrast makes the hearts pop, and the almond shape gives them room to look tidy instead of crowded. It’s a great option for date night, Valentine season, or when you want something playful but still sleek. On skin tones that look great with pure red, this reads crisp and flattering.
Editor's noteIf hearts look lopsided, draw a tiny center guide dot first and build both sides from it.
Apply a clear base gel and cure, then add one thin glossy top coat layer. Use a dotting tool to place two small matte red dots where each heart will sit, then drag a toothpick or liner brush from the center down to form the V shape. Add a tiny highlight of clear gel on top of the heart if you want a slight dimension. Cure, then top coat the whole nail with a glossy top coat that doesn’t smear the matte hearts.
Skip thisDon’t matte the entire nail; matte hearts on a glossy base look intentional.
8. Red Chrome Almond with Mirror Dust Fade
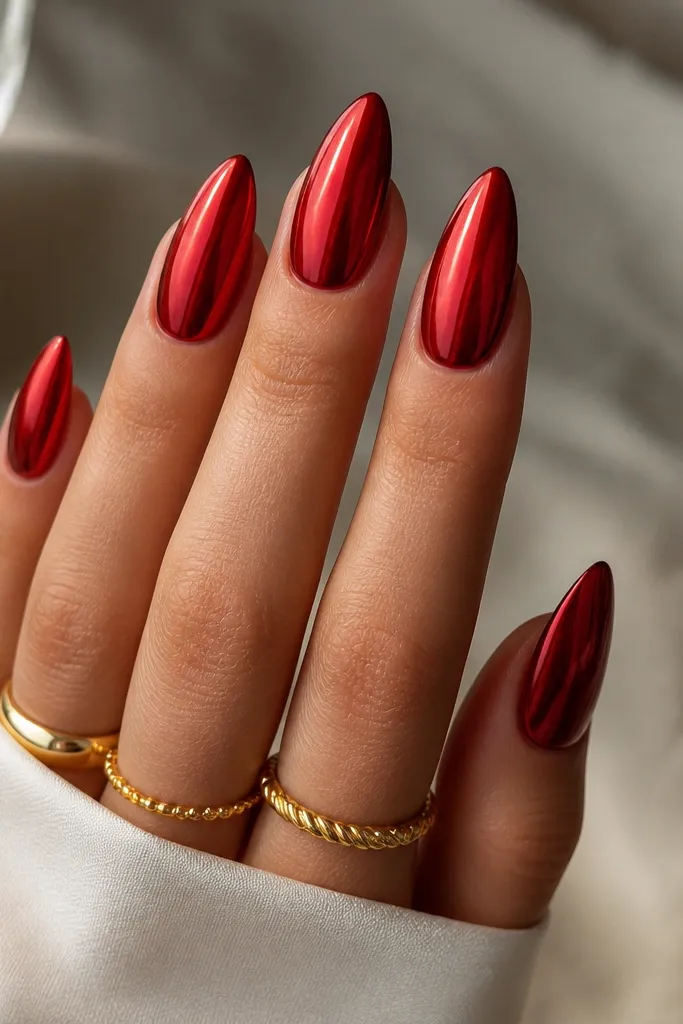
Chrome red is the fastest way to make red almond nails designs look like you paid for a pro set. The mirror dust fade gives depth so the set doesn’t look flat. Almond shape amplifies the reflective curve, and the fade makes the nail bed look longer. This looks best on medium to long almond lengths where you have enough surface area for the chrome to catch light smoothly.
Editor's noteDo chrome over a clean, dry nail surface — oils make the powder patchy.
Start with a black or deep burgundy gel base and cure. Apply chrome gel in a thin tack layer, then rub red chrome powder in with a chrome applicator sponge, focusing on the tip first. Blend upward lightly so the cuticle area is less intense. Brush off excess, then seal with a chrome-friendly top coat (or a thin non-wipe top coat if your system allows it).
Skip thisDon’t use a thick brush-on top coat right after chrome without checking compatibility; it can kill the shine.
9. Red Glitter Cuticle Halo (Half-Moon Sparkle)
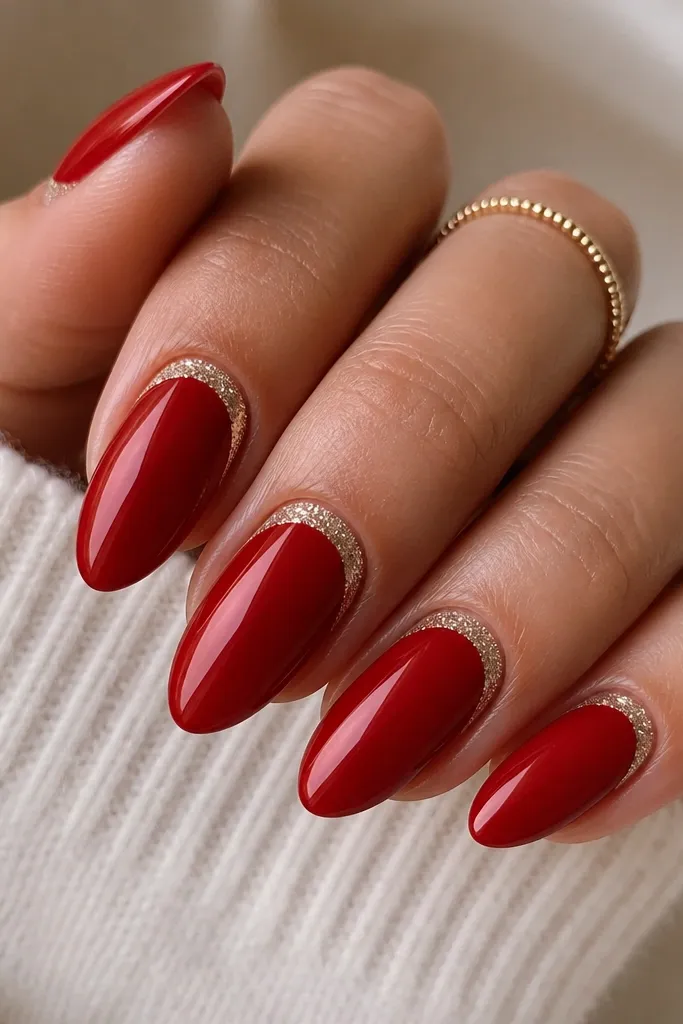
This design is subtle from a distance and sparkly up close, which is why it works for everyday. The half-moon halo frames your cuticle line, and almond shape makes the curve look extra neat. I like it on medium almond because the halo doesn’t overpower the nail bed. It’s flattering for most skin tones since the glitter sits on the nail, not on the skin.
Paint two coats of glossy red gel and cure. Leave a small gap at the cuticle by about 1 mm so the glitter doesn’t flood onto skin. Place a glitter gel or glitter powder starting at the sidewalls and forming a half-moon, then cure. Seal with top coat, applying extra around the halo so it doesn’t snag on hair or jewelry.
Press the glitter gently with a flat silicone tool so it stays smooth under the top coat.
Don’t bring glitter all the way to the sidewalls; that makes the halo look uneven.
10. Red Striped Candy Cane Side Lines
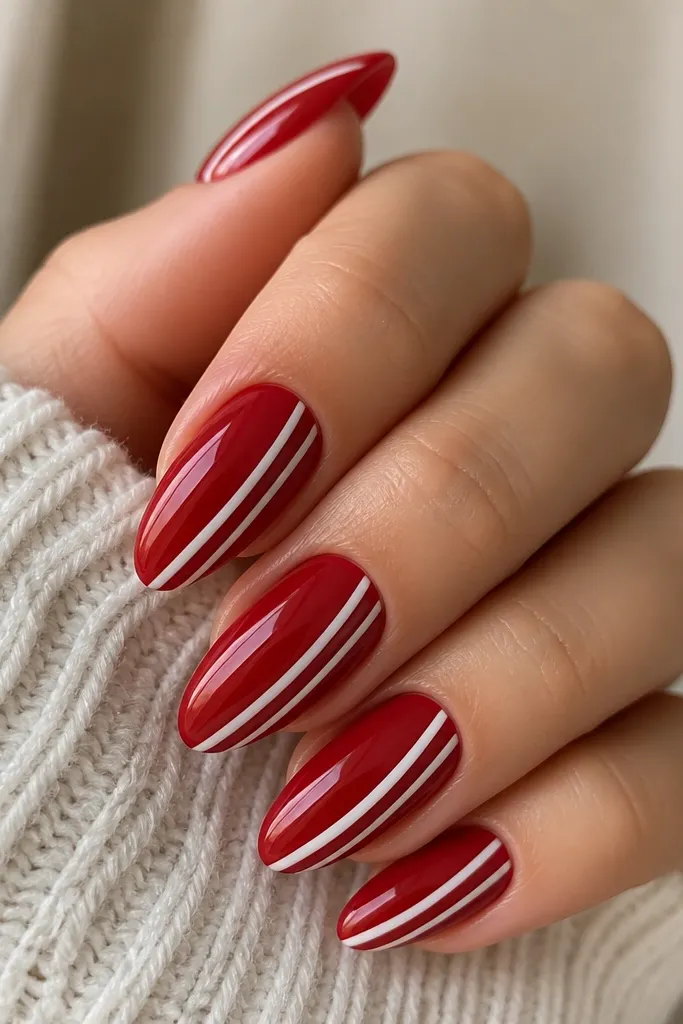
This one is bold but still clean because the stripes are thin and placed on the sides. The two white lines make the nail look longer, and the slight angle adds movement without turning into a busy pattern. It looks great on fair and medium skin with warm undertones, and it’s fun for winter without going full holiday theme on every nail. Almond shape keeps the stripes from spreading too wide.
Paint two coats of glossy red gel and cure. Using a striping brush, place a thin white line along the left side of the nail, starting about 1 mm away from the cuticle and stopping 1 mm before the free edge. Mirror the same line on the right side with even thickness. Clean both sides with a small brush and alcohol, then seal with top coat.
Use the same brush angle for both sides so the stripes match across every nail.
Don’t make the stripes thick; thick lines turn almond nails into block shapes.
11. Red Negative Space Half-Moon at Cuticle
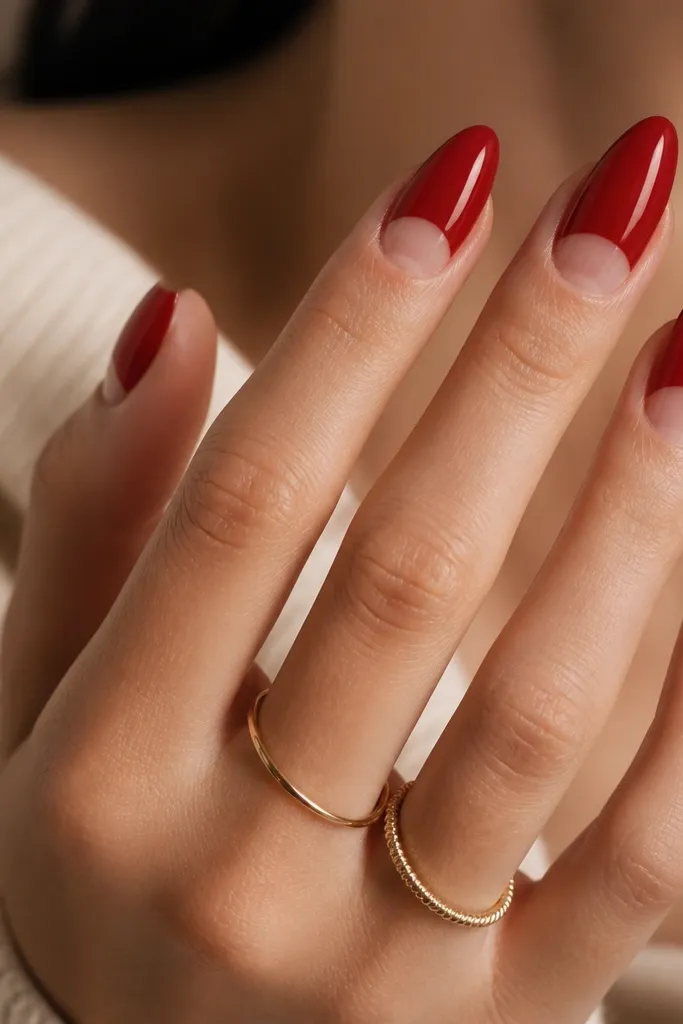
Negative space makes red almond nails designs feel modern and lighter on the hand. The half-moon cuticle opening creates a neat frame that looks good even when your nails grow out, because the border stays defined. I like this on medium almond because the curve has enough room to look clean. It’s especially flattering if your cuticles grow fast since the design disguises the line between new growth and polish.
Start with a clear base gel and cure. Use a small half-moon stencil or freehand with a guide dot to mask the cuticle area — keep the negative space about 2-3 mm tall. Paint red gel over the remaining nail, then remove the stencil and cure again. Finish with a glossy top coat, then use a cleanup brush to sharpen the negative-space border.
If you freehand the half-moon, start with the side curves first, then connect the center — the border looks smoother.
Don’t let red creep into the negative space; it kills the crisp half-moon look.
12. Red Velvet Color-Block with Black Micro Lines
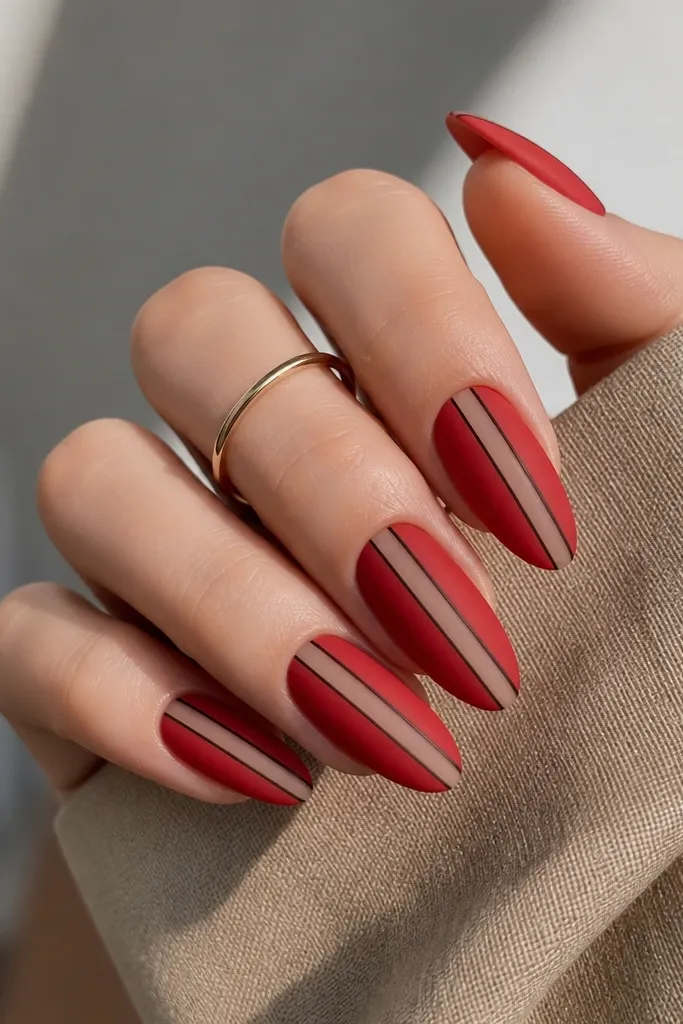
Color-block nails look sharp when the edges are defined, and almond shape makes the blocks look intentional. The matte red gives soft texture, while the nude stripe keeps the design modern and not heavy. Black micro lines are the trick — they act like a graphic outline so the blocks stay separated. This is a great choice for medium skin tones and deeper skin tones because the black outlines make the red look extra clean against contrast.
Apply a nude sheer base and cure, then paint matte red as your main block leaving a vertical nude stripe down the center. Cure and matte top coat if needed. Use a fine liner brush to draw tiny black lines along the edges of the red blocks, about 0.5 mm thick. Seal with a matte top coat over everything except the black lines if you want them slightly shinier — either way, cure fully.
Keep the nude stripe narrow, about the width of your liner brush bristles, so it reads sleek.
Don’t skip the outline; without black separation, color-block can look like messy nail wear.
13. Red Floral on One Accent Nail, Glossy Everything Else
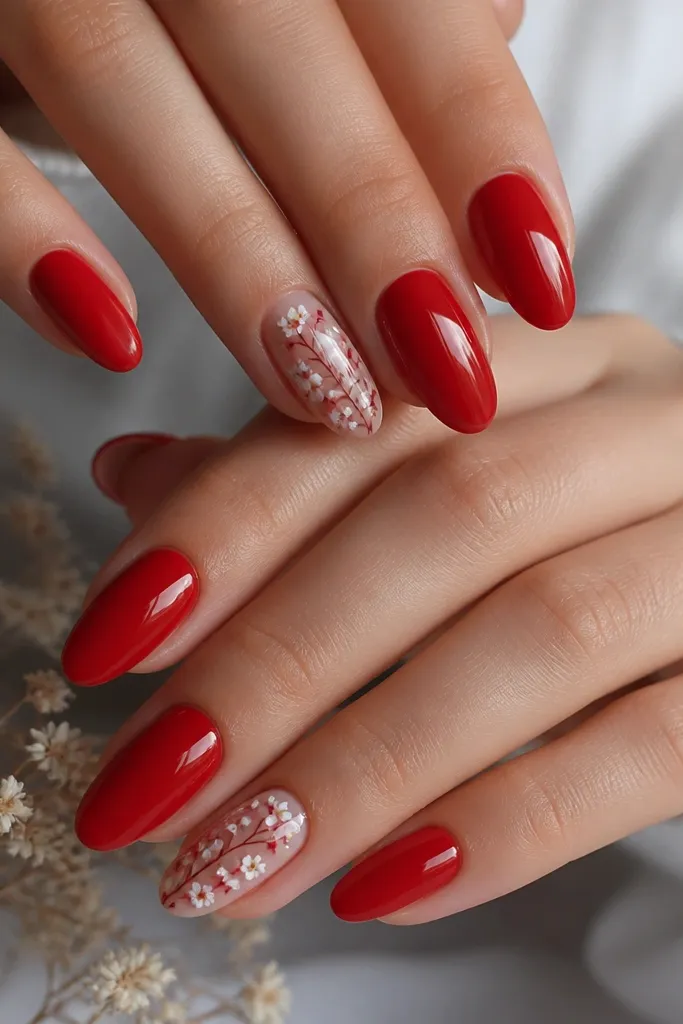
This design is for when you want art but you don’t want your hands to look overdone. Glossy red on most nails keeps the set cohesive, and one accent nail with a small floral cluster gives you that “special” look. Almond shape helps the flowers sit in a vertical zone without spreading. It works across skin tones, but it looks especially flattering on hands that already have a defined nail bed because the flower placement looks balanced.
Paint all nails with two coats of glossy cherry or tomato red and cure. Choose one accent nail and apply a thin clear gel so the details don’t sink. Use a dotting tool to place small white petals, then add a pale pink center dot and a few tiny red stems with a liner brush. Cure and seal with two top coat layers so the floral sits smooth and catches light.
Keep flowers small — 3 petals max per cluster — or the almond shape starts to look crowded.
Don’t put floral on every nail; it turns into patterned clutter.
14. Red Cat-Eye Almond with Side Glow
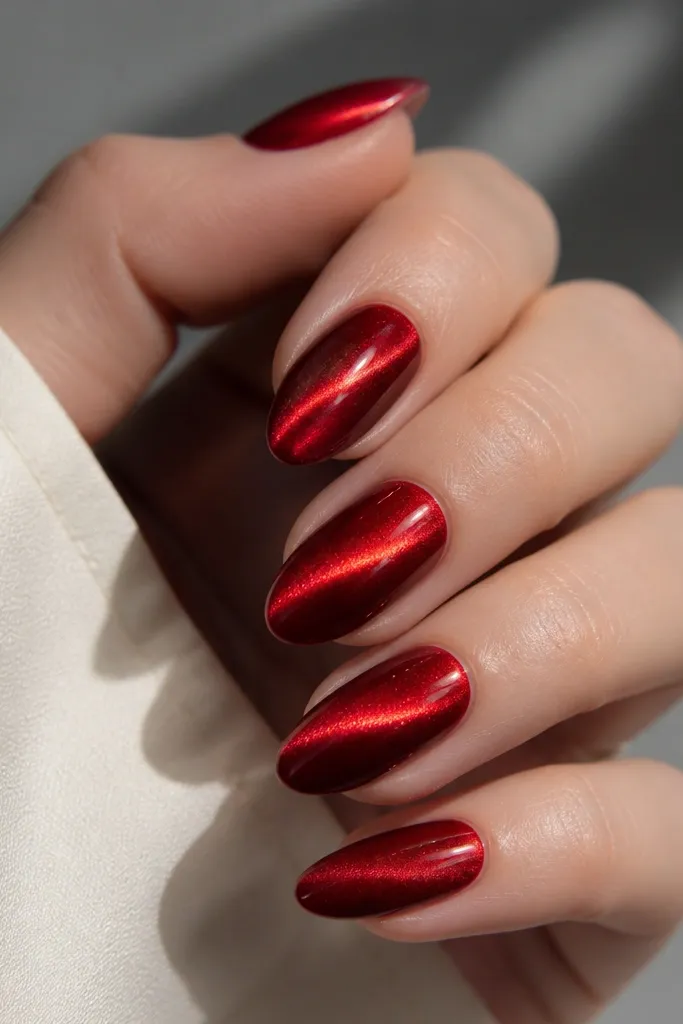
Cat-eye red looks like jewelry, and almond shape makes the magnetic streak look extra long. The side glow gives movement, so even if the rest of the nail is plain, it still looks styled. I’ve worn this to dinners and it photographs insanely well because the streak shifts with your hand. It’s most flattering on medium to long almond lengths where you have enough surface for the glow to stretch.
Editor's notePractice on one nail first — the magnet angle changes the streak from diagonal to straight fast.
Apply a base coat and cure, then paint cat-eye gel in one direction and cure a little under time so the magnet effect locks in. Hold a magnet tool near the nail at a consistent distance to pull the streak, then cure fully. Repeat for a second thin coat if your system needs it, keeping the streak direction the same across all nails. Finish with a glossy top coat that doesn’t blur the magnetic line.
Skip thisDon’t move the magnet mid-cure; that’s how you get a fuzzy streak.
15. Red Almond with Gold Outline French (Thin Frame)
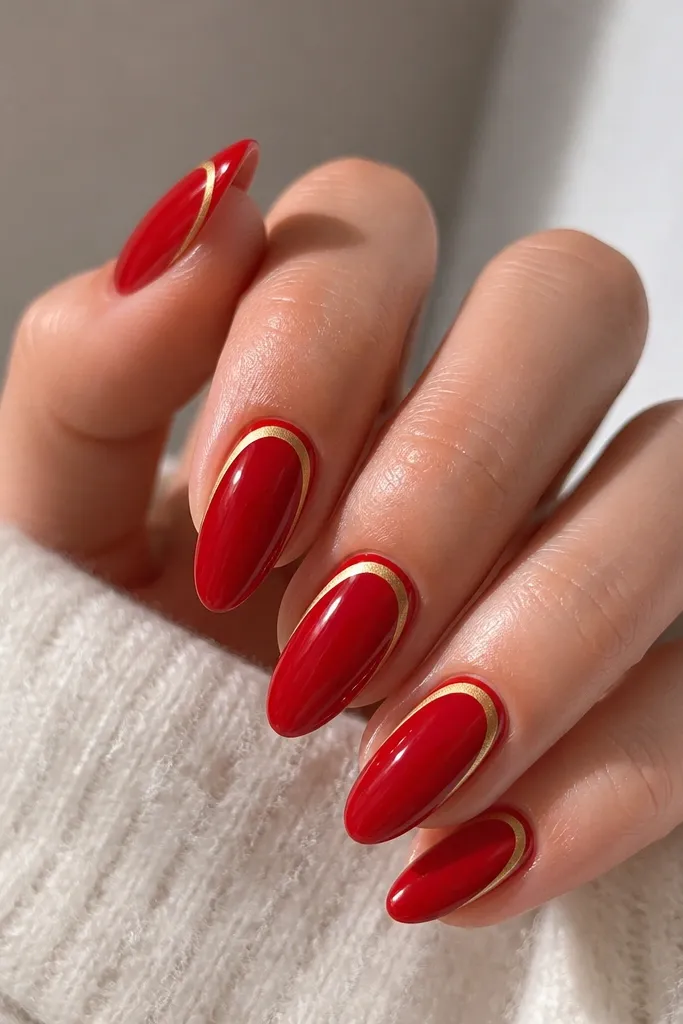
This is my “wedding red” design because it looks polished without giant gems. The red fills the nail, then the thin gold outline gives the illusion of a frame. Almond shape makes the gold line look like a clean border, which is why it reads high-end. It flatters hands on all skin tones, and it pairs beautifully with gold jewelry and warm makeup looks.
Paint two coats of glossy red gel and cure. With a liner brush, paint a thin gold line following the French tip curve — leave a 0.5-1 mm gap from the edge so it looks like an outline, not a blob. If you’re using gold foil gel, tap it lightly and cure. Seal with top coat, and be careful not to smear the gold line while brushing.
Use the edge of your brush like a pen; press lightly for a fine gold line.
Don’t thicken the gold line; thick borders make nails look like they have tape on them.