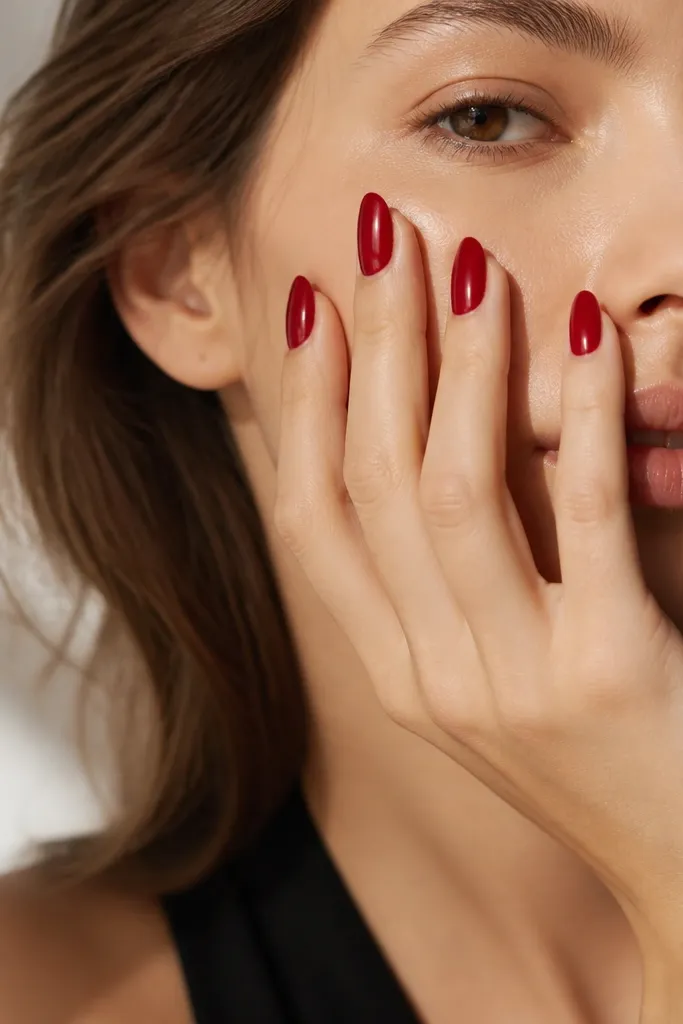
1. Classic cherry gloss almond
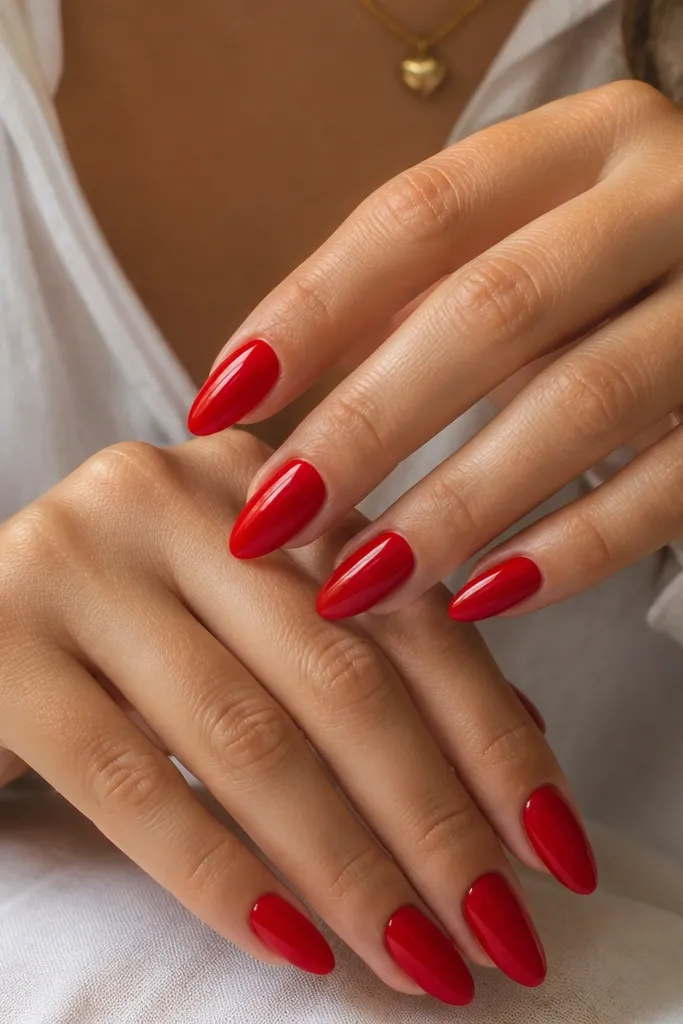
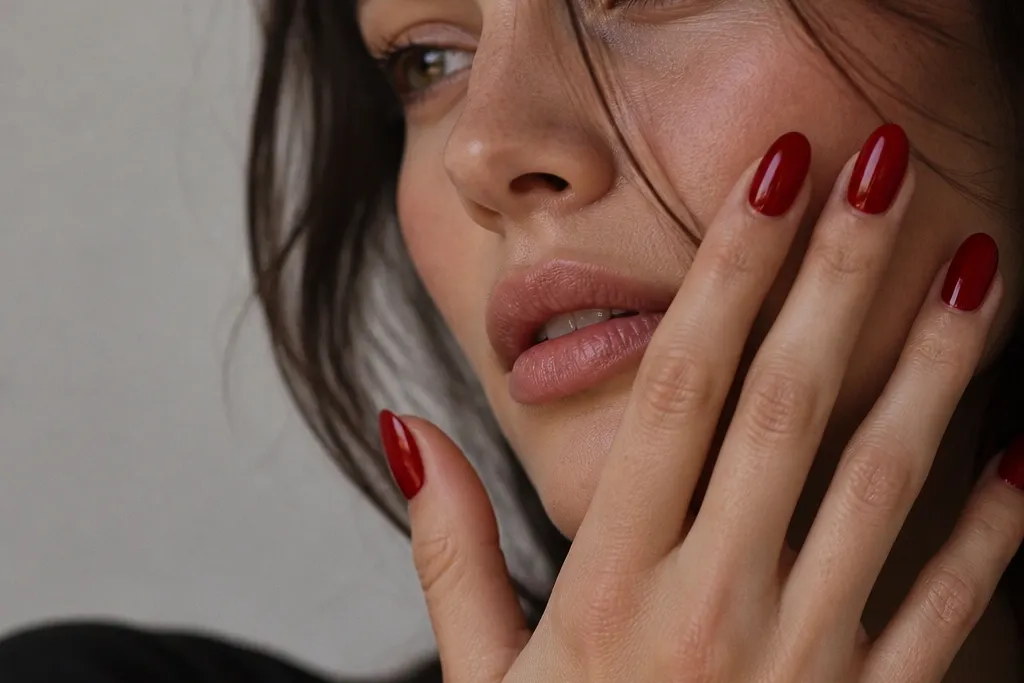
This is the cherry red almond nails look I reach for when I want “put together” without thinking. The color is a warm cherry — not brick, not blood — and the finish is fully glossy so the nail surface throws light like a smooth lacquer. Almond shape matters here: the sides taper evenly toward the tip, so the red looks elongated instead of flat. It flatters fair to deep skin because cherry sits between warm and bright, so it doesn’t wash out or turn muddy. For everyday wear, it also looks right with both gold and silver jewelry.
Start by filing your nails into a soft almond: bring the sides in at the same angle, then round the very tip just slightly. Apply a thin base, then two coats of cherry red gel, curing each coat fully. Keep the first coat slightly sheer near the cuticle to avoid flooding the skin, then build opacity with the second coat. Finally, cap the free edge with topcoat and smooth the surface with a gentle brush stroke down the center. Cure, then wipe with cleanser and check the sidewalls for any thick edges.
If your red looks streaky, use a slightly thicker second coat instead of adding a third thin coat.
Don’t paint right up to the cuticle line — leaving a hairline gap prevents lifting and messy growth lines.
2. Cherry red French almond with micro smile line
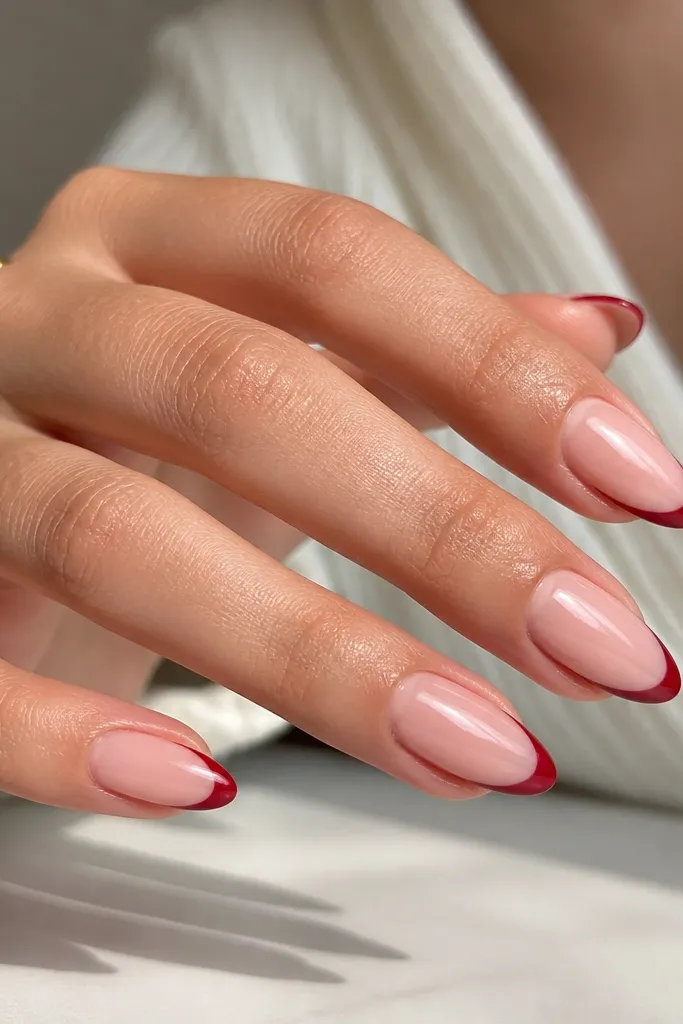
This design gives you the length of a French manicure with the confidence of cherry red almond nails. The base is a sheer pink-nude so the red tip looks clean and intentional, not like it’s floating on top of the nail. The trick is the micro smile line — a narrow curve that doesn’t spread too wide, which keeps the almond tip looking sharp. It’s flattering on shorter almond lengths because the thin tip preserves more nude space. For work, weddings, and date nights, it reads polished without needing extra bling.
Editor's noteUse a flat brush for the tip edge and a liner brush to refine the smile curve — it saves you from wobble.
Start with a sheer nude base (one to two thin coats) and cure. Place a strip of guide tape under the smile line if you’re nervous — keep it aligned with the natural curve of your nail. Paint the French tip in cherry red using a liner brush, keeping the tip thickness around the same width across nails. Cure, remove any guide tape carefully, then clean the edges with a small brush dipped in acetone. Finish with glossy topcoat and cap the free edge so the French line stays crisp.
Skip thisSkip a thick French band; it makes almond nails look shorter and can look like nail polish sticker lines.
3. Cherry jelly base with glossy red streaks
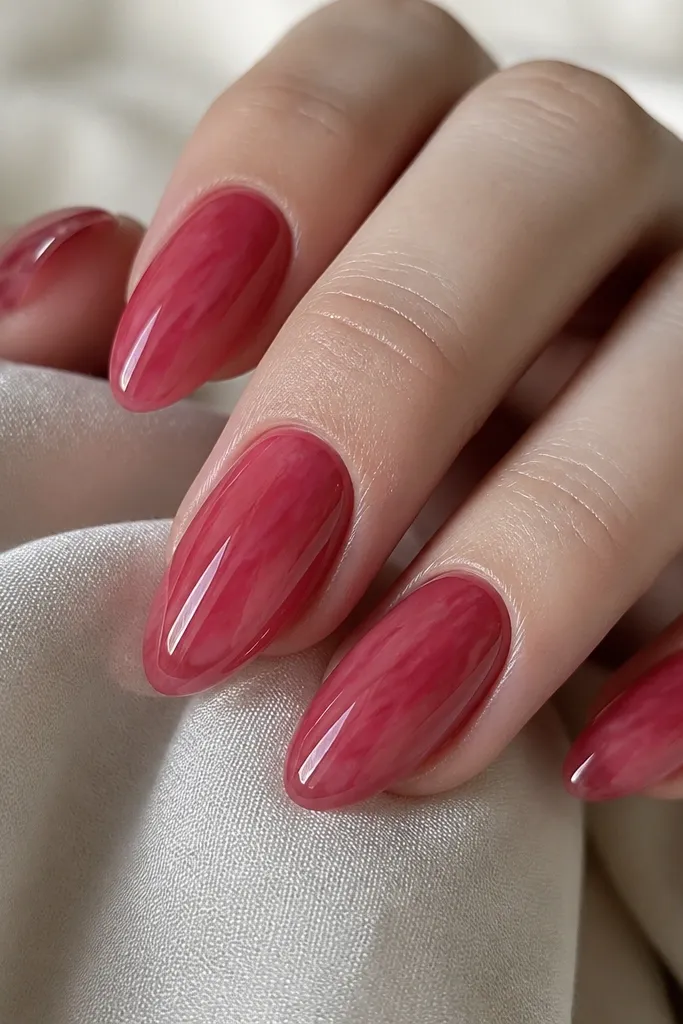
If you want cherry red almond nails that look juicy and dimensional, this jelly + streaks combo is the one. The jelly base is semi-sheer, so it looks like light is moving through the color rather than sitting flat. Then you add a few glossy red streaks diagonally — not full stripes — so it looks like natural marbling. This flatters hands that need a little softness because the translucency smooths the look of ridges. It also looks amazing on medium and deep skin tones because the cherry glows instead of darkens.
Start by applying a jelly cherry base in two thin coats, curing each coat. With a striping brush, add 2-4 diagonal streaks of opaque cherry red in each nail, leaving gaps for the jelly to show. Keep streaks slightly thicker near the center and thinner toward the tip. Cure again, then apply a thick glossy topcoat that levels the surface. When it’s cured, wipe and check for any pooling at the sidewalls.
Practice the streak placement on a paper nail tip first; your second hand will match faster.
Don’t cover the jelly base completely — the translucency is the whole point.
4. Red chrome cherry almond mirror
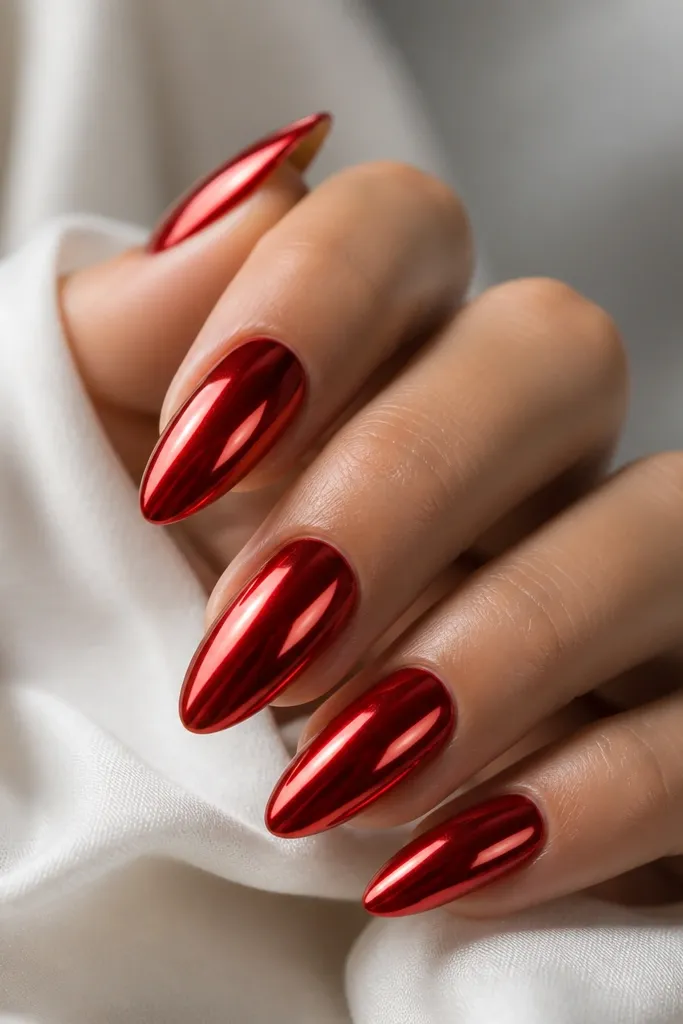
Mirror chrome turns cherry red almond nails into instant glam. The key is using a true red chrome that reflects pink-red highlights, not a dull brick pigment. Almond shape makes the reflection look longer, like a curved spotlight down the center. This is a great choice for nights out, holiday parties, and photos where you want your hands to be the focal point. It also works on fair and warm-medium skin without going too orange, as long as the chrome base is properly sealed.
Editor's notePress the chrome powder in with a sponge applicator, not the brush, for a smoother mirror.
Start with a tacky or chrome base gel and cure it until it’s ready for powder. Apply a thin layer of red chrome powder and rub in gently, focusing on the center ridge so you get a smooth reflective face. Use a soft brush to remove excess powder, then seal with a chrome-friendly topcoat. Cure fully and wipe if your system requires it. Finish by checking the edges — if you see bare spots, add a tiny bit more chrome and seal again.
Skip thisDon’t use a regular glossy topcoat over chrome before the chrome is sealed correctly — it can mute the shine.
5. Matte cherry almond with glossy cuticle half-moon
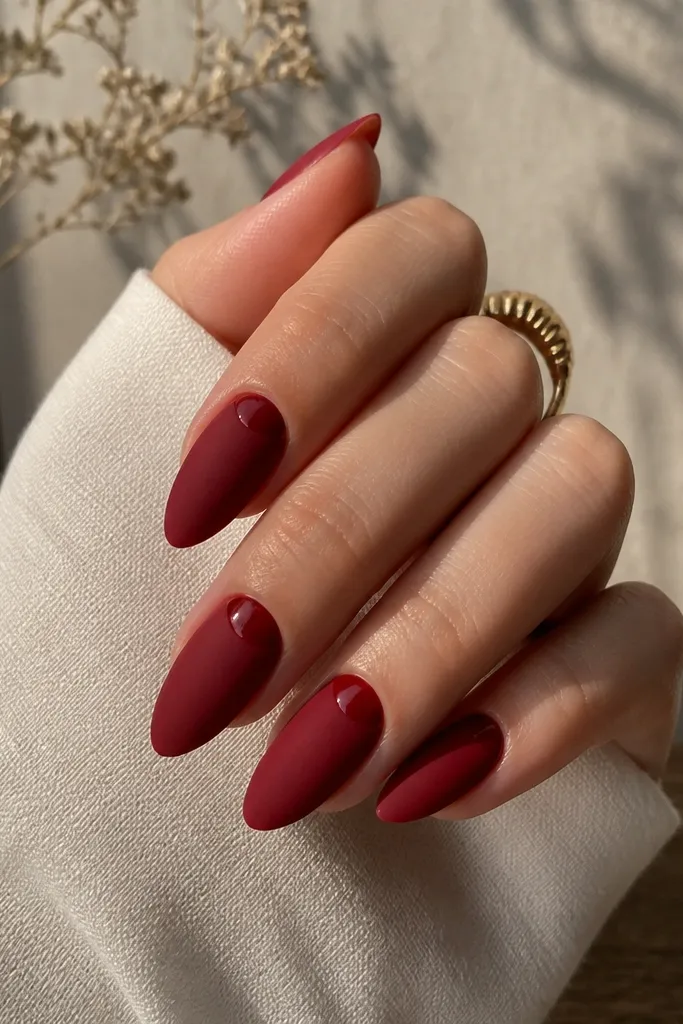
This is the look that makes cherry red almond nails feel modern. Matte across the whole nail makes the color look velvety and smooth, while the glossy half-moon at the cuticle adds a tiny flash that frames your nail bed. I like it most on medium almond lengths because the matte spreads evenly and the half-moon is easy to place. It flatters hands with longer nail beds because the glossy area draws attention where your nail starts. For everyday wear, it still reads glam because cherry is bold.
Paint two coats of cherry red gel and cure. Apply matte topcoat to the whole nail except a small half-moon near the cuticle — use a thin strip of tape or a cuticle guard to mask it. Cure the matte topcoat, then carefully remove the mask. Apply glossy topcoat only on the half-moon area and cap the edges lightly so it blends without smearing. Cure again and wipe clean.
Use a cuticle guard or tape that’s thin — thick tape leaves a visible ridge under the glossy topcoat.
Skip a messy half-moon; if it’s uneven, the whole design looks like smudged tape.
6. Cherry red almond with tiny gold foil crescents
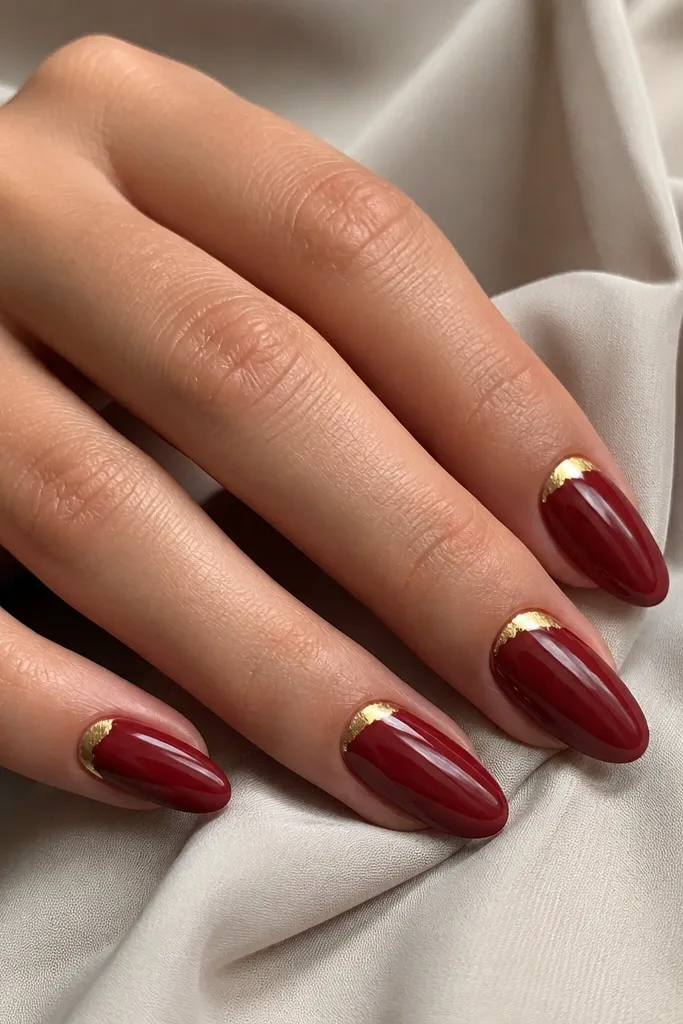
Gold foil adds movement to cherry red almond nails without turning them into heavy bling. I place tiny crescents near the cuticle on one side of the nail, not centered, because it gives an angled, slimming look. The foil is irregular and thin, so the red still feels dominant. This style flatters most skin tones and looks especially good with warm undertones and gold rings. It’s also a nice middle ground if you like sparkle but hate rhinestones.
Start with a glossy cherry red base in two coats and cure. Dab a small amount of foil gel adhesive near the cuticle on one side, about 1-2 mm away from the skin. Press tiny pieces of gold foil so they form a crescent shape, then cure. Seal with a glossy topcoat in two thin layers so the foil doesn’t lift. Keep the foil pieces small — around the size of a grain of rice — so the nail still looks clean.
Use tweezers with a flat tip; it helps you place foil without smearing adhesive.
Don’t put foil too far down the nail — it can make the design look cluttered.
7. Cherry red almond with negative space arc
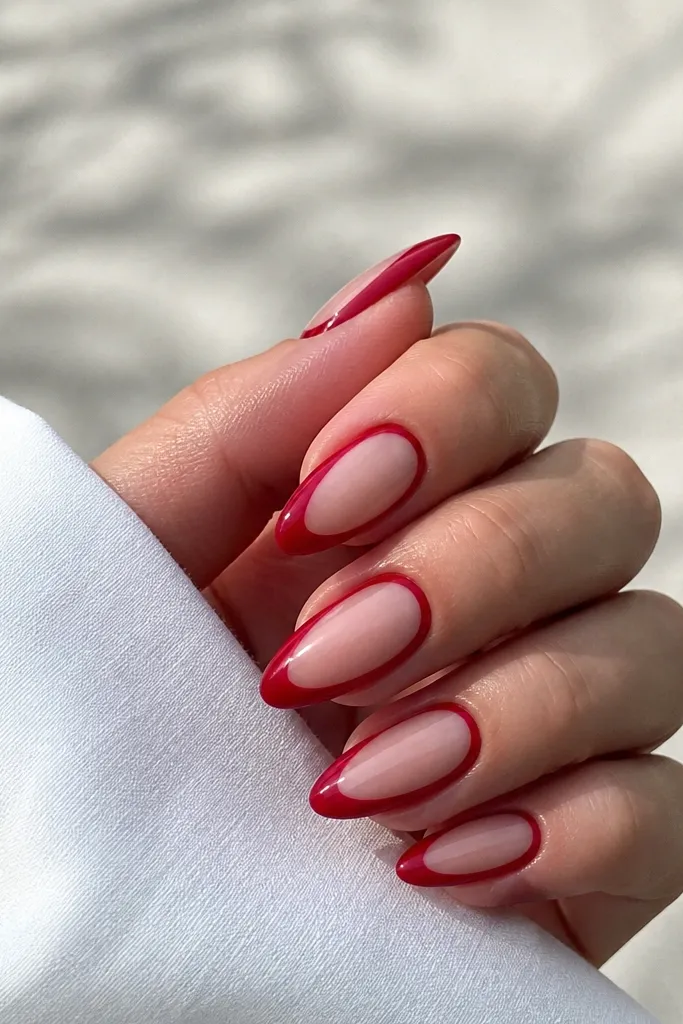
Negative space makes cherry red almond nails look sleek and fashion-forward. The arc shape is the key — it feels intentional instead of random clear spots. I leave a window in the center so the red reads like a frame, which helps hands look longer and cleaner. This design flatters short nail beds because the clear area gives the eye a break. It also looks great for events because it’s bold without needing extra gems.
Editor's noteKeep the arc slightly higher than the center — it lifts the look and flatters the nail bed.
Apply a base coat and cure, then place a thin strip of gel or a clear guard to mask the center window for the arc. Paint cherry red along the sides and outer curve, keeping the red band consistent in thickness. Cure, then remove the mask carefully while the gel is fully cured. Apply topcoat over the whole nail, making sure you seal the edges of the red band so it doesn’t chip. If your arc edge looks fuzzy, refine it with a tiny liner brush after the first topcoat cure.
Skip thisDon’t oversaturate the negative space with red; any seepage makes the clear window disappear.
8. Cherry red almond with black micro-dot constellation
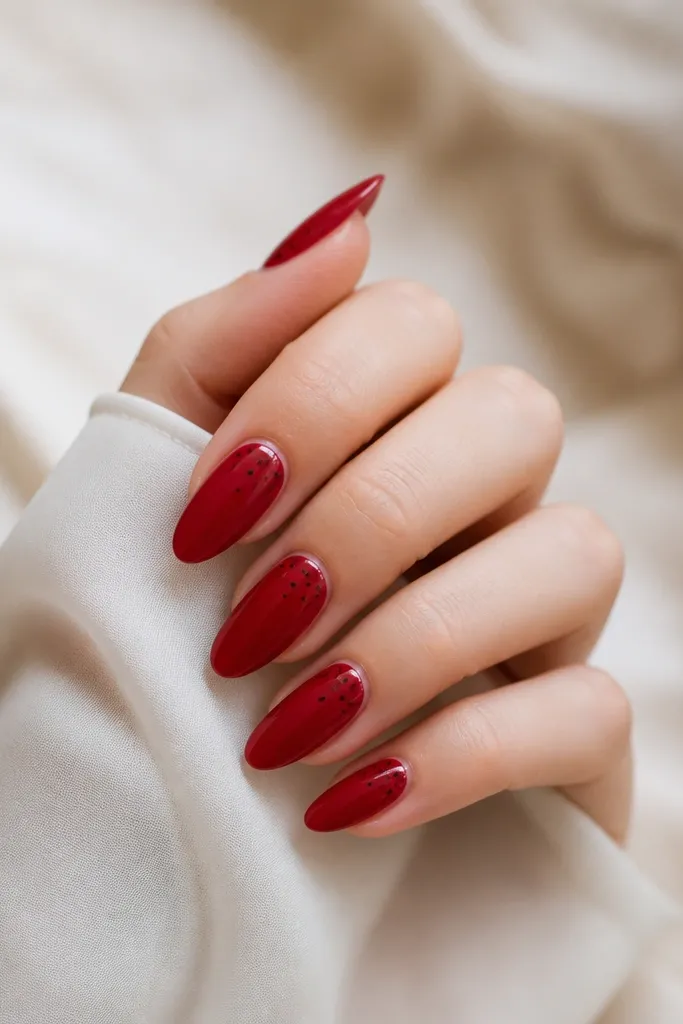
This is for when you want cherry red almond nails to feel edgy instead of sweet. The black micro-dots act like tiny punctuation marks, and because they’re small, the design stays classy. I place most dots near the upper third of the nail so the eye travels toward the tip. It flatters both cool and warm skin tones because black anchors the red and keeps it from reading too playful. For concerts, fall outfits, and leather jackets, this one always gets compliments.
Editor's noteIf your dots look too round, drag the dot tool up and away — it creates a cleaner point.
Paint two coats of cherry red gel and cure. Using a dotting tool (size 1 or a toothpick for super tiny dots), place 6-10 black dots per nail, leaving more space near the tip so it looks airy. Vary dot size slightly so it doesn’t look stamped. Cure the artwork briefly. Finish with a glossy topcoat that lightly covers the dots without smearing them.
Skip thisSkip large dots; big black circles overpower the cherry and make it look like cheap nail art.
9. Cherry red almond with white diagonal V tips
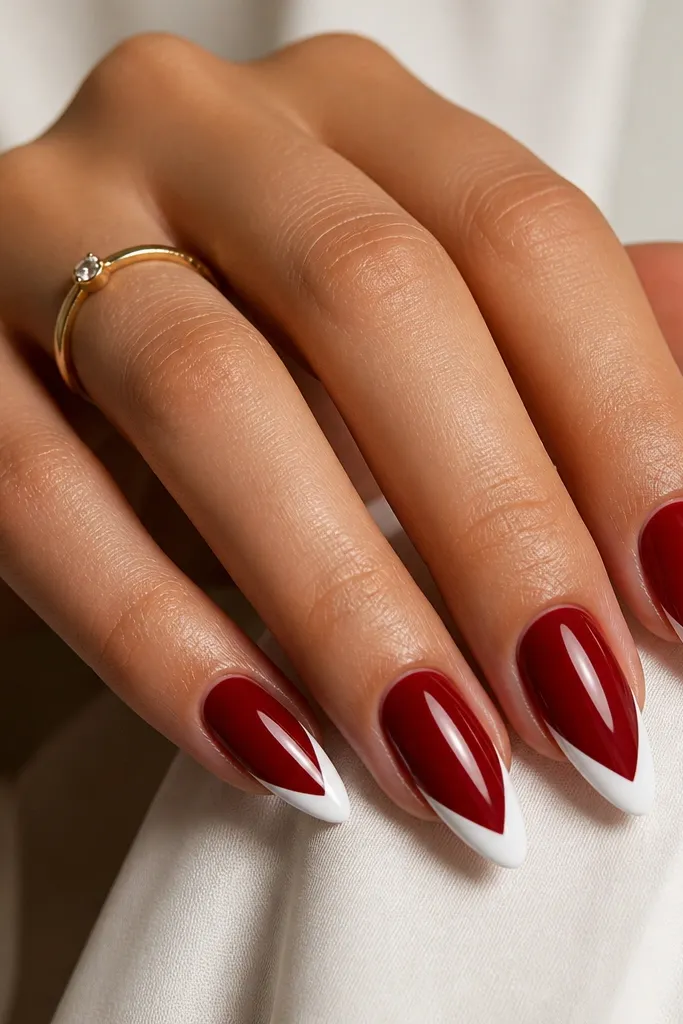
A white diagonal V tip makes cherry red almond nails look graphic and sharp. The V shape lengthens the nail because your eye tracks the point toward the tip. This is the design I wear when I want a bold manicure that still looks neat even with minimal bling. It flatters most skin tones, especially if you like clean contrast. For summer dresses, denim, and monochrome outfits, it reads fresh.
Editor's noteUse a slightly translucent white gel first, then build opacity — it prevents thick, bumpy edges.
Start with a smooth cherry red base in two coats and cure. Use tape or a nail guide strip to form a V angle on the tip; keep the arms of the V even on both sides. Paint white gel on the taped area, cure, and remove the tape while it’s cool. Add a thin cherry red outline only if you need to sharpen the edges, then cure again. Apply glossy topcoat and cap the free edge so the sharp lines stay intact.
Skip thisDon’t paint the V too low; if it starts near the middle of the nail, the almond shape stops looking elongated.
10. Cherry red almond with rhinestone line at the cuticle
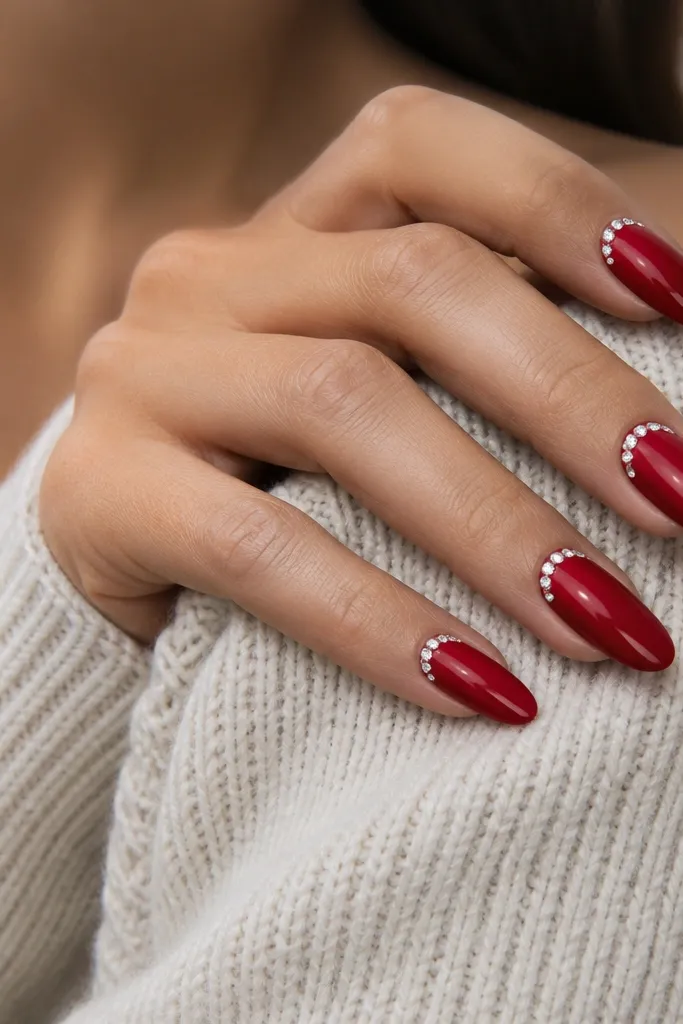
A single rhinestone line makes cherry red almond nails look dressed up in seconds. I keep the stones small and placed along the cuticle curve, so it frames your nail bed without covering the whole nail. Clear stones work best here because the sparkle stays bright and doesn’t compete with the cherry. This flatters hands that want a little lift because the line draws attention to where your nails start. It’s perfect for holidays, birthdays, and bridesmaid looks.
Paint cherry red gel on all nails in two coats and cure. Apply a thin bead of rhinestone gel along the cuticle curve — just a short section at a time. Place micro clear rhinestones with tweezers, pressing each stone lightly so it sits flat. Cure each nail in short bursts to keep stones from drifting. Seal with topcoat, using a brush to cover around the stones without flooding the cuticle.
Do one nail at a time so the adhesive doesn’t start to set before you place stones.
Don’t use big stones — they snag on clothes and look heavy on almond.
11. Cherry red almond with holographic micro flakes
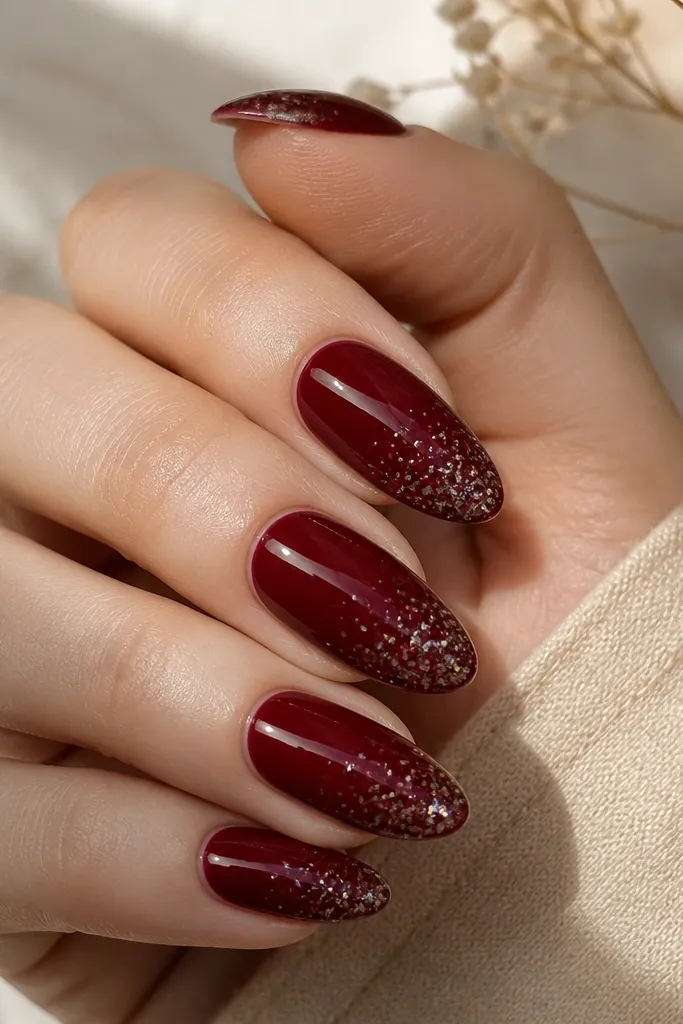
Holographic micro flakes make cherry red almond nails look like they glow from within. I concentrate flakes near the tip so the sparkle is strongest where your nail ends, which makes the almond point look extra defined. The flakes are fine, so the manicure still feels clean instead of chunky. This works on fair through deep skin because holographic reflects multiple shades and doesn’t fight with cherry warmth. It’s a great “night out but still classy” option.
Editor's noteUse less flakes than you think — a light dusting looks sharper than a full coat of glitter.
Apply two coats of cherry red gel and cure. Add a thin layer of clear or slightly tacky gel near the top third of the nail, about 2-3 mm from the tip edge. Dust holographic micro flakes over that area and press gently, then cure. Brush off loose flakes, then apply a thick glossy topcoat to level everything. If you see rough texture, add a second topcoat layer after curing the first.
Skip thisSkip sparse topcoats; flakes can catch and lift if the surface isn’t sealed thick enough.
12. Cherry red almond with pearlized blush base and cherry overlay
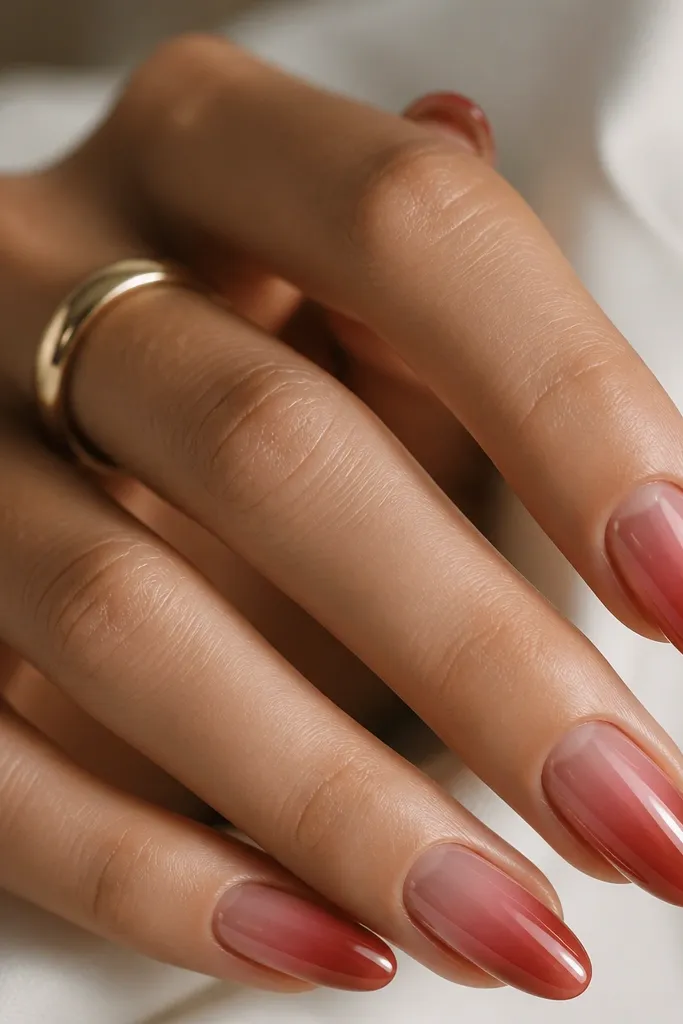
This design turns cherry red almond nails into a softer, romantic version of glam. The base is pearlized blush, so it gives a creamy glow under the cherry overlay. Then the cherry is semi-sheer and layered so it fades slightly toward the cuticle, not a hard stripe. It flatters hands with uneven nail tone because the pearl base smooths the look. I love it for spring events and dates because it feels pretty but still unmistakably red.
Editor's noteBlend the cherry with a stippling sponge — it creates a smoother fade than dragging a brush.
Start with a pearlized blush gel base in one to two coats and cure. Add a semi-sheer cherry overlay using a sponge or soft brush, keeping the heaviest cherry near the center and tapering toward the cuticle. Cure, then add one more cherry layer only if you want deeper color at the tip. Finish with glossy topcoat to lock the gradient and create a smooth, reflective surface. Clean the sidewalls with a flat brush and a tiny bit of acetone.
Skip thisDon’t skip the pearl base; straight cherry gradient on bare nails can look streaky.
13. Cherry red almond with white swirl lines
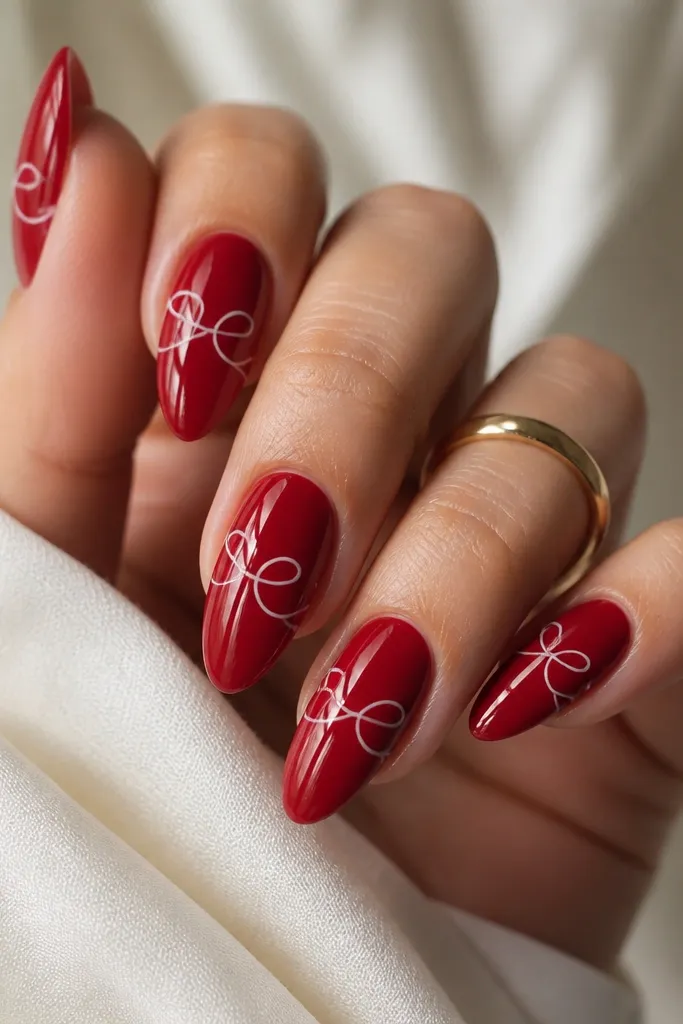
White swirl lines make cherry red almond nails look like nail art you’d see at a salon, but it’s simpler than it looks. The swirls are thin and ribbon-like, so the red stays the star. I place the main swirl down the center and add smaller loops near the upper third so the design has movement. This flatters short-to-medium almond nails because it creates a vertical flow. It also pairs well with silver jewelry because white reads crisp against cherry.
Editor's noteWipe your liner brush on a lint-free wipe before painting — white gel goes on streaky if the brush is too loaded.
Paint two coats of cherry red gel and cure. Use a 000 liner brush with white gel and draw one main swirl from near the upper third down toward the tip, keeping line thickness consistent. Add one or two smaller loops branching off, then cure. If lines look uneven, go back with a tiny brush and correct before curing the final time. Seal with glossy topcoat, making sure the swirls sit under the surface so they don’t snag.
Skip thisDon’t make thick swirls; chunky lines turn the manicure into a sticker look.
14. Cherry red almond with black French tip
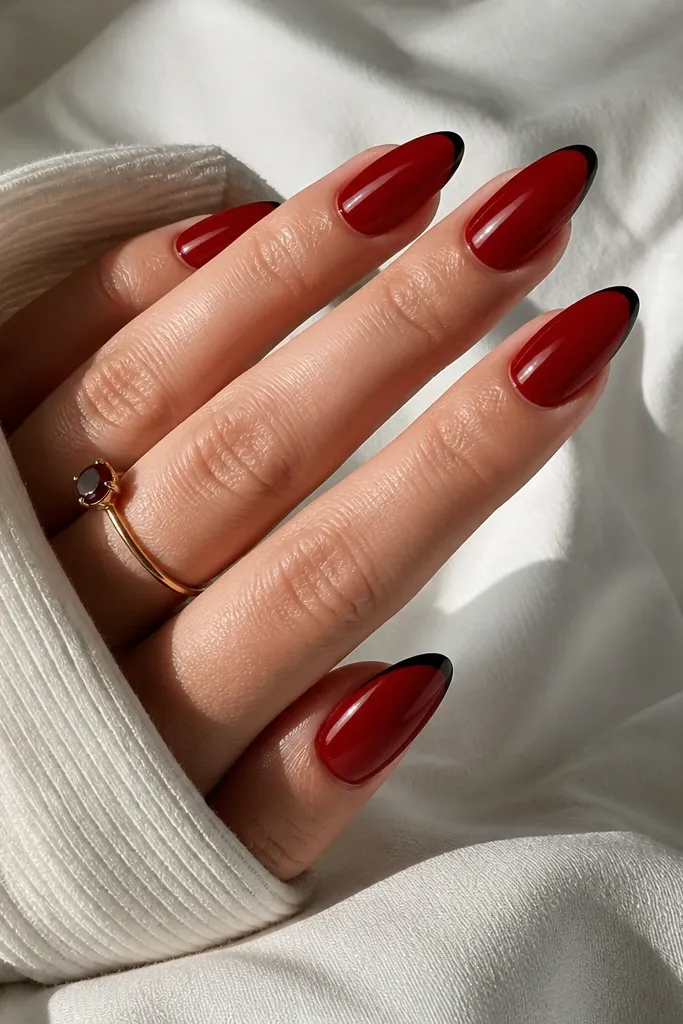
Black and cherry red is a combo I trust when I want cherry red almond nails to feel dramatic but still neat. The black French tip creates a strong outline and makes the almond point look extra sharp. Keep the black line thin — think eyeliner, not paint. This flatters hands of all skin tones because black adds contrast and cherry brings warmth. It’s also easy to wear with dark outfits, gold rings, and even minimal jewelry because the nail design does the work.
Editor's noteUse a slightly matte topcoat on the black tip only if you want extra contrast — keep the rest glossy.
Start with cherry red gel in two coats and cure. Mark the French tip line with a guide strip or by lightly placing tape along the natural smile curve. Paint a thin black French tip using a liner brush, then cure. Remove the tape slowly and clean the edges with a detail brush dipped in acetone. Finish with glossy topcoat and cap the free edge so the black line stays crisp.
Skip thisDon’t let black bleed into the red; even a tiny smear makes the French line look sloppy.
15. Cherry red almond with subtle velvet matte
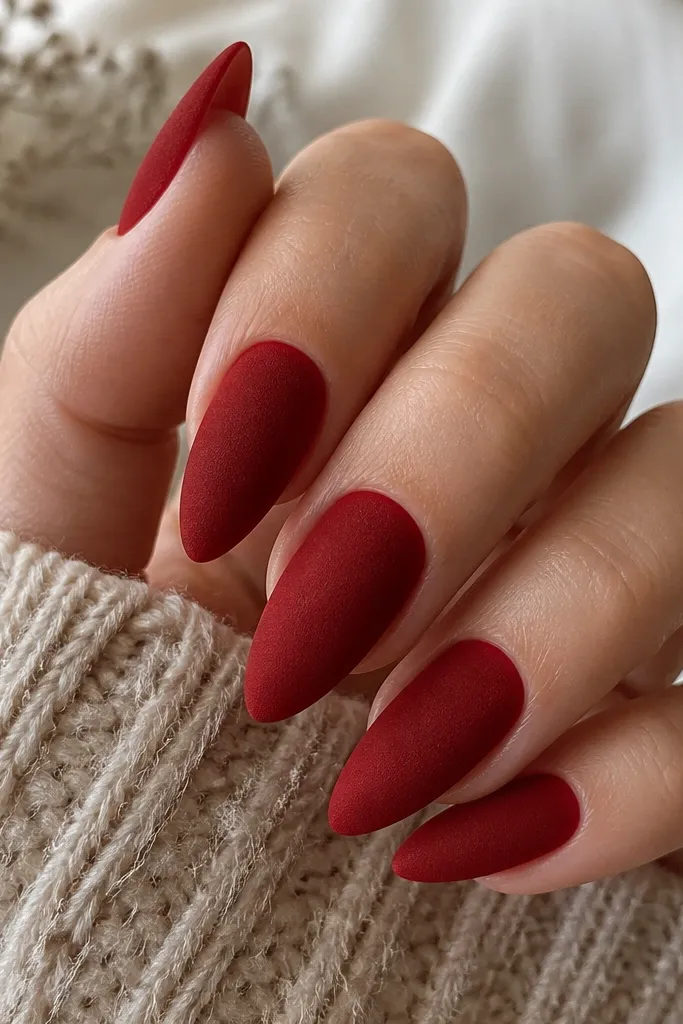
Velvet matte is a different kind of glam for cherry red almond nails. The color looks deeper because the surface scatters light, so it reads richer than glossy cherry. I like this when I’m wearing cozy knits, thick coats, or anything textured because the nail finish matches the vibe. It flatters medium to deep skin tones beautifully because the velvet texture makes the red look almost wine-like. On fair skin, it still works, but you need a warmer cherry so it doesn’t look too dark.
Editor's noteKeep the velvet powder application light — heavy powder can look patchy along the sidewalls.
Apply cherry red gel base in two coats and cure until smooth. Apply a velvet matte topcoat (the kind made for velvet powder) in a thin, even layer and cure lightly if your system requires it. Sprinkle velvet powder over the nails, press gently, and tap off excess. Cure again according to your gel brand instructions. Brush off leftover powder and seal lightly with a second velvet-friendly layer only if your brand calls for it.
Skip thisSkip glossy topcoat over velvet; it kills the fuzzy finish and makes it look uneven.