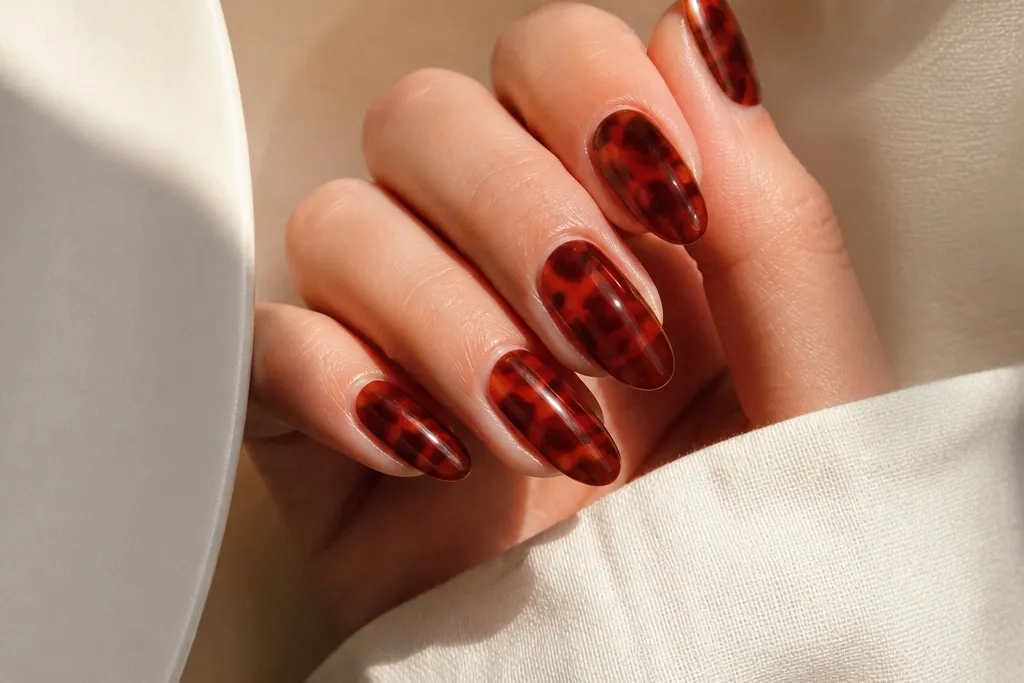
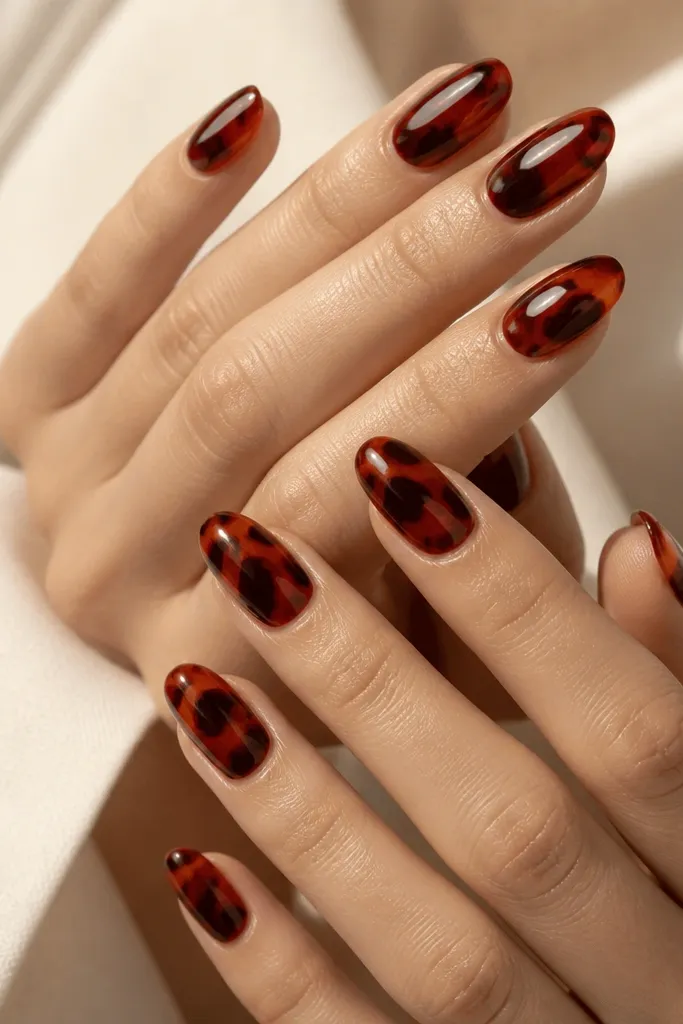
1. Amber Horn Base with Cherry Center Stripe
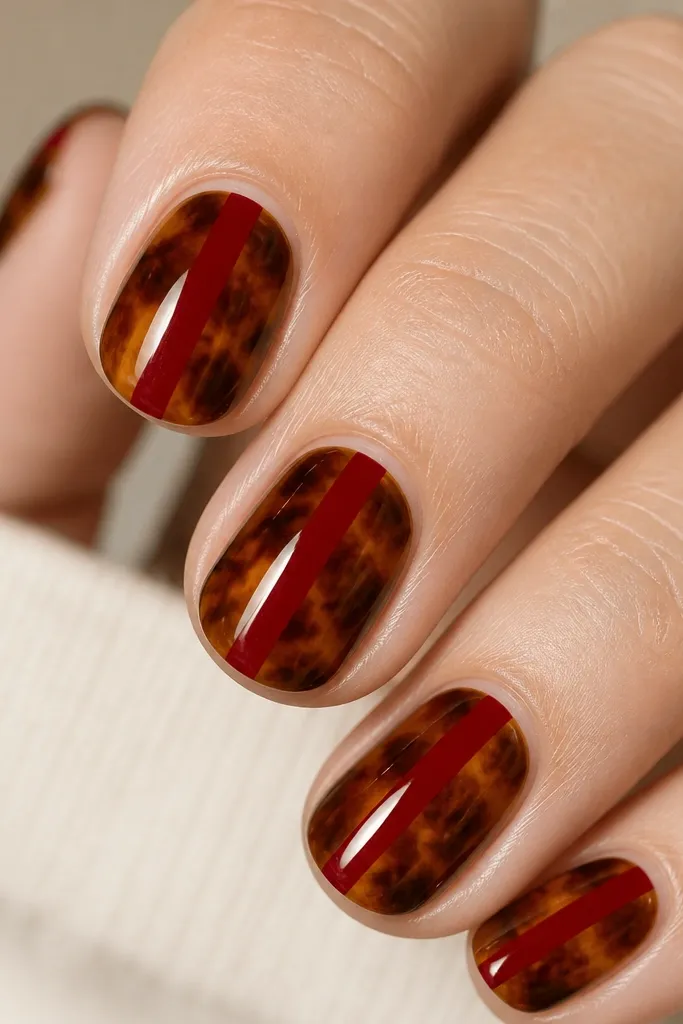
This is the set I reach for when I want tortoise shell to look sharp, not busy. The amber base gives you that warm, wearable glow, while the chocolate shadow keeps the pattern dimensional. The cherry center stripe pulls the eye down the nail, which makes fingers look longer even when you stay short. It flatters medium to warm skin tones especially well, because the red echoes the warmth in your undertone. For workdays and casual nights, it reads styled without screaming for attention.
Start by painting a honey amber gel base on all nails and cure it fully. Sponge the tortoiseshell with three colors: add a chocolate-brown layer lightly over the middle and edges, then dot thin dark-brown lines with a striping brush to mimic horn cracks. Clean up the stripe area by wiping the center with a lint-free wipe so the stripe stays crisp. Then apply a cherry-red gel stripe down the center, keeping it about 1/6 of the nail width, and cure. Finish with a glossy top coat in two thin layers so the stripe looks glassy and the tortoise doesn’t get dented.
Editor's noteIf your stripe bleeds into the tortoise, cap the stripe edges with a tiny brush of top coat before your final cure.
Skip thisSkipping the thin dark-brown “breaks” makes it look like plain brown polish instead of tortoise shell.
2. Black-Brown Crackled Tortoise with Red Micro French
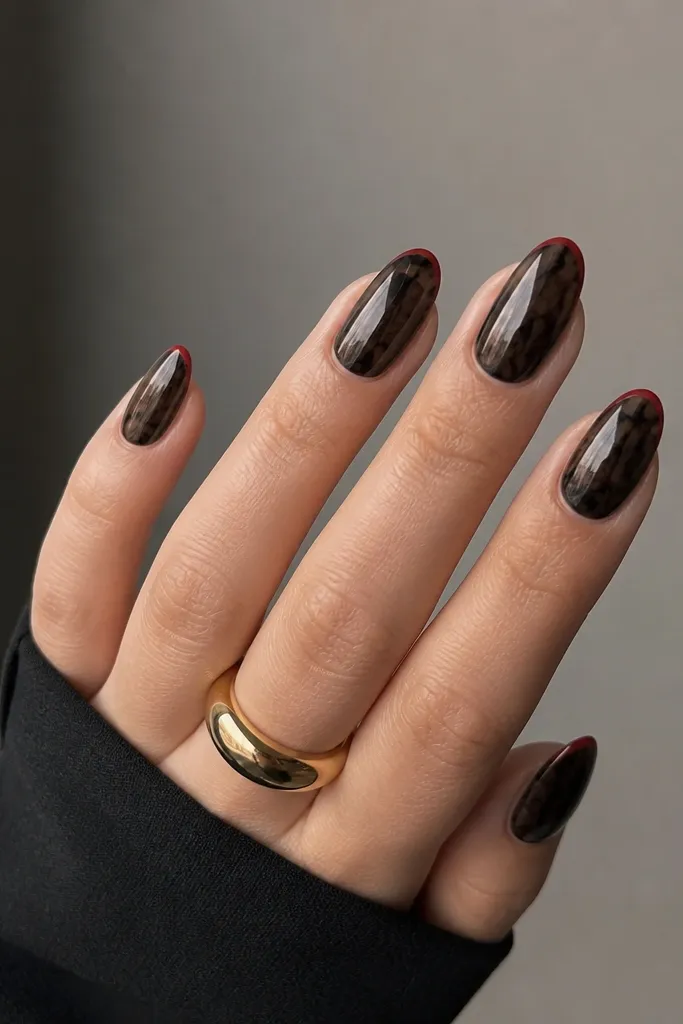
This look is for when you want tortoise shell to feel edgy. The black-brown crack lines add drama and make the red French look like a clean highlight instead of a chunky color block. Because the red is thin and close to the tip, it visually lengthens the nail and makes hands look neat. It’s especially flattering on almond shapes because the curved tip gives the red line a natural arc. I’ve worn this to events where I needed my nails to look “done” in photos without being too loud.
Start with a dark tortoiseshell base: sponge on amber first, then blend in chocolate and finish with a few smoky black-brown patches. Use a dotting tool to drag tiny crack shapes outward from the center so the pattern looks like horn fractures. Cure fully, then wipe the tacky layer if your gel system needs it. For the micro French, draw a thin red curve right at the tip edge — keep it under 1mm thick — and cure. Top coat with a smooth first layer, then a second layer focused on the apex so the tip looks sealed.
Use a liner brush that’s stiff enough to hold a straight line; soft brushes make the French curve look wobbly.
Don’t make the red French too thick or it turns into a chunky border that hides the tortoise texture.
3. Tortoise Ombre with Brick-Red Cuticle Glow
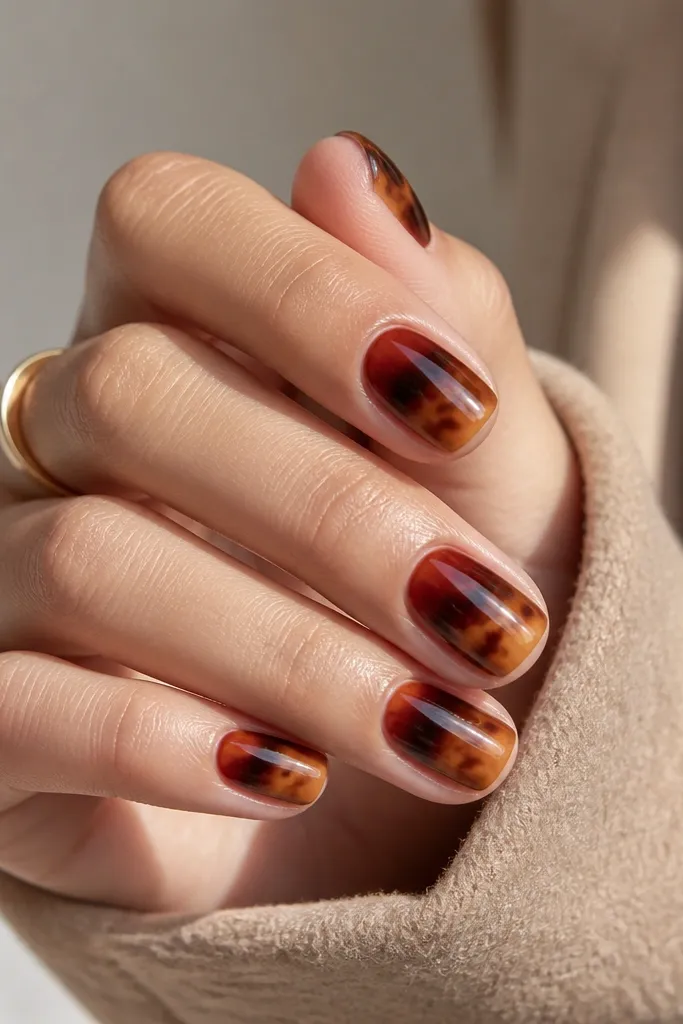
This set looks expensive because the red is placed where light hits — right at the cuticle. The tortoise ombre gives you a gradient that feels smooth, and the brick-red halo adds warmth without overwhelming the nail. I love it on short squoval nails because it balances the width of the nail bed and keeps fingers looking tidy. This works well on fair to medium skin tones because the red glow creates a gentle contrast without turning harsh. It’s a great “I did my nails but I’m not trying too hard” look.
Apply a chocolate shadow near the cuticle area and blend it down into honey amber using a makeup sponge. Add tortoise breaks by tapping tiny thin dark-brown lines into the mid-to-upper area, then cure. For the brick-red cuticle glow, sponge a small amount of brick-red at the cuticle line and blend outward just 1-2mm. Wipe the skin carefully with a brush dipped in acetone-free remover so the glow stays clean. Seal with glossy top coat, especially around the cuticle edge, so it doesn’t lift.
Editor's noteIf the red halo looks too bold, mix brick-red with a tiny drop of clear gel and sponge again — it keeps the glow soft.
Skip thisDon’t drag the red too far toward the tip or it stops looking like a cuticle highlight.
4. Classic Tortoise with Blood-Red Diagonal Slash
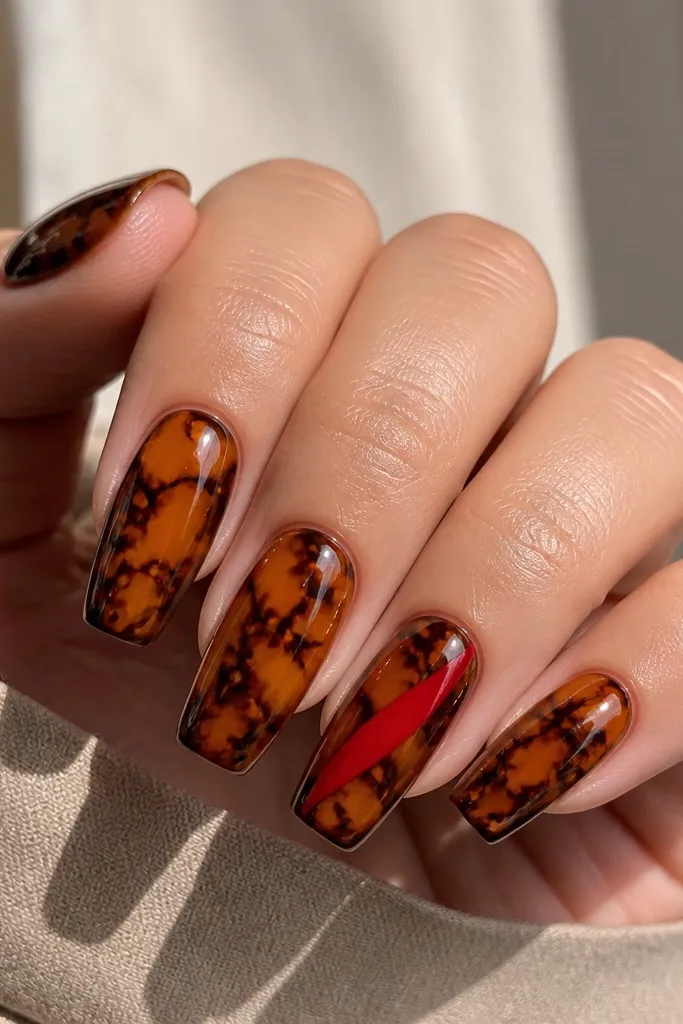
Diagonal red looks like a graphic design when your tortoise shell stays busy behind it. The blood-red slash gives a strong focal point, and the sharp edge makes it feel intentional, not accidental. I like this on medium coffin shapes because the diagonal line follows the nail’s geometry and makes the nail bed look longer. It flatters cooler skin tones too because the red has that deep, almost wine-like intensity. For nights out, it’s my go-to when I want one bold element without doing full red nails.
Start by building your tortoiseshell: amber base, chocolate shadow, then thin dark-brown horn breaks using a striping brush. Cure and clean the surface so the diagonal line sticks cleanly. Tape off the diagonal direction with a small piece of striping tape, then paint blood-red gel along the tape edge for a crisp boundary. Remove tape before curing so the line stays sharp, and cure thoroughly. Top coat with two thin glossy layers so the diagonal stripe looks smooth and not raised.
Editor's notePress the tape down firmly on the sidewalls; lifted tape creates a jagged edge that looks cheap in close-up.
Skip thisDon’t freehand the diagonal line if you’re not steady — a slightly uneven slash ruins the “graphic” feel.
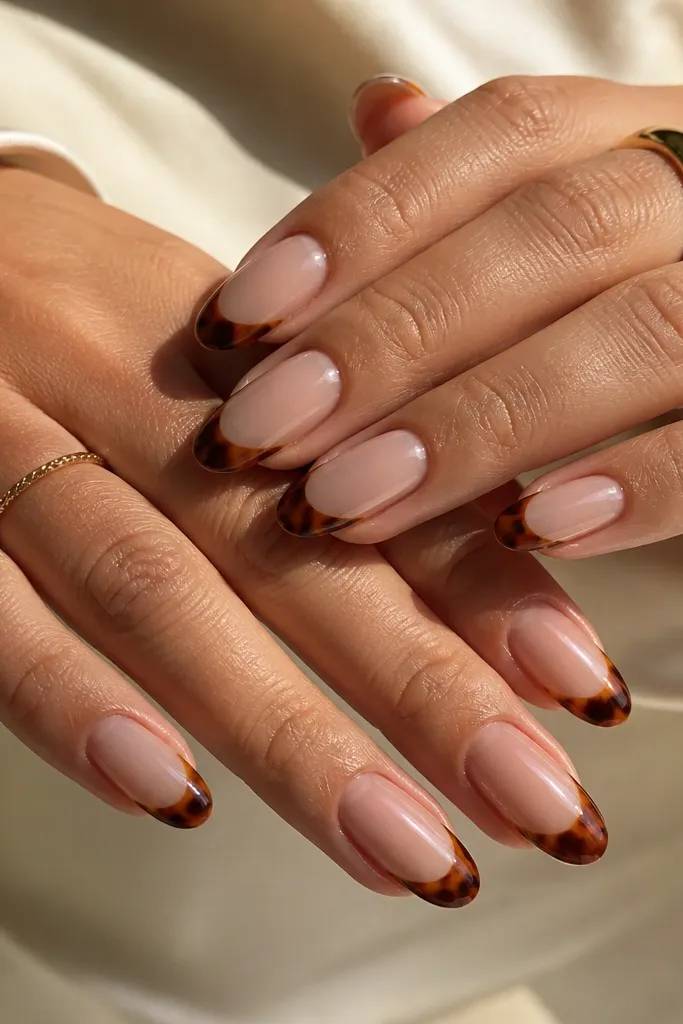
5. Tortoise French Tips with Red Under-Outline
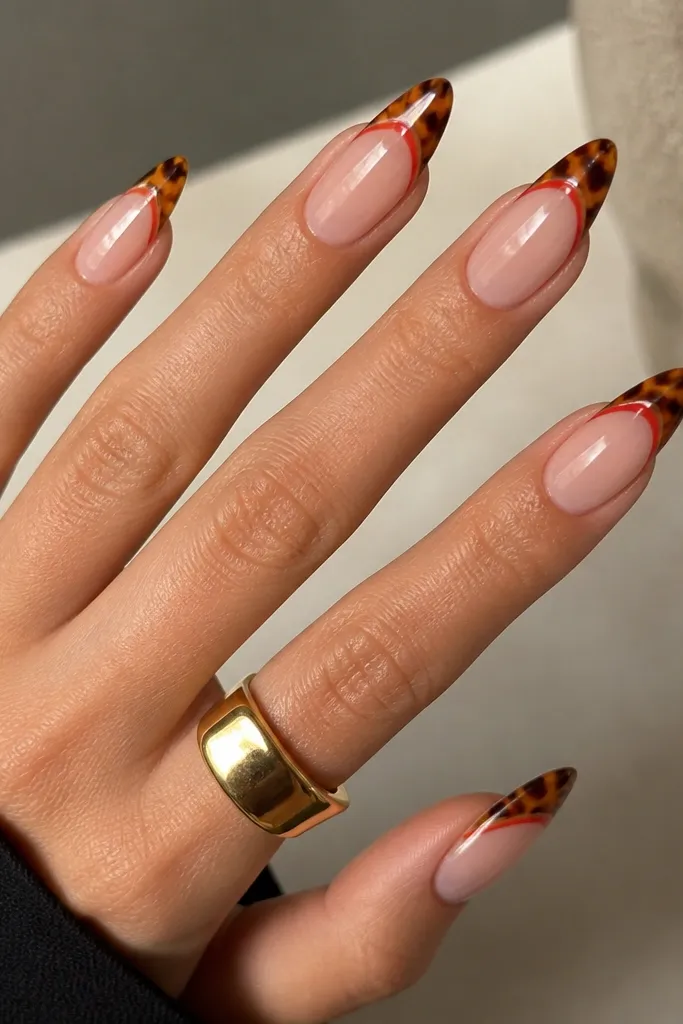
This one looks like layered jewelry because the red outline sits under the tortoise tip. The tortoise concentrated at the tip makes the nail look longer, and the thin red border adds a flash of color at the exact spot where your hand catches light. It flatters longer nail beds and makes fingers look elegant without needing a full red manicure. Warm undertones love it because the amber tortoise and red match naturally. I’ve worn this at weddings and it reads “put together” even from across the room.
Start with a sheer nude base (or a pale pink that matches your skin tone) and cure. Draw a thin red French outline following the natural smile line at the tip, keeping the line even and about 0.5-1mm thick. Then sponge tortoiseshell only on the tip area over and around the red line, using amber and chocolate and leaving the red outline visible at the edge. Cure, then top coat heavily on the tip to smooth the layers. Finish with a second glossy coat on the whole nail so the tortoise looks like it’s sealed under glass.
Editor's noteUse a sheer nude base with a slightly warm tint; cold pink bases make the tortoise look dull.
Skip thisDon’t cover the red outline with tortoise all the way — the border is the point.
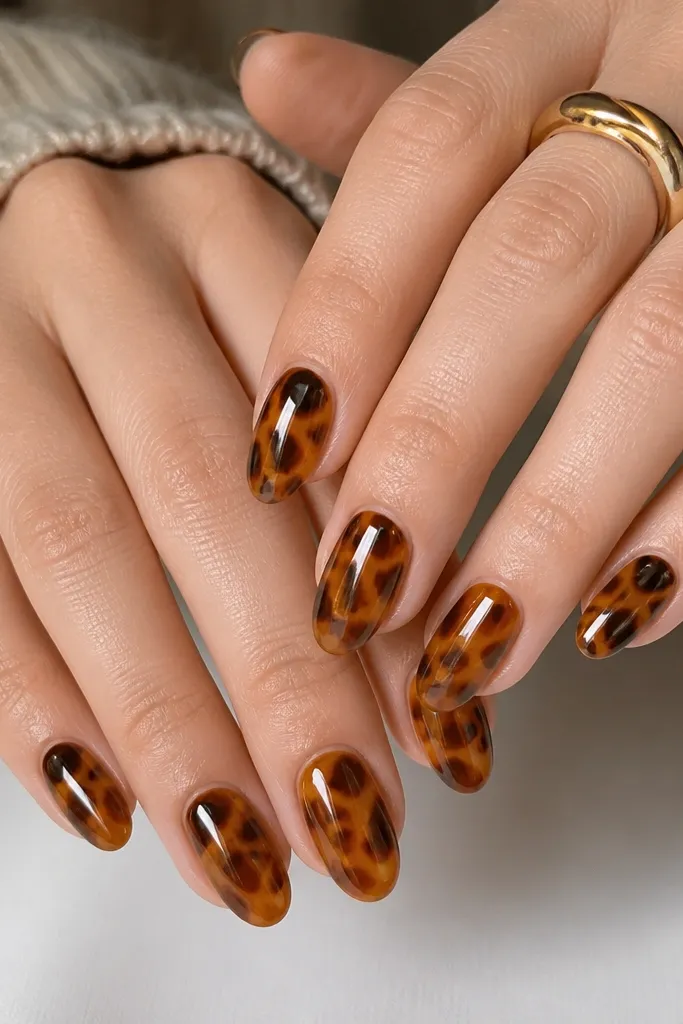
6. Red Confetti Specks on Honey Tortoise
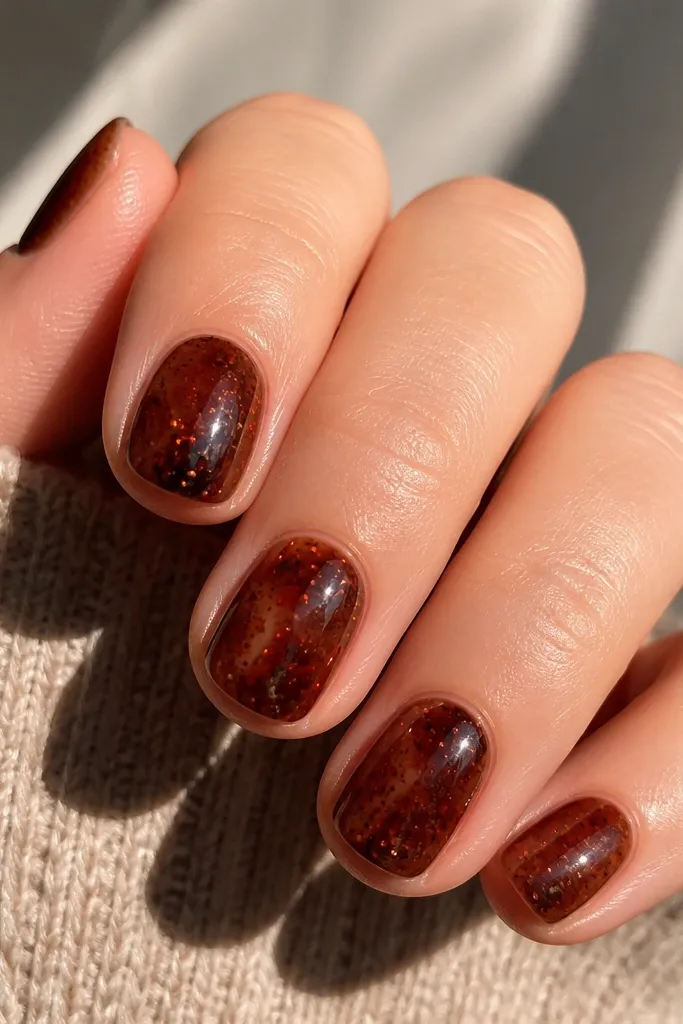
If you want tortoise shell but hate big stripes, this is the sweetest version. The honey tortoise stays warm and wearable, and the red confetti gives it movement without making your nails look heavy. I like it on short round nails because the specks draw the eye inward and keep the shape looking balanced. It looks good on light to medium skin tones because the red dots pop clearly without overpowering the nail bed. For everyday wear, it feels playful but still polished.
Paint a honey amber tortoiseshell base by sponging on amber, then adding chocolate shadow around the sides and curing. With a thin liner brush or dotting tool, place tiny red dots in a loose cluster around the center — aim for 6-10 dots per nail. Add a few micro dots of dark brown between red specks so the pattern still feels like tortoise, not separate art. Cure, then seal with a glossy top coat in two layers, dragging the brush gently to lock in the dots. Clean the cuticle edges so the specks look crisp, not messy.
Keep dots small — the size of a pinhead — or the nails start looking like polish splatter.
Don’t use chunky glitter-red; it makes the tortoise pattern look cheap and textured.
7. Half-Moon Cutout with Red Outline and Tortoise Fill
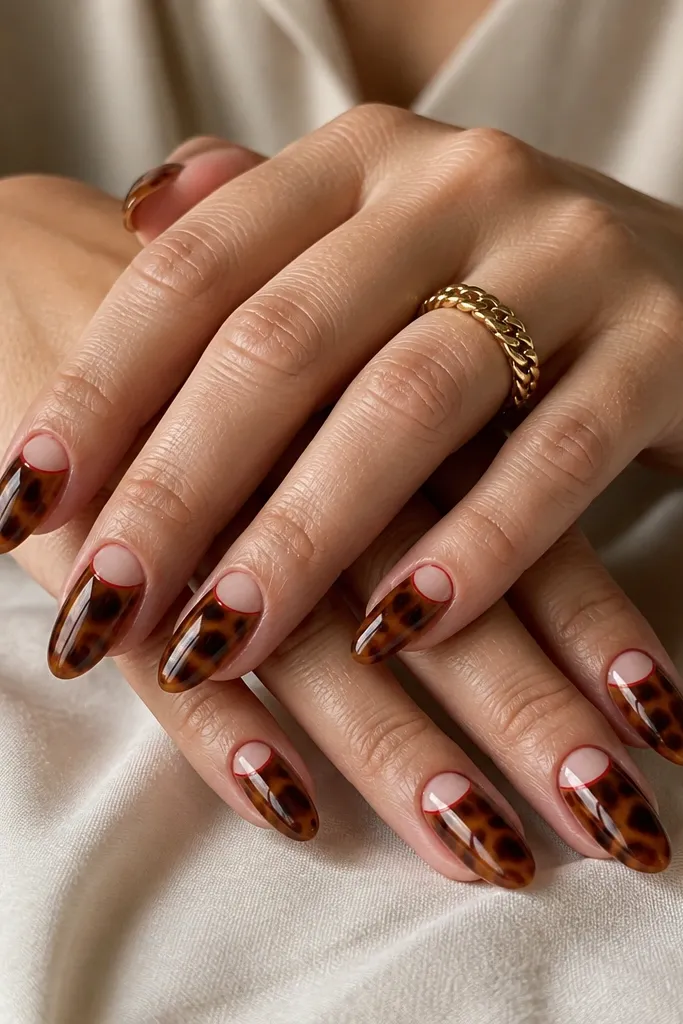
This look is clean and graphic because the half-moon negative space gives your nail room to breathe. The red outline makes the cuticle area look intentional, and it frames the tortoiseshell fill so the pattern stays the star. It flatters hands with longer fingers and also works on shorter nails if you keep the half-moon narrow. The red outline adds a nice pop on all skin tones, but it’s especially pretty on medium and deep skin because the contrast is strong. I’ve used this for photos where I wanted a bold design that still looks neat up close.
Start with a sheer nude base and cure, leaving the half-moon area unpainted. With a thin liner brush, draw a red half-moon outline around the negative space, keeping it tight to the cuticle line and consistent across nails. Then sponge tortoiseshell starting from mid-nail down — amber base first, chocolate shadow second, and thin dark-brown breaks last. Cure and wipe clean if needed. Finish with glossy top coat, but keep the brush from flooding the negative space so the half-moon stays crisp.
If your half-moon shape wobbles, use a small half-moon sticker as a guide for the outline, then remove before curing.
Don’t fill the negative space with tortoise or the half-moon effect disappears.
8. Tortoise Swirl with Glossy Red Loop Accent
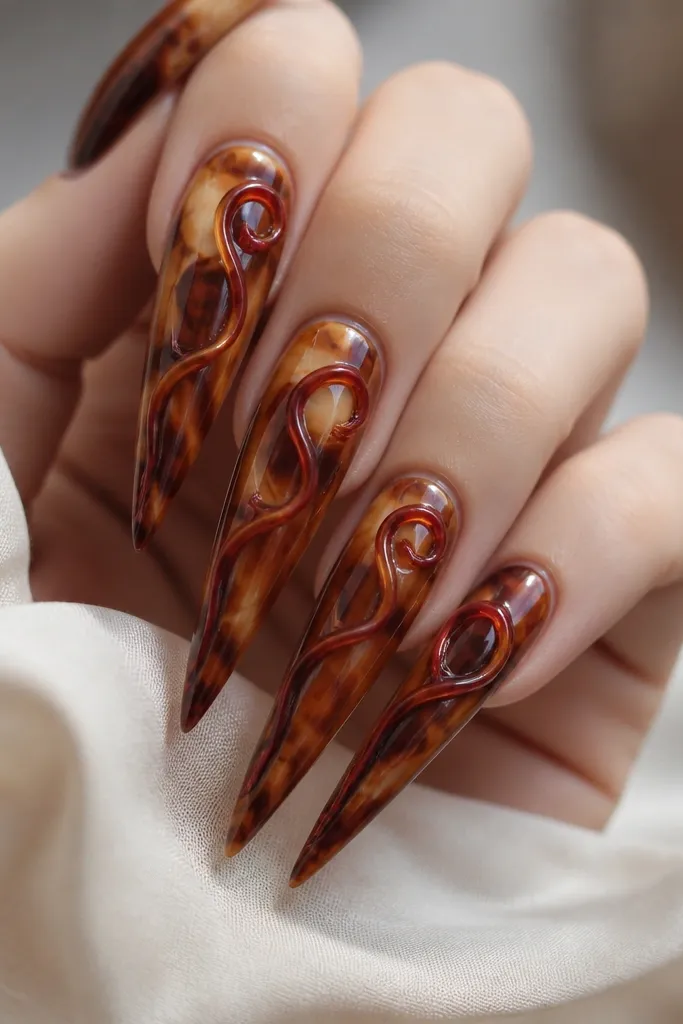
Swirls make tortoise shell feel fluid, and the red loop turns it into a focal graphic. I like this on long stilettos because the swirl can travel and guide the eye toward the tip. The red loop stays shiny and raised-looking without being thick if you apply it in a thin gel line and top coat smooth. This flatters slim nail beds and also looks great when your fingers are long, since the design follows that natural length. It’s a bold statement for parties, but it still feels cohesive because the red matches the tortoise palette.
Apply a honey amber base and cure. Sponge in chocolate shadow around the swirl path, then use a fine brush to pull thin dark-brown lines through the swirl so it looks like horn layers. For the red loop, paint a thin glossy red gel loop that starts mid-nail and curls toward the top third, keeping the loop width about 1-2mm. Cure, then add a tiny second pass on the loop so it stays smooth and bright. Seal everything with glossy top coat, focusing on the swirl ridges so they look smooth under light.
Editor's noteMake the red loop thinner than you think — tortoise already has texture, so thin red reads cleaner.
Skip thisDon’t blob the red loop; raised blobs catch light weirdly and ruin the sleek look.
9. Red-Edge Tortoise with Reverse French at the Sides
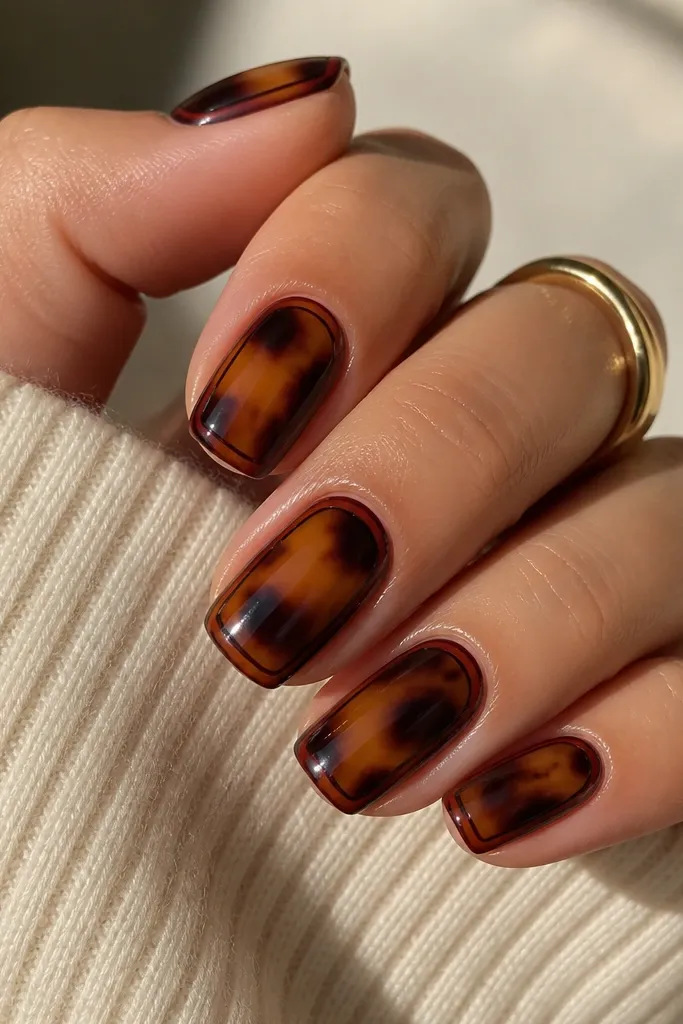
Side framing makes nails look narrower and more refined. The tortoiseshell stays in the center, so your nails don’t look crowded, and the red edges create a clean border that makes the shape look intentional. I use this when my nails tend to look wide, because the side red lines pull the eye inward. It works well on medium squoval and almond shapes and looks great on hands with rounded nail beds. The red also adds a strong pop that still feels classy because it’s controlled to the sidewalls.
Start with an amber tortoiseshell base in the center section only, then add chocolate shadow around the edges and dark breaks sparingly so the pattern doesn’t spill over too much. Cure and clean the surface. Draw thin red lines along both sidewalls using a liner brush, keeping them straight and about 0.5mm wide. Keep the red slightly inset from the cuticle line so it doesn’t smear onto the skin. Cure and top coat with extra attention on the sidewall edges so the red lines look sealed and smooth.
If your side lines look uneven, measure with your eye by lining the brush tip up with the natural sidewall curve, not the nail curve.
Don’t let the red touch your skin — sidewall smudges make the design look messy fast.
10. Tortoise Half-Top with Deep Red Tip Cap
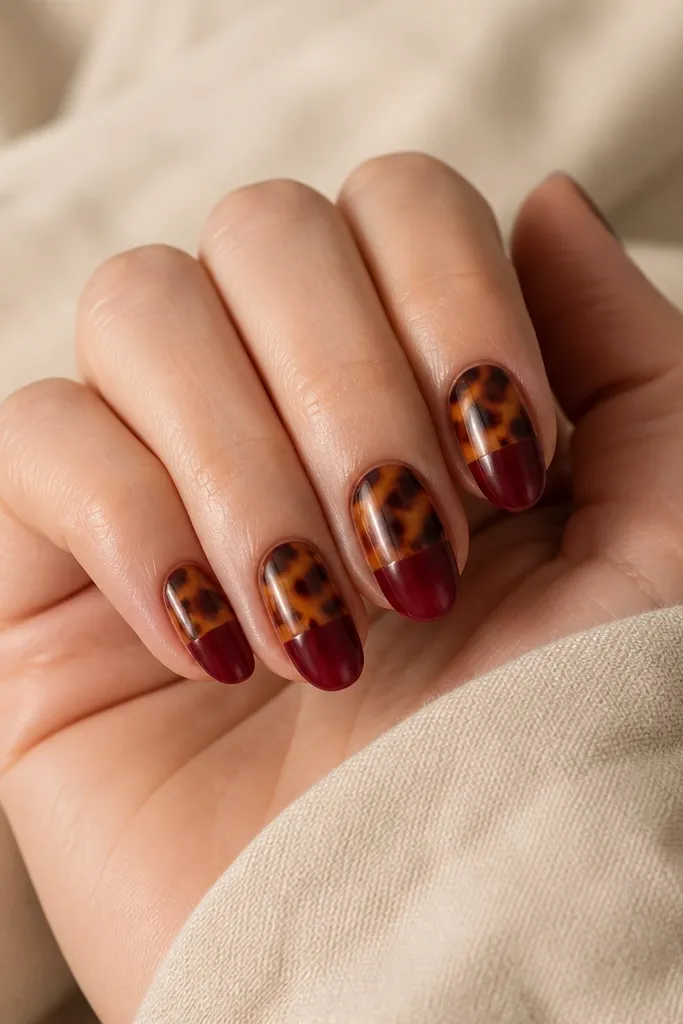
This is the boldest “layout” version because it separates the nail into two finishes — tortoise above, deep red below. The clean horizontal split makes the nail look structured and sharp, and it’s surprisingly flattering on short almond because it elongates the visual balance. The deep red cap reads rich and confident without needing a full red manicure. It’s a great choice for date nights and holiday parties when you want color but still want the tortoise shell design element. Warm undertones love it, and cooler undertones look great too because the deep red anchors the palette.
Apply a sheer nude base and cure. Sponge tortoiseshell on the upper half: amber first, then chocolate shadow, then thin dark-brown cracks, stopping around the midline of the nail. Cure and wipe if needed. For the deep red tip cap, paint deep red gel on the bottom half up to the same horizontal line on every nail — keep that line straight by using a striping guide or very careful brush control. Cure fully, then top coat in two layers to smooth the split. Clean the brush around the line so it looks crisp, not feathered.
Editor's noteUse a striping guide made from thin tape to keep the split line perfectly straight across all nails.
Skip thisDon’t blend the split line; a soft fade turns it into a muddy ombre instead of a graphic cap.