1. Wine-Base Tortoise on Short Squoval
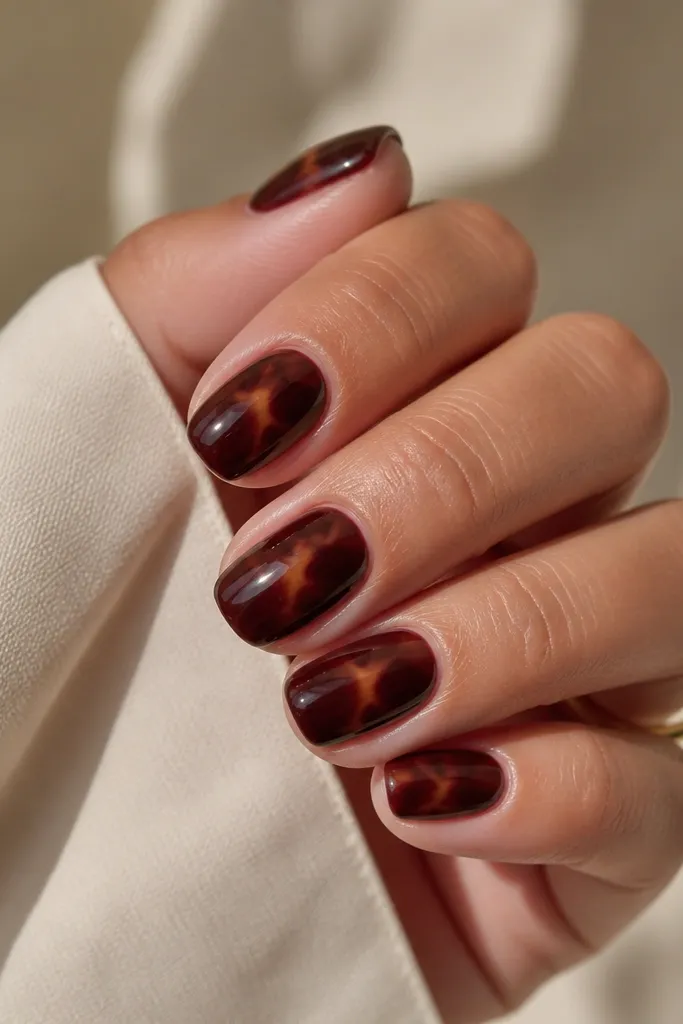
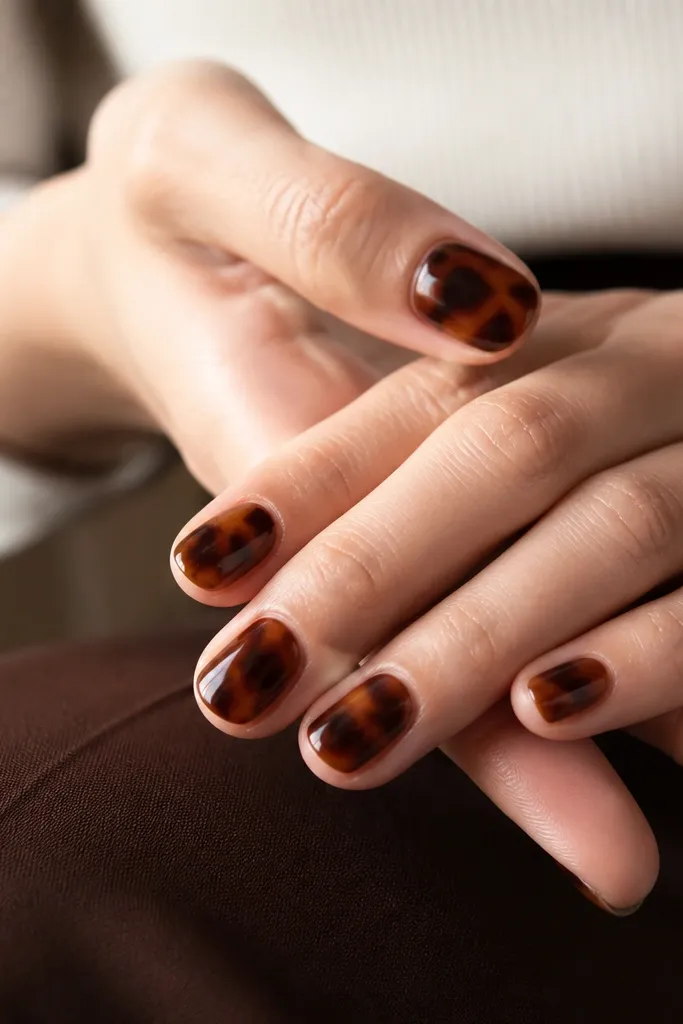
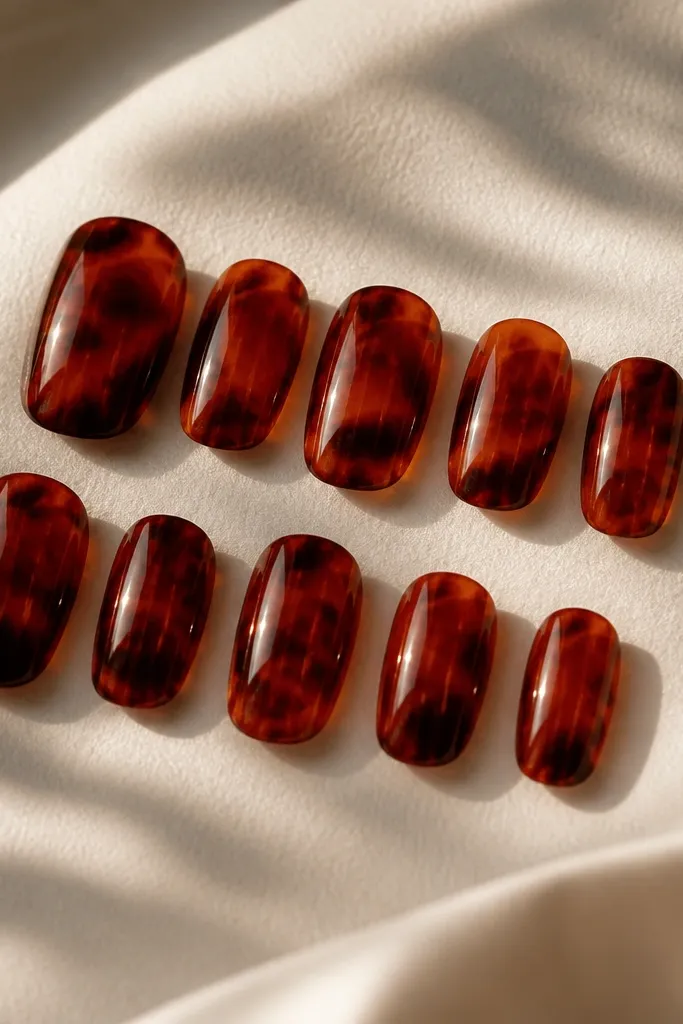
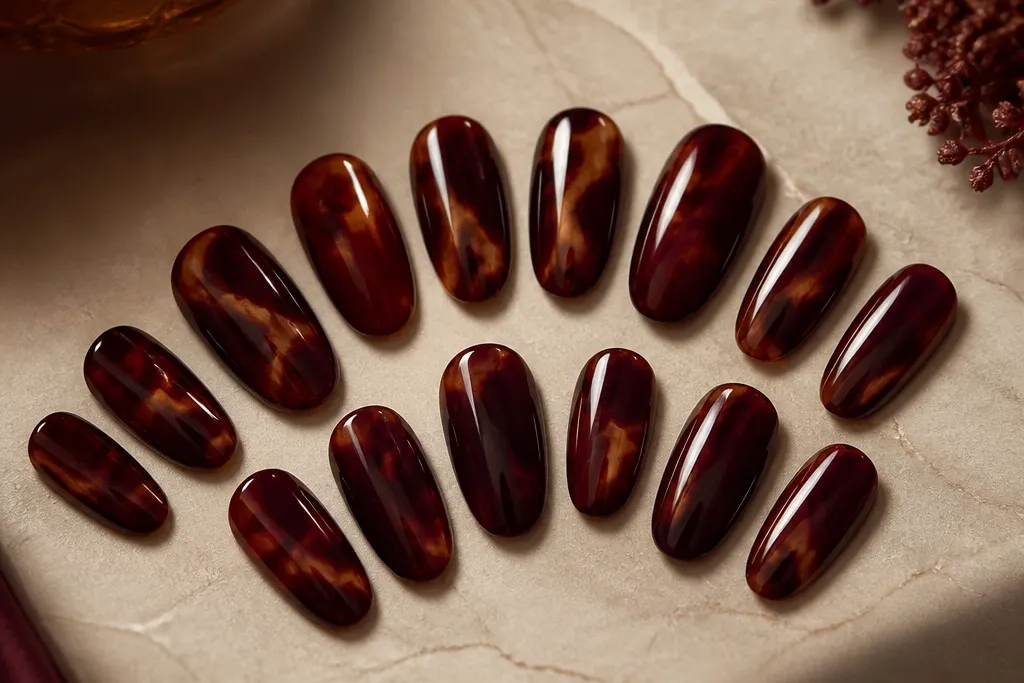
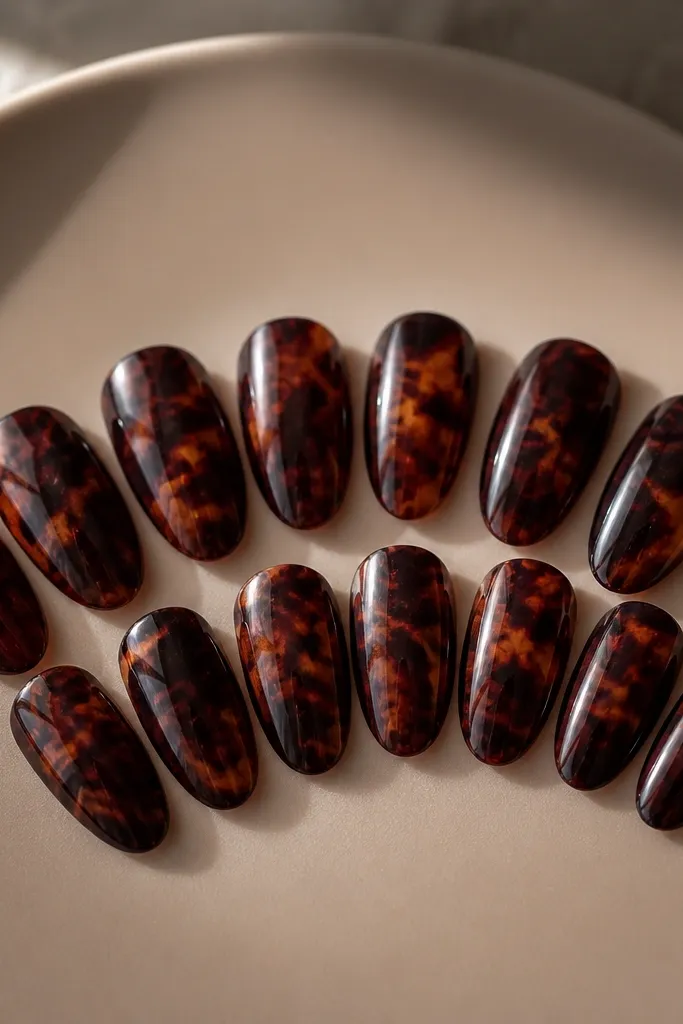
Start by filing your nails into a short squoval shape and buffing off shine with a light 180-grit. Paint two thin coats of your burgundy gel or polish, curing between coats if you’re using gel. For the tortoise, use a thin striping brush to drag 3-5 warm brown lines from the center outward, then dab tiny gold highlights on top of those lines. Seal with a glossy topcoat in two passes, and cap the free edge so the pattern stays sealed.
This one is the most wearable way to get the “luxury resin” vibe. The burgundy base is a wine-plum (think dark grape, not cherry), and the tortoise pattern stays compact so it doesn’t swallow the nail. I like it on short squoval because squoval already softens the edges, and the tight swirl pattern makes your nails look neat instead of busy. If your skin tone is fair to medium, the warm brown-gold swirls pop against the burgundy. For deeper skin tones, the same colors read rich and not washed out when you keep the brown slightly caramel.
Skip thisAvoid putting big tortoise chunks near the cuticle — it makes short nails look crowded and messy.
Editor's noteIf your swirls look too thick, drag the brush through the wet color once more and wipe the brush tip on a lint-free wipe.
2. Burgundy Tortoise Tips on Nude-Mauve Base
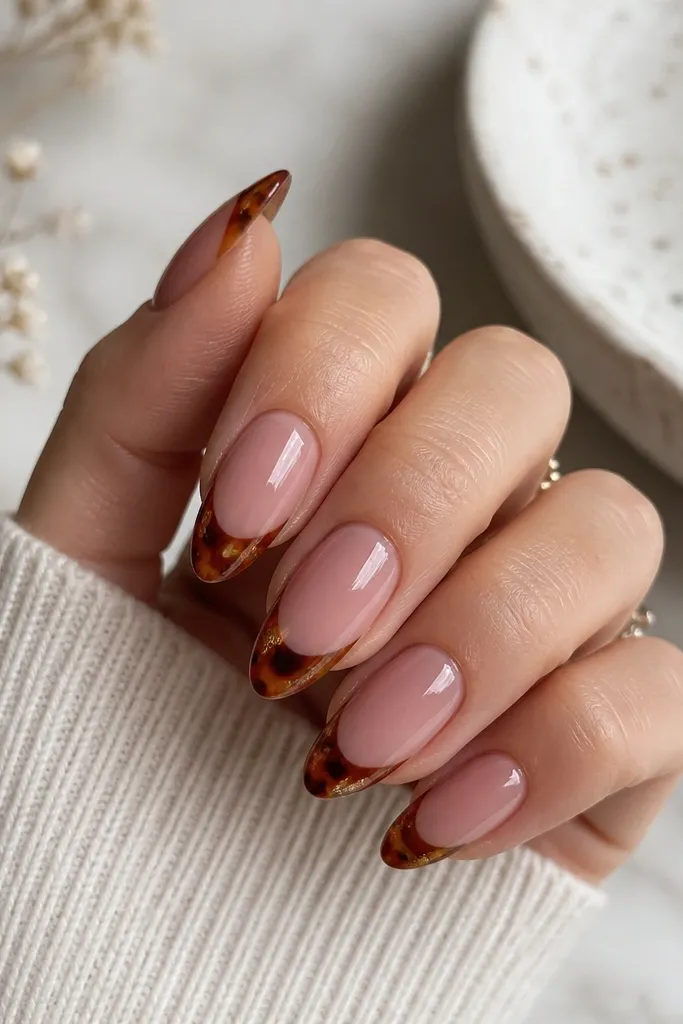
Start by applying a thin nude-mauve base (two coats if you’re using opaque polish), leaving a clean cuticle edge. Map your tip area first by placing a striping guide mentally at about 35-40% of the nail length. Paint burgundy tortoise swirls on that tip section only, using warm brown as the main “shell” and burgundy as the darker shadow layer. Add a few tiny gold flecks along the swirl edges, then finish with a glossy topcoat and cap the tip edge carefully.
This design gives you the look of expensive ombre art without covering the whole nail. The nude-mauve base makes the burgundy tips feel intentional, and it flatters hands that look drier or slightly uneven because the base color smooths the visual texture. I’ve worn this on workdays because it grows out better — the top half stays clean, so you notice the manicure less at week two. On light skin, the mauve reads rosy and pairs beautifully with burgundy. On olive to medium skin, it keeps the tortoise warm and not too cool-toned.
Skip thisDon’t keep the tip band too thick — a wide tortoise block makes almond nails look blunt.
Editor's noteUse a damp brush to soften one burgundy edge into the nude base so the transition looks like resin, not a hard line.
3. Clear Jelly Burgundy Tortoise with Micro Swirls
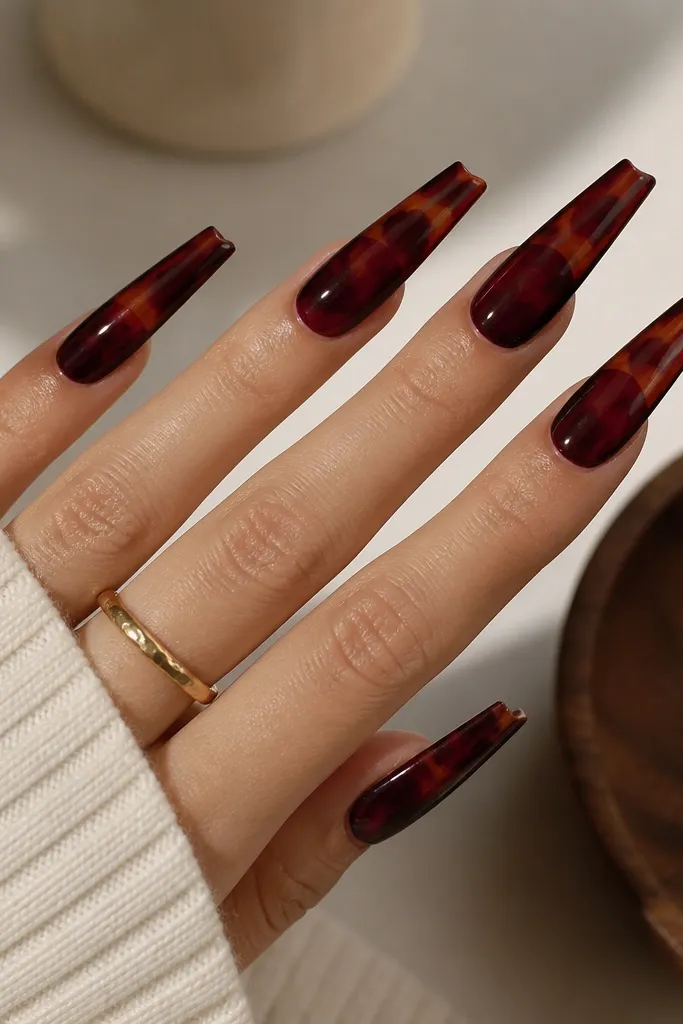
Start with a clear base or builder gel, then apply a jelly burgundy in 2-3 thin coats until it looks like a sheer wash. Cure fully between coats so the jelly doesn’t get streaky. With a fine striping brush, paint 5-8 micro tortoise arcs and dots scattered from mid-nail to the tip, using warm brown and a couple of gold accents. Topcoat with a thicker, self-leveling gel and cap the sides as well as the tip.
This is the “glass candy” version. The key is a jelly burgundy — translucent enough that your nail line still shows through, which makes the tortoise look suspended. Micro swirls work because they create texture without overwhelming the nail shape, especially on long coffin where big patterns can feel heavy. I like this for evenings and dates because the jelly base catches light and makes your hands look smoother. Fair skin looks especially pretty here because the jelly reads rosy-wine. Deeper skin tones get a glowing effect when you keep the warm brown swirls slightly lighter than you think.
Skip thisAvoid dark, opaque burgundy over a clear jelly plan — it kills the suspended look.
Editor's noteIf the jelly base looks streaky, apply thinner layers instead of adding more color at once.
4. Burgundy Tortoise Marble with One Bold Vein
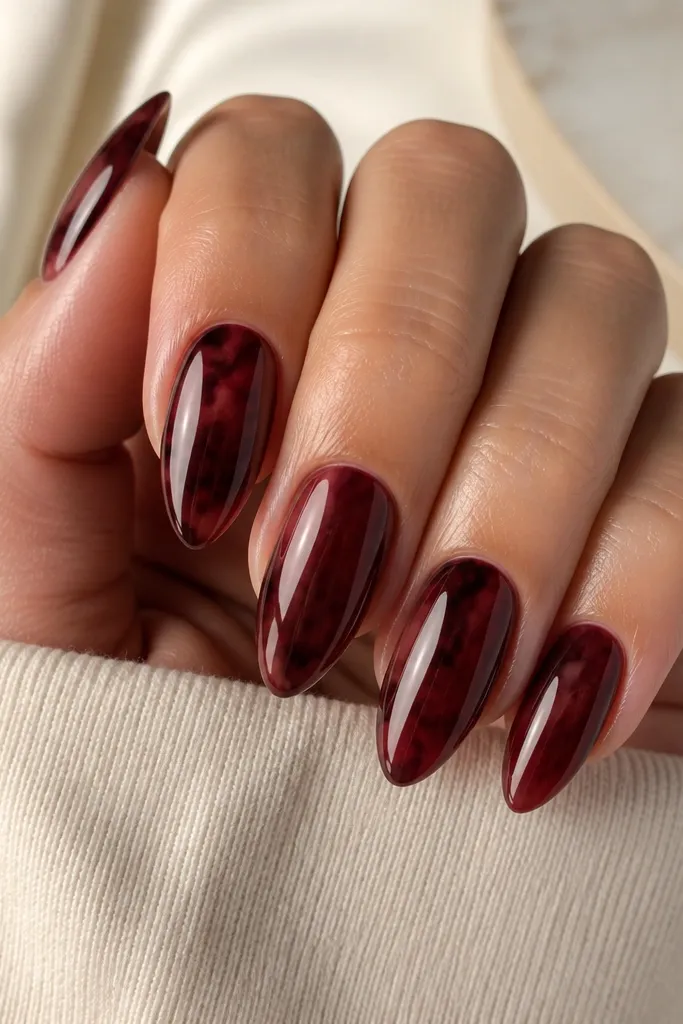
Begin with a burgundy base in two thin coats. For the tortoise marble, dab warm brown and caramel tones onto a tacky layer, then drag lightly with a dotting tool to create marble movement. Add one bold vein by sweeping darker burgundy down the center with a striping brush, keeping it thinner near the cuticle and thicker mid-nail. Finish by sealing with a glossy topcoat and doing a second topcoat on top of the marble nail so the texture feels smooth.
Marble tortoise reads more artistic than classic swirl, and one bold vein makes it feel designed. The background is still burgundy plus warm shell browns, but you smear them like marble so the pattern looks like it’s flowing. I like keeping the vein on only one or two nails because the rest stay elegant and wearable. This flatters most hands because the marble motion follows the nail’s natural length, making fingers look longer. If you have short nail beds, the bold center vein draws the eye upward without needing extra length.
Skip thisDon’t cover the entire nail with heavy marble — too many veins make it look like mud.
Editor's noteUse a clean dotting tool to pull the marble lines — it gives you softer edges than a brush.
5. Tortoise Shell French with Burgundy Outline
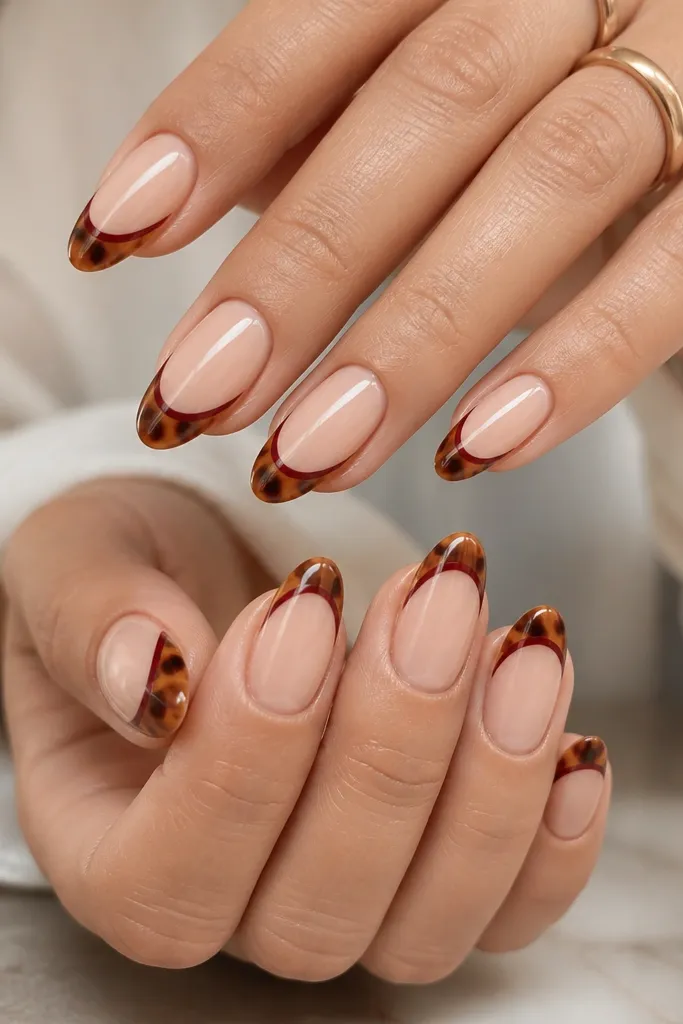
This design looks sharp because the burgundy outline frames the tortoise, like a plated border. French placement also makes the manicure grow out cleaner since the base stays nude. I’ve done this on clients with uneven nail lines and the outline hides the asymmetry — your eye reads the border instead of the nail shape. On light skin it looks classic and crisp, and on warm undertones it looks extra flattering because burgundy and caramel sit well together. It’s also a good pick for weddings because it feels polished without bling.
Start with a nude base that matches your skin tone — I like nude-mauve or nude-rose, two coats for even coverage. Create French tips with a guide or freehand at about 30% of the nail length. Fill the tip with tortoise swirls using warm brown first, then dab gold highlights. Finally, trace a thin burgundy line right along the tip curve, then topcoat twice for a smooth, glassy border.
Use a striping brush with a slightly angled tip for the burgundy outline so the line stays consistent.
Avoid thick outline lines — they make the French look like tape residue.
6. Burgundy Tortoise Aura Around the Cuticle
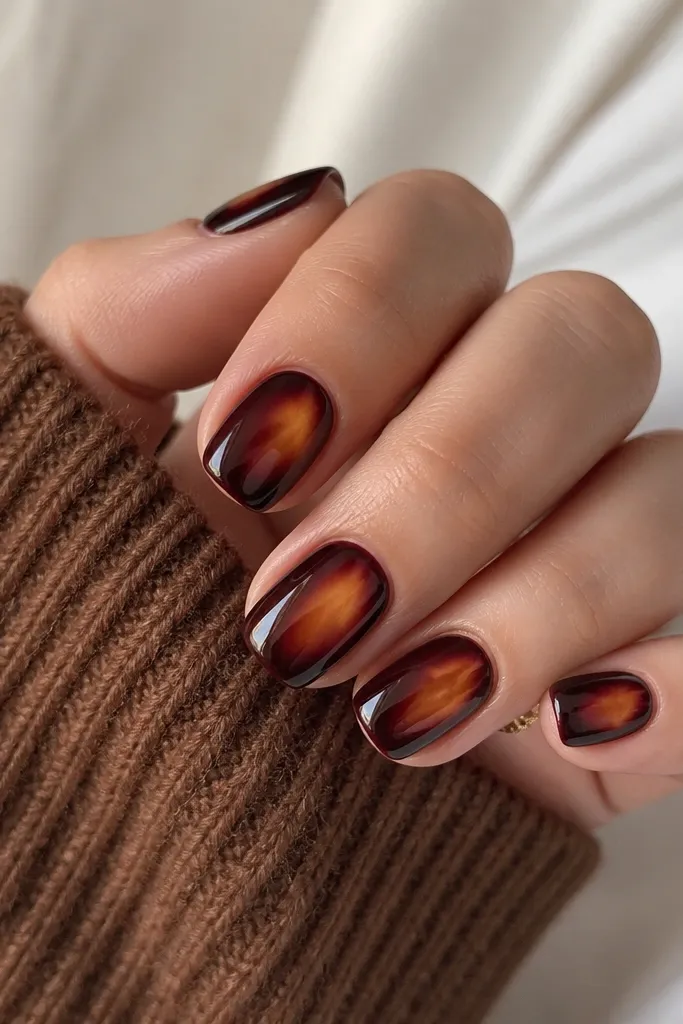
Apply a burgundy base in two thin coats and cure fully. On a tacky layer (or with a thin layer of topcoat left slightly sticky), sponge warm caramel-brown very close to the cuticle using a makeup sponge cut small. Add tiny gold dots around the aura edges, then drag a few short tortoise streaks outward with a striping brush. Seal with a glossy topcoat, and cap the cuticle line lightly so the glow doesn’t smear.
Aura placement makes the design feel modern and softer than full tortoise coverage. The cuticle area is where your eye goes first, so putting the warm tortoise glow there makes hands look brighter and more lifted. I recommend this for nails that are a little wide at the base because the aura spreads in a controlled gradient rather than big swirls. On fair skin, the gold glow looks like warm sunlight; on deeper skin, it gives a polished contrast that doesn’t look harsh. It also works for office days because it’s mostly burgundy with just enough warmth at the cuticle.
Skip thisDon’t put tortoise swirls right on the skin — leave a hairline gap so it looks clean.
Editor's notePractice the sponge pressure on a spare nail stick so you get a soft halo instead of a speckled patch.
7. Burgundy Tortoise with Gold Foil Corners
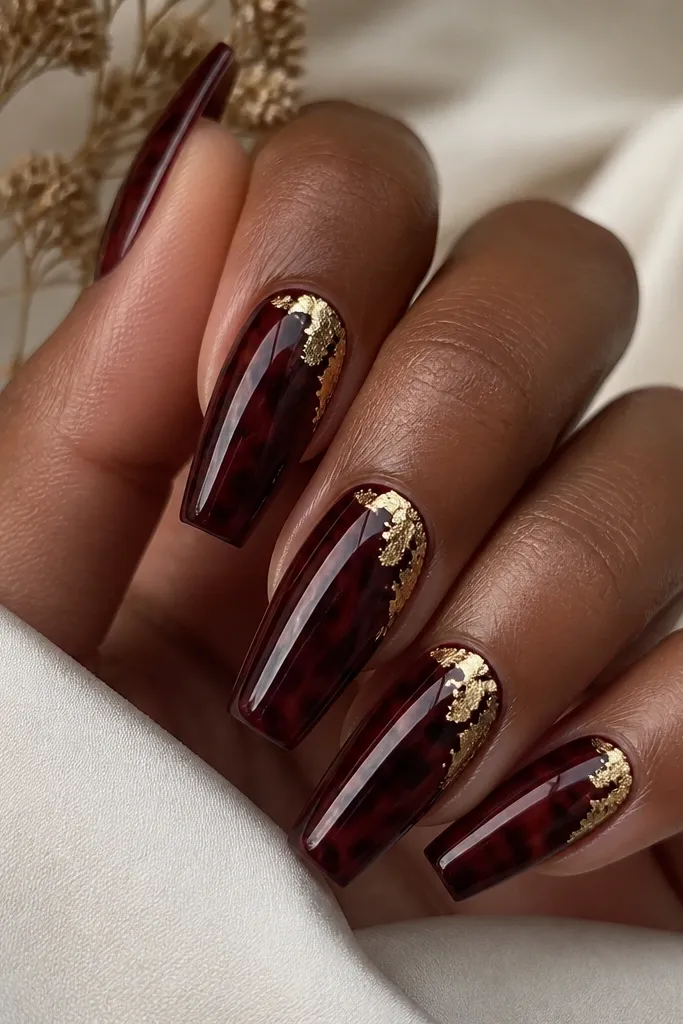
Foil corners make the tortoise look like it’s catching candlelight. I use small pieces placed near the upper sides of the nail — not scattered everywhere — so it stays luxe instead of chaotic. This flatters medium to long nails because the foil frames the length and makes fingers look slimmer. If you have cool undertones, the gold warms everything up against burgundy. For warmer undertones, it looks extra cohesive because burgundy and gold already belong together.
Start with a deep burgundy base and cure. Paint tortoise swirls over the center and lower half with warm brown, then add tiny gold flecks so the foil doesn’t look random. Press small gold foil fragments onto the upper side corners using a foil gel or a sticky topcoat layer, then cure. Finish with a thick glossy topcoat that fully covers the foil so it feels smooth under your finger.
Tear the foil with your hands instead of cutting — torn edges blend into the tortoise better.
Avoid covering foil with a thin, watery topcoat — it lifts and catches on fabric.
8. Matte Burgundy Tortoise with Glossy Center Stripe
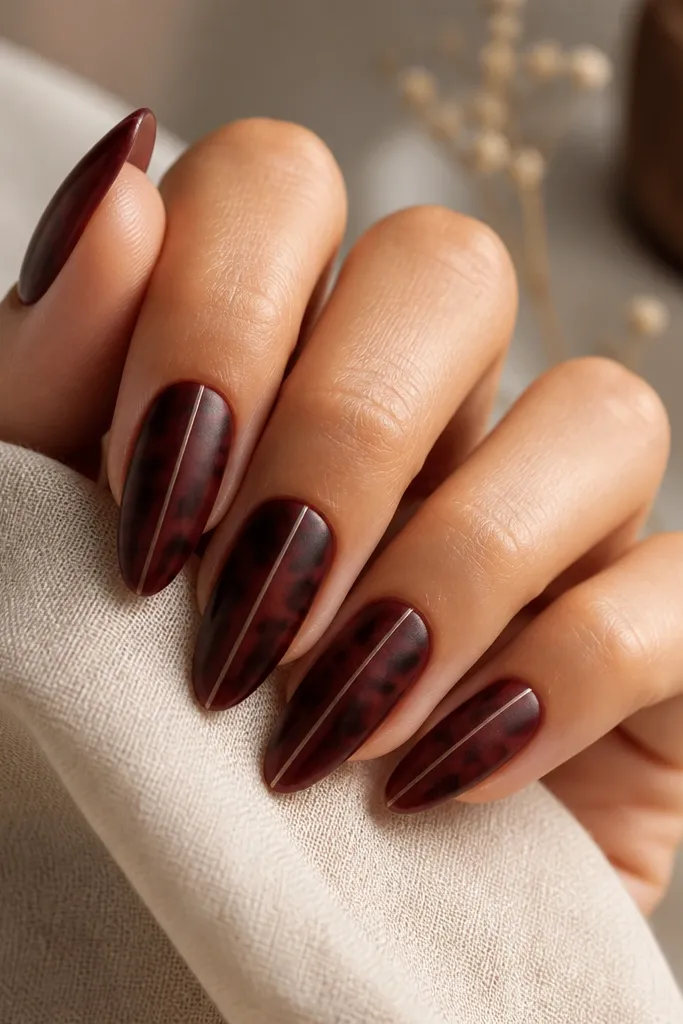
This is a texture trick that makes burgundy tortoise look designer. Matte over tortoise hides glare and makes the warm brown look like aged resin, then the glossy stripe brings your eye straight down the nail. I like it for fall because matte burgundy reads cozy and not too loud. It flatters hands with shorter nail beds because the center stripe adds a vertical line. On fair skin, matte looks classy and not too dark; on deeper skin, it looks creamy and warm when your tortoise browns are caramel, not gray-brown.
Start with a glossy burgundy base and tortoise swirls, then topcoat and cure. Apply matte topcoat over the whole set, cure again, and wipe off any tackiness. With a fine brush, paint a thin strip of glossy topcoat (or glossy gel) straight down the center of each nail, then cure. If you want it extra clean, cap the stripe edges with a micro amount of matte topcoat around it so the boundary stays crisp.
Keep the glossy stripe narrow — about the width of one brush hair — so it looks sharp, not chunky.
Avoid matte topcoat over unsealed tortoise swirls — it can make the pattern look grainy.
9. Burgundy Tortoise Ombre Fade
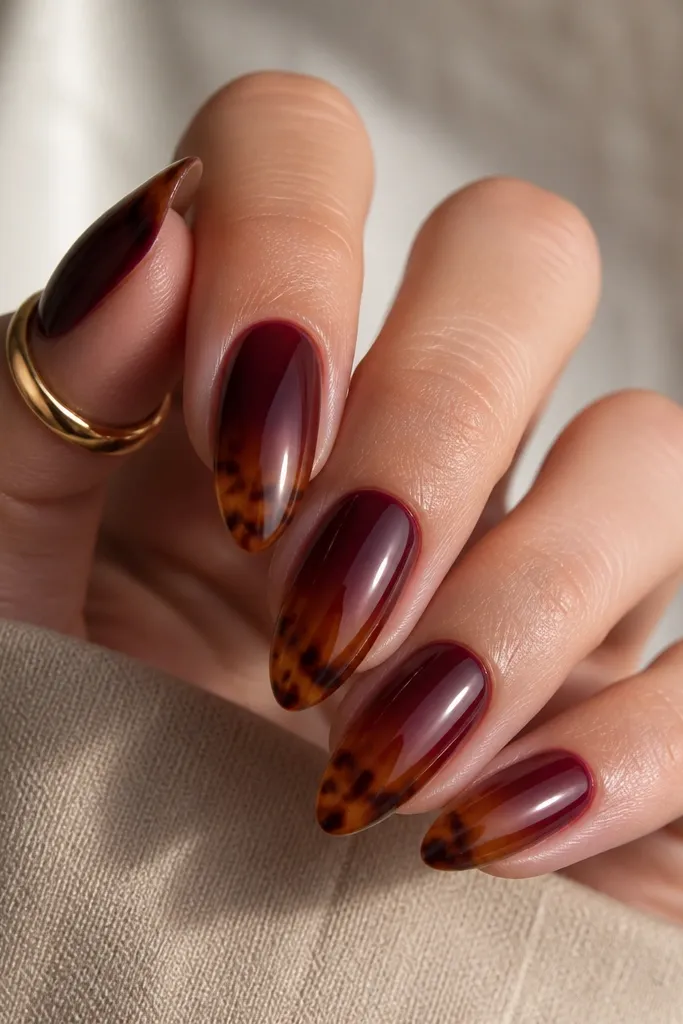
Start by painting your nails burgundy at the base and mid-nail. Using a makeup sponge, blend warm caramel-brown into the upper half where the nail tip starts, keeping the transition smooth. Add tortoise swirls on the top third only, using a thin brush and a mix of warm brown plus a few gold flecks. Seal with a glossy topcoat that self-levels, and make sure the blend area is fully covered so it doesn’t look textured.
Ombre tortoise looks softer and more grown-up than hard color blocks. The fade from burgundy to warm brown gives you that “shell depth” without needing tons of lines. I recommend this for medium lengths because the ombre has enough space to blend and still show the tortoise pattern at the top. It flatters hands by creating a gradient that smooths skin tone differences across your nail bed. If you have darker nail beds, the ombre helps it look intentional instead of patchy.
Skip thisAvoid ombre that reaches all the way to the cuticle — it makes the manicure look older when it grows out.
Editor's noteBlend with a light hand — multiple thin sponge dabs look better than one heavy swipe.
10. Tortoise Shell Checker in Burgundy and Caramel
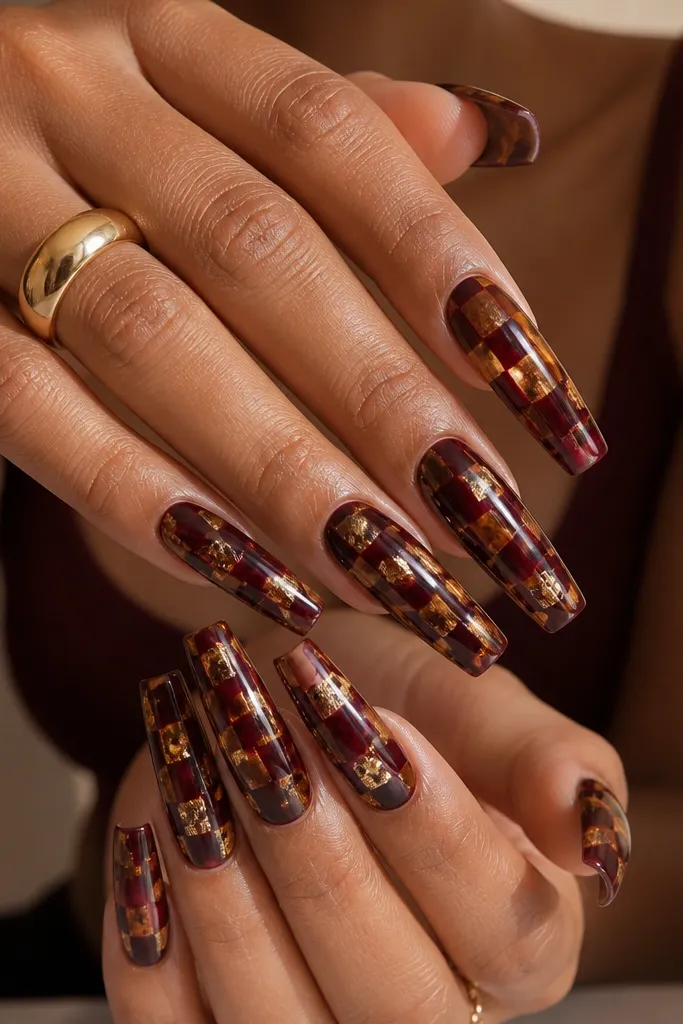
Checker tortoise is bold without needing glitter. The pattern reads structured, so your nails look neat even when the swirls are imperfect. I like this on longer coffin because the grid shape stretches cleanly and doesn’t feel cramped. It flatters slim fingers because the checker adds visual width, but it still looks controlled. For fair to medium skin, burgundy and caramel look classic; for deeper skin, the gold flecks keep the palette from feeling too heavy.
Start with a deep burgundy base and cure. With striping tape or a thin nail guide, section the nail into small rectangles across the center line. Fill alternating sections with warm caramel tortoise color, then add tiny gold flecks inside those sections. Remove the guides carefully, then topcoat twice to smooth out any edges and make the checker look like one piece of resin.
If you use tape, remove it while the gel is slightly tacky so the edges look crisp.
Avoid tiny squares — under 1-2 mm they look like dots and lose the tortoise read.
11. Burgundy Tortoise with Sidewall Frame
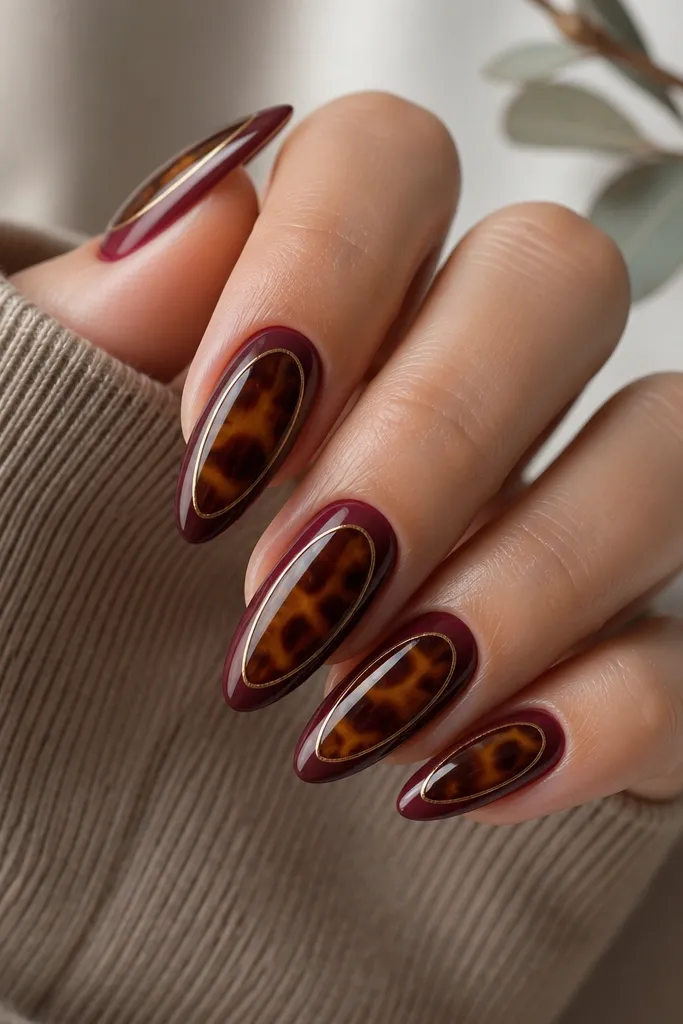
Apply a burgundy base in two coats. Paint tortoise swirls in the center only, leaving a slim gap on both sides so the frame has room. Use a thin striping brush to draw caramel-gold lines along the left and right sidewalls, then cure. Finish with a glossy topcoat, and run the brush along the sidewalls again at the end to lock everything down.
This one is for anyone who wants tortoise but also wants their nails to look slimmer. The sidewall frame creates a vertical boundary that visually narrows the nail bed, especially on almond. The center tortoise stays the star, and the caramel-gold lines add polish without taking over. I’ve worn this with both short almond and medium almond, and it always looks intentional. Fair skin looks extra clean with the gold frame; medium and deep skin tones look warm and glossy because the frame catches light along the sidewalls.
Skip thisAvoid letting the side lines cross into the cuticle area — it can look smudged.
Editor's noteKeep the sidewall lines about one-third the width of your nail — wide lines make almond look thicker.
12. Burgundy Tortoise with Pearl Dot Cuticle Accent
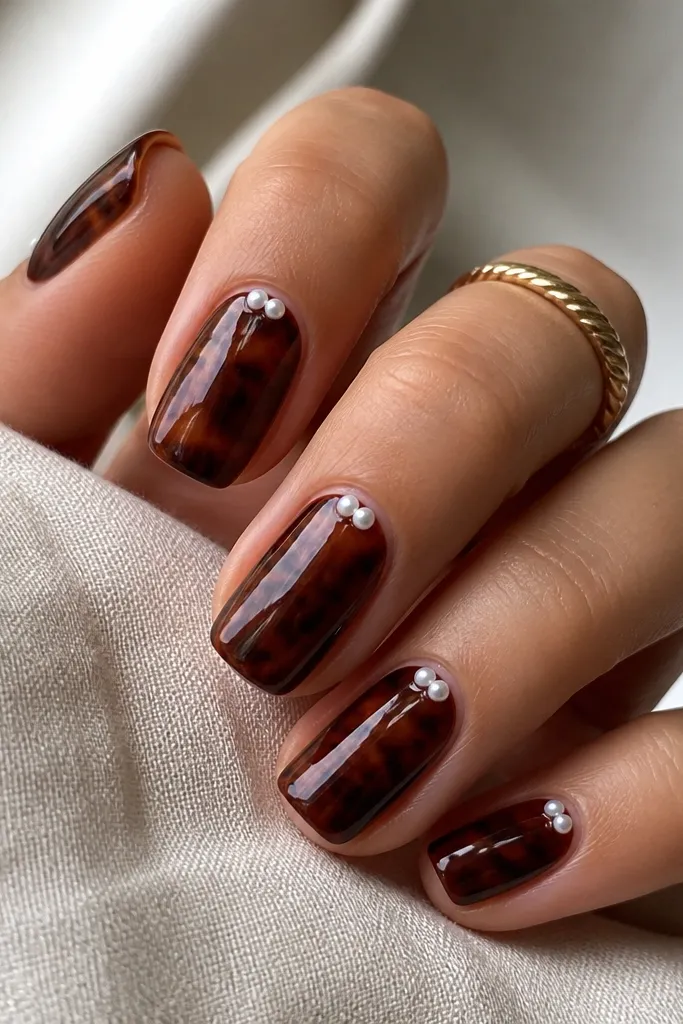
Pearl dots at the cuticle make tortoise look dressed up without going full rhinestone. I place 1 pearl near the center of the cuticle on accent nails, sometimes two pearls on the ring finger only. The pearl sits against burgundy like a soft highlight, and the warm tortoise underneath keeps it feeling rich. This flatters hands for events because it adds a focal point near your natural highlight area. If your skin tone is light, choose creamy white pearls so they don’t look icy; for deeper skin, warm ivory pearls look best against burgundy.
Start with a burgundy base and paint tortoise swirls over the mid-to-tip area using warm brown and a few gold flecks. Use a dotting tool to place a tiny amount of gel adhesive at the cuticle center on your accent nails. Press a small pearl dot into the adhesive and cure. Seal around the pearl with a thin layer of topcoat so it’s secure, then add one more glossy topcoat across the whole nail.
Use a pearl size around 1.0-1.5 mm so it feels like an accent, not a bump.
Avoid covering the pearl with thick gel — it can lift at the edges and snag clothing.
13. Burgundy Tortoise with Sparkle Dust at the Tip
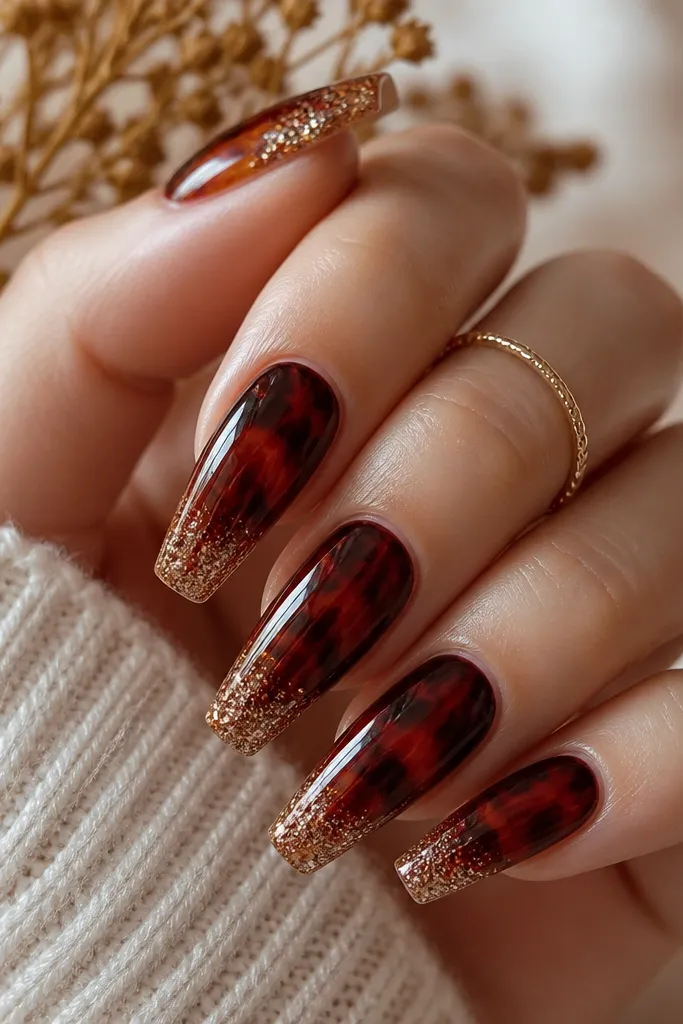
This is the “night out” version that still reads tortoise, not glitter bomb. The tortoise swirls give texture, and the sparkle dust at the tip adds movement when you walk. I like champagne-gold sparkle because it looks like warm light bouncing off resin. This flatters medium to long nails by adding a bright focal point at the end, which makes fingers look longer. On fair skin, it looks soft and romantic; on deeper skin, it looks bold and expensive.
Paint a burgundy base and cure. Apply warm brown tortoise swirls across the center and lower half, then dab gold flecks lightly. For the sparkle, use a small sponge or a stamping sponge to press champagne-gold glitter dust only on the last 15-20% of the nail. Seal with a glossy topcoat in two layers, focusing extra on the tip so the glitter doesn’t feel gritty.
Press glitter dust in place and do not swipe — swiping smears it into burgundy and dulls the sparkle.
Avoid glitter all the way to the middle — it makes the tortoise pattern disappear.
14. Deep Burgundy Tortoise Nails with Burnished Copper Crackle
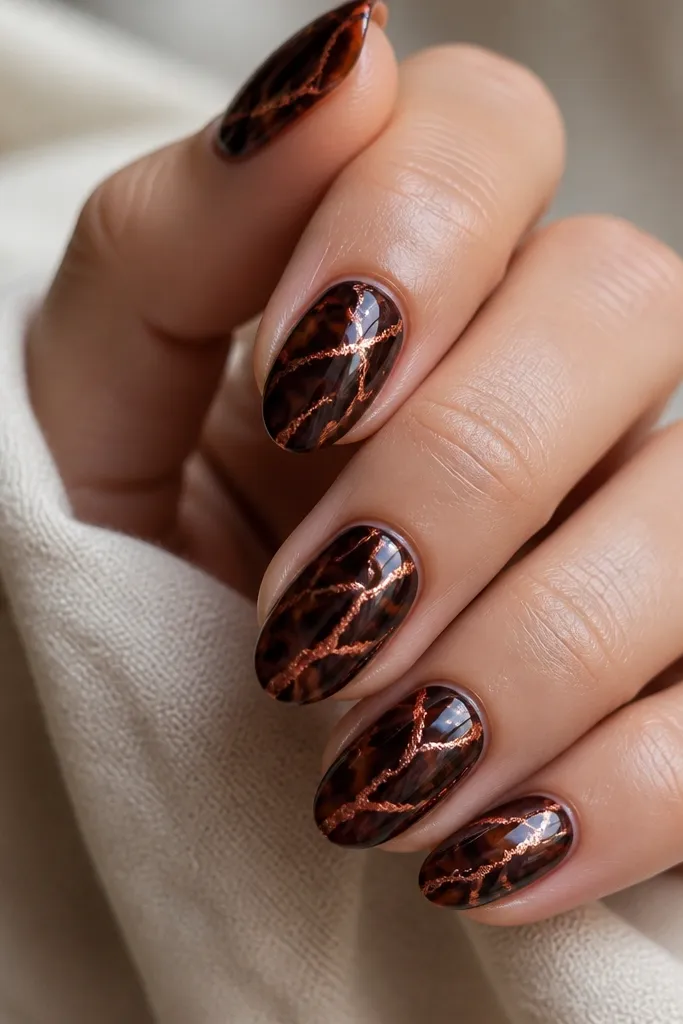
Start with a burgundy tortoise pattern on the full nail using three shades: wine-burgundy, smoky amber, and a little brown for the darkest islands. Keep the tortoise edges soft by blending with a sponge for 10-15 seconds, then cure fully. For the copper crackle, use a crackle gel in a thin layer and drag a fine brush through it so the lines form hair-thin fractures. Cure, then add one more clear gel coat over the crackle so it looks sealed under glass rather than raised.
This set looks expensive because the burgundy tortoise base stays grounded while the copper crackle adds that flicker you only see when you move your hands. I’ve worn a version of this to a winter dinner and caught compliments from people who asked if it was real metal. The trick is making the crackle lines fine and directional, so they don’t turn into chunky “paint strokes.” You get a luxe, aged-metal vibe without making the nails look heavy.
Skip thisDon’t lay the crackle gel too thick or you’ll get chunky shards that look messy instead of “aged glass.”
Editor's noteUse a copper shade that leans more bronze than orange. It reads richer against burgundy and doesn’t go brassy.
15. Burgundy Tortoise Half-Moon Cutouts with Dark Umber Negative Space
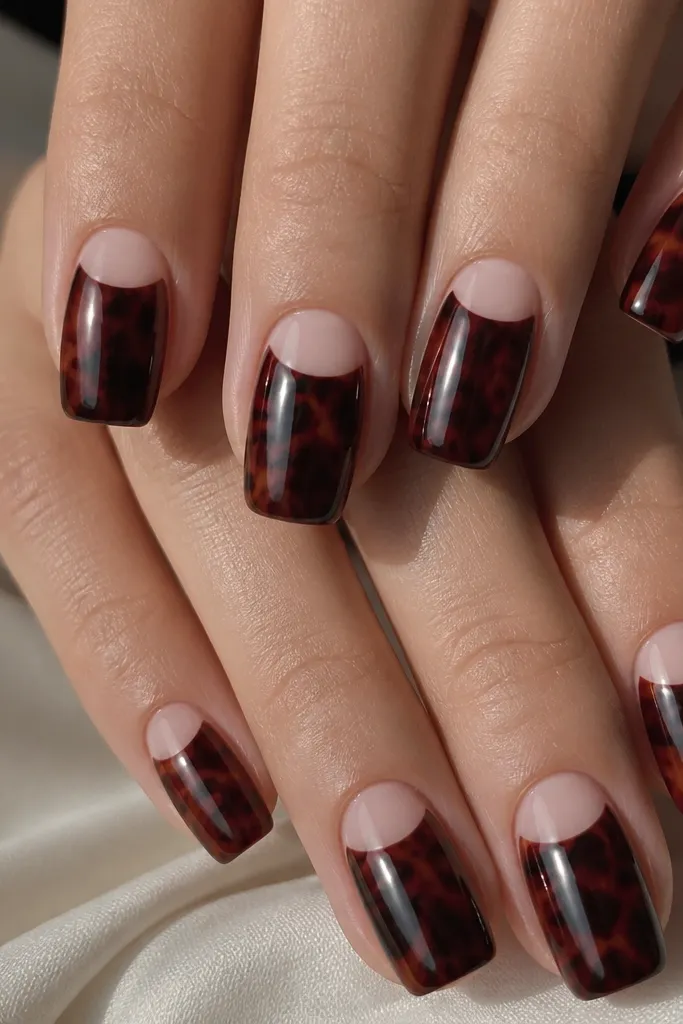
Prep nails and push back cuticles, then lightly buff the shine so gel holds. Apply a thin base coat and cure. Use a half-moon guide sticker or a small curved stencil to mask the cutout area, then paint burgundy tortoise around it — keep the darkest umber islands near the center so the pattern looks “pulled” toward the cutout. Peel the mask while the last gel is still tacky, cure, then seal with a glossy top coat in two thin layers.
This design gives you that tortoise depth while keeping the nails feeling sharp and modern. The half-moon negative space makes the burgundy look even darker, and it visually lengthens your nail bed if you keep the cutout centered. I like it because it grows out better than full-color tortoise sets — the new growth line doesn’t look like a mistake. It also photographs insanely well because the contrast is clean and intentional.
Skip thisSkip rushing the mask removal — pulling it after full cure can lift the gel edge and leave a jagged line.
Editor's noteIf your half-moon cutout keeps smudging, place the stencil and press for 20 seconds using a silicone tool instead of your fingertip.