1. Dusty Rose Shell with Milky Nude Base
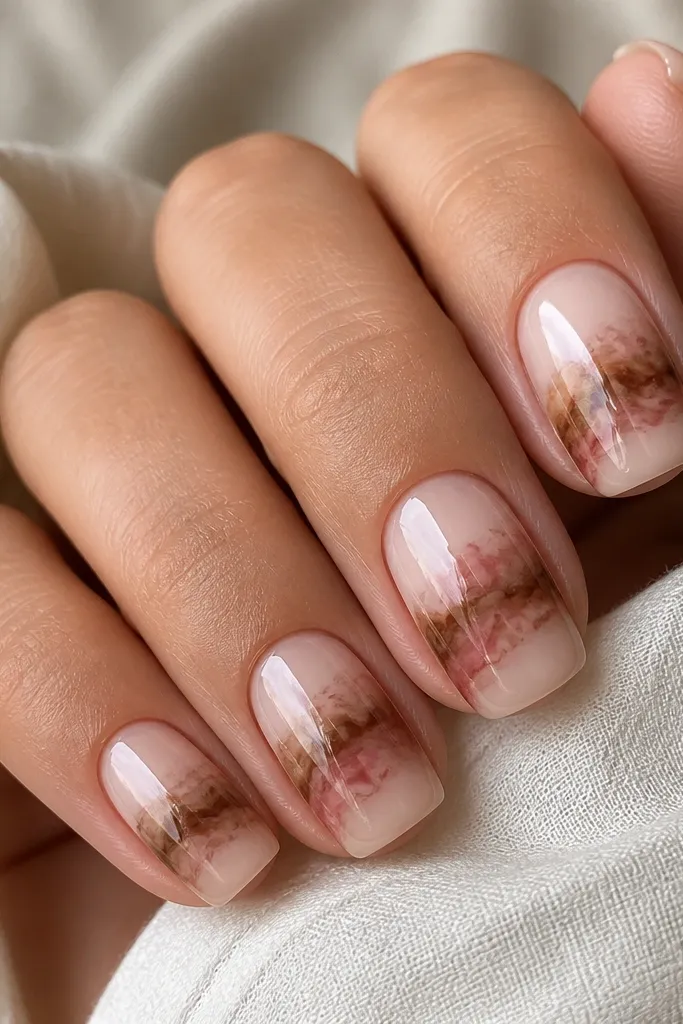
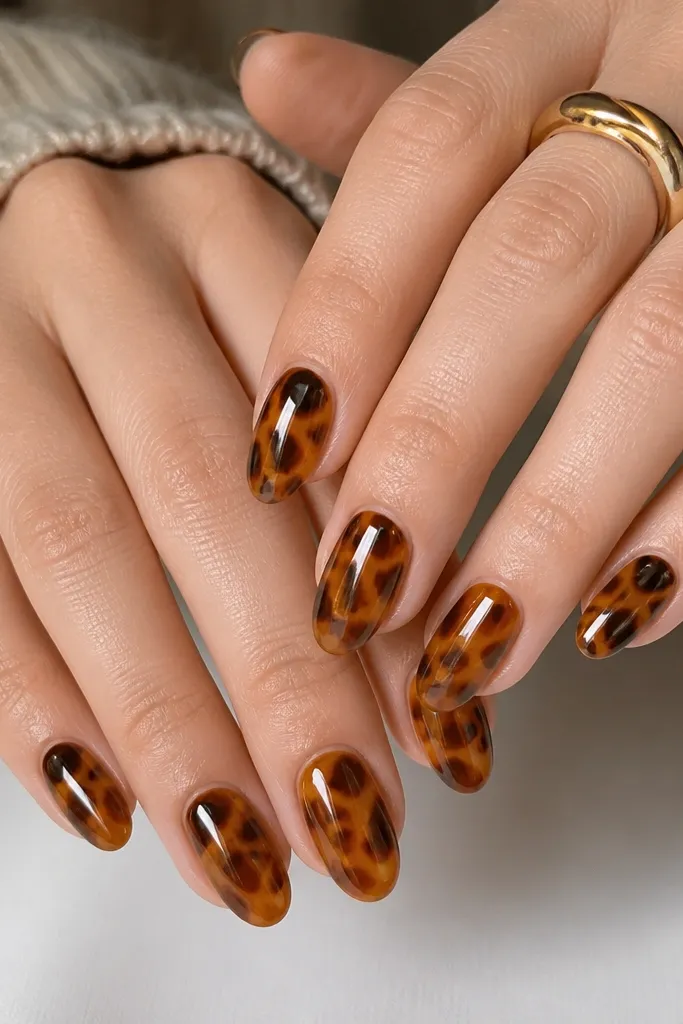
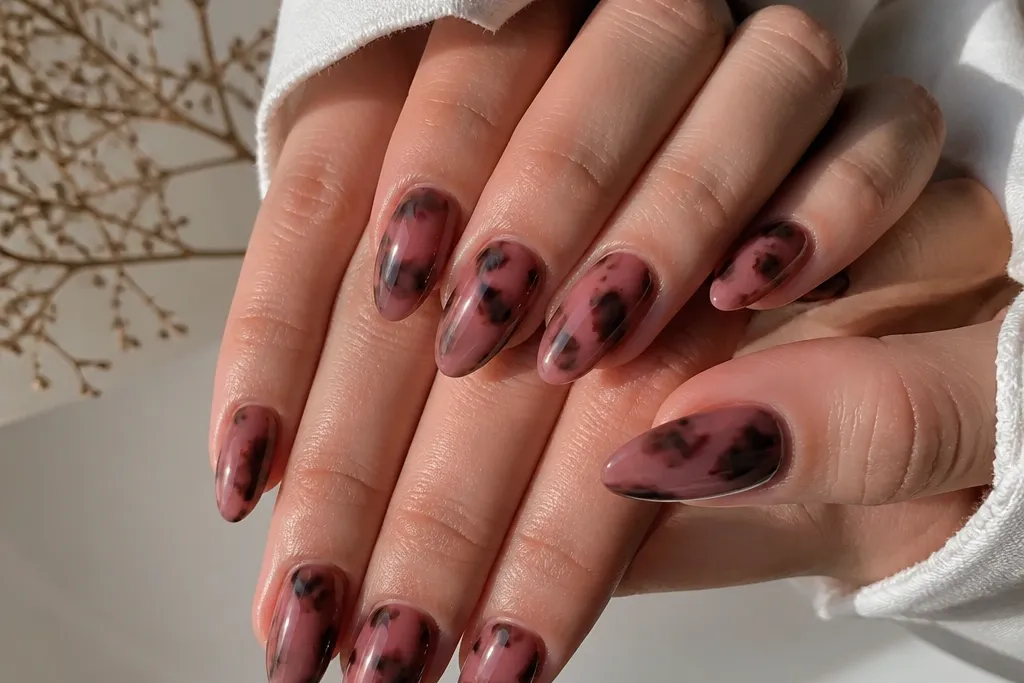
This one is my go-to when the goal is soft and feminine without turning into candy pink. The base is a milky nude-pink that looks like skin but brighter, and the tortoise uses warm cocoa-brown lines with dusty rose gaps. Because the brown sits mostly in the center, the nails look longer and less busy. It flatters fair to medium skin tones especially well, and it also looks good on hands with shorter nail beds because the pattern doesn’t start right at the cuticle.
Paint a milky nude-pink base in two thin coats, then cure each coat fully. Using a thin striping brush, drag cocoa-brown into 2-3 curved bands through the center of the nail, leaving negative space. Dot dusty rose between the bands with a small sponge or dotting tool, then lightly blend the edges with the brush tip. Finish by adding a glossy top coat in two layers, one thin and one slightly thicker for a glassy dome.
Editor's noteIf your brown looks too dark, mix it with a drop of clear polish and do an extra highlight pass in the brown’s edges.
Skip thisAvoid starting the darkest swirls at the cuticle; it makes short nails look crowded and stumpier.
2. Blush Tortoise French Tips with Clear Cuticle
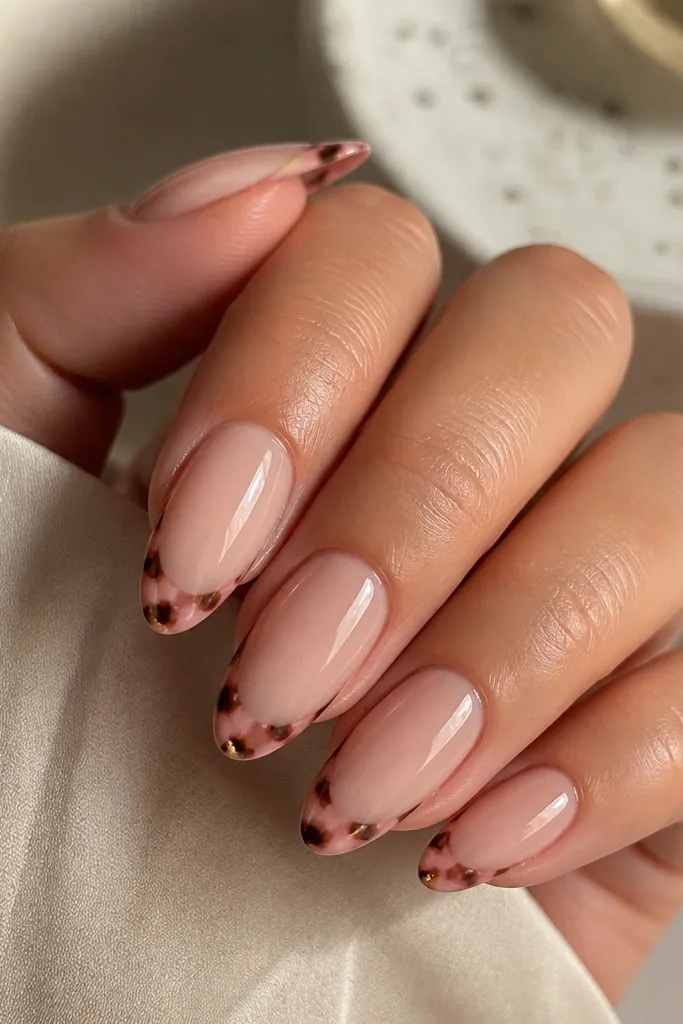
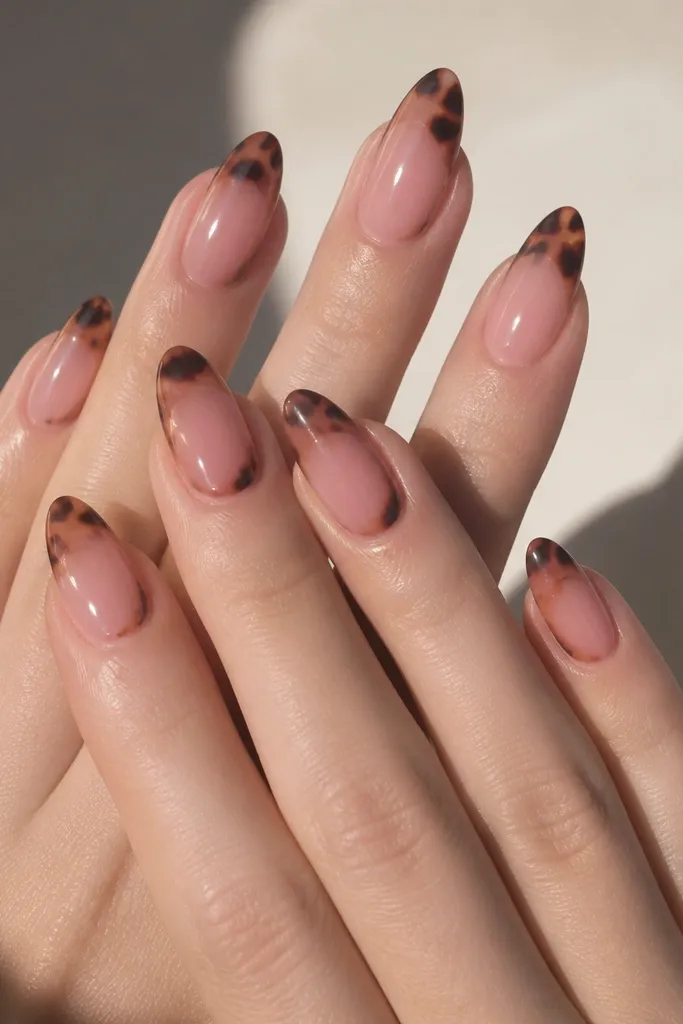
This design gives you a “fresh manicure” look even when you’re not wearing a full shell pattern. The clear cuticle zone makes the nail bed look airy, while the tortoise only lives in the French tip area. The blush-pink keeps it feminine, and the thin brown lines add that real shell depth. It’s flattering on medium to longer almond nails and especially looks good with warm undertones in your skin because the blush echoes your natural coloring.
Apply a sheer nude base coat, then let it level so the cuticle edge stays crisp. Create French tips by painting a soft blush arc at the free edge, then add thin cocoa-brown lines inside the blush arc like curved veins. Use a dotting tool to add tiny honey-gold flecks near the tip center, and drag them slightly to form mini highlights. Seal with top coat, making sure the tip edge is fully covered so the pattern doesn’t catch on your hair.
Use a guide strip or your nail’s natural smile line as the outer boundary so the French arc stays even.
Skip thick brown blobs at the tip; they look heavy and chip faster at the free edge.
3. Pink Shell Fade with Cocoa Center Band
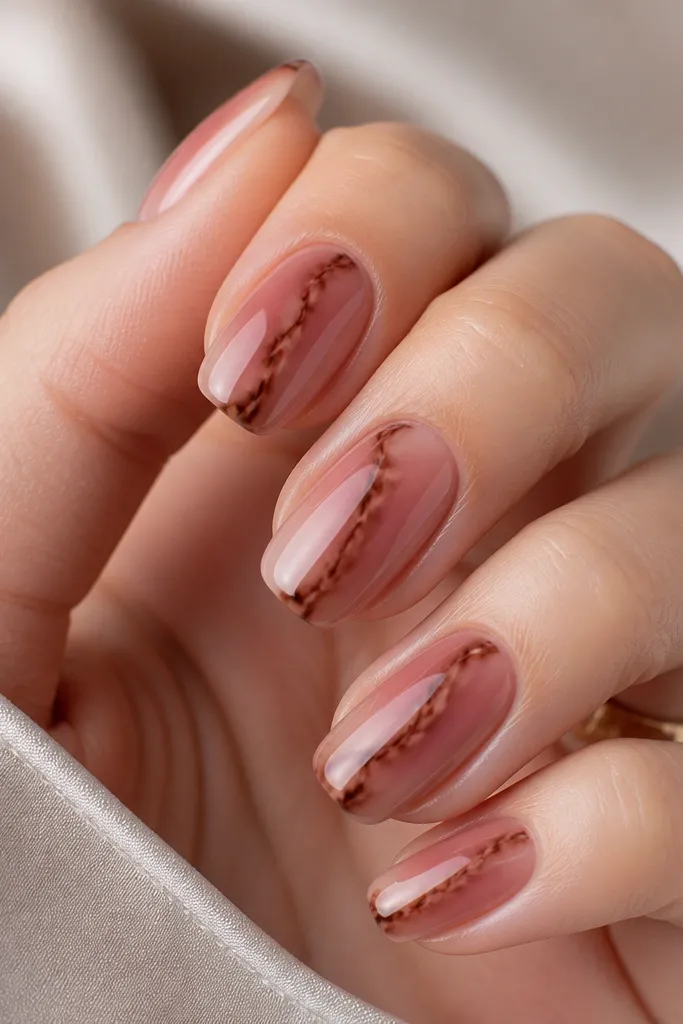
This one looks expensive because it’s controlled. You get a pink fade that feels soft, then you add a single cocoa center band so the eye has a focal point. The lighter sides keep the design wearable and prevent the shell from overwhelming your fingers. It flatters hands with slightly wider nail beds because the center band visually narrows the nail. It also photographs well under warm indoor lighting because the gradient shifts from blush to rose.
Start with a pale pink base at the cuticle and airbrush or sponge a deeper rose toward the center and upper tip, curing after each layer. Paint a straight cocoa-brown center band about one-third of the nail width, then add small curved shell offshoots on both sides with the striping brush. Keep the offshoots short so they stay in the center area. Finish with two top-coat layers, and use the brush to “pull” the top coat slightly over the edges for smoothness.
Editor's noteIf you don’t have an airbrush, a makeup sponge dabbed lightly gives the fade without harsh streaks.
Skip thisDon’t make the gradient too dark at the tip; it steals the softness and turns the nails into a solid rose block.
4. Rose Quartz Shell with Clear Glaze Overlay
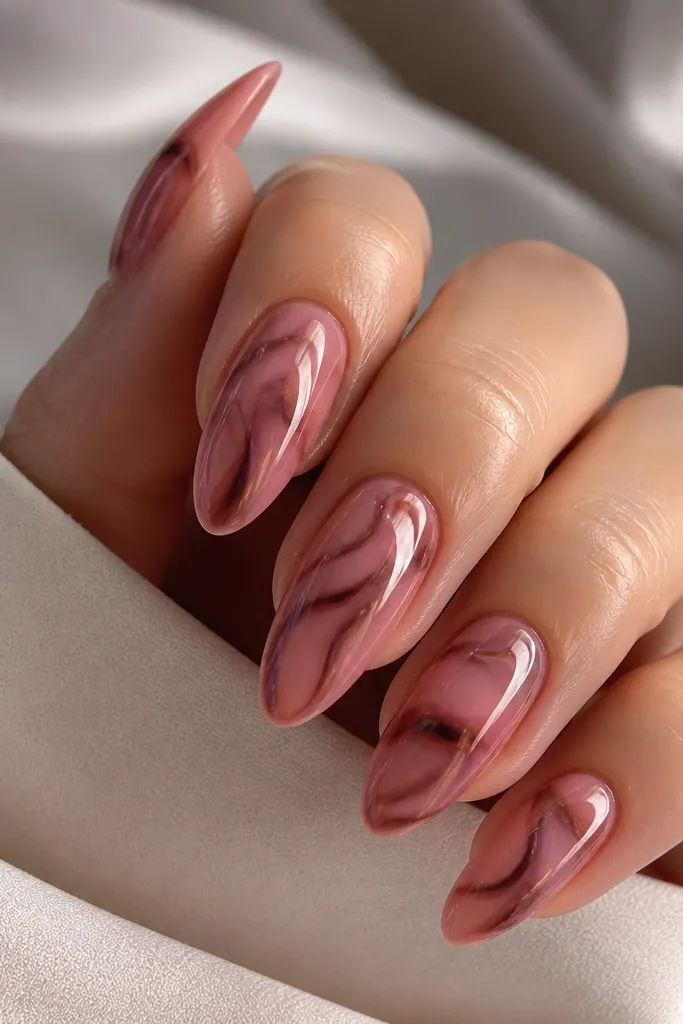
This is the “jewelry nail” version. The base is a translucent rose jelly that looks like it’s glowing from within, and the tortoise swirls sit beneath a clear glaze layer. That clear top makes the pattern look dimensional, like rose quartz with caramel veins. It flatters medium to tan skin tones because the rose stays luminous instead of dull. For events or date nights, this is the one I reach for when I want a soft look with real impact.
Apply a translucent rose-pink jelly in two thin coats, curing each. Draw tortoise swirls with warm brown polish, keeping lines medium-thin and spaced so the jelly shows through. Add a few muted pink streaks to connect the shell currents, then cure. Finally, apply a thicker clear glaze (either a clear builder gel or a high-viscosity clear top coat) and cure again, then cap the free edge with a thin top coat.
Use jelly polish as your base even if you have to buy one small bottle — it changes the whole look.
Avoid using a fully opaque pink base; the glaze will look like it’s sitting on top instead of under it.
5. Blush Micro-Shell Confetti on Nude
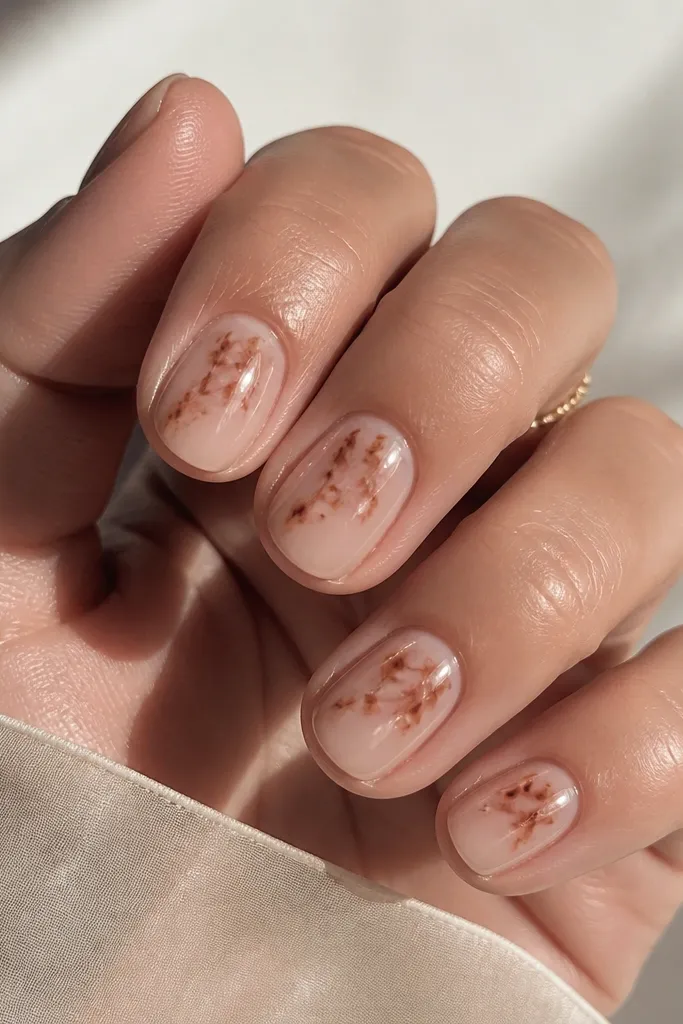
This design is for when you want tortoise but you don’t want it to take over your whole nail. Instead of large shell bands, you use micro swirls — small, scattered currents that look like confetti. The nude-pink base keeps everything soft and clean, and the tiny brown lines add just enough contrast to read “shell” at a glance. It’s flattering on short nails because the pattern stays light and doesn’t crowd the edges.
Paint a nude-pink base in two thin coats and cure. With a dotting tool, place tiny warm brown dots, then drag each dot into a short curved swirl using a striping brush. Add a few blush-pink streaks between swirls so the pattern stays pink-forward. Seal with two coats of top coat, then gently clean the sidewalls with a lint-free wipe and a bit of polish remover on a brush.
Editor's noteIf your micro swirls blur, let the base fully cure and don’t rush the top coat layer.
Skip thisSkip big shell shapes on short nails; they make the nail feel smaller.
6. Pink Tortoise Half-Moon Accent
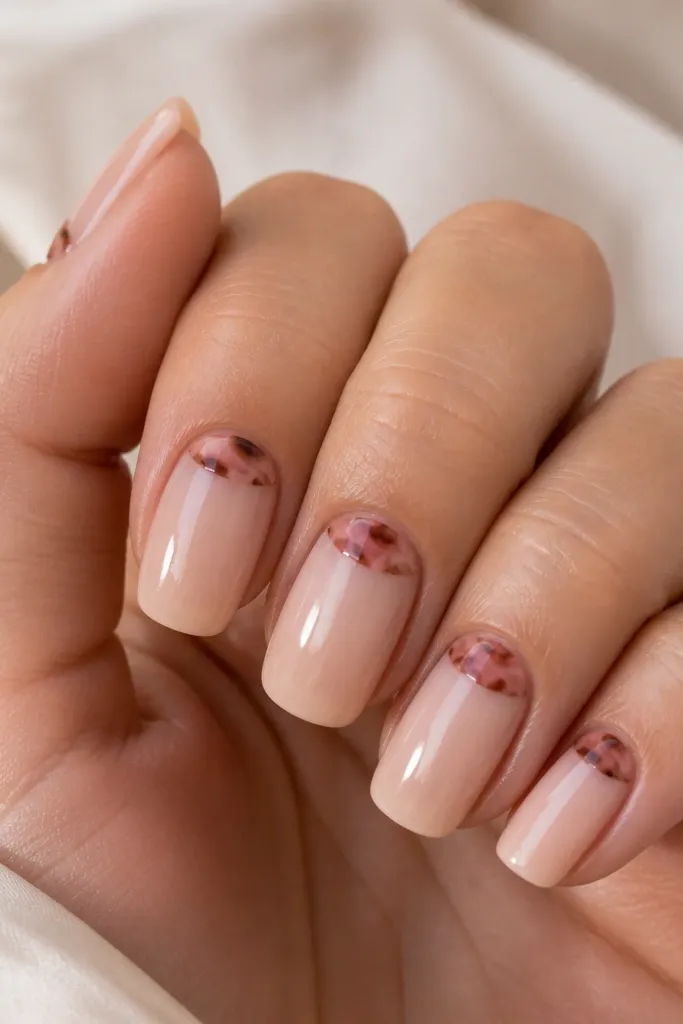
This is the easiest way to wear tortoise if full patterns make you nervous. The half-moon at the cuticle gives a focal detail, and the rest stays nude and clean. The pink tortoise lines are thin and controlled, so it reads feminine instead of messy. It works on every skin tone because the nude base matches your natural nail color, then the shell detail adds warmth. If your job has a more conservative dress code, this stays safe and still looks styled.
Apply a sheer nude base, then cure. Using a small angled brush, paint a half-moon of blush-pink tortoise swirls at the cuticle, keeping it about 1/3 of the nail width from the center outward. Add warm brown lines inside the half-moon, then finish by adding tiny highlight streaks in pale pink. Top coat the whole nail, and cap the cuticle edge gently so it doesn’t lift.
Use a lip liner-style cleanup brush to sharpen the half-moon edges without smearing.
Don’t extend the shell detail down the nail too far or it stops looking like an accent.
7. Hot Pink Shell with Espresso Outline
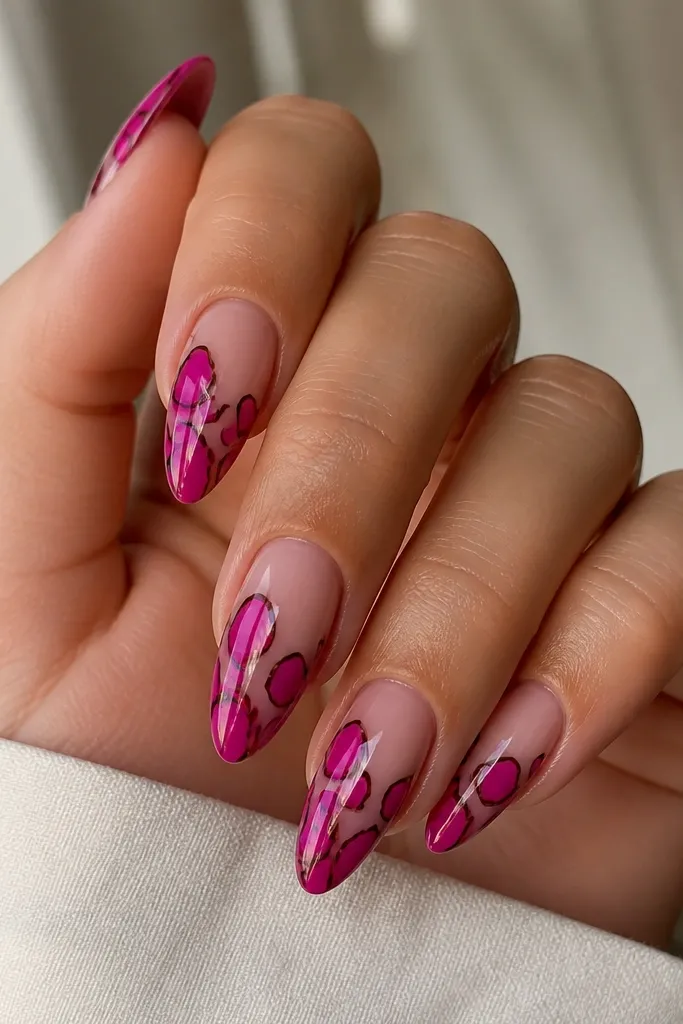
This version is for when you want pink to show up clearly, even in photos. The hot pink gives you the feminine punch, while the espresso outline keeps the shell from looking muddy. The sheer nude base keeps it wearable so it doesn’t become a solid hot-pink block. I love this on medium to deep skin tones because the contrast stays clean and the hot pink looks saturated without turning neon.
Start with a sheer nude base and cure. Paint hot pink tortoise swirls with a striping brush in irregular curved shapes across the center. Once the hot pink is set, go over the edges of the swirls with espresso-brown using a very thin brush, tracing the contours. Add a couple of tiny pale-pink highlights inside the swirls, then seal with two top coats so the outlines stay crisp.
Editor's noteUse the thinnest brush you own for the espresso outline — thick lines ruin the “shell” illusion.
Skip thisAvoid skipping the outline; without it, hot pink and brown can blend into a dull patch.
8. Peachy Nude Tortoise with Copper Flecks
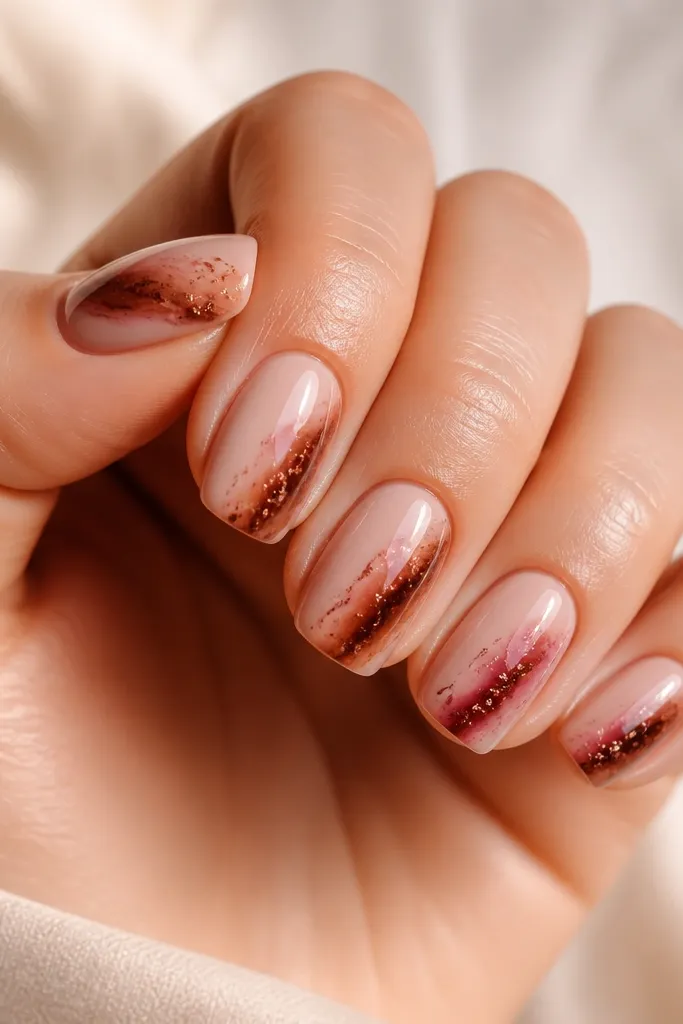
This is warm, feminine, and slightly glam. The base is peachy nude, so the pink tortoise reads as soft coral rather than cool blush. Diagonal swirls add movement, and copper flecks mimic the light you’d see in real shell under sun. This looks amazing with gold jewelry and warm-toned outfits. It’s also forgiving if your nail shape isn’t perfectly symmetrical because the diagonal pattern pulls the eye.
Apply peachy nude base in two coats and cure, then lightly buff if it feels too smooth. Paint diagonal tortoise swirls using warm brown, with dusty rose streaks breaking up the brown. Place copper micro flecks at 3-4 points where the lines intersect, then gently press them in with the brush tip. Finish with a glossy top coat in two layers, and cap the free edge to lock the flecks down.
Copper flecks look best when you use a tiny amount — three placed well beats a whole sprinkle.
Don’t use large glitter pieces; they catch on fabric and make the shell feel chunky.
9. Soft Pink Tortoise Aura Around Center
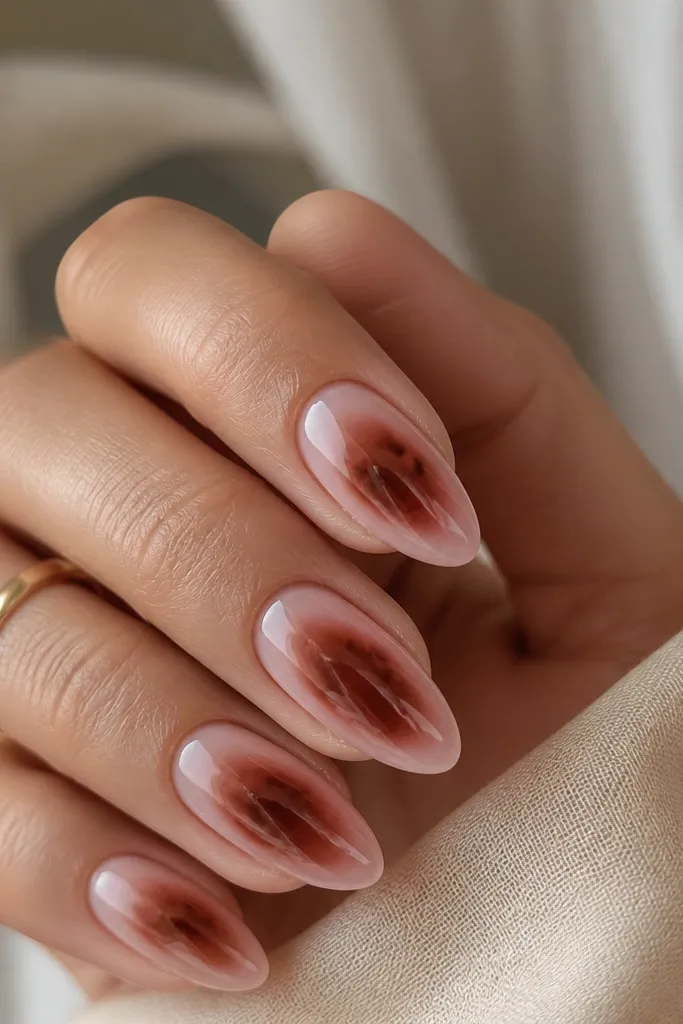
Aura placement makes tortoise look modern and extra flattering. Instead of covering the whole nail, the shell concentrates around the center, then fades outward into lighter nude-pink. The result is a soft focus look that still reads patterned. This flatters hands that have a slightly uneven nail bed because the halo effect balances the visual weight. It’s also great if you want something feminine for work but still fun on weekends.
Start with a sheer nude-pink base and cure. Create a center “aura” by sponging a light layer of pale pink around the center area, then add warm brown tortoise lines in that same center zone. Use a small brush to pull a few lines outward and fade them into the base, then add tiny pink highlights at the ends. Seal with top coat and do extra attention on the center so it stays smooth and glossy.
Editor's noteIf the aura looks too harsh, wipe the brush on a paper towel and lightly feather the edge.
Skip thisAvoid full-coverage shell on every nail if you’re going for aura — it defeats the soft halo effect.
10. Pink Tortoise Marble with Translucent Veins
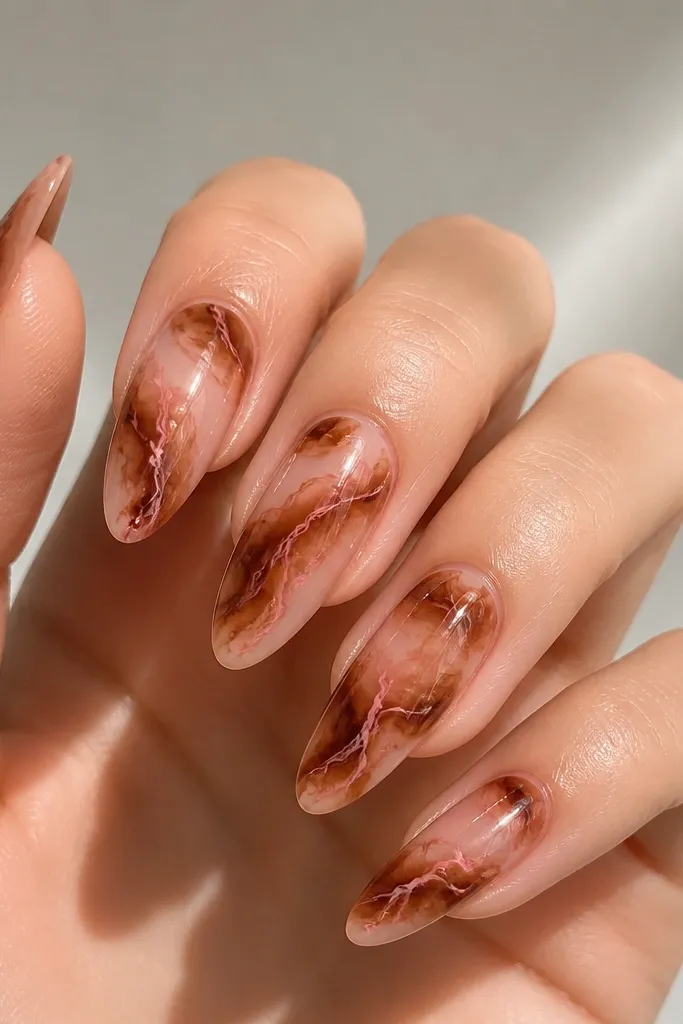
Marble tortoise looks softer than classic shell because it has cloudy movement. The base stays translucent, and the brown is applied like smoke rather than crisp bands. Thin translucent pink veins keep it feminine and prevent the brown from taking over. This is flattering on long almond nails because the marbling can stretch lengthwise. It also looks great on cooler skin tones because the pink veins keep the design from feeling too warm.
Apply a translucent nude-pink base, then cure. Create marble clouds by dabbing warm brown in irregular swirls, then lightly drag with a damp brush tip to soften edges. Add translucent pink veins by painting thin lines with a diluted pink polish, then cure. Finish with a thicker top coat layer to smooth the marble texture and give it that under-glass look.
Editor's noteDilute your pink for veins — thick pink lines look opaque and lose the marble softness.
Skip thisAvoid harsh edges on marble; crisp outlines make it look like stickers.
11. Rose Pink Shell with Black-Brown Shadowing
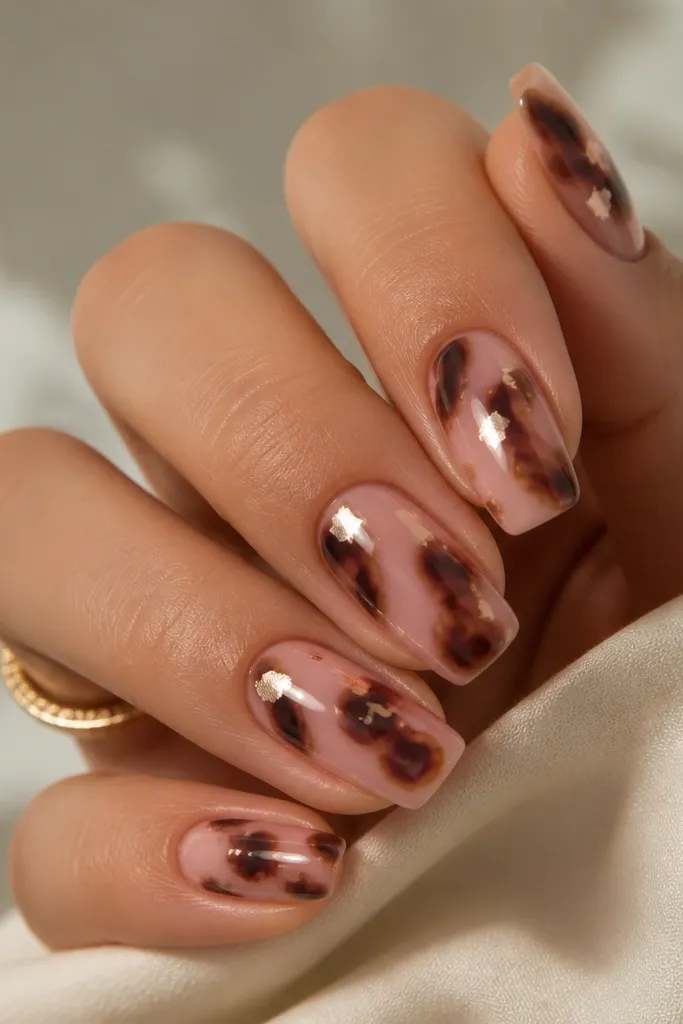
This one is for a more dramatic shell without going into dark manicures. The rose-pink base is medium coverage, and the tortoise has a black-brown shadow underparts that make the brown lines pop. Highlights in pale pink keep the whole set soft, even with the darker undertone. It flatters anyone who likes a sharper look, and it looks especially good on nails with a slightly wider shape because the shadowing adds definition.
Paint a rose-pink base in two coats and cure. Add tortoise swirls with brown first, then go back and place black-brown shadowing slightly offset under parts of the swirls. Use a striping brush to keep the shadow thin so it looks like depth, not a second pattern. Dot pale pink highlights on the raised edges of the swirls, then seal with two top coats for a smooth, shiny finish.
Offset the shadow by a hair’s width — if you offset too much, it looks like a mistake instead of depth.
Don’t flood with black-brown; too much makes pink look dull and heavy.
12. Pink Tortoise Checker Accent on One Nail per Hand
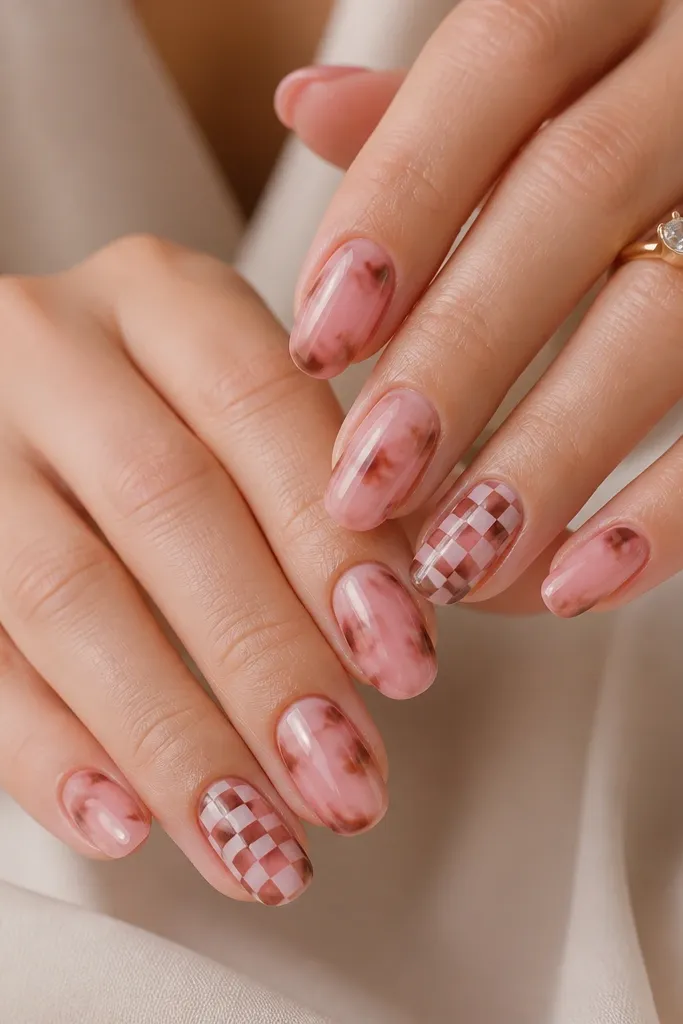
Checker details make tortoise feel playful while staying feminine. The main nails use softer shell swirls in blush and warm brown, and the accent nail adds a micro checker grid that looks like shell segments. This is flattering because the checker is limited to one nail, so your hands don’t look busy. I love it for birthdays, bridal events, or any time you want something cute that still feels “nail art” not costume.
Start all nails with a nude-pink base and cure. Paint pink tortoise swirls on four nails using warm brown and dusty rose streaks, keeping the pattern in the center. On the accent nail, draw a small checker grid by painting tiny squares in blush and warm brown, then connect them with thin brown lines for crisp edges. Finish with top coat on every nail, and cap the checker edges carefully so they don’t chip.
Editor's noteUse a steady hand and do the checker with a dotting tool first, then draw lines between dots.
Skip thisAvoid making the checker too large — big squares look childish on longer nails.
13. Blush Tortoise with Shimmer Top Coat Only on Swirls
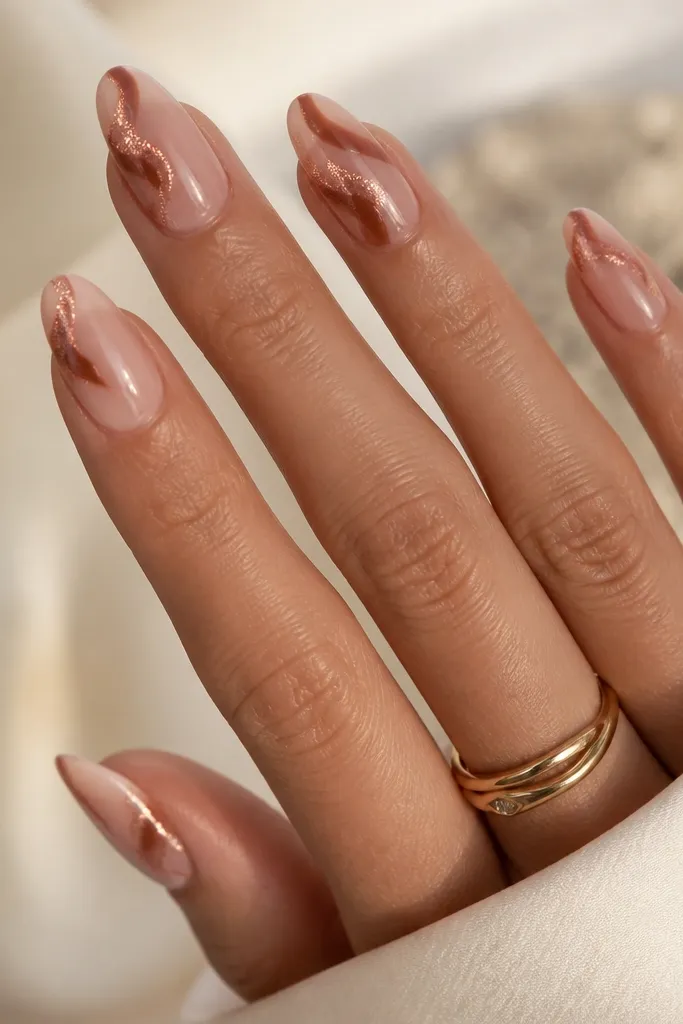
This is how you get sparkle without turning your whole manicure into glitter. The base stays soft and clean, while the shimmer hits only the tortoise lines, so the shell looks like it catches light. It’s extremely flattering in sunlight and under warm indoor bulbs because the shimmer rides along the pattern. This works on fair through deep skin tones since the shimmer tone is pink-gold, not icy silver. It also looks great with simple outfits because the nails do the “decorating.”
Apply a sheer blush base and cure. Paint warm brown tortoise swirls and add dusty rose streaks inside the swirls. Let that cure fully, then take a fine pink-gold shimmer top coat and paint it only over the swirl lines with a small brush, avoiding the negative space. Seal everything with one regular glossy top coat layer so the shimmer stays smooth and doesn’t snag.
If your shimmer thickens, thin it with a drop of clear polish so it spreads only where you paint it.
Don’t shimmer the entire nail if you want soft femininity — full glitter can read harsh with pink tortoise.
14. Pink Tortoise Reverse French on Nude Half-Moons
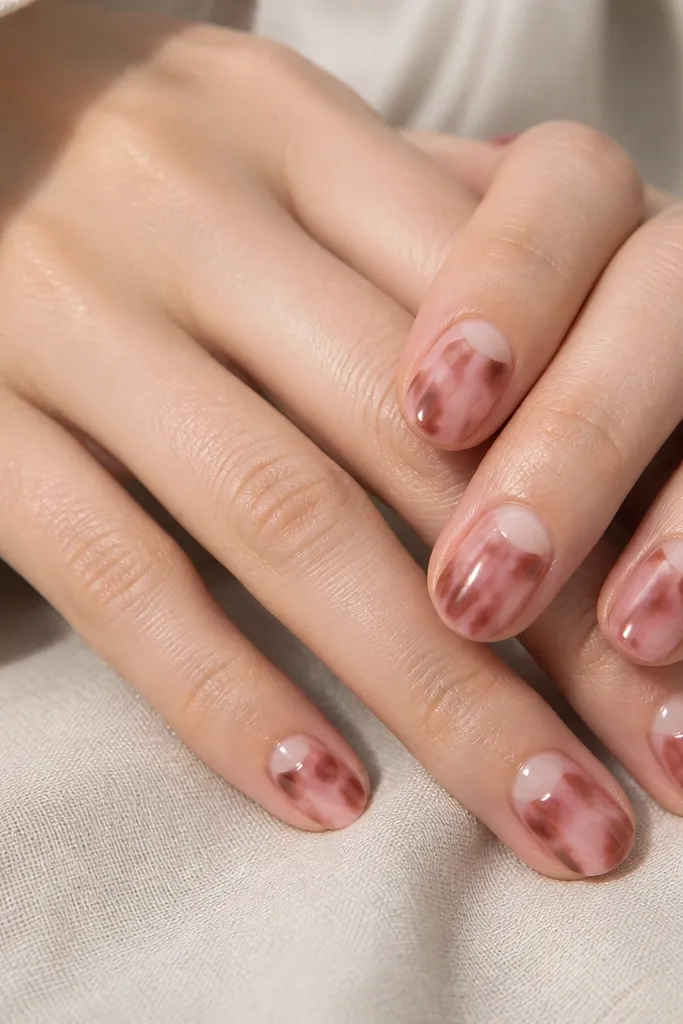
Reverse French is a trick I use when I want the pattern to look intentional and airy. The nude half-moons at the cuticle keep the nails light, while the pink tortoise covers the rest of the nail for that shell effect. The contrast between nude space and pink-brown swirls makes the manicure look neat even when the swirls are organic. It flatters short nails because the negative space near the cuticle makes fingers look longer.
Paint a nude base and cure. Leave the cuticle half-moon area bare by covering it with a small piece of tape or by carefully painting around it first, then removing the tape after curing. Apply pink tortoise swirls across the remaining nail, using blush pink and warm brown bands that flow outward from the center. Add pale pink highlights, then cap with top coat, focusing on smoothing over the boundary where the half-moon ends.
Editor's noteUse tape that’s thin and flexible so you get a clean curved half-moon without jagged edges.
Skip thisDon’t rush tape removal; peel too early and you’ll pull the base layer and create gaps.
15. Powder Pink Tortoise Wrap with Clear Jelly Tips
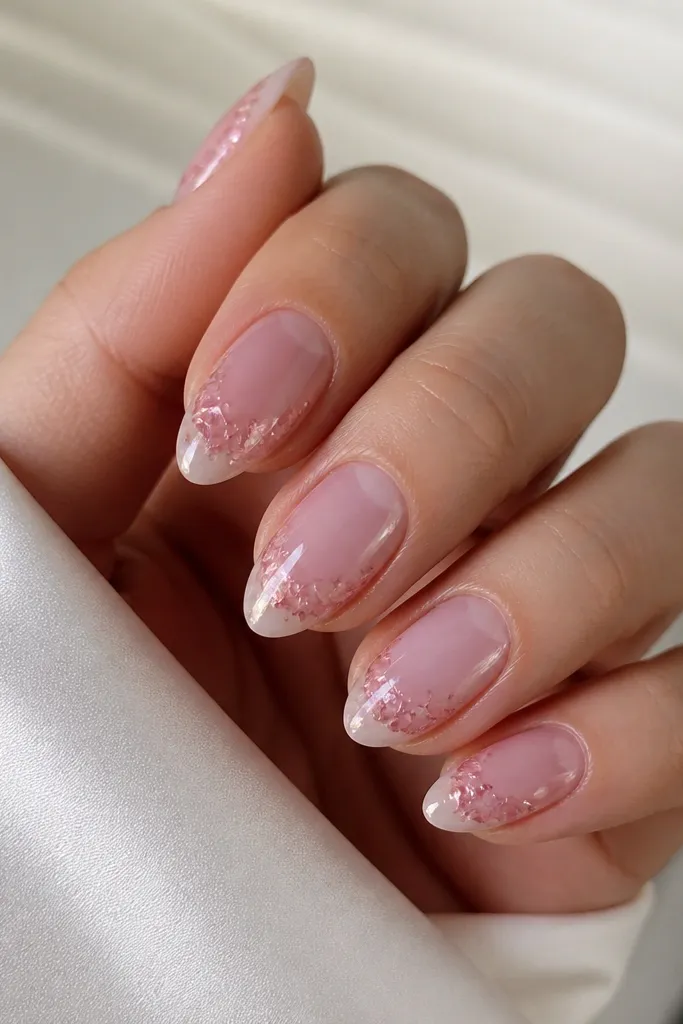
This look gives you that soft tortoise vibe without the heavy, opaque coverage. The “wrap” pattern hugs the sides first, so your nails still look airy in the middle. I love it because it reads feminine in daylight, then turns glossy and slightly playful under indoor lighting. The clear jelly tips make the whole set feel fresh, like you didn’t paint over your nail plate — you built a gentle glaze on top.
Start with a sheer milky base, then cure it fully. Sponge or dab a powder-pink tortoise mix along the sidewalls in two vertical bands, leaving the center more sheer so it looks wrapped, not filled. Use a thin brush to drag darker dusty rose chips inward about 1-2 mm, then seal the pattern with a glossy clear jelly layer. After that cures, add clear jelly only on the free edge and cap the tip so it looks like glass. Finish with a final top coat that keeps the jelly slightly rounded, not flat.
Editor's noteWhen you place the tortoise on the sides, stop short of the center by at least one brush-width. It keeps the set from looking muddy and makes the jelly tips look brighter.
Skip thisDon’t spread the tortoise chip pattern all the way across the nail — it kills the wrap effect and makes it look like a full opaque decal.