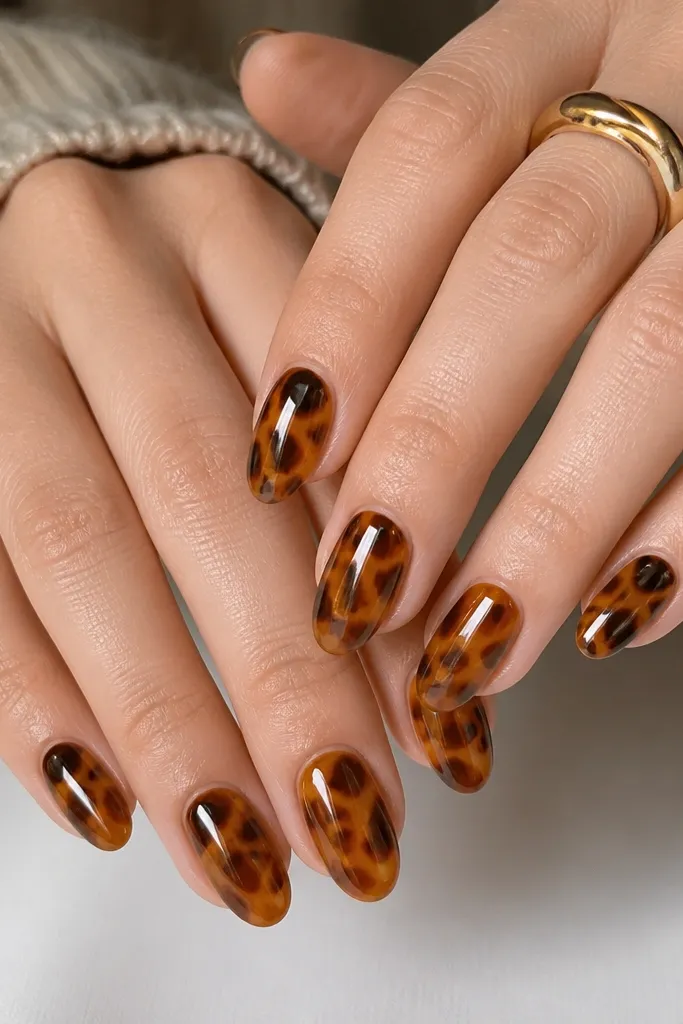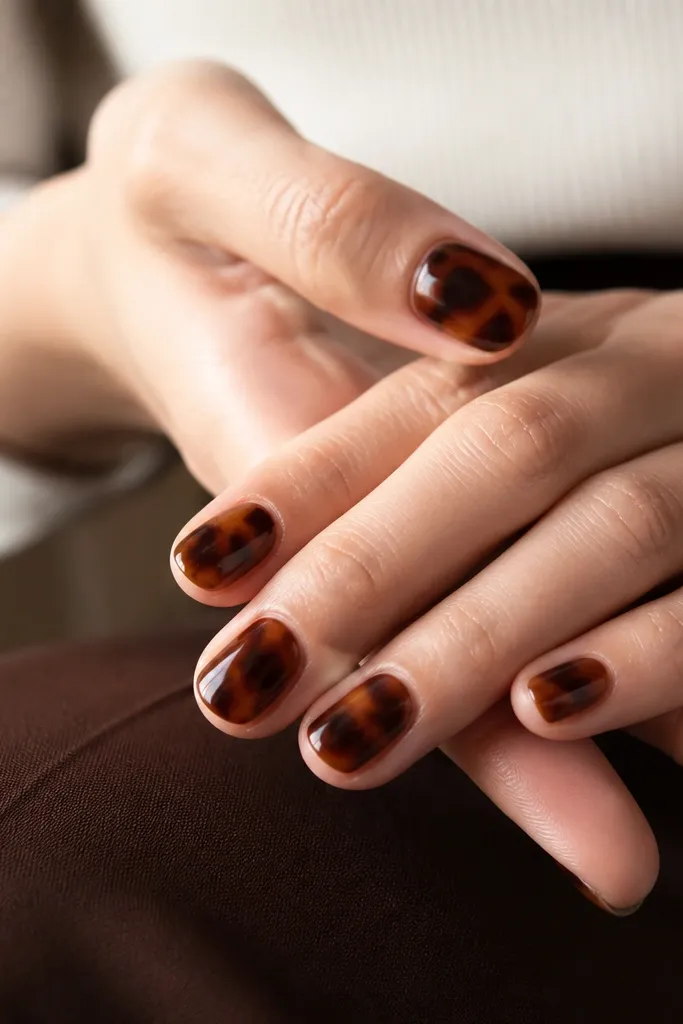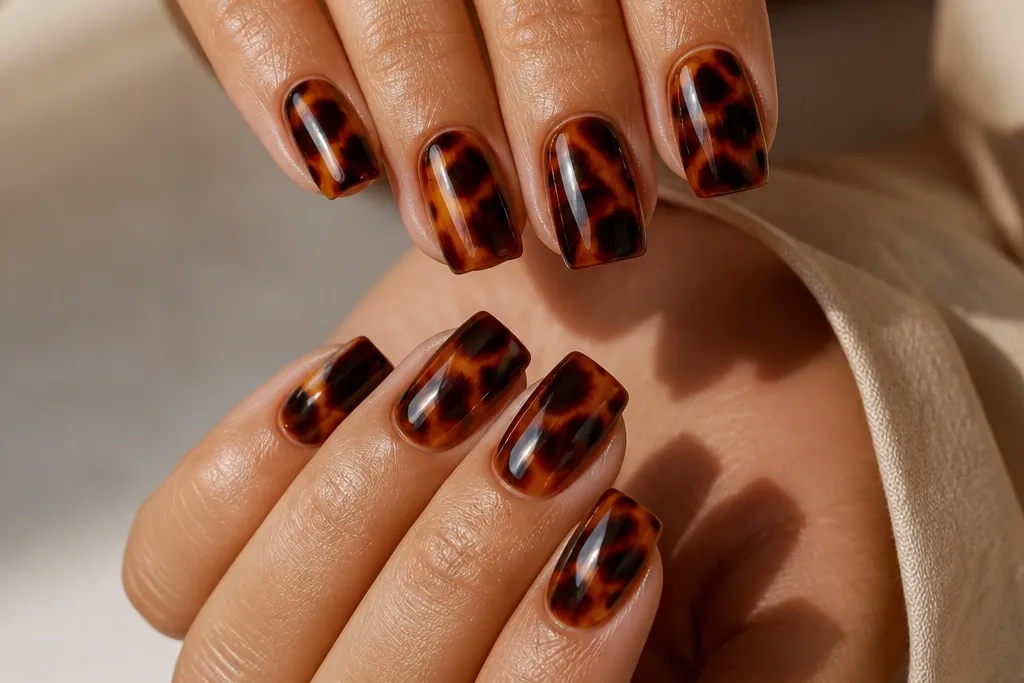
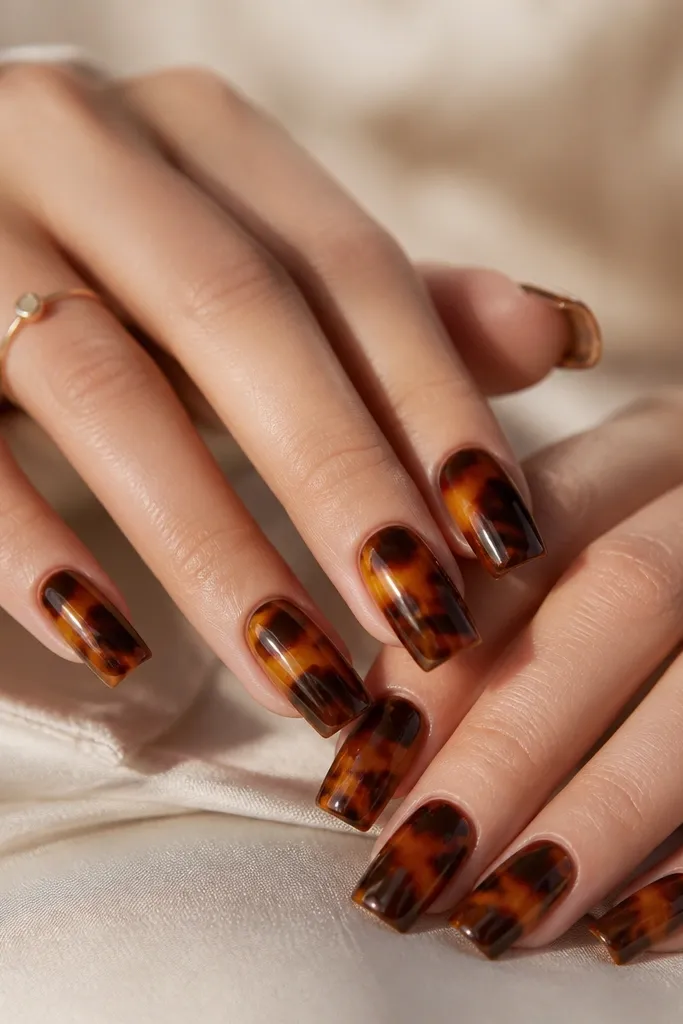
1. Honey Caramel Square Tortoise with Clear Edge Frame
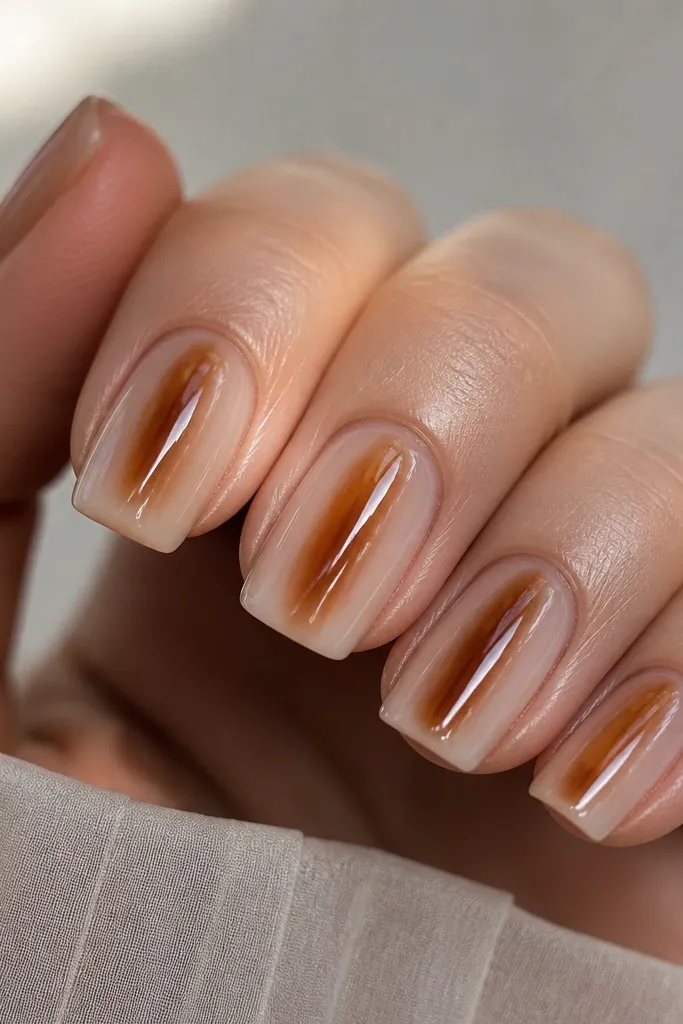
This one is for when you want tortoise that looks sleek, not heavy. The honey caramel base flatters warm undertones and also looks good on fair skin because it reads like a nude with glow. The clear edge frame makes the nail look more structured, especially if your cuticle line is slightly uneven. I like it for workdays and casual outfits because it has contrast without turning into “dark nails.” The shell pieces are medium-sized, so it still looks readable from a distance.
Start by applying a warm milky caramel nude as your base and cure fully. Using a thin striping brush, drag dark amber-brown gel into irregular vertical lines, then add a few near-black fragments only in the center third of the nail. Leave a clean strip at both sidewalls and about 1 mm from the free edge so you get that clear frame effect. Finish with a high-gloss top coat, making sure the corners get extra product before you cure.
Editor's noteIf the pattern looks too dense, wipe your brush on a paper towel so the next line is lighter and thinner.
Skip thisDon’t fill the entire nail with shell — when it covers edge-to-edge, it starts to look like a solid brown smudge.
2. Espresso Shell Tips on Nude Rose Square
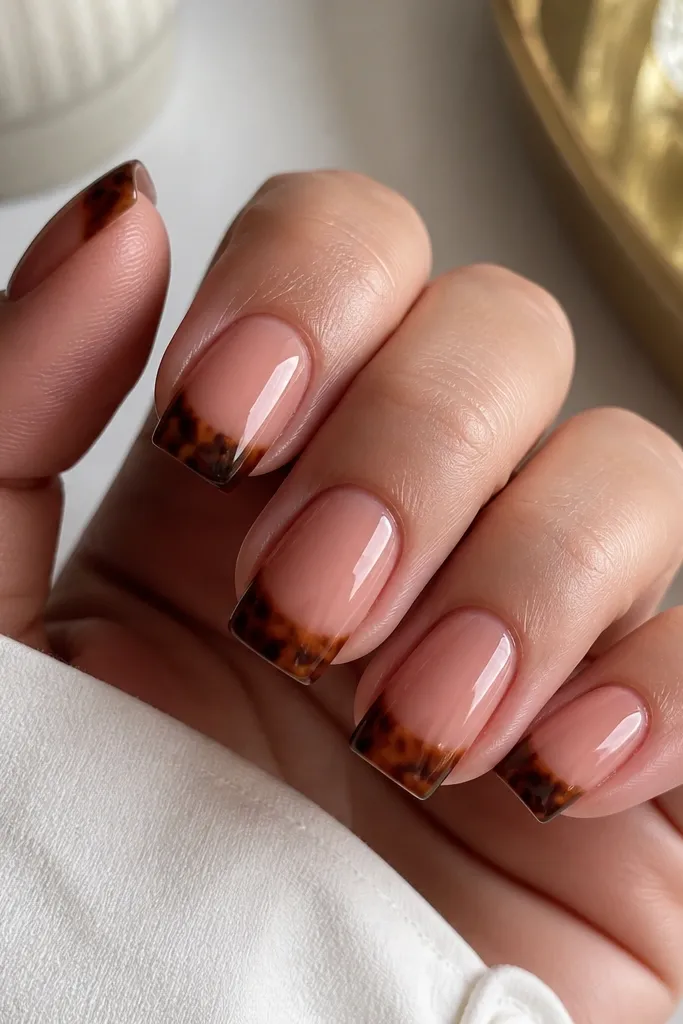
This design is a cheat code for people who hate busy cuticles. The nude rose base makes the tortoise tips look intentional, and it plays nicely with cool-to-neutral skin because the rose tone keeps everything from turning brown-gray. I’ve worn it with gold rings and it still looks crisp, even when the nails grow out a little. The shell placement also makes short squares look longer because your eye reads the clear base first. It feels trendy without being loud.
Paint nude rose as the base and cure. With a liner brush, place irregular tortoise blobs only on the last third — mix espresso brown and a lighter caramel shade so you get depth. Blend the blobs by dragging one or two thin lines downward about 2 mm from the tip, then keep the cuticle area untouched. Seal with a glossy top coat and cap the tip edge so the design doesn’t catch on fabric.
Use a slightly thicker gel for the tip pattern so it holds shape after curing.
Skip placing shell too close to the cuticle; if it creeps upward, the manicure looks cluttered.
3. Black-Brown Tortoise Half-Moon Square
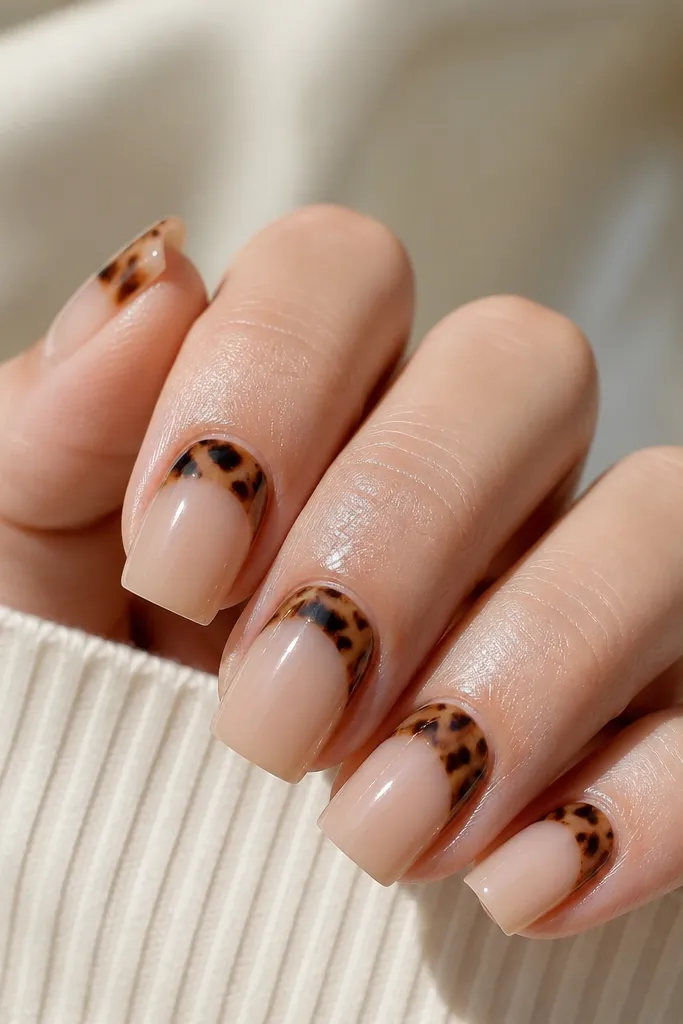
This is the tortoise set I pick when I want something modern and a little graphic. The sheer beige base keeps it light, and the half-moon placement makes the nails look clean and lifted. On medium and deep skin tones, the black-brown reads bold without needing bright colors. It also looks good if you have short nail beds because the curved band visually balances the shape. I like how the pattern feels intentional — like a design, not a random print.
Apply a sheer beige nude and cure. Use the edge of a makeup sponge or a small silicone tool to map a soft half-moon band across the top third, then fill it with thin tortoise fragments using black-brown gel. Add a few warm brown pieces inside the same curve so it doesn’t look like pure black. Keep the rest of the nail clean, then top coat and cure with extra attention on the curve edges.
Editor's noteIf the half-moon looks uneven, clean the border with a small brush dipped in alcohol before curing.
Skip thisDon’t smear the pattern across the whole nail — the look depends on leaving nude space.
4. Amber Smoke Tortoise with Micro Glitter Vein
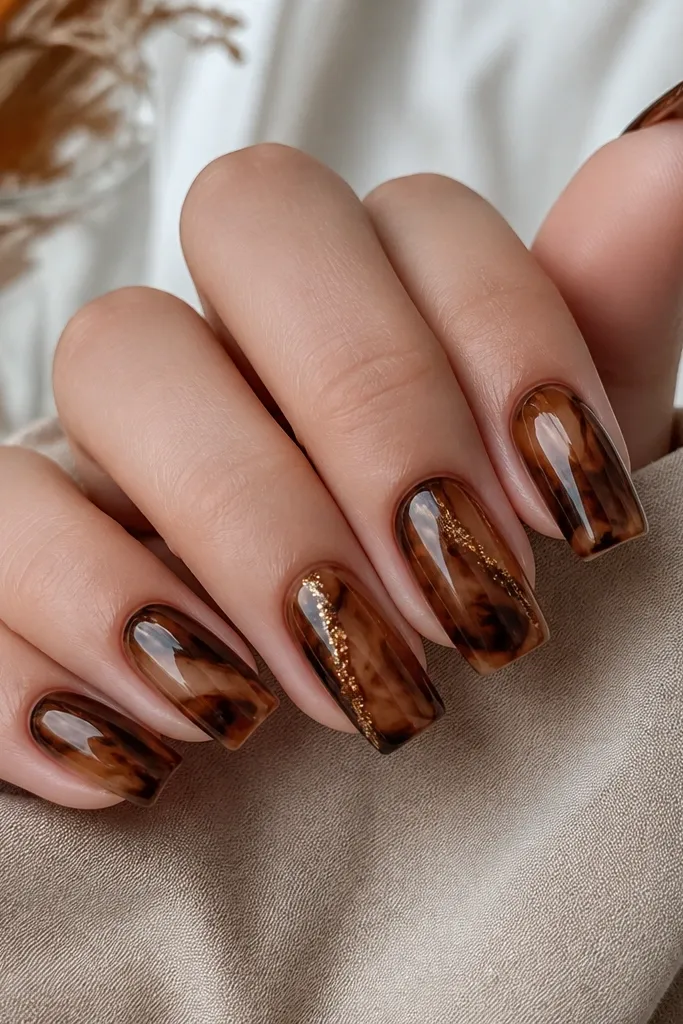
If you like tortoise but want it to feel more “evening,” this one nails it. The amber smoke base gives warmth and depth, and the diagonal drift makes the manicure look like it’s moving. The micro glitter vein adds a refined sparkle — it doesn’t look chunky because it’s just a thin line. This set flatters olive and golden undertones hard, but it also works on fair skin when the base is more honey than caramel. It’s also a great way to use tortoise on nails that are short to medium length.
Start with an amber smoke base (a translucent honey-brown) and cure. Paint diagonal tortoise lines with a thin brush, mixing medium brown and a near-black fragment — keep the lines wispy, not thick. On two accent nails, add a micro gold glitter gel vein down the center, then cover it with clear amber-brown glaze so it looks embedded. Finish with one glossy top coat, then cure longer than usual for the glitter nails so it stays smooth.
Use a toothpick to place the glitter line — it gives you a steadier width than a brush.
Avoid big glitter. Large flakes turn tortoise into a party mess instead of a sleek smoke effect.
5. Tortoise French Square with Thin Dark Outline
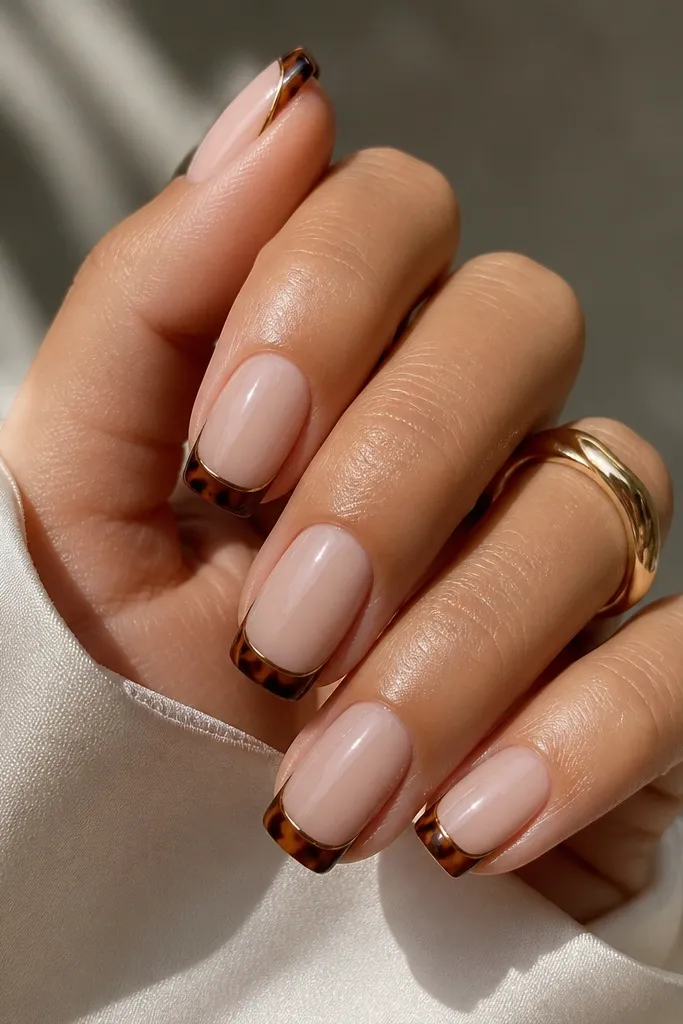
This is the cleanest way to wear tortoise if you still want that French vibe. The nude base keeps it fresh, and the thin dark outline makes the tip look crisp even if your application isn’t perfect. I like it on hands that have visible ridges because the outline adds structure and the tortoise tip hides tiny edge imperfections. For fair skin, pick a nude with a peach undertone. For deeper skin, choose a nude closer to caramel so the tip reads warm.
Apply a nude base and cure. Create the tortoise French tip by painting an irregular curved band at the free edge using caramel and espresso browns, then blend the internal pieces with a lighter amber. With a liner brush, draw a thin dark brown outline just inside the outer edge of the French area. Top coat twice: first a normal coat, then a second coat focused on the tip boundary so it stays smooth.
Editor's noteIf you struggle with outlines, practice on one nail using striping tape as a guide for the first pass.
Skip thisDon’t skip the outline if you want it to look sharp; without it, the tip can look blurry.
6. Chocolate Marble Tortoise Square with Clear Topcoat Swirl
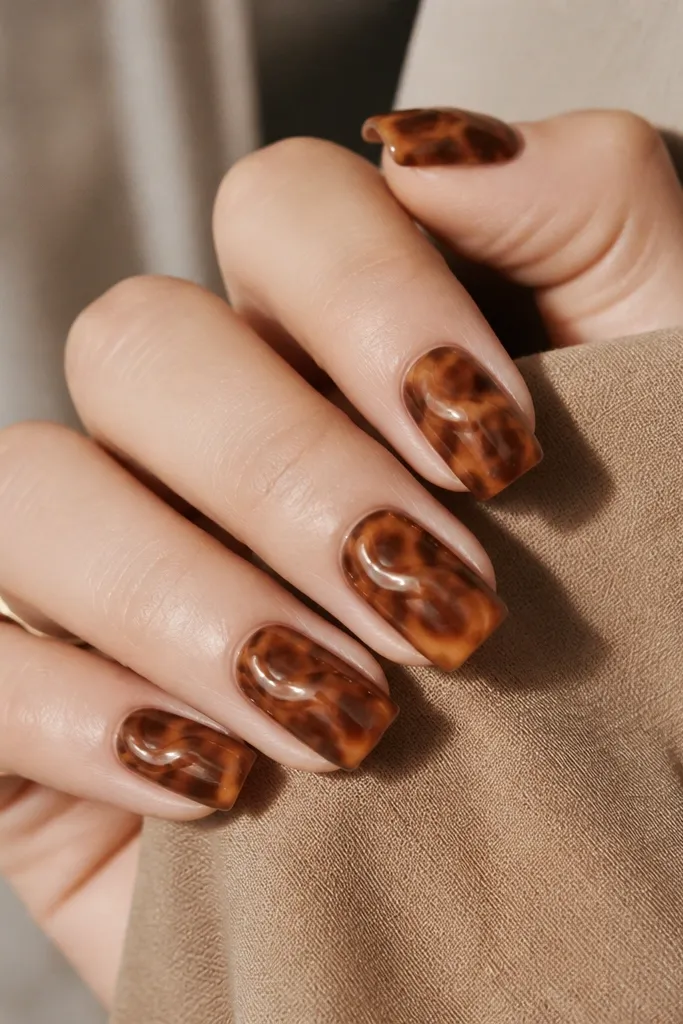
This one looks like tortoise got mixed with marble, and it’s gorgeous under daylight. The chocolate base is flattering on medium to deep skin because it makes the nail look richer, not dull. The clear swirl is what keeps it from looking too dark; it adds a highlight that makes the pattern feel layered. On fair skin, use a lighter caramel patch density so it doesn’t overtake your hand. This is also a great set if your nails are medium length — the marble effect has room to breathe.
Paint a chocolate-brown base and cure. Add tortoise fragments by dropping lighter caramel patches and then dragging a thin dark line through them to connect. For the clear swirl, apply a thin layer of clear gel in a curved shape across the middle, then lightly drag one edge so it looks organic — cure. Finish with a glossy top coat over everything so the swirl looks like it’s under glass.
Editor's noteKeep caramel patches irregular — if they’re too symmetrical, it looks printed instead of marbled.
Skip thisAvoid using three or four dark shades. Too many browns turns the pattern muddy.
7. Olive Sage Tortoise Square with Matte Cuticle Band
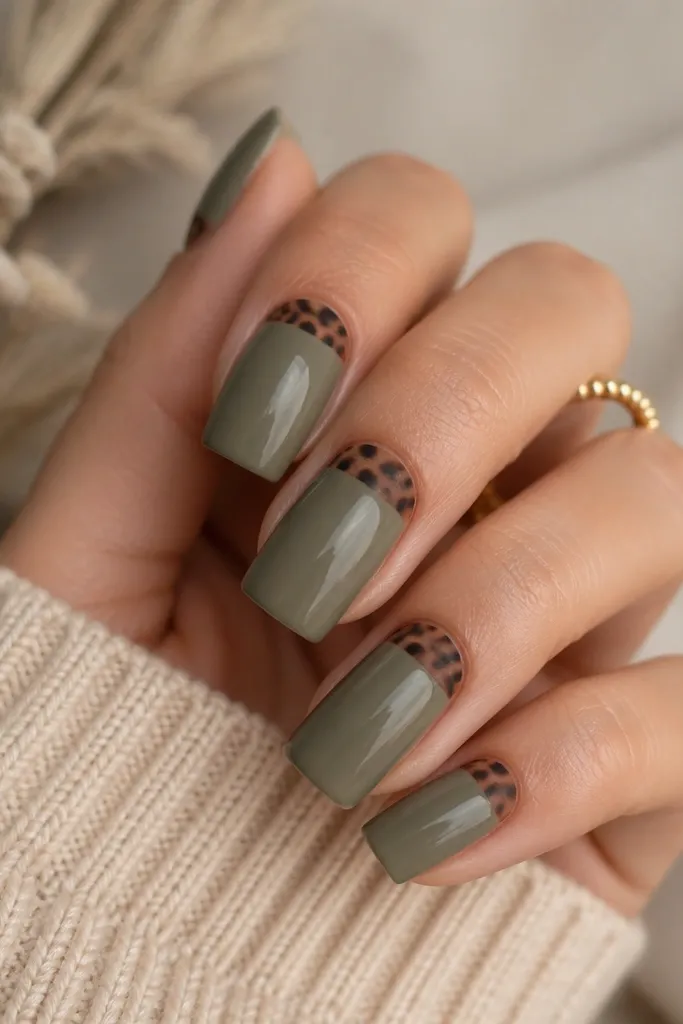
This is tortoise for people who like color but don’t want neon. Olive sage changes the vibe completely — the shell reads like it’s sitting in a muted garden tone. The matte cuticle band adds a soft texture contrast that looks expensive in person, especially with simple rings. It flatters olive and neutral undertones, and it also looks surprising on fair skin because the sage makes your nails look warmer. The square shape keeps everything looking modern.
Apply an olive sage base and cure. Paint tortoise pieces only in a band at the cuticle area, about 2 mm tall, using caramel and dark brown fragments. Top that band with matte top coat while the rest gets glossy — I do this by applying matte top only to the cuticle zone with a small brush. Cure fully, then seal with glossy top coat over the rest of the nail for a two-finish look.
Editor's noteIf matte gets on the glossy area, wipe the brush with alcohol and re-apply matte only where you want texture.
Skip thisDon’t matte the whole nail — you’ll lose the tortoise depth and it can look flat.
8. Warm Nude Tortoise with Gold Leaf Corner Pop
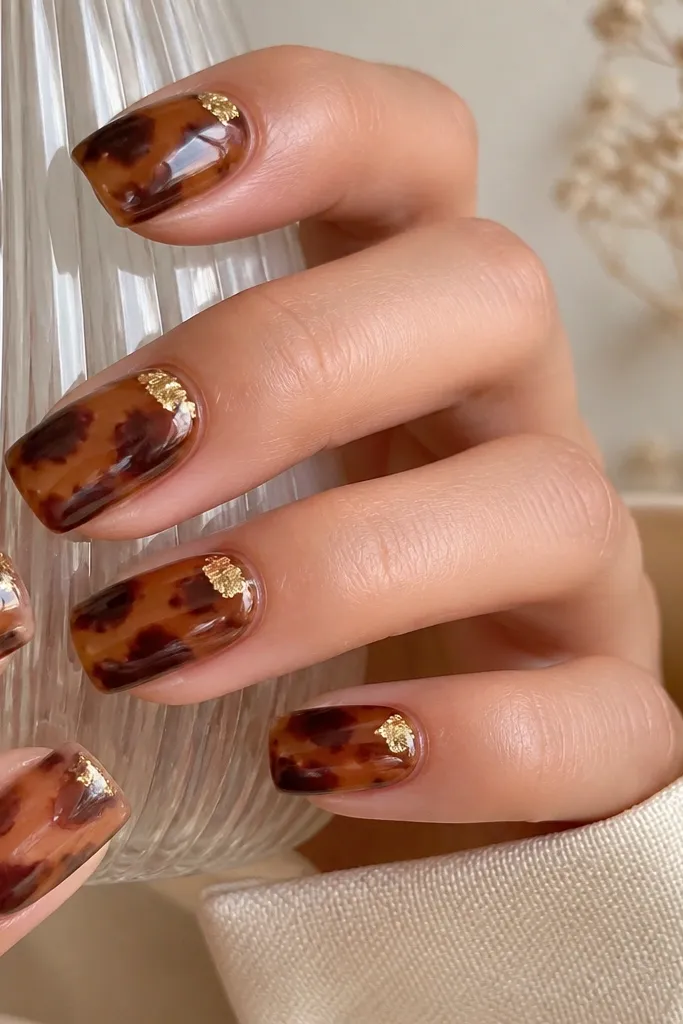
This set makes tortoise look like jewelry. The warm nude base keeps it wearable, and the gold leaf corner pop catches light when you move your hands. I’ve had this paired with plain outfits — denim, a white tee — and it still looks styled. It flatters most undertones because the gold balances the brown shell tones. The square shape also helps the corner leaf look deliberate instead of random.
Start with a warm nude base (caramel beige) and cure. Apply tortoise shell using a thin brush, keeping the dark fragments slightly heavier on the outer thirds. Place gold leaf in the top-right corner area under a thin layer of clear gel, then press gently with a silicone pusher. Cure, then add another clear layer and glossy top coat to lock the leaf down so it doesn’t snag.
Editor's noteUse small pieces of gold leaf. Big flakes lift at the edges and catch on hair or fabric.
Skip thisDon’t put leaf directly over thick shell lines — it can sink and look uneven.
9. Tortoise Ombré Square from Cuticle to Tip
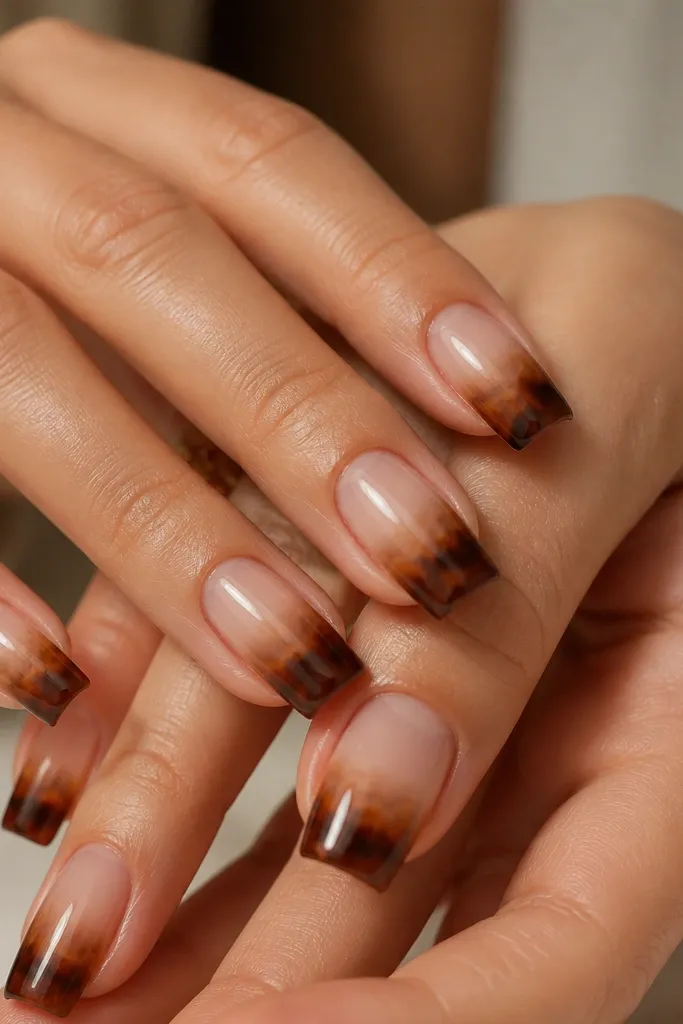
This is the most flattering tortoise design for nails that need length without feeling dark. The ombré fades the shell near the cuticle so the nail looks airy at the start and stronger at the tip. It works on fair and deep skin tones because the base is a nude gradient, not a stark contrast. I like it for everyday because even when nails grow out, the fade still looks natural. Square tips make it look crisp instead of rounded.
Apply a sheer nude base and cure. Sponge on a warm brown ombré starting at the mid-nail and building toward the free edge, then cure. Use a liner brush to add tortoise fragments only where the ombré is darker, concentrating shell density in the last third. Finish with a glossy top coat and cap the tip with extra product so the ombré doesn’t look dry.
Let your sponge ombré dry or cure before you paint shell. If you paint too soon, the shell lines blur.
Avoid a harsh line between nude and brown. If the fade is too sharp, it looks like a sticker.
10. Tortoise Checkerboard Accent on Every Other Nail
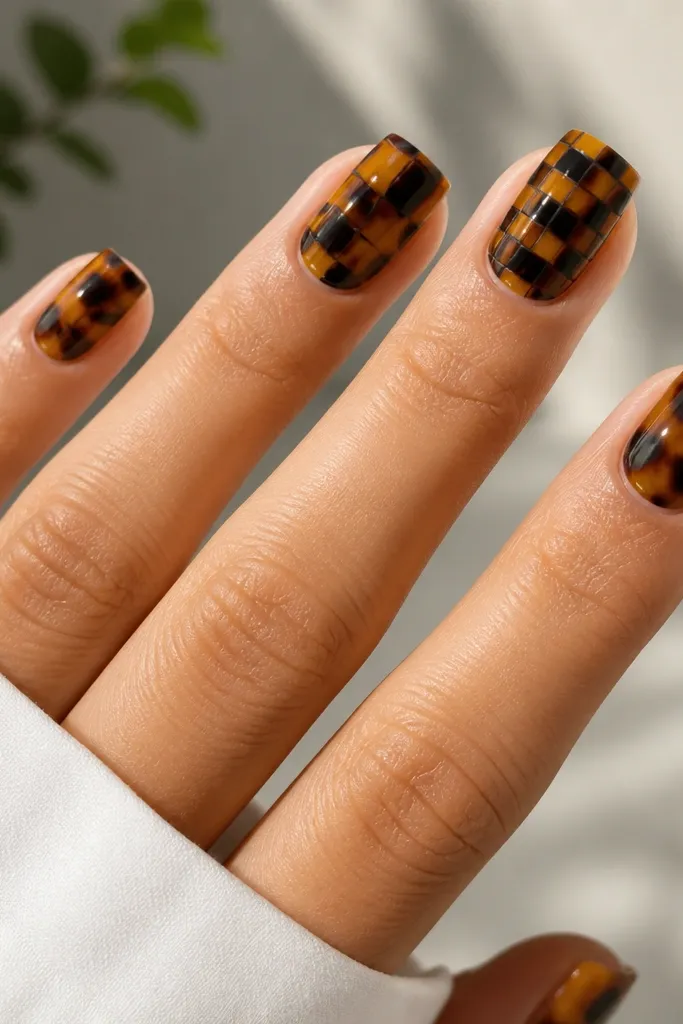
This set is for when you want tortoise but you also like structure. The checkerboard accents add a graphic rhythm that makes the manicure look intentional, not random. On short squares, the grid helps your nails look neat because the lines guide the eye. It flatters cool undertones well because the checkerboard has enough contrast to read cleanly. I’ve worn it at events and it still looks good in photos because the pattern repeats.
Paint the first base coat in a warm milky nude and cure. For the classic nails, add tortoise fragments across the whole nail with medium brown and near-black pieces. For the accent nails, use striping tape to section a simple grid, then fill each square with lighter caramel base plus dark tortoise outlines — remove tape after curing. Top coat all nails glossy, then run the brush along the checkerboard borders so the lines don’t snag.
Editor's noteIf you’re using gel, cure each nail fully before removing tape — otherwise the edges stretch.
Skip thisDon’t make the checkerboard squares too big. Oversized squares on short nails look chunky.
11. Caramel Smoke Tortoise with Reverse French Base
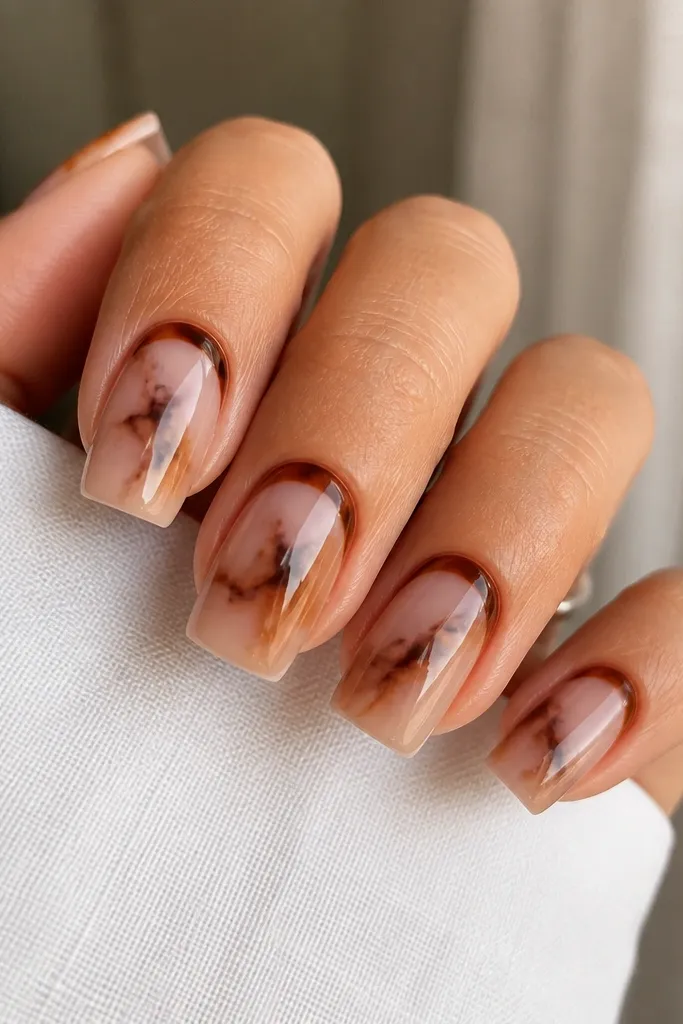
Reverse French makes tortoise feel fresh because your eye starts at the cuticle instead of the tip. The dark caramel band near the cuticle adds shape, and the smoky wisps in the center keep it from looking heavy. This design flatters hands with longer nail beds because the cuticle band looks crisp and gives a lifted effect. On fair skin, keep the band caramel rather than espresso so it doesn’t overpower your hand. On deeper skin, go a touch darker for that “pressed leather” vibe.
Apply a sheer nude base and cure. Paint a thin reverse French band at the cuticle using caramel brown, keeping it about 2 mm tall and slightly arched. Add tortoise wisps to the center by lightly dragging thin dark lines outward, leaving lots of nude space. Seal with glossy top coat and cap the free edge so the smoky lines stay smooth.
Editor's noteUse a fine liner brush and let the first wisps be faint. You can always add density later.
Skip thisAvoid filling the whole nail with smoky lines. Reverse French needs breathing room.
12. Plum Espresso Tortoise Square with Burgundy Micro Dots
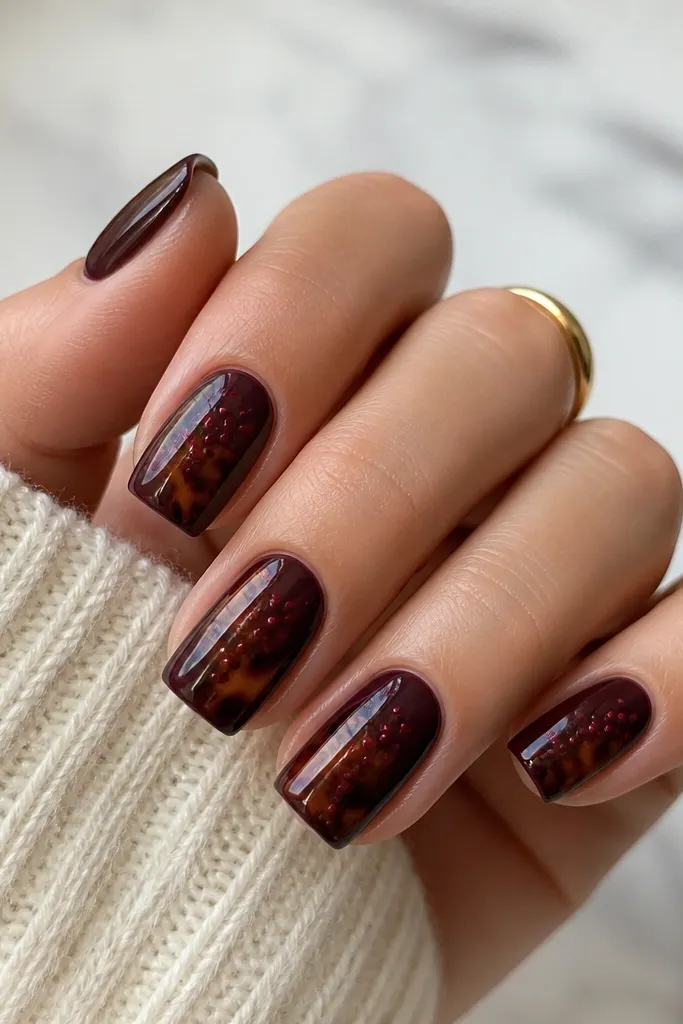
If you want tortoise that reads moody without going fully black, this is the look. The plum-espresso base gives depth, and the burgundy micro dots add a subtle “texture” that looks good up close. It flatters cool undertones and also looks stunning on warm skin because plum plays against golden tones. I wear this for fall and winter, but it also works year-round if you like darker neutrals. The square shape makes the dots look intentional because the nail edges frame them.
Start with a plum-espresso base and cure. Add tortoise shell fragments mainly around the center third, using caramel and dark brown lines. With a dotting tool, place a small cluster of micro burgundy dots along one sidewall — keep them sparse, about 3-5 dots per nail. Finish with glossy top coat, and cure a little longer than normal so the dots don’t sink.
Editor's noteIf dots look too big, switch to a smaller dotting tip — the micro scale is what keeps it elegant.
Skip thisDon’t scatter dots across the entire nail. Side placement looks designed; full coverage looks random.
13. Tortoise Stained Glass Square with Clear Negative Lines
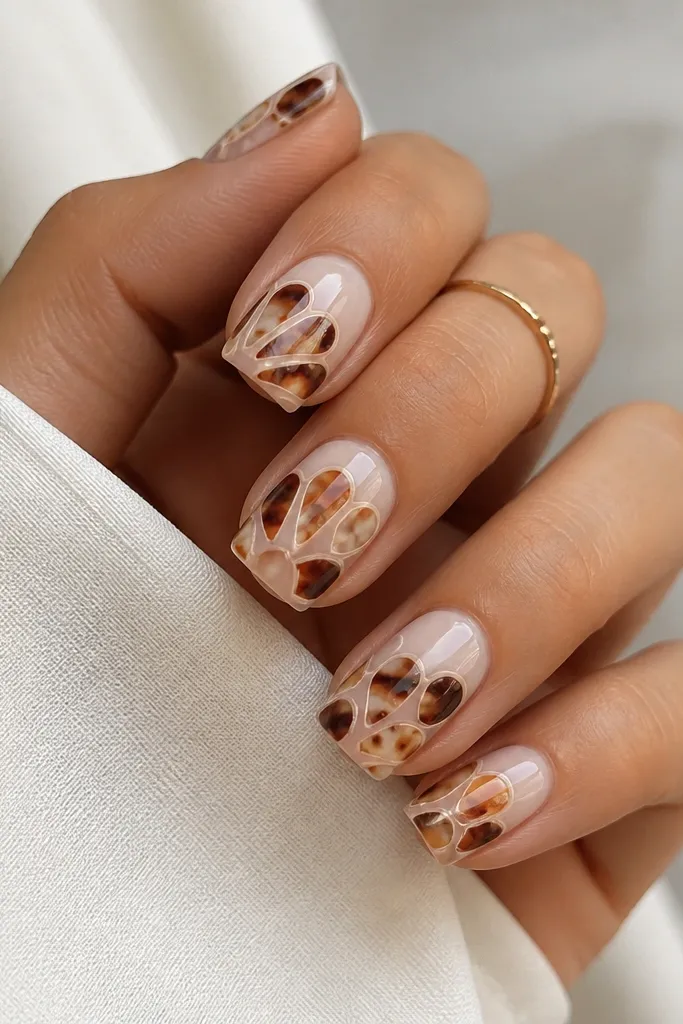
This is the most “art” version that still reads wearable. The trick is clear negative lines — they make the tortoise look like layers of translucent material instead of paint. It flatters most skin tones because the base stays light and the pattern lines are thin. I like it on medium length squares because the panels have room to show shape. In photos, it looks sharp because the negative lines create crisp edges.
Apply a warm milky nude base and cure. Paint tortoise fragments inside irregular panel shapes by first outlining panel borders with a thin layer of clear gel, then curing briefly. Fill each panel with amber and dark brown shell pieces, leaving the outlined borders clear. After curing, top coat twice to fully glass over the panel edges and smooth the surface.
Editor's noteOutline borders first, then fill. If you fill first, you lose control of the negative-line spacing.
Skip thisAvoid thick outlines. Thick clear gel makes the nails look bulky and uneven.
14. Classic Tortoise with Creamy White Cuticle Highlight
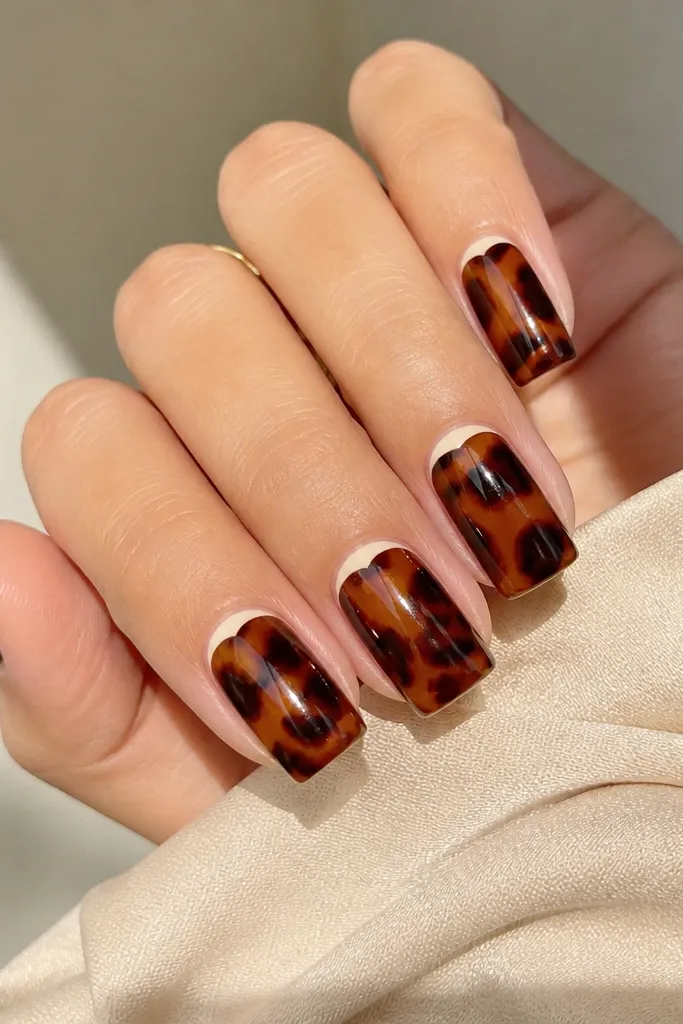
This one makes tortoise look extra clean because the creamy white highlight lifts the cuticle area. It’s a trick I learned the hard way after my first tortoise set looked too brown near the cuticle — adding a tiny white crescent fixed it instantly. It flatters fair, neutral, and olive undertones because the white pops without turning the whole manicure cold. Wear it for dates or whenever you want your nails to look polished even if your outfit is simple. Square tips keep the lines crisp so the highlight doesn’t blur.
Start with a warm beige base and cure. Paint tortoise shell all over with caramel and espresso fragments, keeping the pattern denser in the middle and lighter toward the sides. Add a creamy white gel crescent at the cuticle — about 1 mm tall — leaving a thin line of base visible between the crescent and the shell. Top coat glossy and cure thoroughly so the crescent looks like it’s under glass.
Editor's noteUse a small angled brush for the crescent. A round brush makes the highlight too wide.
Skip thisDon’t put white too far down. If it covers the cuticle line, it looks like a mistake.
15. Sable Brown Tortoise with Rose Gold Foil Edge
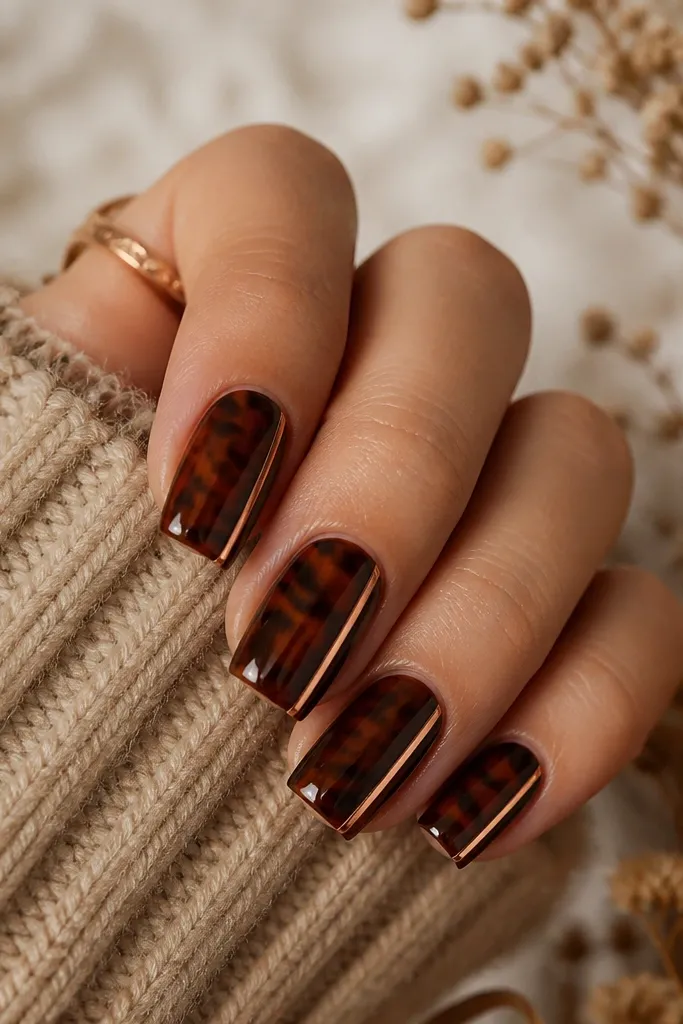
This set is for people who want tortoise but also want a little shine that isn’t glitter. The sable brown base keeps it grounded, and the rose gold foil edge adds a sleek, jewelry-like border. It flatters warm undertones because rose gold plays nicely with caramel and espresso tones. I’ve worn it to weddings and it looks expensive without being overdone. The square shape helps the foil look straight and deliberate rather than messy.
Apply a sable brown tortoise-friendly base (a deep caramel nude) and cure. Paint tortoise fragments across the nail with medium brown and near-black pieces, then keep the foil side slightly lighter so the foil pops. Apply rose gold foil along one side near the free edge using foil gel, press gently, and cure. Seal with a glossy top coat in two layers to protect the foil and keep the surface smooth.
Trim foil edges with a clean nail file so it doesn’t lift at the corners.
Avoid foil on top of thick shell swirls. It wrinkles and creates bumps.