1. Milky White Base with Classic Tortoise Tips
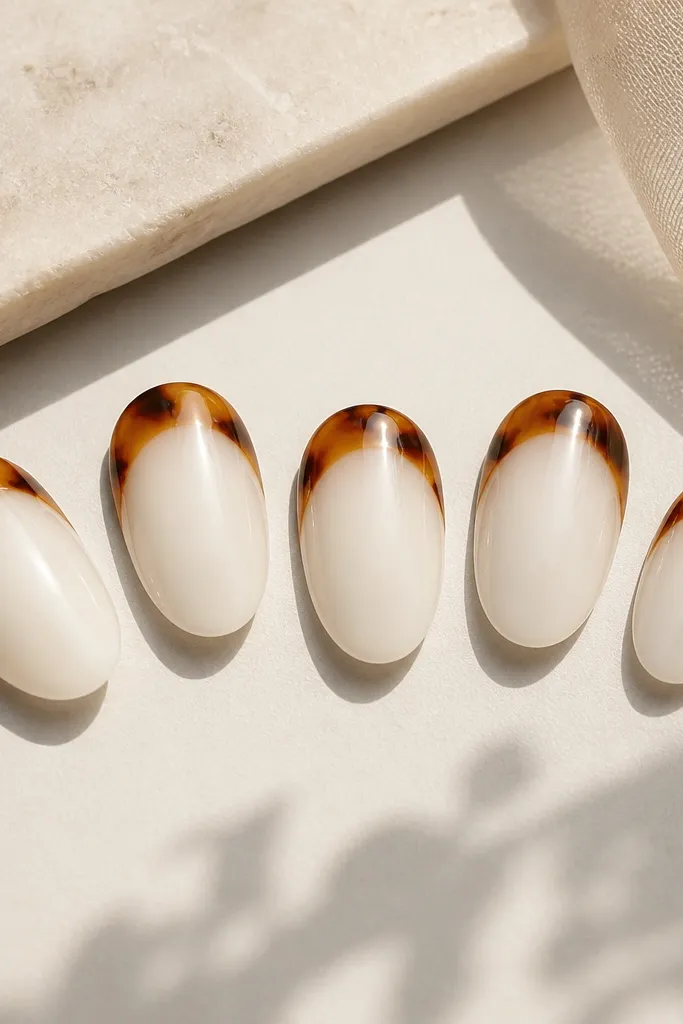
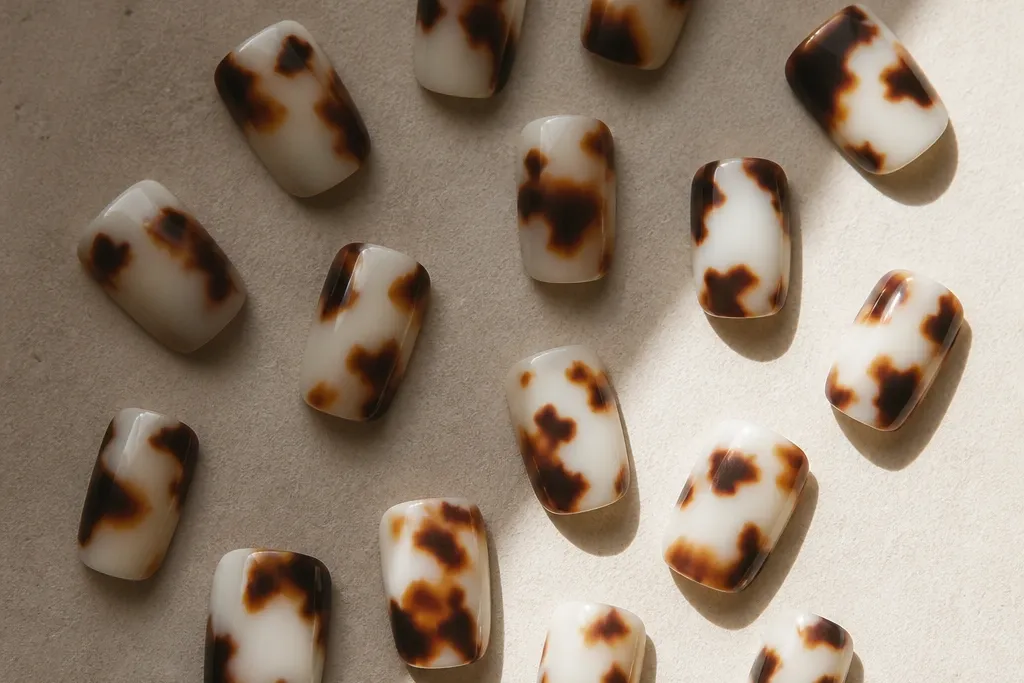
This design is clean because the white takes up most of the nail and the tortoise only lives where the tip naturally draws the eye. I like it on short almond because it makes your nail bed look longer without turning the whole nail into a pattern block. The tortoise colors here are warm — caramel and espresso — so it flatters light to medium skin tones and also looks great on cool undertones because the white stays bright. For a “clean and elegant” vibe, keep the shell pieces narrow and let the edges feather into the white rather than drawing heavy outlines.
Start by applying two thin coats of milky white, curing each coat fully. After that, place tortoise shell only on the last third of the nail — think tip-to-mid, not all the way to the cuticle. Use a thin brush to drag caramel streaks first, then add darker umber fragments between them so the shell has depth. Finally, blend the shell edge with a light white wipe around the border, cure, and seal with a glossy topcoat.
Editor's noteDo a quick lamp check before topcoat. If the white looks slightly translucent, add one more micro-thin white coat only where you see patchiness.
Skip thisAvoid thick black outlines — they make white tortoise look like costume nail art.
2. White Tortoise Half-Moons at the Cuticle
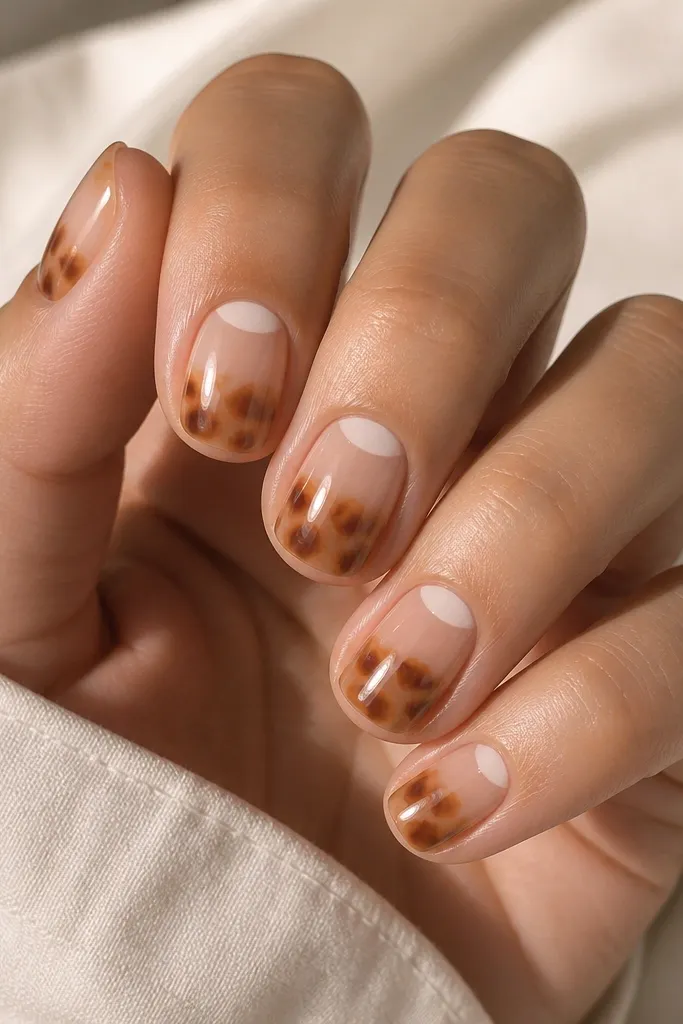
Half-moons look elegant because they frame the cuticle instead of covering the whole nail. I’ve found this layout flatters hands with longer fingers because the negative space keeps it airy, and it flatters wider nail beds because the shell starts small and grows. The tortoise here uses beige-brown tones, so it doesn’t overpower fair skin. If your cuticle area tends to look dry, the white half-moon also makes the nail edge look intentional and neat.
Prep and push back the cuticle, then apply a sheer nude base in two thin layers. Paint a crisp half-moon in opaque white right at the cuticle line, leaving a tiny gap where the nail curve needs room. Next, use a sponge or stamping-like technique with a detail brush to place beige tortoise fragments starting from the half-moon edge and stopping about halfway down the nail. Add small darker brown specks between lighter pieces, cure, and topcoat with a glossy finish.
Use a cuticle brush dipped lightly in white — the softer bristles help you keep the half-moon edge sharp.
Don’t drag the white half-moon too low. If it covers more than the bottom third of the nail, it stops looking like a clean frame.
3. Reverse Tortoise with White Veins
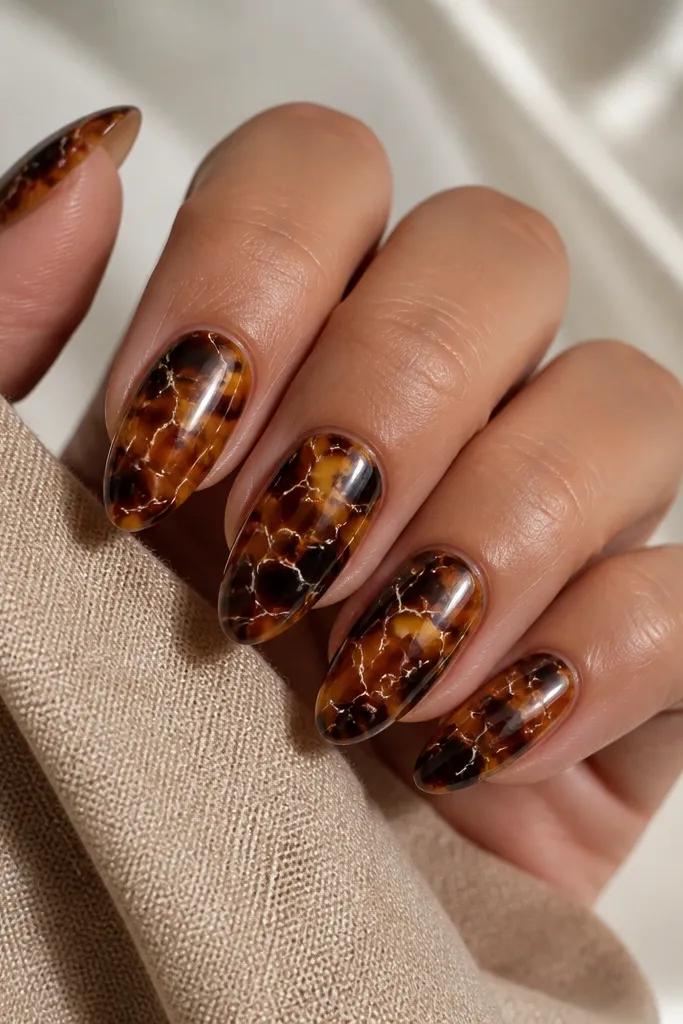
This is the one I reach for when I want tortoise to look premium but still bright. Instead of putting tortoise on top of white, you lay tortoise first and then carve white veins through it, so the white shows up as clean lines rather than a big block. It looks especially good on medium skin tones because the warm browns contrast without turning yellow. If you have short nails, the white veins help the pattern read as delicate, not heavy.
Start with a warm tortoise base: caramel streaks on a sheer nude, then add small darker brown fragments and blend edges with a soft brush. Once that cures, use an ultra-fine liner brush to draw thin white veins across the nail in different directions. Keep the veins irregular — two can be close, then one can gap — so it reads like real shell. Cure again, then apply a glossy topcoat in two layers, making sure the lines don’t sink or blur.
Editor's noteIf your white looks chalky, thin your white gel with a gel medium so it stays glassy and smooth.
Skip thisAvoid thick white lines. They make the shell look like it was painted with a sticker.
4. White Tortoise French Fade
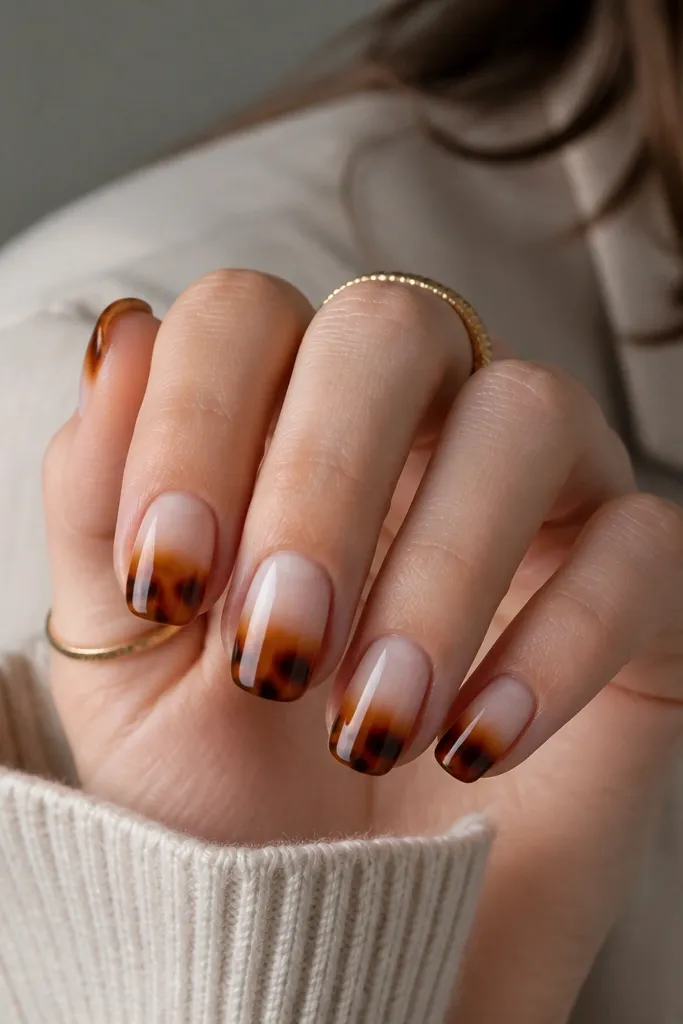
A French fade feels clean because it doesn’t have a harsh border. This version uses a milky white that gradually gives way to tortoise, so your nails look polished even if your growth line shows a little. I like this on medium-length squoval because the corners stay neat and the fade doesn’t distort the nail shape. On deeper skin tones, the warm tortoise looks luxe, and the milky white keeps everything from going too dark.
Apply a nude base or sheer pink, then paint a milky white layer starting at the tip area and blending downward with a makeup sponge. While it’s still workable, add tortoise pieces only in the outer tip zone and blend them into the white fade using a clean brush. You want the tortoise to take over the last 20-30% of the nail, not the whole tip. Cure fully and seal with a glossy topcoat, then do one extra topcoat pass over the blend area to smooth texture.
Editor's noteUse a sponge with a dry edge — it creates a softer fade than a wet sponge that puddles the color.
Skip thisAvoid a hard French line. A sharp border makes it look like separate stickers instead of a single manicure.
5. White Tortoise Over Clear Jelly Nude
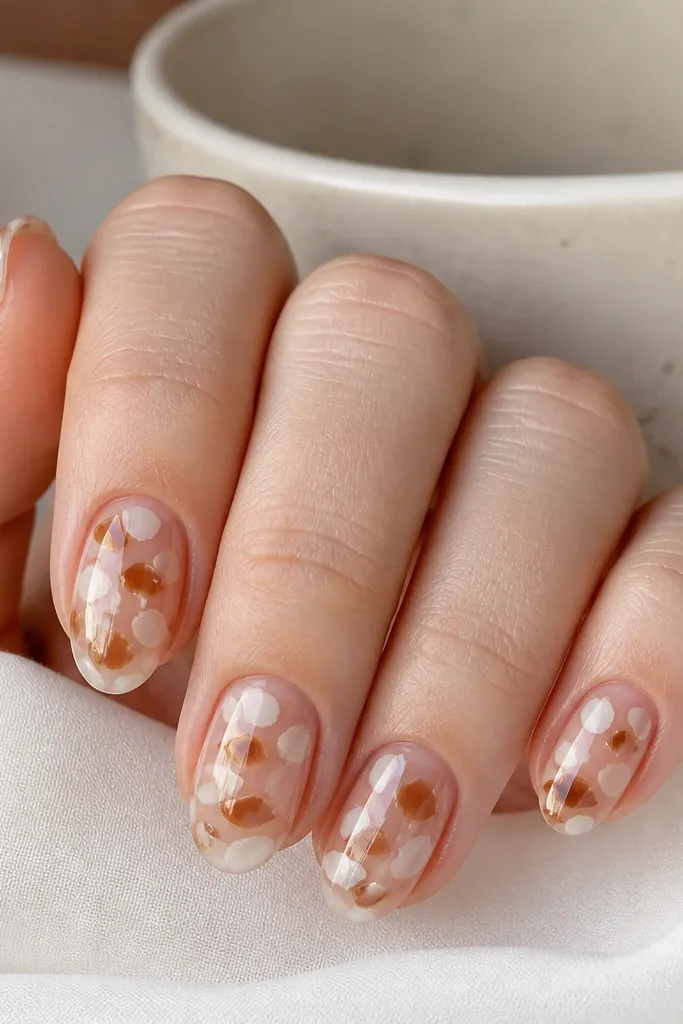
This one looks clean because the jelly nude shows your nail underneath and makes the pattern feel lighter. The tortoise pieces here are more spaced out, so the white has room to breathe and the set doesn’t crowd your nail bed. I like it for people who hate heavy coverage because it still looks “done” without fully hiding the natural nail tone. It flatters hands with uneven nail beds too, since the jelly base smooths visual differences.
Start with a clear jelly nude base in two thin coats, curing each. Add small opaque white tortoise fragments — about the size of a rice grain — leaving gaps between them. Then place warm brown islands between the white pieces so you get depth without mass coverage. Cure and finish with a thick glossy topcoat, paying extra attention to the surface so the jelly doesn’t trap bumps.
If you’re using decals, press them down with a lint-free wipe after curing to prevent lifting edges.
Avoid full-coverage tortoise blocks. They defeat the clean, airy “floating” look.
6. Matte White Shell with Glossy Edge Seal
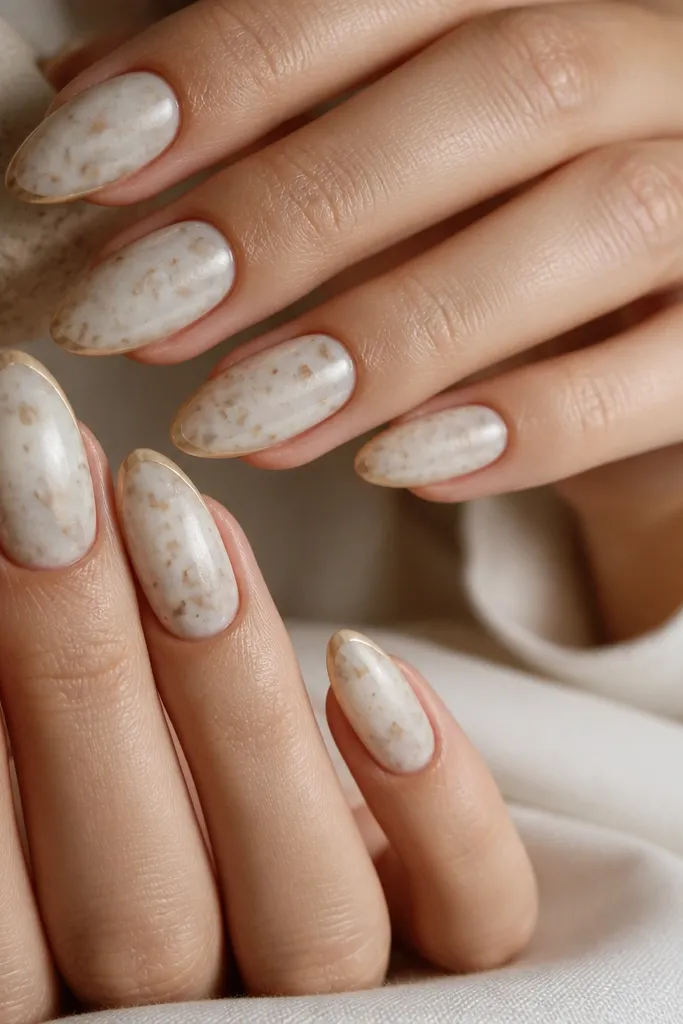
This is a contrast manicure, and it works because the matte finish kills shine on the white while the glossy edge keeps the set looking crisp. I use it when I want tortoise to feel modern instead of classic. It looks best on almond or squoval because the shape holds the contrast cleanly along the edges. On fair skin, the matte white looks creamy; on warm undertones, the brown fragments keep it grounded and not icy.
Build the design with a milky white base and add tortoise fragments on the upper half of the nail, leaving the center mostly white for balance. Cure, then apply matte topcoat over the whole nail. After the matte cures, go back to the tip line and side edges with a glossy topcoat — use a thin brush to keep it as a narrow seal. Cure again and check under light to make sure the glossy strip stays sharp.
Editor's noteUse matte topcoat sparingly. If you flood it, the shell texture can look flat and dull.
Skip thisDon’t matte the entire tip edge. A fully matte edge makes the manicure look unfinished.
7. White Tortoise Micro-Confetti on Nude
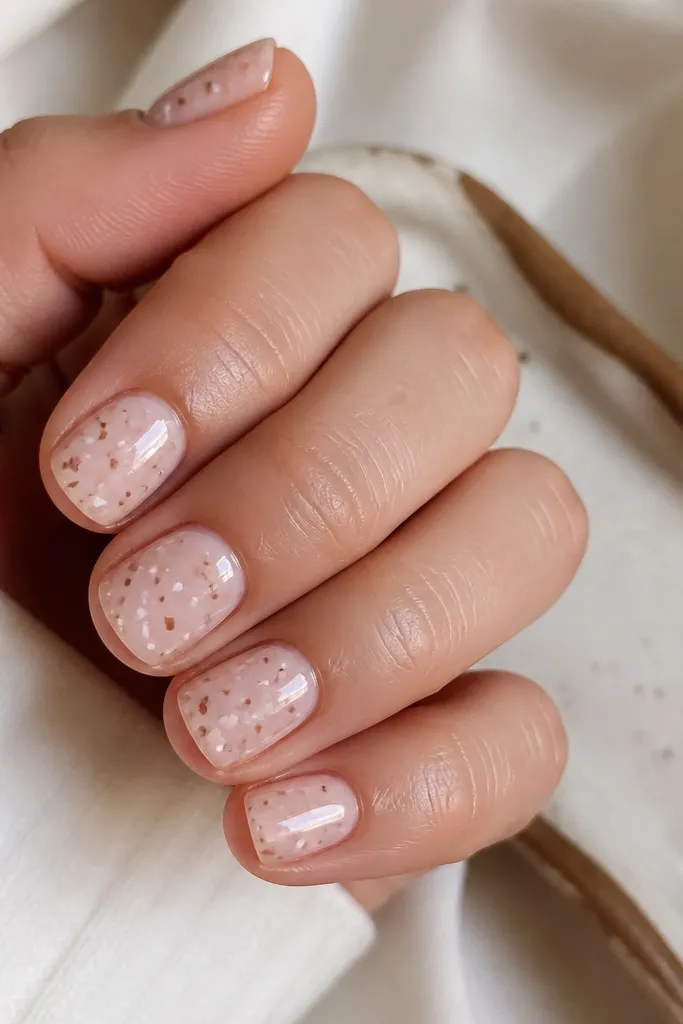
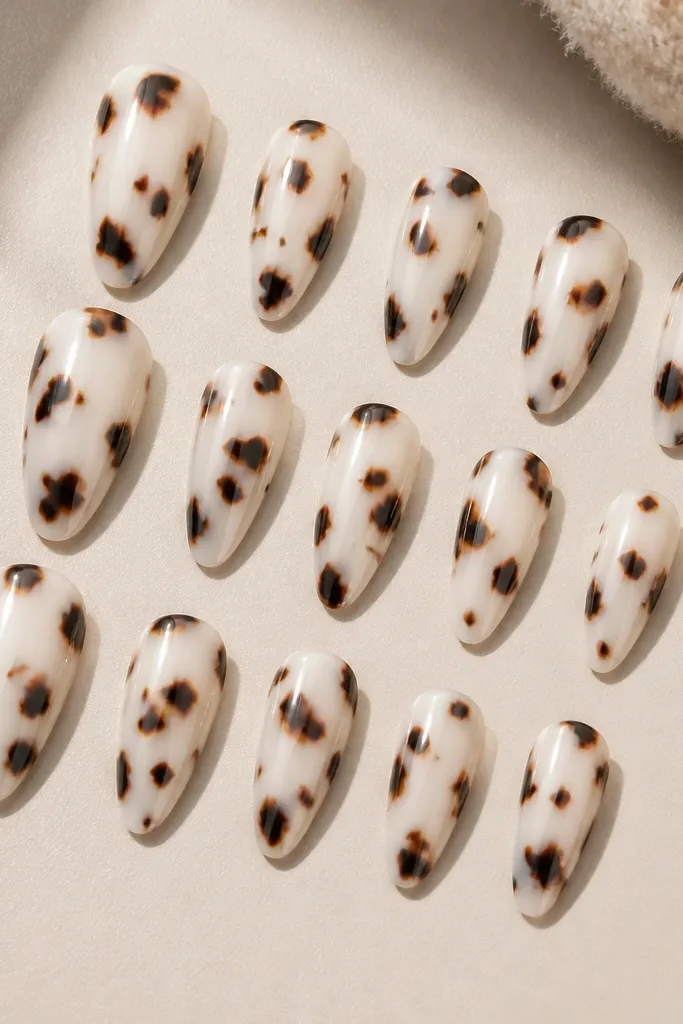
Micro-confetti tortoise is my go-to when someone wants tortoise but hates “busy.” The white stays bright because it’s in small pieces, and the nude base keeps it from looking heavy. This flatters short nails because the pattern is light and doesn’t widen your nail visually. It’s also great for work because it reads like texture, not loud art.
Apply a sheer nude base and cure. With a dotting tool or liner brush, add tiny white tortoise flecks — keep them irregular and varied in size. Add smaller brown flecks between the white ones so the shell pattern has depth. Cure, then topcoat in two layers to smooth the bumps and make the confetti look like it’s under glass.
If the specks look too random, repeat one shape twice per nail — like two teardrops near the center — so it looks designed.
Avoid large tortoise chunks. They make short nails look thicker than they are.
8. White Tortoise Marble with Soft Brown Smoke
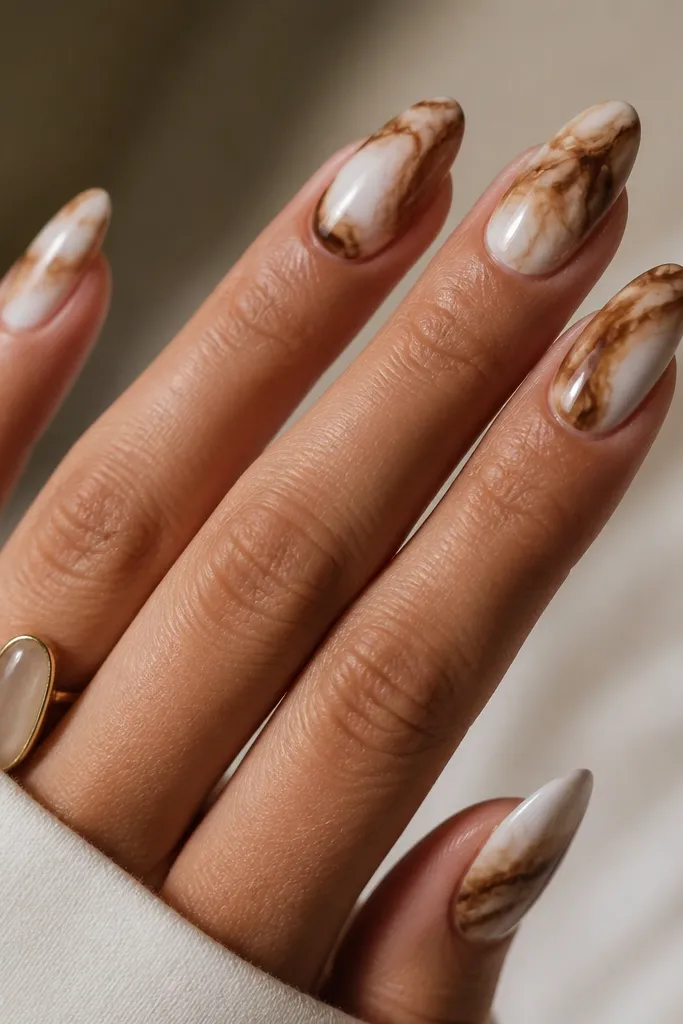
Marbled tortoise looks clean when the brown is blended, not outlined. The white stays dominant and the brown “smoke” makes the shell feel airy and expensive. I like this on medium almond because the curve helps the marble lines flow, and it flatters hands that need a bit of visual softening. If you have dry hands, this style hides texture because the marble looks smooth and continuous.
Start with a milky white base, cured. Add thin brown streaks with a soft brush, then tap and drag lightly to blend them into marbled smoke. Place a few sharper tortoise fragments across the streaks so it still reads as shell. Cure and seal with a glossy topcoat, then do one more thin topcoat only on the highest points to keep it sleek.
Editor's noteBlend with a barely damp brush, not a dry one. Dry blending leaves patchy edges that show brush lines.
Skip thisSkip black. A smoky brown marble with black turns harsh fast.
9. White Tortoise Diagonal Panel on Each Nail
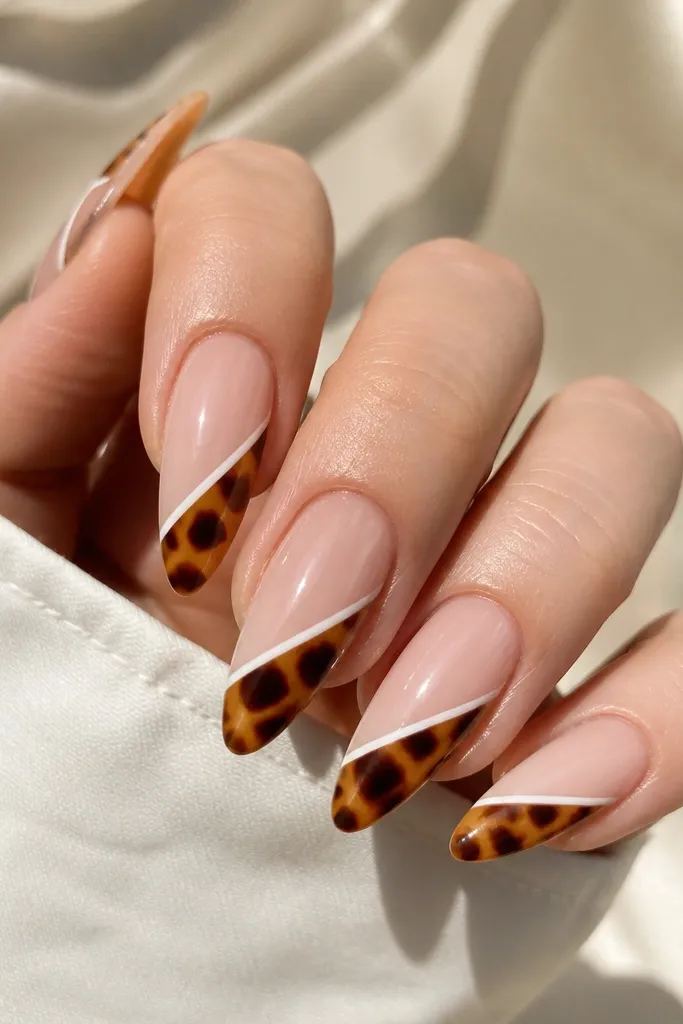
Diagonal panels make tortoise look engineered and clean. The crisp angle draws the eye and makes the nail look longer, which is why I love it on long almond. The key is keeping the panel shape consistent across nails so it feels like a set, not random art. Warm tortoise in a diagonal stripe also flatters most skin tones because the white border keeps it bright and controlled.
Apply a nude base and cure. Use a striping brush to paint a clean diagonal line from lower left to upper right, then fill the diagonal panel with tortoise: start with caramel, add darker brown fragments, and finish with a few white breaks inside so it matches the theme. Leave the diagonal border edges crisp by wiping the brush on a lint-free wipe before you trace. Cure, then topcoat, keeping the diagonal stripe smooth so the line doesn’t look raised.
Measure the diagonal with your brush width. If the stripe is too thin on one finger, your set looks uneven.
Don’t freehand the diagonal without a guide. One nail off-angle makes the whole set look sloppy.
10. White Tortoise Cuticle Halo with Sheer Pink Center
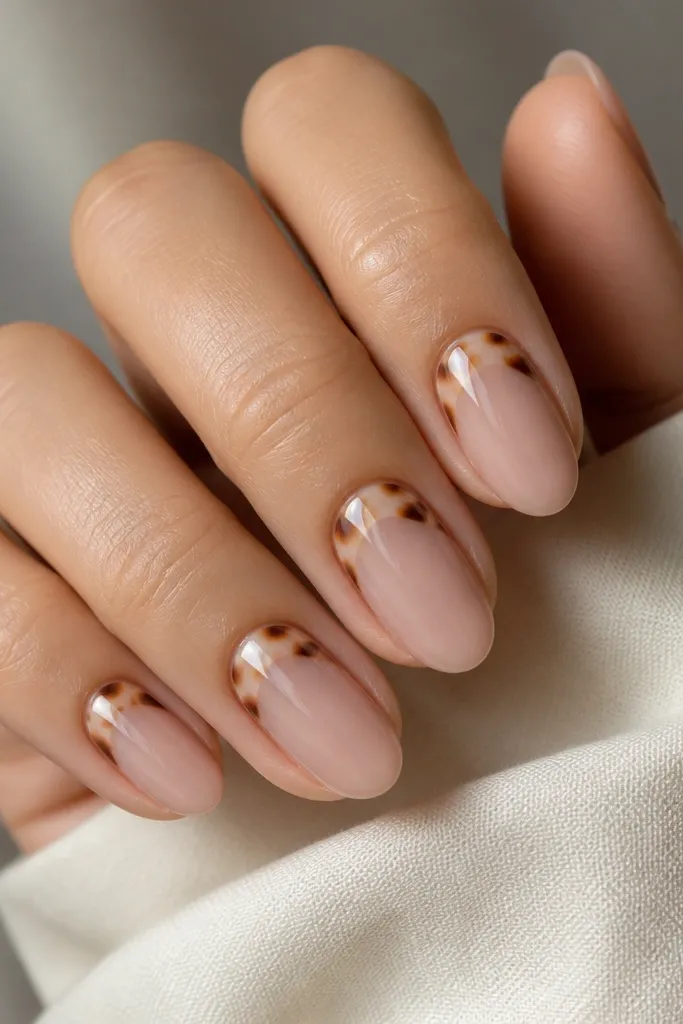
A cuticle halo looks elegant because it frames your nail without covering the whole surface. The sheer pink center is the breathing space, so the tortoise stays refined instead of loud. This style flatters hands with slightly irregular nail beds because the sheer center smooths the look while the halo draws attention to the top. I’ve worn it on both fair and medium skin tones, and the white-brown ring reads clean as long as the halo stays narrow.
Start with a sheer pink base in two coats. Paint a thin ring of opaque white around the cuticle, then add warm tortoise fragments inside that ring — mostly brown with a few white breaks. Keep the halo height to about 2-3 mm above the cuticle line, then fade it out by blending the edges with sheer pink. Cure and apply glossy topcoat over the whole nail so the halo looks smooth, not textured.
Editor's noteUse the back of a gel brush to nudge the halo edge into the sheer center while it’s still slightly tacky before curing.
Skip thisAvoid a thick halo. If it wraps too wide, it starts to look like a bandage.
11. White Tortoise with Tiny Gold Flecks
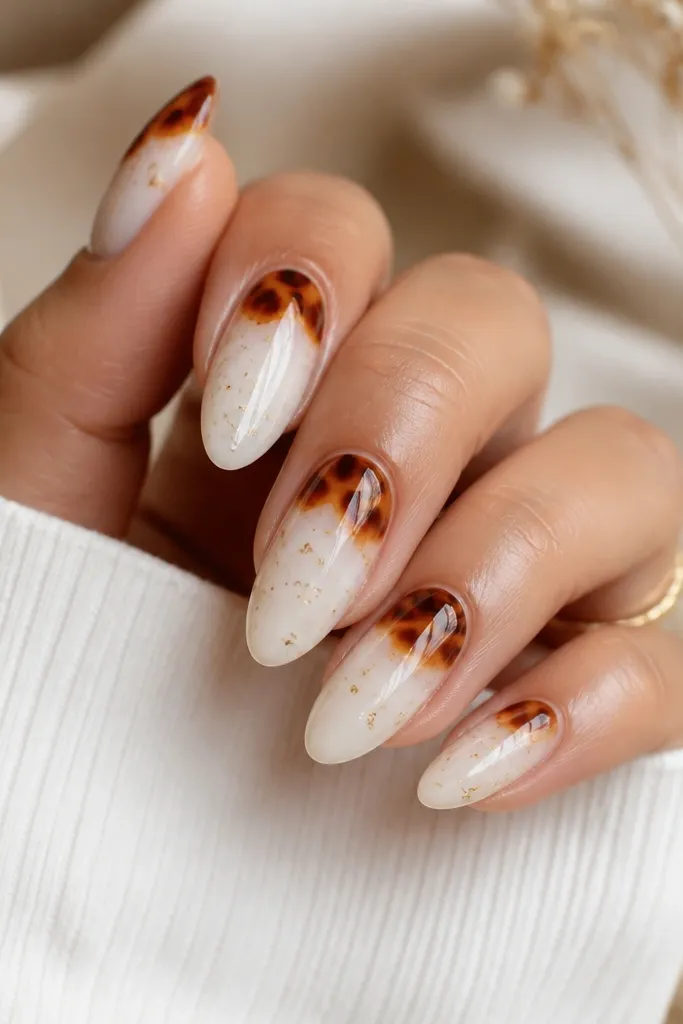
Gold flecks make white tortoise look dressed up without turning it into holiday glitter. The flecks are tiny and spaced, so they read as highlights instead of sparkles. I like this for date nights and events because the white keeps it bright and the gold adds warmth. It flatters cool undertones too since the gold gives a gentle glow, and it looks sharp on almond because the light hits the curves.
Apply opaque milky white as your base and cure. Add tortoise patches only on the tip and upper third — leave the center mostly white. With a dotting tool, place micro gold flecks on the white areas and keep them away from the tortoise edges so it doesn’t look messy. Cure and seal with a glossy topcoat in two layers to trap the flecks and prevent snagging.
Editor's noteIf your gold flecks sink, you’re using too thick a layer. Place flecks on a tacky surface and cure right away.
Skip thisDon’t dust gold across the whole nail. Sparse placement looks intentional; full coverage looks cheap.
12. White Tortoise with Glossy Jelly Top Layer
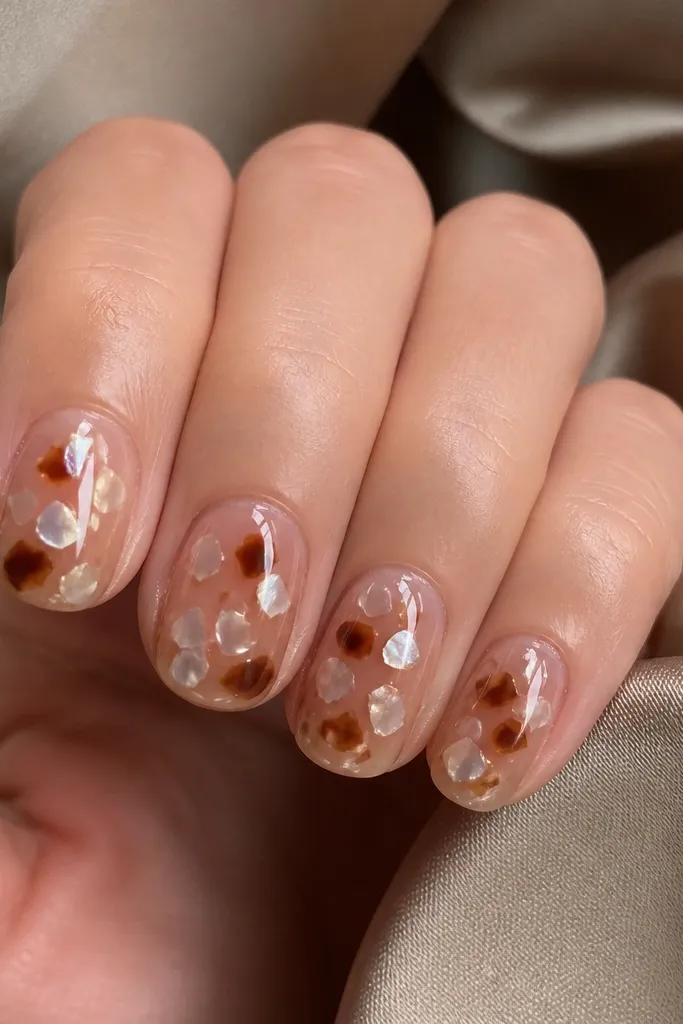
A domed jelly topcoat makes tortoise shell look like it’s sealed inside glass. The white stays crisp because the surface is smooth, and the warm tortoise looks deeper under the jelly shine. This style flatters hands that have ridges, because the domed layer visually levels the nail. I like it on medium squoval because the corners stay clean and the dome doesn’t over-highlight uneven cuticles.
Paint your base with sheer nude, then add milky white tortoise fragments and warm brown pieces in a controlled pattern, leaving negative space for balance. Cure. Apply a thick layer of glossy jelly topcoat and cap the free edge — do not rush this step, because the thickness is what creates the glassy dome. Cure fully, then lightly buff the surface only if you see sharp edges, and wipe clean before a final thin topcoat.
Editor's noteCap the sides with the jelly layer too. Sidewall lifting is what makes domes pop off faster than flat topcoats.
Skip thisAvoid making the dome too thick at the cuticle. It can flood the skin and lift.
13. White Tortoise Frame Nail Accent
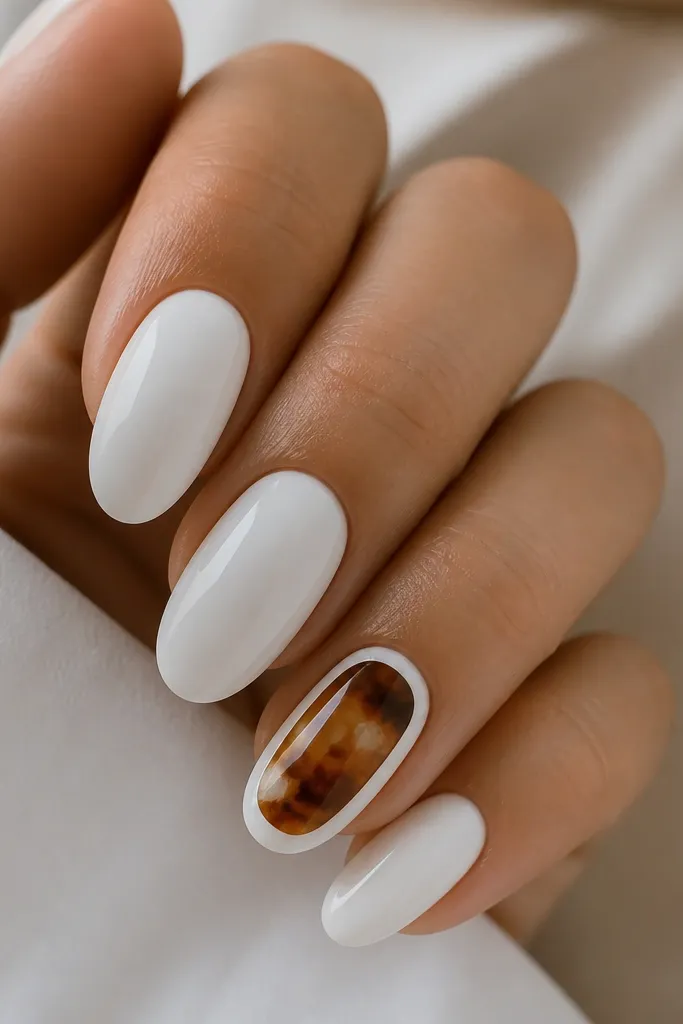
This is the easiest way to keep tortoise elegant when you don’t want it on every finger. The solid milky white nails make your hands look clean, while the framed accent nail gives you that tortoise interest without the visual overload. I’ve worn this on short squoval and it still looks intentional, because the accent nail is the only one with pattern density. The thin white frame keeps the shell from bleeding into the accent and makes the whole set look designed.
Paint four nails in opaque milky white and cure. On the accent nail, start with a sheer nude base, then draw a thin white border around the nail leaving a gap inside the frame. Fill the inside with warm tortoise fragments: caramel first, then add darker brown pieces between. Add a few small white breaks inside the shell so the accent matches the rest of the set. Cure and finish with glossy topcoat on all nails.
Editor's noteKeep the frame border consistent thickness — use the same brush width you used for the outline on the first pass.
Skip thisDon’t put tortoise on all five nails if you want “clean.” Pattern density is what makes it start looking messy.
14. White Tortoise Half-Cover with Micro Outline
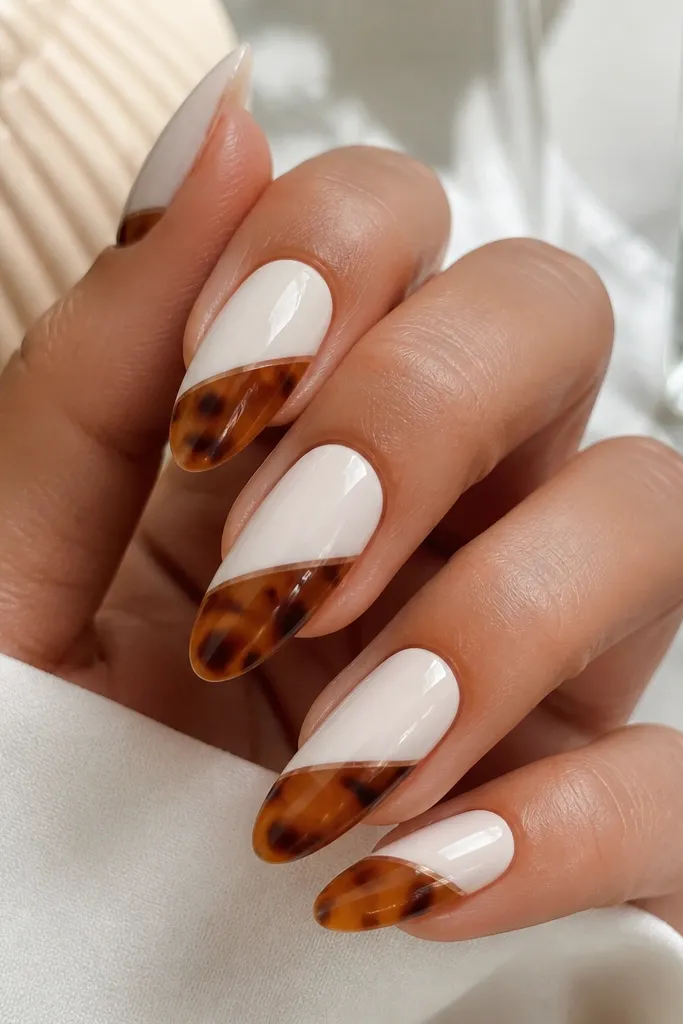
Half-cover looks graphic, and the micro outline keeps it refined instead of chaotic. The white upper half is what makes it “clean and elegant,” while the tortoise lower half gives the shell personality. This works especially well on longer nails because the split gives you structure and prevents the shell from spreading too far. If your skin tone is fair, the milky white reads creamy; on deeper tones, the white section still pops and doesn’t fade.
Apply opaque milky white to the upper half of each nail and cure. Draw a micro-thin outline along the split line using white gel, then fill the lower half with tortoise: caramel patches, then add darker umber fragments and a few tiny white breaks. Use a small brush to keep the split line crisp, and cap the outline with a thin layer of the same white gel so it doesn’t chip. Cure and apply glossy topcoat across the entire nail, making sure the split area stays smooth.
Do the outline before filling the tortoise. It’s easier to keep the line clean when you’re not trying to paint around a pattern.
Avoid wide outlines. A thick border on half-and-half looks like nail art stickers.
15. White Tortoise Swirl Gradient with Milky Edge
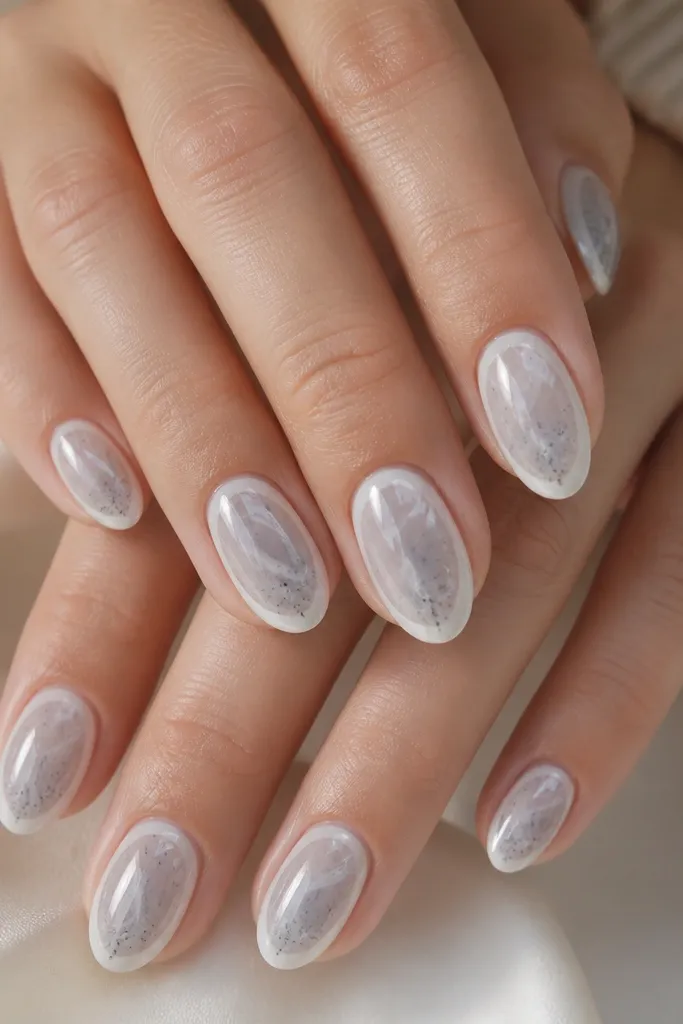
This design looks clean because the white stays dominant at the edges, then the tortoise pattern concentrates toward the center and free edge. I like it for everyday wear because it reads polished from a distance, but up close you can see the swirl motion and the layered depth. The milky edge also hides small application lines, so it forgives when you’re doing your own nails. It works especially well on short almond or squoval shapes where the edge is visible but not overly wide. The final gloss makes the swirls look like they’re floating under glass instead of sitting on top.
1) Paint a milky base on the whole nail using an opaque white with a jelly-like finish, then cure fully. Leave a thin 1 mm “halo” of milky white at the outer edge by applying a slightly thicker coat there and keeping the center lighter. 2) With a thin liner brush and a gray-white tortoise gel (or a white + a drop of charcoal mixed on a palette), drag swirls from near the center out toward the free edge, then pull some lines back into the center. Add darker specks only where the swirl ends, so the pattern looks concentrated instead of speckled everywhere. 3) Seal with a clear builder or glossy top coat in two thin layers, curing between them, so the swirls sink slightly and look dimensional.
Editor's noteUse a liner brush with a flat tip for the swirl pulls. It keeps the lines smooth instead of turning into dots.
Skip thisDon’t spread the darker tortoise specks across the whole nail — it makes the set look dirty instead of clean.