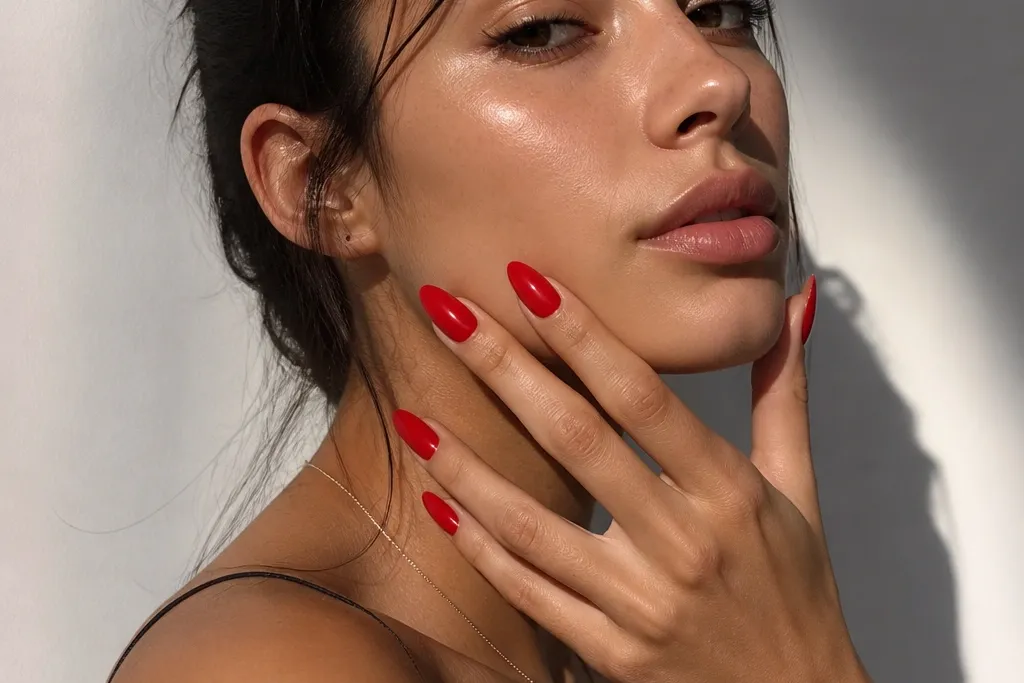
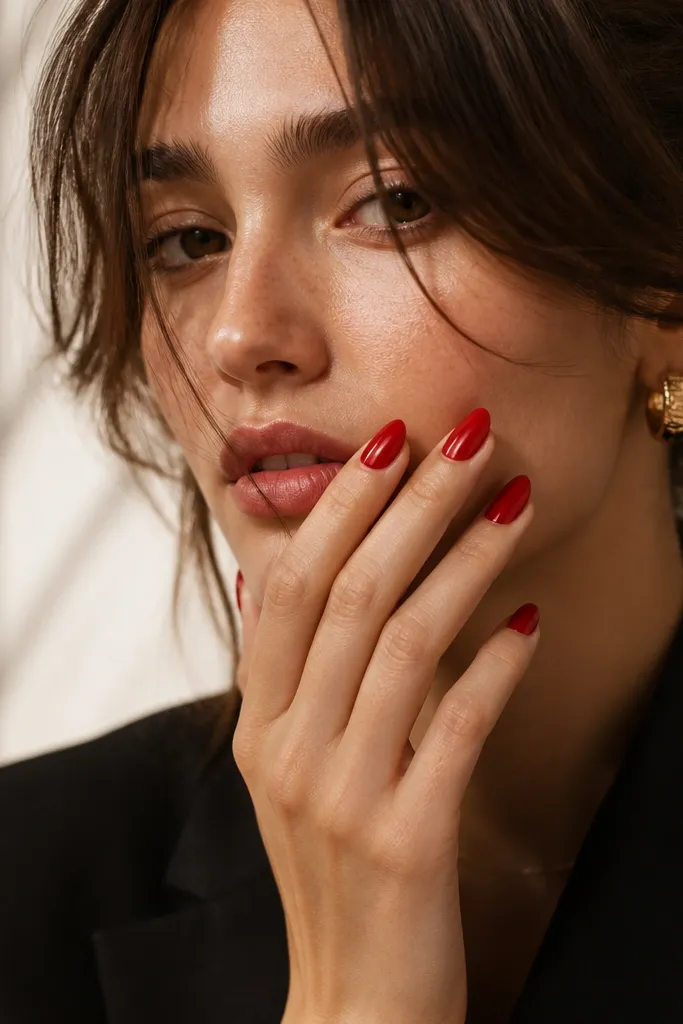
1. Classic mirror-gloss bright red almond nails
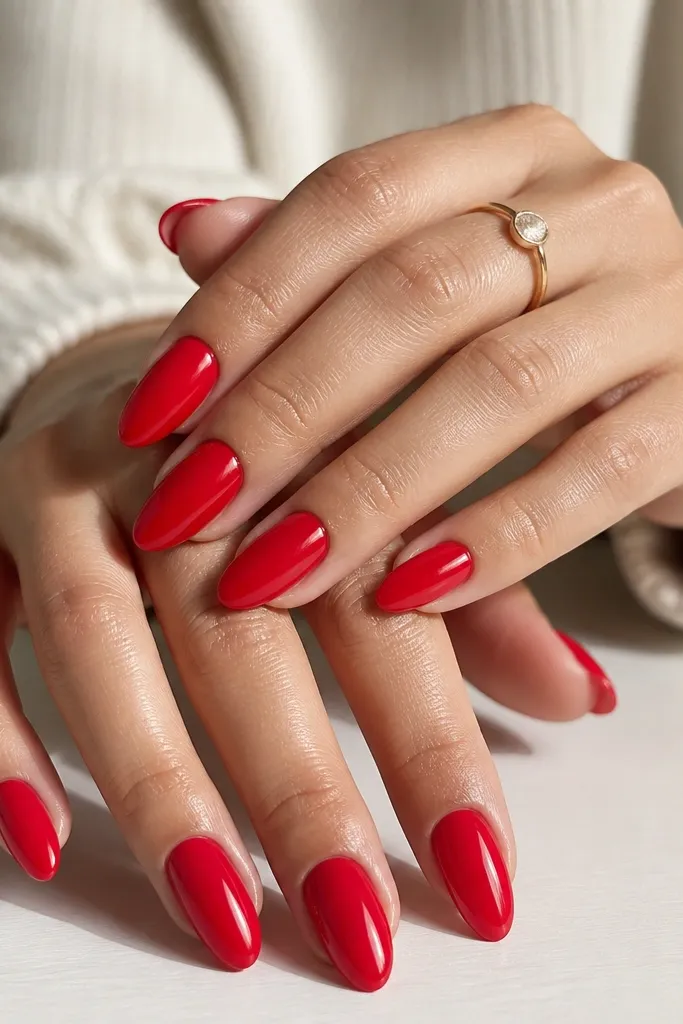
Start by pushing back cuticles and buffing the nail surface just enough to remove shine. Apply a thin base coat, then do two thin coats of bright blue-red, letting each coat dry fully and capping the free edge on the last coat. Use a glossy topcoat that levels well, and apply it slightly thicker at the tip so the edge stays sealed. Finish by cleaning around the cuticle line with a small brush dipped in acetone or nail polish remover for crisp edges. If you want extra “mirror” effect, add one more ultra-gloss topcoat layer after the first topcoat sets.
This is the set I tell people to start with when they want bright red almond nails that look expensive in every lighting. The color is a cool blue-red, not brick, and the finish is high-gloss so the red reads crisp instead of flat. Almond shape matters here because the curve catches light along the sidewalls, which makes your nails look longer without adding extra length. It flatters most skin tones, especially if you have warm undertones, because the blue in the red cools the overall look. For work or date night, this set looks like you planned it, even when you keep the design simple.
Skip thisSkipping edge-capping is the quickest way to get chips that look messy on almond tips.
Editor's noteIf your red polish stains the nail, wipe the nail with alcohol after buffing and before base coat — it helps the color sit cleaner.
2. Bright red almond nails with nude negative space V
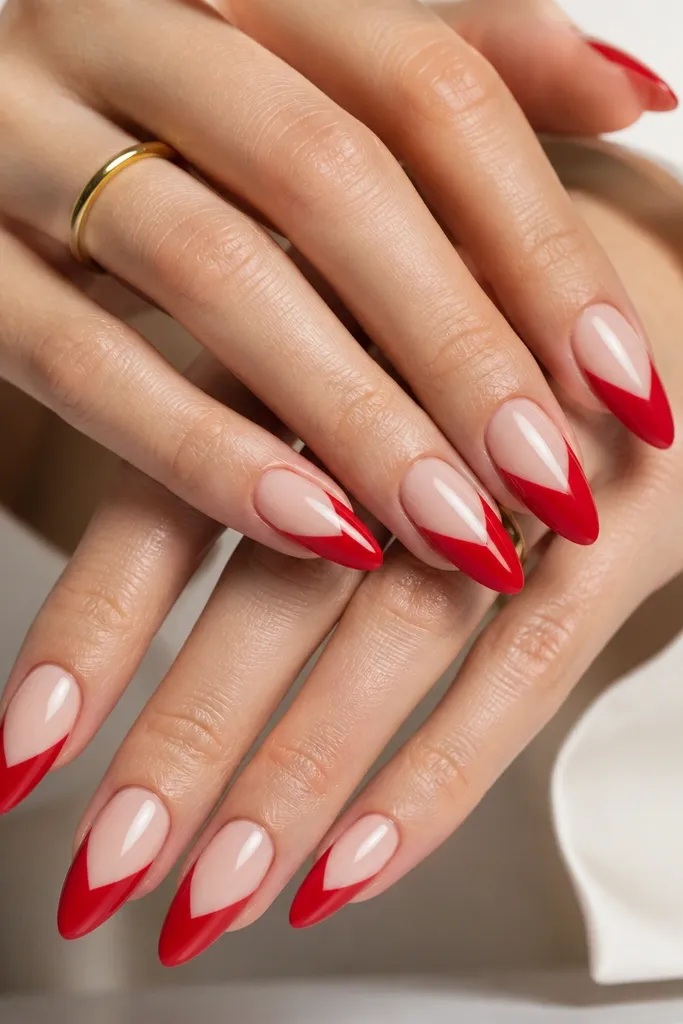
This look gives you bright red almond nails with a lighter, fashion-forward feel. The nude negative space makes the red look intentional and reduces visual bulk, which helps if your fingers run short or wide. I like a sheer nude (pink-beige, not yellow) so it matches skin and doesn’t look like a sticker. The V shape also elongates because it leads the eye to the center of the nail. It works for everyday wear, and it looks especially good with gold jewelry because the nude balances the warmth.
Start with a nude base coat that’s sheer and evenly applied, then cure/dry it completely. Paint a bright blue-red tip, but leave a V-shaped gap in the middle by placing a thin brush at the center and pulling the red away from the gap. Use a second thin red coat to even out the pigment, keeping the V edges clean. Seal with glossy topcoat, and apply extra topcoat only over the red areas so the nude stays smooth and not cloudy. If you’re doing this at home, use nail tape or a small strip of clear plastic as a guide for the V line while the red is still wet.
For a sharper V, use a dotting tool to mark the center point first, then draw the V edges from there.
Smudging the V edges while the red is wet makes the gap look accidental instead of designed.
3. Matte bright red almond nails with glossy cuticle arcs
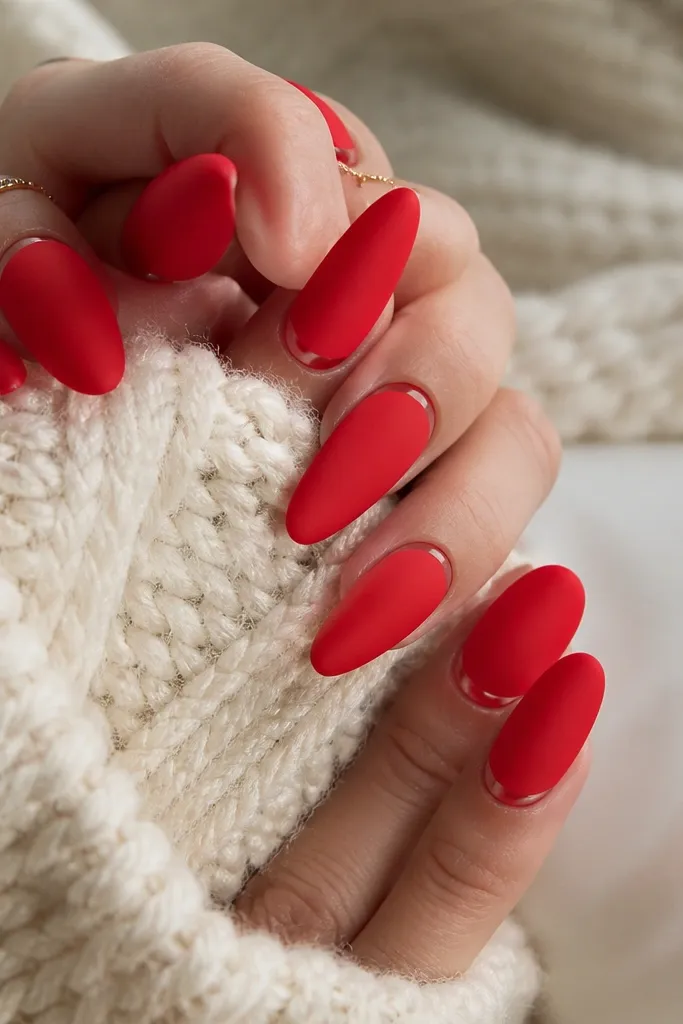
Paint two thin coats of bright blue-red and let them dry fully. Apply matte topcoat over the entire nail, avoiding the cuticle line as much as you can so the matte doesn’t blur the highlight. After the matte sets, use a fine detail brush to paint a thin glossy arc right at the cuticle edge, using regular glossy topcoat or gel topcoat. Then cure/dry that arc and seal the rest with a light matte topcoat touch-up if needed. Clean the cuticle area after everything dries so the arc stays sharp.
If you want bright red almond nails that look styled even with one color, matte plus a glossy arc does it. The matte finish absorbs light, so the red looks velvety and bold, while the glossy crescent at the cuticle adds a crisp highlight. This is flattering on hands that show dryness because matte hides tiny surface unevenness better than high-gloss. It also looks great on medium to long almond shapes, where the arc gives definition near the widest point. For parties, it reads dramatic without adding glitter or extra shapes.
Skip thisPutting matte topcoat over a wet glossy arc smears the highlight.
Editor's noteIf your matte topcoat turns patchy, mix slowly and wipe the brush on the bottle lip — too much product causes streaks.
4. Bright red almond nails with silver chrome half-moons
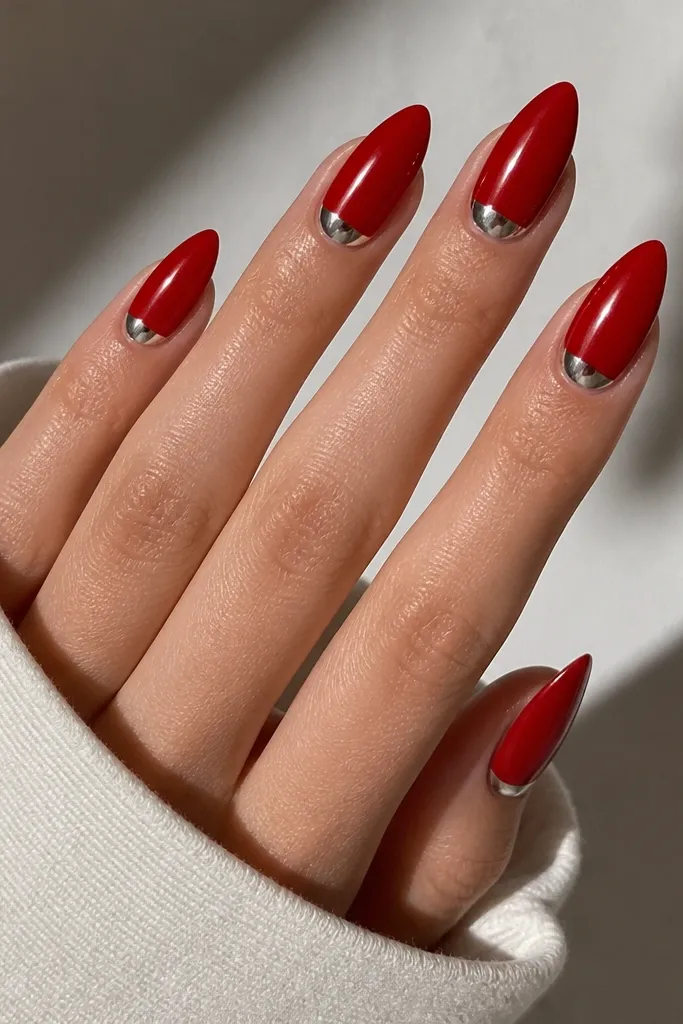
Chrome half-moons make bright red almond nails look instantly polished, like salon work. The silver reflects cool tones, which pairs perfectly with a blue-red shade and keeps the set from looking warm or dusty. Half-moons are also forgiving — you don’t need perfect nail art lines across the nail, just a clean curve near the base. This style looks great on shorter almond lengths because the half-moon adds structure at the widest point. If you wear silver rings or have cool-toned makeup, this set matches without trying.
Start with two coats of bright blue-red and seal with a tacky layer if you’re using gel chrome. For gel, apply a base coat and cure, then apply red and cure each coat. Add a half-moon guide using a small stencil or freehand with a detail brush, leaving the center of the nail red. Apply chrome powder/gel to the half-moon area with a small sponge applicator, then buff gently so it turns mirror-smooth. Finish by sealing with a clear topcoat that won’t dull the chrome — use a thin coat over the chrome area and cap the edges.
Do one nail at a time so the tacky layer doesn’t dry out before you place the chrome.
Overloading chrome makes it look grainy instead of mirror-smooth.
5. Bright red almond nails with micro-glitter clear overlay tips
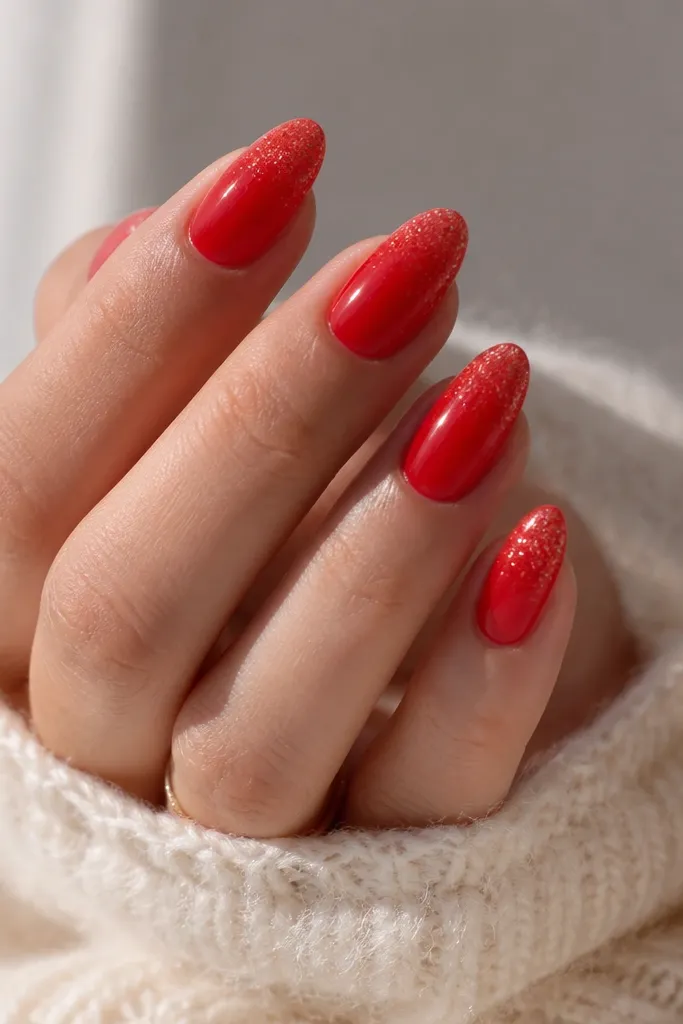
This one keeps the boldness of bright red almond nails but adds movement when you move your hands. The trick is using micro-glitter in clear or near-clear base, so the red still looks bright and doesn’t get muddy. I like a fade that starts about 2-3 millimeters from the tip, because it looks intentional and doesn’t thicken the nail too much. This style is flattering for hands that like shimmer but hate heavy chunky glitter. It also photographs well because the glitter catches light without looking opaque.
Paint two coats of bright blue-red and let them fully cure/dry. Apply a thin layer of clear gel or clear polish only near the tip, then sprinkle micro-glitter so it’s densest at the free edge. Use a small sponge to press the glitter lightly so it bonds and doesn’t flake. Blend upward by tapping a very small amount of glitter higher, then shake off excess. Seal with a thick-enough topcoat to smooth texture, and cap the free edge so the sparkle doesn’t peel.
Use a fan brush to remove loose glitter before topcoat so the fade stays clean.
Skipping a sealing topcoat leads to glitter catching on fabric and lifting.
6. Bright red almond nails with thin white line art stripes
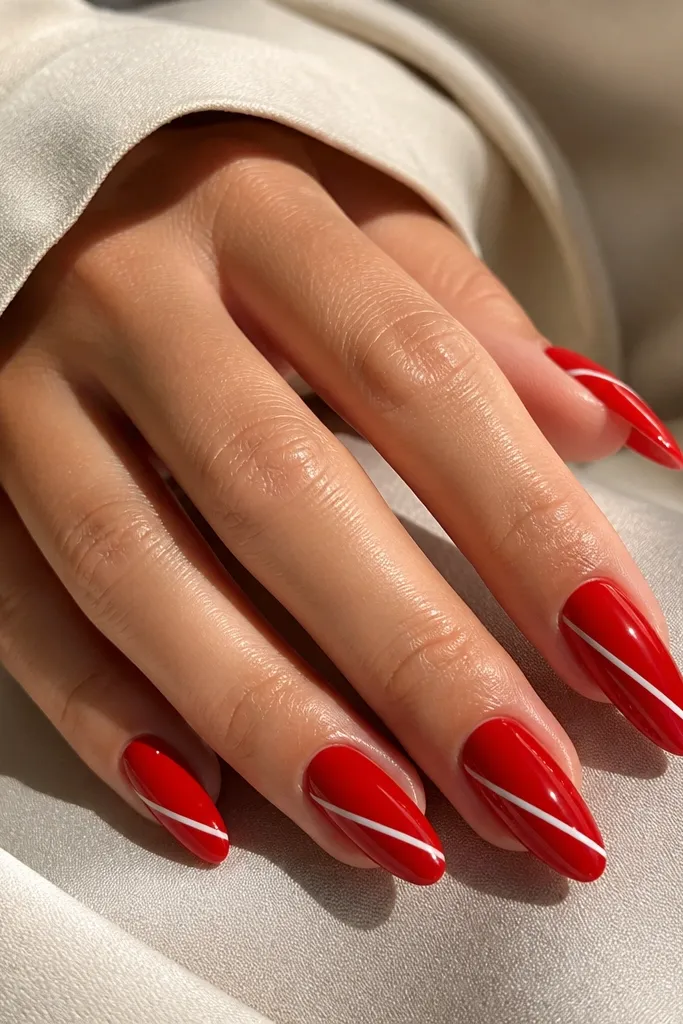
Start with two coats of bright blue-red and cure/dry fully. Use striping tape or a liner brush to place one diagonal stripe on each nail, keeping the line centered and parallel across the set. Paint the stripe with opaque white, then remove tape before the paint dries completely if you’re using tape. Add a second white pass only if you see translucent spots, then seal with glossy topcoat for a smooth finish. Finish by cleaning around the stripe edges so the white stays crisp against the red.
Thin white stripe line art makes bright red almond nails look graphic and sharp instead of sweet. I like stripes because they create “movement” along the almond curve, so the nail looks longer. Keep the white lines narrow — about the thickness of a hair — and they’ll read clean even from far away. This set flatters hands with uneven nail beds because the stripes pull the eye across the nail instead of focusing on one area. It looks great with black outfits, denim, or sporty looks.
Skip thisThick stripes make bright red almond nails look crowded and childish.
Editor's noteLet your red coat dry longer than you think before you stripe — tacky red makes white bleed.
7. Bright red almond nails with black micro-dot accents
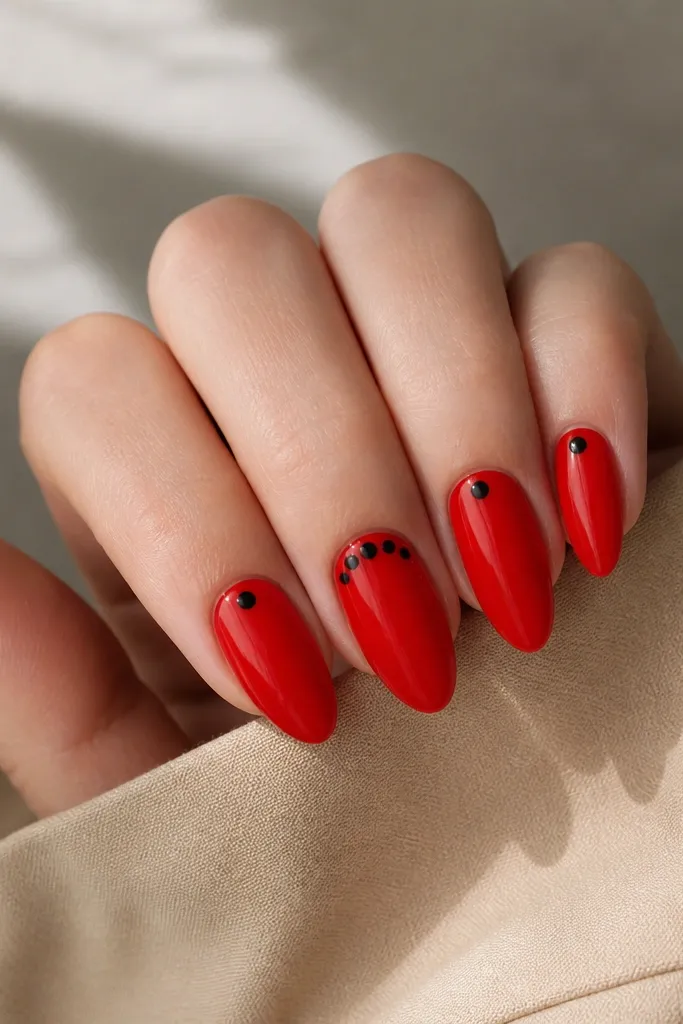
Apply two thin coats of bright blue-red and cure/dry completely. Use a dotting tool with the tip about the size of a pinhead and dip it in black polish or gel paint. Place dots near the cuticle line on two accent nails, then add one dot on each of the remaining nails toward the sidewall. Keep the dots spaced evenly so they don’t merge. Seal with glossy topcoat, and cap the free edge so the dots don’t lift when your nails hit things.
Black micro-dots turn bright red almond nails into a moody, modern set without adding big shapes. Because the dots are small and repeated, the look stays neat and doesn’t feel like random nail stickers. I place dots near the cuticle on two nails and leave the rest with one dot — it keeps the set balanced and stops it from looking busy. This works especially well on medium-length almond nails where you have room for the dots to read clearly. If you like fashion details like polka dots but want them more grown-up, this is the move.
Skip thisUsing too much paint on the dotting tool makes the dots blob and look uneven.
Editor's noteIf your dots smear, wipe the dotting tool tip on a lint-free pad before each dot.
8. Bright red almond nails with gold foil french tips
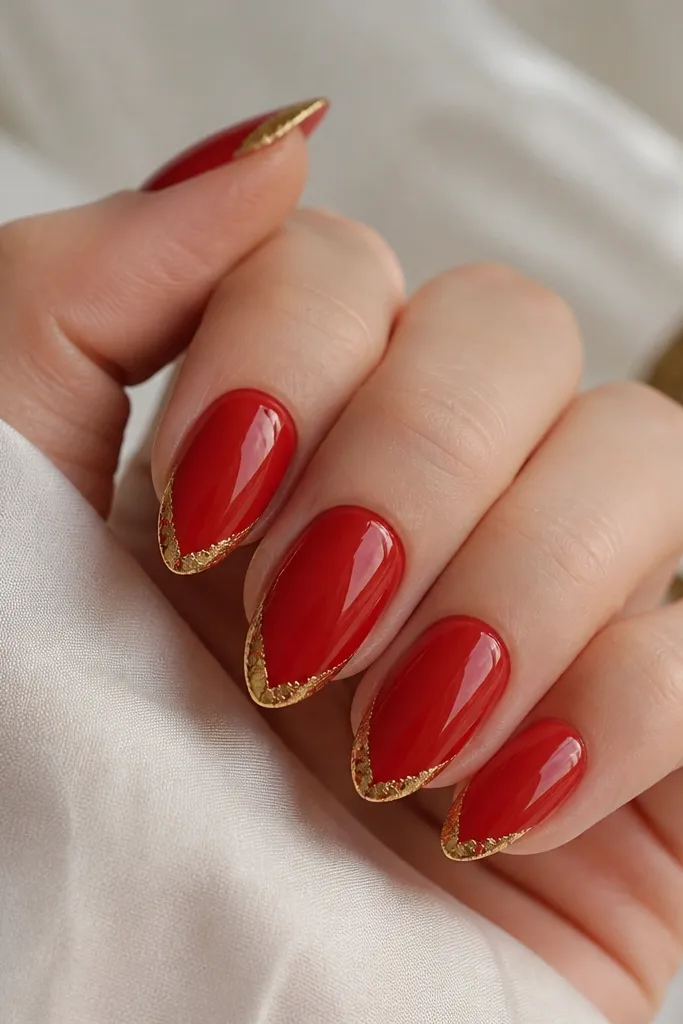
Start with a smooth red base using two coats of bright blue-red. For the french, draw a thin white or nude guide line first if you need control, then paint the tip area red clearance so the foil sits on a clean base. Apply a small amount of foil adhesive/gel topcoat to just the tip line, then press gold foil onto it and lift — you want torn edges, not a perfect rectangle. Add a thin clear topcoat over the foil to lock it down, and cap the free edge. If the foil looks uneven, add a second tiny foil press only where you need more coverage.
Gold foil french tips make bright red almond nails look festive without turning into full-on glitter. The red stays the star, while the foil adds texture and sparkle that looks expensive in indoor lighting. I keep the gold confined to the tip line — about 2-3 millimeters — so the nail still reads clean. This style flatters medium skin tones and looks stunning with warm gold jewelry. It also works well for weddings, holiday parties, and nights out because the foil catches flash photos.
Skip thisPutting foil on top of a thick red layer makes it lift and wrinkle.
Editor's notePress foil with a folded makeup sponge, not your finger, so you get sharper edges.
9. Bright red almond nails with glossy red on red 3D bow accent
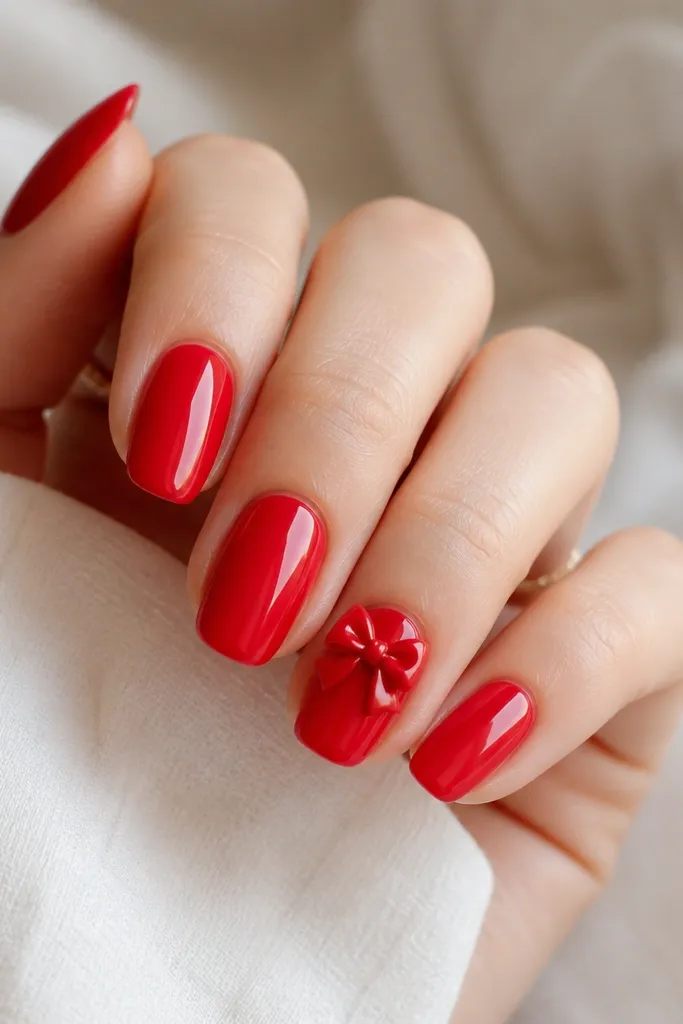
A single 3D bow turns bright red almond nails into a cute-but-not-kid look. The secret is “one accent only” and using glossy gel for the bow so it stands out against the smooth nail surface. I place the bow near the cuticle, not in the middle, because it makes your nail bed look longer and keeps the bow from feeling heavy. This style looks great on medium to long almond lengths where you have space for the raised piece to sit flat. It’s also a solid pick for birthdays, Valentine season, or any time you want your nails to look like a gift.
Paint all nails with two coats of bright blue-red and cure/dry fully. On the accent nail, apply a small dot of clear gel near the cuticle where you want the bow center, then cure it lightly. Build the bow loops using two small teardrop-shaped pieces of glossy red gel, placing them symmetrically around the center and curing each loop. Add a tiny strip for the bow knot in the middle, then cure again until hard. Seal the rest of the nail with glossy topcoat, but go lighter over the bow so you don’t flatten it.
Use a toothpick to nudge the bow into place before curing — gel moves for a short window and it’s easier than chasing it after.
Adding multiple 3D accents makes bright red almond nails look cluttered fast.
10. Bright red almond nails with smoky gradient red-to-rose
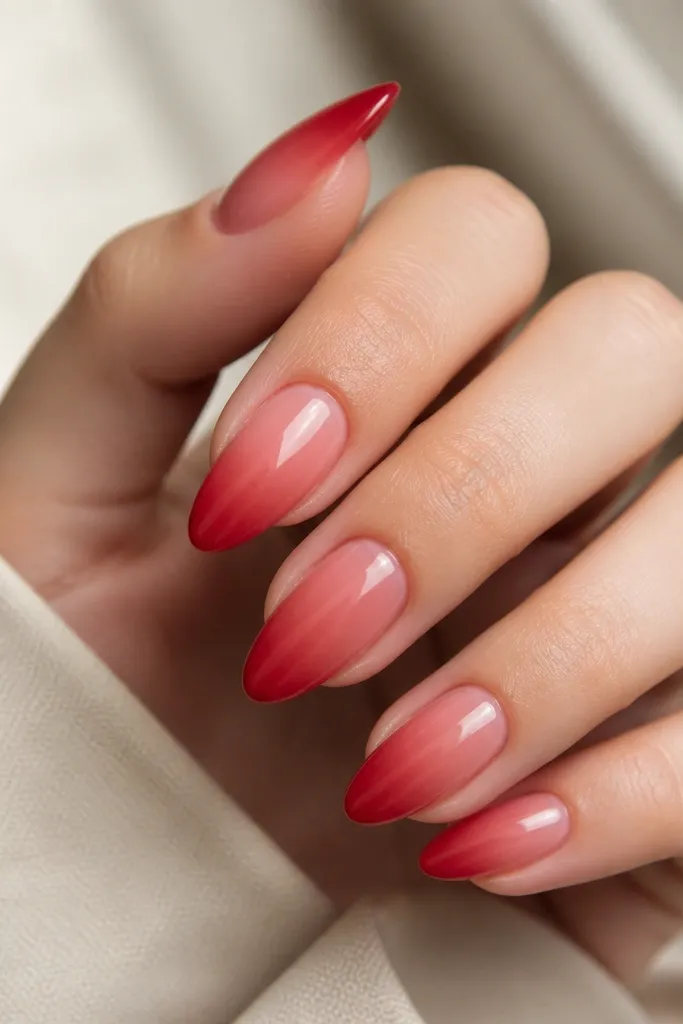
Start with a sheer base coat and then apply bright blue-red to the tips only, leaving the cuticle area bare. Use a makeup sponge to dab rose-pink polish from the mid-nail upward, blending into the red with light taps. Work in small sections so the gradient stays smoky, not streaky — add more red only at the tip. Once the blend looks smooth, seal with a glossy topcoat and cap the free edge. If you see any patchiness, add one extra thin red coat at the very tip and re-topcoat.
A smoky gradient keeps bright red almond nails from feeling flat and gives you a softer, more wearable red. The transition from bright red at the tip to a rose tint near the cuticle makes your nails look smoother and longer, because the eye reads a gradual change instead of hard blocks. I like rose that’s pink with a tiny bit of purple, not orange — it keeps the whole set cool. This is flattering on hands that look dry because the gradient hides minor ridges better than a solid coat. It’s also a great choice if you want red but you don’t want the full-on punch of a single solid shade.
Skip thisOverloading the sponge makes the gradient look muddy instead of smoky.
Editor's noteBlend with taps, not swipes — swiping creates lines on almond curves.