1. Classic Cherry Gloss Almond
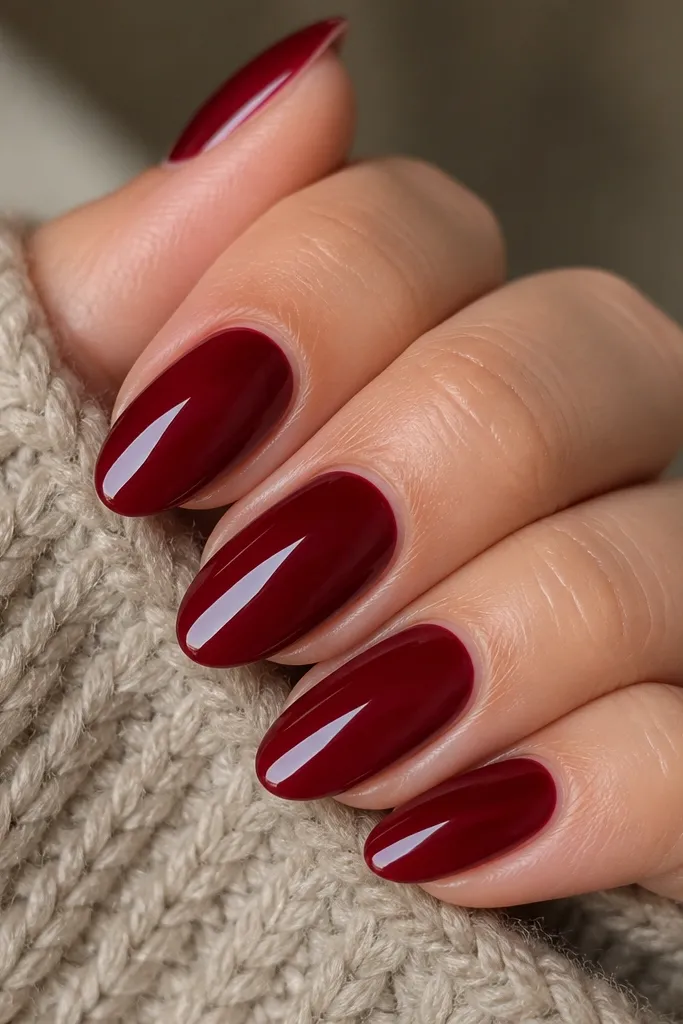
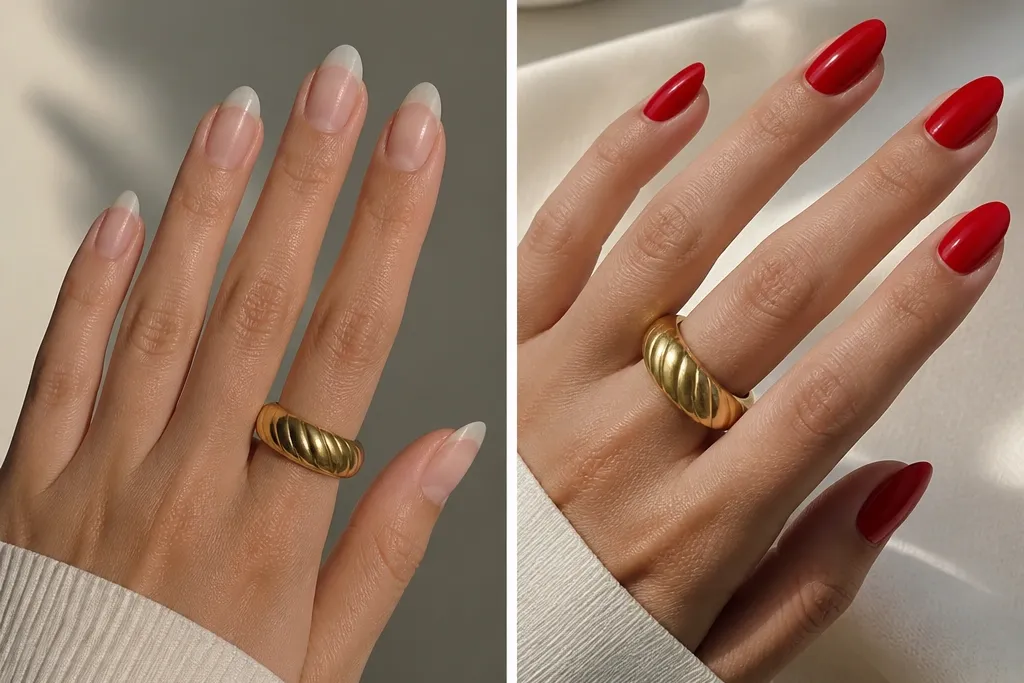
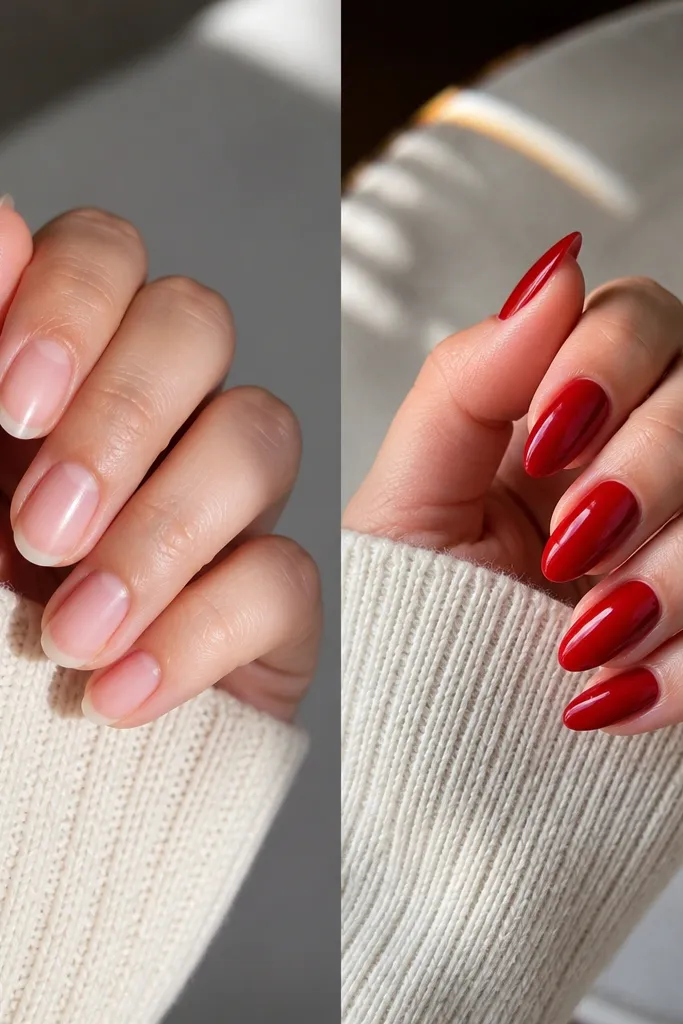
This is the red almond nails transformation that surprises people because it’s simple and still looks expensive. Use a true cherry red (slightly blue-based) so it doesn’t go orange on camera. The glossy finish makes the almond taper look intentional, especially on medium skin tones and fair skin with pink undertones. I’ve worn this to weddings and regular workdays, and it still reads “put together” because the shine catches light at the tip.
Start by shaping your almonds: file the sides straight toward the tip, then soften the point with 3 light passes so it rounds. Apply your base coat, then paint two thin coats of cherry red, letting each coat level out before curing. Clean around the cuticle with a small brush dipped in acetone so there’s no ridge. Finally, apply a medium-thick gel top coat, cap the free edge, and cure fully so the surface stays glassy.
Editor's noteIf your cherry looks too dark, add a micro-sheen top coat only on the center of the nail so it doesn’t dull the edges.
Skip thisAvoid thick red coats — they pool near the cuticle and make the almond look wider.
2. Brick Red French Arc on Almond
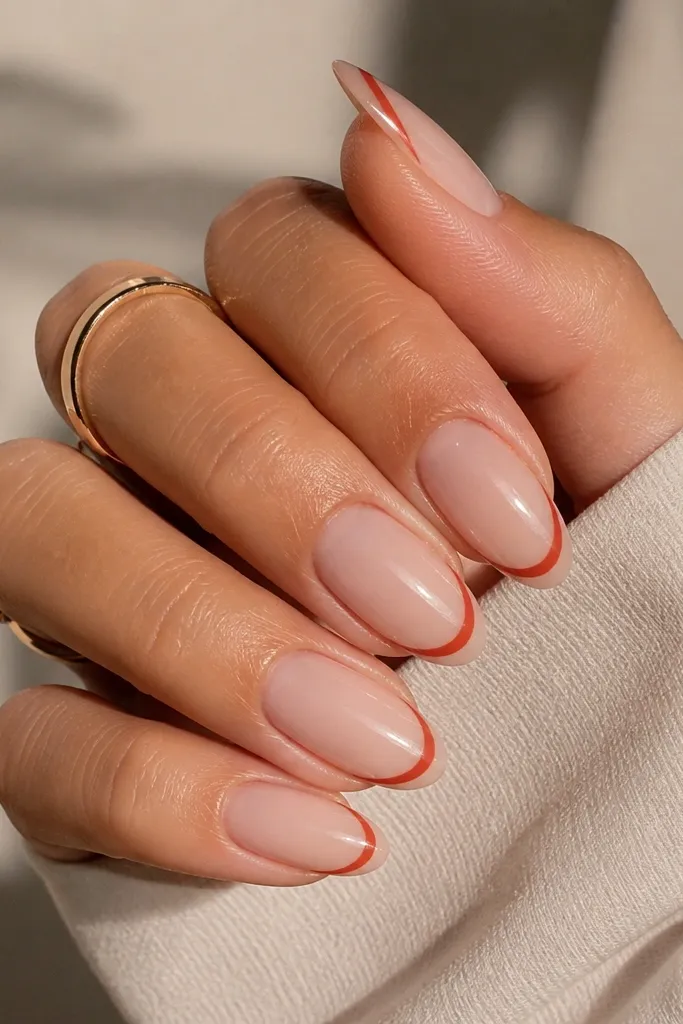
This design makes almond nails look longer because the red sits only on the tip in a controlled arc. Pick a brick red that leans warm, like terracotta-red — it flatters yellow and olive undertones without turning harsh. The nude base keeps the nail from looking heavy, which is great if your nail beds are short. For photos, the arc reads crisp even when your hands move.
Apply a sheer nude base (pink-beige) and cure. Then use a French tip guide or just steady your hand: paint a thin brick-red arc that follows the almond curve, leaving about 1-2 mm of nude space between the arc and the sidewalls. Add a second thin coat of brick red only on the arc so it stays opaque without bleeding. Finish with glossy top coat, and cap the tip so the red arc doesn’t chip at the edge.
Editor's noteUse a liner brush with a flat cut for the arc; it gives you a smooth curve without wobble.
Skip thisDon’t paint a full French tip block — it shortens the almond by covering too much area.
3. Wine Red Half-Moon Cuticle Glow
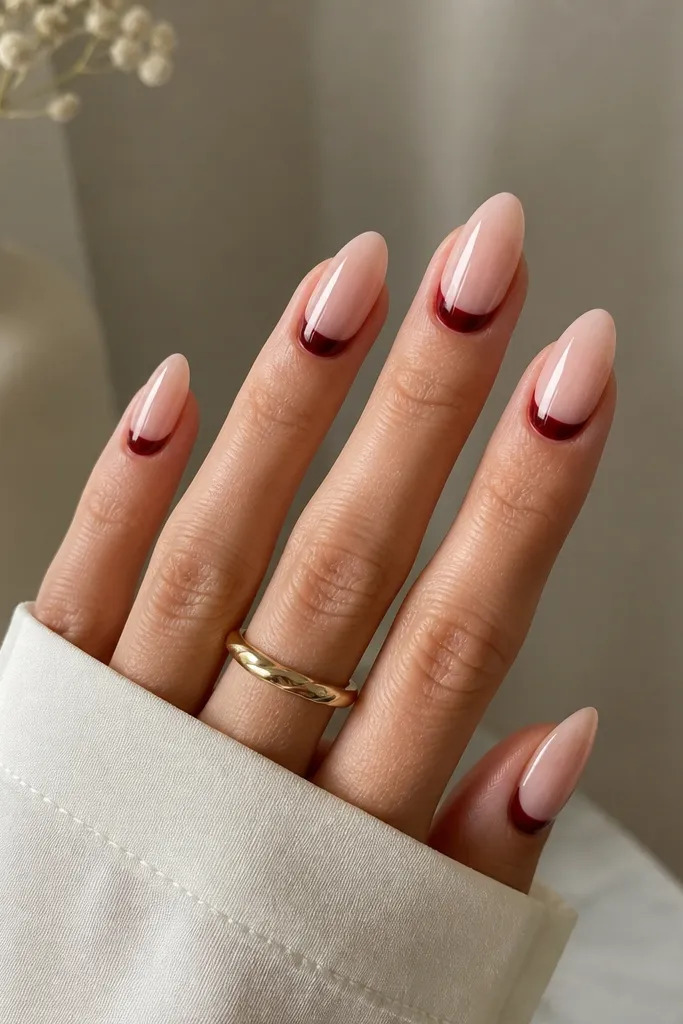
The half-moon at the cuticle creates a “lift” effect that makes nails look neat and longer. Choose a wine red that’s deep and cool (think cranberry-wine) so it looks clean against fair and medium skin. This one is flattering when your cuticles are dry because the design draws attention to the shape rather than the texture. It also looks sharp for evenings because the wine catches light at the base.
Start with a sheer nude or soft blush base and cure. With a small detail brush, paint a half-moon of wine red right at the cuticle line, leaving a tiny nude gap so the curve stays crisp. Let it self-level for 10-20 seconds, then cure. Seal with a glossy top coat, and lightly clean the edges with a cotton swab around the sidewalls before curing the final layer.
If your half-moon looks uneven, use a damp lint-free wipe to soften one edge before curing.
Don’t flood wine red under the cuticle — it lifts and makes the half-moon look messy.
4. Velvet Matte Red with Glossy Cuticle Line
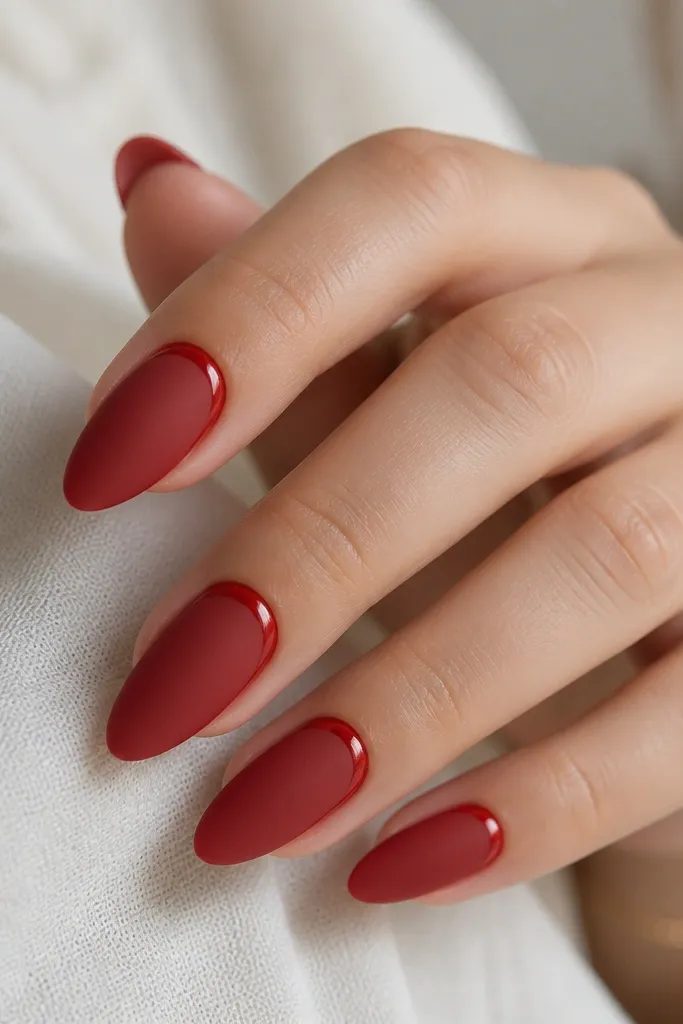
Matte red looks soft and expensive, but it can make almond tips look flat if you do it wrong. This version solves that by keeping the cuticle line glossy, which adds a highlight and makes the shape read sharper. Use a deep red (raspberry-wine) with a velvet matte top coat. I like it on medium skin because the matte finish smooths visual texture, and it looks great for fall and winter outfits.
Paint two coats of your deep red gel, cure each coat. Apply a matte velvet top coat over the whole nail and cure. Then, with a fine liner brush, paint a thin glossy stripe right along the cuticle using clear gel top coat (no pigment) and cure under the lamp. Finish with a final glossy top coat only over the stripe so it stays crisp, not smeared.
Use a striping brush, not a regular nail polish brush, for the cuticle line — it keeps the highlight thin.
Don’t matte the cuticle stripe too — it kills the contrast that makes the almond look defined.
5. Red Ombré Almond Fade
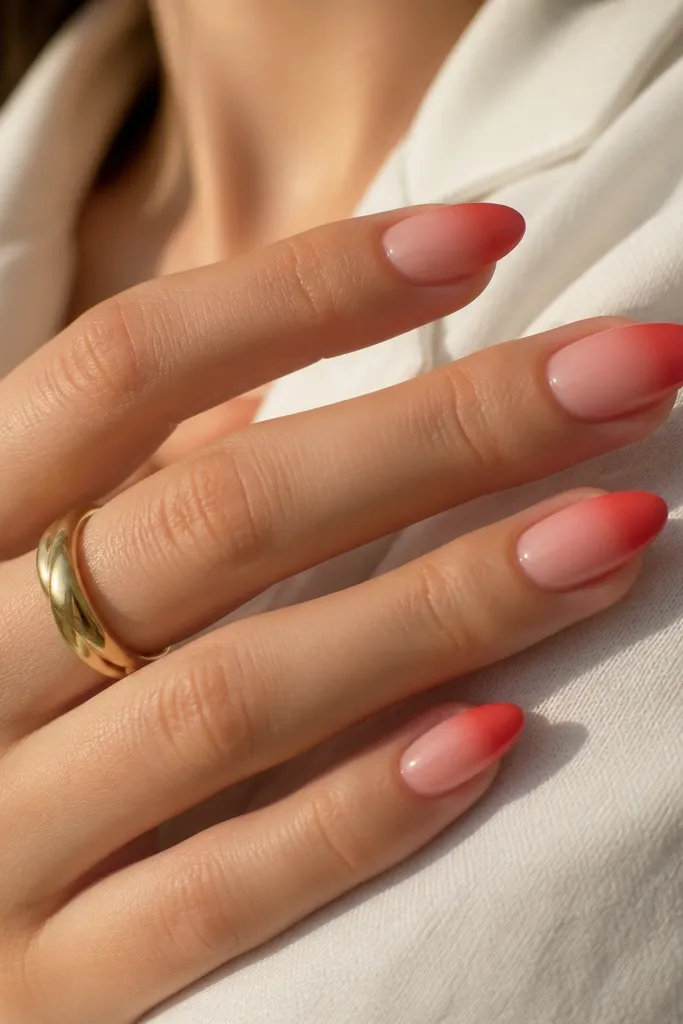
Ombré is the fastest way I’ve found to make almond nails look longer because the darkest color lives at the tip. Start with a nude base that matches your skin, then blend into a vivid red. This works especially well on short nails because the lighter base visually extends the nail bed. For undertones, choose a red that complements yours: warm fade into tomato-red, cool fade into cherry-red.
Apply nude base and cure, then sponge a light red layer starting around mid-nail. Use a makeup sponge for the blend: dab from center to tip, keeping the fade soft and stopping before the cuticle. Build to your desired intensity with two or three thin sponge layers, curing between layers. Finally, paint a thin solid red band at the tip and blend the edges once more with a sponge, then seal with glossy top coat for a smooth finish.
Wipe the sponge edge on a paper towel before touching the nail so your first dab is never too dark.
Don’t blend too close to the cuticle — the ombré loses its length effect.
6. Red Foil Flake Accent on One Side
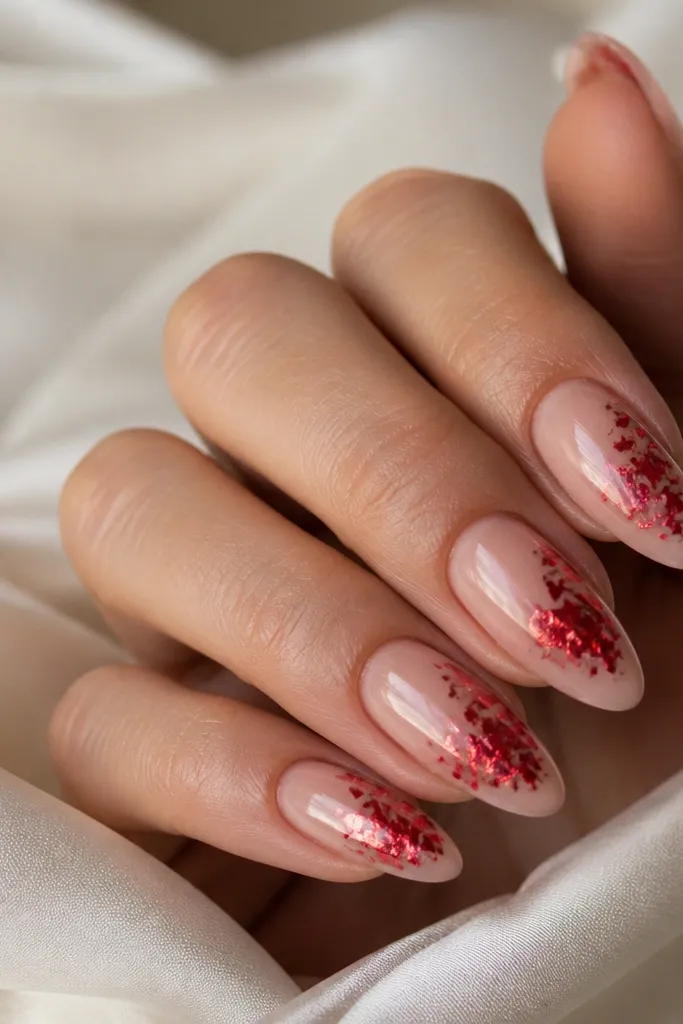
Foil flakes look like salon work because the light breaks into tiny shards along the almond curve. This design keeps the foil on one side so it guides the eye up the nail instead of making it look wider. Use sheer nude base so the foil reads clean, and pick red foil that has a slightly pink or copper tint depending on your undertone. I like this for parties and date nights because it looks different under indoor lighting.
Apply sheer nude base and cure, then paint a thin layer of sticky gel where you want the foil (mid-nail to tip). Press small foil flakes onto that sticky gel, then seal with a thin clear gel layer to lock them down. Repeat on each nail, keeping the foil cluster on the same side so your set looks intentional. Finish with glossy top coat over the whole nail, but keep the foil area sealed with extra care so it doesn’t snag.
Editor's noteCut foil flakes smaller than you think — big flakes bunch and kill the almond line.
Skip thisDon’t place foil at the very tip edge — it lifts first when nails catch on things.
7. Red Marble Vein with Clear Base
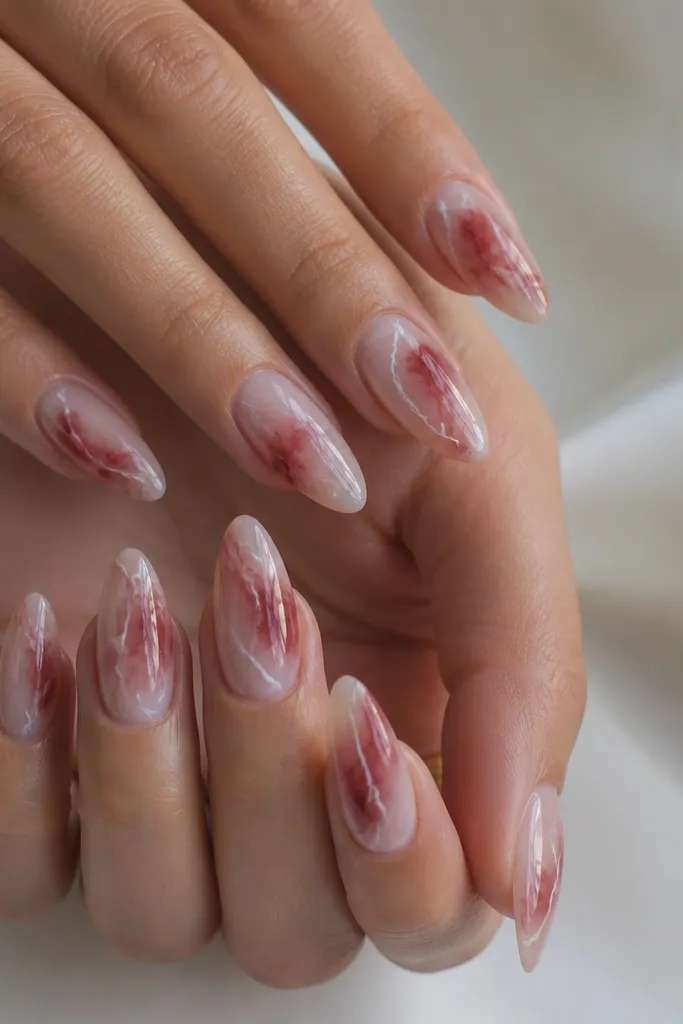
Marble nails work on almond because the veins naturally follow the nail’s shape. Use a clear jelly base so the red looks like it’s suspended, not painted on top. For a marble that reads upscale, add white thin lines and a few soft red smudges, then keep the rest clean. This flatters fair and medium skin because the clear base makes the nail look fresh and not crowded with color.
Apply a jelly clear or nude jelly base and cure. Add a sparse layer of deep red gel with a sponge or brush, focusing on the center area and leaving space near the sidewalls. Drag white gel lines through the red with a toothpick or thin detail brush to create veins. Cure, then add a second tiny pass of white lines for contrast and seal with glossy top coat.
Let the marble look imperfect on purpose — the best ones have a few broken veins and thin gaps.
Don’t cover the whole nail in red — it turns marble into a block.
8. Cherry Red Reverse French with Nude Triangle
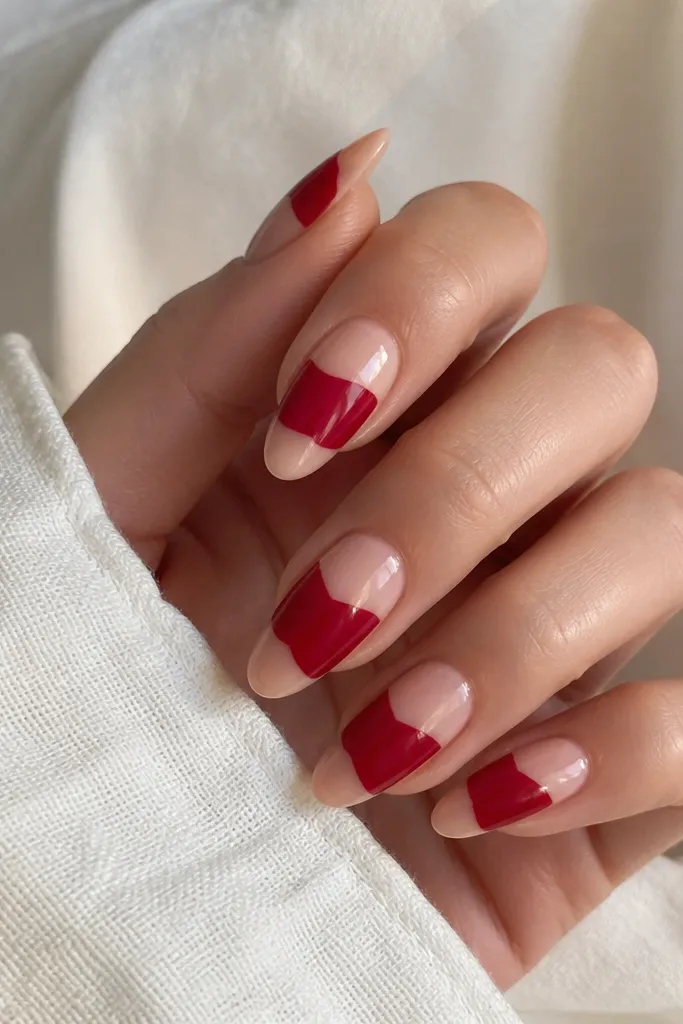
Reverse French makes almond nails look graphic and modern, and the nude triangle keeps it from looking too heavy. Choose cherry red for a clean contrast against nude, and keep the band thin so the almond taper still shows. This flatters people with wider nail beds because the negative space helps balance width. It’s also a great choice if you hate tiny details — the design is bold but still neat.
Paint a nude base and cure. With striping tape or a steady freehand, place a thin cherry-red band across the nail around the middle, leaving a small wedge of nude space near the cuticle shaped like a triangle. Carefully fill the band and cure. Remove tape while the gel is cured, then clean edges with a fine brush and acetone. Finish with a glossy top coat, and cap the free edge.
Editor's noteUse striping tape for the first try — you’ll get a straight band in one pass instead of repainting.
Skip thisDon’t make the band too close to the tip — it shortens the almond visually.
9. Red Glazed Donut Nails with Micro Glitter
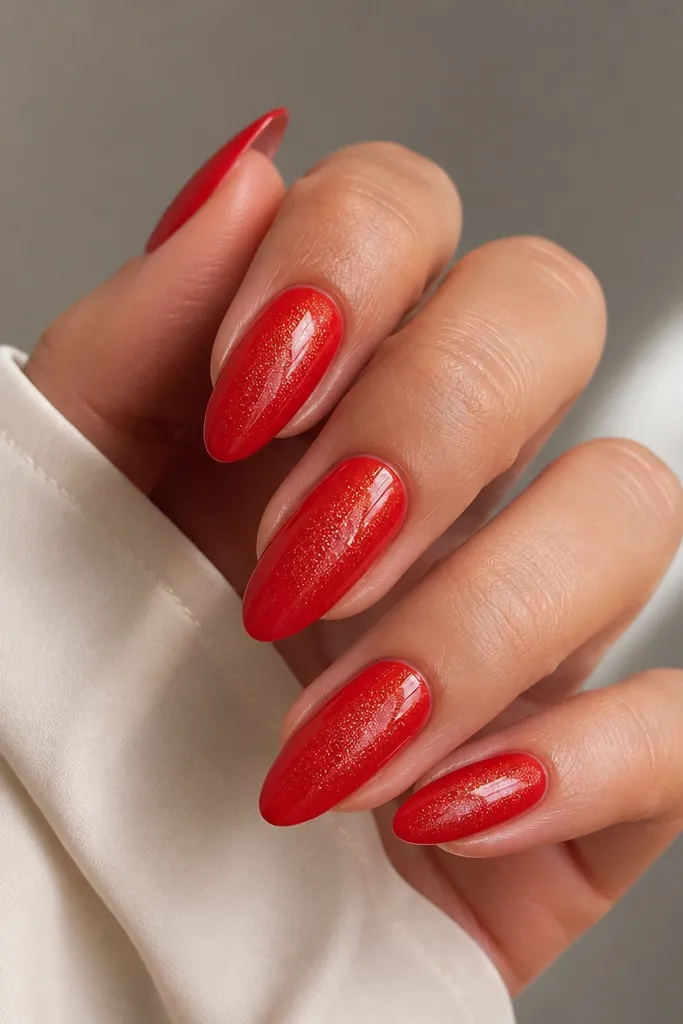
Glazed donut nails look like the red has a soft glow under the glass. The key is micro glitter — it reflects light evenly and keeps the almond from looking flat. Use a bright red base (classic red, not too dark) and sprinkle fine holographic micro glitter only where light would naturally hit. This is flattering for all skin tones because the sparkle is small enough to stay elegant in daylight and strong enough for flash.
Apply two coats of your bright red gel, curing fully each time. Dab a tiny amount of clear gel at the center and lightly toward the tip, then tap micro glitter onto those wet spots. Press gently so the glitter sits flat, then cure. Seal with glossy top coat in two layers so the surface stays smooth and the glitter doesn’t catch.
If glitter looks gritty, add a thin layer of clear gel before top coat to smooth the texture.
Avoid chunky glitter — it makes almond tips look uneven and rough.
10. Red Rhinestone Line at the Sidewall
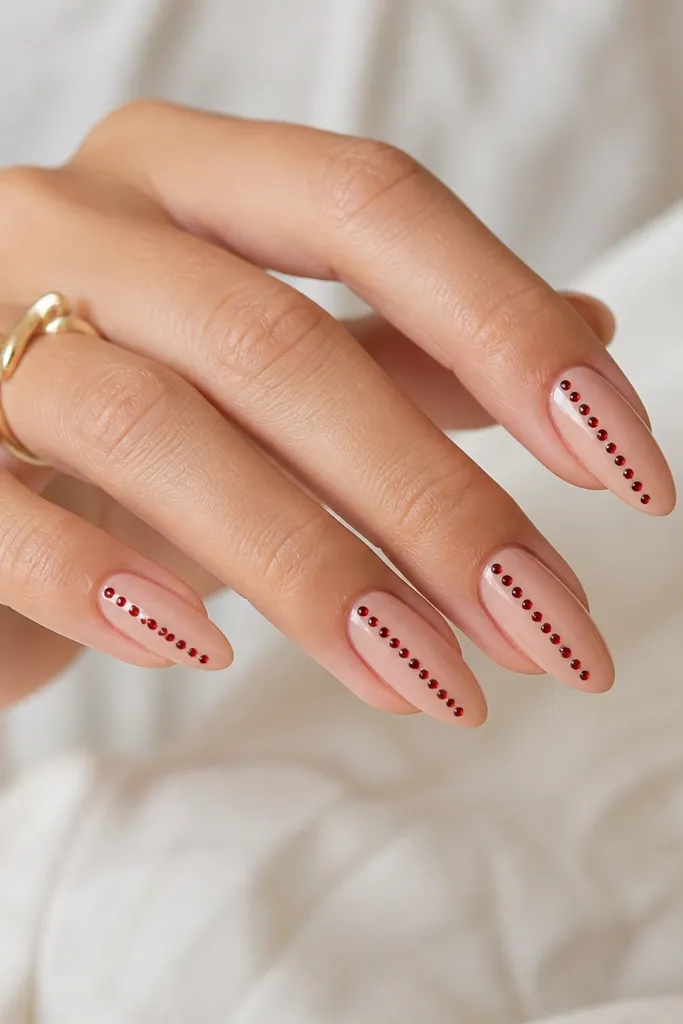
A sidewall rhinestone line looks like jewelry without covering the whole nail. Keeping it on one side makes the almond taper feel longer and slimmer, which matters if your nails are naturally broad. Use a sheer nude base so the red stones pop, and pick small stones (2 mm to 3 mm) so the line stays delicate. I wear this when I want sparkle but not full glitter — it still looks clean up close.
Start with sheer nude base and cure. Paint a thin strip of clear gel along one sidewall from mid-nail to near the tip, then place rhinestones in a straight line using tweezers. Space stones about the width of one stone so the line looks continuous but not crowded. Cure, then apply a thin clear gel layer over the stones to lock them down. Finish with glossy top coat over everything, keeping the top coat thick enough to prevent snagging.
Press each stone with the flat end of a silicone tool so it seats evenly.
Don’t place stones on the very edge where the nail flexes — they pop off first.
11. Red Velvet Smoke Fade (No Marble, Just Smoke)
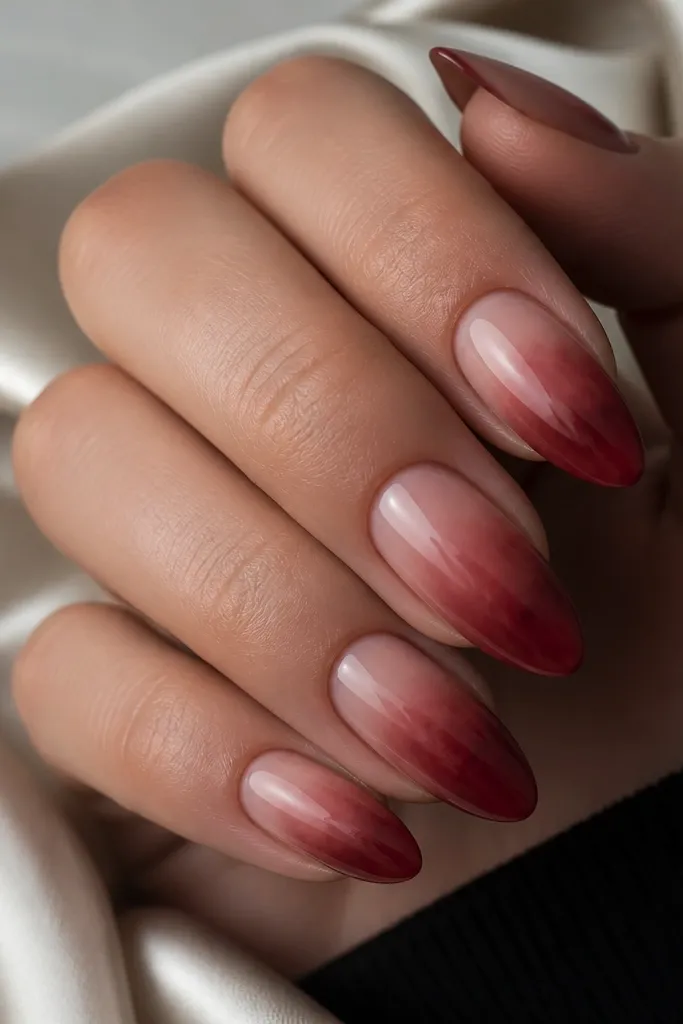
Smoke nails look artsy but still wearable, and they look especially good on almond because the haze follows the nail’s curve. Use a nude base and blend red like a blur, not like ombré. This version flatters hands because the smoke hides minor nail ridges visually and keeps the color from feeling harsh. For undertones, choose a red that matches your preference: warm smoke into brick-red, cool smoke into berry-red.
Apply nude base and cure. Sponge a small amount of red gel near the tip, then drag it upward lightly with a clean sponge so you get a soft cloud. Add a second layer of red smoke only where you want intensity, curing between layers. Use a tiny brush with clear gel to soften the edges so it looks hazy instead of painted. Finish with glossy top coat to smooth the surface and make the smoke look “under glass.”
Editor's noteUse a separate sponge for each nail so the haze stays controlled and doesn’t get muddy.
Skip thisDon’t blend with too much product — thick smoke looks like smudged paint.
12. Red Linework Cat-Eye Accent
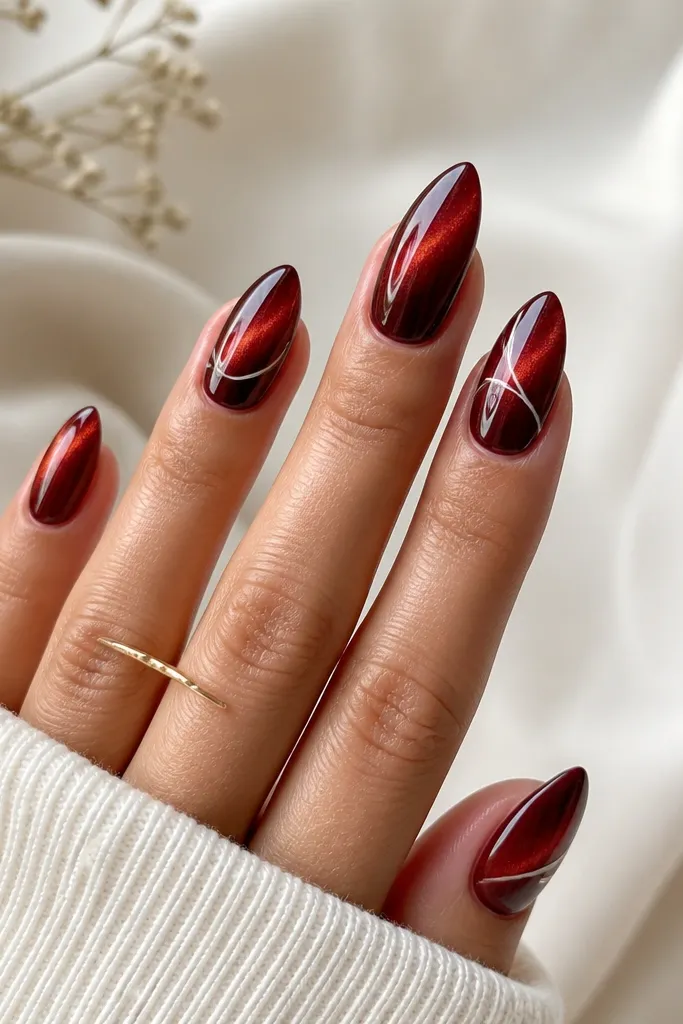
Cat-eye red is the fastest way to get dimension without chunky art. The magnet effect creates a bright streak that pulls the eye toward the center, which looks great on almond tips. I add thin white linework on one or two nails so it doesn’t get busy — think tiny crescents near the tip, not full drawings. This works best on medium to deep skin tones because the streak has enough contrast to look crisp.
Apply base coat and cure if needed. Paint two coats of red cat-eye gel, but magnet on the second coat: hold the magnet parallel to the nail for 10-15 seconds without touching the nail. Cure. Then, on accent nails, use a striping brush to add a couple of thin white curved lines near the tip. Seal with glossy top coat, keeping the white lines thin so they don’t spread.
Editor's noteMove the magnet slowly — jerky movement makes the streak wander.
Skip thisDon’t top coat too early over wet cat-eye — it dulls the magnet streak.
13. Red Jelly Skittle Tips (Three-Tone Almond)
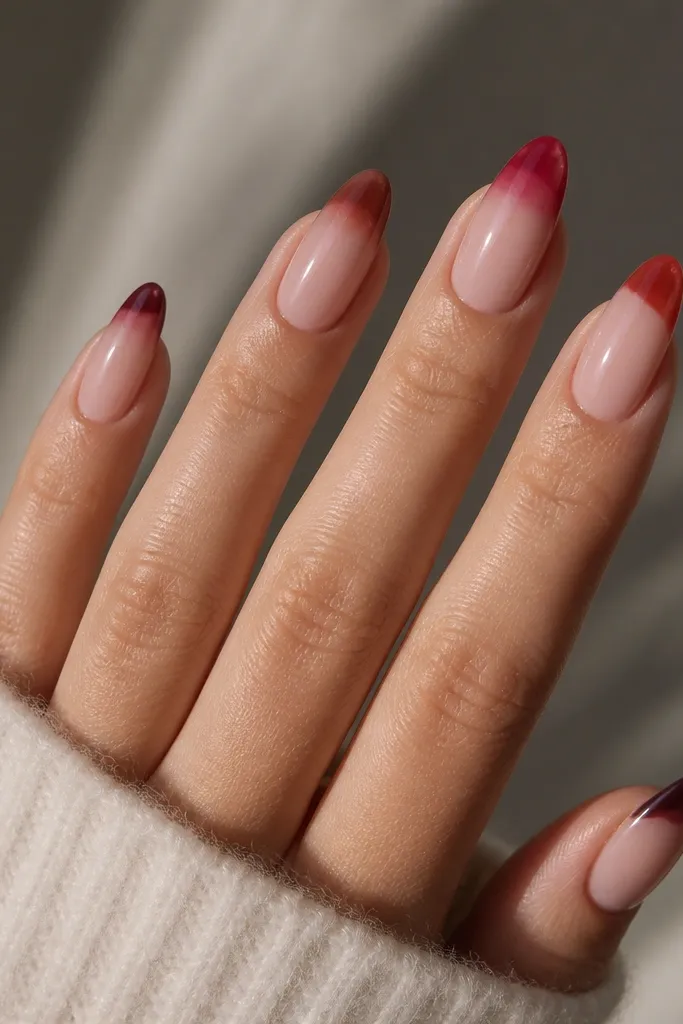
Skittle tips keep red from looking repetitive while still reading cohesive. I like jelly tips because they look airy and don’t overpower short almond nails. Use three reds that share a family: cherry, berry, and brick. This flatters all undertones because the base is nude and the jelly finish softens any harsh contrast. It’s also great if you want variety without detailed nail art.
Paint a nude jelly base and cure. On each nail, apply a jelly red to the tip only, starting around 2-3 mm from the free edge and fading upward with a sponge. Use three different reds across the fingers, keeping the placement the same so the set looks intentional. Build a second thin jelly layer if you want more opacity, then cure. Finish with glossy top coat for a smooth, glassy look.
Editor's noteKeep the fade consistent across all nails — that consistency is what makes skittle sets look “designed.”
Skip thisDon’t make the jelly tips too opaque — the charm comes from the translucency.
14. Red Velvet Half-Glitter Tip
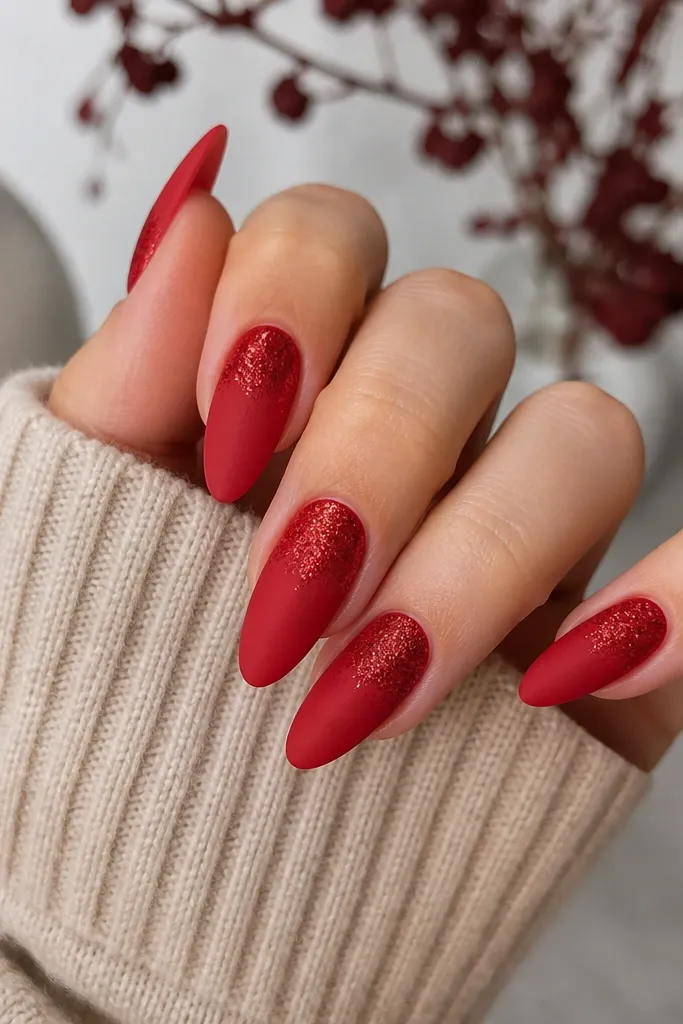
Two-texture nails look like you spent hours, and this one is actually pretty straightforward. The matte red makes the glitter look brighter, and the half-tip placement keeps the almond shape clean. Choose fine silver or red micro glitter so it doesn’t look chunky against the matte. This is flattering when you want something bold for holidays or events but still want the nails to feel lightweight and not bulky.
Paint and cure two coats of your matte-ready red gel, then apply matte velvet top coat and cure. With a thin brush, paint clear gel on the tip area only — about the top half of the free edge area — and avoid the center of the nail. Tap micro glitter onto that sticky gel, then press gently and cure. Seal with a slightly thinner top coat over the glitter area so it stays sparkly but smooth. Leave the matte finish untouched on the rest of the nail.
Use a makeup brush to dust off loose glitter before top coat so you don’t get grit along the edges.
Don’t put glitter on top of matte without sealing it — it flakes and looks messy fast.
15. Red Ombre with Thin Black Outline
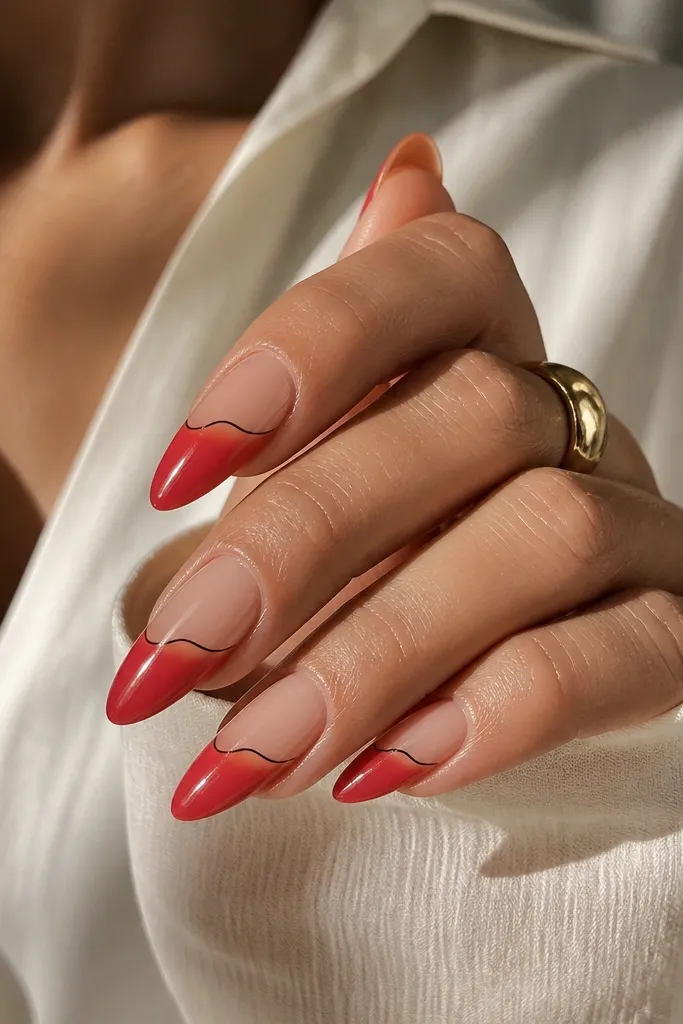
The black outline turns a soft ombré into a graphic design. It makes the fade edge crisp, so your almond still looks sharp even if your blending isn’t perfect. Choose a true red for the ombré, then use black gel for the outline. I love this on medium skin because the contrast pops, and it also looks great for fall outfits with denim and boots. The outline gives structure, which is why it looks polished.
Start with a nude base and cure. Sponge or airbrush a red ombré from mid-nail to tip, leaving a smooth fade. Cure and let the surface cool for 30 seconds so the outline line stays steady. With a liner brush, draw a thin black line right along the fade boundary, then fill any gaps. Cure again and seal with a glossy top coat to keep the black line crisp and smooth.
Outline only one side first, then mirror it — your line will look even when you compare both edges.
Don’t outline too thick — thick black makes almond nails look shorter and heavier.