1. Tomato Red Glass Almonds
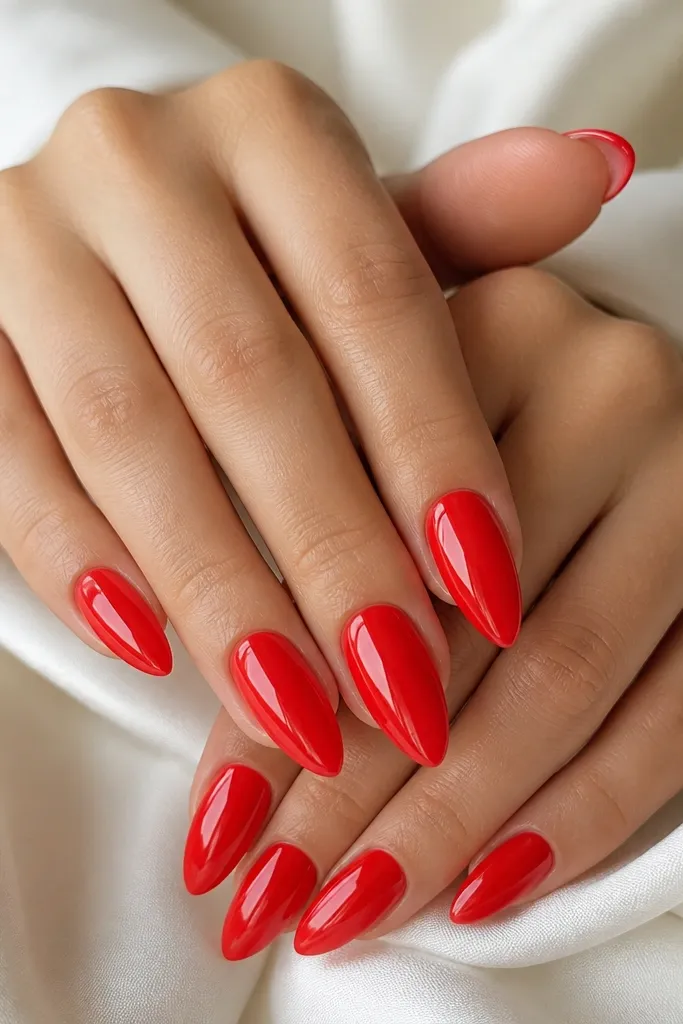
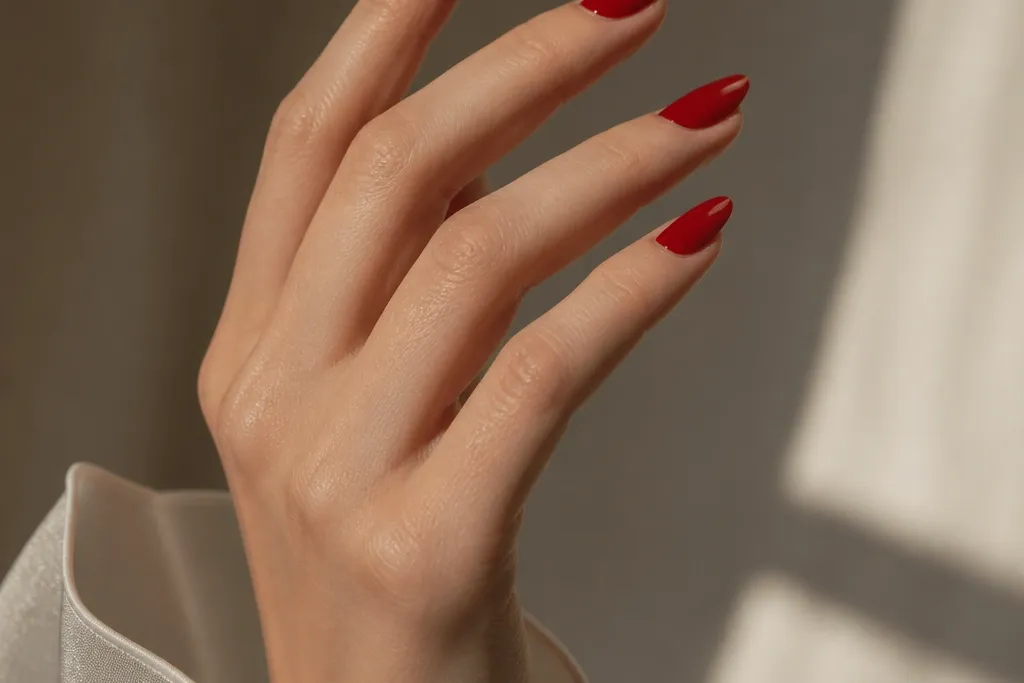
This is the red I reach for when I want “fresh manicure” energy without ornament. Tomato red has enough orange warmth to flatter olive and warm undertones, and the glossy finish makes the almond curve look clean in daylight and flash. Because there’s no pattern, the shape does the work — the tapered tip reflects light and visually lengthens fingers. It looks best on medium almond (not super short), where the red has room to sit evenly across the sidewalls.
File your nails into a soft almond first, then gently buff the surface so gel polish grips without streaking. Apply a thin base coat, cure, then paint tomato red in three thin coats, curing each one. Keep your brush centered and let the color self-level — don’t drag it to the cuticle. Cap the free edge with the final coat, then finish with a thick glossy top coat and cure fully.
If you see streaks, stop and add a thinner third coat instead of a thicker second coat. Thick layers make the tip look rounded and dull after a few days.
Avoid neon-red tomato shades with chunky pigment — they show brush marks on almond tips.
2. Cherry Red French Almond Line
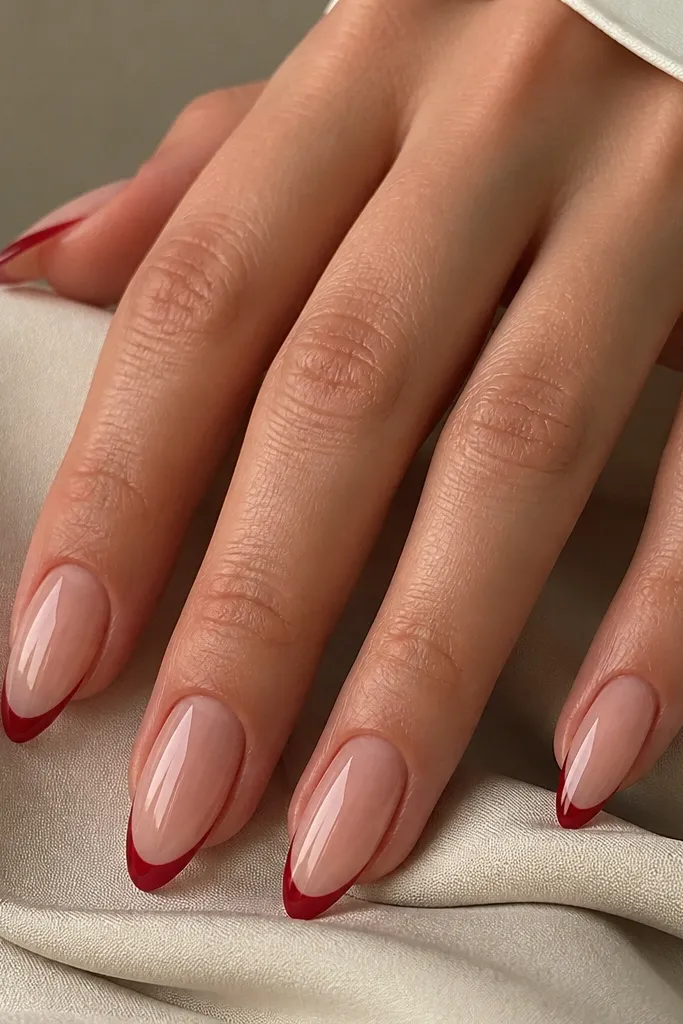
A French line in cherry red makes almond nails look sharp and “clean” without feeling plain. The sheer nude base softens the red so it flatters fair to medium skin tones, and the thin line keeps the tip from getting too heavy. Cherry red is cool-leaning, so it pairs nicely with pink undertones and gives a polished contrast against nude. This design also works for shorter almonds because the line is narrow and controlled.
Start with a sheer nude base that matches your skin tone — I use a pink-beige that looks like my natural nail. Paint two thin nude layers, cure, then use a fine striping brush to draw a slim cherry red smile line at the tip. Keep the line about 1 mm thick so the almond still looks tapered. Finish with a glossy top coat and cap the tip so the line stays crisp when the nail grows.
Editor's noteUse tape only if your hand shakes — press the tape lightly at the angle of your almond tip, then paint over it and remove after the polish is tacky.
Skip thisSkip thick French tips — they turn almond nails into a blocky shape and make red look cheap.
3. Wine Velvet Matte Almonds
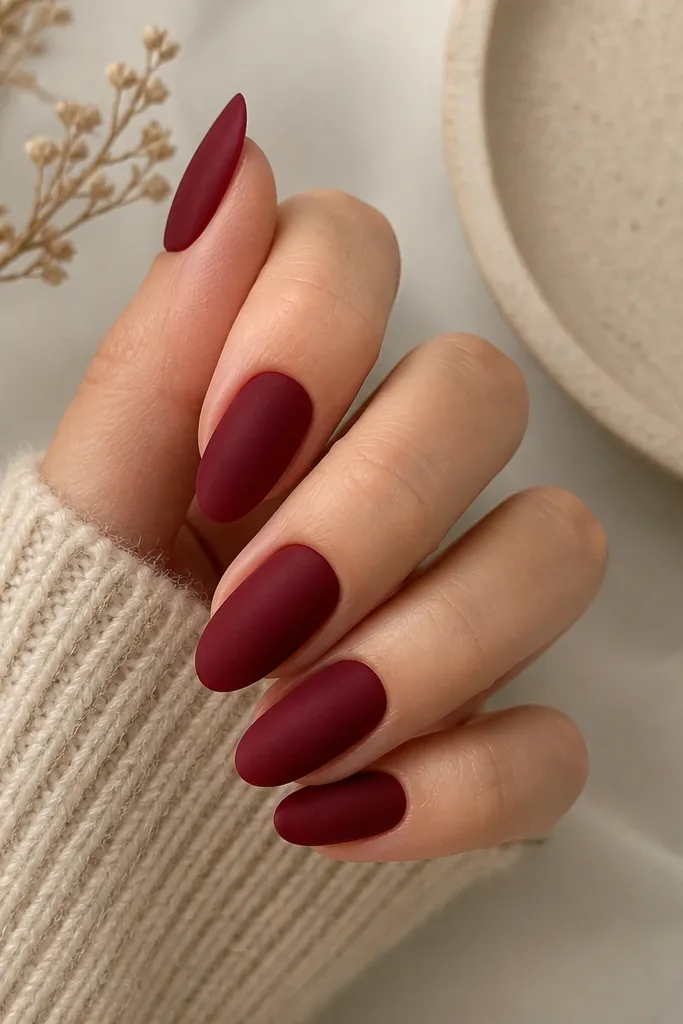
Wine velvet matte is dramatic in the best way: it looks expensive up close and doesn’t scream from across the room. The deep plum-red flatters cool undertones and makes hands look more defined, especially if your skin is fair or rosy. Almond shape matters here because the matte finish shows surface unevenness — when the shape is smooth, the color looks like velvet. This one is perfect for dinners, winter outfits, and anyone who gets tired of glossy every day.
Prep and buff lightly so the matte top coat doesn’t cling to bumps. Apply two thin coats of wine gel polish, curing each layer, then wipe tacky residue if your system requires it. Seal with a matte top coat in a thin layer, cure, and avoid going back over it — extra strokes can create dull patches. If you want extra depth, add one more matte top coat only after the first is fully cured.
Matte top coat hides minor ridges less than glossy does, so file your sidewalls smooth before you paint.
Don’t use glitter matte or heavy pigment wine polish — it can look gritty and uneven on almond.
4. Red Jelly Gradient Almond Tips
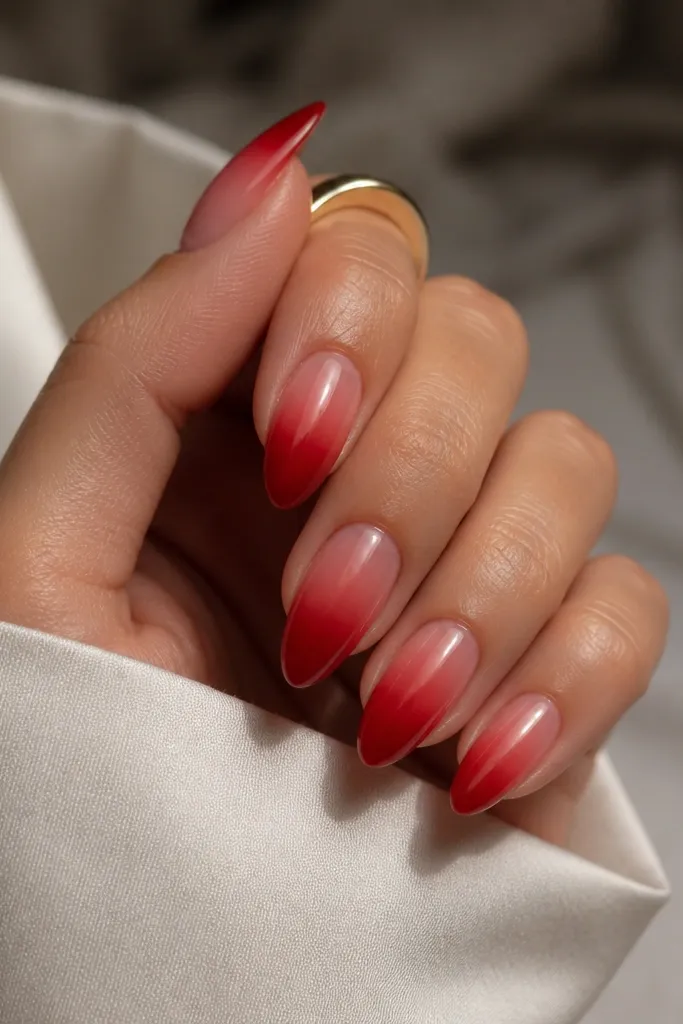
Jelly gradient tips give you that “soft-focus” red look that still reads sleek. The translucent base flatters almost any skin tone because it doesn’t overpower your natural nail color — the tip does the work. I like this on almond because the fade follows the tapered shape and makes the nail look longer. It’s also forgiving if your cuticle line isn’t perfect, since the jelly base blends.
Start with a sheer jelly base red (not opaque), then cure. For the gradient, sponge a slightly deeper red jelly onto the last third of the nail, keeping it centered and avoiding the sidewalls for the cleanest fade. Blend the sponge area upward with a light touch so there’s no hard line. Seal with glossy top coat to make the jelly effect look juicy, and cap the tip.
Editor's noteUse a makeup sponge that’s firm, not porous — porous sponges create speckled gradients on almond tips.
Skip thisAvoid opaque reds under jelly — the gradient will look like a sticker edge instead of a fade.
5. Brick Red Micro-Glitter Center
Brick red with micro-glitter in the center looks sleek because it’s placed where your eye lands first. Brick red has warmth that flatters golden and neutral undertones, and the fine glitter stays refined instead of turning sparkly-cheap. The center placement also makes almond nails look longer since the glitter line follows the nail’s natural taper. This design works great for events when you want sparkle without full coverage.
Paint brick red in two to three thin coats until it’s smooth and even, then cure. With a fine liner brush, apply a tiny amount of micro-glitter gel down the center, starting just above the midpoint and stopping about 1 mm before the tip. Blend the glitter edges lightly so it fades instead of ending blunt. Finish with a glossy top coat and make sure the glitter is fully sealed so it doesn’t catch fabric.
Editor's noteIf the glitter feels gritty, add one extra thin clear gel layer over it before top coat.
Skip thisSkip chunky glitter — it creates texture that ruins the clean almond silhouette.
6. Classic Red Cremé Almonds
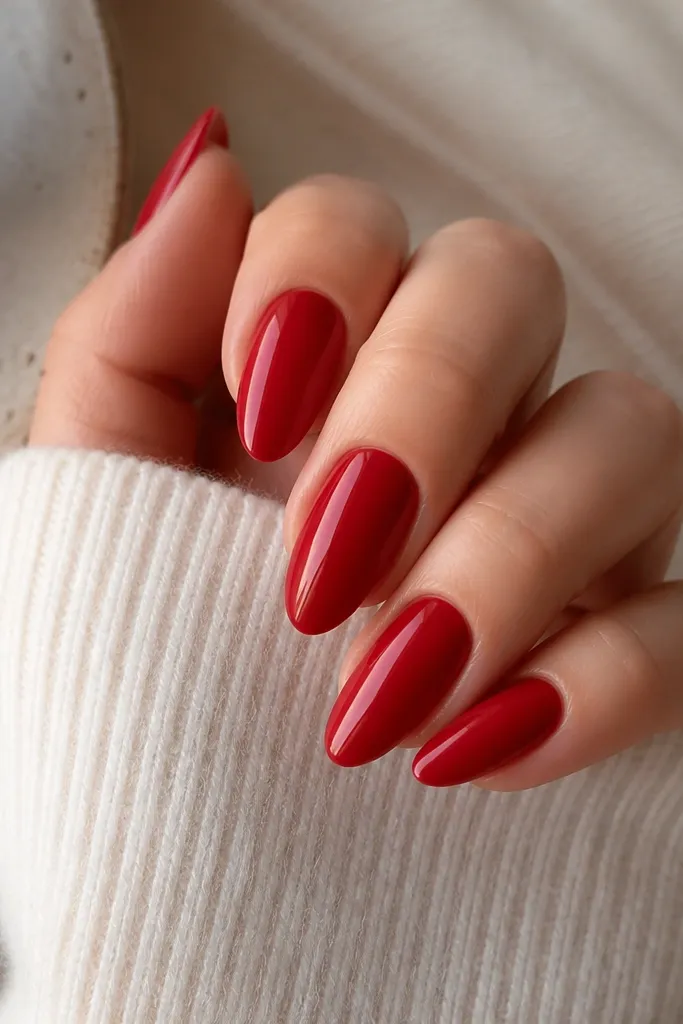
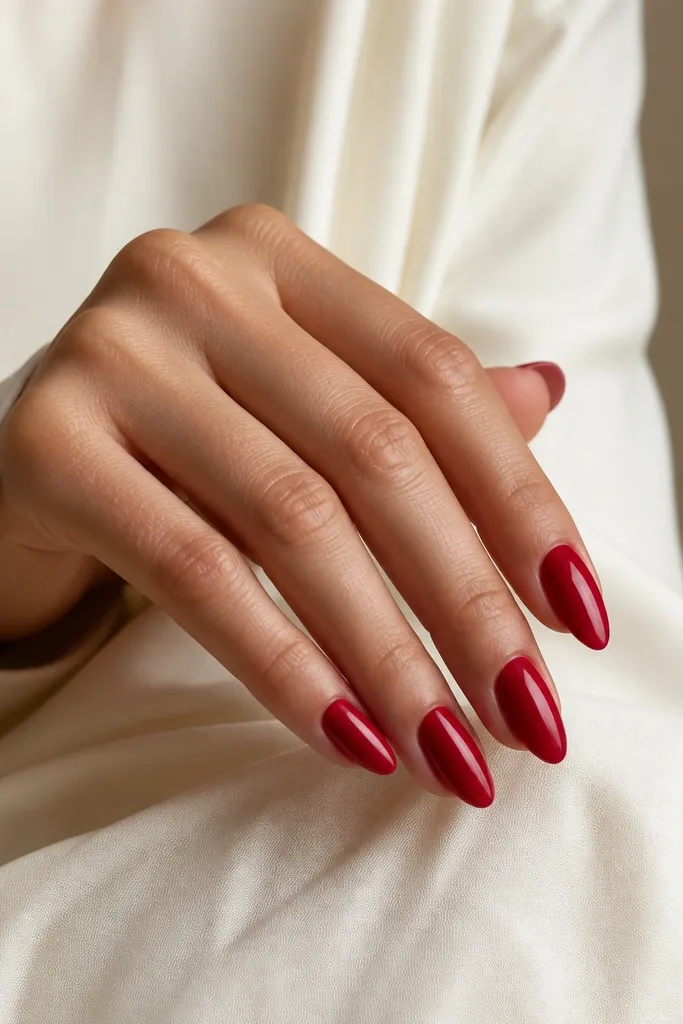
A classic red cremé is the safest “always works” choice, and it looks especially good on almond because the finish stays uniform across the curved tip. This shade sits in the middle — not too orange, not too purple — so it flatters a wide range of undertones. If you wear minimal jewelry, cremés look clean and intentional. I also like it because it doesn’t show tiny application errors as much as jelly or high-shine top coats.
Prep and push back cuticles gently, then apply a smoothing base coat. Paint classic red in two thin coats, curing each one, then check for any thin spots under a bright lamp. Add a third coat only where you can see nail line through. Top with either a glossy or a satin top coat depending on the look you want, and cap the free edge.
Use a lamp check: rotate your hand under a phone flashlight at a 45-degree angle to spot streaks before curing.
Avoid streaky, self-leveling reds that pool at the tip — almond shows uneven thickness fast.
7. Red Ombré Side-Swoop
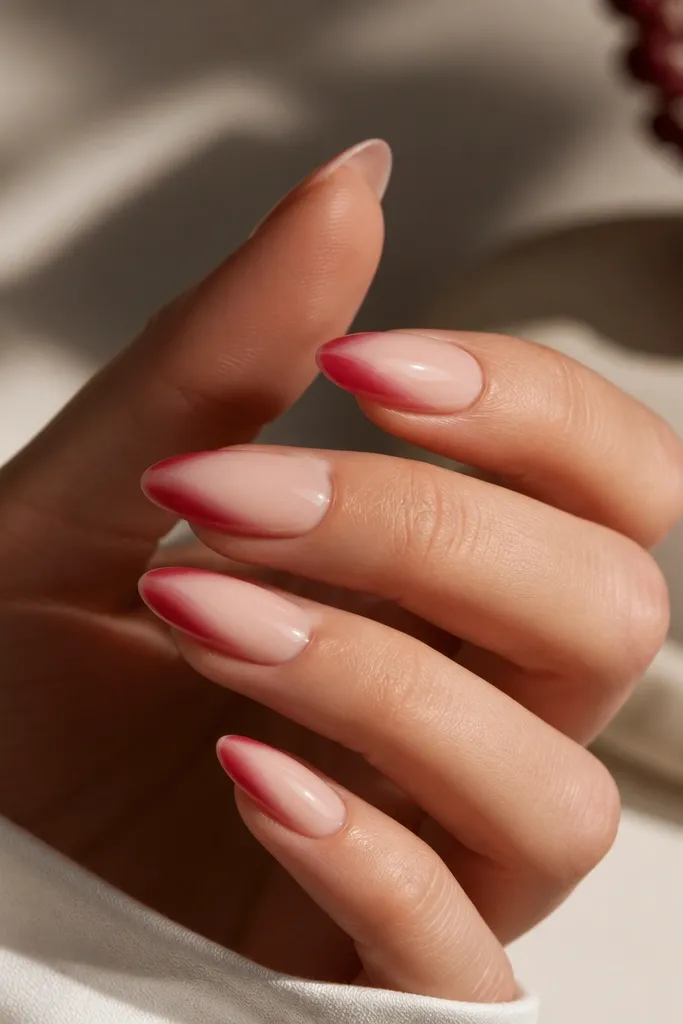
This design looks sleek because the line is diagonal, so it visually guides the eye along the almond shape. The nude base keeps it wearable, while the red swoop adds attitude without covering the entire nail. It’s flattering for hands that feel shorter — the diagonal placement makes the nails look longer and more narrow. I’ve worn it with both gold and silver rings, and the red still looks clean.
Start with a nude base that matches your skin or your natural nail color, then cure. Mix or choose a medium red and sponge or airbrush a soft ombré swoop from the side of the nail at the middle third toward the tip. Keep the swoop thin at the tip — about 1-2 mm wide — so the almond stays tapered. Seal with glossy top coat and add a final thin clear coat over the swoop so the fade looks smooth.
Editor's noteOutline the swoop lightly with a thin red gel first, cure, then soften the edges with a sponge for an ombré effect.
Skip thisDon’t let the swoop hit the cuticle line — it makes the design look messy and broad.
8. Red Almonds with Gold Micro Dots
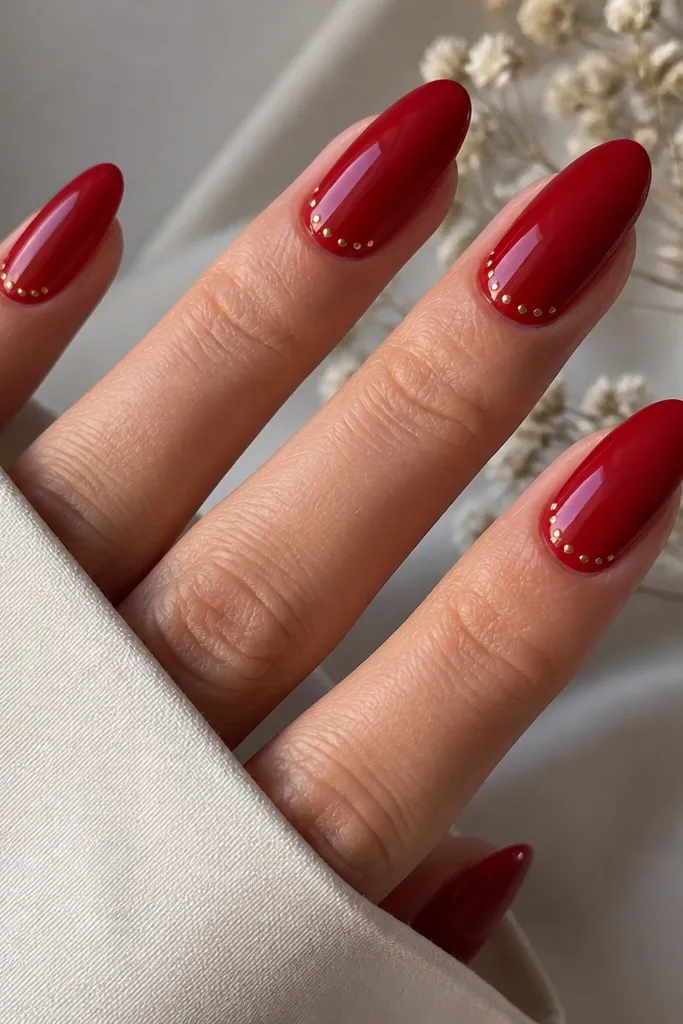
Gold micro dots on red look classy because they’re controlled and tiny. I like this on almond because the dots near the cuticle lift the whole nail without making the tip feel crowded. Warm gold works with tomato, brick, and warm reds, and the shine from the top coat makes the dots pop in photos. It’s flattering on fair, medium, and deep skin tones because the dots are small enough to feel intentional, not overpowering.
Paint a smooth glossy red in two to three thin coats and cure. Using a dotting tool (or the tip of a toothpick), place 4-6 micro dots in a slight arc near the cuticle, leaving a small gap from the skin line. Cure again if your gel system needs it, then add a thin clear gel coat over the dots to lock them in. Finish with glossy top coat and cap the free edge.
If your dots smear, let the red base fully cure and add dots on a slightly tacky clear gel layer, not directly on cured red.
Skip large rhinestones — they interrupt the almond taper and look bulky.
9. Matte Red with Glossy Tip Cap
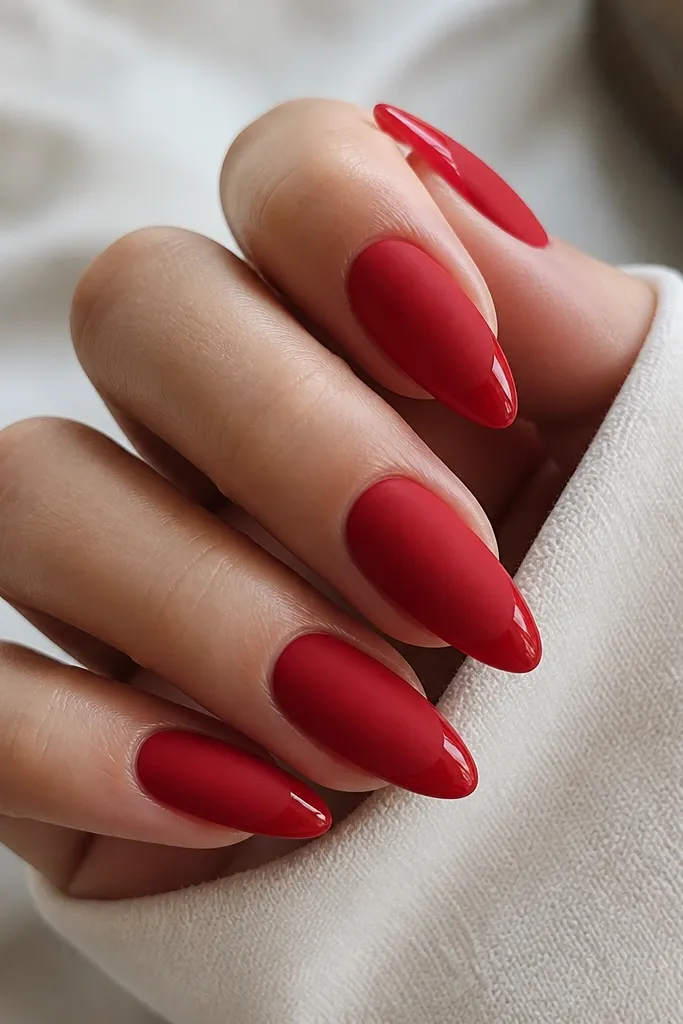
This two-finish combo looks sleek because it creates a sharp boundary at the almond tip. Matte red hides tiny ridges and looks velvety, while the glossy tip reflects light and makes nails look freshly shaped. It flatters hands that show dryness since matte finish doesn’t emphasize every shine patch the way full gloss can. It’s also great for people who get bored with one finish.
Paint red gel in two thin coats and cure. Apply matte top coat across the whole nail except the last 2-3 mm of the tip — you can protect that area with a small piece of nail tape. Cure, then remove the tape and apply glossy top coat only on the tip area, sealing the free edge. Cap the transition line lightly with clear gel so the boundary stays crisp.
Editor's noteUse a piece of tape and press it against the sidewalls to keep the tip edge clean. A wobbly line ruins the contrast effect.
Skip thisDon’t put matte on the tip — it dulls the almond point and makes the design look unfinished.
10. Red Marble Vein Almonds
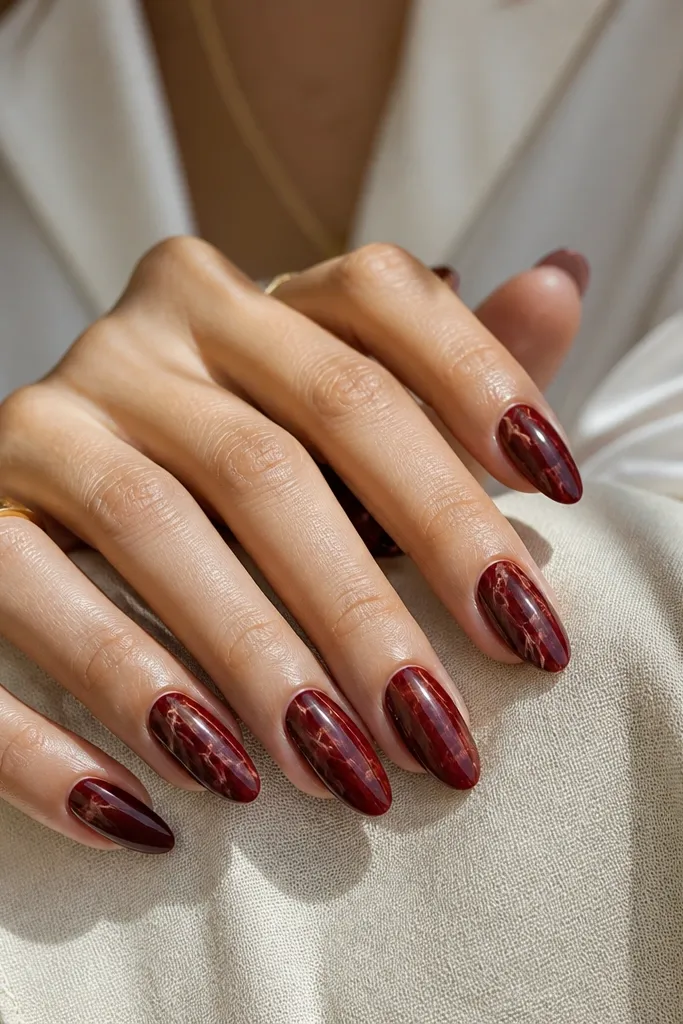
Red marble looks stylish because it has movement while still reading as one color family. The base is deep enough to flatter most undertones, and the lighter veins add dimension without needing glitter. Almond shape makes marble veins look longer, especially if you keep the main vein running from near the center toward the tip. I like this for fall outfits and for anyone who wants something more interesting than solid red.
Start with a deep red base, two thin coats, cure. Drag a very thin line of lighter red gel or nude-pink gel using a striping brush, then add a second thinner vein branching off at a slight angle. Use a clean brush to soften the edges so the veins look like they’re under the surface, not painted on top. Seal with glossy top coat, and cap the tip so the marble lines don’t lift.
Practice on a spare nail tip: marble needs thin lines. If your lines are thick, the design will look like smear paint.
Avoid heavy white marbling — it turns red marble into red-and-white candy and can look harsh on almond.
11. Red Ombré Cuticle Glow
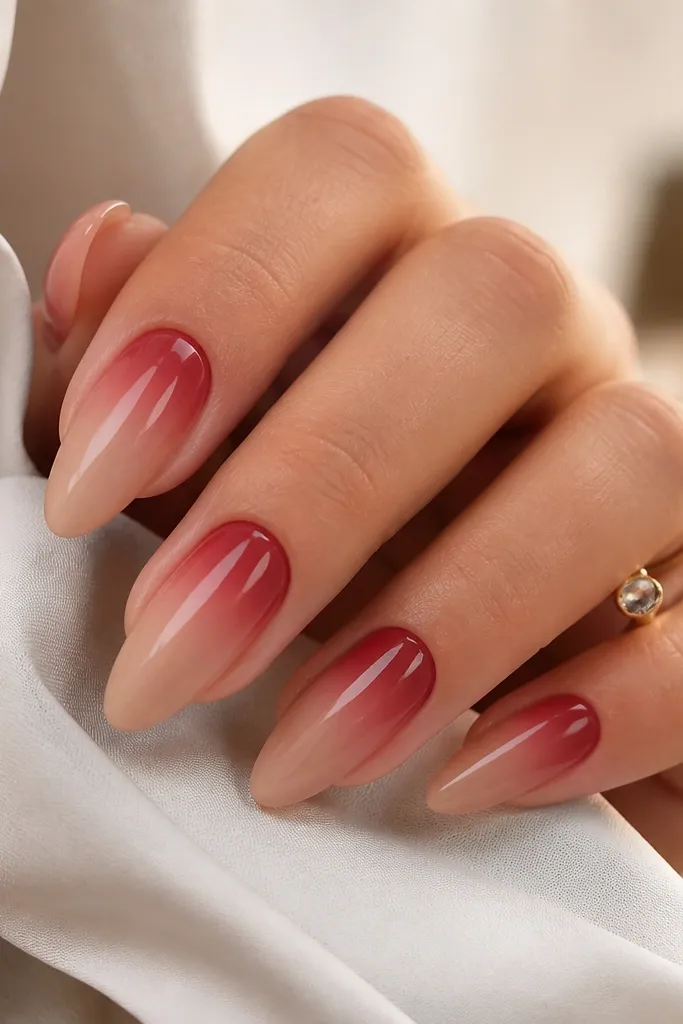
This cuticle glow effect makes fingers look bright and polished because the gradient starts where your eye naturally focuses. It’s flattering on shorter almond lengths because it doesn’t require a long tip for impact. The red is concentrated near the base, so it softens the look and makes hands appear tidy. I wear it with everyday rings and it never looks too “done.”
Apply a nude sheer base and cure. Sponge a medium red gel lightly on the cuticle area, then blend it outward with a clean brush so it fades before it reaches the midpoint. Add a second red layer only if the glow looks too subtle — keep it translucent. Finish with glossy top coat so the gradient looks smooth and not dusty.
Wipe the brush often. One clean pass over the transition area makes the glow look like gel, not pigment.
Don’t cover the entire nail in opaque red — you lose the cuticle glow effect.
12. Red Chrome Mirror Almonds
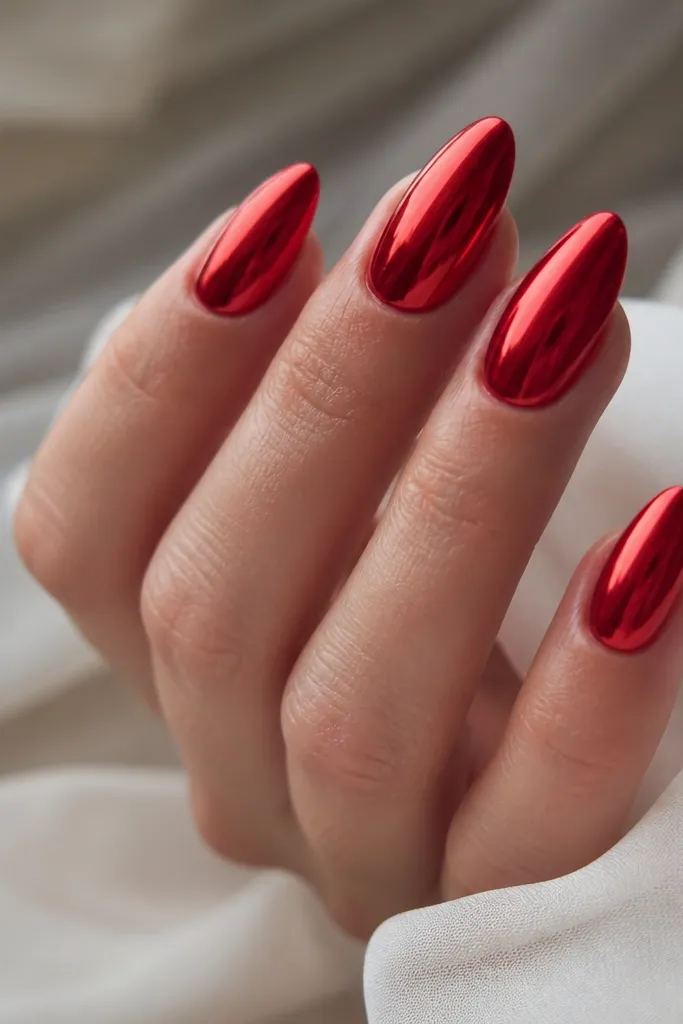
Red chrome on almond looks sleek because chrome makes the tapered shape read instantly in photos. The finish is reflective and intense, so it flatters hands with longer fingers and also makes shorter fingers look more defined. I prefer true mirror chrome rather than glitter chrome — it looks cleaner and more expensive. This design is a night-out pick and holds attention even with simple outfits.
Paint a black or deep burgundy base gel, cure, then apply a chrome mirror base (if your system uses one) and cure. Buff the chrome powder onto the nail using an applicator, then wipe off excess according to the product directions. Work nail by nail so it stays even on the curve. Seal with a non-dull top coat if your chrome system allows it — some mirror finishes break if you use the wrong top coat.
Editor's noteIf your chrome looks patchy, it’s almost always because the base isn’t fully cured or you didn’t apply powder evenly across the sidewalls.
Skip thisAvoid thick top coats over chrome — they kill the mirror effect.
13. Red Almonds with Tiny Heart Accent
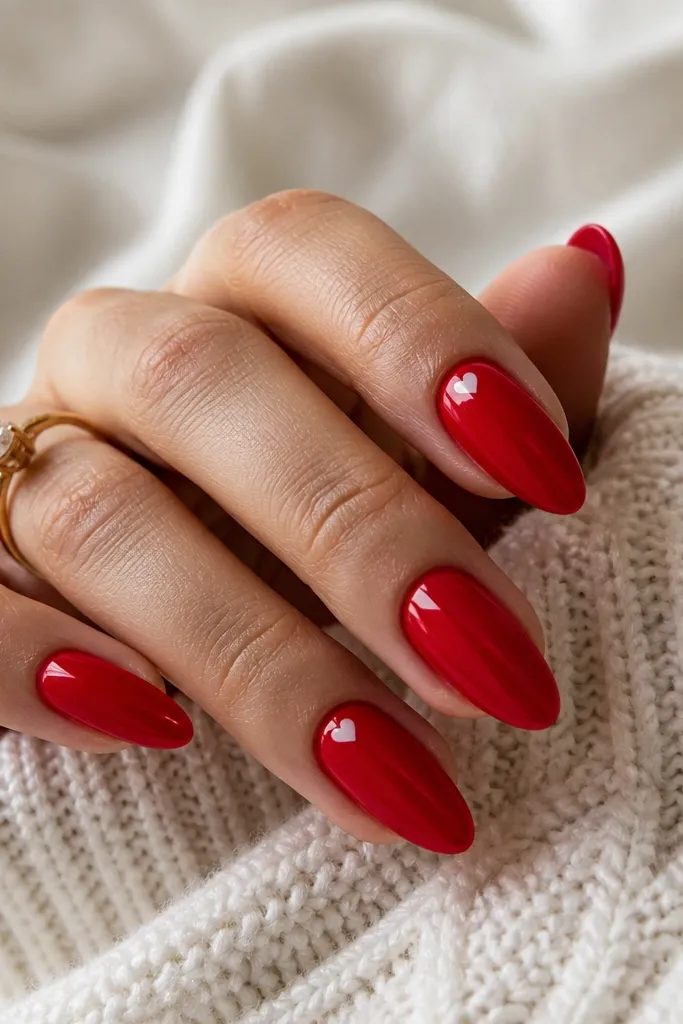
Tiny hearts keep red feeling sweet without turning it into cartoon nails. I place the heart near the cuticle because it looks delicate and doesn’t fight the almond taper. White hearts pop on cherry and classic reds, and the glossy finish makes the heart lines look crisp. This is a great choice for dates, birthdays, and anyone who wants romance without a full set of hearts.
Paint the nails glossy red in two to three thin coats and cure. On accent nails, use a striping brush to dot two small white points, then connect them with a quick V shape to form a heart. Add a tiny line at the bottom point if needed so the heart looks symmetrical. Cure, then add a thin clear gel layer over the art and finish with glossy top coat.
Use a nail art pen with a fine tip if you’ve ever smeared hearts — gel pens give sharper control than brushes for tiny details.
Skip oversized hearts — they make almond nails look wider at the base.
14. Deep Red Lace-Effect Lines
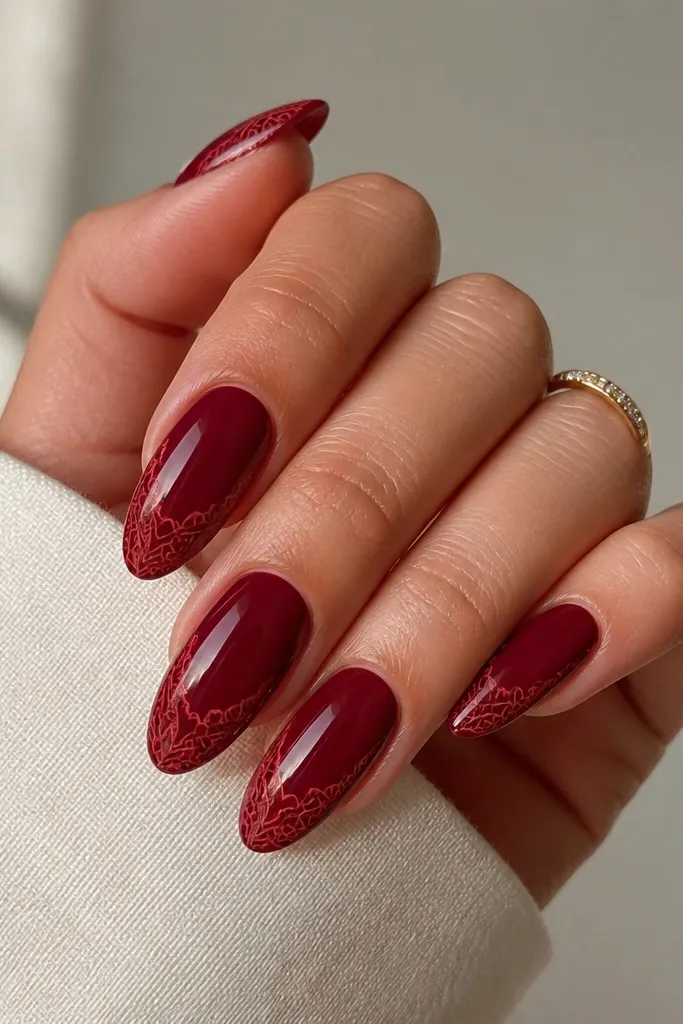
Lace-effect linework looks sleek because it adds texture through thin lines, not heavy decoration. The deep burgundy base flatters cool undertones and gives a moody, polished look that still feels feminine. Almond shape helps the lace curls look intentional, especially when the lines follow the nail’s curve. This one is perfect for holiday parties, weddings where you want something different, and nights when you wear black or navy.
Start with a deep burgundy red base in two thin coats and cure. Using a fine liner brush or nail stamping plate, draw delicate lace curls along the sidewalls, keeping the pattern lighter at the center. Add a few thin connecting lines so it looks like lace, not random scribbles. Seal with glossy top coat and cap the tip so the linework stays smooth when your nails hit sleeves and bags.
If your lace lines look shaky, do short strokes and let them meet naturally. One long line is harder to control on almond.
Avoid thick black line art on red — it can look harsh and drag the design down.
15. Red Gradient with Clear Negative Space
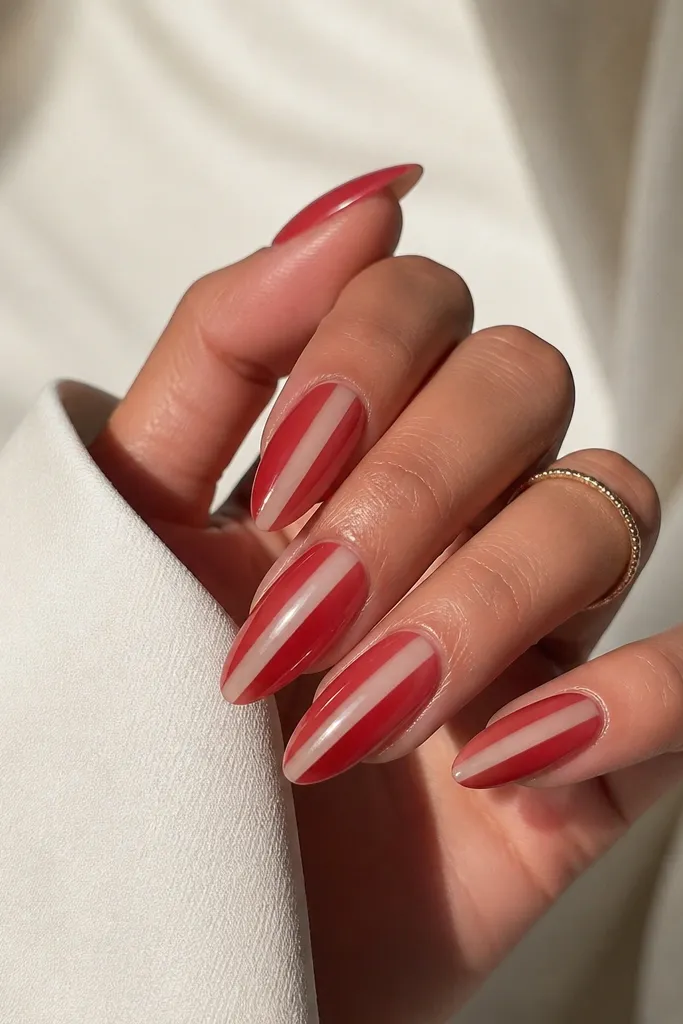
Clear negative space makes red look modern and extra sleek because it breaks up the color mass. The vertical clear strip elongates the nail and flatters hands that want a slimmer look. I like this best with medium reds like tomato or cherry because the contrast stays crisp. It looks especially good on almond when the negative space is centered and the gradient fades smoothly toward the tip.
Apply a base coat and then place a thin barrier (like a gel strip or carefully placed tape) down the center to keep the negative space clear. Paint red gradient on the sides — use a sponge to fade from deeper red near the tip toward a lighter red closer to the middle. Remove the barrier while the gel is still workable so edges stay clean. Seal with top coat across the whole nail, and cap the tip so the gradient doesn’t lift.
Editor's noteUse tape designed for nails, not regular craft tape. Nail tape peels cleanly and keeps the center line crisp.
Skip thisDon’t let the gradient cross the center strip — blurred negative space looks sloppy fast.