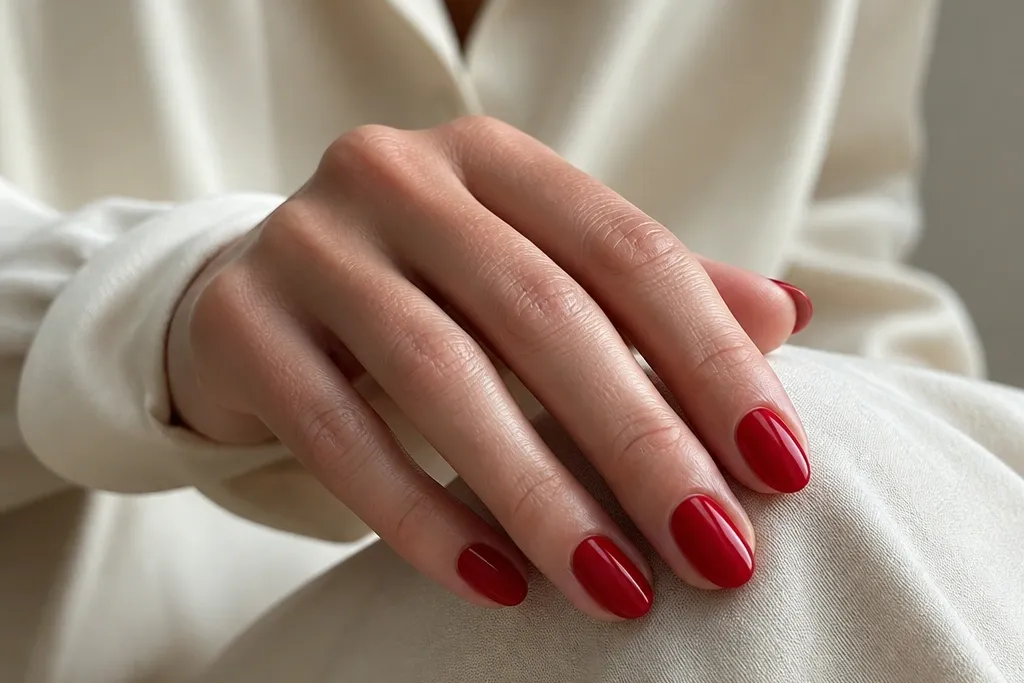
1. Classic glossy cherry red short almonds
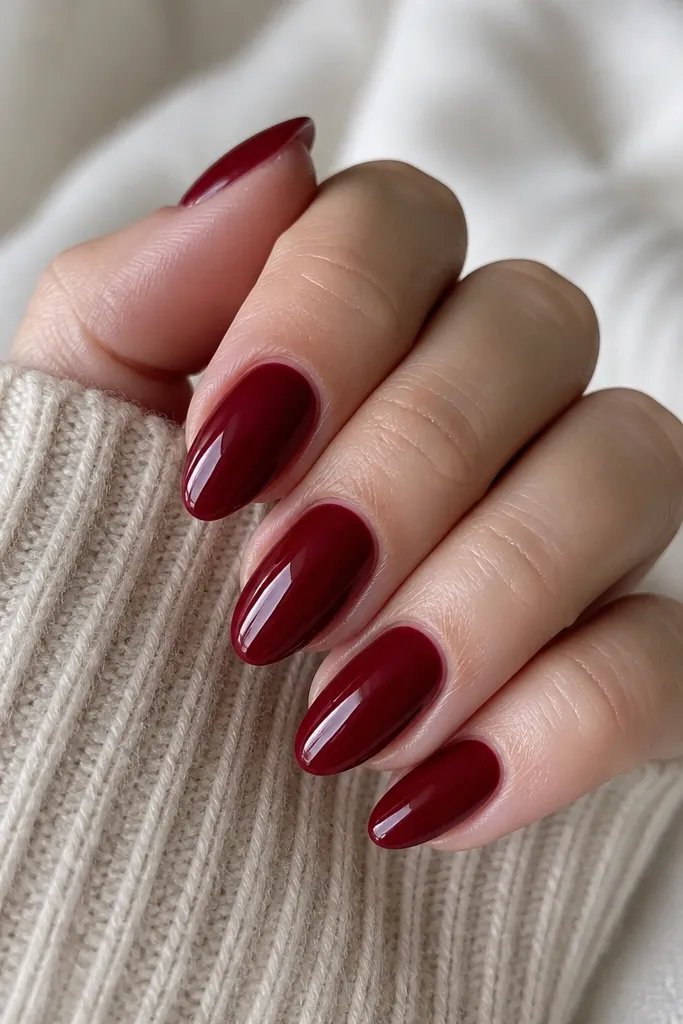
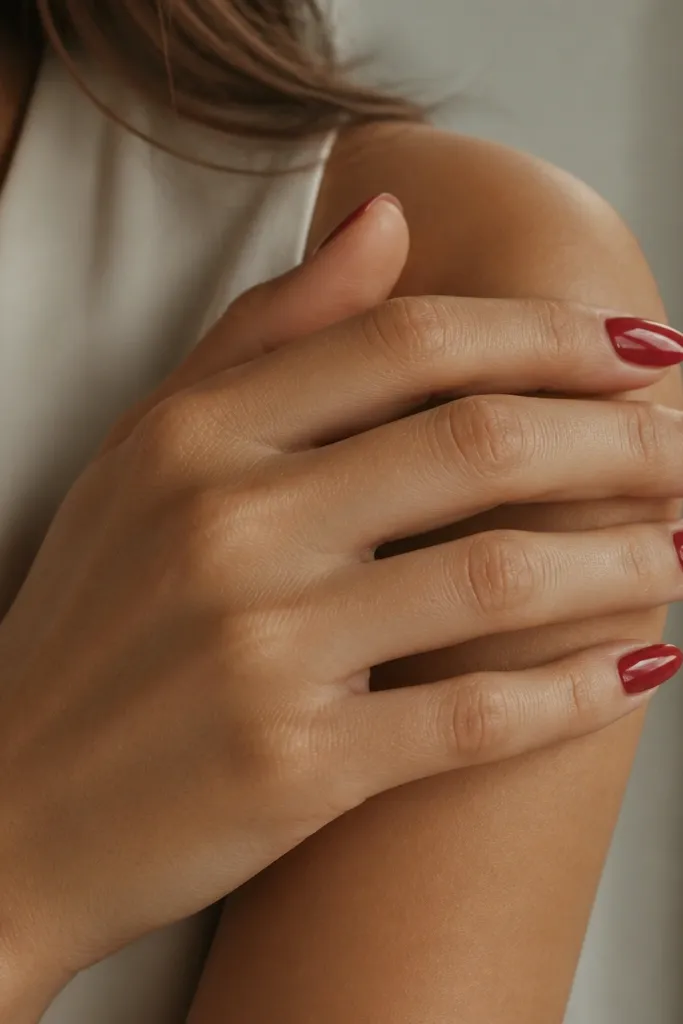
This is the red that always looks put-together because it has enough pigment to look even on a short nail. I use a true cherry red (slightly blue-leaning) so it reads crisp rather than orangey. The glossy finish makes the nail surface look thicker, which is a big deal when your nails are short. It flatters fair, medium, and deep skin, especially if your hands get light from daylight — the red reflects without turning dull. The styling principle is simple: clean shape, even coverage, and shine.
Start with a short almond shape where the widest point sits around the middle, then file the tip to a soft point (not sharp). Apply a thin base coat, then do two thin coats of cherry red, letting each coat dry fully. Use a third slightly thicker layer of red only if you can see streaks at an angle. Finish with a glossy top coat, and press extra product along the free edge and sidewalls. Cure or wait until the top coat is fully set so it doesn’t smear at the edges.
If your red looks streaky on short nails, your coats are too thick — switch to thinner layers.
Skip any gritty top coat or uneven filing — it makes short red look bumpy fast.
2. Warm brick red with creamy nude half-moon
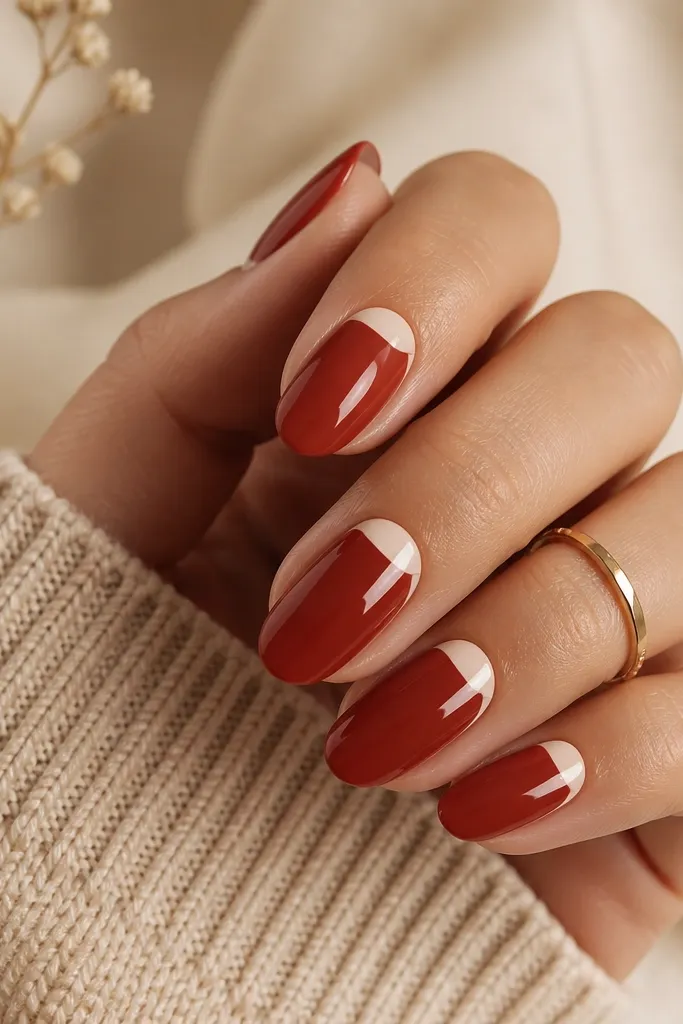
This look works because the nude half-moon gives your short nails a visual “pause” at the cuticle, which makes the red look tailored. I choose warm brick red (red with a hint of brown) so it looks richer on medium and deep skin tones. The nude should match your skin tone closely, not a stark white — stark contrast makes short nails look shorter. The glossy finish keeps the nude from looking dry or chalky. It’s flattering when your hands have visible veins or dryness, because the nude base makes everything look smoother.
File your nails into a short almond and push back cuticles gently. Apply base coat, then paint the full nail with brick red using two thin coats. Once the red is dry, place a small strip of half-moon guide tape or use a half-moon stencil near the cuticle. Fill the half-moon area with a creamy nude polish, then remove the stencil carefully. Seal with a glossy top coat, making sure the half-moon edges are fully covered.
Use tape for the half-moon edge if you want restaurant-clean lines without freehand shaking.
Don’t pick a nude that’s too pale — it creates a harsh line on short almond nails.
3. Red jelly overlay with nude base
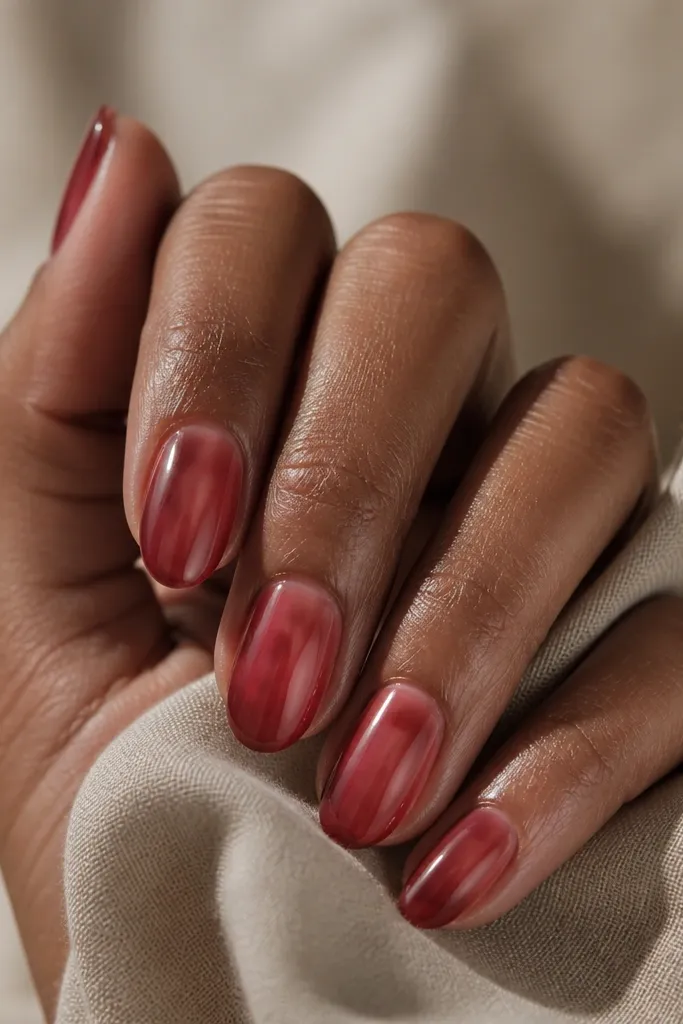
A jelly red over nude is the most forgiving option for short nails. The nude base adds evenness, while the jelly red lets some of your nail show through so it doesn’t look thick or pasted-on. I like a red jelly that’s slightly fuchsia-leaning because it looks lively without getting neon. This flatters hands with ridges because the translucency hides minor imperfections better than opaque reds. It also makes your nails look “fresh” even if you’re due for a touch-up.
Apply a nude base polish or sheer nude gel and cure or dry it completely. Then paint a red jelly polish in two thin coats, keeping it slightly concentrated in the center and feathering to the edges. If you get pooling near the cuticle, wipe the brush on the bottle lip before applying. Finish with a thick glossy top coat that levels out the jelly texture. Cap the free edge with top coat so the jelly stays shiny longer.
For extra smoothness, do one extra thin top coat layer after your first top coat cures.
Skip thick jelly coats — they look uneven and take forever to dry.
4. Micro french tips in deep red
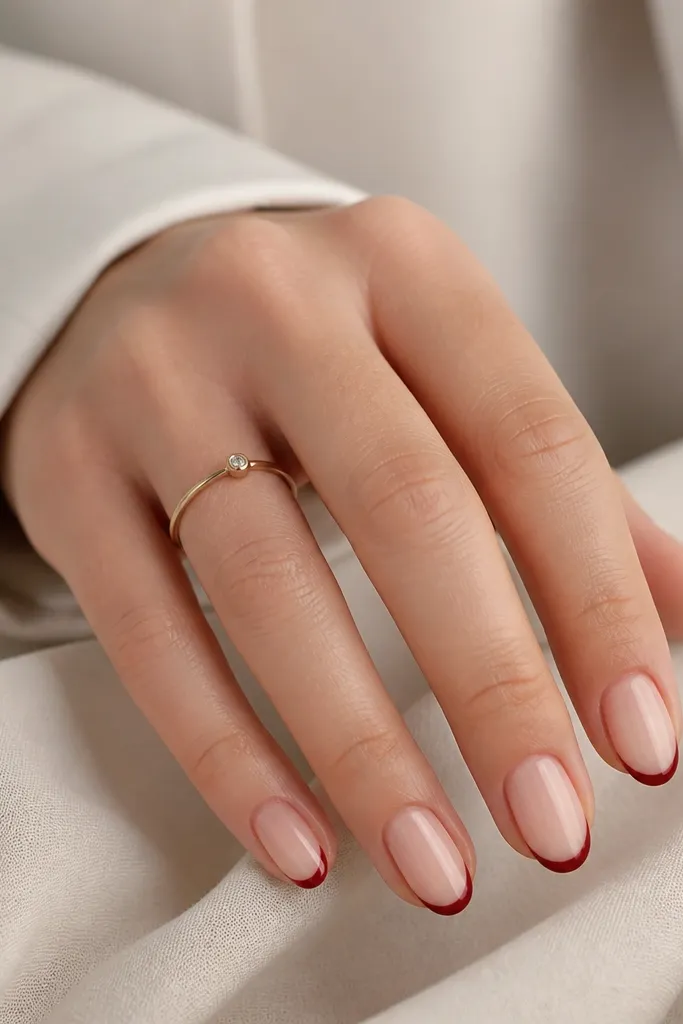
Micro French makes short almond nails look longer without adding bulk. The trick is keeping the tip line thin and centered so it doesn’t swallow the short length. I use a deep red for the tip (more wine than cherry) because it looks expensive against a sheer nude base. This flatters hands with shorter nail beds because the line creates a clean “end point.” It also works for office wear and interviews because it reads polished, not flashy.
Start with a sheer nude base. Paint two thin coats so it looks even but still natural. Use a fine striping brush to draw a micro French line right at the tip, keeping it narrow — about the width of a single bristle line. Fill the tip area with deep red, then clean up the edges with a small brush dipped in acetone or polish remover. Seal everything with a glossy top coat, paying attention to the very edge of the tip.
If your lines wobble, place a tiny dot at each side of the tip first, then connect the dots with the brush.
Don’t widen the French — on short almonds it makes the nails look chopped.
5. Side-swept red stripe over nude
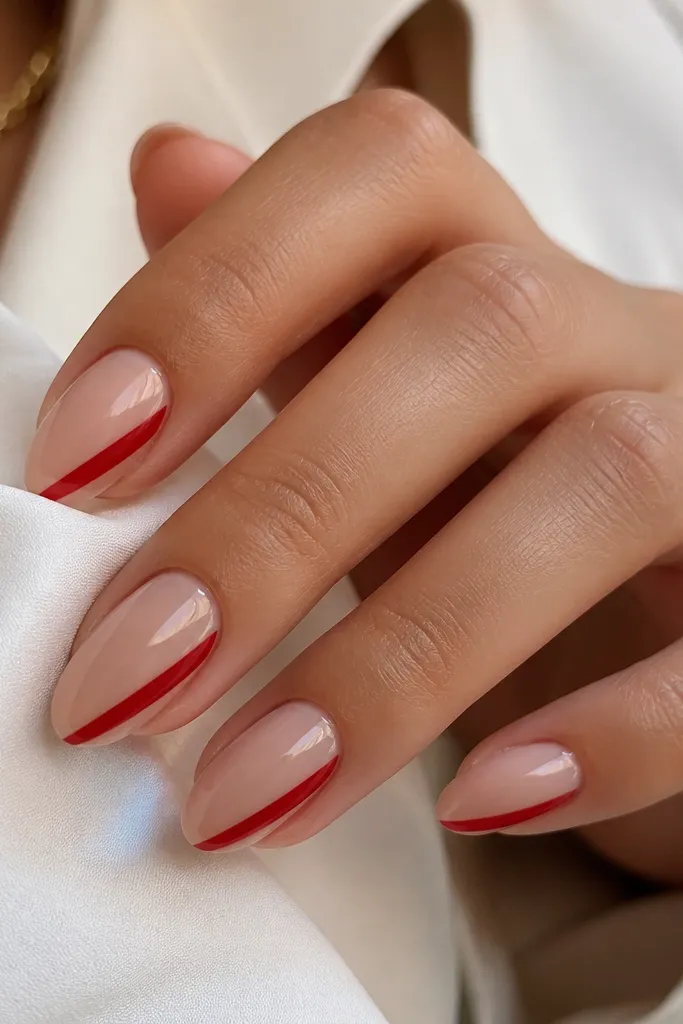
A side-swept stripe is my favorite trick for making short nails look intentional. The diagonal line pulls the eye upward, and because it sits on the sidewall, it doesn’t crowd the center of the nail. I use a bright red stripe (slightly orange-red) so it contrasts cleanly with a nude base. This looks great on every skin tone, but it’s especially flattering if your hands look a little pale in winter because the red brings warmth. The styling principle is one strong line, not a full pattern.
Apply nude base polish and let it dry fully. Use a striping tape or a steady hand with a thin striping brush to place a diagonal guide line on the side of each nail. Paint glossy red over the guide and remove tape immediately while the paint is still wet. If you freehand, do one pass for the stripe, then a second pass only to even the edges. Finish with a glossy top coat to lock the stripe down and smooth the surface.
Editor's noteMatch the stripe angle across all nails — even a small change makes short nails look uneven in photos.
Skip thisSkip glittery reds here — chunky shimmer catches on fabric and chips at the stripe edge.
6. Red ombre fade from cuticle to tip
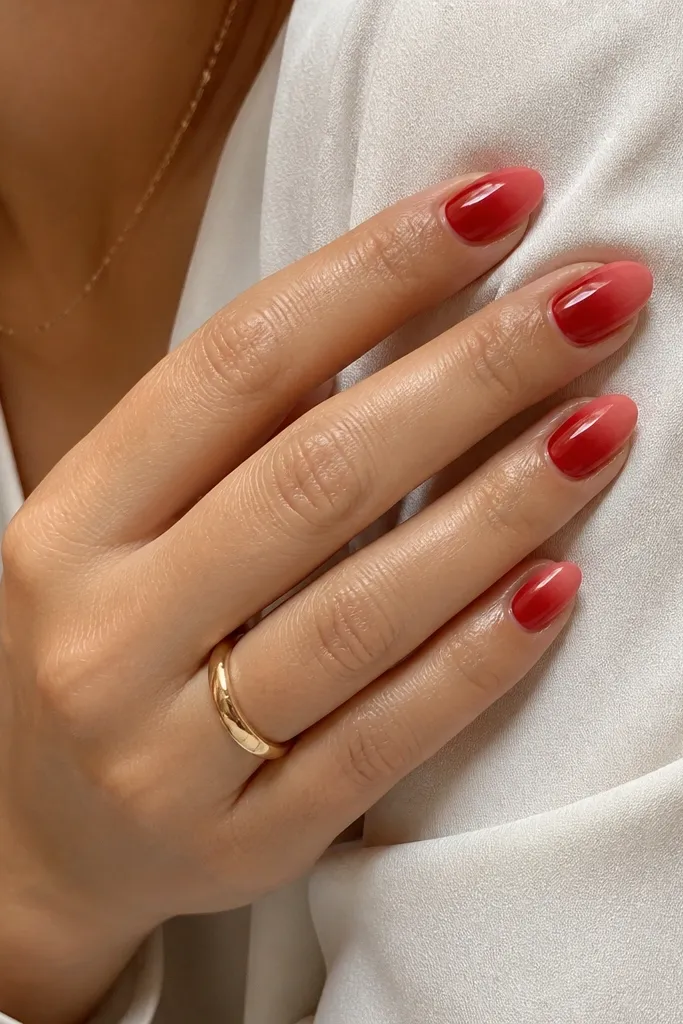
Ombre works on short almond nails because it creates a gradient that visually lengthens the nail. I do it with a sponge so the fade looks soft, not striped. The deeper shade near the cuticle makes your nail bed look fuller, which is flattering on shorter nail beds. I use a medium red that fades into a pink-red, so it stays wearable and doesn’t turn harsh. This looks great on fair and medium skin in particular because the fade reads delicate, but it’s also stunning on deeper skin when you keep the base opaque.
Start with a sheer nude base to smooth the surface. Dab a darker red near the cuticle on a makeup sponge and blend outward toward the tip, keeping the darkest area small. Do 2-3 sponge dabs until the gradient is even, then wipe any mess off the skin right away. Add a thin layer of the light pink-red over the tip area if you need more brightness. Seal with a glossy top coat and cap the free edge.
Editor's notePractice on one finger first — sponge ombre is fast once your sponge pressure feels right.
Skip thisDon’t skip cleanup around the cuticle — red ombre smudges look worse on short nails.
7. Red velvet matte with glossy red accent ring
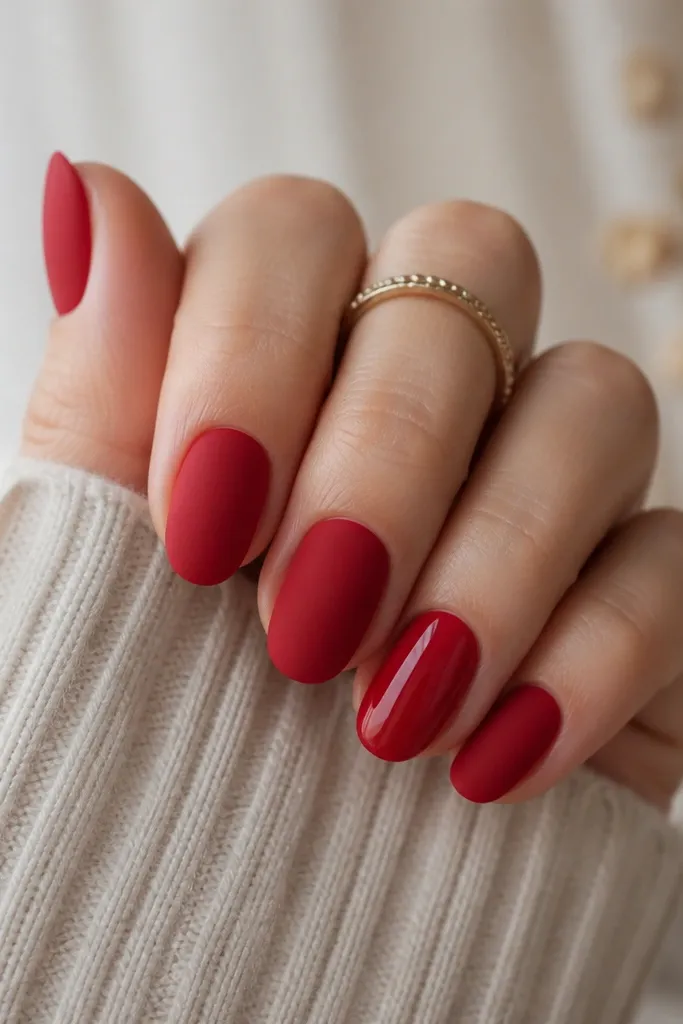
This is the only matte red combo I like on short almond nails: matte everywhere, one glossy accent. The matte finish makes the red look smooth and hides tiny surface flaws, while the glossy ring finger gives you a focal point. I use a true red velvet matte polish, not a flat dusty red. It flatters hands that show dryness because matte can hide roughness better than high-gloss alone. The principle is contrast in finish, not contrast in color.
Shape nails into short almonds and apply base coat. Paint all nails with matte red in two thin coats, curing/drying fully. On the ring finger, paint the same red but skip the matte top coat and use a glossy top coat instead. If you want even sharper contrast, wipe the brush with a lint-free pad before painting the accent nail so it doesn’t pick up matte product. Finish by sealing the matte nails with a matte top coat and the accent nail with glossy only.
Press a little top coat extra at the tip on the glossy accent so it doesn’t dull from rubbing.
Don’t do matte on every nail if your nails chip easily — matte chips show edges.
8. Red satin chrome tips over sheer nude
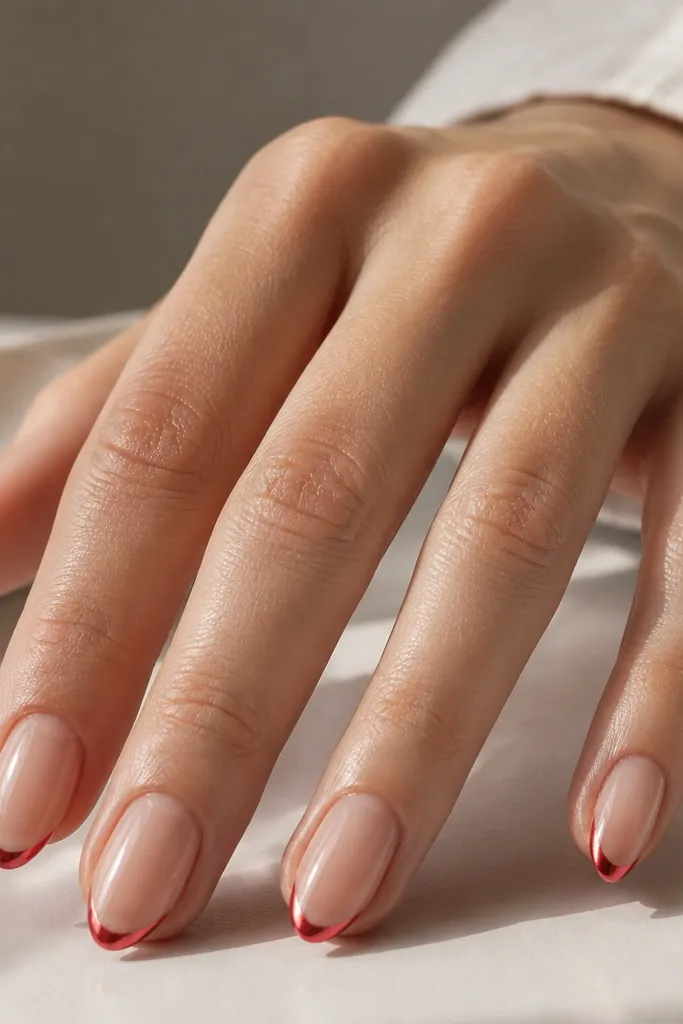
Chrome tips look chic on short almonds because they act like a highlight stripe. I keep it satin chrome (less mirror, more velvety glow) because pure mirror chrome shows every bump. The red chrome is usually a blue-leaning red so it looks cooler and more refined on photos. This flatters medium to deep skin especially, because the glow reads smooth against darker tones. The styling principle: keep the chrome area small so it doesn’t overwhelm short length.
Apply a sheer nude base and cure it fully. Paint the tip area with a thin layer of red gel polish or use a tacky layer gel if your chrome needs it. Apply red satin chrome powder carefully with a sponge or applicator, focusing only on the tip and staying within a narrow band. Dust off excess and seal with a top coat that’s compatible with chrome. Shape the tip line evenly by filing the edges lightly after curing.
Use a narrow piece of tape as a boundary if you struggle to keep chrome off the rest of the nail.
Skip full coverage chrome — on short almonds it makes the nail look too busy.
9. Red and white tiny dot constellation
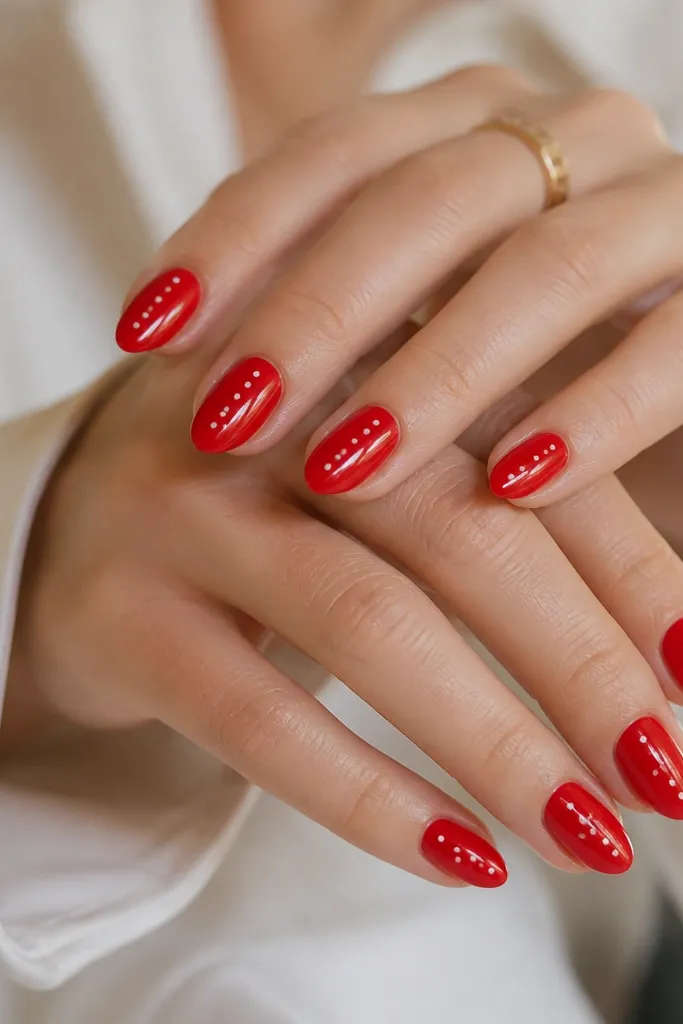
Tiny dots make red nails look playful without turning them into cartoon art. I place the dots slightly toward the center of the nail so the short almond point still looks sharp. Use a cool white (not creamy) so the dots pop against red. This works for fair, medium, and deep skin, and it’s great if you want something “cute” but still practical. The styling principle is spacing: dots should have breathing room so the nail still looks neat when you’re tired.
Paint nails with glossy red in two thin coats. After the second coat is tack-free, use a dotting tool or toothpick with a tiny amount of white polish. Place 3-6 dots per nail, keeping them clustered near the center and slightly above the midpoint. Let the dots dry, then seal with a glossy top coat, dragging gently over the dots to avoid lifting edges. Cure fully if you’re using gel.
Editor's noteDot sizes should match on each nail — I use the same tool tip and reload it the same way every time.
Skip thisDon’t overload dots — on short nails it turns messy fast.
10. Half-red nail with nude negative space
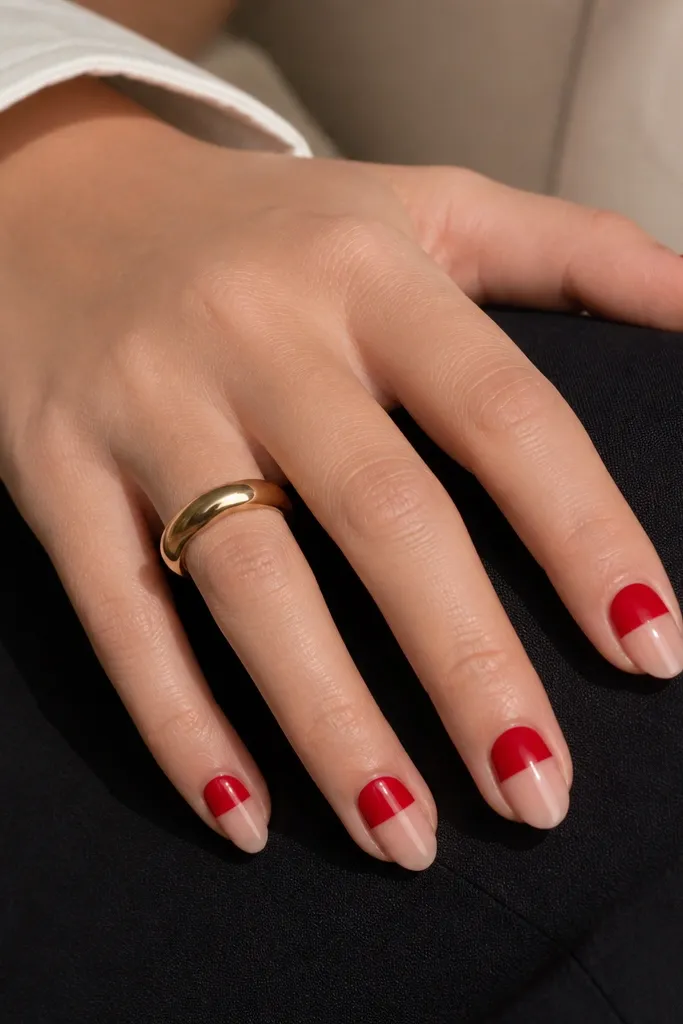
Negative space is what makes this look feel chic instead of childish. The crisp horizontal line splits the nail in a way that makes short almonds look designed, not accidental. I use a solid red with a smooth, opaque finish so the top half looks clean. This flatters almost everyone because it reduces visual clutter and makes the nail bed look longer. It also looks great on hands with shorter nail beds because the nude portion keeps things airy.
Apply a nude base and cure it until it’s fully set. Tape a straight guide line across each nail about one-third from the bottom, then paint the top area with glossy red. Remove the tape while the red is still slightly wet so the edge stays sharp. Let it dry completely, then apply top coat over the whole nail. If you see a faint line at the split, do a thin top coat pass only along that edge to level it.
Editor's noteUse nail tape, not painter’s tape — nail tape has a thinner edge that gives a cleaner line on short almonds.
Skip thisSkip messy edges — a wobbly split line screams “first attempt.”
11. Red micro flowers on a nude base (one accent nail style)
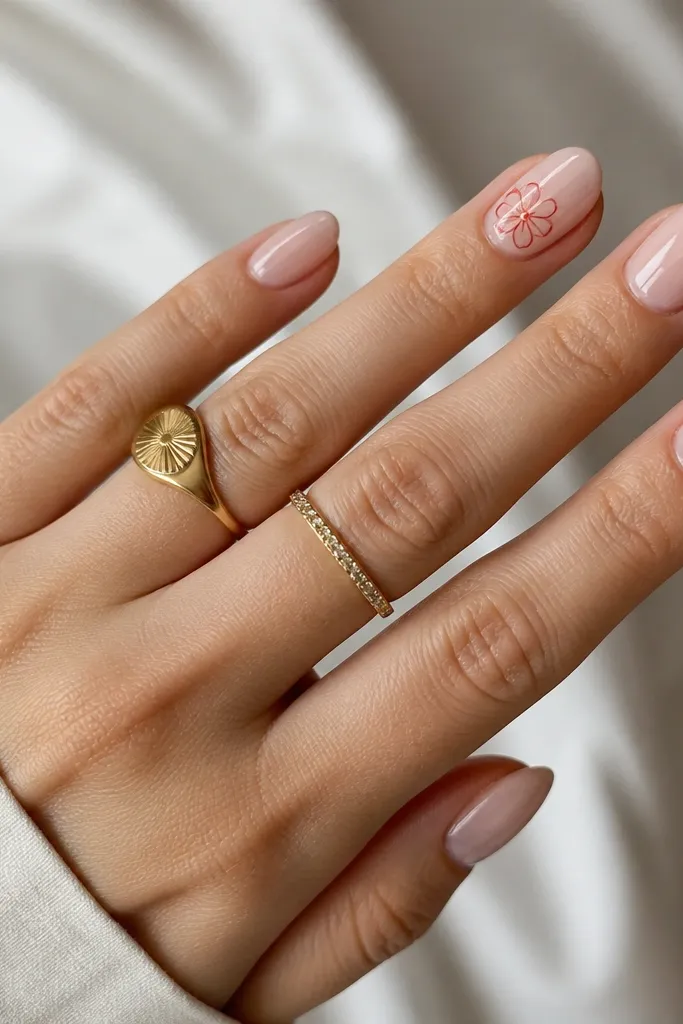
Micro flowers look delicate on short almond nails when you keep them small and place them near the center of the nail. I do this as an accent style because full floral coverage makes short nails look crowded. The red flower outlines should be slightly lighter than your base red so the design doesn’t blend into the nude. This flatters hands with dry cuticles because the nude base hides staining and looks clean as it grows out. The styling principle is restraint: one or two nails get detail, the others stay simple.
Start with a sheer nude base and two thin coats for an even glow. On the accent nail, use a fine liner brush to draw a simple flower outline: five petals and a tiny dot center. Add a second pass for thicker lines only if it looks faint. Let it dry, then seal with a glossy top coat and cap the tip. Keep the flower size about the width of a dime on your actual nail — small enough that it won’t snag on sleeves.
Editor's noteIf your flowers look shaky, draw them with gel liner on a sticky nail after curing the base.
Skip thisDon’t place flowers too close to the cuticle — regrowth makes them look uneven.
12. Glossy red with thin black line art on one side
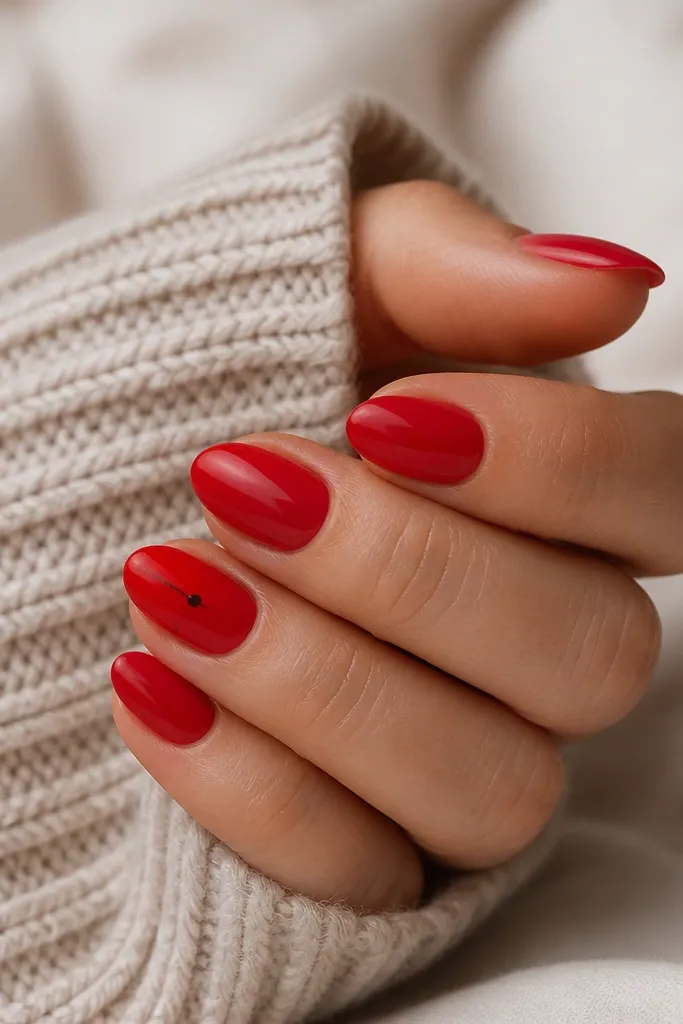
Thin black line art adds edge without making short almond nails look heavy. I like a single vertical line because it mimics length — your nail still stays short, but it reads longer in photos. The black should be true black, not charcoal, so it stays crisp against red. This flatters medium to deep skin with strong contrast, but it also works on fair skin when your red is cool-toned. The styling principle is one graphic element, placed to guide the eye.
Paint all nails glossy red with two thin coats. On the accent nail, use a striping brush to draw a thin line about 1-2 mm from the sidewall, running from just below the cuticle to near the tip. Add a tiny black dot at the midpoint and let it dry. Clean up any stray edges with a small brush dipped in remover. Finish with glossy top coat over everything, and cap the tip carefully so the line stays smooth.
Thin brushes matter here — if the line is too thick, it looks like a smudge on short nails.
Skip thick outlines — they turn line art into “sticker” vibes.
13. Red ombre with white edge highlight
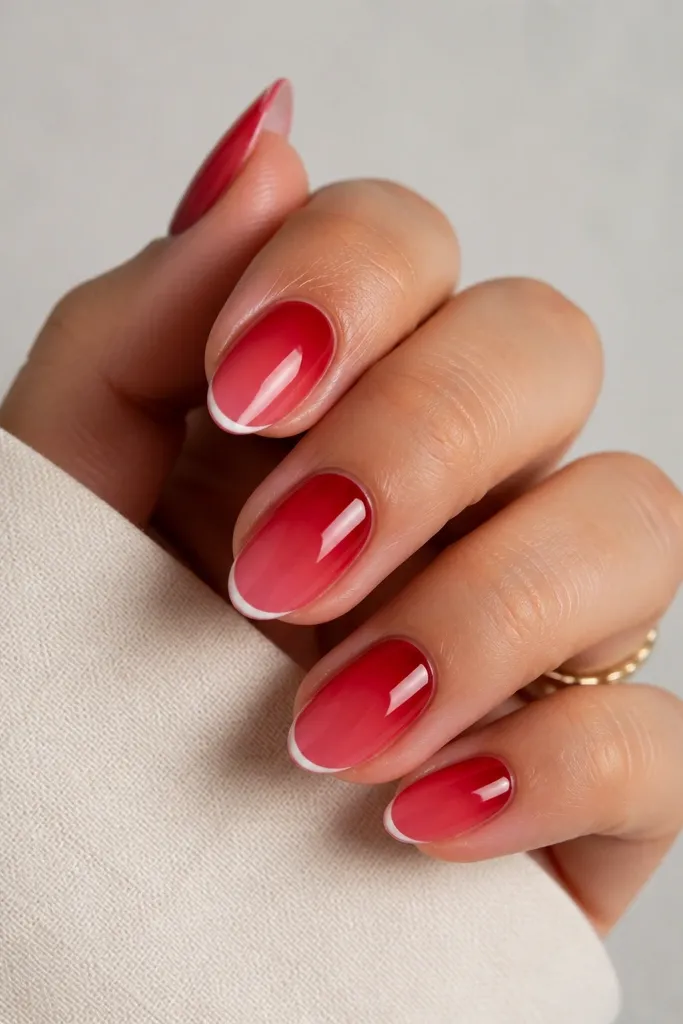
This one is for when you want the “fresh manicure” look even on short nails. The white edge highlight makes the tip look sharper and gives a subtle French effect without painting a full band. I use a medium red that fades into a lighter pink-red, then apply a micro white line right at the free edge. It flatters all skin tones, but it’s extra pretty on fair skin because the white stays bright and clean. The styling principle is layering: gradient for length, then a thin border for definition.
Apply a nude or sheer base first. Sponge on red ombre from cuticle area outward, keeping the darkest point near the cuticle and fading toward the tip. After it dries, use a fine liner brush to paint a micro white line along the very edge of the free tip. Keep the line thin and centered — if it spills onto the nail, it looks messy. Seal with glossy top coat and cap the tip so the white line doesn’t wear off first.
If your white line looks wobbly, do it twice thin instead of once thick.
Don’t make the white band wide — that’s when short nails look shorter.
14. Red twist marble with nude swirls
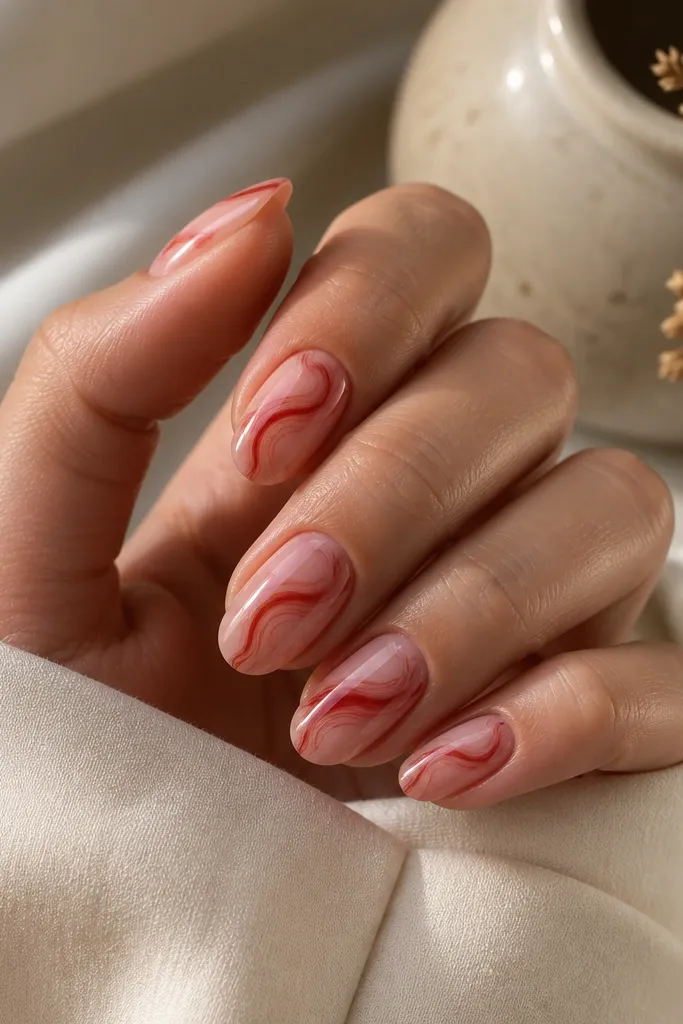
Marble works on short almond nails when the lines are thin and the base stays nude. I use a nude base with red gel marble lines, then swirl them in a twist so the pattern looks like movement instead of blobs. A deep red marble keeps it chic, while thin nude swirls keep it from looking heavy. This flatters hands with shorter nail beds because the nude portions keep the nail looking airy. It also looks great on medium to deep skin since the nude contrasts without being stark white. The styling principle is negative space inside the marble.
Start with a nude base and cure it until smooth. Add two thin coats of sheer red gel or a red-tinted base so the marble has a consistent background. Using a thin brush, drag red gel lines across the nail, then gently twist with the tip of the brush to create swirls. Don’t fill the whole nail — leave nude gaps so the marble looks airy. Cure and seal with a glossy top coat, capping the tip.
Work one nail at a time — marble dries fast and you’ll lose the swirl effect.
Skip thick marble blobs — on short almonds they look like paint spills.
15. Red gloss with tiny gold foil flakes at the cuticle
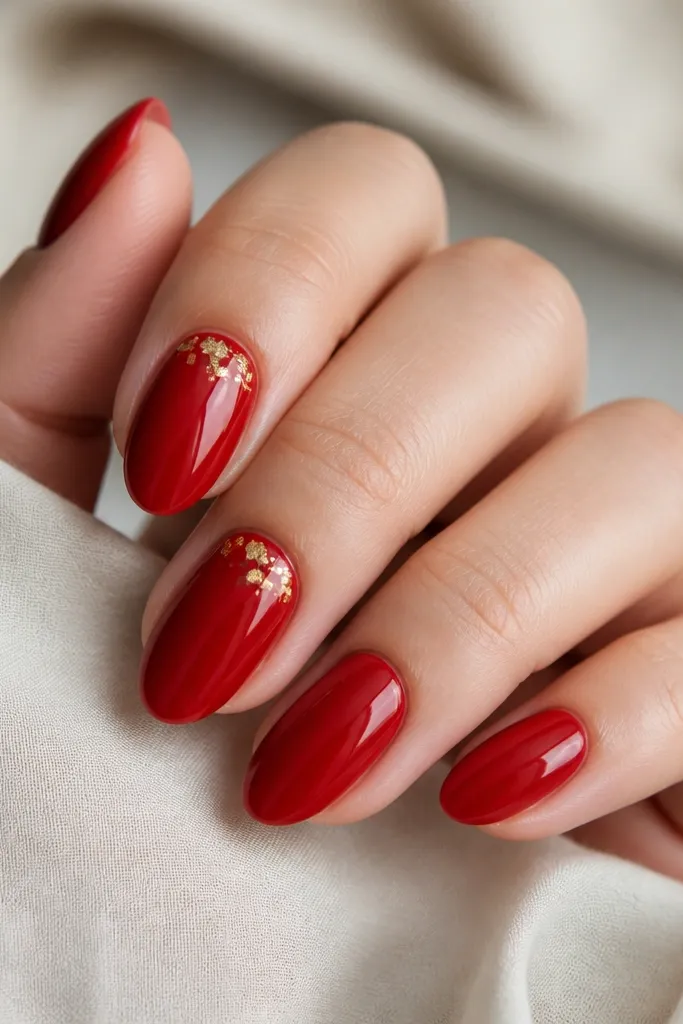
Gold foil at the cuticle looks expensive because it catches light right where your hand moves. I keep flakes tiny and sparse, placed near the cuticle on only one or two nails. The red needs to be glossy and smooth so the foil doesn’t look dusty. This flatters fair and medium skin because the gold warms the look, and it also flatters deep skin when the red is deep and not too bright. The styling principle is placement: concentrate the sparkle at the base and leave the rest clean.
Paint nails glossy red with two thin coats. On the accent nails, apply a small amount of clear tack gel or foil adhesive near the cuticle — about a half-moon size. Press tiny gold foil flakes onto the tack area using foil tweezers, then lightly pat so they stick without spreading. Remove any loose bits with a soft brush. Seal with a glossy top coat, using extra care at the foil edge so it stays smooth.
Editor's noteUse a soft makeup brush to clean foil dust before top coat — it prevents gritty texture.
Skip thisSkip big chunks of foil — they lift and snag on short nails.