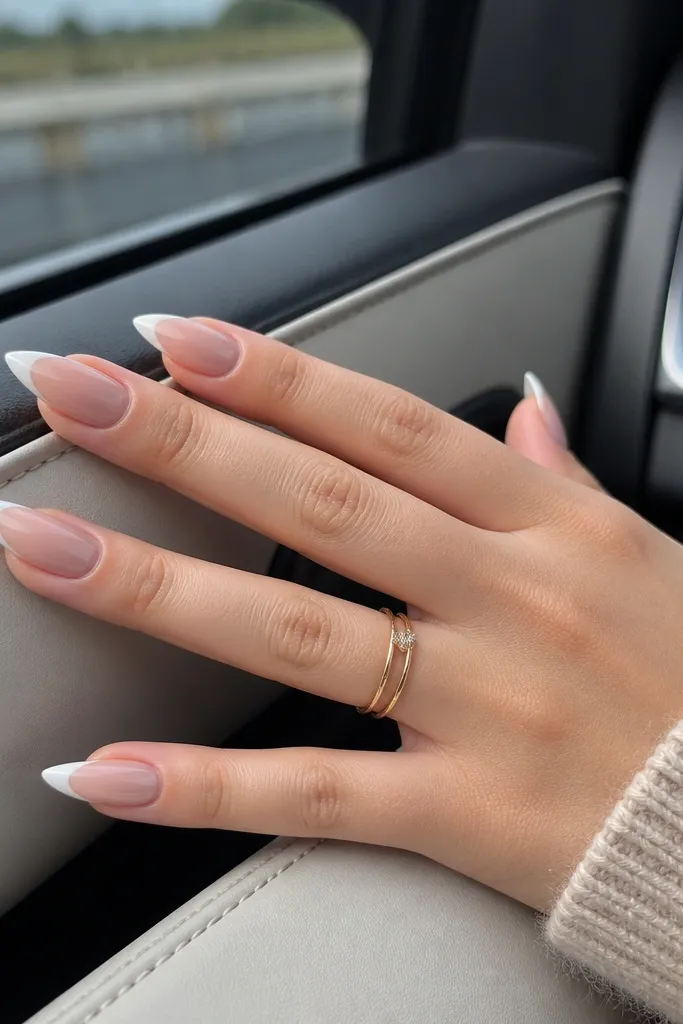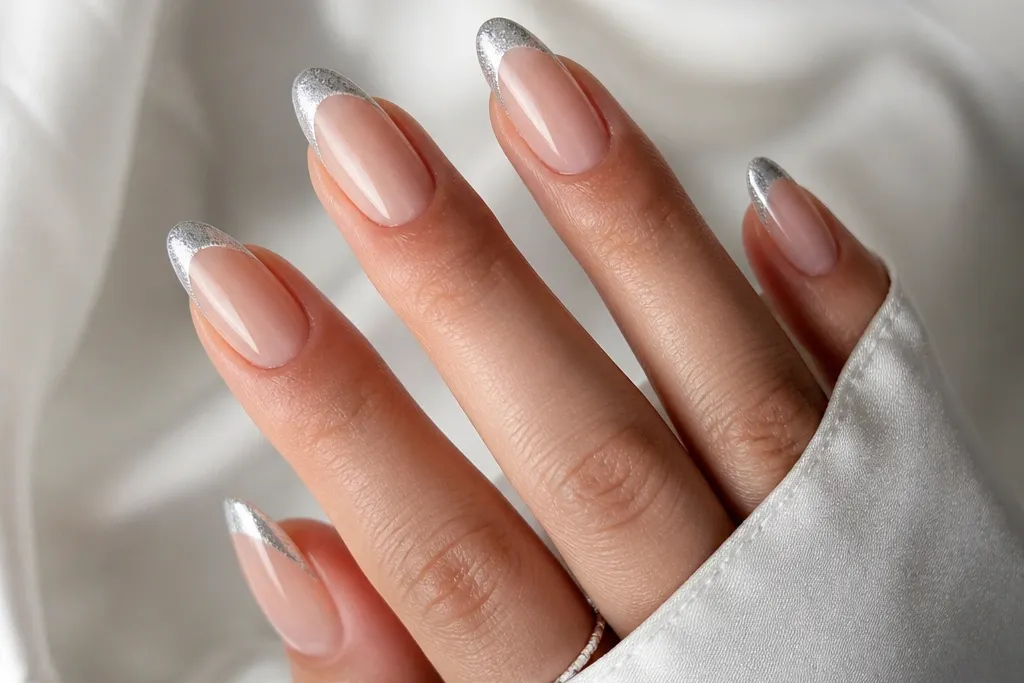
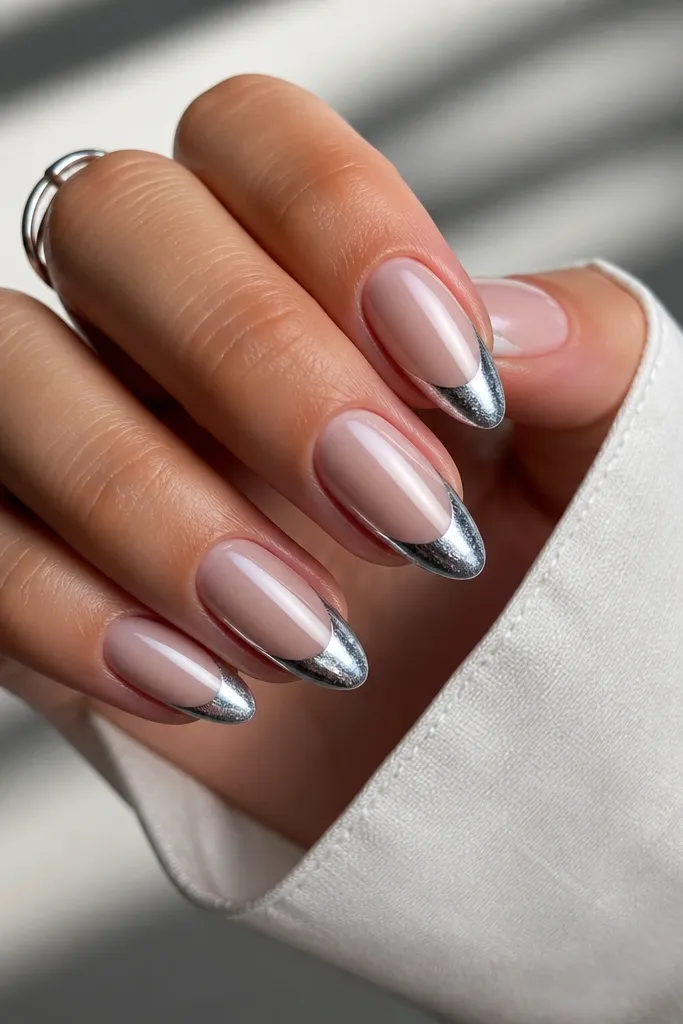
1. Chrome Silver Cat Eye French Tips with Clear Storage Case
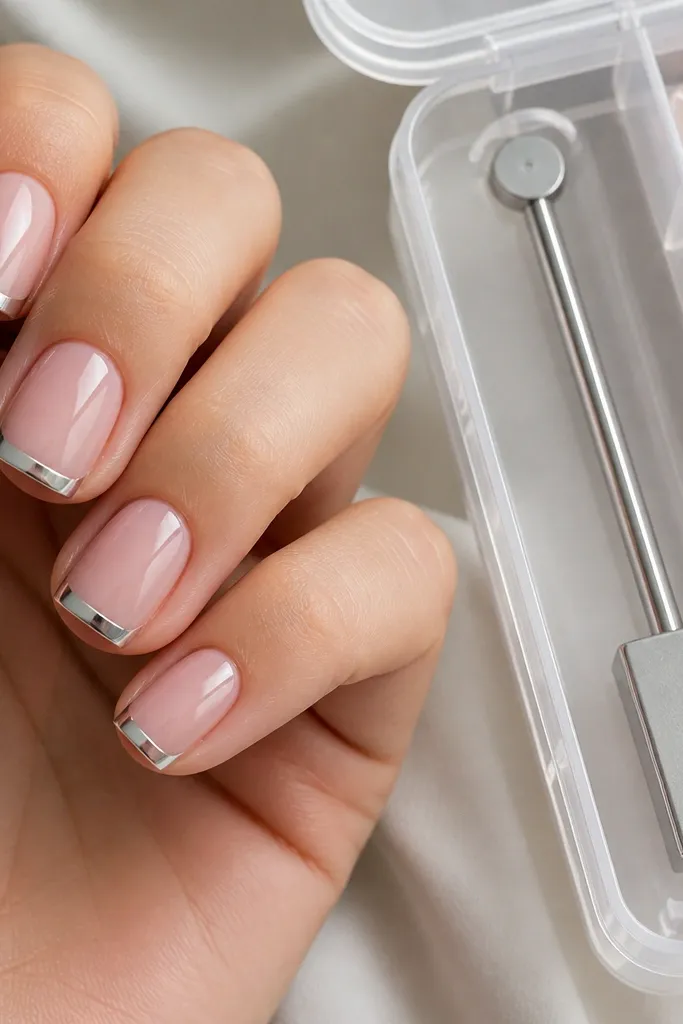
This one is for when you want the silver to look like real chrome, not glitter. The base is a sheer nude-pink that matches a warm to neutral skin tone, then the french line is painted thin so the magnetic streak stays straight. The cat-eye effect reads brightest under flash because the silver is smooth and highly reflective. Short square nails make the line look clean and intentional, especially if you keep the tip width around 1/6 of the nail.
Start by prepping and pushing back cuticles, then buff the nail lightly so the polish grabs. Apply two thin coats of nude-pink base, curing 30-60 seconds per coat. Paint only the tip zone with a thin layer of silver cat-eye polish, leaving a tiny gap at the side walls so the french edge stays sharp. Magnetize for 15 seconds at a 45-degree angle over the tip, then cure. Finish with one full top coat, cure, and cap the free edge with a second top coat sweep.
Editor's noteStore your magnet wand in the same clear case as your top coat so it never picks up dried polish dust from other bottles.
Skip thisDon’t paint the silver cat-eye too thick — it makes the center line spread and your french border looks soft.
2. Icy Silver Cat Eye French Tips on Blush Base
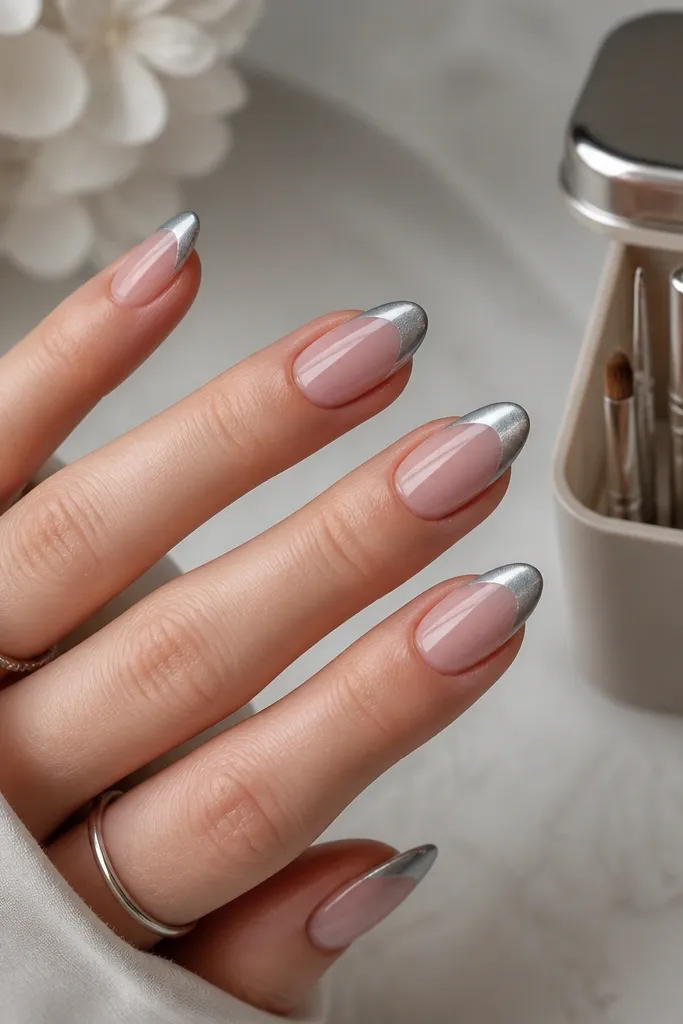
Icy silver looks expensive when the base is blush, because the cool shimmer doesn’t fight your skin’s undertone. This version uses a more pearly silver rather than mirror chrome, so the cat-eye line feels softer and more wearable. It flatters fair to light-medium skin tones and also looks great on hands with visible veins because the blush base balances the contrast. Almond shape helps the french tip curve naturally, which makes the magnetic line look like it follows your nail’s shape.
Begin with a blush base gel in two thin coats, curing fully between each layer. Use a french brush to paint a smooth arc at the tip — keep it about 2-3 mm from the cuticle line. Apply a thinner coat of icy silver cat-eye only inside the french zone, then magnetize for 10-12 seconds straight down the center. Cure, then add one more silver micro-coat only if the line looks too faint. Seal with a glossy top coat and cap the tip edges.
Editor's noteIf the magnetic line looks too faint, do a second thin silver coat instead of thickening the first.
Skip thisSkip heavy glitter top coats over the cat-eye line — they blur the magnetic detail.
3. Smoky Steel Silver Cat Eye French Tips for Short Nails
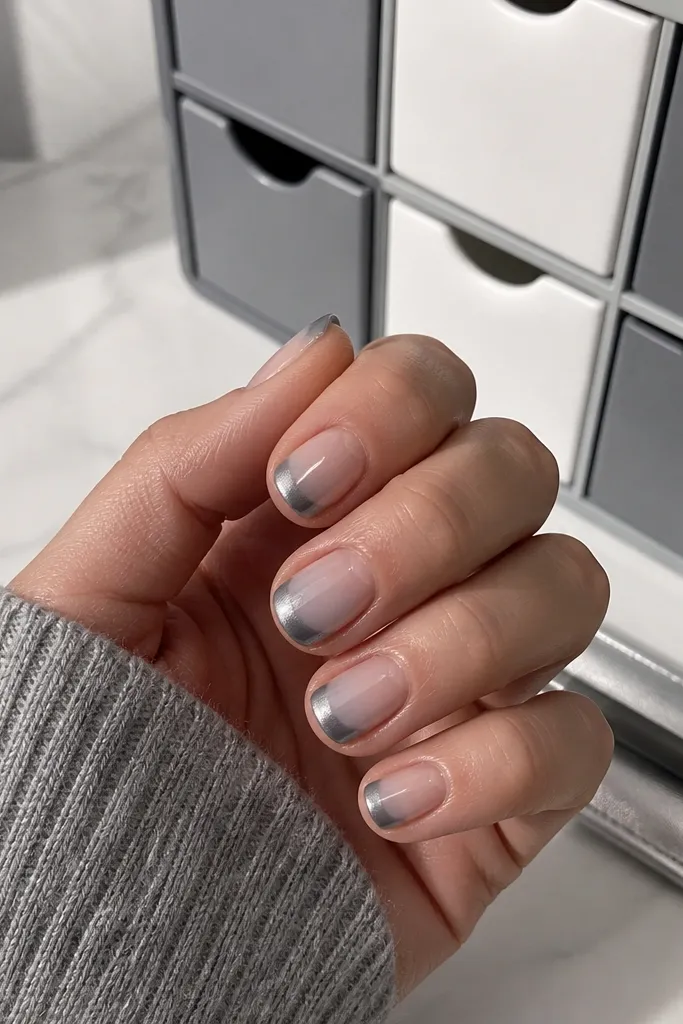
Smoky steel silver is my pick when you want the cat-eye to look dimensional instead of flat chrome. The base is a nude that’s slightly more beige, which keeps the steel tone from looking too cool on warm skin. Rounded short nails make this look practical for everyday wear, because the tips don’t need a long runway to look polished. The smoky edges hide tiny application imperfections, so your french line still looks neat even if you’re not perfectly steady.
Prep the nail and apply a beige nude base in two thin layers, curing each coat. Paint the french tip with a steel-gray silver cat-eye polish, but keep the layer thin and slightly blended at the outer corners. Magnetize for 18 seconds at a shallow 30-degree angle so the stripe has a soft glow around it. Cure and add a second ultra-thin coat only where the stripe needs more brightness. Finish with a high-gloss top coat and run the brush along the sidewalls to lock the edges down.
Editor's noteUse a quick wipe of the brush in acetone between nails so the french line stays clean, even with smoky polishes.
Skip thisDon’t skip sidewall sealing — that’s where short tips start lifting first.
4. Silver Cat Eye Micro-French Tips with Magnetic Storage Tray
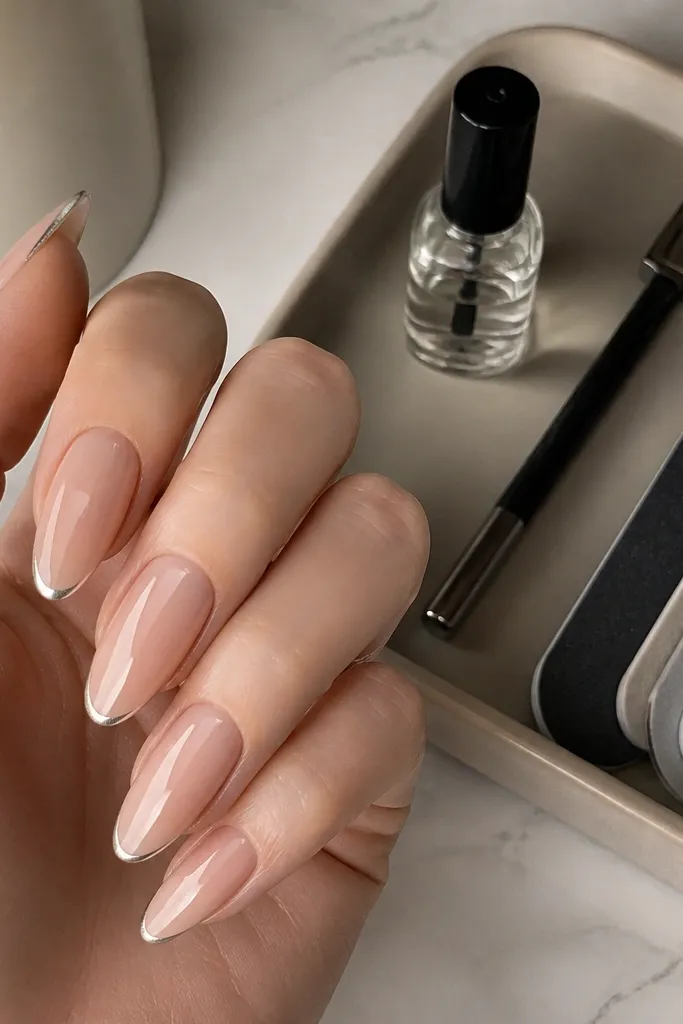
Micro-french makes silver cat-eye look modern because it keeps the focus on the magnetic stripe, not the tip area. The base is a barely-there nude, which makes the silver line pop without needing a wide border. This flatters most skin tones because the contrast is controlled, and long almond gives you space for a clean, centered stripe. If you’re new to cat-eye polish, micro-french is the easiest way to get a crisp look while you learn magnet timing.
Start with a sheer nude base gel and cure it in two thin coats. Use a fine liner brush to draw a micro-french arc at the tip — keep it narrow, about 1-2 mm wide. Apply silver cat-eye polish only on that micro zone, then magnetize for 12-15 seconds until you see the stripe brighten. Cure and add a second thin pass if the stripe doesn’t reach the full tip length. Top coat in two directions: brush from cuticle to tip, then again along the tip edge to smooth the surface.
Editor's noteWipe the magnet wand with a lint-free pad before each set so the stripe stays razor clean.
Skip thisAvoid drawing a thick french band — micro-french disappears if the tip is too wide.
5. Two-Tone Nude to White Gradient with Silver Cat Eye French
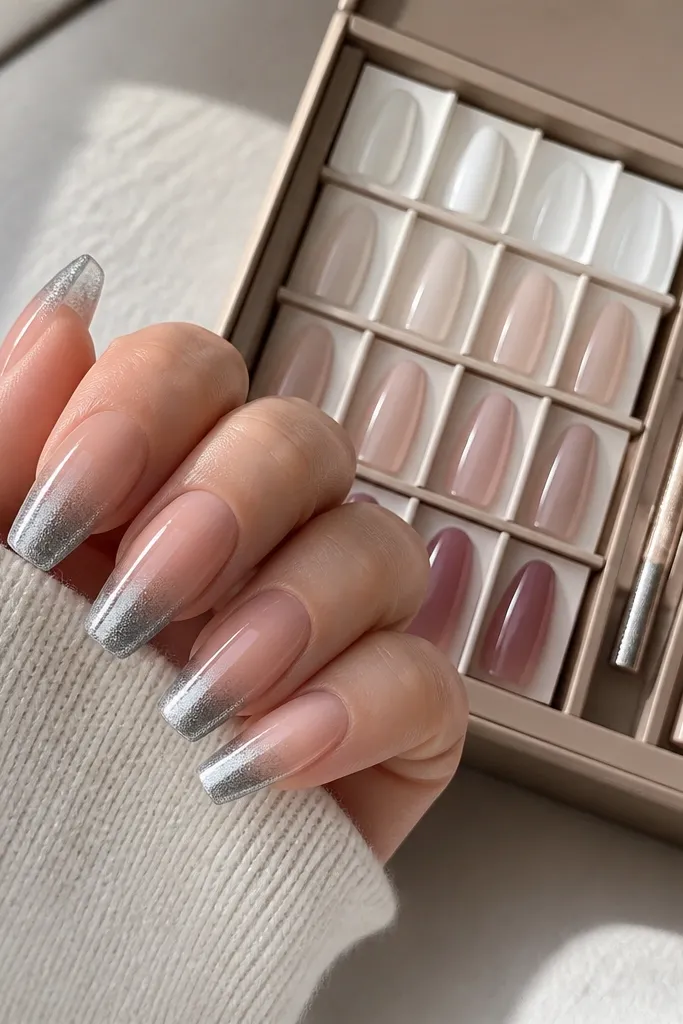
This look is for people who want french tips that don’t look flat. The nude-to-white gradient gives the silver cat-eye a “highlight” underneath, so the magnet stripe looks brighter and more dimensional. I like it on medium coffin because the gradient follows the natural coffin taper, and the silver cap stays crisp at the very edge. It flatters light to medium skin tones because the nude-white transition is gentle and doesn’t overpower your hand.
Apply a nude base in one thin coat, cure, then add a second coat for even coverage. Sponge on a nude-to-white transition near the tip using a tiny makeup sponge, blending about 2-3 mm upward. Let it set tack-free (or cure if your gel system allows), then paint a thin silver cat-eye french cap on top of the transition. Magnetize for 15-20 seconds, keeping the wand centered over the nail. Cure and finish with a glossy top coat, then cap the free edge to prevent gradient lift.
Editor's noteBlend the gradient with a damp sponge — dry sponging leaves specks that show under chrome silver.
Skip thisDon’t magnetize too long — smoky spreading makes the stripe bleed into the gradient.
6. Pearl Nude Base with Silver Cat Eye French and Top Coat Gel Shine
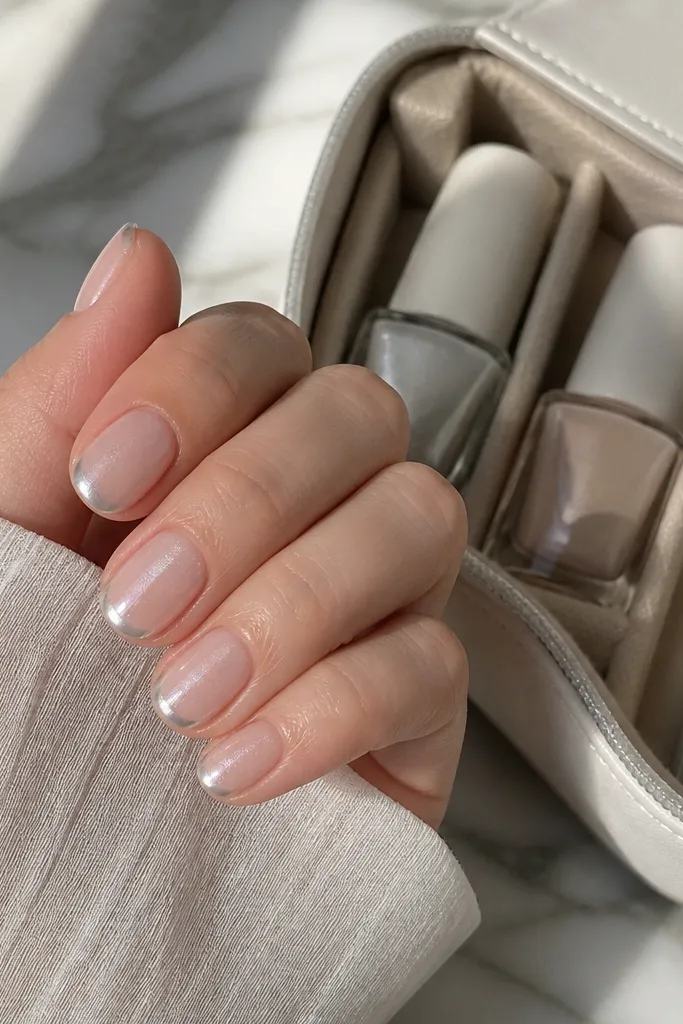
Pearl nude under silver cat-eye makes the whole set look like it’s lit from within. The base has micro-pearl reflect that softens the contrast, so the french tips look sleek instead of harsh. This is flattering on hands with dry cuticles because the pearl finish visually smooths the look. Oval short nails keep it classy, and the glassy top coat makes the cat-eye stripe look like it’s under a lens.
Start with a pearl nude base gel in two thin coats, curing thoroughly. Paint the french tips with silver cat-eye polish in a thin layer, and keep the edge straight using a french guide strip if you need it. Magnetize for 14 seconds with the wand hovering close to the nail surface, then cure. Apply a thick, self-leveling glossy top coat, cure again, and wipe off any tackiness. Finish by gently buffing the top coat shine only if you see bumps, then add a final thin top coat.
Editor's noteUse a self-leveling top coat for this one — it hides brush lines and makes the stripe look smooth.
Skip thisDon’t use a matte top coat — it kills the cat-eye effect and makes silver look flat.
7. Silver Cat Eye French Tips with Thin Rose Gold Outline
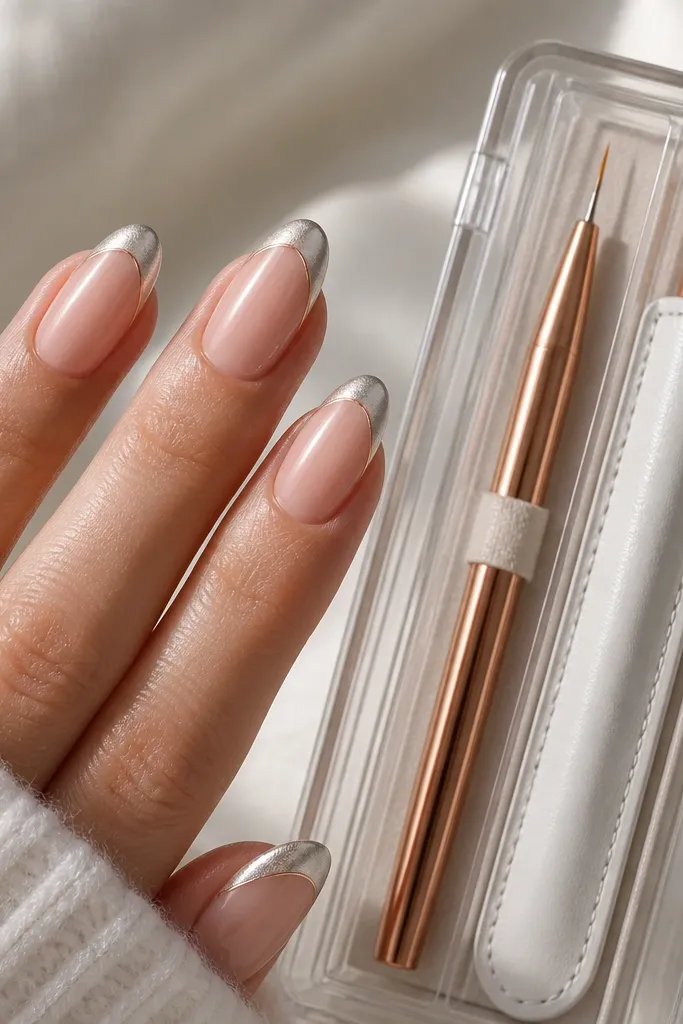
Adding a thin rose gold outline makes the silver look sharper and gives you a custom “jewelry” edge. The cat-eye stripe stays silver, but the outline adds warmth that flatters both cool and warm skin tones. This is a great set for events because the outline catches light even when the cat-eye stripe isn’t facing the camera. Medium almond is the sweet spot because the outline follows the curve without getting chunky.
Paint the nude base in two thin coats and cure. Apply silver cat-eye polish to the french zone in a thin layer, then magnetize for 15 seconds and cure. Use a fine liner brush to draw a single rose gold line right along the silver outer edge — keep it 0.5-1 mm thick. Cure the rose gold line, then seal with top coat in two passes: one full coat and one focused on the tip edge. If the outline is raised, do a very light top coat leveling pass.
Editor's noteUse a gel rose gold liner, not a striping lacquer — gel levels smoother and stays glossy for weeks.
Skip thisAvoid thick rose gold — it turns the french into a border sticker and looks messy.
8. Dark Nude Base Silver Cat Eye French Tips for Contrast
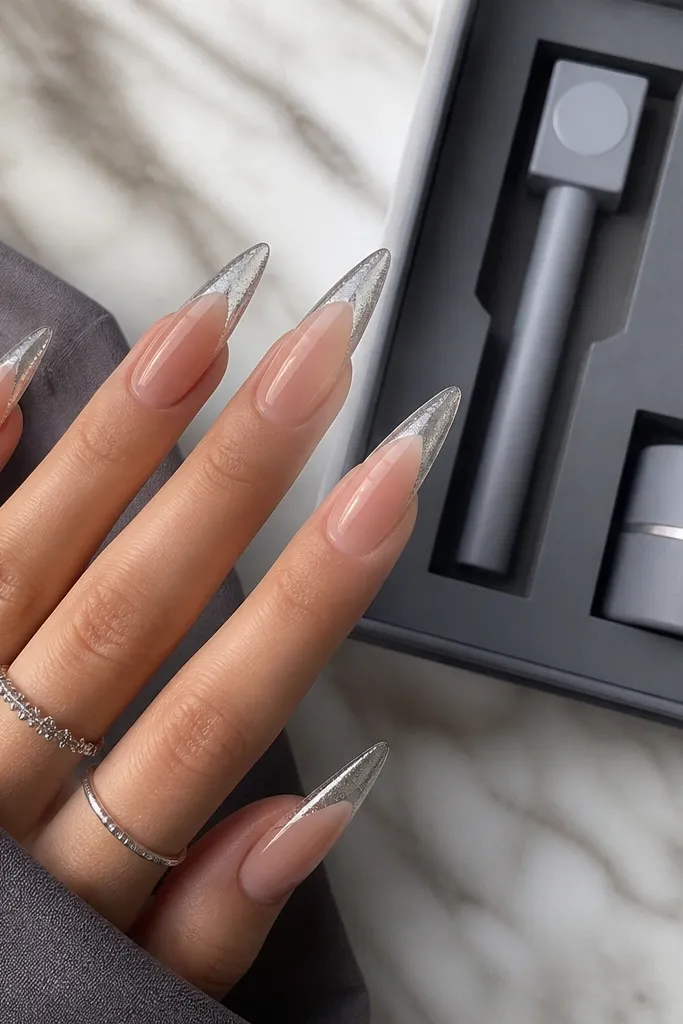
Dark nude base plus silver cat-eye is the quickest way to make the stripe look dramatic without extra art. The base is a mauve-taupe nude that shows up clearly on medium to deep skin tones, so the silver doesn’t turn dull. The french tip area becomes the focal point, and stiletto shape keeps the look sharp and fashion-forward. When you magnetize correctly, the cat-eye stripe looks like a vertical beam.
Apply a dark nude gel base in two thin coats, curing each coat completely. Paint a clean french tip with silver cat-eye polish — keep the layer thin and the tip line even. Magnetize for 10-12 seconds, holding the wand steady so the stripe doesn’t shift. Cure and check both sides of the tip for an even stripe width. Finish with a glossy top coat and cap the free edge twice to stop stiletto tips from chipping at the point.
Editor's noteIf your stripe looks too wide, use a narrower french brush and keep the silver coat thinner.
Skip thisDon’t drag the silver brush back over cured edges — it causes ridges that catch light badly.
9. French Half-Moon Extension with Silver Cat Eye Center Stripe
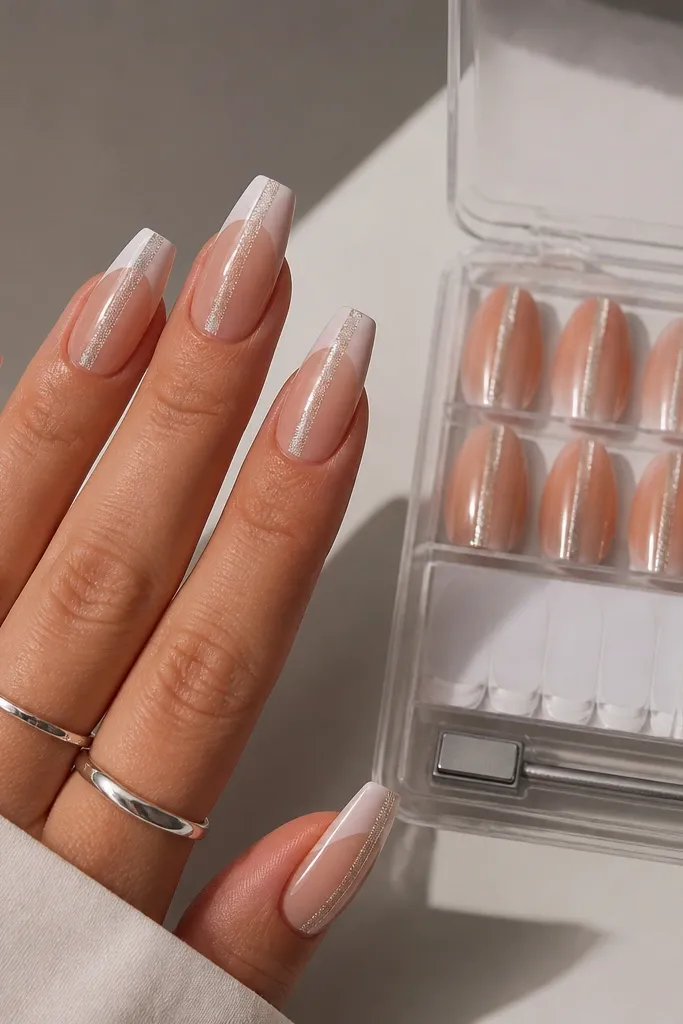
This is a french tip that feels different because the silver sits like a curved cap rather than a straight band. The half-moon extension makes the cat-eye stripe look like it’s coming from the nail’s center, which is super flattering on coffin shapes. I use it when I want the set to look custom even if I’m doing it at home. It looks great on most skin tones because the base is nude and the silver is the only strong color.
Start with nude base gel in two thin coats and cure. Use a half-moon french guide (or tape) to outline the silver cap shape at the tip. Apply a thin coat of silver cat-eye polish inside the cap, leaving the outer edges clean. Magnetize for 16 seconds directly over the center of the nail, then cure. Seal with top coat and pay attention to the curved edge so it doesn’t lift — cap the edge with a careful brush stroke.
Editor's noteUse a guide strip — freehand half-moon french looks uneven if you’re rushing.
Skip thisDon’t overfill the cap edge — excess polish makes the stripe look lopsided.
10. Silver Cat Eye French Tips with Micro Glitter Fade on the Sides
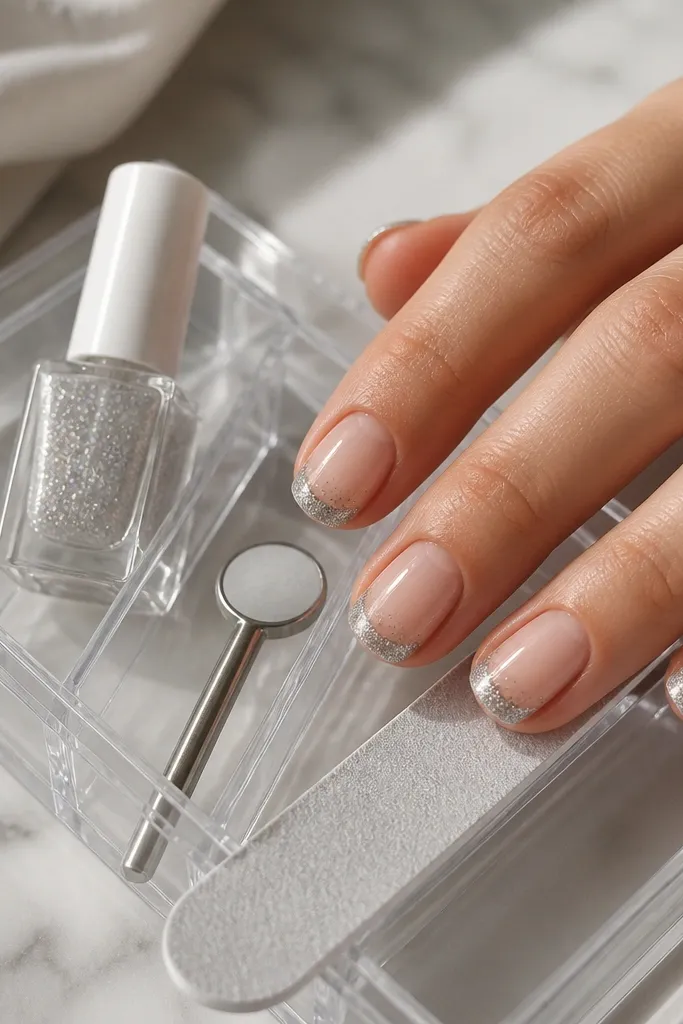
This version keeps the cat-eye stripe crisp but adds sparkle where your eyes naturally look — the sides. The micro glitter fade makes the set feel celebratory without turning it into full glitter overload. I like it on short square because the flat top makes the glitter pattern easy to control and doesn’t smear as much as on curved shapes. It flatters medium and deep skin tones especially well because the glitter catches warm light.
Apply nude base in two thin coats and cure. Paint a thin silver cat-eye french tip across the center line, then magnetize for 14 seconds. Before curing fully (or right after, depending on your system), add micro glitter only on the outer side edges of the french, keeping the center stripe untouched. Cure, then top coat carefully so the glitter is sealed but the center stripe stays sharp. Cap the free edge and clean up any glitter that creeps onto the skin with a small brush dipped in remover.
Use a tiny fan brush to place glitter — it gives you control over the fade instead of dumping it on the tip.
Avoid glitter right under the magnet stripe — it turns the cat-eye into a textured blur.
11. Silver Cat Eye French Tips with Matte Nude Base and Glossy Silver
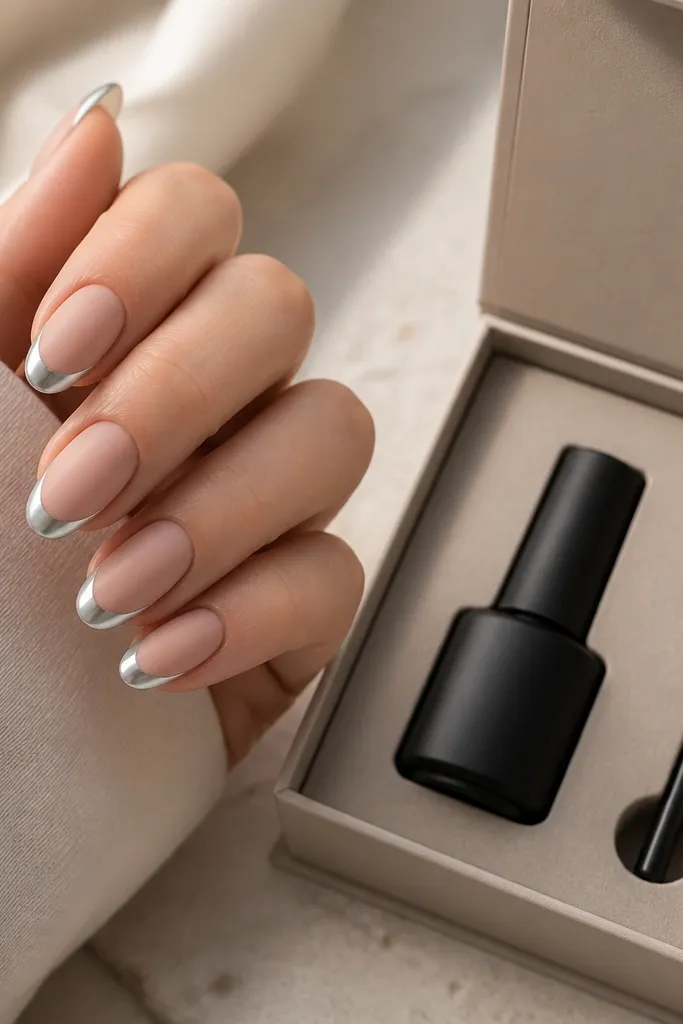
Matte nude under glossy silver makes the cat-eye stripe look like it’s floating. The contrast is the whole point: your eye reads the stripe first, then the matte base gives it a soft, modern feel. This works well on hands that get shiny fast, because the matte keeps the set from looking greasy. It flatters light-medium skin tones and looks especially good for day-to-night outfits because it doesn’t require extra jewelry.
Paint nude base gel in two thin coats and cure. Apply matte top coat over the entire nail (including the base) and cure it. Paint your silver cat-eye french tips on top of the matte — keep the silver layer thin and smooth. Magnetize for 12-18 seconds, cure, then apply glossy top coat only over the silver tip area, not the matte base. Clean the edges with a brush and remover so the matte-gloss line stays crisp.
Editor's noteIf your silver looks dull on matte, do a second thin silver coat and magnetize again for 10 seconds.
Skip thisDon’t put glossy top coat over the whole nail — it removes the matte contrast.
12. Silver Cat Eye French Tips with Pearl Drop Accent at the Cuticle
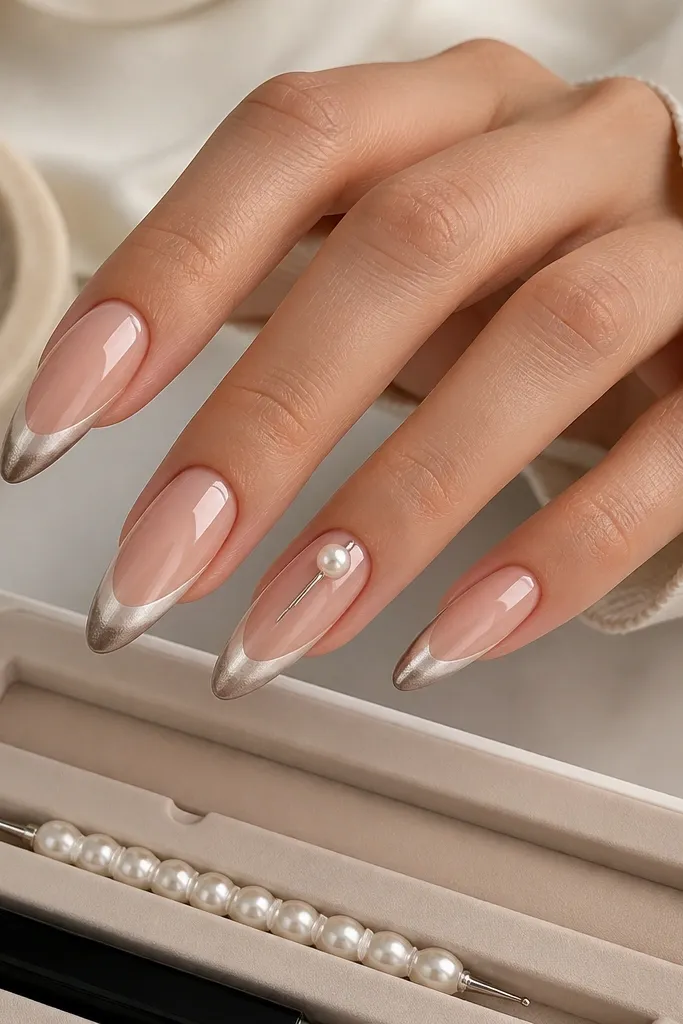
This is the sweet spot between minimal and cute. The pearl drop near the cuticle pulls attention upward and makes the silver tips feel intentional, not plain. I use it when I want the set to look “done” for birthdays or photos, but I still want the french line to be the main design. It flatters most skin tones because the pearl matches any nude base, and the long almond shape spreads the pearl without looking crowded.
Start with nude base in two thin coats and cure. Paint silver cat-eye french tips in a thin, even layer and magnetize for 15 seconds, then cure. On the ring finger only, place a tiny pearl drop accent using gel and a dotting tool — keep it about 1-2 mm away from the cuticle line so it doesn’t flood. Cure the pearl setting gel, then top coat over everything. Seal the tip edges with extra top coat so the french border stays smooth.
Editor's noteUse a dotting tool with a flat tip so the pearl sits level instead of rolling.
Skip thisDon’t place the pearl too close to the cuticle — it lifts faster there.
13. Silver Cat Eye French Tips with Side-Swept Stripe Angle
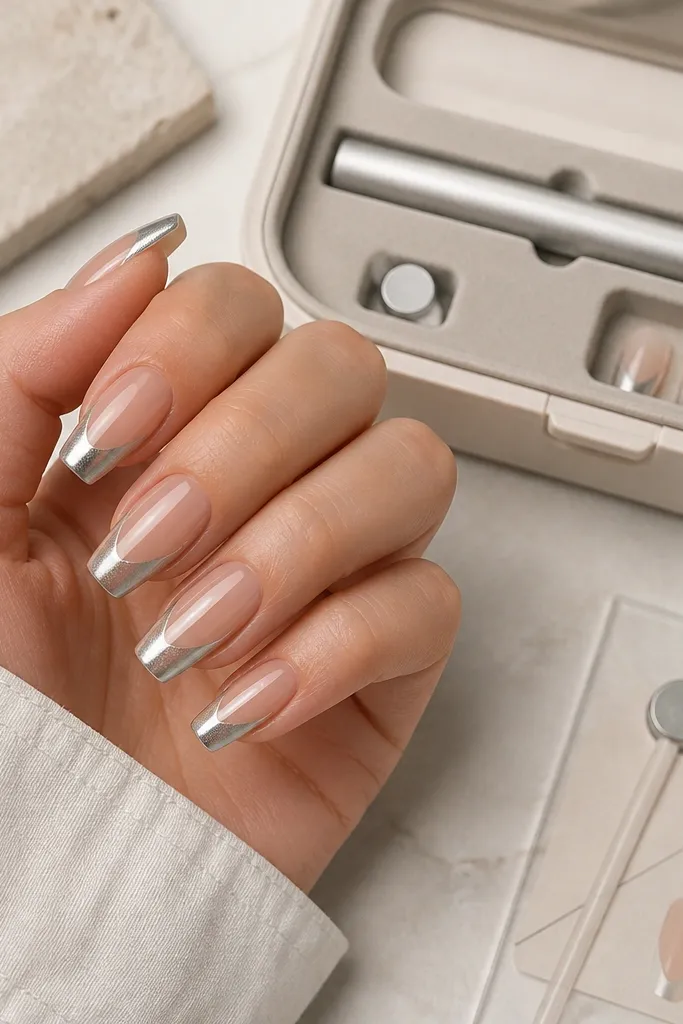
This version changes the vibe by angling the cat-eye stripe instead of keeping it perfectly vertical. The diagonal beam looks sleek and editorial, and it adds motion even on short outfits. It flatters hands with longer nail beds because the diagonal stripe elongates the look. I like it most on medium coffin because the shape already has a natural tilt, so the stripe looks like it belongs.
Apply nude base gel in two thin coats and cure. Paint your silver cat-eye french tips in a thin layer, then magnetize using the wand at a 60-degree angle so the stripe pulls diagonally. Hold the wand steady for 18 seconds, then cure. If the stripe is too faint, add a second thin silver coat on the tip only and magnetize again for 10 seconds. Seal with glossy top coat and run the brush along the french edge to keep the border crisp.
Editor's notePractice the wand angle on one nail first — the diagonal effect comes from your magnet position, not the polish.
Skip thisAvoid moving the magnet while curing starts — it warps the stripe and makes it look accidental.
14. Silver Cat Eye French Tips with Storage-Friendly Brush-On Gel Base
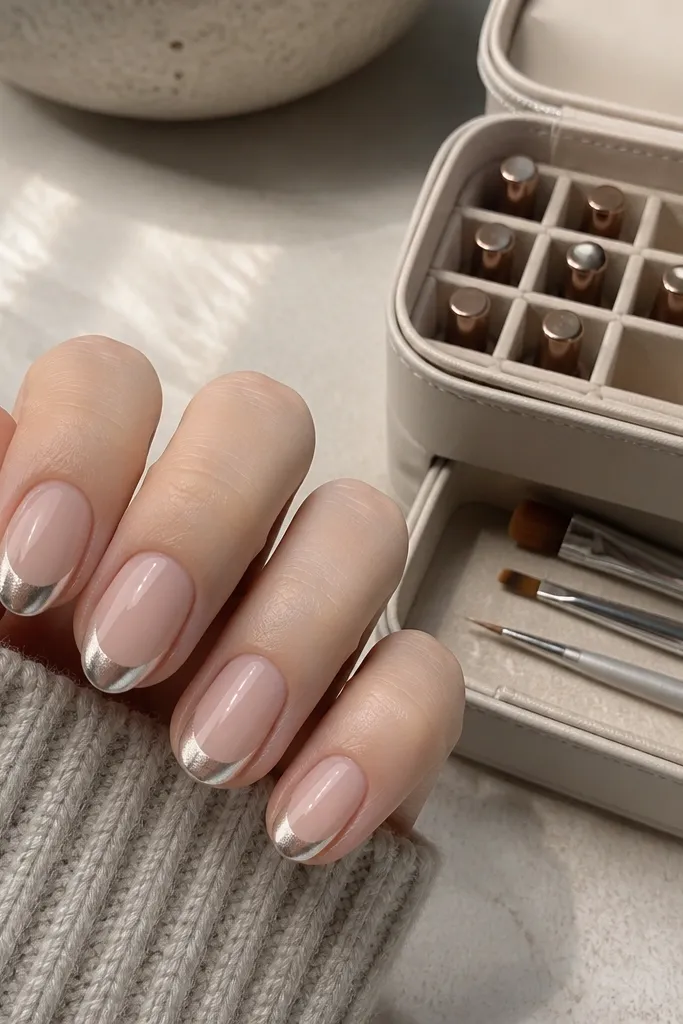
This one is built for people who hate messy bottles. The base uses a brush-on gel that spreads evenly, so you get a uniform nude layer under the silver cat-eye french tip. That matters because cat-eye polish shows every ridge — a bumpy base makes the stripe look uneven. The result is crisp, sleek french contrast that looks good on short oval nails and works for everyday wear. It flatters a wide range of skin tones because the nude base is the neutral, not the star.
Start by applying the brush-on nude gel base in one smooth coat, cure, then add a second thin coat for opacity. Paint silver cat-eye french tips with a steady hand, keeping the polish thin at the sides. Magnetize for 14-16 seconds while the polish is still tacky, then cure. Add one more thin silver pass only if the stripe needs more brightness near the tip edge. Finish with a glossy top coat, cure, and cap both the free edge and the side edges.
Editor's noteWipe your brush gel cap every time you close it — dried gel around the rim makes the next coat streak.
Skip thisDon’t skip a second base coat — thin base makes the silver look patchy.
15. Silver Cat Eye French Tips with Storage Case for Reuseable Nail Guides
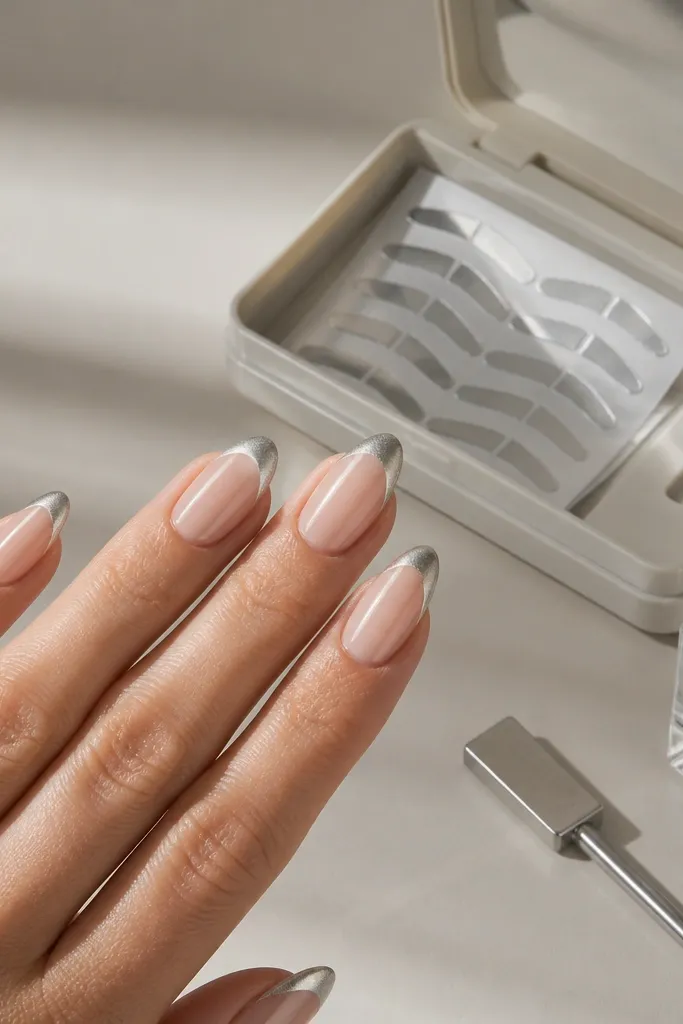
When your french border is even, the cat-eye stripe looks intentional, not accidental. This look uses reusable nail guides so the tip line stays consistent nail-to-nail, which is the whole reason it looks salon-clean. The silver cat-eye is mirror-bright, so the stripe pops under daylight and flash. Almond shape gives you a smooth curve that matches the guide, and the nude base makes it flattering for both casual and dressy settings.
Prep nails and apply nude base gel in two thin coats, curing each. Place the reusable nail guides so the french line has the same height on every nail. Paint silver cat-eye polish inside the guide area with a thin layer — don’t overload or the stripe spreads. Magnetize for 15 seconds centered over the tip, then cure. Pull the guides off carefully, then top coat the full nail and cap the free edge.
Editor's noteStore the guides flat in the case — bent guides create uneven tips the next time you use them.
Skip thisAvoid freehanding the french border when you’re aiming for a mirrored look — uneven lines make the set look homemade.