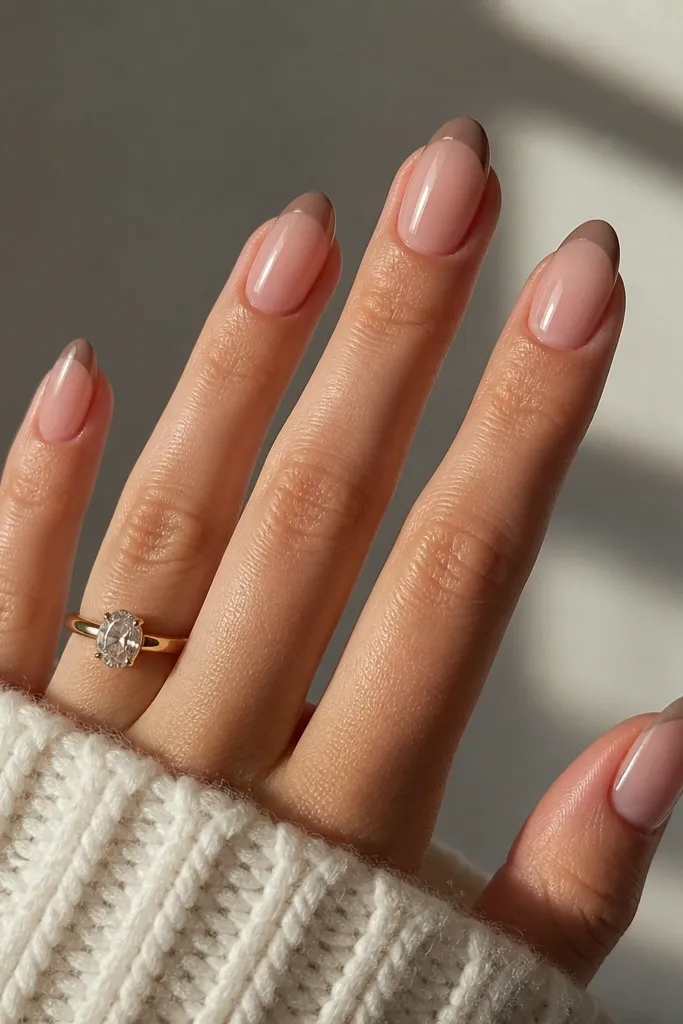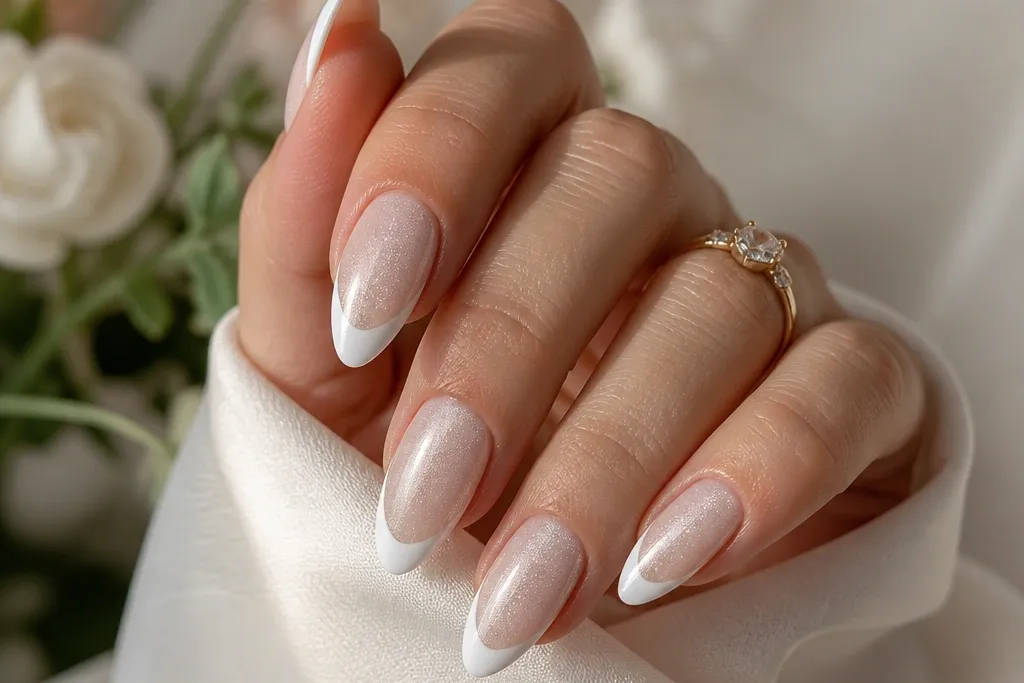
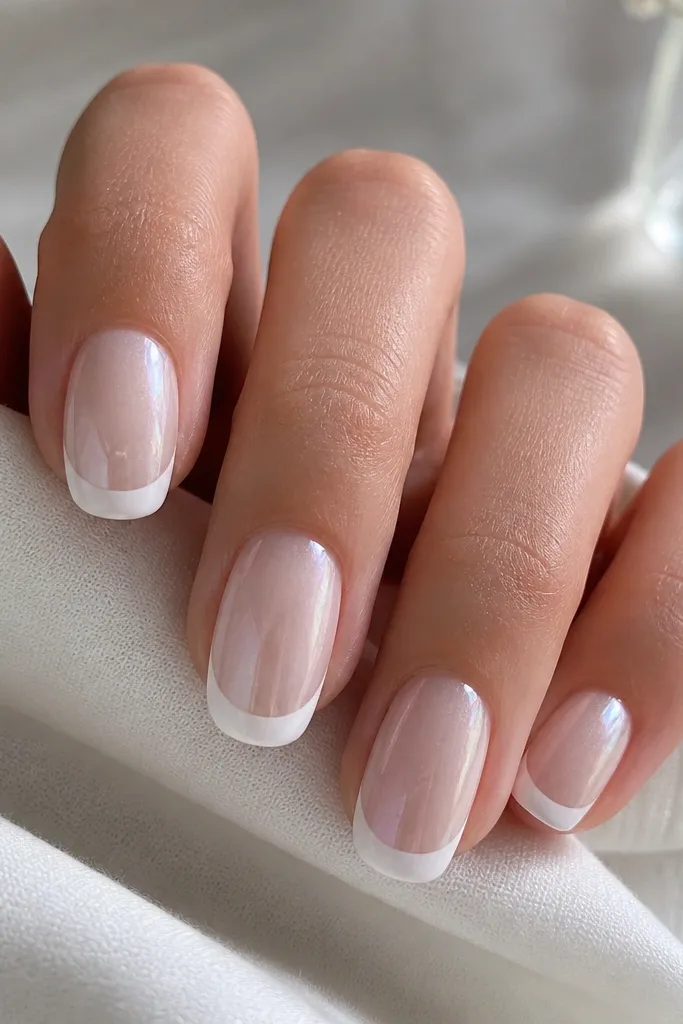
1. Pearl White Tip with Side-Drag Cat Eye Glow
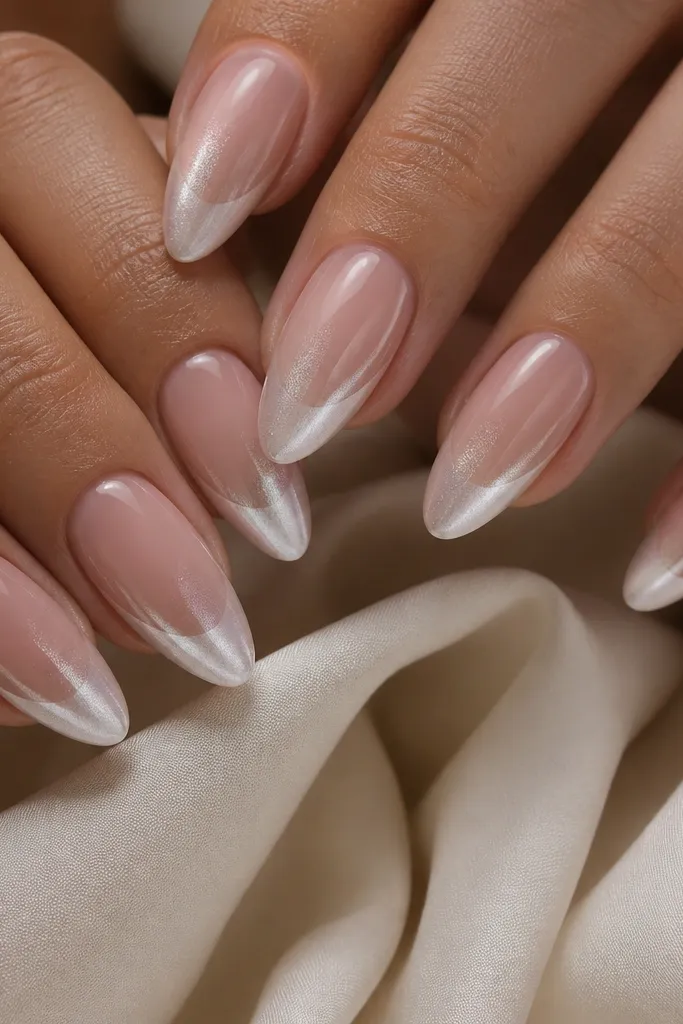
This one is the cleanest “cat eye french” version I’ve worn to work without getting comments. The base is a sheer nude gel (not opaque pink) so your nail bed still shows through, and the white tip stays bright but not blinding. The cat eye stripe sits just inside the tip, pulled diagonally so the light travels across the nail instead of sitting in one spot. It flatters almost every skin tone because the nude base neutralizes the white and the glow reads like pearl on top. For hands with shorter nail beds, the sheer base makes your fingers look longer.
Start by prepping the nails and pushing cuticles back, then buff the shine down lightly so gel grips. Paint a sheer nude base, cure it, then add a white french tip that’s about 2 mm wide at the center. Cure the white tip fully. Apply a thin coat of silver cat eye gel only on the inner edge of the tip — leave a clean line of white at the very outer edge — then hold a magnet from the side for the diagonal pull and cure. Finish with a glossy top coat in two thin layers, curing each one.
Editor's noteMagnet pull time is short — watch the stripe form, then stop and cure. If you over-magnet, the stripe widens and looks cloudy.
Skip thisDon’t cover the whole tip in cat eye gel — you’ll lose the crisp french edge and it turns into a cloudy ombre.
2. Chalk-White French with Jet-Black Cat Eye Line
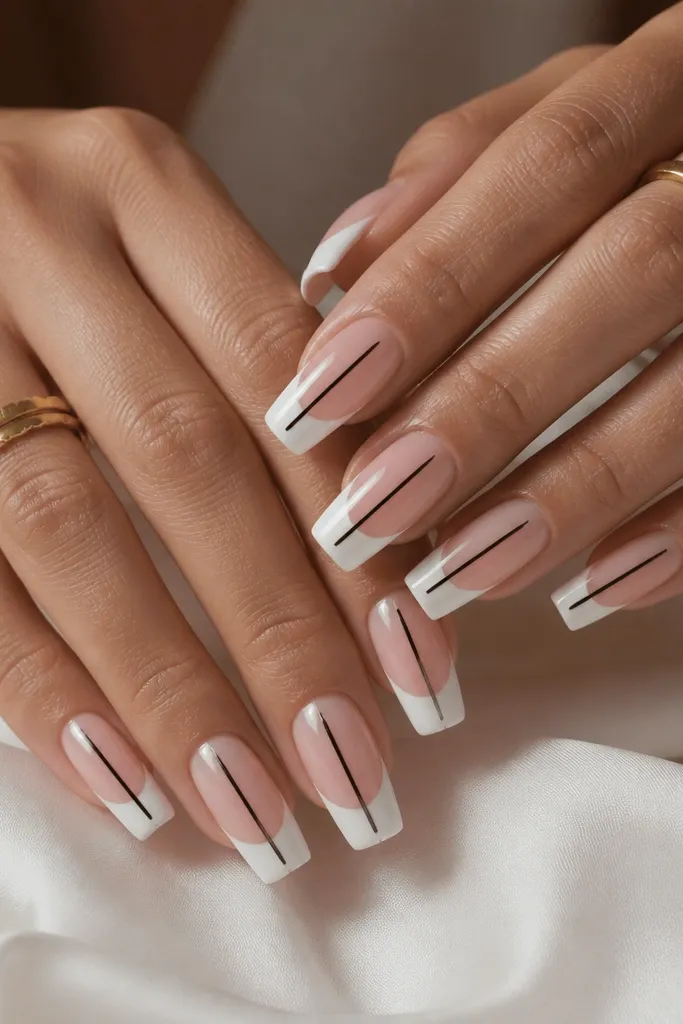
This is the “clean but edgy” option. The white looks crisp, almost like porcelain, and the black cat eye line gives you that high-contrast look that reads well in indoor lighting. I love it on medium to deeper skin tones because the black stripe makes the white look brighter, not gray. If you have thin nail beds, the vertical stripe creates a longer visual path. For events where you’ll be in photos, the black glow catches flash and looks expensive.
Apply a sheer nude base and cure. Use a french guide to paint a clean chalky white tip, then cure. Avoid thick white — you want smooth coverage without ridges. Add a very thin layer of black cat eye gel only where you want the stripe, keeping it centered so the line stays straight. Magnet from directly above for a tighter vertical pull, cure immediately, then top coat twice for a glassy seal.
Keep the black stripe narrow — aim for about 1 mm width. Narrow lines look intentional; wide lines look like a mistake.
Skip matte top coat — matte over white makes the cat eye look dusty instead of luminous.
3. White Micro-French with Blush Cat Eye Ribbon
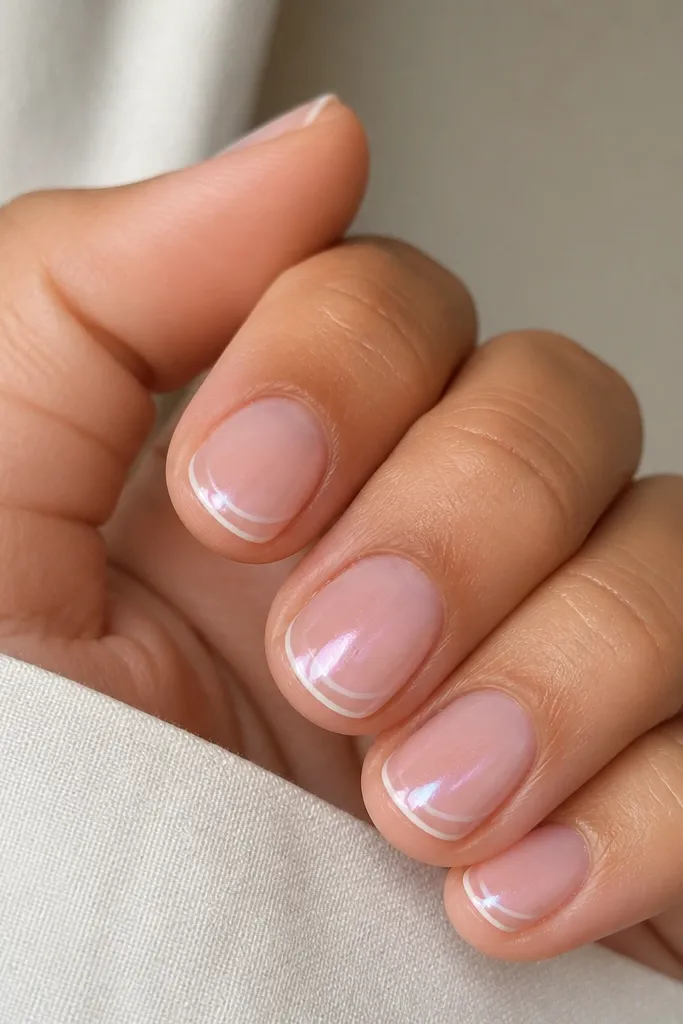
If you hate thick tips, this is your answer. The micro-french keeps everything airy, and the blush cat eye ribbon gives movement without looking loud. It flatters short nails because the white is tight and the glow sits close to the edge, so your nail bed still looks roomy. On fair skin, the blush cat eye adds warmth; on medium skin, it keeps the look sweet instead of stark. This one is perfect for everyday wear and for people who want cat eye but don’t want drama.
Start with a sheer base gel and cure. Paint micro-french tips using a thin brush or a guide, keeping the tip width around 1 mm. Cure the white. Apply blush cat eye gel in a thin layer just under the white edge, then magnet diagonally from the outer side for a soft ribbon effect. Cure, then finish with a thick, glossy top coat to smooth out any magnetic texture.
Editor's noteUse a dotting tool to place the cat eye gel first, then brush it lightly. That stops the pigment from flooding under the white.
Skip thisDon’t widen the micro-french — if it grows past 2 mm, it stops looking dainty and starts looking like a shortcut.
4. Classic White French with Gold Cat Eye Aurora
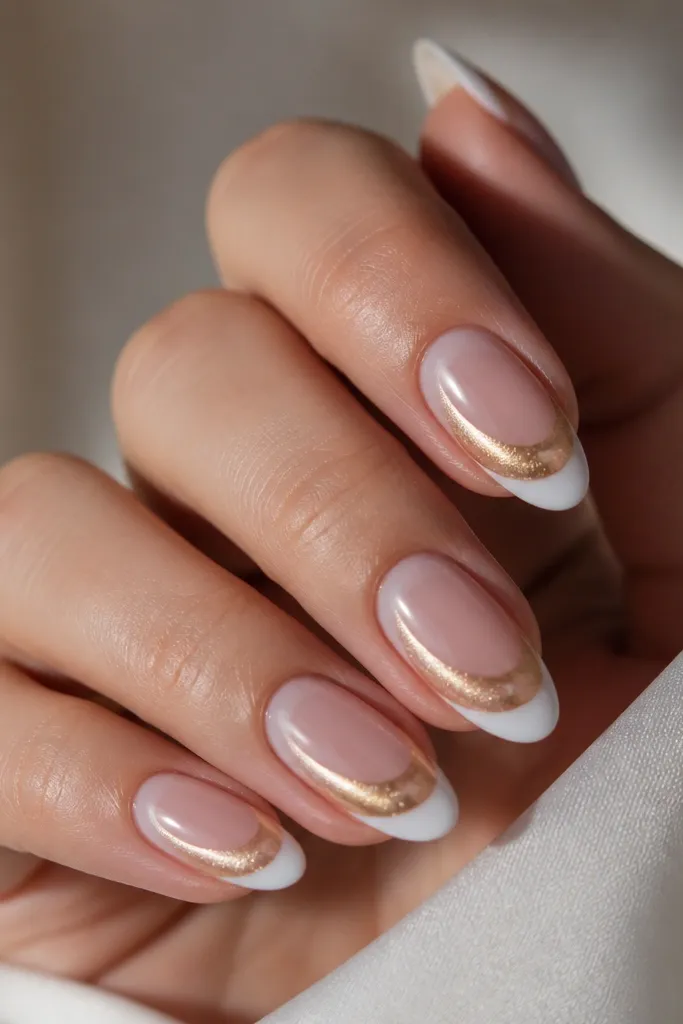
This design looks like jewelry on your nails. The gold cat eye aurora gives that warm light shift that feels luxurious without adding glitter. It’s flattering on cool and warm undertones because the white neutralizes, and the gold glow brings warmth where your skin needs it. I’ve worn this for holiday dinners and it looks great even when your outfit is simple. If you have longer nails, the arc makes your nail shape look smoother and more tapered.
Prep and apply a nude base, cure. Create your white french tips with a clean curve and about 2-2.5 mm width at the center. Cure thoroughly. Paint a thin band of gold cat eye gel inside the white edge, leaving a 0.5 mm white border. Magnet from the lower side to pull an arc that bends toward the center, then cure. Seal with top coat in two layers for a glass-smooth surface.
After magnet curing, wipe the magnet area gently — don’t touch the gel with a cotton pad or it smears.
Don’t put gold cat eye all the way to the sidewalls. The glow needs a white frame to look intentional.
5. White French with Turquoise Cat Eye Under-Glow
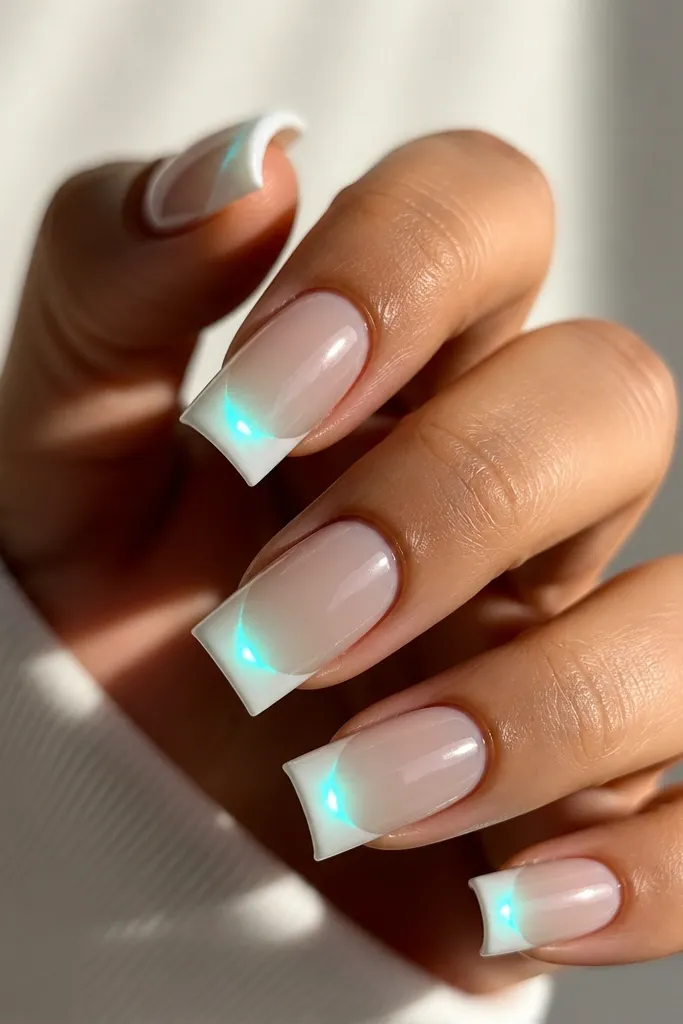
This one is for summer brains and beach trips. The turquoise cat eye looks like sea glass under the white, so it feels fresh instead of neon. I like it on medium to deep skin tones because the turquoise pops without turning harsh. On fair skin, it still works because the white frames it and keeps the color controlled. It also looks clean on square nails where you want the design to feel structured.
Apply a clear or sheer nude base and cure. Paint the white french tips using a guide for straight edges, keep tip width about 2 mm. Cure. Add turquoise cat eye gel in a thin layer directly under the white edge, but do not cover the entire tip — leave the outer edge white. Magnet diagonally with the magnet held closer to the nail from the side, then cure. Top coat twice to lock in the glow and smooth the magnetic texture.
Editor's noteUse a gel that doesn’t spread fast. If it floods, the turquoise goes cloudy and you lose the “under-glow” look.
Skip thisDon’t overbuild the turquoise layer. Thick layers hide the magnetic shift and look flat.
6. White French with Silver Cat Eye Split Tips
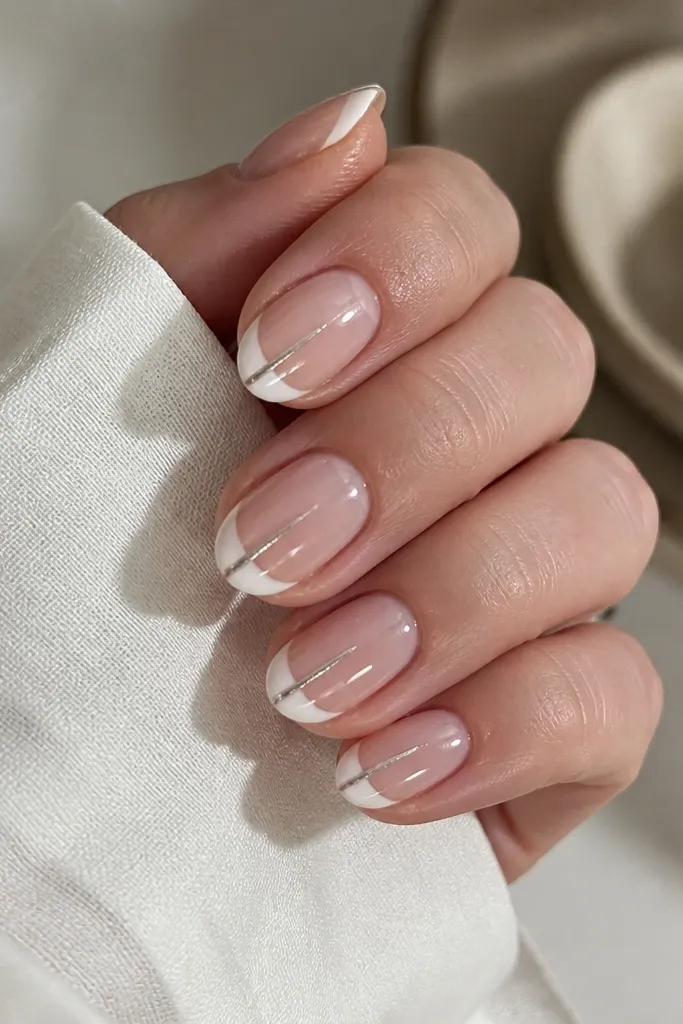
This is a graphic twist that still reads clean. The white is solid and crisp, and the silver cat eye line creates a focal point that makes the tip look designed, not decorated. It flatters hands because the center line draws attention to the length. On smaller nail beds, the split keeps the design from looking heavy. It also works for people who hate full cat eye coverage because the effect is narrow and controlled.
Start with a nude base and cure. Paint a white french tip, then cure and check for clean symmetry. With a liner brush, add a thin stripe of silver cat eye gel down the exact center of the tip, leaving 0.5-1 mm of white on each side. Magnet from above for a tight, bright line, cure. Top coat carefully around the stripe edges so it stays crisp and doesn’t smear.
Editor's noteUse a long, thin liner brush. Thick brushes widen the stripe and it stops looking like a clean split.
Skip thisDon’t attempt this with thick cat eye gel. Thin coats hold a sharper center line.
7. Negative Space White French with Cat Eye Crescent
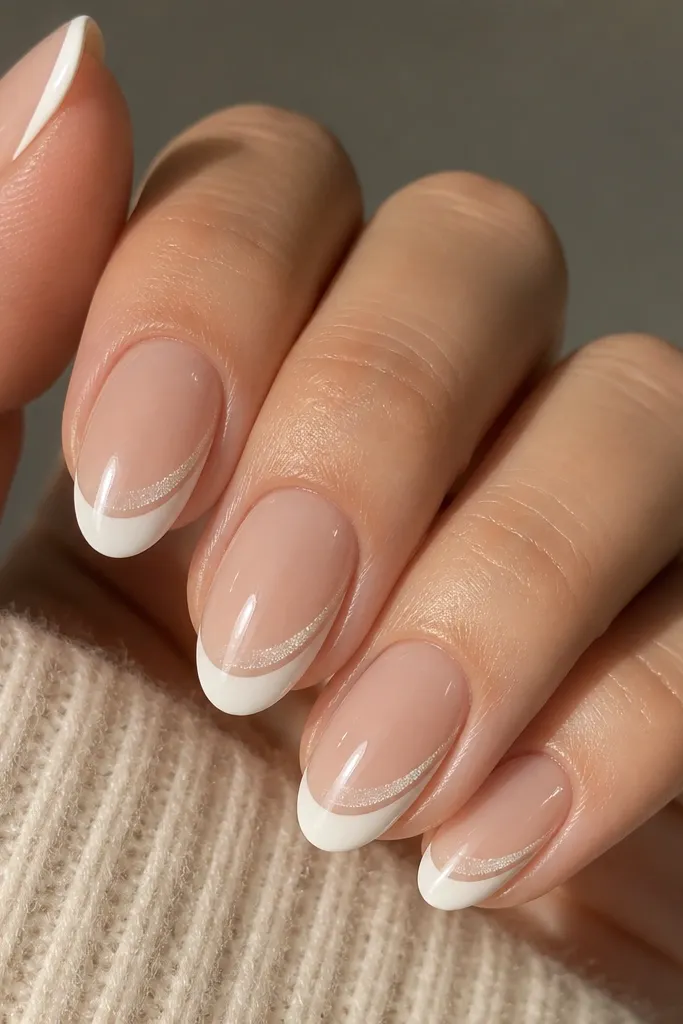
Negative space makes the manicure look expensive because your nail bed stays light. Here, the white french only frames the outer edge, and the cat eye crescent sits at the inner boundary like a soft halo. It flatters short nails because it creates an illusion of a wider nail bed without making the tip too thick. For all skin tones, the sheer base keeps it clean. This also grows out better than full coverage designs since the lines stay intentional.
Apply a sheer nude base and cure. Use a guide to paint white only from the outer edge to about halfway toward the center, leaving the inner area natural. Cure. Place a thin coat of cat eye gel at that boundary line, then magnet to pull a crescent glow toward the outer edge. Cure and clean the edges with a small brush dipped in gel cleanser. Finish with top coat in two layers.
Editor's noteBefore curing the cat eye, tilt the nail slightly under the lamp so you can see if the stripe is forming where you want it.
Skip thisDon’t fill the negative space with opaque gel. Keep it sheer so the grow-out stays pretty.
8. White French with Rose Cat Eye Smoke Gradient
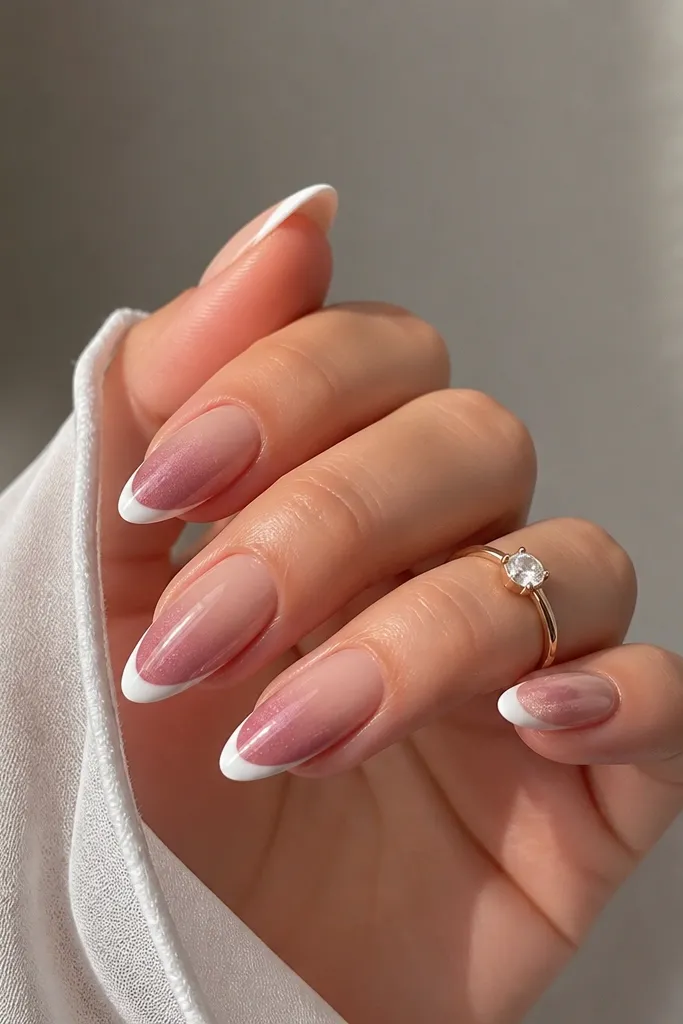
This is the romantic option that still looks clean. The rose cat eye smoke gives you that soft haze effect, but because the french tip stays solid white, it doesn’t turn into messy ombre. I love it on fair to medium skin tones because the rose glow warms up the manicure. On longer almond nails, the diagonal fade makes the fingers look sleek. If you want cat eye but dislike sharp stripes, this is the one.
Start with a nude base and cure. Paint a white french tip with a smooth curve and 2-2.5 mm width at the center. Cure completely. Apply rose cat eye gel in a thin layer starting at the tip edge, then use a small brush to feather it inward about 2-3 mm. Magnet diagonally from the side to create a smoke line, cure. Seal with a glossy top coat, and cap the free edge.
Feather with a nearly dry brush. If the brush is wet, the cat eye pigment blends into a dull haze.
Don’t magnet straight down. A side pull gives the smoke line its flattering diagonal shape.
9. White French with Black Cat Eye Side Wing
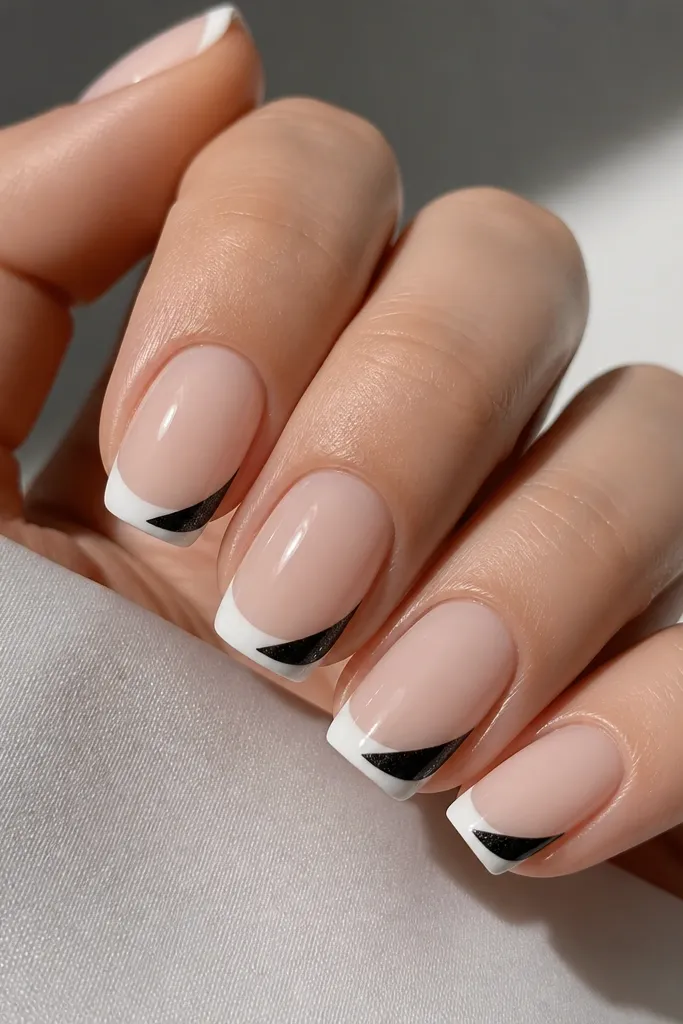
This design looks like eyeliner for your nails. The cat eye wing stays near the outer corner, so it lifts the look and makes the nail shape look sharper. It flatters hands with round nail beds because the wing adds structure. I’ve worn it with both gold and silver jewelry — the black stripe always makes the manicure feel intentional. The white base keeps it clean even with the darker cat eye color.
Apply a sheer nude base and cure. Paint white french tips with a clean outer curve, keep width around 2 mm. Cure. For the wing, place a small amount of black cat eye gel near the outer corner — keep it off the center line. Magnet from the side for a diagonal pull that creates a wing flare, then cure. Top coat carefully with two layers and cap the tip edge so the wing doesn’t snag.
Editor's noteUse a tiny silicone-tipped tool to place the cat eye gel. It’s cleaner than a brush for corner shapes.
Skip thisDon’t let the black wing touch the cuticle. It will look like a smudge instead of a wing.
10. White French Marble Cat Eye Vein
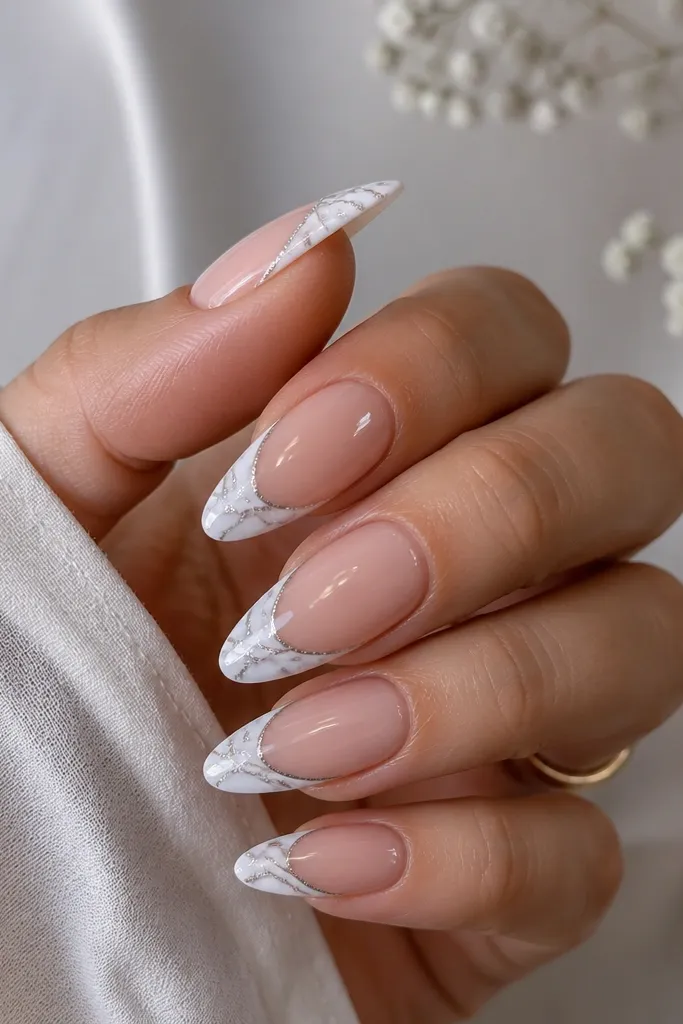
This one is for people who like art but still want a neat manicure. The cat eye vein runs through the marble lines, so it looks like light traveling through stone. I like soft gray marble because it keeps the look believable and not too cartoon. On medium to deep skin tones, the silver cat eye vein pops and makes the white french feel brighter. On fair skin, the gray marble keeps it from looking stark.
Start with a nude base and cure. Paint a crisp white french tip with about 2.5 mm width at the center. Cure. Add thin gray marble lines using a striping brush and a gel that self-levels, then cure. Place a thin strip of silver cat eye gel right over part of the marble line, magnet from above for a narrow vein effect, cure. Finish with a glossy top coat and cap the edges.
Keep marble lines thin — if they’re thick, the cat eye loses its “vein” look and turns into a blob.
Don’t draw marble on top of uncured white. It muddies and the vein looks dull.
11. White French with Multi-Chrome Cat Eye Shift
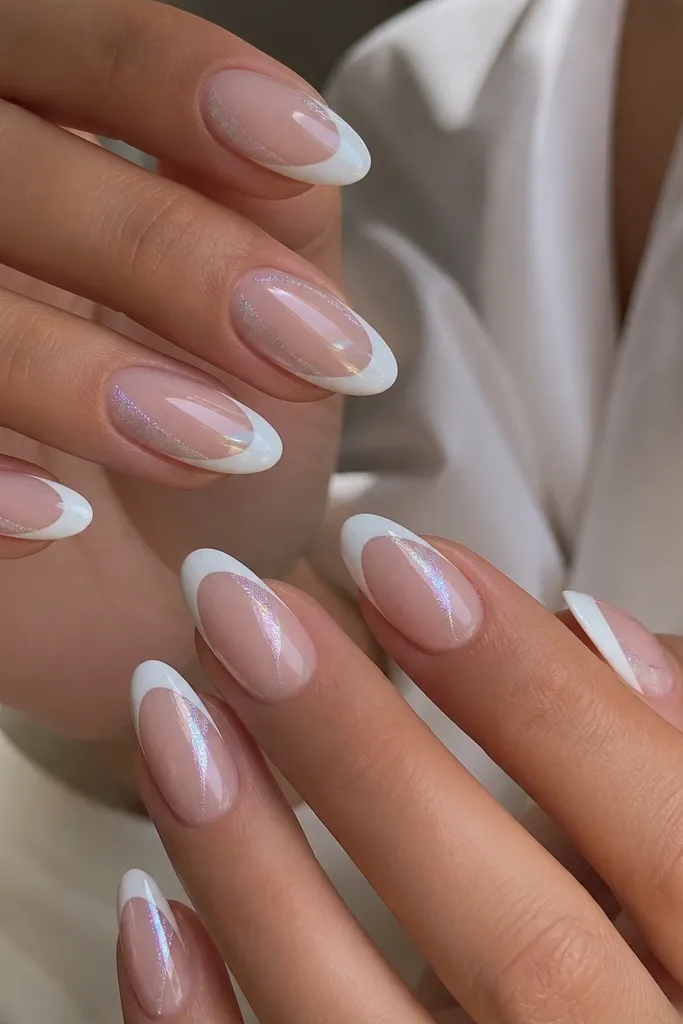
Multi-chrome cat eye is the one that makes people stop scrolling. The ribbon shifts between tones, but the overall manicure still reads clean because the french tip is solid white. I like this on medium skin because the shift looks like jewelry stones. On fair skin, it still works, just keep the ribbon narrow so it doesn’t overwhelm the nail bed. This is a strong pick for weddings or events because it looks different in every room.
Prep and apply a nude base, cure. Paint white french tips with a guide for sharp edges, about 2 mm wide at the center. Cure. Apply a thin diagonal ribbon of multi-chrome cat eye gel inside the white border, leaving a visible white frame. Magnet from the side for a diagonal sweep, cure, then top coat twice. Make sure the top coat is glossy and fully covers the magnetic texture.
Angle your magnet during pulling — slightly rotate it to get a ribbon that looks smooth, not jagged.
Don’t use matte top coat on multi-chrome — it kills the color shift.
12. White French with Sapphire Cat Eye Sparkle (No Glitter)
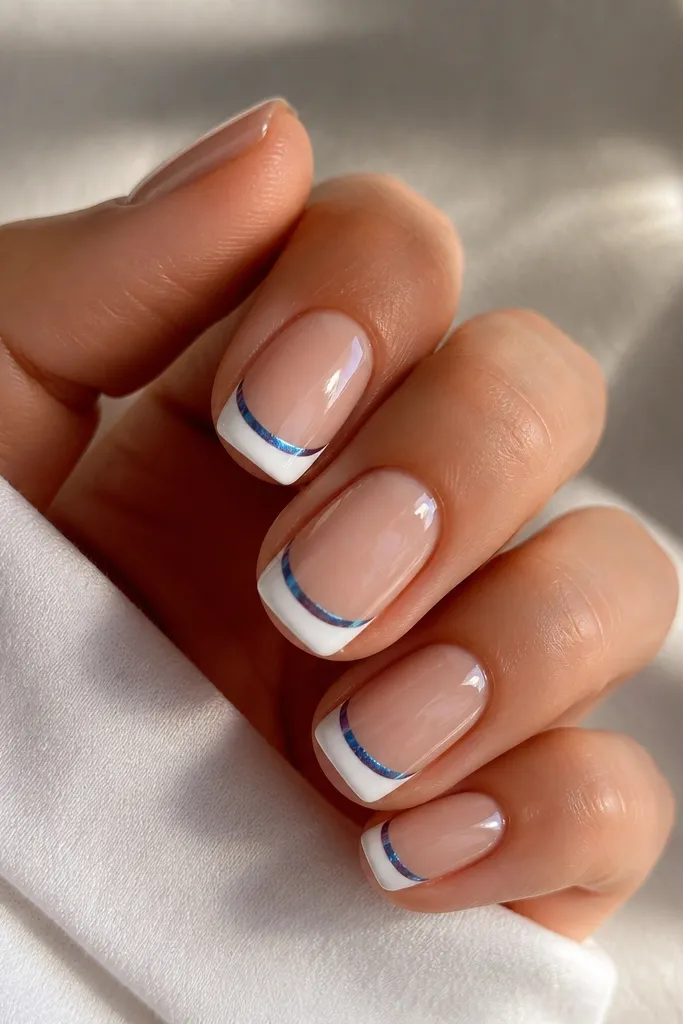
This gives you that “sparkly” look without actual glitter particles. The sapphire cat eye pigment creates a bright, clean shimmer effect that looks smooth under gloss. I like it for everyday because it’s bold but controlled. It flatters olive and medium skin tones especially well because sapphire makes the manicure look crisp. On fair skin, the white tip keeps it from turning too cold.
Apply nude base gel and cure. Paint white french tips with a guide, keep width around 2 mm. Cure. Add sapphire cat eye gel only in a thin strip along the inner edge of the tip. Magnet from slightly above and to the side so you get a bright stripe, cure. Seal with two layers of glossy top coat and cap the free edge.
If the blue looks too dark, use a thinner coat of cat eye gel and add a second thin coat after magnet pulling.
Don’t overload the stripe. Too much pigment makes it look like a solid blue block.
13. White French with Soft Silver Cat Eye Half-Moon
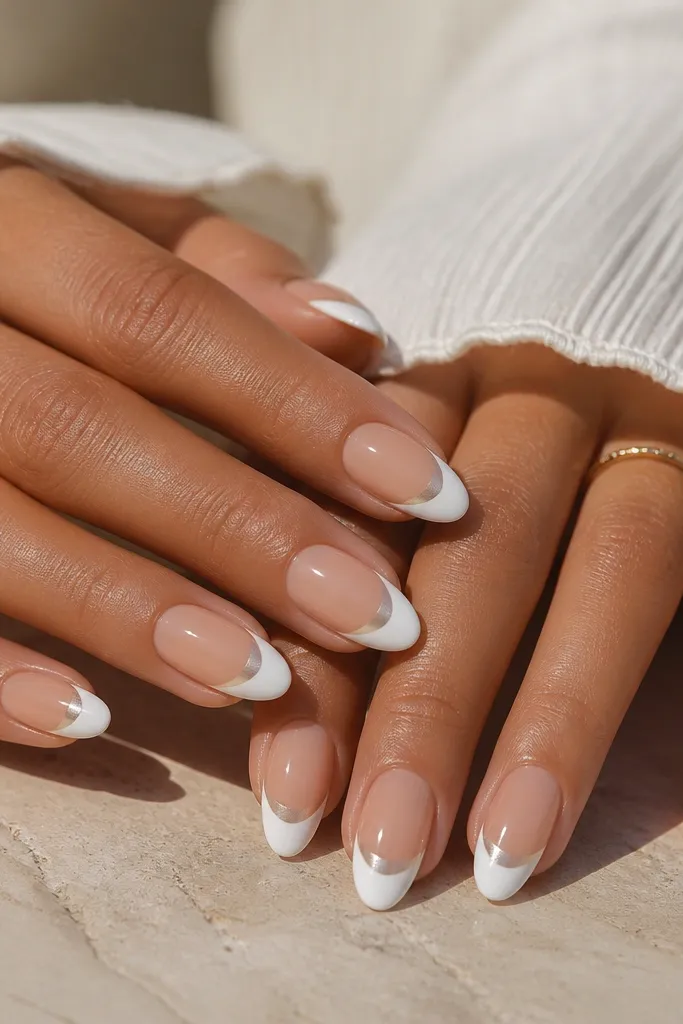
This design is calm and classy. The half-moon cat eye sits in the center of the tip area, so it looks like a subtle highlight instead of a full stripe. It’s flattering on almond nails because the shape already has a curve, and the half-moon matches it. I’ve worn this with neutral outfits and it still looks like I did something special. For hands with uneven nail edges, the half-moon glow helps hide small imperfections because your eye goes to the center highlight.
Start with a sheer nude base and cure. Paint a clean white french tip, about 2-2.5 mm wide at the center, cure. Place a small amount of soft silver cat eye gel in the center of the tip area, then magnet from directly above for a rounded half-moon pull. Cure and check the curve under a lamp — you should see the crescent glow. Finish with a glossy top coat in two layers, and cap the free edge.
Editor's noteUse less gel than you think. A small amount gives a cleaner half-moon than a thick puddle.
Skip thisDon’t magnet from the side for this one. Side pulls make the glow too diagonal and lose the half-moon shape.
14. White French with Frosted White Base and Cat Eye Edge
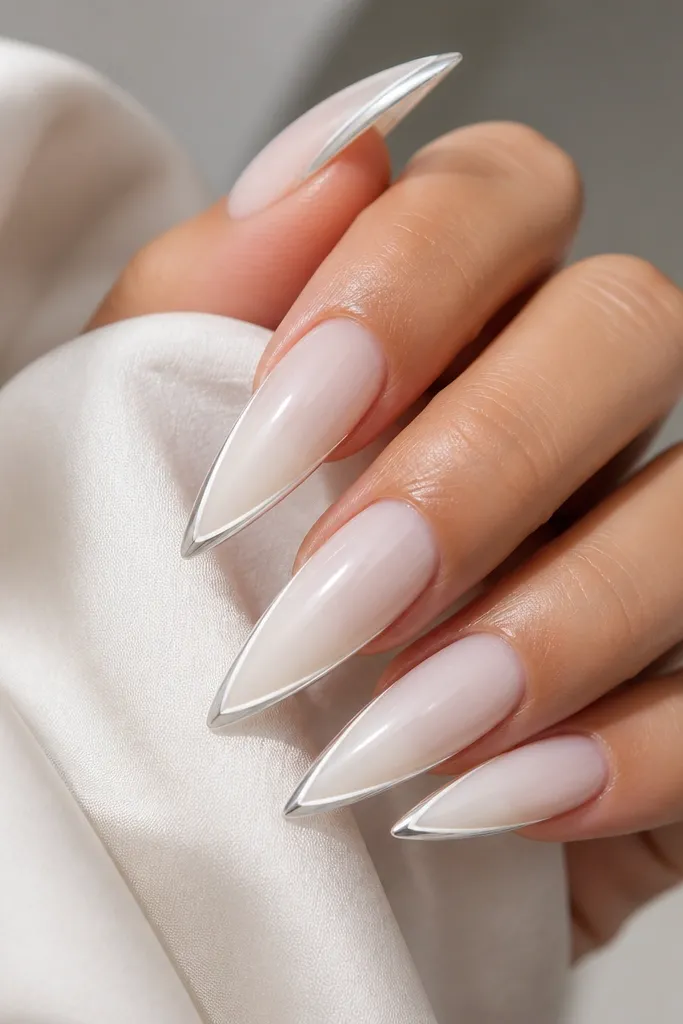
This is the “snow globe” look — clean, bright, and photo-ready. The frosted white base gives texture, while the cat eye edge adds a sharp, high-end highlight right at the tip line. It flatters long nails and makes skin look brighter because everything stays in the white family. If your hands run warm-toned, the silver cat eye balances it out. This is also a strong choice if you want cat eye without painting lots of art — it’s mostly structure.
Prep nails and apply a frosted white base gel, cure. Paint a french tip line that’s slightly brighter white, keeping the tip width around 2 mm and the edges sharp. Cure. Apply a thin strip of silver cat eye gel only along the very inner edge of the tip so it looks like a border. Magnet diagonally from the side for a flash effect, cure. Top coat twice for a smooth, glassy finish over the frosted base.
Cap the very tip edge with top coat so the border doesn’t lift when you file or wash dishes.
Don’t skip smoothing the frosted base. If it’s bumpy, the cat eye border looks messy.
15. Iced White French with Thick-Gloss Cat Eye Center Stripe
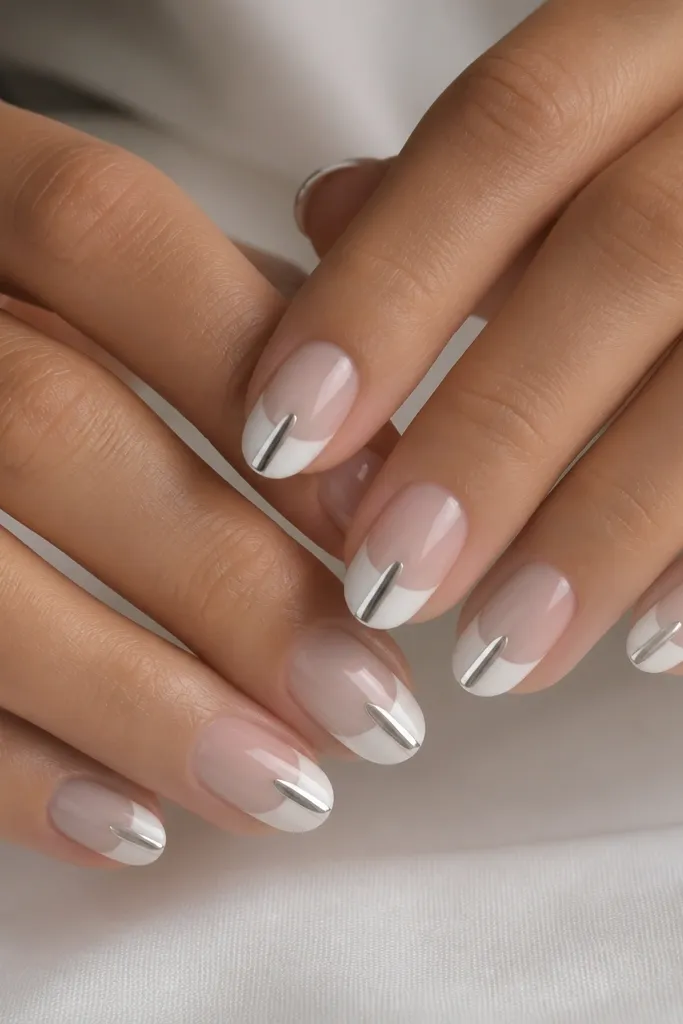
This design looks clean because the cat-eye effect is controlled to one place: the center stripe. Instead of a full cat-eye sweep across the tip, you get a sharp visual line that makes the nails look longer and more “done” even with short length. The iced white French stays the star, and the stripe adds movement when you tilt your hand. I did this on myself after a long week and it held up in photos because the stripe stays reflective even when the rest of the nail loses a little shine. It also works well if you want cat eye without glitter or heavy gradients.
Start with a sheer milky nude base, then cure. Paint a crisp French tip using iced white gel, keeping the tip line 1-2 mm above the free edge for a cleaner smile. After curing, add a thin layer of clear builder gel or thick gel in the center stripe area only — about 1.5-2 mm wide on each nail — and do not spread it to the sides. Place the cat-eye magnet over the stripe while the gel is in its tacky stage, then cure — you want the light to pull into a tight beam. Finish by sealing the whole nail with a high-gloss top coat, but leave the stripe area slightly more glossy by applying an extra brush pass just on the center.
Use a thicker center gel stripe than you think you need. If the stripe is too thin, the cat-eye pulls into a blurry line and the French looks heavier.
Do not magnetize after the gel is fully cured or the stripe will look flat and cloudy.