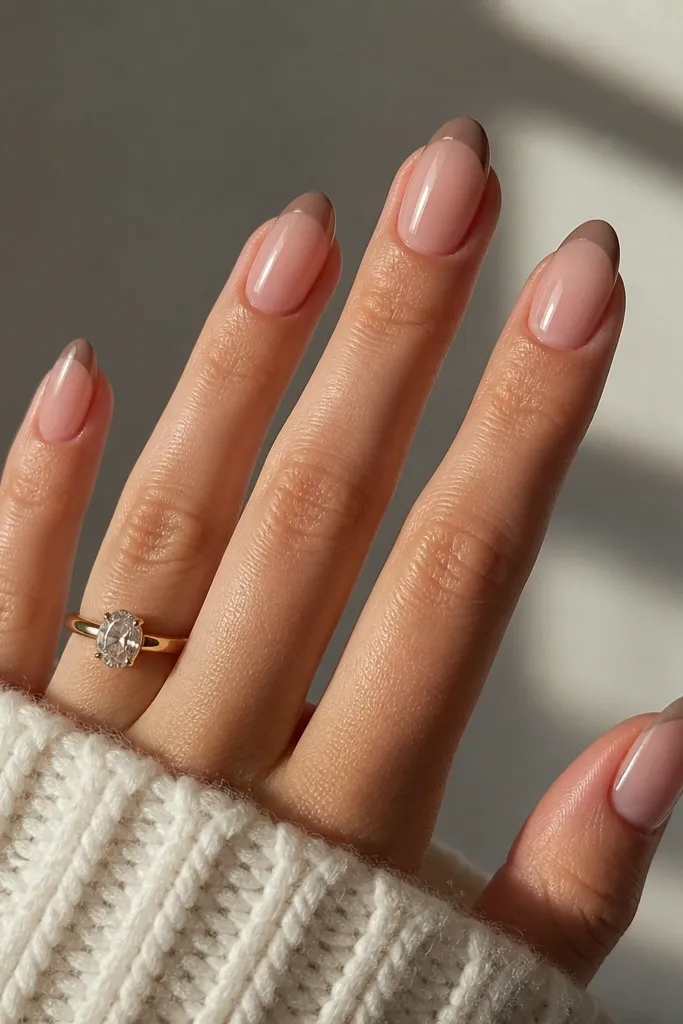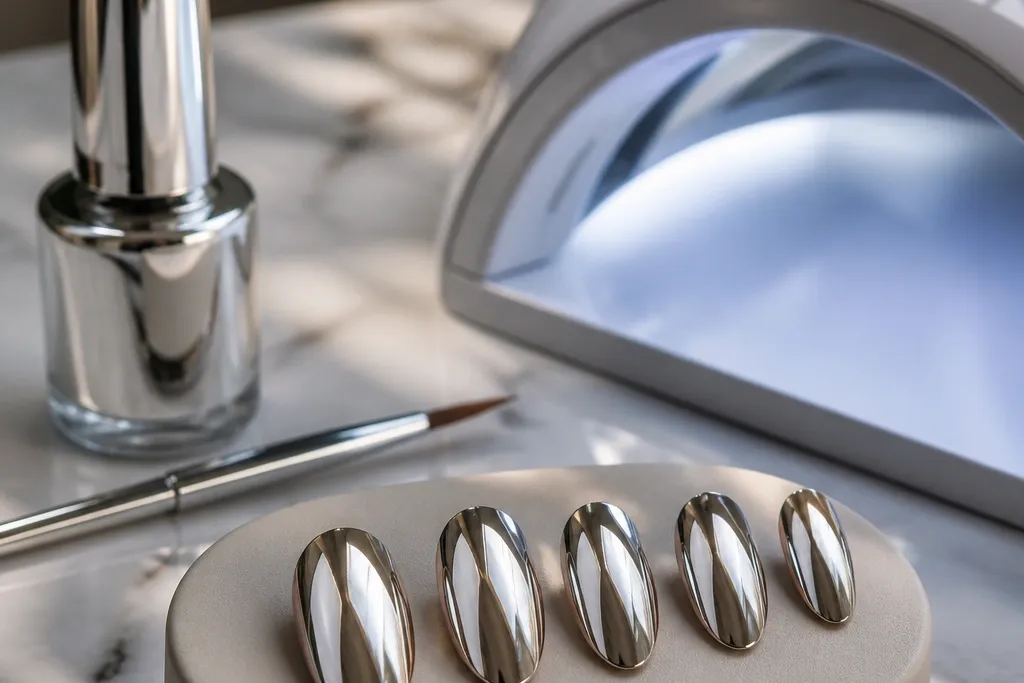
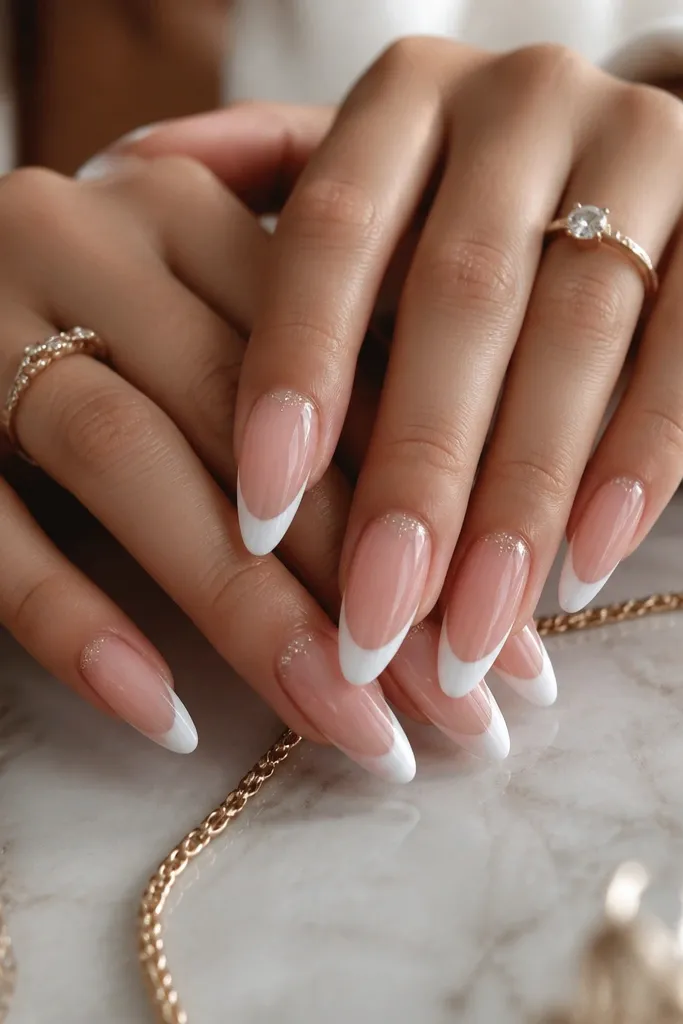
1. Milk Chrome Almond with Clear Cuticle Border
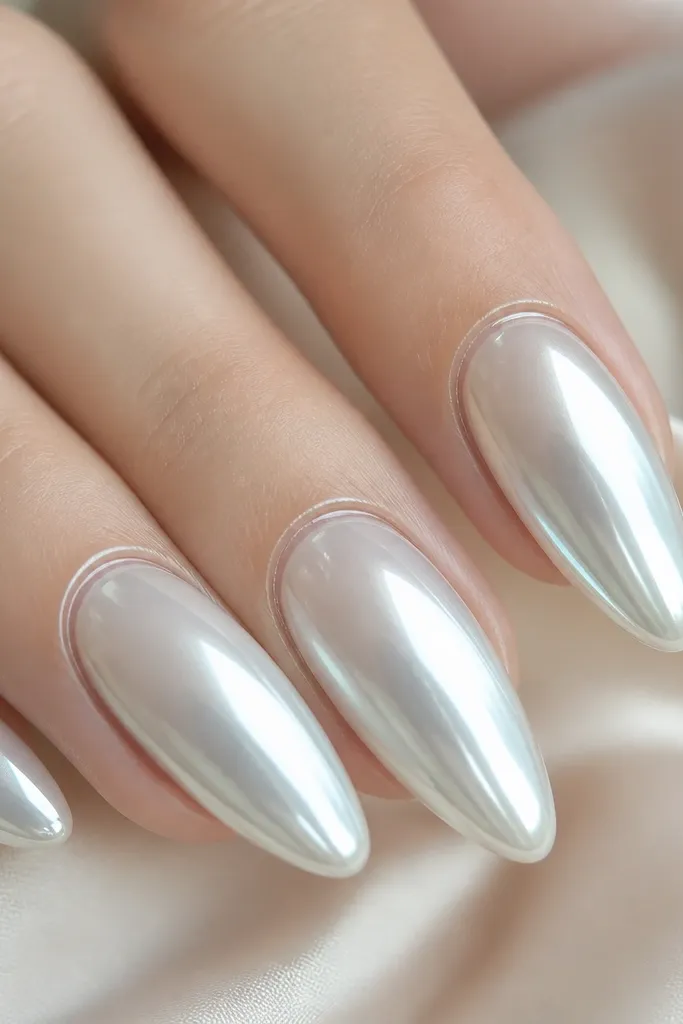
This set uses a milky white base so the chrome reads bright instead of gray. The clear cuticle border is the trick that makes it look “done,” because it frames your nail bed like a tiny window. I’ve worn this on fair to medium skin and it flatters because the milky base brightens the hands without looking stark. The almond shape stretches the finger and keeps the chrome reflection crisp, especially in indoor lighting. It works for office days when you want glam that still looks neat.
Start by prepping nails and pushing back cuticles gently, then buff the shine off only the top layer. Paint a milky white gel polish in two thin coats, cure each coat fully. Add a high-gloss top coat and cure it, then apply chrome powder over the tacky surface, pressing lightly with an applicator sponge. Wipe off excess and finish with a no-wipe top coat, keeping it away from the cuticle border so the clear ring stays clean. Finally, use a fine brush to clean the cuticle edge with a tiny amount of gel cleanser.
If your chrome looks patchy, polish the surface one more time with a 1800-grit buffer before applying chrome. The smoother the base, the sharper the mirror.
Avoid using a matte top coat under chrome — it turns the metallic finish dull and grainy.
2. Rose Champagne Chrome French on Nude Base
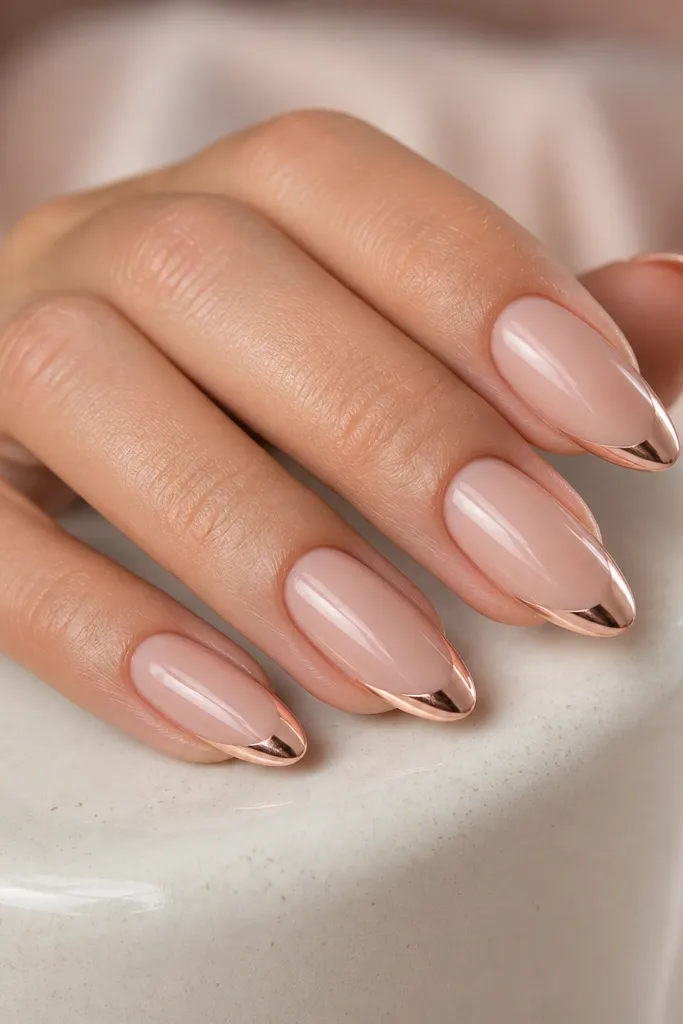
This is the sleek metallic look that still feels wearable: nude base, chrome French tips, and a warm rose-gold reflection. I like it because it flatters most skin tones — the nude base blends, and the champagne chrome adds glow without overpowering your hand. The thin French line makes the nails look longer and cleaner than a thick chrome smile line. It’s especially flattering on medium-length ovals and stiletto-lite shapes because the tip carries the design. Great for events, but it also works for daily wear if you keep the line thin.
Start with a nude gel polish close to your natural nail color, then cure two coats. Apply a striping tape guide for a straight French line, placing it about 1.5 to 2 mm from the free edge on medium nails. Paint the tips with a rose champagne chrome gel or apply rose champagne chrome powder over a small cured gel patch at the tip. Remove the tape carefully while the gel is still in its workable stage, then cure and seal with a glossy top coat. Clean around the sides with a soaked lint-free wipe and gel cleanser so the chrome line stays crisp.
Use striping tape and measure the line height on one nail before you start the rest. Matching the gap is what makes it look “high end.”
Don’t make the French line too thick — thick chrome tips look like costume glitter under flash.
3. Jet Black Mirror Chrome with Micro-Glint at the Cuticle
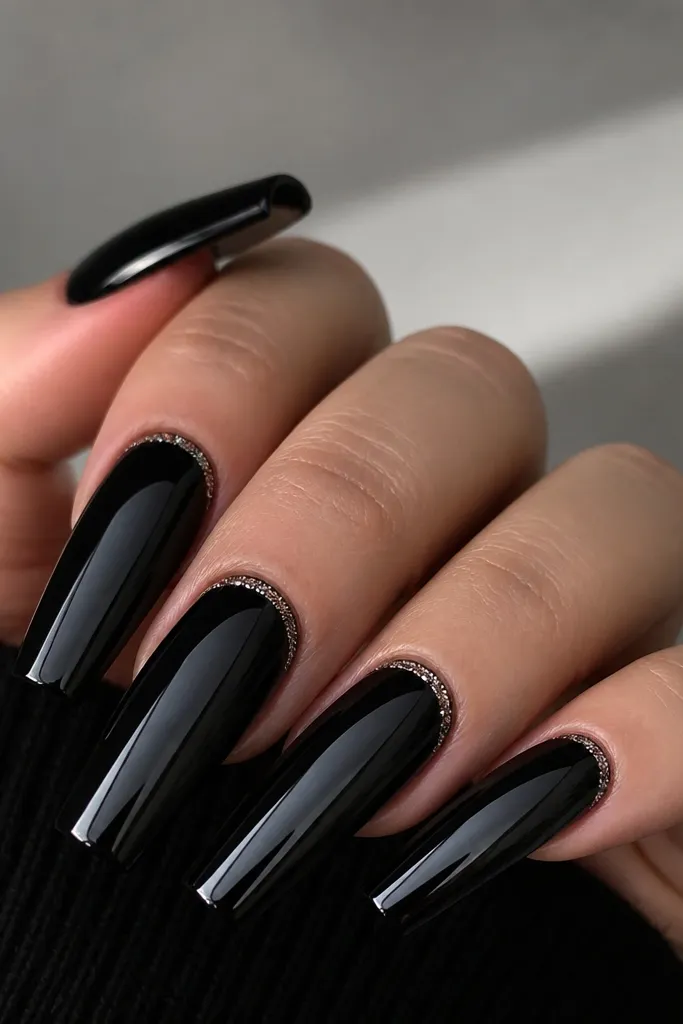
Black mirror chrome looks expensive because it’s high contrast and reads like lacquered metal. The micro-glint at the cuticle adds a small highlight without turning the set into bling overload. I’ve worn this with cool undertones and it looks even sharper, but it still works on warm skin because the silver accent breaks up the darkness. Coffin shape helps because the flat top gives the chrome reflection a clean plane. This set is a great pick for night events, because it photographs like glossy hardware.
Begin with a black gel polish base in two thin coats, curing each one. Apply a high-gloss gel top and cure, then buff nothing — you want it smooth. Apply mirror chrome powder over the black surface using a firm press, then wipe off excess so it’s uniform. For the micro-glint, dab a pinpoint amount of clear gel near the cuticle and sprinkle fine silver micro-glitter into a 2 to 3 mm crescent, cure, and seal. Finish with a thick no-wipe top coat for a smooth mirror finish and wipe the edges for clean lines.
For the cuticle glint, use a toothpick to pick up glitter — it keeps the arc tiny and controlled.
Avoid thick glitter layers at the cuticle; they catch and lift first.
4. Icy Silver Pearl Chrome on Short Rounded Square
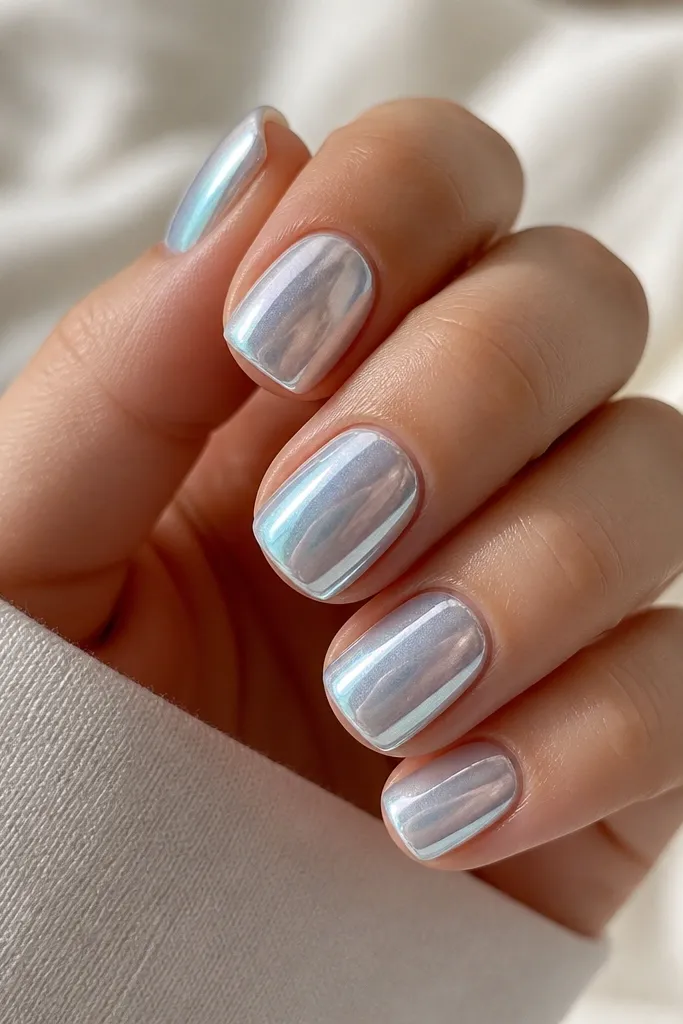
Short nails can still look luxe when the finish is bright and even. Icy silver pearl chrome gives a cooler, “fresh” glow that looks great on hands with visible veins or cooler undertones, and it also brightens deeper skin tones without turning gray. The rounded square shape keeps it modern and practical, and the pearl shift makes it look expensive even when you’re not in flash photography. This style is perfect for everyday wear because it doesn’t rely on length to make the statement. It also pairs easily with silver jewelry.
File nails into a rounded square, then buff the surface lightly so the chrome has grip. Apply a white gel polish base or a very pale cool nude, cure in two thin coats. Add a glossy top coat, cure, then apply pearl chrome powder in thin layers — press, wipe, and repeat until it’s even. Seal with a high-shine top coat, and cap the free edge so it doesn’t wear at the corners. Clean around the cuticles with a cotton swab dipped in gel cleanser for that sharp, salon finish.
If your pearl chrome looks patchy, do a second chrome pass after the first wipe-off. Two thin passes look more even than one heavy one.
Avoid skipping the base color; chrome over bare nails often turns uneven and too dark.
5. Champagne Gold Chrome with Thin Black Side Lines
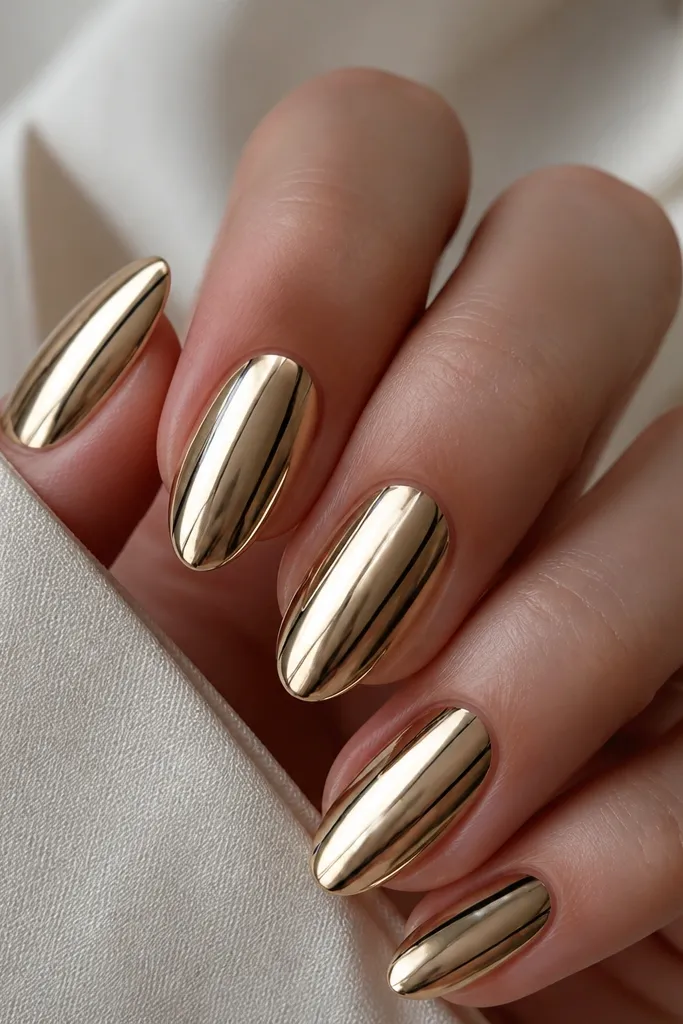
This set uses contrast like designer nails: champagne gold chrome as the main event, then two narrow black side lines that sharpen the shape. The black lines make fingers look longer because they frame the nail without breaking the glossy gold reflection. I like it on medium skin tones because it adds definition without washing you out. Almond shape keeps the gold sleek, and the side stripes add that “Kylie” vibe you see in close-ups. It’s a good pick when you want metal but still want clean, graphic lines.
Start with champagne gold chrome base coverage — either a gold chrome gel or a mirrored gold powder applied over a cured glossy base. Cure fully and wipe any loose powder. Use striping tape or a thin liner brush to paint two black vertical lines about 0.5 mm wide on each side, leaving a gap so the gold stays dominant. Cure the black gel and apply a final glossy top coat, keeping brush strokes gentle to avoid smearing the lines. Finish by cleaning the sidewalls so the stripes look centered and straight.
Use a liner brush with a short, firm tip. Long, floppy brushes wobble and make the stripes look hand-drawn.
Avoid thick black lines; they make the gold look dull and the set looks heavier than it should.
6. Pearl Blush Chrome with 3D Crystal at the Cuticle Center
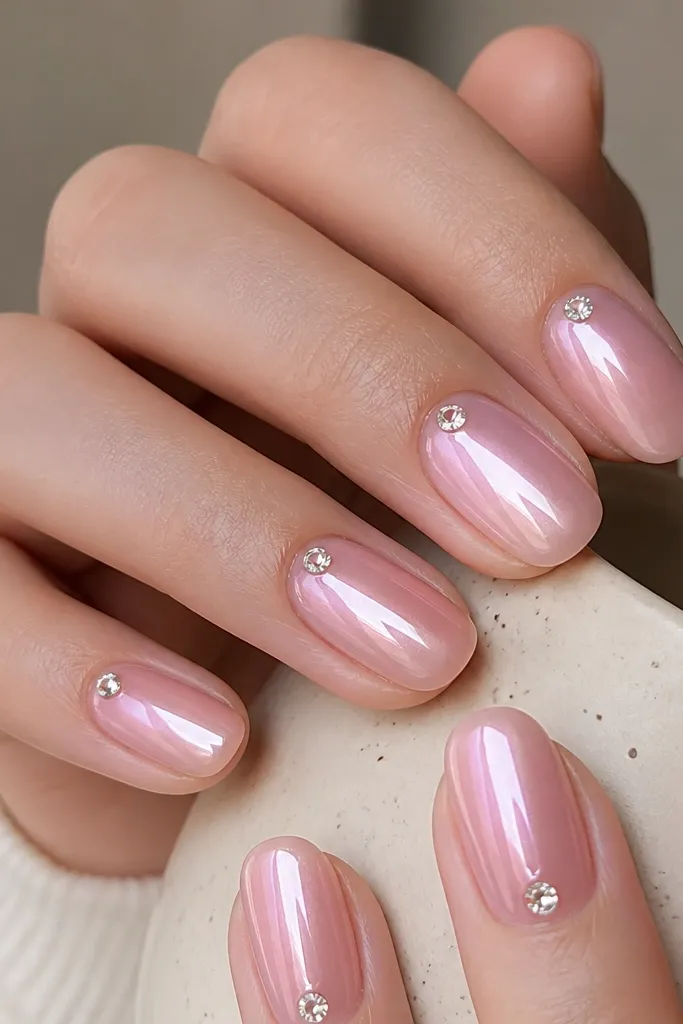
Pearl blush chrome gives you that sweet Kylie vibe without going fully pink. The reflection is soft, so it flatters hands that look dry or slightly textured — the chrome smooths the visual read. The single 3D crystal at the cuticle center makes the set feel high-end, but it stays minimal because it’s one stone per nail. I like this on oval and almond shapes because the cuticle center lines up nicely with your nail bed. This works for weddings, birthdays, and any time you want “pretty” that still looks metallic.
Apply a blush gel polish base in two coats, cure each one. Add a glossy top coat and cure, then apply pearl blush chrome powder with a soft press and wipe off excess. Seal with a thin layer of top coat, cure, then attach a single small crystal using a dot of clear gel at the cuticle center. Set the crystal with a fine tool and cure under a lamp until it feels secure. Finish with a final top coat around the crystal edges so it looks smooth instead of raised.
Editor's notePick crystals with flat backs and a small face size (think tiny rhinestone scale). Big crystals look bulky on short-to-medium nails.
Skip thisAvoid placing the crystal too close to the skin — it lifts faster and catches on sleeves.
7. Iridescent Chrome Over Clear Jelly for a Wet-Look Glow
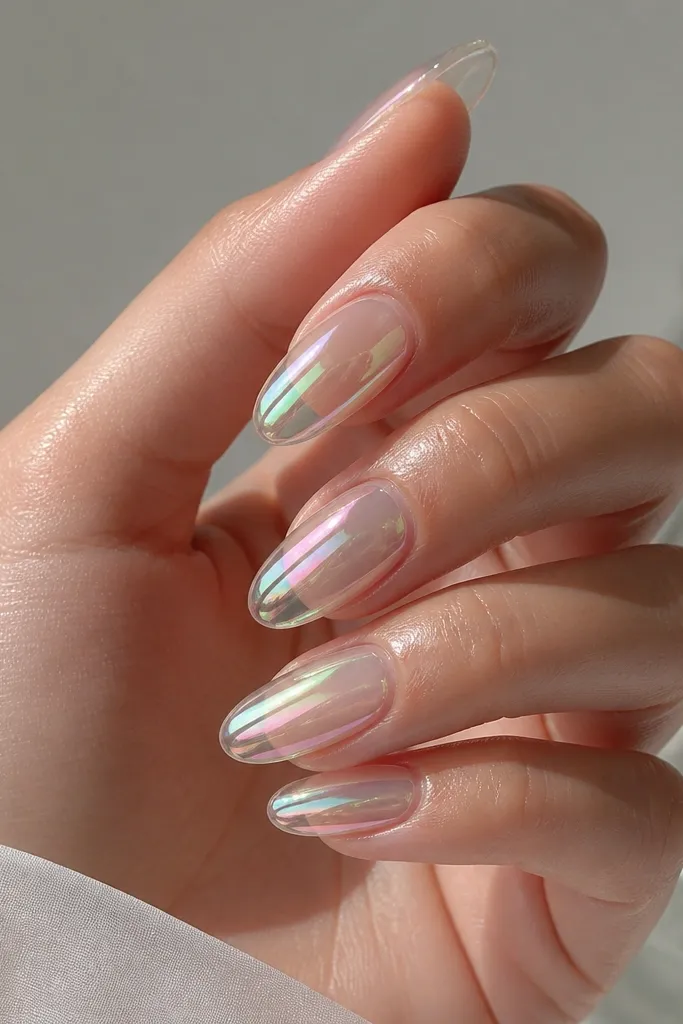
This one is glossy and different from the usual fully opaque chrome sets. Clear jelly base makes the iridescent chrome look like it’s suspended under glass, so it has depth instead of a flat metallic film. I’ve worn it with both gold and silver jewelry; it works because the chrome reflects multiple tones. It flatters hands with longer nail beds because the jelly look emphasizes the natural shape. If you want that “fresh out of the salon” vibe that still feels modern, this is the set.
Start with a clear builder gel layer to create a smooth, even surface and cure it. Add a thin clear jelly gel coat and cure, then apply iridescent chrome powder over the tacky area only — keep it from flooding the cuticle. Use a sponge applicator and press lightly so the iridescent shift stays controlled. Seal with a thick, glossy top coat that has good leveling, then cap the free edge. Wipe and clean the edges so the jelly depth stays visible at the center.
Use fewer chrome passes on jelly bases. Too much chrome makes it look opaque and loses the wet-look depth.
Avoid matte top coat — it kills the glassy jelly effect immediately.
8. Metallic Nude Chrome with Micro Foil at the Center Line
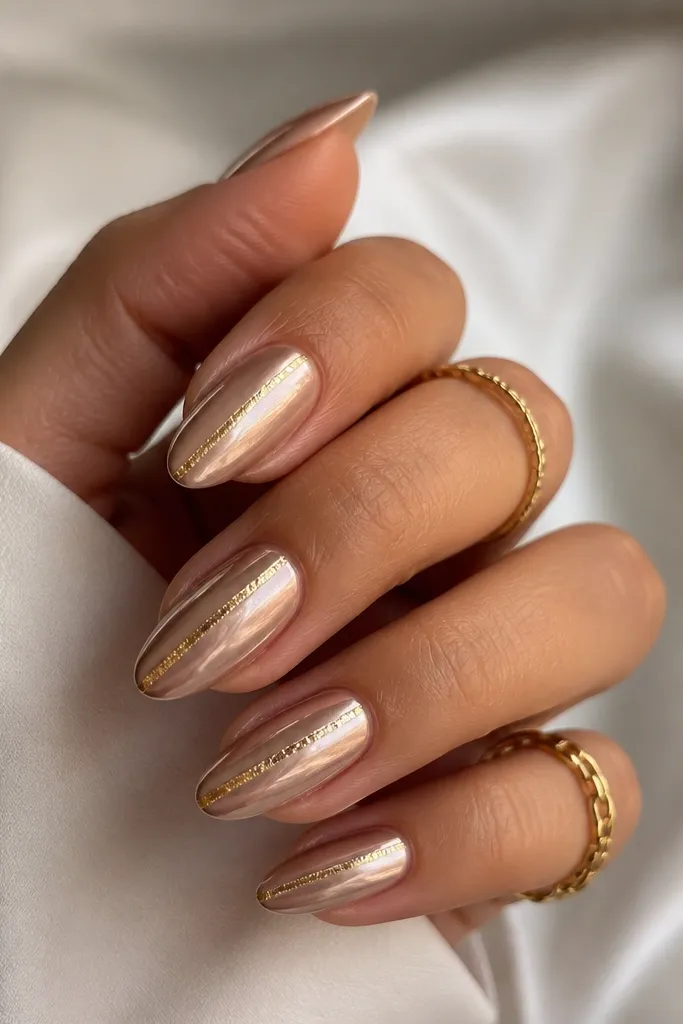
Metallic nude chrome is the “I did my nails but it still looks natural” option that still reads luxe. The warm beige tone makes hands look healthy, and the center line of micro foil adds the kind of detail that catches cameras. I like this on short almond and medium squoval shapes because the vertical line visually lengthens without needing long nails. It also works for people who don’t want full chrome everywhere — the foil gives you a focal point. This is a go-to when you wear lots of neutrals.
Apply a warm beige gel polish base in two thin coats, cure each. Add a glossy top coat and cure, then apply metallic nude chrome powder with even pressure and wipe off. Cut tiny pieces of gold foil (small enough to be about 1 mm wide) and place them on a thin line of clear gel down the center, cure. Press the foil lightly so it adheres without spreading. Seal with a glossy top coat, using gentle strokes to keep the foil edge crisp.
Tear the foil instead of cutting it with scissors. Torn edges look more organic and expensive.
Avoid using large foil chunks; they make the set feel heavy and less sleek.
9. Cool Pewter Chrome with Tiny Star Accents
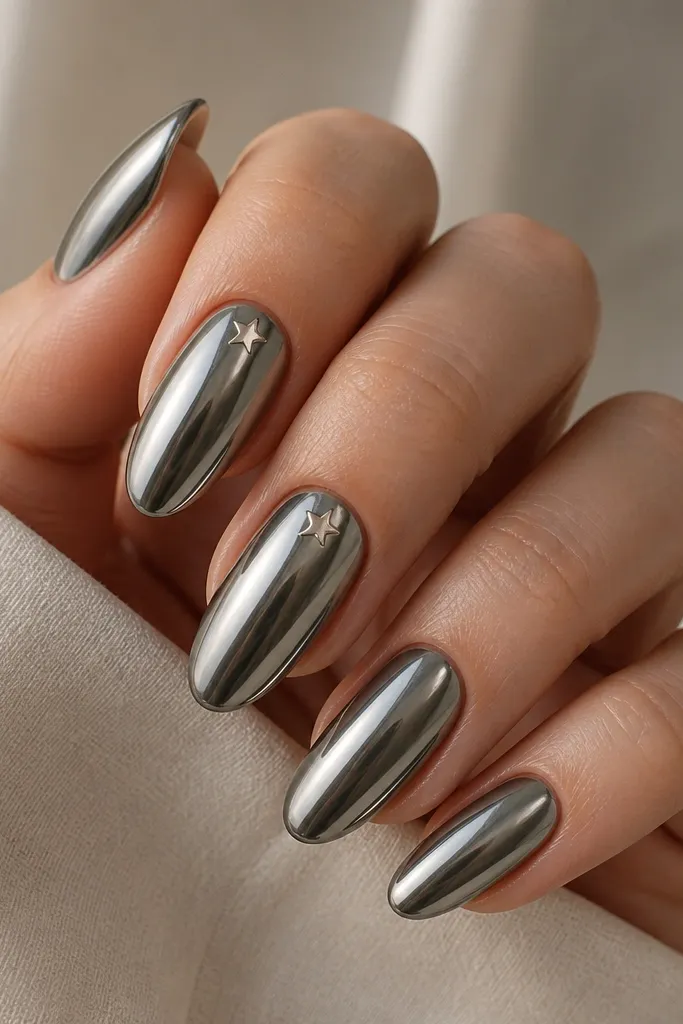
Pewter chrome is the cooler cousin of gold and it looks sharp on camera. When you pair it with tiny star accents, you get that playful Kylie energy without making the set look like holiday nails. I like it on medium-length almond because pewter can look too gray on very short nails, but the almond shape gives it a cleaner reflection. The star size matters — micro stars read cute, while big stars look childish. This is a fun option for birthdays, music festivals, and any time you want a metallic look with a wink.
Start with a cool pewter gel polish base or apply pewter chrome powder over a cured glossy top coat. Cure fully and wipe off excess so the mirror finish is even. Add tiny star decals on one or two accent nails, placing them about 2-3 mm away from the cuticle line. Seal decals with a thin layer of glossy top coat, cure, then apply a final thick top coat. Clean the edges carefully so the stars stay flat and don’t lift.
Editor's noteUse tweezers and a bright light behind the nail to place micro decals exactly. Misplaced tiny accents are what make sets look messy.
Skip thisAvoid putting stars on every nail; it makes the design feel busy and less luxe.
10. Violet Reflective Chrome with Skinny Silver Side Stripes
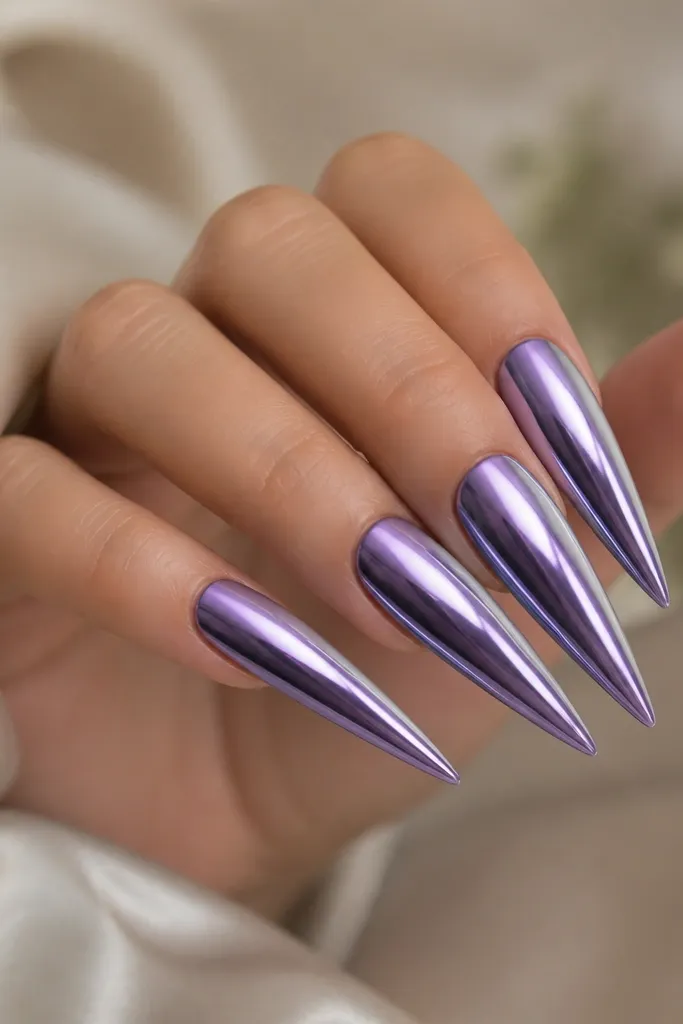
Violet reflective chrome is bold but still sleek when the stripes stay thin. The purple-to-silver shift looks expensive because it changes with your movement, especially when you’re holding a phone or touching hair. Skinny silver side stripes make the nail look sharper and more sculpted, and they flatter longer fingers by adding definition. I like this on stiletto and long almond because the stripes follow the natural lines of the nail bed. It’s a great pick for parties where you want your hands to look like jewelry.
Prep nails and build a smooth surface with builder gel if needed, then cure. Apply violet reflective chrome powder over a glossy cured base, pressing evenly and wiping off excess. Use a liner brush to paint two skinny silver side stripes about 0.5 mm from each sidewall, then cure. Keep the stripes straight by resting your hand on a table and drawing one nail at a time. Finish with a glossy top coat that levels — two thin top coats look smoother than one thick coat.
Editor's noteChill your chrome powder and top coat in a cool room — it helps prevent streaking on long nails.
Skip thisAvoid thick stripes — they cover the violet shift and flatten the look.
11. Seafoam Chrome with Clear Jelly Tips (Reverse French)
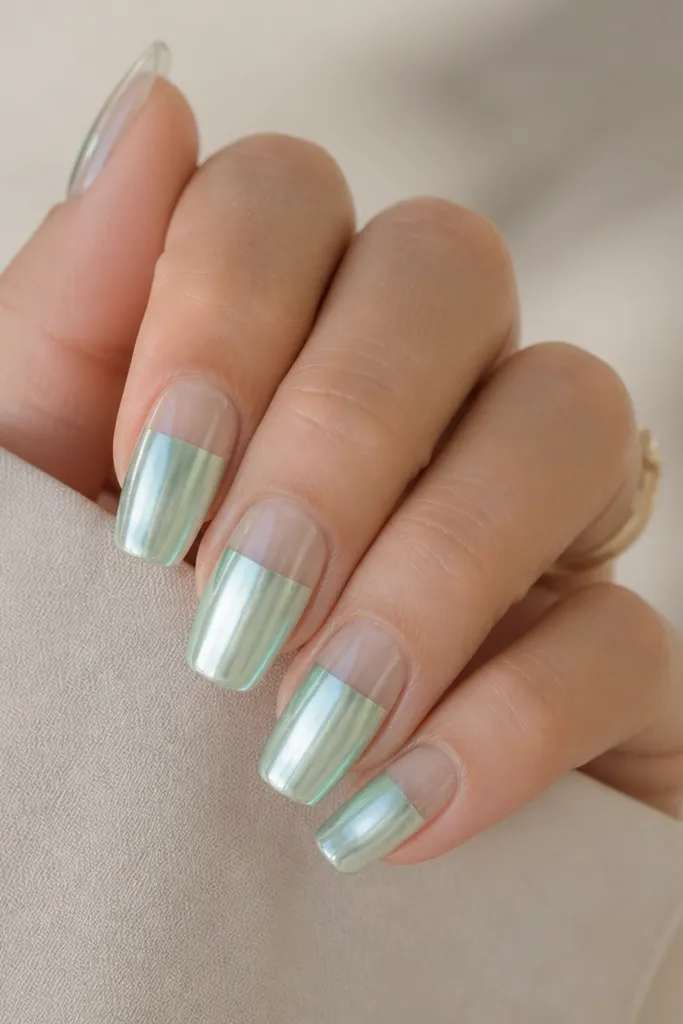
This reverse French is the sleek metallic look that feels fresh. Seafoam chrome gives you that cool “spa” color, but the clear jelly tips keep it from looking heavy or fully opaque. It’s flattering on all skin tones because the seafoam sits in a bright, clean range. On short squoval nails, it makes your nails look longer by adding a transparent top section. It also looks amazing with minimal jewelry because the nail becomes the focal point.
Start with a clear jelly layer and cure, then apply seafoam chrome powder to the lower half only. Use a striping tape guide for a straight stop line — place it where you want the chrome to end, usually about 45-55% of the nail length. Remove the tape to keep the edge clean, then build the clear jelly tips over the top portion and cure. Seal everything with a glossy top coat, making sure the clear section stays transparent. Clean around the cuticle so the chrome edge looks intentional, not messy.
Editor's notePractice the tape placement on a spare nail wheel first. The reverse French line is what makes it look designer.
Skip thisAvoid overloading chrome at the stop line; it causes a fuzzy edge that looks cheap.
12. Pearl White Chrome with Micro Linework at the Smile
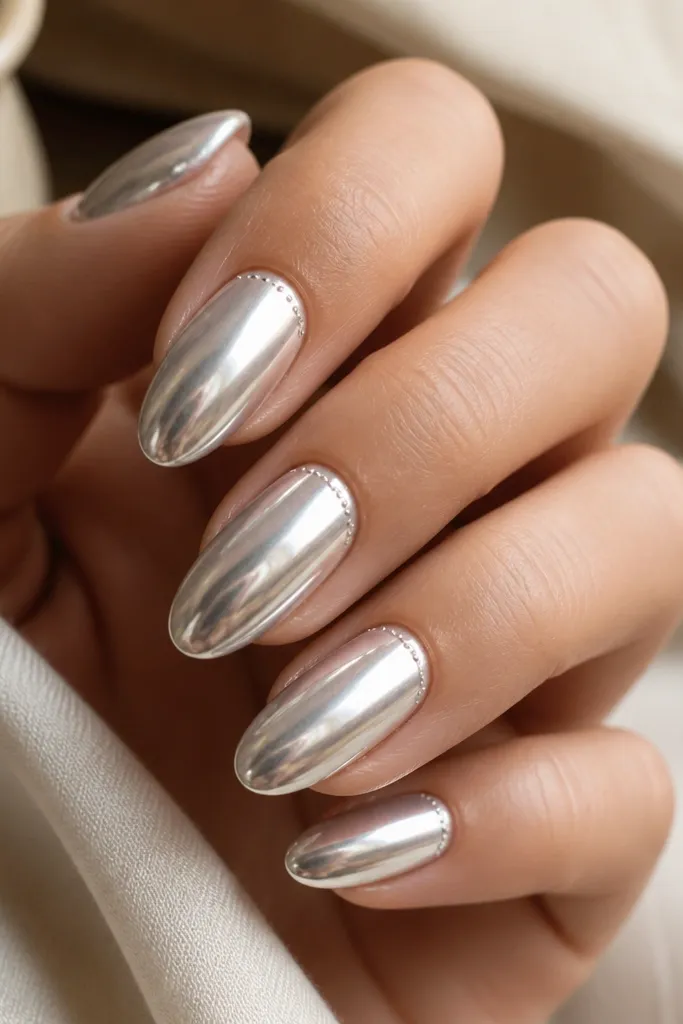
Pearl white chrome looks like soft porcelain metal, and it’s one of the most flattering shades for a Kylie-style sleek metallic manicure. The micro linework at the smile line adds just enough detail to feel high end without turning into full nail art. I like this for people who want “chrome” but don’t want big gems or thick designs. It also works on short nails because the linework sits near the natural curve of your nail bed. If you want a clean, elegant look that still has sparkle, this is it.
Apply a pearl white gel base in two thin coats and cure. Add a glossy top coat and cure, then apply pearl white chrome powder and wipe off until it looks mirror-smooth. With a fine liner brush, add micro silver linework at the smile line — keep it tiny, about 1-2 mm tall. Cure the linework and seal with a glossy top coat in two thin layers. Clean the edges with a cotton swab to keep the smile line crisp.
Editor's noteUse a gel liner pen if you have shaky hands. It keeps the line consistent and reduces smudging.
Skip thisAvoid thick paint linework; it creates a raised texture that breaks the sleek chrome look.
13. Gold Chrome Cat-Eye Overlay with Clear Base
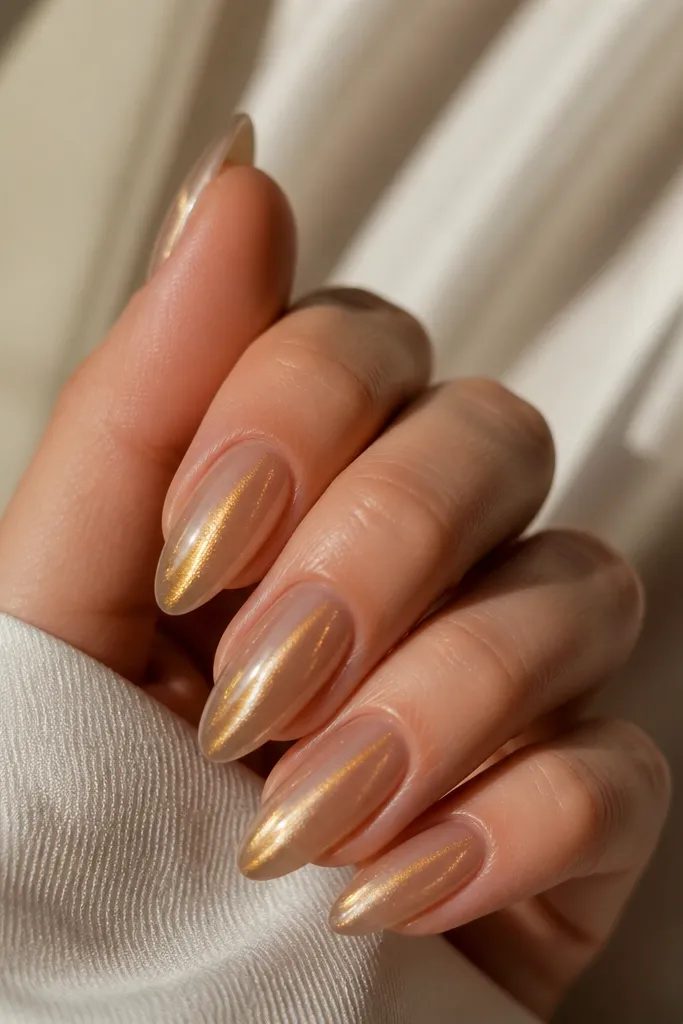
Cat-eye chrome looks luxe because it has movement in the reflection, not just shine. With a clear base, the gold streak looks like light trapped inside glass, which is the whole vibe you see in high-end salon photos. I’ve worn this on medium skin and it looks bright without being brassy. The vertical streak also makes fingers look longer and more sculpted. Almond shape is my pick because it holds the center streak nicely and doesn’t distort the light.
Start with a clear base gel layer and cure it smooth. Apply gold cat-eye gel on top, then use a magnet to pull the glow streak to the center; hold the magnet steady for the gel’s recommended time. Cure, then add a glossy top coat carefully over the whole nail without smearing the streak. For extra sleekness, do a second thin top coat and cure again. Clean the cuticle line with gel cleanser and a lint-free wipe so the streak looks centered from base to tip.
If your streak drifts, lower the magnet closer to the nail and keep your hand still. Even a small movement shifts the line.
Avoid thick cat-eye gel layers; they blur the streak and look uneven.
14. Silver Chrome Ombré Fade from Cuticle to Tip
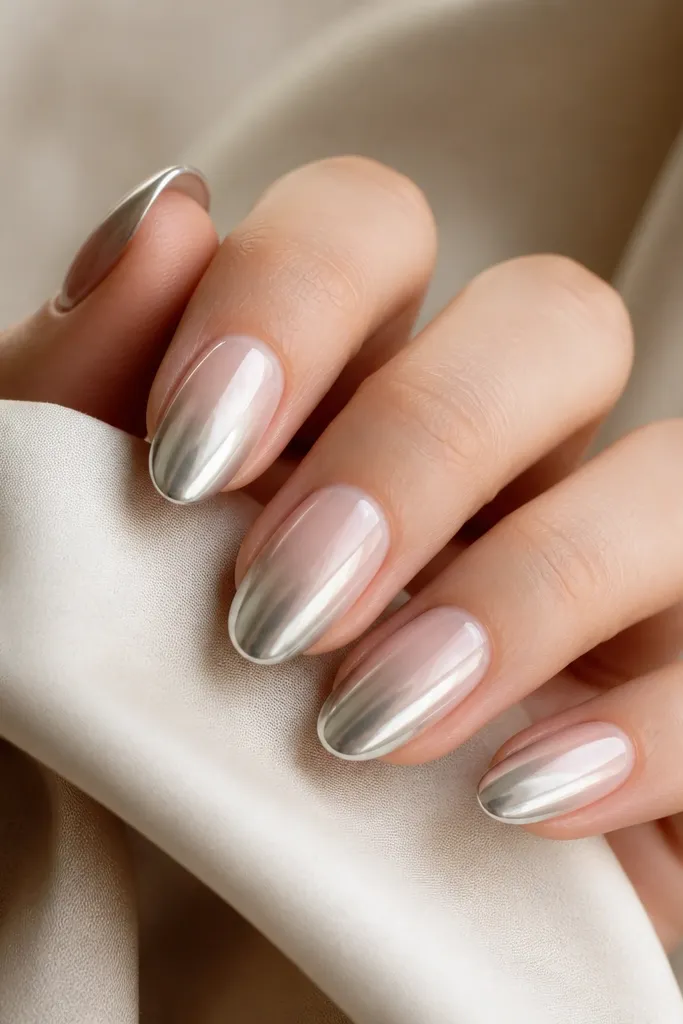
Ombré chrome looks expensive when the fade is smooth and the shine stays consistent. This silver fade flatters hands because it visually lightens near the cuticle and intensifies at the tip, which makes nails look longer. I like it on oval and medium almond shapes because the curve helps blend the gradient. It’s also a nice option if you want chrome but don’t want the full mirror look on every inch of the nail. This set photographs beautifully because the tip catches light and the cuticle still looks polished.
Start with a sheer nude or clear-pink base and cure. Add a glossy top coat and cure, then apply silver chrome powder starting at the tip. Use a sponge to blend the chrome upward lightly, then wipe off excess before it gets too heavy near the cuticle. Cure and seal with a glossy top coat, keeping it thin over the blended area so the gradient stays soft. Clean the cuticle edge so the fade looks intentional, not messy.
Editor's noteBlend with a makeup sponge in tiny taps, not swipes. Swipes create streaks that show up under flash.
Skip thisAvoid trying to create the fade with thick polish; chrome powder makes smoother gradients.
15. Metallic Taupe Chrome with Micro Pearl Dots
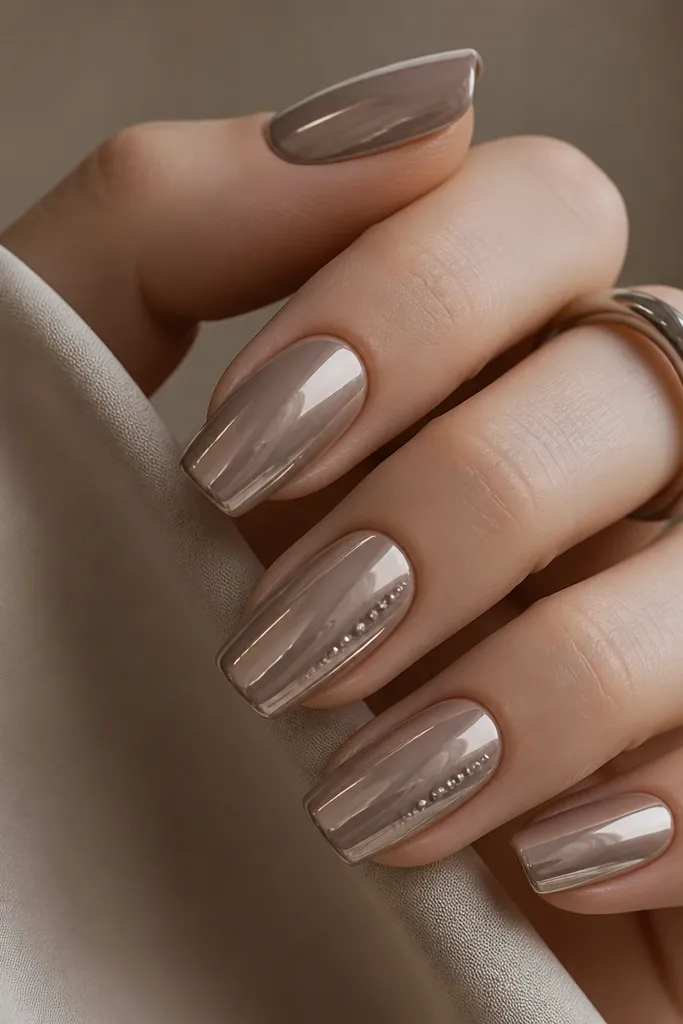
Taupe chrome is the “luxury neutral” that still looks metallic. It’s flattering on nearly everyone because it doesn’t clash with warmer or cooler undertones — it sits in that in-between gray-beige zone. The micro pearl dots add a delicate detail that feels high-end, especially if you keep them small and placed like jewelry. I like this look on short-to-medium squoval because it keeps the set tidy and wearable. It’s a great choice for work events and dinners when you want shine without loud color.
Apply a metallic taupe gel polish base or taupe chrome powder over a glossy cured top coat. Cure and wipe the surface clean so the chrome stays mirror-smooth. Pick up micro pearl beads with a dotting tool and place them along a short line on accent nails — usually 3 to 5 dots total. Use a tiny dot of clear gel under each pearl, cure, then seal with a glossy top coat, brushing around the dots carefully to keep them from shifting. Finish by cleaning around the sidewalls so the placement looks intentional.
Editor's noteUse micro pearls that are small enough to sit under a top coat without creating bumps. The smooth finish is what makes it look expensive.
Skip thisAvoid large pearls; they snag and make the chrome feel less sleek.