1. Micro White French with Sheer Pink Base
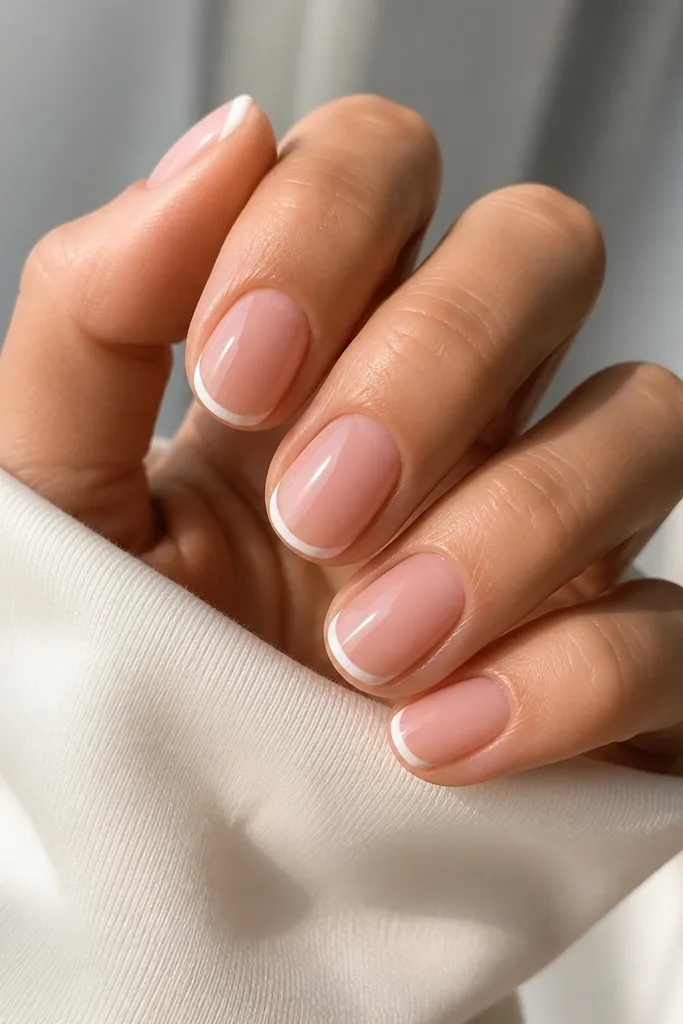
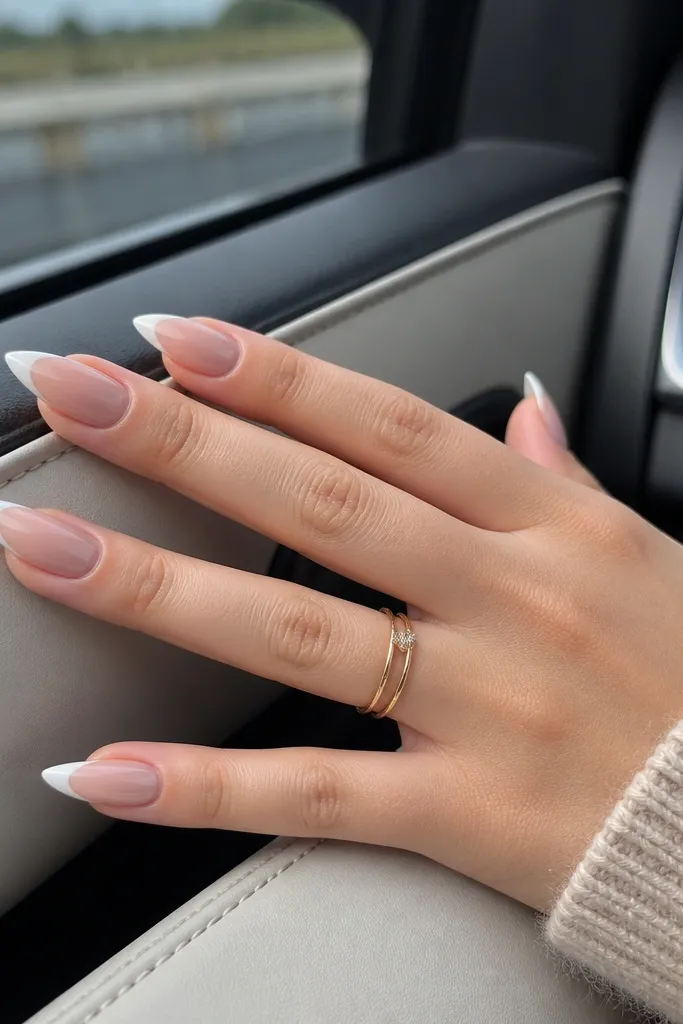
This is the Kylie-style French that looks expensive even on bare hands. The sheer pink base sits close to your natural nail color, so your nail bed looks healthy and the tip reads crisp instead of harsh. Pure micro white on the tip makes the nail look longer because the line is narrow and clean. I like this one for everyday wear and for office days when you want “put together” without glitter. It flatters most skin tones because the base is sheer and the white stays bright.
Start by applying a sheer pink base gel or milky nude polish in thin layers, curing each coat if you’re using gel. Use a French guide strip or a striping brush to paint a tip that covers about 25-30% of the nail width, keeping the smile line thin. Clean up the edges with a flat brush dipped in acetone or gel cleanser, then seal with two coats of glossy top coat. Finally, cap the free edge by dragging the top coat over the tip so chips have a harder time starting.
Editor's noteIf your white looks chalky, use a gel white that’s labeled for opacity and cure it fully under your lamp.
Skip thisDon’t widen the tip to “make it visible” — thick French tips are what make it look like costume nails.
2. Champagne French with Clear Milky Nude
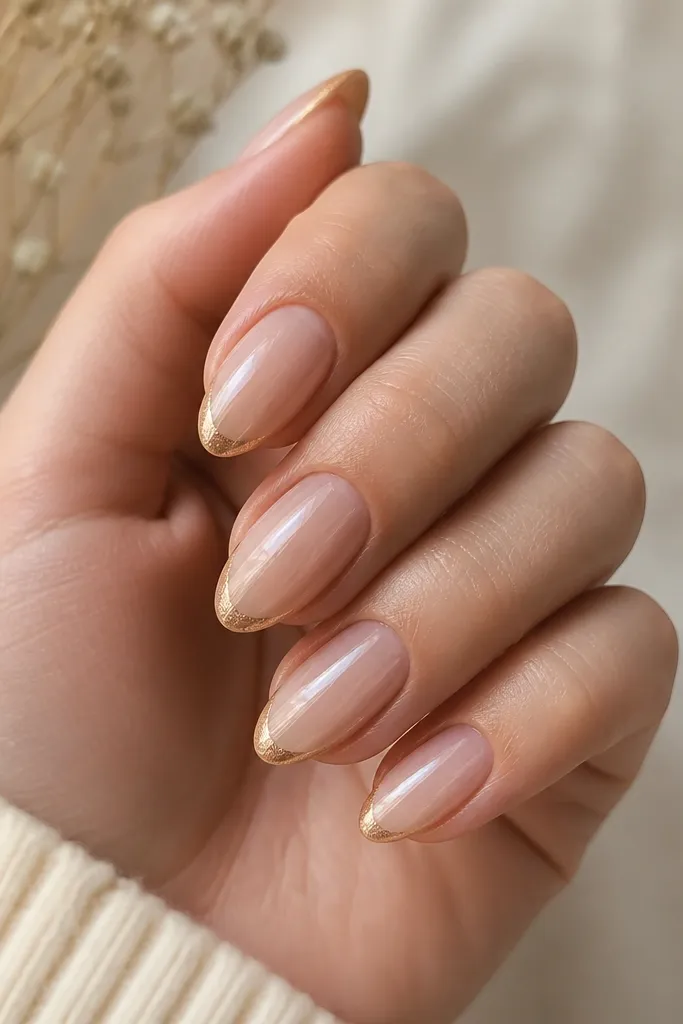
Warm champagne French looks so flattering when your makeup is more neutral and your jewelry is gold. The clear milky nude base gives a glassy, hydrated look, and the champagne tip catches light without looking like straight glitter. This set works especially well on medium almond shapes because it elongates the sides and keeps the shimmer from feeling busy. I’ve worn this through holiday dinners and it still reads wearable the next day. It flatters light to medium skin tones best, but it also looks good on deeper tones when the champagne is opaque.
Apply a milky clear nude base gel in one thin layer, cure, then add a second layer only if you need more coverage. Paint the French tips in champagne gel using a striping brush, keeping the line narrow and slightly curved upward at the corners. Add a tiny amount of shimmer gel only along the tip edge if your color is too flat — don’t spread it into the base. Finish with a glossy top coat and cap the sides and free edge with a steady brush pass.
Choose champagne that’s more reflective than sparkly. The reflective look stays elegant instead of gritty.
Skip chunky glitter champagne — it looks uneven and shows texture under glossy top coat.
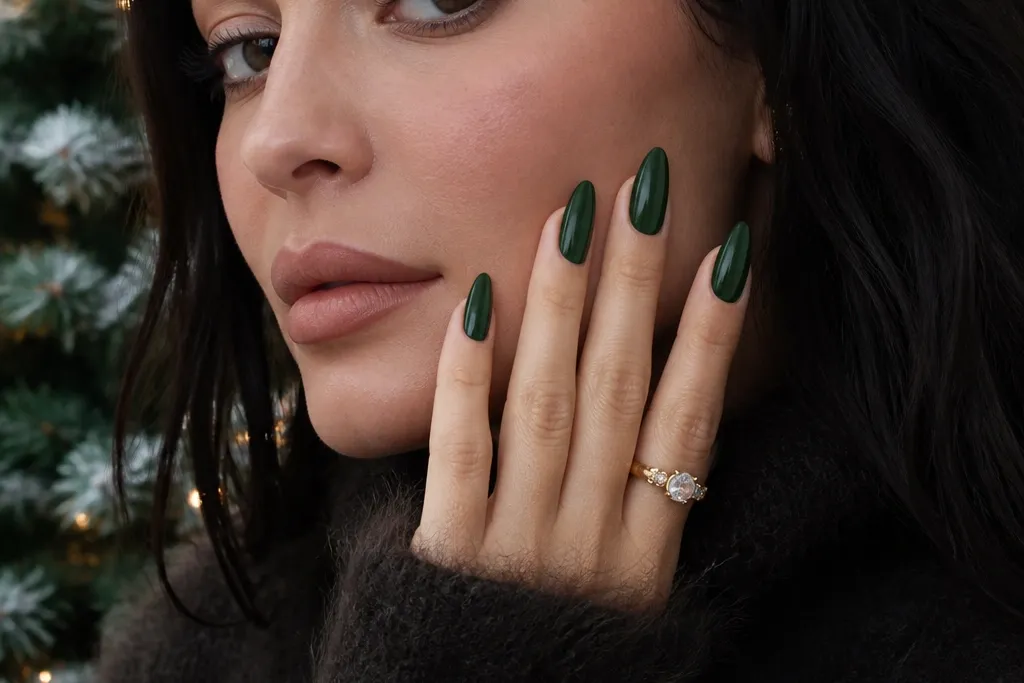
3. Forest Green French with Micro Gold Line
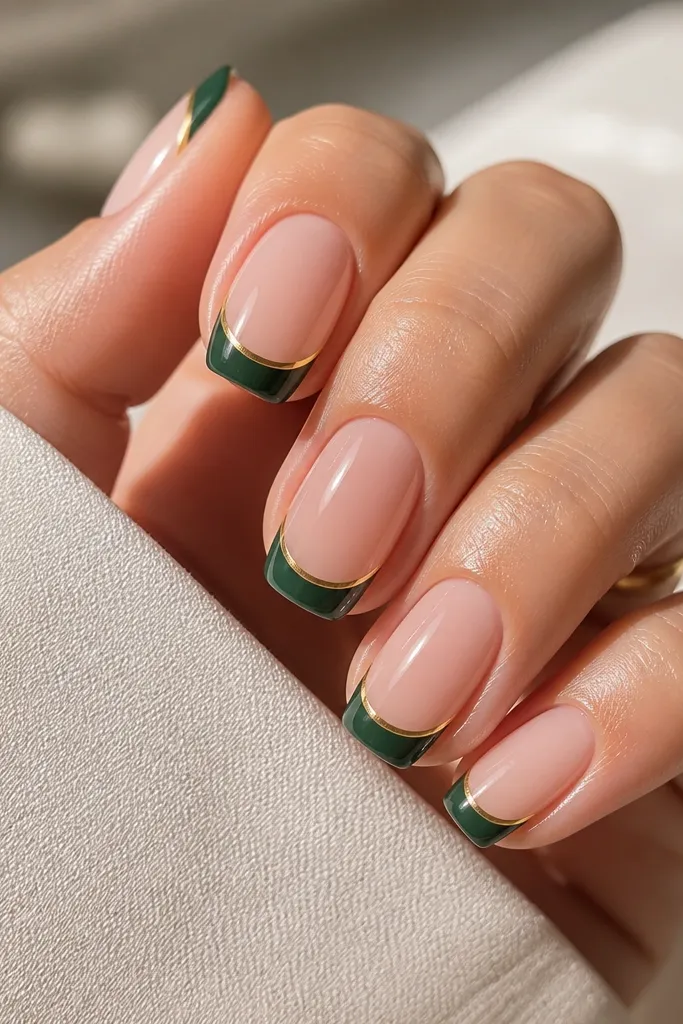
This is my go-to evergreen set because forest green reads seasonal without screaming “holiday.” The sheer nude base keeps it Kylie-clean, while the micro gold line adds that celebrity polish. The gold stripe should be thinner than the green tip, like a fine pen line, so it looks intentional. I wear this with dark sweaters and gold hoops, and it always gets compliments. It flatters cool undertones and also looks great on warm undertones if the green is true forest, not neon.
Start with a sheer nude base and cure or dry fully. Paint the French tips in forest green, covering roughly a third of the nail width, then let it set. With a fine striping brush, add a micro gold line just inside the smile line — think 0.5 to 1 mm, not a thick border. Seal everything with a high-gloss top coat in two thin layers, and cap the free edge carefully so the gold line doesn’t lift.
Editor's noteIf your gold stripe smears, wipe your brush on a lint-free pad before you touch the nail.
Skip thisDon’t add gold on every nail plus extra charms — the clean look dies fast.
4. Berry Ombre French Fade
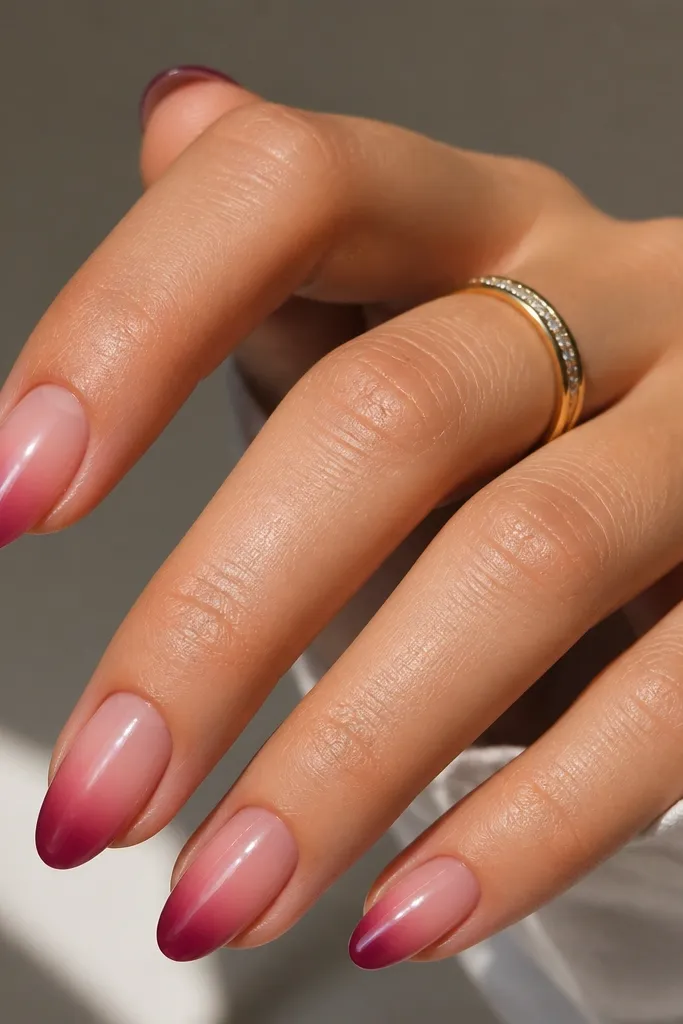
This is a softer take on French that still looks like Kylie got her nails done for real. The berry fade stays evergreen because berry reads wintery, and the gradient keeps it modern instead of flat. I like it on medium almond because the taper makes the fade look smooth. It flatters many skin tones because the base is sheer and the berry sits on top like a tint. If you want something a little more romantic than classic white tips, this is it.
Apply a sheer pink base gel or milky nude polish and cure/dry fully. Sponge a berry gel onto the tip area using a makeup sponge, starting at the free edge and blending upward until the color covers about 25-35% of the nail. Use a brush dipped in cleanser to tidy the smile line so the fade stays French-shaped. Finish with two coats of glossy top coat, and cap the free edge. If you’re using gel, cure long enough to prevent that “soft” look that gradients can get.
Use a light hand on the sponge. You want the berry edge bold, not the whole tip opaque.
Don’t leave the gradient fuzzy. A messy blend looks like nail polish you tried to rush.
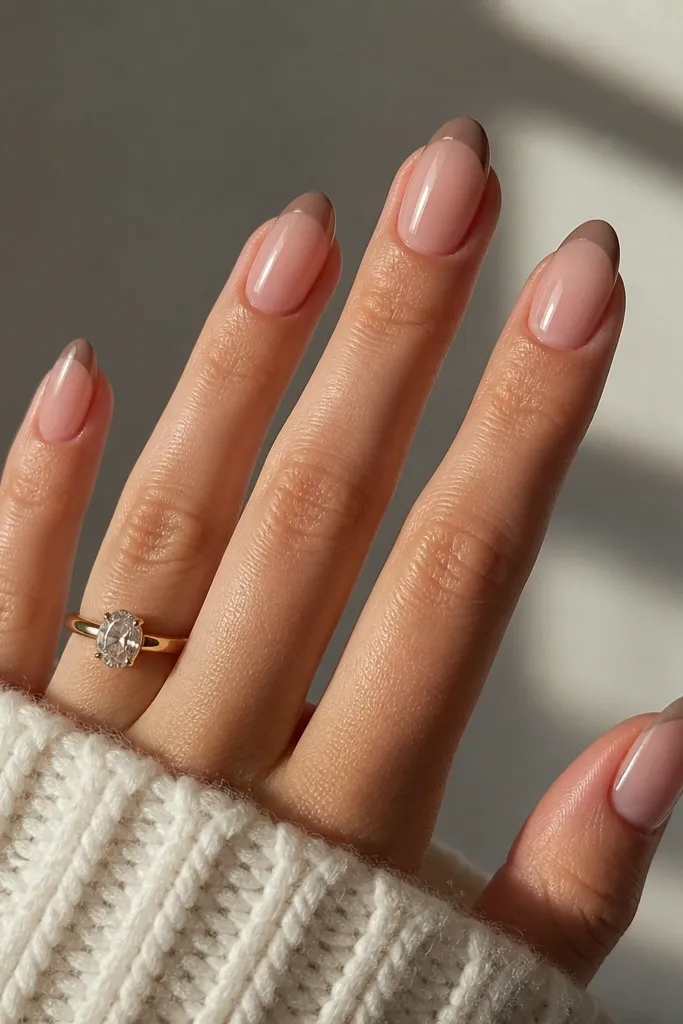
5. Espresso Brown French with Glossy Nude Base
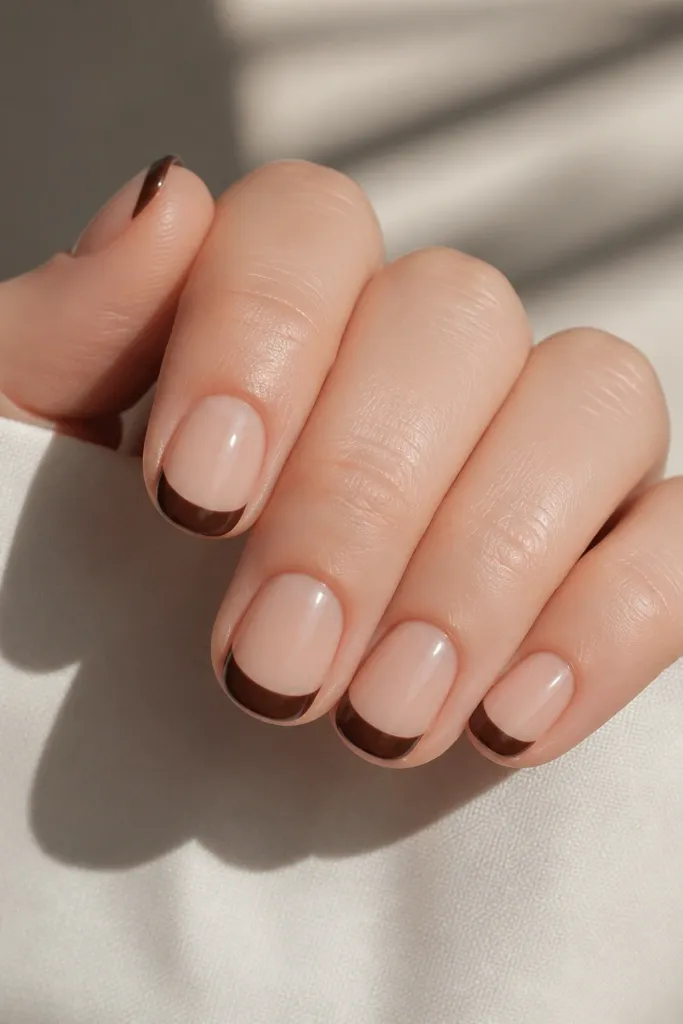
Brown French is the grown-up version of black tips, and it looks incredible with winter neutrals. The espresso shade adds depth without looking harsh, and the glossy nude base makes the whole set look fresh. I’ve worn this when I’m in all-black outfits and it still reads warm, not gloomy. It flatters olive and deeper skin tones especially well, but it’s also wearable on fair skin if the brown is rich and opaque. The clean, undecorated look is the point — it’s Kylie minimal but still seasonal.
Start with a glossy nude base. I use a nude that’s slightly warm, then cure and ensure it’s smooth. Paint the French tips in espresso brown with a steady striping brush, keeping the tip thickness thin and the smile line even across nails. Let it fully dry/cure, then apply two coats of top coat, making sure the sides are sealed too. Wipe any stray brown off your skin right after painting so it doesn’t stain.
Editor's noteIf your espresso looks too gray, add a warmer brown gel on top of the first coat before curing.
Skip thisAvoid sheer brown tips — they look patchy and cheap in daylight.
6. Icy White French with Crystal Dust Accent
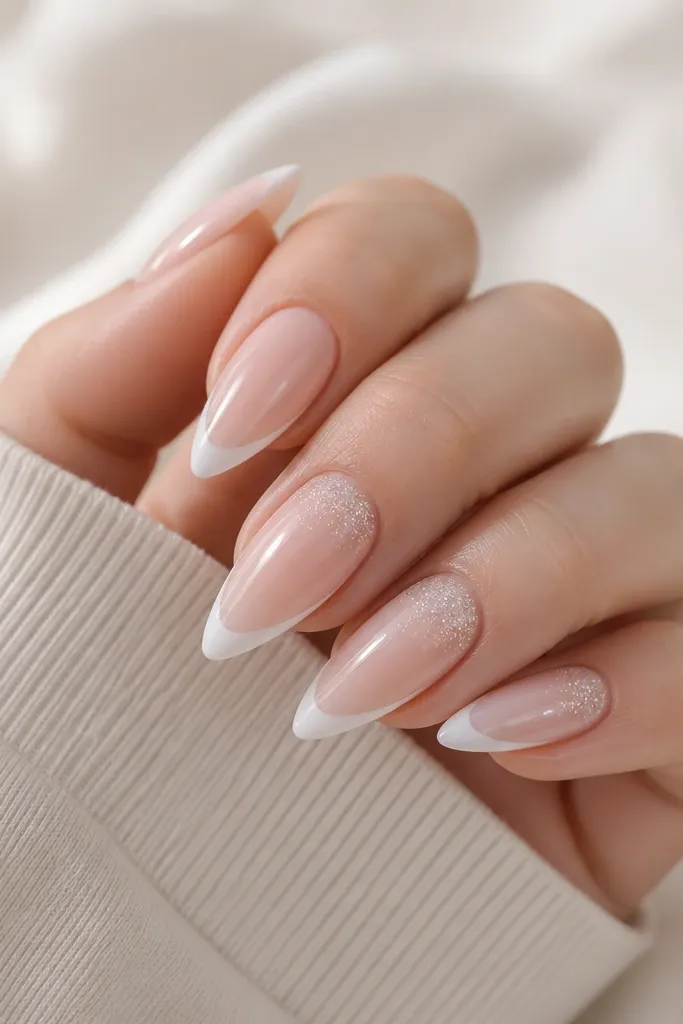
Icy white French is the winter version of classic Kylie tips, and the crystal dust near the cuticle gives it that “camera flash” effect. Keeping the crystals mostly at the top prevents the nails from looking like snow-globe glitter. I like this when I’m wearing silver jewelry or a satin top because the icy finish matches the cool shine. It flatters fair to medium skin tones the most, since the icy white can look too stark on very deep skin unless the base is slightly warmer. The accent placement makes it feel intentional, not random.
Apply a sheer nude base and cure until smooth. Paint icy white French tips with a thin line, then cure again. For the accent nails, use a small fluffy brush to dab crystal dust lightly near the cuticle and blend downward with minimal pressure. Seal with a top coat that doesn’t pull the shimmer around, usually two coats, and cap the free edge. Avoid putting crystal dust on every nail — two accents are enough.
Editor's notePress the crystal dust in with the brush handle lightly so it sticks before top coat.
Skip thisDon’t rub crystals aggressively — you’ll end up with texture and bald spots.
7. Red Currant French with Negative Space Half-Moon
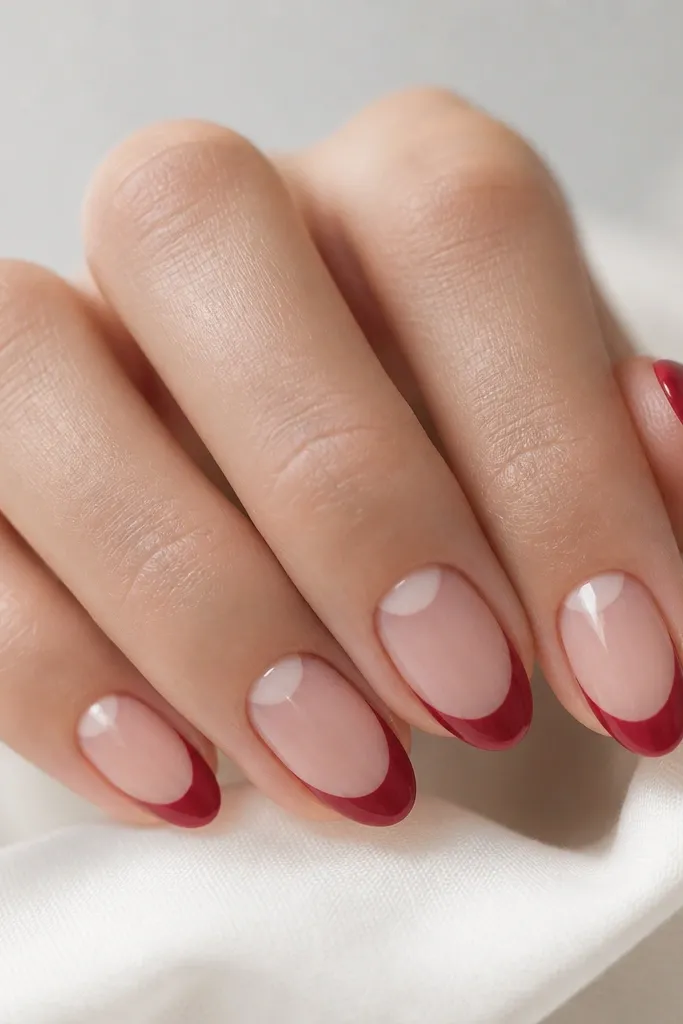
Negative space makes French nails look modern, not old-school. Red currant is evergreen because it’s darker than cherry and reads wintery, especially under indoor lighting. The half-moon cut at the cuticle keeps the design light and gives your nail a longer look. This flatters hands with shorter nail beds because the negative space visually lifts the shape. It also works well on medium and short almond since the curve matches the half-moon.
Start with a sheer nude base and cure it smooth. Use a small piece of tape or a half-moon stencil to mask the cuticle area if you’re doing this for the first time. Paint red currant on the tip, keeping it about a third of the nail width, then remove the mask carefully. Clean edges with a thin brush, then seal with top coat and cap the free edge. If you’re free-handing the half-moon, use a dotting tool to mark the curve before you paint.
Editor's noteLet the red currant gel sit for 30 seconds before curing so it self-levels into a sharp tip line.
Skip thisDon’t flood the cuticle while painting — messy cuticle edges ruin the negative-space effect.
8. Sage Green French with Clear Outline
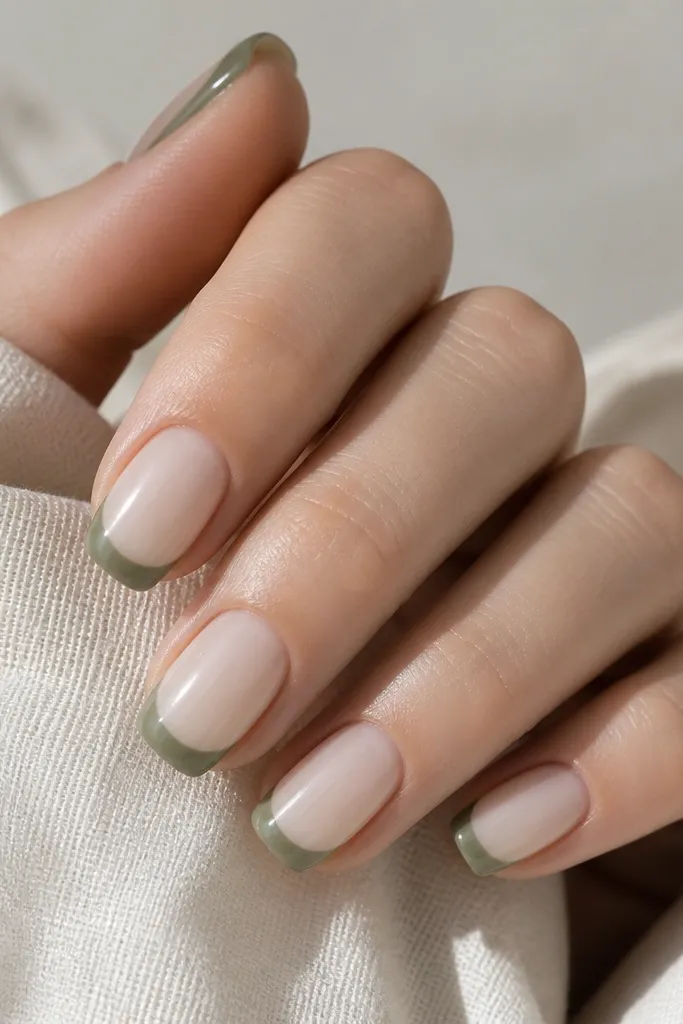
Sage French looks like quiet luxury, and it’s a genuinely wearable evergreen color. The clear outline adds a “cut glass” edge without turning into a thick border. This set is flattering on neutral skin tones because sage sits in the middle — not too cool, not too warm. I love it when I’m wearing soft knits and want nails that look calm but still polished. It also photographs well because the outline catches light.
Apply a sheer milky nude base and cure fully. Paint the French tips in sage green, keeping the smile line crisp and the tip width around 25-33%. Let it cure, then trace the outer edge of the green tip with a thin layer of clear builder gel or clear gel liner — keep the line narrow so it looks like an outline, not a second tip. Cure again and finish with two coats of glossy top coat, capping the free edge. Clean up any clear gel that touches skin before it cures.
Use a gel liner brush — it keeps the clear outline sharp instead of streaky.
Skip matte top coat here. Matte makes the outline look cloudy.
9. Soft Pink French with Pearl Dot at the Cuticle
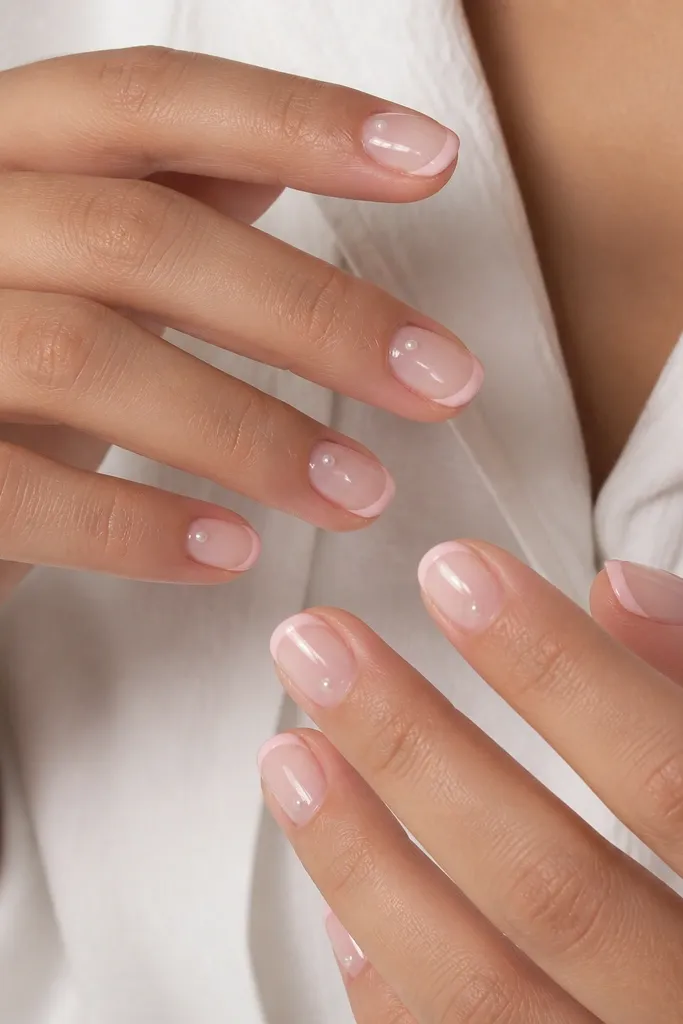
Pearl dot French is one of those details that reads Kylie without going full rhinestone. The soft pink tip blends into the base, which looks flattering on hands that get dry in winter. The pearl dot at the cuticle creates a focal point that makes your nail shape look intentional and neat. I like this for dates, brunch, and when you want your nails to match a pearl necklace. It’s especially flattering on fair to medium skin tones, but it still works on deeper skin if the base is a true milky pink rather than grayish nude.
Start with a sheer pink base and cure. Paint soft pink French tips with a slightly darker shade than your base so the line shows but stays subtle. Place a tiny pearl dot near the cuticle using nail glue or a small amount of gel adhesive, and cure or set it securely. Seal with one careful coat of top coat around the pearl first, then a second full coat once it’s anchored. Cap the free edge so the pearl detail doesn’t lift from the edges.
Editor's noteUse micro pearls, not big ones. A pinhead-sized dot looks expensive and stays comfortable.
Skip thisDon’t glue pearls too close to your skin. Leave a hairline gap so they don’t snag your sleeves.
10. Black Micro French with Clear Negative Tips
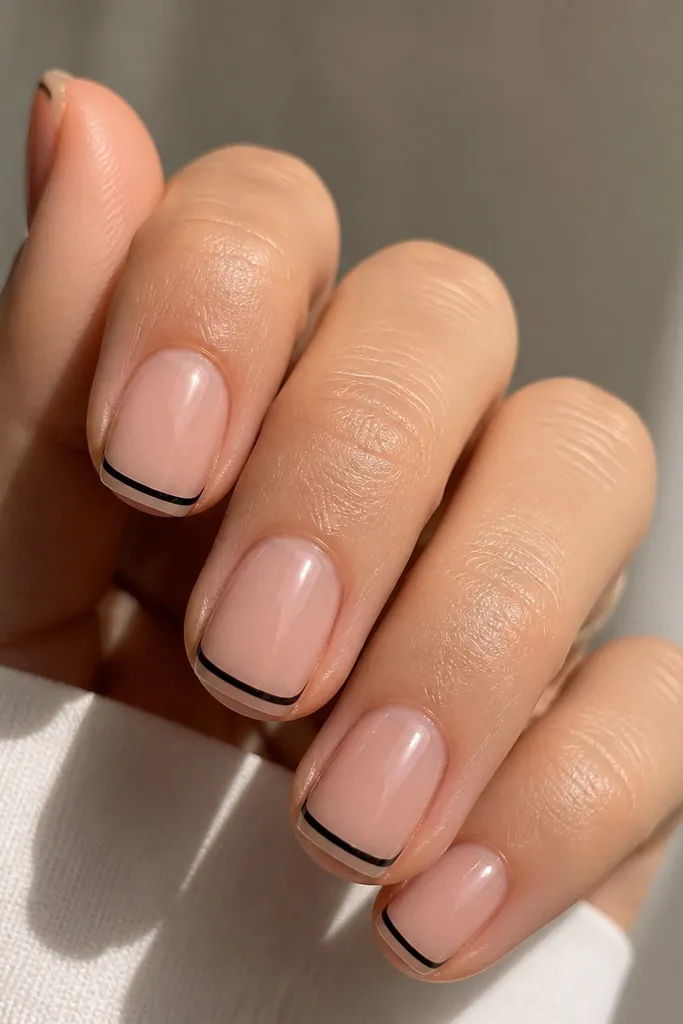
This is the modern French that looks like it came from a celebrity nail tech’s station. The black micro border gives contrast, while the clear negative tip keeps it airy and avoids that heavy “painted” look. I like it on short square because the crisp edges make the border feel graphic. It flatters all skin tones because the nude base anchors it and the black line is clean. For winter, it looks sharp with black coats and white sneakers.
Apply a sheer nude base and cure/dry smooth. Use a French guide to mask the tip area, then paint only the outer edge line with black gel or nail polish. Leave the center of the tip clear by not filling it in — just border the smile line. Remove the guide, clean the edges, and apply glossy top coat in two thin layers, being careful not to flood the clear area. Cap the free edge lightly so the border stays sealed.
Editor's noteIf your black line bleeds, let the base set fully before you draw the border.
Skip thisAvoid filling the clear center. That’s how it stops looking modern and starts looking messy.
11. Nude French with Copper Foil at One Side
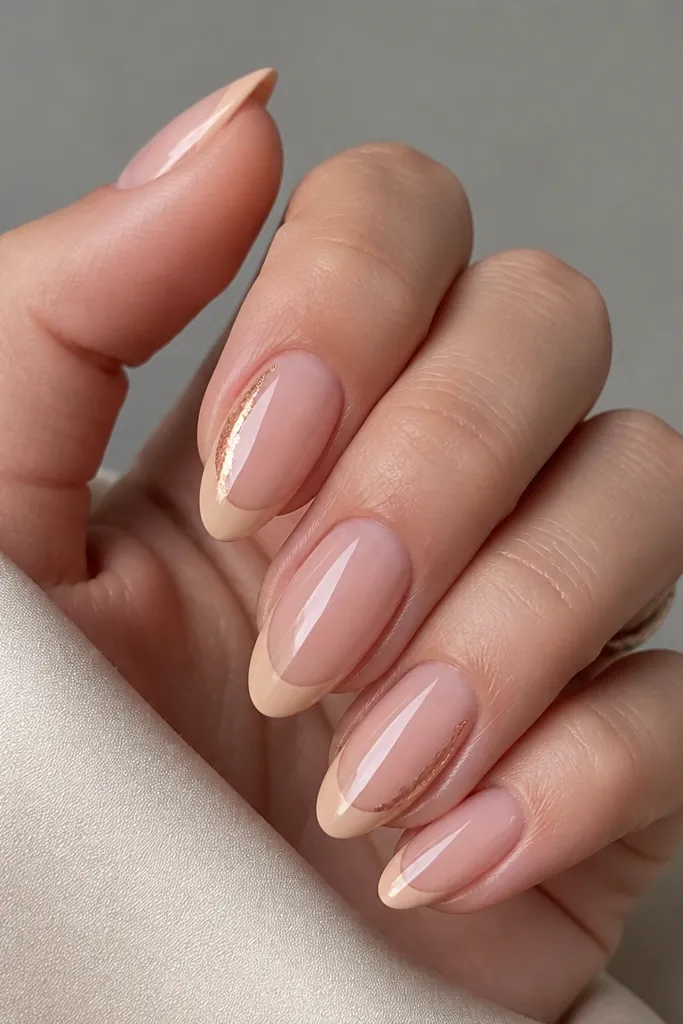
Copper foil gives French nails that “wow” detail without adding bulky texture. The nude French stays evergreen because it’s close to your nail color, and the foil only shows on the side where it catches light when you move your hand. I love this for fall and winter because copper plays nicely with warm knits and caramel-toned makeup. It flatters warm undertones and also works on cool undertones if the foil is more rose-copper than orange. Keep the foil small — that’s what keeps it Kylie-clean.
Start with a sheer nude base and cure until glassy. Paint nude-beige French tips, thin and even, about a third of the nail width. For accent nails, dab a small amount of clear builder gel near one side of the tip edge, press copper foil onto it, then cure. Brush away extra foil edges gently, then seal with two top coats, making sure the foil is fully covered so it doesn’t snag. Cap the free edge for durability.
Editor's noteUse foil bits, not sheets, if you want a soft streak instead of a solid patch.
Skip thisDon’t over-foil. Big foil areas look like costume makeup on nails.
12. Glazed French with Clear Jelly Topcoat
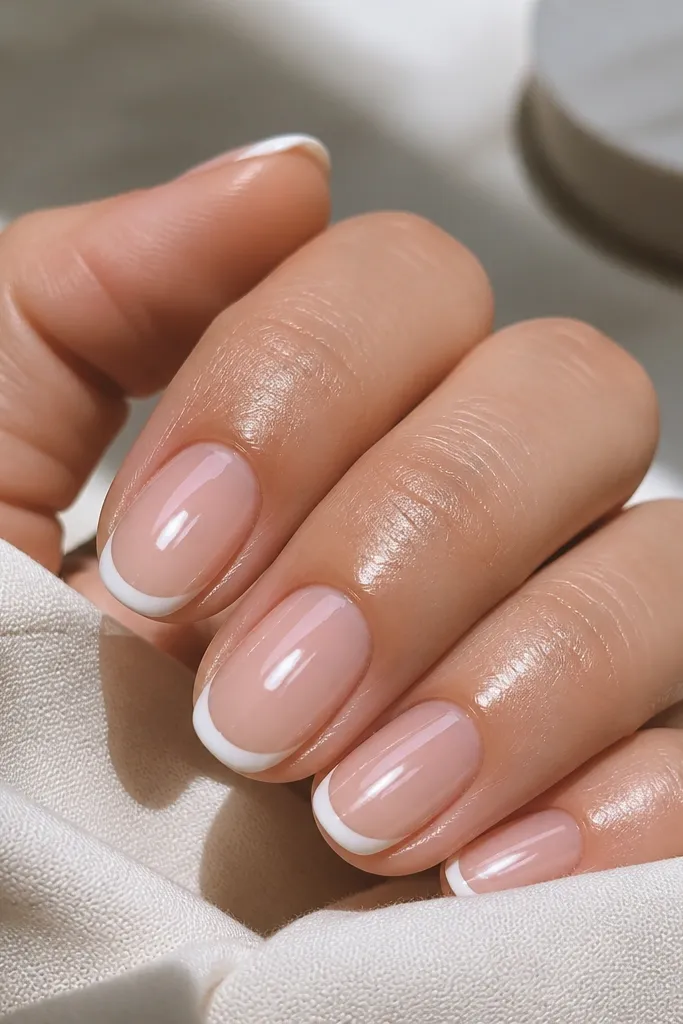
A glazed French finish is the difference between “done” and “done for real.” The French line stays classic, but the clear jelly topcoat makes the nail look thick, smooth, and reflective like a fresh gel manicure. This is the set I pick when my hands look dry and I want the nails to look hydrated. It flatters every skin tone because the base is sheer and the white is bright. It also makes short nails look healthier because the shine hides small surface imperfections.
Apply a sheer nude base gel and cure until it’s even. Paint thin bright white French tips using a striping brush, keeping the smile line consistent. Cure fully, then apply a clear jelly topcoat in one thicker layer, not thin — you want that glassy dome effect. After curing, add a second thin topcoat if you want extra mirror shine. Finish by wiping the tacky layer if your gel system requires it, then cap the free edge.
Use a clear jelly topcoat that’s labeled for thickness, not a watery one.
Don’t put jelly topcoat over uneven white. It will magnify bumps.
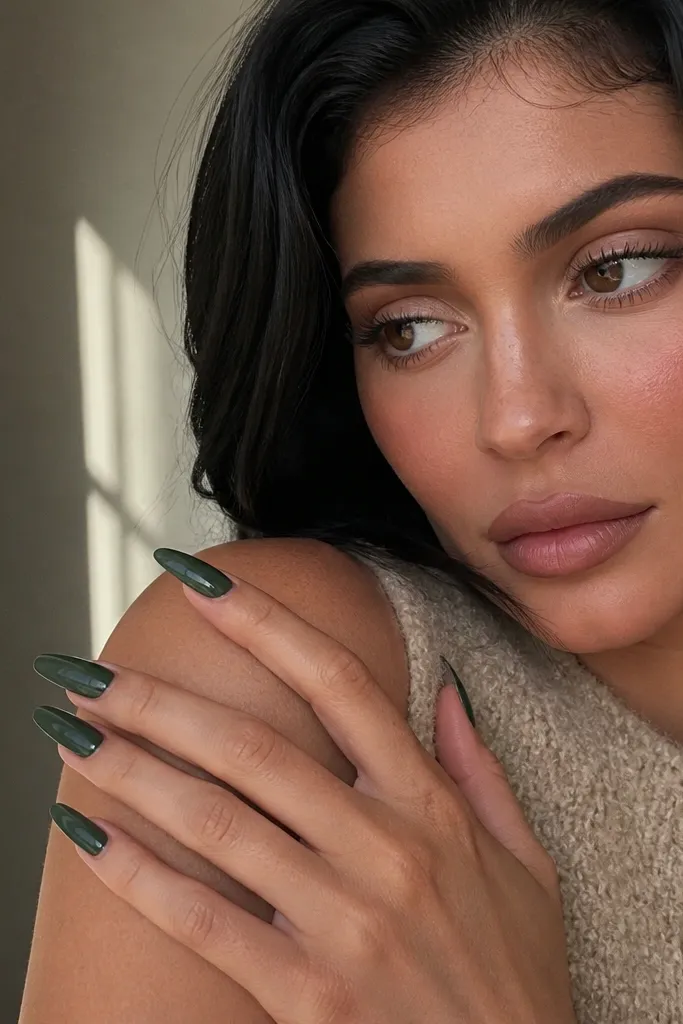
13. Evergreen Velvet French with Matte Seal
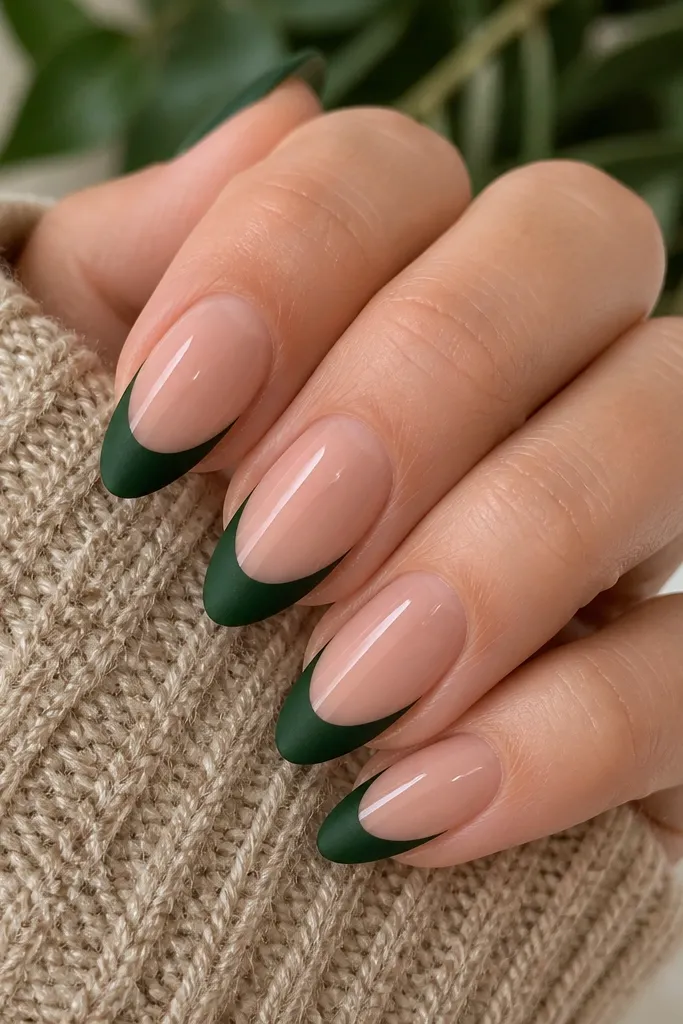
This is my favorite winter twist because it looks soft like fabric, not shiny plastic. The deep evergreen tip reads seasonal instantly, and the matte seal makes the green look like velvet under indoor lights. Keeping the base glossy is key — it frames the matte tip and stops the set from looking flat. I like this on medium almond because the shape makes the velvety tip look smooth. It flatters most skin tones, and it looks especially good with cozy sweaters and gold rings.
Start with a sheer nude base and keep it glossy by using a normal top coat on the base area. Paint the French tips in deep evergreen green, thin and crisp, about a third of the nail width. Cure fully, then apply matte top coat only over the green tips — use a small brush to avoid dulling the base. Seal the edges and cap the free edge with a tiny matte layer so it doesn’t start peeling. Let it fully dry so the velvety texture sets evenly.
Editor's noteIf matte top coat looks streaky, apply in thinner passes rather than one heavy coat.
Skip thisDon’t matte the whole nail. Matte base + matte tips usually looks dull on hands.
14. Rose Nude French with Tiny Rhinestone Corner
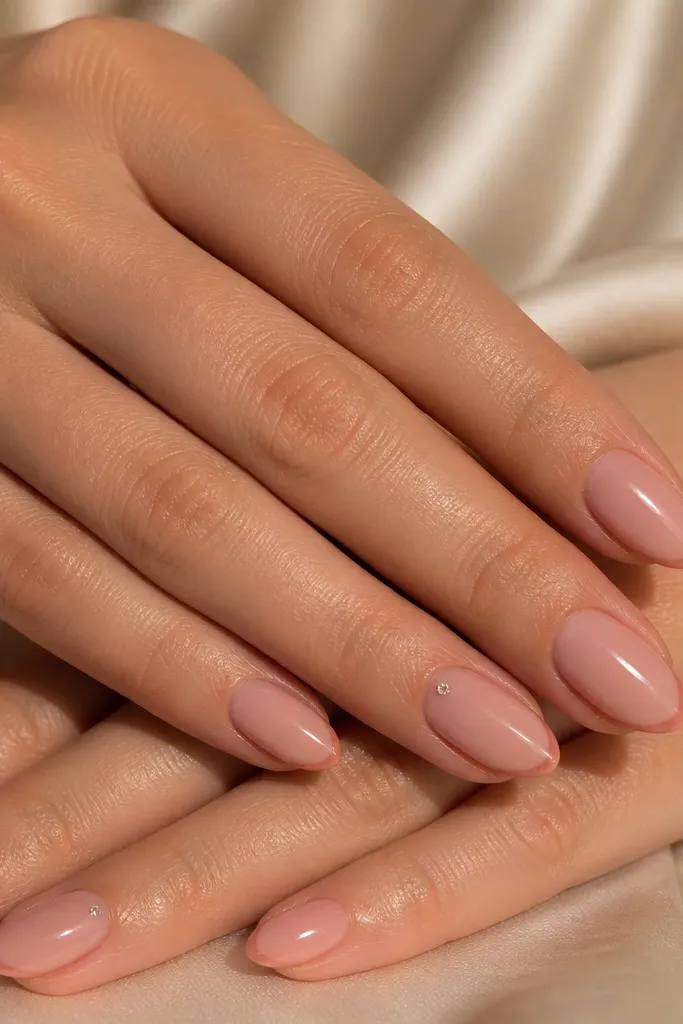
This set is for when you want a hint of sparkle without turning your nails into a disco ball. The rose nude French keeps it evergreen and flattering, and the rhinestone corner placement adds a flash only when your hand moves. I’ve worn this to weddings and holiday parties and it still looks classy because it’s one stone, not a line of stones. It flatters fair to medium skin tones best, and it works on deeper skin when the rose nude is warm and not gray. The corner placement also makes nails look slightly longer.
Apply a rose nude base gel and cure. Paint rose nude French tips slightly darker than your base, keeping the line thin and centered so it stays delicate. Place a single tiny rhinestone at the outer corner of the tip near the smile line using nail glue or clear gel adhesive, then cure to lock it in. Apply glossy top coat around the rhinestone first, then a second full coat to smooth the surface. Cap the free edge carefully so the rhinestone doesn’t lift from edge wear.
Editor's noteUse a rhinestone with a flat back and small diameter. Big stones make the corner look bulky.
Skip thisDon’t place rhinestones near the cuticle. They snag and pop sooner.
15. Clear French Half-Tip with Emerald Outline
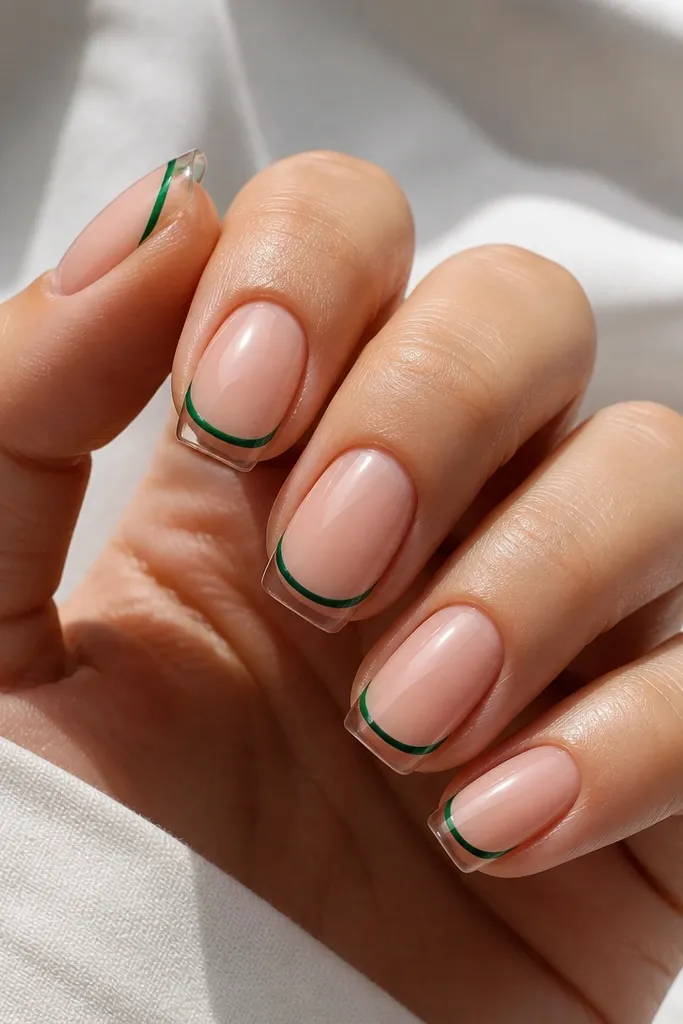
Clear half-tip French is one of those designs that looks like it took hours, but it’s actually all about clean lining. The emerald outline brings the evergreen vibe, while the clear tip keeps it light and modern. I like it when I’m growing out nails because it hides uneven growth at the tip — the clear area makes the line look smooth. It flatters all skin tones because the nude base is sheer and the emerald reads as a crisp border. The look is also amazing with green eyeshadow or gold accessories.
Start with a sheer nude base and cure to a smooth surface. Mask the clear area using a French guide and paint only the outer smile outline with emerald green gel — keep it about 1 mm thick. Remove the guide and clean the edges with a liner brush. Apply glossy top coat over the whole nail, but avoid flooding the outline so it stays crisp and not cloudy. Cap the free edge to prevent lifting along the border.
Editor's noteIf your outline looks wobbly, use two guides: one for the center smile line and one for the side corners.
Skip thisDon’t fill the clear tip with green. That turns it into a normal French and loses the modern look.